
Chapter 5
Installing Windows on a Virtual Machine
Like a physical server, a virtual machine needs to have an operating system installed to function and run applications. Although there are still dozens of different operating systems that can work on the x86 platform, the bulk of virtualization today is done on the more recent versions of Windows. Understanding how to install Windows and then optimize it for a virtual environment is crucial.
- Loading windows into a virtual machine
- Understanding configuration options
- Optimizing a new virtual machine
Loading Windows into a Virtual Machine
A Windows operating system can be loaded into a virtual machine in a number of ways. In the previous chapter, you saw that during the process of creating a virtual machine, VMware Workstation Player offers the option to install Windows as part of that effort. Most virtual machines are created through a template. Templates are virtual machines that already contain an operating system and often are already loaded with application software as well. These prebuilt VMs are stored in a nonexecutable state that allows an administrator to rapidly stamp out copies of the selected configuration. Once a copy is created, a few more personalization and system configuration steps, such as providing a unique system name and network address, will need to be completed before the new VM can be deployed. We will cover more about templates in Chapter 11, “Copying a Virtual Machine.”
Periodically, a virtual machine requires a pristine copy of Windows. Some administrators create a new template with every new major release, while others merely power on the existing template and apply the service packs. Some administrators prefer the new install because it forces them to look at the other pieces of software in the VM that might also need updates or refreshes. Others believe that loading a version of Windows with the service packs (SPs) already as part of the distribution is somehow intrinsically superior to applying the service packs separately. There is no incorrect choice here. Most people choose a path that works for them. Instructions for installing VMware Tools follow those for installing Windows 10. These steps are optional but highly recommended.
Installing Windows 10
In order to install Windows, or any operating system, you need the source disks so that you can execute from them. These disks can take the form of actual CDs, DVDs, or image files of the software on other media. In the case of Microsoft Windows, you can purchase a copy at a retail store and come home with the disks, or buy it online and download the images to your computer. That image can be burned to a CD or DVD for backup or execution purposes. If you are using this text as part of a class, you may have access to a student version of Windows. Many universities have agreements with Microsoft to allow students to download Windows for educational use at little or no cost.
The steps that follow are not the only method you can use to create a Windows 10 virtual machine, but rather one of many possible options. For these examples, a 64-bit version of Windows 10 was used (see Figure 5.1). The ISO image is staged on the desktop for the VM to access.

Figure 5.1 The Windows image
- Open VMware Workstation Player.
- Select the Windows 10 x64 virtual machine you created earlier by left-clicking on the Windows 10 x64 VM icon shown in Figure 5.2. You can also select the VM by choosing the Open A Virtual Machine option on the right, navigating to the Windows 10 x64 directory under the Virtual Machines directory, selecting the
.vmx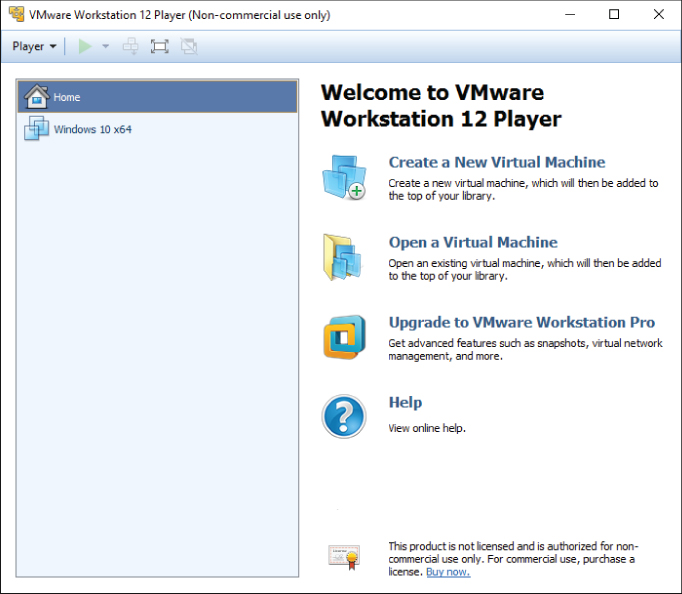
Figure 5.2 Select the VM.
- Note that the machine state is powered off. You need to tell the VM to boot from the ISO image, much as a physical server needs the CD or DVD drive in the boot sequence so it can find the Windows disks you would stage there. Select Edit Virtual Machine Settings, which results in the screen shown in Figure 5.3.
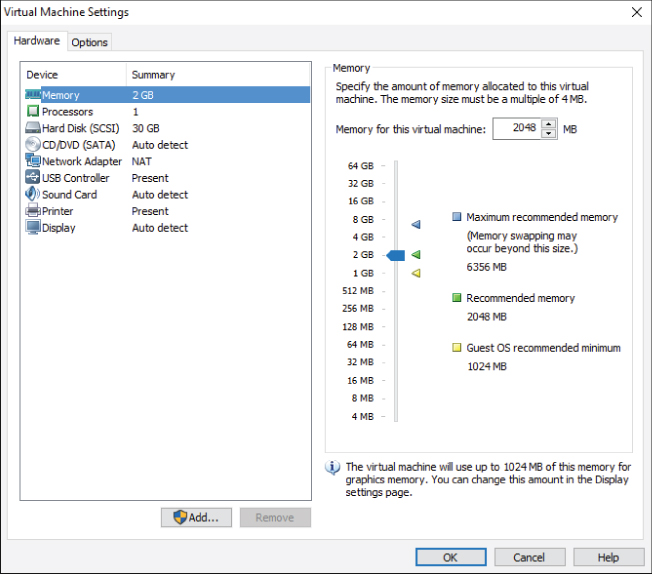
Figure 5.3 Edit the virtual machine settings.
- As shown in Figure 5.4, select CD/DVD.

Figure 5.4 Using the ISO image to connect
- You can see a number of choices regarding the CD/DVD devices. Under Connection, choose Use ISO Image File. This will allow you to have the VM use the ISO image you have staged. Use the Browse button to locate and select the ISO image. Select OK to continue.
- Now select Play Virtual Machine. You might get a message similar to that shown in Figure 5.5. It means that you have additional hardware devices on your physical computer that could be added to the virtual machine for use. Select OK to continue.
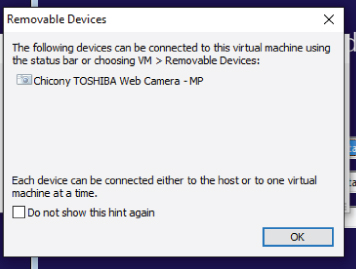
Figure 5.5 Removable devices
- The virtual machine boots up and connects to the Windows 10 ISO image as if it were a DVD in a disk drive. If you are prompted to download VMware Tools for Windows 2000 and later, you can accept the download by choosing Download And Install and pausing a few moments until it completes the update.
The Windows Setup screen appears, as shown in Figure 5.6. Notice at the bottom of the screen, outside of the virtual machine is an alert bar with some choices regarding the installation of VMware Tools. We will cover this separately after the installation. Select Remind Me Later and the alert bar disappears.
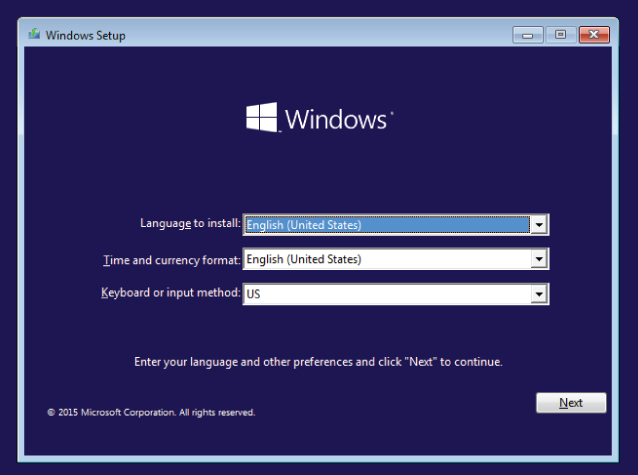
Figure 5.6 Windows installation
- In the VM Window, click inside the Window Setup window and select your menu choices. Select Next to continue.
- The next screen, illustrated in Figure 5.7, allows you to Repair Your Computer if needed before continuing. Select Install Now to continue.
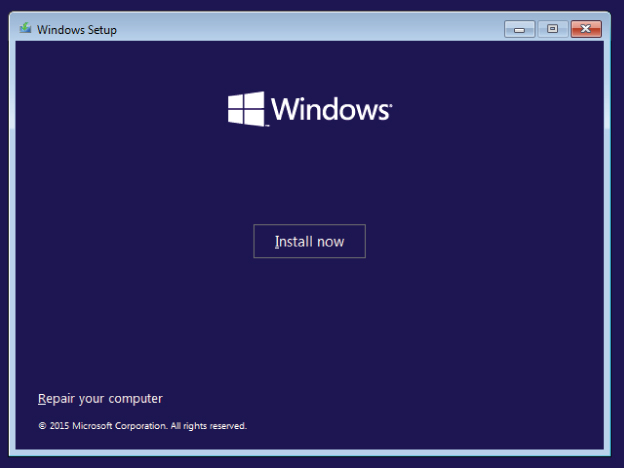
Figure 5.7 Select Install Now.
- As with most software, you will need to accept the license terms. Select the checkbox as shown in Figure 5.8, and then select Next to continue.
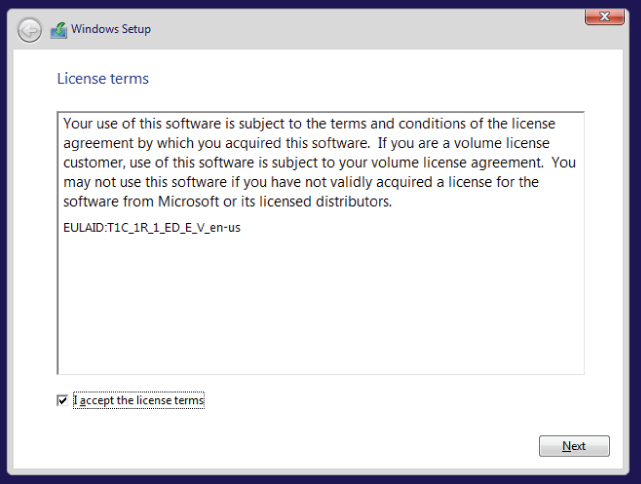
Figure 5.8 The license terms
- Because this is a new installation, you will be doing a Custom installation rather than an upgrade of an existing system. As shown in Figure 5.9, choose Custom to continue.
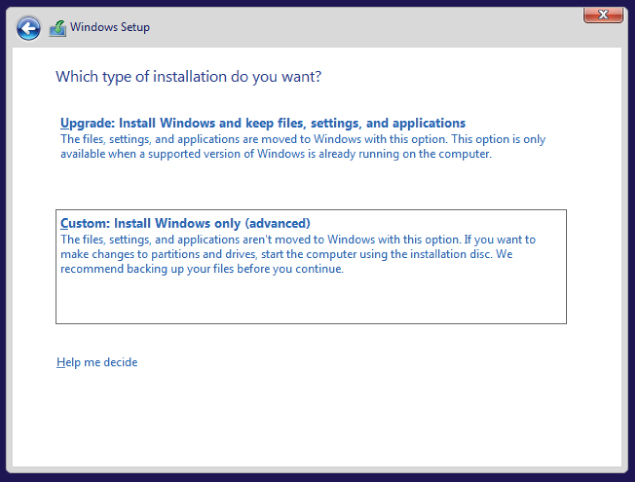
Figure 5.9 The installation type
- The example VM was created with one 30 GB disk drive. Select Next to continue. (See Figure 5.10.)
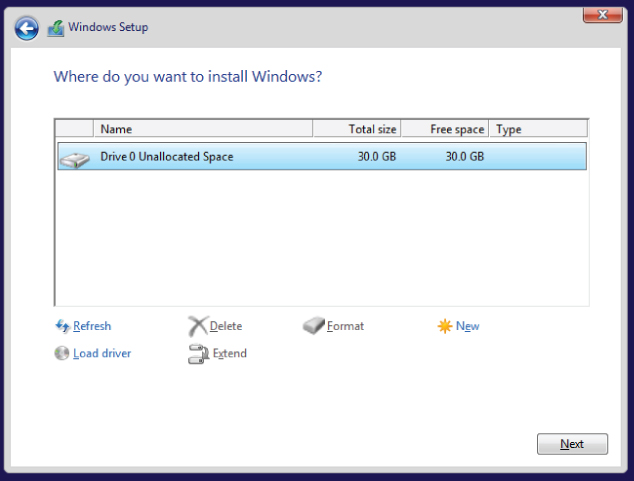
Figure 5.10 Disk choice and options
- The Windows installation process will proceed with a number of steps, including formatting the disk storage, creating a file system, and copying the files to the disk. This is usually the most time-consuming step. You can see the steps and the progress in Figure 5.11.
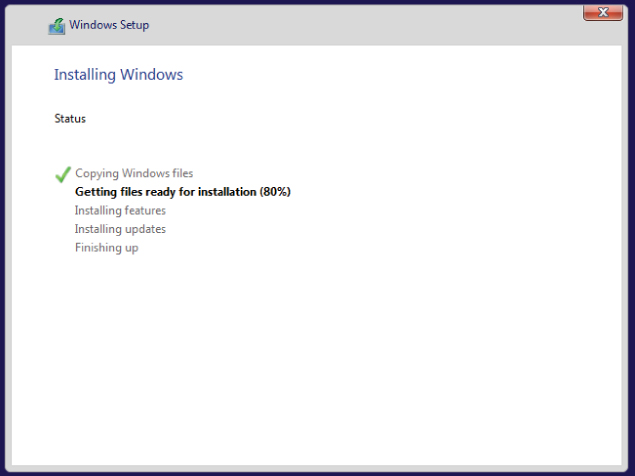
Figure 5.11 Installation progress
- Windows will reboot a number of times during the process. It will then run through a number of first-time use initialization steps. The Express Settings screen, illustrated in Figure 5.12, allows you to streamline the configuration process or to customize all of the settings. For our purposes, streamlining is fine. Select Use Express Settings to continue.
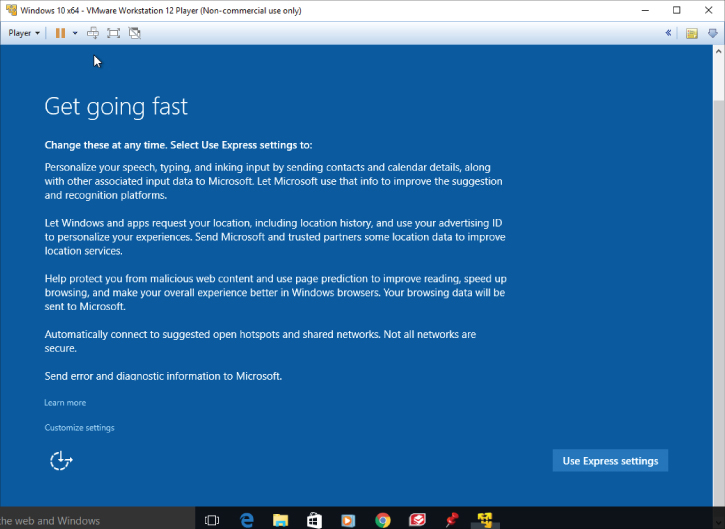
Figure 5.12 The Express Settings screen
- After a reboot, you will be prompted to select a connection method. Choose Join A Domain, as shown in Figure 5.13, and then select Next to continue.
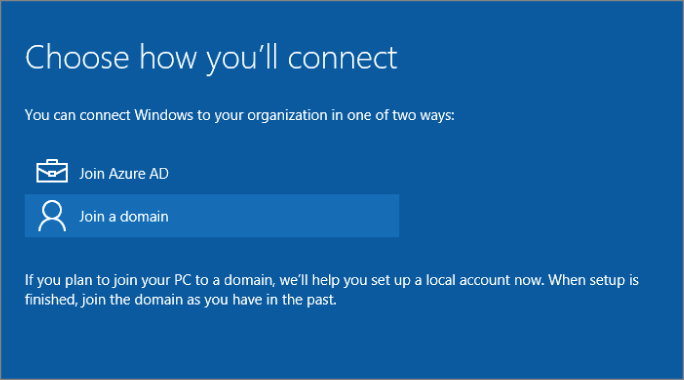
Figure 5.13 Connection choices
- You will need to choose a username, a password, and a hint for that password for the user you just created. Figure 5.14 shows this screen. Enter a username, a password, and a hint, and then select Next to continue.
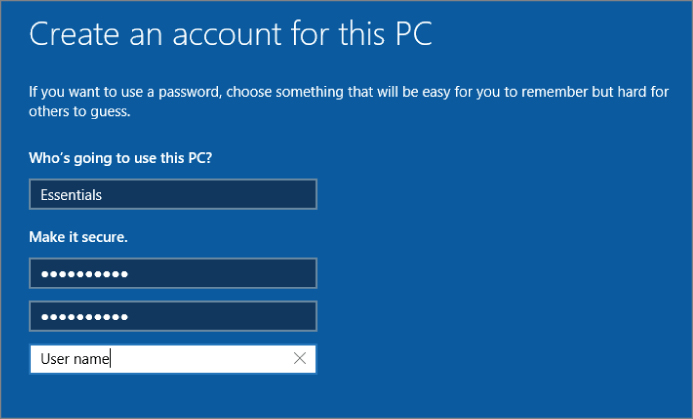
Figure 5.14 Create the username, password, and hint.
- The Windows installation process logs into Windows and does some initial setup. When that is complete, you will be presented with a Network screen, as shown in Figure 5.15. Select Yes to continue.
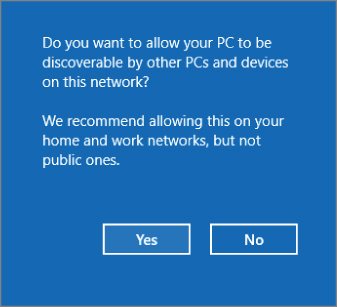
Figure 5.15 Network sharing
- As you can see in Figure 5.16, Windows will complete the one-time setup and be ready for use.
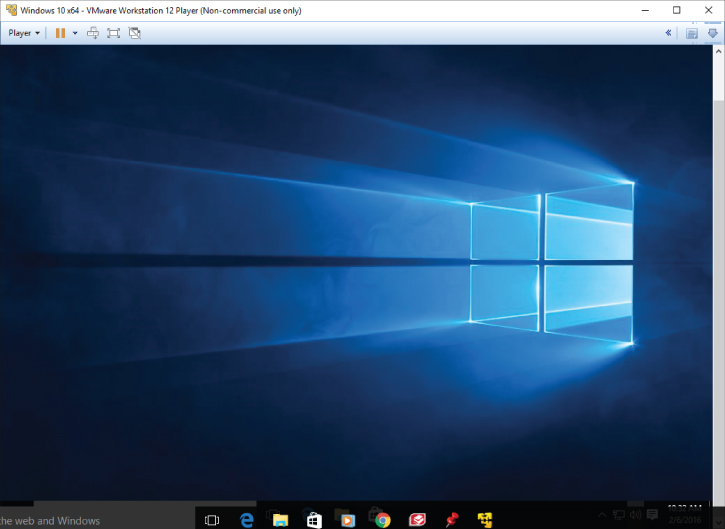
Figure 5.16 The completed Windows 10 installation
Installing VMware Tools
You have one more step left to complete before you can work in this virtual machine, and that is adding the VMware Tools. VMware Tools are a combination of device drivers and processes that enhance the user experience with the VM, improve VM performance, and help manage the virtual machine. Although installation of the VMware Tools suite is not mandatory, it is very highly recommended for VMs in any of the VMware environments.
- Select Player from the menu at the top of the VMware Workstation Player window. Choose the Manage menu option. Select Install VMware Tools as shown in Figure 5.17.
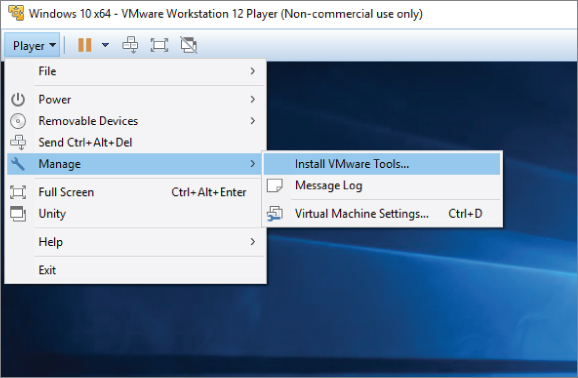
Figure 5.17 Install VMware Tools.
- The VMware Tools DVD is mounted in the virtual machine. (If you did not download the VMware Tools earlier, you may get a prompt to do so now. Download the Tools and then continue.) Click on the Disc Mounted message. Illustrated in Figure 5.18 are the choices for the disc. Choose Run Setup64.exe to continue. Answer Yes to the Allow Changes screen.
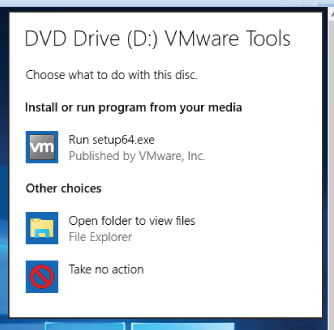
Figure 5.18 VMware Tools DVD drive options
- The initial VMware Tools installation screen appears, as illustrated in Figure 5.19. Choose Next to continue.
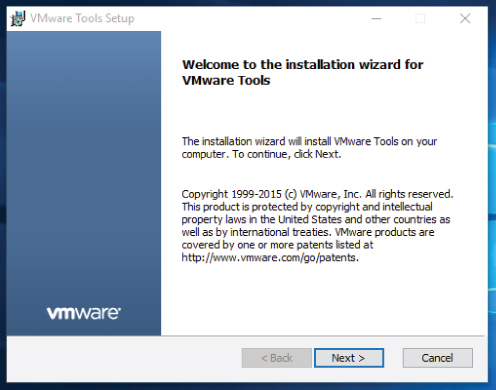
Figure 5.19 The VMware Tools Welcome screen
- Figure 5.20 shows the Setup Type selection window, which offers short descriptions of the three options. The default is Typical, which is sufficient for your needs. Choose Next to continue.
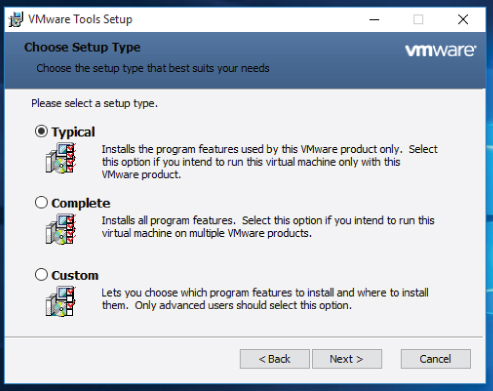
Figure 5.20 Setup type
- The Install screen appears, as shown in Figure 5.21. If any changes need to be made, you can use the Back button to scroll back through the preceding screens to make those changes. If you are ready to continue, select Install.
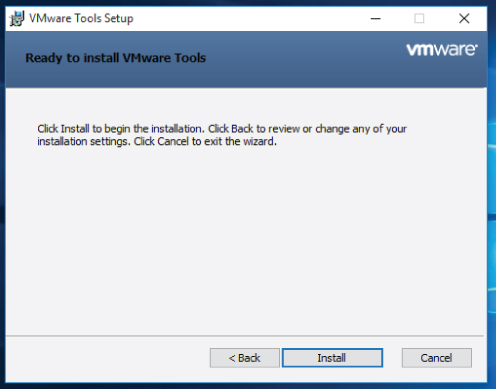
Figure 5.21 Ready to install
- The VMware Tools are installed, and you can mark the progress on the displayed Status screen. It is typically a very short process, requiring only a few minutes. When it is completed, the final screen, as shown in Figure 5.22, is displayed. Select Finish.
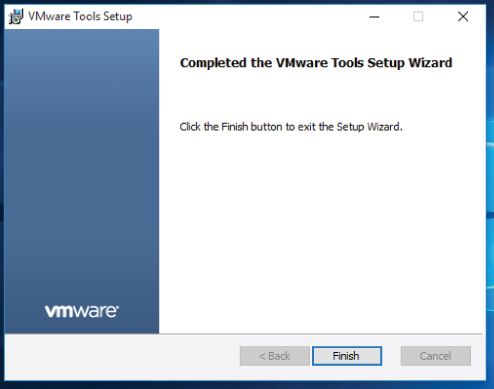
Figure 5.22 The installation is complete.
- Finally, you need to reboot the VM one more time. The system prompts you, as shown in Figure 5.23. Select Yes to restart the VM.
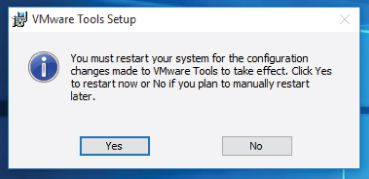
Figure 5.23 Restart the system.
Understanding Configuration Options
Now that you have a working VM, let's take a closer look at what you've built. The first thing to observe is that the VM looks identical to the physical desktop, which is exactly what you want. If you select the Start icon, you'll see exactly what you would expect to see in a fresh install of Microsoft Windows 10, as shown in Figure 5.24. It is easy to tell that you are using a virtual machine by looking at the VMware Workstation Player application bar at the top of the VM window. However, most virtual machines are run on servers and are connected to by users who never see the physical or virtual servers with which they work.
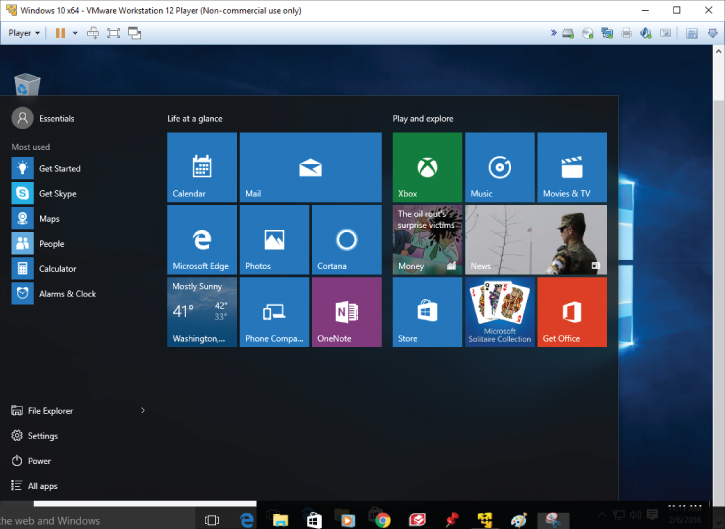
Figure 5.24 A running Windows 10 VM
If you were to connect to this VM via the network using the Remote Desktop Connection, could you determine if it was a physical or virtual server? The answer is yes. There are a number of key giveaways that you could quickly check to make that determination. First, by highlighting the hidden icons at the bottom right, you will see a VM logo. This indicates that VMware Tools has been installed on this particular VM. You can open the About VMware Tools window to verify that the service is running, as shown in Figure 5.25. Remember, though, that installing the VMware Tools is recommended, but not mandatory. This means that the absence of VMware Tools does not automatically indicate that it is a physical machine. Close the About VMware Tools window.
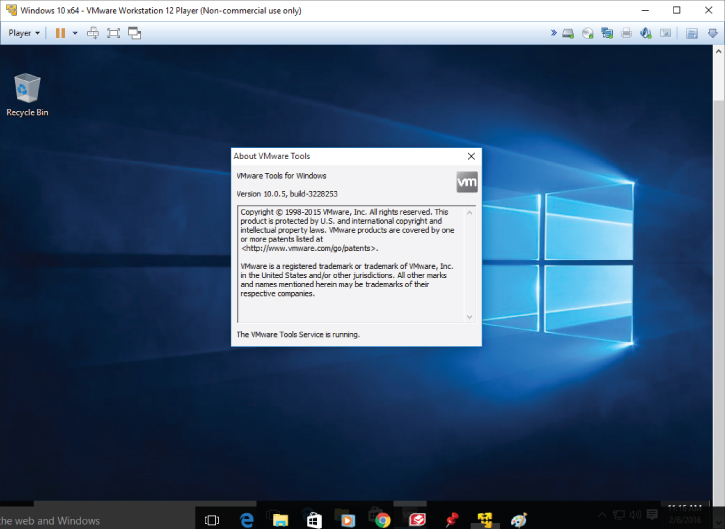
Figure 5.25 The About VMware Tools screen
There are ways to more definitively determine what type of system you're using. Choose the Start icon and select Settings and then the Devices icon. Choose Connected Devices and scroll down on the right side of the screen to the bottom. Select Devices And Printers. You can instantly see that some of the devices do not match any physical vendor hardware. Figure 5.26 shows a VMware Virtual USB Mouse, a VMware Virtual S SCSI Disk Drive, and VMware Virtual USB Sensors; but even more telling is that when you select the machine icon on the top left of the devices window.
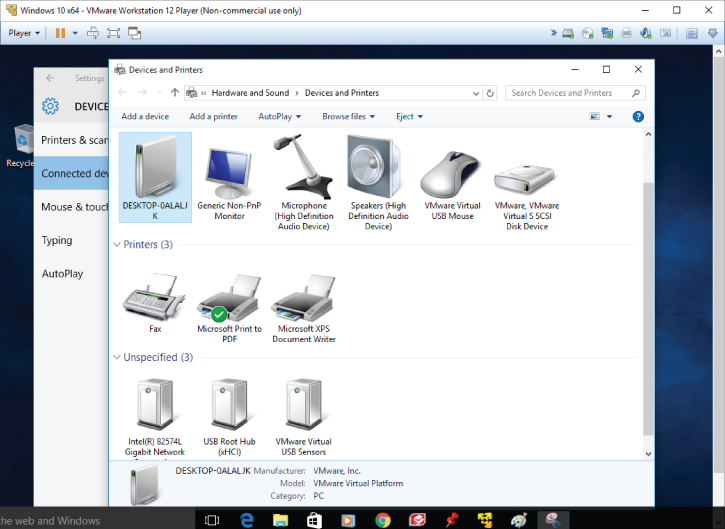
Figure 5.26 Windows 10 devices
When you highlight the image, you can see preliminary information at the bottom of the window. It is fairly obvious that this computer is of the virtual variety manufactured by VMware. If you follow the same path on your physical computer, you should see the difference immediately. When you double-click the computer image, a properties window appears, and you can see that the VM is a virtual machine. Select the Hardware tab and scroll through the devices, as shown in Figure 5.27, to confirm that virtual devices compose the system. On your physical computer, obviously only physical devices would be present. Close the windows to continue.
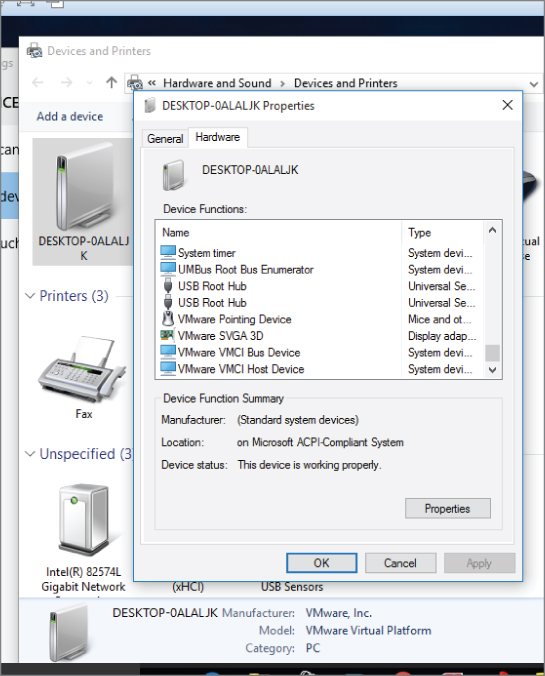
Figure 5.27 System properties
Let's look at two more items that will help illustrate the differences between what the physical machine has and what the virtual machine thinks it has. Again, select Start &cmdarr; Settings &cmdarr; System &cmdarr; Storage. Here you can see the single disk drive that you created; the C: drive still has about 20 GB free out of the 30 GB it has. But what is the actual size of the storage on this physical system? By following the same steps for the physical system, as shown in Figure 5.28, you can see that the physical C: drive is considerably larger. We'll look closer at this in Chapter 9, “Managing Storage for a Virtual Machine.” Close both the physical and virtual Storage windows.
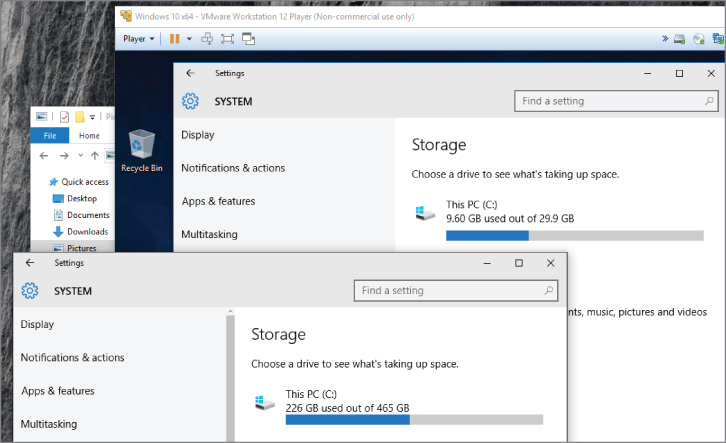
Figure 5.28 Disk sizes
- Enter Control Panel into the search bar of your virtual machine. When the program appears in the list, select it. Navigate to System and Security &cmdarr; System.&cmdarr;The key information is displayed. The Windows version is, as you'd expect, Windows 10. You have 2 GB of memory (RAM), just as you configured. The processor information is also available.
- Now, in your physical environment, duplicate the previous steps to show the Control Panel on your computer. As you can see in Figure 5.29, this physical machine actually has 8 GB of memory, again more than what is configured for the virtual machine.
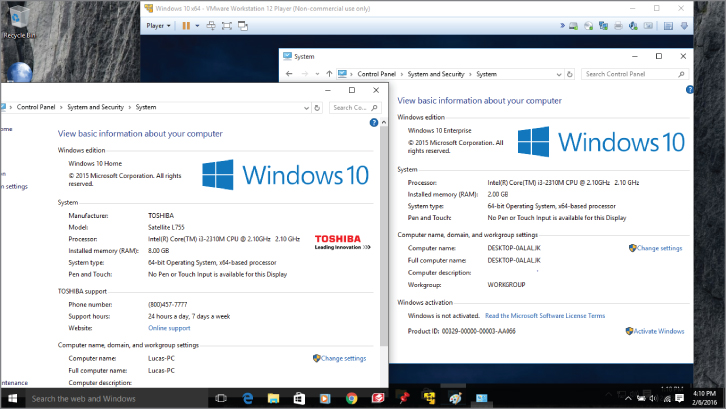
Figure 5.29 Memory sizes
- You can examine some of the other similarities and differences and then close those windows when you are done.
Now let's make one small adjustment to the VM just to experience the flexibility of changing the configuration. You've allocated 2 GB of memory to the VM, but if you look at the Microsoft Windows 10 system requirements, a 64-bit implementation, which is what is deployed, should have a minimum of 2 GB. You haven't done anything yet to stress the VM from a performance standpoint, so the 2 GB has been sufficient to operate without any ill effects.
- Select Player from the VMware Workstation Player menu bar.
- Select Manage from the menu and then select Virtual Machine Settings.
- As shown in Figure 5.30, highlighting the Memory device in the Hardware tab shows the controls for adjusting the memory in the VM. There are values that are selected by VMware Workstation Player as minimum, recommended, and maximum values. You can adjust the memory right to those values by selecting the colored boxes next to those suggestions. You can also manually adjust memory by moving the slider up or down, or by entering a specific value into the field indicated by Memory for this virtual machine.
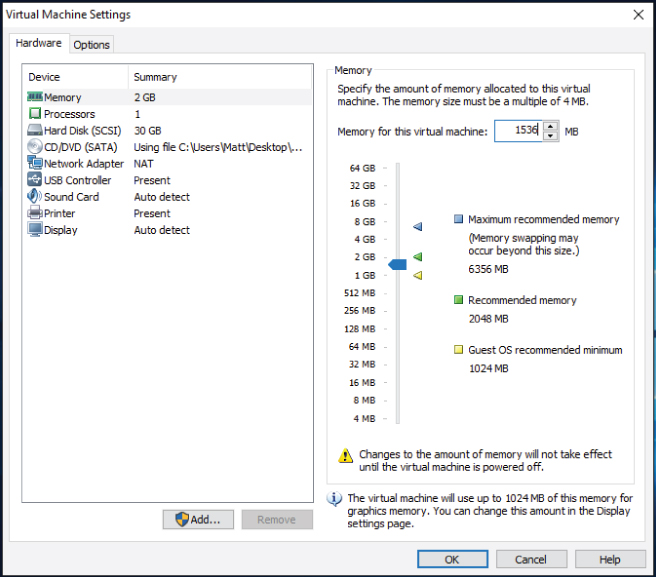
Figure 5.30 Adjusting the memory in a VM
- Adjust the memory value to 1.5 GB by entering 1536 into the Memory For This Virtual Machine field. Notice the warning at the bottom of window that states the change will not occur until the VM is restarted. This is an operating system requirement, not a virtual machine requirement. In certain versions of the hypervisor applications, the VM would automatically accept the additional memory and show the new larger value. Here, we would need to shut down the VM, change the amount of memory, and then reboot the VM for the change to take effect. To perform the equivalent reconfiguration in a physical server would require not only the same system restart but actual hardware changes, installing additional memory, which would take anywhere from tens of minutes to hours, depending on the environment. Multiply the time of that operation by dozens of servers, or hundreds, and it is easy to see why rapid reconfiguration is one of the many strengths of virtualization.
Optimizing a New Virtual Machine
The process we just executed is not very different from what system administrators go through as they deploy workloads onto a virtual platform. There are automation options and other methods of improving their operational efficiency available, and we'll cover some of these as we progress, but the basic template is here. This, however, is only the first step in creating an application's virtual machine. You have completed a fairly generic Microsoft Windows installation, but there are two more important steps you need to take to help the VM perform its very best for the application that will run there. The first is specific to virtual machines, while the second is just good practice for physical or virtual servers.
Many services that run as part of the Windows operating system help optimize how the physical environment runs. Some of these services don't optimize a virtual environment, so it makes good sense to just disable them. Many of the wireless networking services, for example, while perfectly reasonable for a Windows 10 implementation running on a local laptop, do nothing for a Windows 10 VM running on a host server because that physical hardware wouldn't normally have access to a wireless network. There are other physical world features that PCs have that don't translate to a virtual world. Administrators routinely disable power management features because they don't apply to a VM. Virtualized servers often have many of the personalization features removed or disabled because fancy fonts and customized sounds are not necessary for an application server. They also take up disk space and use CPU and memory resources.
Wallpapers are removed, as are screen savers. Various visual effects, such as Aero, are often disabled for virtual application servers. The intent of all of these modifications is to provide VMs that do not needlessly consume extra CPU cycles, memory blocks, I/O bandwidth, or disk space. On one virtual machine, all of these savings are small, but when you stack many multiple VMs on a physical server, they provide significant efficiencies—and virtualization is all about improving efficiencies. Administrators apply these optimizations into their templates so they can be replicated again and again to newly provisioned VMs.
The second step could apply to either physical or virtual machines. One of the best practices for moving physical application workloads to virtual machines is to ensure that enough resources are allocated to the virtual machine to provide equal or better performance on a virtual platform. So that you can understand what those resource requirements are, some type of performance metrics need to be collected while the application is still staged in a physical environment. There are professional services engagements as well as automated tools that can help gather this information and translate it into recommendations for virtual machine configuration sizes and even host server configurations.
However those metrics are acquired, the information is vital to properly configuring the virtual machine. Then there are certain applications that seem to have been created for virtualization. Very often web servers, which in the physical world typically each require their own server, can be densely packed onto a single host, because of memory optimization technologies available within certain hypervisors. We'll cover this in more depth in Chapter 8, “Managing Memory for a Virtual Machine.”