
CHAPTER 9
Fieldwork
CONTENTS
KEY WORDS
Batteries
B-Roll
Cover Footage
Drone
Establishing Shot
Filter
Frame
Handheld Microphone
Headphones
Lavaliere Microphone
Mixed Light
Mobile Journalist
Nat Sound
Pass
Primary Sound
Room Tone
Sequence
Time Code
Tripod
Videotape
White Balance
INTRODUCTION
Although we emphasize the need for journalists to develop writing and reporting skills, students also need to acquire some basic technical and production skills, such as how to use video cameras and editing software. These skills are necessary in the increasingly competitive world of broadcast journalism.
Some stations have always required reporters to shoot their own stories, interviews, and even standup reports and then bring that material back to the station where the video is edited for that evening’s newscast. At some of these stations, the reporters sometimes even anchor the news and introduce the packages they have shot and edited. The advantage of working at small stations is that you get to do everything and, therefore, have an opportunity to learn how to do everything.
However, interacting with a professional videographer provides many benefits to the field reporter. The videographer is another set of eyes in the field, seeing images that the reporter may miss. They can also troubleshoot most technical problems, drive the news van while the reporter reviews footage, and even serve as a sounding board for story angles and possible interview questions.
This chapter introduces some of the technological tools used in broadcast news and the skills necessary to operate them. The first part of this chapter examines the equipment used in the field, while the second part concentrates on the techniques used to obtain the best video and audio possible. Finally, we’ll examine the logistical differences when working with a videographer or when operating alone.
EQUIPMENT
The gear available to news crews changes with blinding speed. Earlier newscasts were based on 16-millimeter film footage; a field crew would tote a film camera to the location and record the story. Then, it was off to a processing lab (often in a hidden closet at the news station) where the film would be developed into a workable print. The film was then physically cut with razor blades, spliced with adhesive tape, synchronized with audiotape, and used on the nightly newscast.
The limitations were maddening. Film could easily be scratched or damaged at any step in the daylong process. News crews had to shoot in the morning and edit in the afternoon, as the time to develop the film could take hours. Although film allowed news stories to be covered on a daily basis, it was an expensive, fickle, and time-consuming medium, ill-suited for fast news coverage.
Engineers tinkered with new videotape formats constantly. According to a Library of Congress report, from 1956 to 1996, more than 100 fundamentally incompatible video formats were introduced into the marketplace. Videotape sizes would be introduced into the market, then disappear forever, leaving behind a trail of equipment that was immediately obsolete.
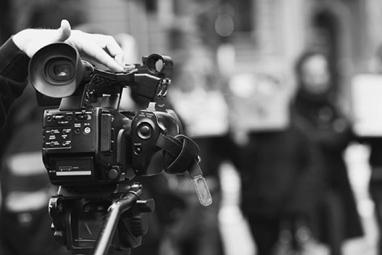
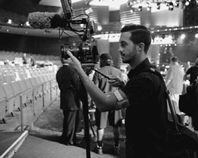
FIGURE 9.1 wellphoto/Shutterstock.com
Sony introduced the 3/4” U-Matic videotape in 1971. Although bulky and heavy, the 3/4” format became an industry workhorse. Even though it eventually gave way to smaller tapes with better quality, this format showed that a standard size could be adopted into different newsrooms across the country.
Digital Versus Tape Recording
Recording on digital formats, instead of videotape, has become the norm in newsrooms nationwide. WSB-TV’s Lucas Johnson says:
Everything is server and cloud based. We record into and edit from the server. We also have a service called Aspera which allows field crews to send footage in as long as they have a wireless signal on their laptops. We can also send video out to the crews the same way, so we don’t have to send an intern with a tape of chopper footage for the reporter to put in their breaking news PKG.
In fact, digital technology is equally important for both broadcast journalists at their stations and freelance videographers who shoot for various clients. Atlanta-based Bobby Brunelle, who has worked for clients including The Weather Channel and BET, says:
Keeping up with digital technology is extremely important in what I do and in the media field in general. I have been hired on some gigs alone because I had the latest gear out at the time and it is how I have made long lasting clients that I still work for today. It is important to keep up with some of the trends as a camera operator and learn new things every day. But it is not just in learning about the gear as well as it is keeping up with social media. I’m not saying go out and follow the Kardashians, but keep up with people in your field.
Video Cameras
Modern digital video cameras are a far cry from early film cameras or even the videotape cameras of just a decade ago. Today’s cameras can be divided into three broad categories:
■ Digital video cameras. These are larger, professional cameras that are typically favored by newsrooms. They have excellent quality yet they are limited by function. Specifically, they excel at recording and playing back video and audio files, but they may not have streaming or Internet connectivity.
■ DSLRs. These are digital single-lens reflex cameras that are smaller and less obtrusive than other professional digital video cameras. The advantages are portability and the fact that they can be easily mounted on body harnesses to get a stable video image. However, they cannot connect to the Internet, plus their audio recording is often poor.
■ Cell phones. Cheaper than the other options, iPhones and similar models can shoot video, provide rudimentary editing, and allow the user to stream live video from remote locations. A number of downloadable apps are making these devices more formidable in gathering news, but the audio quality and limited recording space can pose problems.
All these cameras use flash drives, portable hard drives, or SD cards that measure video capacity in gigabytes, not minutes. A typical SD card that records at very good quality can record 81 minutes of broadcast-quality footage. One advantage is that some digital video cameras are programmable, allowing you to record more footage (at lower quality) if you are pressed for space.
Because the technology is evolving so rapidly, videographers frequently train themselves on new gear, attend conventions and seminars on digital tech nology, and read industry magazines about what equipment is being developed. It is also common for videographers to have multiple cameras available while shooting. This allows them to obtain footage on a traditional digital camera (better quality) while also having an iPhone handy (for connectivity and live streaming).
Batteries and AC Power
Anyone who has ever used a cell phone or laptop computer knows that batteries require more attention than one might assume. Be sure to have plenty of battery power and carry an extension cord and an AC adaptor. Some new batteries will power equipment for up to eight hours. One good battery and a backup should be all you need to complete your story, although you should always take more if they are available. Batteries are often the weak link in your equipment chain. It’s hard to tell exactly how long batteries will last, especially under different temperature conditions.
FIGURE 9.2 Microgen/Shutterstock.com
A word of caution: Keep all types of battery away from extreme temperatures. Always keep them as close to room temperature as possible. Batteries can lose their power quickly in below-freezing temperatures. Many videographers keep their batteries in inside jacket pockets in winter. Never leave batteries in the trunk of a car or in direct sunlight when it’s hot outside, as they will lose their stored energy.
If you are working indoors and doing interviews, using an AC power source helps conserve your batteries for shooting outdoors. It’s also a good idea to carry a three-to two-prong adaptor (because many older buildings do not have three-prong outlets) and a four- or six-outlet power strip.
Camera Support Systems
Early 3/4” tape systems required a heavy video camera to be balanced on the right shoulder, a heavy tape deck to be slung over the left shoulder, and a thick cable to connect them slung across the back. Adding in batteries, tapes, and a portable light kit could force a videographer to tote at least 40 pounds while still trying to shoot steadily off the shoulder.
Fortunately, cameras are becoming lighter and more portable, making good videography more attainable than ever before. Mobile journalists, some times referred to as “mojos” or “mmjs”, often shoot directly off an iPhone, which weighs a mere 7 ounces. Many of these smaller video cameras have motion stabilization technology that reduces jerky movements, making smooth video even easier.
Most videographers who have been in the business for a while have little trouble shooting video with the camera on their shoulders. But even the pros use a tripod for an interview if they have the time to set it up. For beginners, it is best to use a tripod as much as possible, particularly for interviews, because weaving and bobbing heads are not acceptable in professional newscasts.
In addition to tripods, you may occasionally come across a monopod. These are one-legged supports that originated from adventure videographers who needed support in remote locations without the bulk and weight of a tripod.
Another camera support system is the shoulder or chest mount, which is akin to a Steadicam in film production. Basically, the videographer wears a harness on his body that holds the camera in front of his face. These are especially popular with DSLR cameras.
Some shakiness is expected when covering spot news. If you come on a story where paramedics are removing an injured driver from a wrecked car, leave the tripod or body harness in the news van and shoot off the shoulder. News directors would much rather see bumpy footage of the actual extraction than a tripod-steady shot of the closed ambulance pulling away.
FIGURE 9.3 wellphoto/Shutterstock.com
Drones
One tool that is rapidly becoming part of a news team’s field operations is an unmanned aerial vehicle (UAV), commonly known as a drone. These small aircraft can be readily purchased already equipped with a digital camera with 4K resolution. Drones without cameras usually have mounts for GoPro cameras to ride beneath the craft’s body.
There are several advantages to drones: They can capture images that span large areas, they are able to travel into places (like a neighborhood hit by a natural disaster) that may put a traditional camera crew in danger, and they can easily record sweeping panoramic footage that is visually stunning.
The disadvantages, however, are numerous. First, drones are loud, akin to a small leaf blower. Second, they put out a substantial downdraft of air, so simply flying in an area will attract attention. The other difficulties deal with technical limitations, such as battery life (28 minutes of flight time is common), problems dealing with inclement weather, the inability to record audio from a drone, and the durability of the craft itself. Since they are designed to be lightweight, any crashes or collisions can damage the drone.
The Drone Journalism Lab at the University of Nebraska-Lincoln’s College of Journalism and Mass Communications provides columns, research, and links for reporters interested in using drones. One ongoing item at the lab concerns the legalities of operating drones, which are regulated by the Federal Aviation Administration (FAA). Current FAA rules specify limitations for drones, including:
■ Drones may not be operated during nighttime hours.
■ The maximum altitude for a drone is 400 feet above ground level.
■ Drones may not fly over people.
■ No careless or reckless operations are allowed.
■ The drone must be in the visual line-of-sight of the craft’s operator at all times.
■ If you fly within five miles of an airport with a tower, you must receive permission from that airport to fly the drone.
Additionally, the FAA has rules for any broadcast journalist using a drone, including:
FAST FACT: The University of Nebraska-Lincoln’s Drone Journalism Lab is a new addition to this field of journalism. It was established in 2011.
■ The drone operator must be at least 16 years old and understand English.
■ The drone operator needs to pass the FAA’s Part 107 certification.
■ The drone operator must be vetted by the Transportation Security Administration.
Beyond the technical and legal parameters of using unmanned aircraft for news, ethical considerations concerning the use of drones have also sprung up in just a few years. The Professional Society of Drone Journalists (PSDJ) has devised the Drone Journalism Hierarchy of Ethics to address the growing concern over the use of UAVs for daily news gathering. The group’s website at www.dronejournalism.org offers five considerations for broadcast journalists who want to use a drone in the field. They are as follows:
■ Newsworthiness. The investigation must be of sufficient journalistic importance to risk using a potentially harmful aerial vehicle. Do not use a drone if the information can be gathered by other, safer means.
■ Safety. A drone operator must first be adequately trained in the operation of his or her equipment. The equipment itself must be in a condition suitable for safe and controlled flight. Additionally, the drone must not be flown in weather conditions that exceed the limits of the drone’s ability to operate safely, and it must be flown in a manner that ensures the safety of the public.
■ Sanctity of law and public spaces. A drone operator must abide by the regulations that apply to the airspace where the drone is operated whenever possible. An exception to this is provided in instances where journalists are unfairly blocked from using drones to provide critical information in accordance with their duties as members of the fourth estate. The drone must be operated in a manner that is least disruptive to the general population in a public setting.
■ Privacy. The drone must be operated in a fashion that does not needlessly compromise the privacy of non-public figures. If at all possible, record only images of activities in public spaces, and censor or redact images of private individuals in private spaces that occur beyond the scope of the investigation.
■ Traditional ethics. As outlined by professional codes of conduct for journalists.
SETTING UP IN THE FIELD
Atlanta videographer Bobby Brunelle offers a quick checklist of what he mentally looks at when arriving on location:
I do have a mental checklist when I arrive at a location but even more I have a checklist the day before. I make sure I have packed everything I could possibly need for the specific project (a majority of the time I pack more than is needed), I make sure all of my batteries are charged and that I have any extra batteries I could possibly need, and I make sure everything is clean. That means no fingerprints on the lenses or screens. That is all the day before.
Once I arrive on the location I make sure my memory cards are formatted and double check that I have fresh batteries in everything that needs them. Next step is to set up the lights, then camera. After the camera is ready, I tweak the lights accordingly for a better image. Finally I check audio. I make sure I’m on a clear channel (all I have are wireless mics). Then I check the levels myself before I mic up any talent. Next, I mic up the talent and do one final test. Finally, we are good to go and start shooting. That’s the process I go through for every shoot.
VIDEO
Now that we’ve seen what a video camera can do, let’s investigate it further to see how videographers can manipulate the images. Good shooting is well lit, the right color, and conveys the story well. Because poor shooting can ruin an otherwise compelling story, videographers must know the nuances of each camera they use.
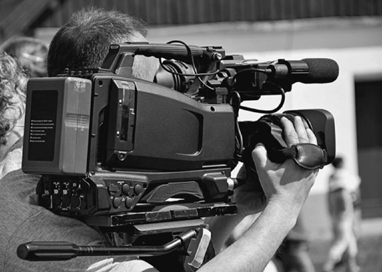
FIGURE 9.4 Laszlo66/Shutterstock.com
Filters
Every camera has a built-in filter system to accommodate different lighting situations. If you shoot indoors with artificial light, you should use a different filter than you would outdoors in natural light. If you use the wrong filters, the end result will look unnatural.
Light is measured by Kelvin degrees, which are units of measurement on an absolute thermodynamic scale. But instead of thinking of this as a scale where temperatures range from hot to cold, picture it as a scale that measures the relative “redness” or “blueness” of white light. Indoor light from incandescent bulbs is 3,200 degrees Kelvin (reddish-orange) and outdoor sunlight is at 5,600 degrees Kelvin (blue). While these temperature differences are invisible to the human eye, video cameras can have trouble shifting between light sources of various colors. Thus, if you shoot outside and your camera filter is set for that Kelvin temperature (blue), moving inside with the same filter will result in blue footage. An easy way to remember the difference is that the sunlight is filtered down through a blue sky, thus sunlight is blue on the Kelvin scale.
Cameras may also have additional filters for shooting outdoors in bright situations, such as after a snowfall or on the beach. The initials ND that appear on some 5,600 Kelvin filters stand for “neutral density.” These filters produce the same colored video as the 5,600 Kelvin filter but reduce the amount of light entering the camera.
White Balancing
Along with filters, a white balancing system is built into video cameras to provide accurate color. To white balance the camera, you must aim it at something white, such as a white wall or piece of white paper, while you push the white balance switch or button on the camera. You must repeat this process each time you shoot at a different location.
Digital video cameras have preset and automatic white balance settings. In the preset mode, the video will look good if the color temperature of the light in which you’re shooting is near 3,200 degrees Kelvin indoors or 5,600 degrees Kelvin outdoors. Many videographers use the preset white balance for most of their shooting.
The automatic white balance setting is for when the light in which you’re shooting is neither 3,200 degrees Kelvin nor 5,600 degrees Kelvin. Fluorescent lights are guilty of having a number of possible color temperatures. When they were first developed, their color temperatures gave skin tones a slight greenish tint. Now, fluorescent bulbs come in a variety of more flattering color temperatures, many of which are closer to incandescent bulbs’ 3,200 degrees Kelvin mark. When in doubt, flip the camera’s white balance selector to automatic, fill the screen of your viewfinder with a white object, and then toggle the white balance switch on the camera. This process calibrates the camera to recognize the white color accurately, thus allowing it to render all other colors correctly as well.
Name—Robert Brunelle
Job Title—Freelance Production
Employer and Website—Talmond Films, Atlanta, GA; talmondfilms.com
Social Media Outlets I Use—Facebook, Instagram
Typical Daily Duties— Always editing, camera, audio.
FAST FACT: The Kelvin scale was created by nineteenth-century physicist William Thomson, whose University of Glasgow office was near the River Kelvin.
Mixed Light
Any light entering a room through a window can cause problems for news videographers. The best practice is to avoid shooting with windows anywhere in your background. Even a window with the blinds closed can create a distracting blue highlight in the background of an indoor interview shot. For a beginner, it is best to shoot the interview either with all artificial light or outside with natural light. If there is enough light coming through windows, the interview can sometimes be shot nicely with natural sunlight if either (a) the outdoor camera filter (5,600 degrees Kelvin) is used or (b) the camera will take a white balance while set to the indoor filter (3,200 degrees Kelvin). Just remember to keep windows out of your background. As you gain experience, you’ll learn the various filter and white balancing combinations to use in mixed lighting.
Most professional news videographers use what are called dichroic or “dicro” filters that clip onto the front of their lights. Dicro filters simulate sunlight and allow you to use your artificial light during the day to augment the natural sunlight already present. Dicro filters on a light can be used to illuminate a person when shooting in a room already filled with natural sunlight from windows. Dicro filters are also handy during the day to brighten the face of your subject when you have a bright background, to light a reporter doing a daytime shot, or to brighten an interviewee when shooting during the day in deep shade.
Whenever you are in doubt about the color temperature, you can always flip your camera’s AWB (Automatic White Balance) to the “on” position and white balance your camera on a white object, like a piece of paper. This may not be a perfect fix, but it will usually result in a usable video image.
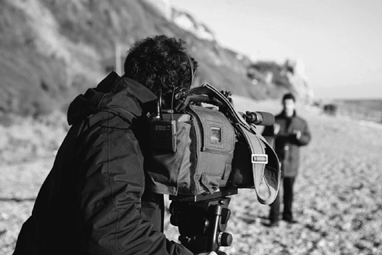
FIGURE 9.5 JoeGough/Shutterstock.com
Focusing
Poor focus can destroy a story, but there’s a reason why it’s so unsettling for viewers. As a brief example, look at this book. Now, quickly look across the room. If you have normal vision (or it is at least correctable with glasses or contact lenses), the book appeared in focus, then the object across the room also appeared in focus, even though the distance was much greater. People are accustomed to seeing things that aren’t blurry, since the human eye can autofocus so fast.
Not so with camera lenses. The distance from a camera to an object away from it is on the Z-axis. The X-axis is vertical while the Y-axis is horizontal. The Z-axis, however, is determined by how far something is placed in a straight line away from the camera. Your eyes can focus on the book (very close on the Z-axis) then readily refocus on the far side of the room (farther away on the Z-axis) without you being conscious of it. But camera lenses must be reset each time so the Z-axis is sharp no matter the distance between the camera and the subject.
This explains the blurry footage from video cameras. If a camera lens isn’t focused on a specific distance on the Z-axis, the footage isn’t sharp. Fortunately, this is very simple to remedy.
When you are setting up a shot, zoom into the subject, focus (if the subject is a person, focus on their eyes), then zoom out to the desired composition. By zooming in and focusing, you have essentially told the camera what area of the Z-axis must be in focus. This is easier in well-lit situations (and conversely more difficult in dark or night situations) since the amount of light entering the lens impacts how much appears to be in focus. You should also be careful of recording moving subjects who are either coming closer to or moving away from the camera. In those cases, you need to pull focus, which means you adjust the focus ring during the shot, effectively changing the Z-axis while recording. While this sounds daunting, it can be learned easily with a bit of practice.
Most lenses have a “macro” function that allows you to shoot small things at close range, but caution should be used. If your lens is in “macro” function when you are trying to shoot normally, everything will be out of focus no matter if zoomed in or out. In most cases, the macro function is a ring on the barrel of the lens near the aperture (iris) ring. You can feel it click into place when it is secured in the disabled mode. If you are trying to focus on something and the image is consistently blurry, check if the macro function has accidentally been enabled.
Shooting Techniques
Let’s look now at a few fundamental shooting techniques that beginners should learn immediately. First, avoid zooms and pans until after you’ve shot your static shots. Unless there is some important reason to zoom in or pan on to something, avoid those movements. It is better to cut from one shot to another. Always consider composition carefully, especially when shooting interviews. You should shoot interview subjects slightly off center, not right in the middle of the frame. Ideally, you will frame the interview subject’s head over the reporter’s shoulder or at a slight angle. Profiles do not work well because they lose the viewer’s attention; you can easily determine if a shot is “too profile” if you cannot see the subject’s second eye over the bridge of the nose. Once you see the subject’s second eye and far cheekbone, the shot is fine. The subject should be looking at the reporter and, if the camera is positioned correctly— just behind or slightly to the side of the reporter—the audience at home will see the whole face of the interviewee.
Typically, videographers who are shooting an interview will come away with a medium or medium close-up shot. This is important because you want to leave enough room at the bottom of the frame for graphics that identify the speaker. Some news directors discourage tight head shots because it is difficult to superimpose graphics over the image without it covering part of the subject’s face. Tight shots are sometimes effective if the interview is dramatic or emotional or if the person’s face is interesting because of age, beauty, or some other reason.
Some videographers like to get a variety of headshots, but it is important to remember not to change shots while someone is speaking unless there is a good reason. If, for example, the person on camera begins to cry, you would probably want to slowly zoom in for a close-up.
Remember that the reporter will not appear on camera most of the time, so all of the shots should concentrate on the interviewee. The reporter may be brought into the picture after the interview is completed when the videographer shoots the cutaways and reversals used as a part of the editing process to avoid jump cuts. As discussed earlier, editing interviews presents a problem because sound bites cannot be cut from one to another without the image instantly appearing to “jump” as the shots transition; this is why it’s called a jump cut. Without something in between the two sound bites, the head appears to jerk when the sound bites are edited together. One technique that is becoming more popular is to bridge the two sound bites together with a short dissolve. This informs the viewer that an edit has occurred yet somewhat eases the transition between the two sound bites.
Cover Footage
The best way to avoid jump cuts is to use appropriate cover footage—video illustrating what the newsmaker is discussing. Good pictures usually are more interesting than heads and cover footage allows editors to connect as many sound bites as they like without jump cuts.
Cover footage is also called b-roll, which is a series of visual images used to illustrate the story. B-roll received its name because it typically consists of video and natural sound. This natural sound is traditionally recorded on the second, or “B,” audio channel.
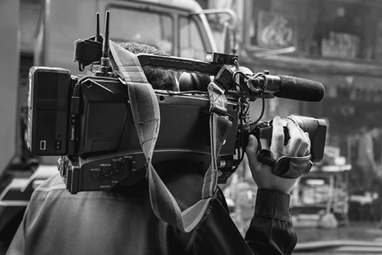
FIGURE 9.6 Freedom_Studio/Shutterstock.com
Establishing Shots
Some of the first pictures a videographer takes at the scene are establishing shots. These are wide shots of the activity at the scene of a fire or an accident, of floodwaters pounding against seawalls, or of baseball fans lined up outside the stadium before a World Series game. Establishing shots set the stage for what is to follow and they often provide the opening video for the story.
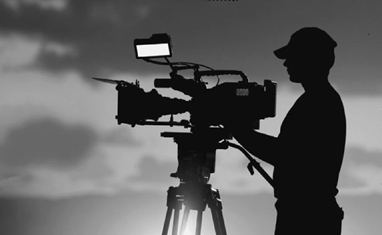
FIGURE 9.7 sculpies/iStockphoto.com
One technique that draws viewer interest is to begin with estab lishing shots that are interesting. A novice mistake is to start a visual report with an “official” shot, such as the exterior of a building. As an example, picture a story about a class of schoolchildren who’ve excelled on a state-mandated test. The stodgy opening shot would be a wide shot of the exterior of the building, followed by the obligatory medium shot of the school’s name on an outside sign. Not only is this dry video, it shows the viewer nothing they can’t see by driving down the street. As a rule of thumb, if a viewer can see the exact same image by simply looking out the window, you’re not doing your job as a videographer.
Instead, try the same story with a more compelling image as the establishing shot. How about some video of the schoolchildren? A close-up of a pencil solving a math problem on a piece of paper? A medium shot of a student hunched over a pile of homework? Remember, an establishing shot need not be a wide shot; it should, however, be a compelling image that will invite viewers to watch the story. A tepid shot of a building or sign is not an effective strategy to hook someone to stay for another 90 seconds.
Better footage can be obtained by getting a variety of close-ups, medium shots, and wide establishing shots. Too many novice videographers hesitate in shooting close-ups, leaving a bland array of wide shots for editing. To combat this, an easy strategy is for students to watch an hour of dramatic programming on television. Narrative stories are conveyed through the power of close-ups, which attract and maintain a viewer’s attention. News stories without close-ups will not have the power of those that do.
Sequences
Good videographers shoot their footage in groups called sequences, which are a collection of shots concentrated in a single visual setting. A sequence need not tell a story in a sequential manner; it simply covers the images in a setting so the editor has ample editing options.
Let’s take a visually dull story about taxes being prepared just before the annual April 15 deadline. To simplify this example, picture a taxpayer typing a spreadsheet on a computer program. A quick suggestion of shots would include:
■ WS of the taxpayer and the computer
■ MS of the taxpayer
■ CU of the taxpayer’s face
■ CU of the taxpayer’s hands typing on the computer keyboard
■ MS of the computer screen
■ CU of the tax forms on the desk.
Now, imagine editing with these six shots and each shot will average about five seconds on the air. The editor now has the ability to easily cover 30 seconds of audio narration. Of course, discretion must be used. This type of shooting requires you to direct your subjects a bit, which can be inappropriate and even unethical in some circumstances. As you get better at using this technique, you’ll find ways to shoot sequentially on most assignments.
Shooting Enough Footage
Reporters, especially inexperienced ones, often wonder whether they’ve asked enough questions. Videographers often feel the same way. With experience, they learn when they’ve shot enough pictures, but initially they all tend to overshoot, fearing that they might miss something. Eventually, a videographer and a reporter who work together come to know when they have enough video. Until that time, shooting too much video is better than returning to the newsroom with too little.
Ethan Forhetz of KYTV notes “I think this is something that just comes with experience. At the beginning, everyone overshoots. Eventually, you get tired of going through 20-minute interviews and 40 minutes of B-roll for a story that will be only 1:30 long.”

FIGURE 9.8 Microgen/Shutterstock.com
Jade Bulecza of WTXL agrees that overshooting can be a problem, saying: “My rule of thumb is to shoot 15 different shots for packages and VOSOTs. That’s not including interviews. You don’t want to shoot much more than that for news stories because it will take you a longer to edit. As a reporter you don’t have time to waste! You need every minute of your day.”
Time Coding
Videotapes record images on individual frames. A frame is a frozen picture that lasts 1/30th of a second on a video signal. To see what a frame looks like, just pause a video while it is playing; the image you see is one frame. Since there are 30 frames per second, finding the exact footage you want for editing can become a daunting task.
As you record, your digital video camera is discretely marking your footage with time code. This serves a valuable function, as the time code marks each individual frame with a unique address. Time codes appear as hour:minute: second:frame. Thus, if you see a time code reading of 01:52:03:13, you know your frame is exactly 1 hour, 52 minutes, 3 seconds, and 13 frames into the footage.
When you review existing footage, you will log the time code by just writing down the number for future reference. Since the time code is a permanent address on each frame, it will remain the same number even if you move to a different editing station.
FAST FACT: There are 30 frames in a second of video, but 24 frames in a second of film.
AUDIO
While much attention is devoted to quality video images, poor audio can ruin a news story just as quickly. There are three basic rules for getting good audio.
■ Move the microphone in close. You should get the mic as close to the sound source as possible without disrupting the shot or causing audio distortion.
■ Use the right microphone. A lavaliere mic is perfect for interviews, but not for covering a football game from the sidelines.
■ Be aware of audio problems. These include wind, loud background noises, and noise from the lavaliere mic rubbing on the subject’s clothing.
In addition to microphones and headphones, field crews carry a small arsenal of wind screens and pop filters to deaden background noise. These are placed on microphones to reduce ambient sounds and wind noise when recording.
Most professional video cameras have two audio tracks (Channel 1 and Channel 2). The easiest way to manage audio recording is to record the primary sound, such as field interviews and stand-ups, on Channel 1. This leaves Channel 2 free for recording natural sound and room tone.
However, DSLRs and iPhone cameras are limited in their audio recording capabilities; the quality just isn’t as good, plus the audio may be limited to a single channel. Always learn the audio specifications of your gear before attempting to record sound in the field so you aren’t disappointed with the end product.
Recording Primary Sound
Primary sound is the audio recorded as the reporter’s narration, sound bites, and stand-ups. To obtain a good audio level, the videographer should have the subject talk into the microphone before the tape is rolling; this will allow the audio levels to be set accurately. The truest audio checks come naturally, when the subject is simply speaking into the microphone. Having the person count “one . . . two . . . three . . .” may confirm that the microphone is indeed hooked up, but the counting is so stilted that the videographer will likely need to adjust the level once normal speech begins. Try not to settle for counting.
Aside from setting the proper audio level, the videographer must decide what type of microphone to use. The two most common are the lavaliere mic and the handheld mic. The lavaliere is a clip-on microphone that affixes to a jacket, shirt, or tie; the advantages are that it allows for both hands to be free and provides a solid audio level. The second type of microphone, the handheld, also gives a quality signal. It tends to be more durable than the lavaliere and can be used without bothering to clip on a microphone, plus it works well when interviewing multiple subjects on a breaking news story. As an added advantage, the news director will purchase mic flags to be placed on the handheld microphones. These are the square or triangular mini-signs that display the news channel’s logo prominently on the mic.
DEFINING TERM: Room tone—the sound of a room when no one is speaking. It is like ambient background noise, which can help smooth out the audio during editing.
The shotgun mic is a third popular choice. It is a unidirectional microphone, meaning it picks up sound from the source at which it is pointed. These mics are excellent for event coverage, such as football games or parades.
Professional video cameras are pre-equipped with an onboard microphone. This mic is placed just above the lens, so it is always aimed precisely at the image. This is the nat (or natural) sound microphone. There are two reasons why it should always remain in the “on” position. First, it will capture the ambient sound whenever the camera is recording, thus the nat sound is simple for the videographer to obtain. Second, if a lavaliere microphone fails (due to a dead battery) or the handheld microphone is not working, the nat sound mic will serve as an emergency back-up for primary audio. It should not be relied on to provide quality audio for interviews and stand-ups, but it will work in an emergency.
Recording Natural Sound
Good pictures are essential for good television, but pictures are not nearly as effective without their nat sound. In television, seeing traffic, a heavy downpour, or a construction site without the benefit of audio in the background gives an antiseptic feeling for the viewer. For radio, nat sound is important because the sound provides many of the “pictures” for the radio audience.
At the end of shooting at a given location, it is customary for the videographer to ask for quiet while recording for a few seconds. This is when the videographer is recording room tone. This audio can be used as “filler” audio if there are unusable sounds that must be covered elsewhere on the videotape. When these shots are being taken, it is important that the reporter simply walk away from the camera. Fewer things are more irritating to a videographer than a reporter who uses this occasion to stand near the camera to discuss lunch plans. Not only does this make the ambient noise unusable, it forces the videographer to stand behind the camera for a few more minutes for no good reason.
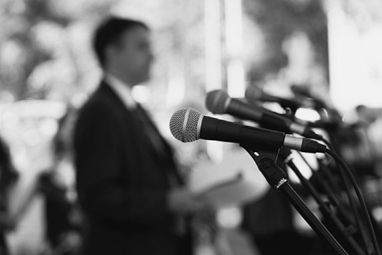
FIGURE 9.9 wellphoto/Shutterstock.com
Headphones
A common problem for young people just starting to work with equipment is recording good sound. A set of headphones is critical in ensuring that you are getting the signal from the microphone to your camera. If you aren’t listening, you could end up with both audio tracks containing a signal from just the nat sound microphone mounted on the camera. If you are responsible for recording good sound, wear headphones during the interview. You cannot depend on the camera’s sound meter reading or the tiny monitor speaker because they just tell you that sound is being picked up. They do not guarantee that the sound quality is good. The only way to hear if there is radio interference or microphone problems is to listen to the sound through headphones.
Headphones range from small earbuds to over-the-ear headphones that cover both ears in their entirety. Either way, the small investment needed for a pair of headphones is a worthwhile purchase for any field videographer.
Mobile Journalist
The television news industry is evolving from using large field crews to one-man-band broadcast journalists who report, shoot, and edit by themselves. These positions are commonly called mobile journalists (mojos) or multimedia journalists (MMJs). If you start out in a small market, which is where most young people right out of college begin their careers, you may not just be reporting the news; you could be shooting it as well. To save money, many small stations—and even some bigger ones—are hiring people who can do it all.
Action News Jax Reporter Larry Spruill has worked both on a news crew and as an MMJ. He says:
I work with a photographer every day. I prefer working with a photographer, rather being in myself. I started in Macon, Georgia, where I was a MMJ for three years and then moved on to Savannah. I worked MMJ for almost three years there and now I’m in Jacksonville, Florida. Working with a photographer, I’m able to focus on my craft as a reporter and the story itself. As a reporter, more is required of me on a story, since I have a photographer, but I strongly prefer working with a photographer rather myself.
Due to lighter cameras, digital technology, and tighter budgets, some stations are employing people who know how to write, report, and handle a camera in the field. Many of the people who are working alone seem to enjoy the freedom of doing everything by themselves. For example, WCTV’s Noelani Mathews operates a news bureau by herself, saying:
In my situation as a bureau reporter, I always work as a one man band. That means I shoot, write, edit, and report live by myself. My coverage area is a 45-minute radius of Valdosta, so if I’m traveling far I bring all my editing gear along with me. Once it’s time to edit, I will usually do everything I would normally, but inside my car using an aircard to send.
It’s always tough working in the field alone, but I secretly enjoy knowing my work is put to the test. News will always send you a curve ball you never planned, so it’s always easier to expect the unexpected.
Some critics raise safety issues about working alone. In breaking news, the reporter often watches the videographer’s back and helps protect that person from danger. Other news directors worry about theft of equipment when only one person is doing the job. Still another news director was concerned about stand-up shots, which he described as “often god-awful when only one person is trying to shoot and talk at the same time.” However, once a reporter has experience as an MMJ, they are qualified for a number of jobs in front of and behind the camera.
For students interested in broadcast journalism, learn how to do it all as well as you can, not necessarily because you may have to do everything in your first job but because if you know how to write, shoot, and report, you will be able to cover all of the bases. That background will make you better at your job, whatever that job may be.
SUMMARY
The gear available to field crews has improved dramatically in the past decades as digital technology has made steady gains for video recording. But even as the gear becomes lighter and more foolproof, there are still fundamental techniques that must be followed when working as either a one-man-band or with a videographer.
First, television relies on great video. Viewers will quickly lose patience with a newscast that offers out-of-focus footage that is shaky and has an unusual bluish tint. Anyone working with field gear must instinctively use a mental checklist (white balance, filter, focus, etc.) before recording.
Second, even though excellent audio is expected in radio newscasts, it is equally vital in television news. The correct microphones are needed, mic levels must be monitored, and headphones should be standard in all shooting situations.
Finally, reporters and videographers must work together to create the best images and sound possible. While one-man-bands are common in smaller television markets, the benefits of having a videographer cannot be understated. Not only do they provide technical expertise for a news story, they also enable the reporter to offer the best package possible.
As always, make sure all the equipment is operating properly before leaving to do a story. Shoot some video and play it back to be sure that the gear is functioning. Also, test the microphone and the lights. Don’t wait until you arrive at the scene to discover that something is not working. And most importantly? Practice, practice, practice.
Test Your Knowledge
1. What are some of the basic rules to remember about using drones in the field?
2. Why is it important to use camera filters?
3. What does white balance do?
4. How can you easily tell if an interview subject is being shot too far to the side, revealing too much profile?
5. What is a sequence?
6. How long does a frame last?
7. What are the basic types of field microphone?
8. What are the two different types of audio?
9. What are some of the advantages and disadvantages of working as a one-man-band?
EXERCISES
1. Describe a scenario in which you would deliberately leave a tripod in the news van during a field shoot.
2. List a sequence of six shots that could be used in a typical classroom setting in which a teacher lectures to a room full of students.
3. Describe what a time code is and how it can help an editor.
4. Watch a field report on a newscast. Identify the sequences used in the story.
5. In the same report, identify primary and nat sounds.