
![]()
Pages, Themes & Layouts
In this chapter, I describe one of the key building blocks for jQuery Mobile applications: pages. I touched on pages in Chapter 27, but now I’ll go into the detail and show how to define, configure, and navigate between pages. I’ll also show you two useful jQuery Mobile features for styling and structuring the content in pages: themes and grid layouts. Table 28-1 provides the summary for this chapter.
Table 28-1. Chapter Summary
| Problem | Solution | Listing |
|---|---|---|
| Define a jQuery Mobile page. | Apply the data-role attribute to an element with a value of page. | 1 |
| Add a header or footer to a page. | Apply the data-role attribute to elements using a value of header or footer. | 2 |
| Define multiple pages in a document. | Create several elements whose data-role is page. | 3 |
| Navigate between pages. | Create an a element whose href element is the id of a page element. | 4 |
| Specify a transition effect for an a element. | Apply the data-transition attribute. | 5 |
| Set a global transition effect. | Assign a value to the defaultPageTransition setting. | 6 |
| Link to a page in another document. | Specify the URL of the document as the href value of an a element. | 7, 8 |
| Disable Ajax for a single link. | Set the data-ajax attribute to false. | 9 |
| Disable Ajax globally. | Set the ajaxEnable event to false. | 10 |
| Prefetch a page. | Use the data-prefetch attribute. | 11, 12 |
| Change the current page. | Use the changePage method. | 13 |
| Control the direction of the transition effect. | Use the reverse setting for the changePage method. | 14 |
| Specify the delay after which the loading dialog is shown. | Use the loadMsgDelay setting. | 15 |
| Disable the loading dialog. | Use the showLoadMsg setting. | 16 |
| Determine the current page. | Use the activePage property. | 17 |
| Load pages in the background. | Use the loadPage method. | 18 |
| Respond to page loading. | Use the page loading events. | 19 |
| Respond to page transitions. | Use the page transition events. | 20 |
| Apply a swatch to a page or an element. | Use the data-theme attribute and set the value to the swatch that should be used. | 21, 22 |
| Lay out elements in a grid. | Use the jQuery Mobile layout CSS classes. | 23 |
Understanding jQuery Mobile Pages
In Chapter 27, I showed you how to define jQuery Mobile pages within an HTML document using elements with specific roles. To recap, Listing 28-1 shows a simple page.
Listing 28-1. A Simple jQuery Mobile Page in an HTML Document
<!DOCTYPE html>
<html>
<head>
    <title>Example</title>
    <meta name="viewport" content="width=device-width, initial-scale=1">
    <link rel="stylesheet" href="jquery.mobile-1.3.1.css" type="text/css" />
    <script type="text/javascript" src="jquery-1.10.1.js"></script>
    <script type="text/javascript" src="jquery.mobile-1.3.1.js"></script>
</head>
<body>
    <div data-role="page">
       <div data-role="content">
           This is Jacqui's Flower Shop
       </div>
   </div>
</body>
</html>
This is a minimal page, which consists of two key elements, each of which has a data-role attribute. The element whose role is page denotes the region of the HTML content that contains the jQuery Mobile page. As I mentioned in Chapter 27, one of the key characteristics of jQuery Mobile is that the pages that are displayed to the user are not directly related to the HTML elements that contain them.
The other important element has a role of content . This denotes the part of the jQuery Mobile page that contains the page content. A page can contain different sections of which the content is only one, as I’ll demonstrate shortly. You can see how the HTML in the listing is displayed in the browser in Figure 28-1.
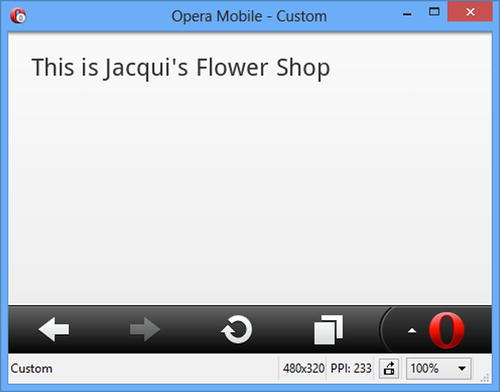
Figure 28-1. Displaying a minimal jQuery Mobile page in the browser
Adding Headers and Footers to a Page
In addition to a content section, a jQuery Mobile page can contain a header and footer, denoted by elements whose data-role attributes are set to header and footer, respectively. Listing 28-2 shows both of these sections added to the example page.
Listing 28-2. Adding a Header and a Footer to the Example Page
<!DOCTYPE html>
<html>
<head>
    <title>Example</title>
    <meta name="viewport" content="width=device-width, initial-scale=1">
    <link rel="stylesheet" href="jquery.mobile-1.3.1.css" type="text/css" />
    <script type="text/javascript" src="jquery-1.10.1.js"></script>
    <script type="text/javascript" src="jquery.mobile-1.3.1.js"></script>
</head>
<body>
    <div data-role="page">
        <div data-role="header">
           <h1>Jacqui's Shop</h1>
        </div>
        <div data-role="content">
           This is Jacqui's Flower Shop
        </div>
        <div data-role="footer">
           <h1>Home Page</h1>
        </div>
   </div>
</body>
</html>
You can see the effect of these additions in Figure 28-2.
![]() Caution Headers and footers can occupy a lot of space on a small screen, as the figure shows.
Caution Headers and footers can occupy a lot of space on a small screen, as the figure shows.
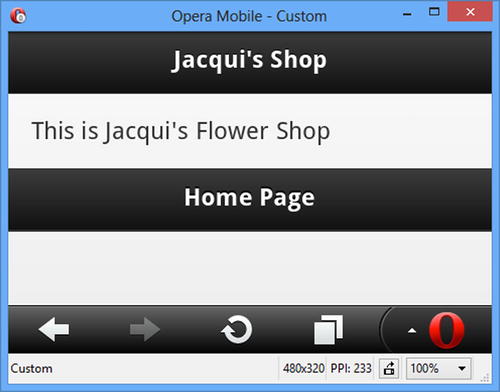
Figure 28-2. Adding a header and footer to the page
![]() Tip Notice that the footer is displayed at the end of the content section, rather than at the bottom of the page. You can fix the position of headers and footers by setting the data-position attribute to fixed – this has the effect of keeping the header and/or footer in place while allowing the rest of the content to scroll freely. Test thoroughly when using this option: not all browsers support the CSS features that fixed headers and footers require.
Tip Notice that the footer is displayed at the end of the content section, rather than at the bottom of the page. You can fix the position of headers and footers by setting the data-position attribute to fixed – this has the effect of keeping the header and/or footer in place while allowing the rest of the content to scroll freely. Test thoroughly when using this option: not all browsers support the CSS features that fixed headers and footers require.
You can define multiple jQuery Mobile pages in a single document. This can be useful for simple web applications because you can bundle everything you need into a single HTML file, which can reduce the number of requests that have to be made to the server and the overall amount of data that has to be transferred (because some elements – like those in the head section – are only specified once for multiple pages). Listing 28-3 shows a multipage document.
Listing 28-3. Defining Multiple jQuery Mobile Pages in an HTML Document
<!DOCTYPE html>
<html>
<head>
    <title>Example</title>
    <meta name="viewport" content="width=device-width, initial-scale=1">
    <link rel="stylesheet" href="jquery.mobile-1.3.1.css" type="text/css" />
    <script type="text/javascript" src="jquery-1.10.1.js"></script>
    <script type="text/javascript" src="jquery.mobile-1.3.1.js"></script>
</head>
<body>
    <divid="page1"data-role="page">
        <div data-role="header">
           <h1>Jacqui's Shop</h1>
        </div>
        <div data-role="content">
           This is Jacqui's Flower Shop
        </div>
    </div>
    <div id="page2" data-role="page">
        <div data-role="header">
           <h1>Jacqui's Shop</h1>
        </div>
        <div data-role="content">
           This is page 2
        </div>
   </div>
</body>
</html>
This example defines two pages in the document. I have used the id attribute to assign each page a unique identifier, and these values form the basis for navigating between pages. Only the first page is shown when the HTML document is loaded. To let the user navigate between pages, I add an a element whose href is the id of the target page, as shown in Listing 28-4.
Listing 28-4. Navigating between Pages
<!DOCTYPE html>
<html>
<head>
    <title>Example</title>
    <meta name="viewport" content="width=device-width, initial-scale=1">
    <link rel="stylesheet" href="jquery.mobile-1.3.1.css" type="text/css" />
    <script type="text/javascript" src="jquery-1.10.1.js"></script>
    <script type="text/javascript" src="jquery.mobile-1.3.1.js"></script>
</head>
<body>
    <div id="page1" data-role="page">
        <div data-role="header">
           <h1>Jacqui's Shop</h1>
        </div>
        <div data-role="content">
           This is Jacqui's Flower Shop
           <p><a href="#page2">Go to page 2</a></p>
        </div>
    </div>
    <div id="page2" data-role="page">
        <div data-role="header">
           <h1>Jacqui's Shop</h1>
        </div>
        <div data-role="content">
           This is page 2
           <p><a href="#page1">Go to page 1</a></p>
        </div>
   </div>
</body>
</html>
In this example, I have added links between the pages. When a link is clicked, jQuery Mobile takes care of displaying the appropriate page from the document, as demonstrated in Figure 28-3.
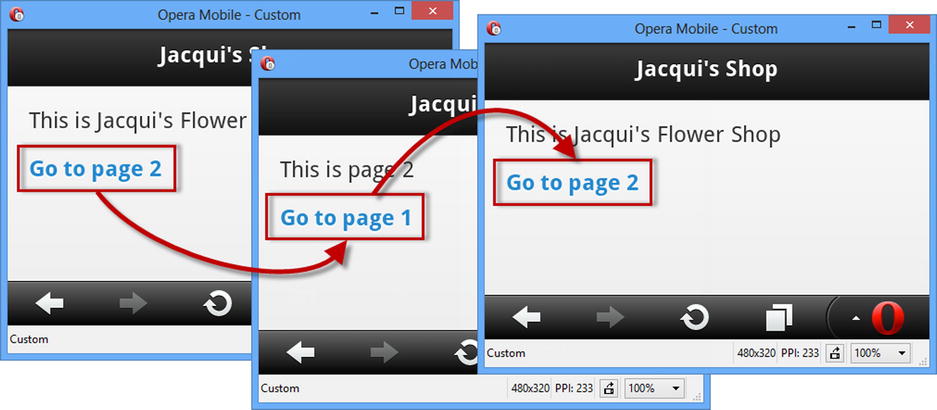
Figure 28-3. Navigating between pages in a document
When the user navigates between pages, jQuery Mobile uses an animation effect to transition between one page and the next. The default effect is called slide , which has the outgoing page slide to the left while the new page slides in from the right. jQuery Mobile defines a number of different effects, as follows:
- slide
- pop
- slideup
- slidedown
- slidefade
- fade
- flip
- turn
- flow
- none (meaning no effect, also expressed as null)
Not all mobile devices support all of the transitions correctly and you may encounter flickering and stuttering. Each new release of jQuery Mobile improves the number of devices that can support all of the transitions, but you should always test thoroughly to make sure that you don’t see any problems on the devices you are targeting. If in doubt, try the fade or slide transitions, which I have found have problems on the fewest devices.
![]() Tip The mobile browser emulators don’t handle transitions well and generally ignore them. They work just fine on real mobile devices, however. If you want to see the transition on the desktop, then use either Google Chrome or Apple Safari, both of which handle the effects well.
Tip The mobile browser emulators don’t handle transitions well and generally ignore them. They work just fine on real mobile devices, however. If you want to see the transition on the desktop, then use either Google Chrome or Apple Safari, both of which handle the effects well.
You can change the way that an individual page transition is animated by using the data-transition attribute on the a element, setting the value to the effect you want. Listing 28-5 provides an example.
Listing 28-5. Using the data-transition Attribute
<!DOCTYPE html>
<html>
<head>
    <title>Example</title>
    <meta name="viewport" content="width=device-width, initial-scale=1">
    <link rel="stylesheet" href="jquery.mobile-1.3.1.css" type="text/css" />
    <script type="text/javascript" src="jquery-1.10.1.js"></script>
    <script type="text/javascript" src="jquery.mobile-1.3.1.js"></script>
</head>
<body>
    <div id="page1" data-role="page">
        <div data-role="header">
           <h1>Jacqui's Shop</h1>
        </div>
        <div data-role="content">
           This is Jacqui's Flower Shop
           <p><a href="#page2" data-transition="turn">Go to page 2</a></p>
        </div>
    </div>
    <div id="page2" data-role="page">
        <div data-role="header">
           <h1>Jacqui's Shop</h1>
        </div>
        <div data-role="content">
           This is page 2
           <p><a href="#page1">Go to page 1</a></p>
        </div>
   </div>
</body>
</html>
![]() Note I can’t easily show you the different animation effects using figures. This example is one that requires experimentation in the browser. You can avoid having to type in the HTML by downloading the source code that accompanies this book and is freely available from Apress.com.
Note I can’t easily show you the different animation effects using figures. This example is one that requires experimentation in the browser. You can avoid having to type in the HTML by downloading the source code that accompanies this book and is freely available from Apress.com.
When the user clicks the highlighted link, the turn transition is used to display the target page. The turn effect is applied only to that single link. Other links in the page or in other pages in the same document will continue to use the default. Set the data-transition attribute to none if you want to disable the animation effect.
![]() Tip You can change the direction in which the effect is played by applying the data-direction attribute to the a element with a value of reverse. In the “Changing the Current Page” section, I give an example of reversing the transition direction and explain why it can be useful.
Tip You can change the direction in which the effect is played by applying the data-direction attribute to the a element with a value of reverse. In the “Changing the Current Page” section, I give an example of reversing the transition direction and explain why it can be useful.
If you want to change the animation effect used for all navigation, then you need to set a global option. jQuery Mobile defines the defaultPageTransition setting, which you can set when the mobileinit event is triggered. Listing 28-6 shows how this is done.
Listing 28-6. Changing the default page Transition
<!DOCTYPE html>
<html>
<head>
    <title>Example</title>
    <meta name="viewport" content="width=device-width, initial-scale=1">
    <link rel="stylesheet" href="jquery.mobile-1.3.1.css" type="text/css" />
    <script type="text/javascript" src="jquery-1.10.1.js"></script>
    <script type="text/javascript">
        $(document).bind("mobileinit", function() {
            $.mobile.defaultPageTransition = "fade";
        })
    </script>
    <script type="text/javascript" src="jquery.mobile-1.3.1.js"></script>
</head>
<body>
    <div id="page1" data-role="page">
        <div data-role="header">
           <h1>Jacqui's Shop</h1>
        </div>
        <div data-role="content">
           This is Jacqui's Flower Shop
           <p><a href="#page2">Go to page 2</a></p>
        </div>
    </div>
    <div id="page2" data-role="page">
        <div data-role="header">
           <h1>Jacqui's Shop</h1>
        </div>
        <div data-role="content">
           This is page 2
           <p><a href="#page1">Go to page 1</a></p>
        </div>
   </div>
</body>
</html>
There is no convenient method for registering a handler function for the mobileinit event, so you have to select the document object and use the bind method. The arguments to this method are the name of the event you want to handle and the handler function to use when the event is triggered.
![]() Caution The mobileinit event is triggered as soon as the jQuery Mobile script library is loaded, which means you have to register the handler function to change the global jQuery Mobile setting before the jQuery Mobile library is referenced in a script element. You can see how I have done this in the listing. The function will never be executed if the call to the bind method is not defined before the script element that loads the jQuery Mobile code.
Caution The mobileinit event is triggered as soon as the jQuery Mobile script library is loaded, which means you have to register the handler function to change the global jQuery Mobile setting before the jQuery Mobile library is referenced in a script element. You can see how I have done this in the listing. The function will never be executed if the call to the bind method is not defined before the script element that loads the jQuery Mobile code.
To change the value of a global setting, you assign a new value to a property of the $.mobile object. Since I want to change the defaultPageTransition setting, I assign a value to the $.mobile.defaultPageTransition property, like this:
...
$.mobile.defaultPageTransition = "fade";
...
This statement sets the default effect to fade. I can still override this setting with the data-transition attribute.
You don’t have to include all the pages in a single document. You can add links just as you would if using regular HTML. To demonstrate this, I have created a new file called document2.html , the content of which is shown in Listing 28-7.
Listing 28-7. The Content of the document2.html File
<!DOCTYPE html>
<html>
<head>
    <title>Document 2</title>
    <meta name="viewport" content="width=device-width, initial-scale=1">
    <link rel="stylesheet" href="jquery.mobile-1.3.1.css" type="text/css" />
    <script type="text/javascript" src="jquery-1.10.1.js"></script>
    <script type="text/javascript" src="jquery.mobile-1.3.1.js"></script>
</head>
<body>
    <div id="page1" data-role="page">
        <div data-role="header">
           <h1>Jacqui's Shop</h1>
        </div>
        <div data-role="content">
           This is page 1 in document2.html
           <p><a href="#page2">Go to page 2 in this document</a></p>
           <p><a href="example.html">Return to example.html</a></p>
        </div>
    </div>
    <div id="page2" data-role="page">
        <div data-role="header">
           <h1>Jacqui's Shop</h1>
        </div>
        <div data-role="content">
           This is page 2 in document2.html
           <p><a href="#page1">Go to page 1</a></p>
        </div>
   </div>
</body>
</html>
This document contains a pair of jQuery Mobile pages, following the same structure as in the other examples. Linking to pages in other documents is simple. You just define an a element whose href attribute contains the URL of the target document, as shown in Listing 28-8.
Listing 28-8. Navigating to a Page in Another HTML Document
<!DOCTYPE html>
<html>
<head>
    <title>Example</title>
    <meta name="viewport" content="width=device-width, initial-scale=1">
    <link rel="stylesheet" href="jquery.mobile-1.3.1.css" type="text/css" />
    <script type="text/javascript" src="jquery-1.10.1.js"></script>
    <script type="text/javascript" src="jquery.mobile-1.3.1.js"></script>
</head>
<body>
    <div id="page1" data-role="page">
        <div data-role="header">
           <h1>Jacqui's Shop</h1>
        </div>
        <div data-role="content">
           This is Jacqui's Flower Shop
           <p><a href="#page2">Go to page 2</a></p>
           <p><a href="document2.html">Go to document2.html</a></p>
        </div>
    </div>
    <div id="page2" data-role="page">
        <div data-role="header">
           <h1>Jacqui's Shop</h1>
        </div>
        <div data-role="content">
           This is page 2
           <p><a href="#page1">Go to page 1</a></p>
        </div>
   </div>
</body>
</html>
jQuery Mobile uses Ajax to load the specified document and displays the first page automatically, using a transition effect if one has been specified. You can see the result in Figure 28-4.
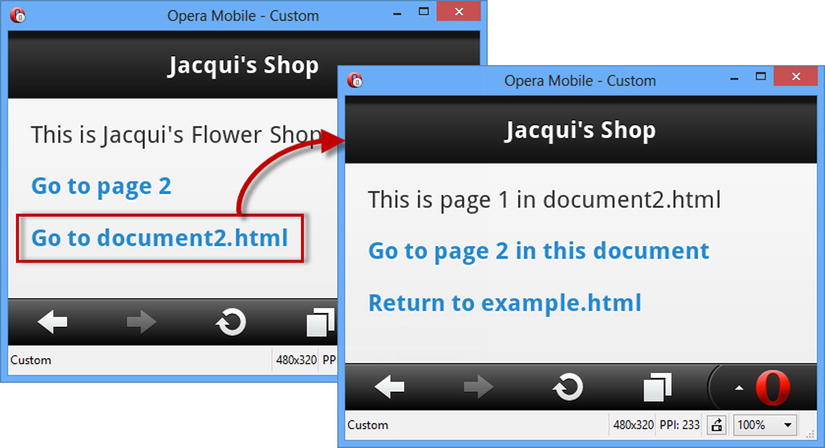
Figure 28-4. Navigating to a page in another document
![]() Tip jQuery Mobile automatically applies its styles and enhancements to remote documents that are loaded via Ajax. This means you don’t have to include the jQuery and jQuery Mobile script and link elements in files such as the document2.html file I used in the example. That said, I recommend you do include those references because it is possible to prevent jQuery Mobile from using Ajax when making such requests, and if this is done, then the automatic processing of content isn’t performed.
Tip jQuery Mobile automatically applies its styles and enhancements to remote documents that are loaded via Ajax. This means you don’t have to include the jQuery and jQuery Mobile script and link elements in files such as the document2.html file I used in the example. That said, I recommend you do include those references because it is possible to prevent jQuery Mobile from using Ajax when making such requests, and if this is done, then the automatic processing of content isn’t performed.
Dealing with the Ajax/Page ID Issue
It isn’t all plain sailing when linking to pages in other documents. There is a conflict between the way that Ajax content is managed and the way that jQuery Mobile pages are defined. Both rely on the value of the id attribute of elements. Figure 28-5 shows the problem.
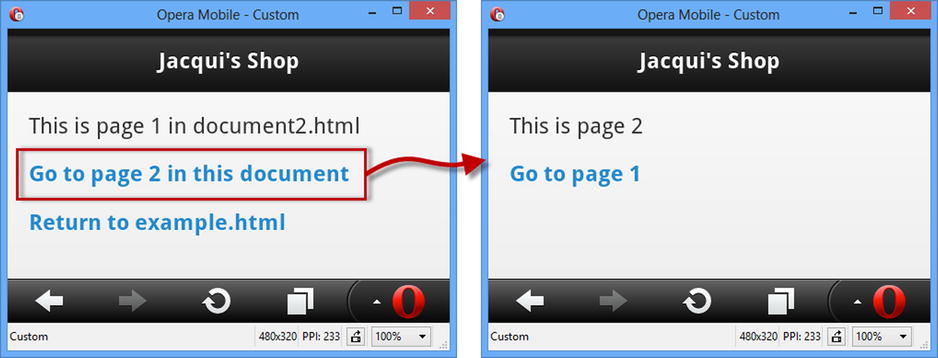
Figure 28-5. The multipage Ajax issue
In this figure, I click the link that should display the page2 element in document2.html, but what I get is actually the page2 element in example.html, a confusing and unexpected result.
You can address this in two ways. The first is to define only one jQuery Mobile page per HTML document – this is the advice from the jQuery Mobile team.
The second approach is to disable Ajax when loading multipage documents. This fixes the problem, but it does mean that jQuery Mobile is unable to apply a transition effect when showing the new page. You can disable Ajax for a single a element by setting the data-ajax attribute to false, as shown in Listing 28-9.
Listing 28-9. Disabling Ajax for a Single Link
<!DOCTYPE html>
<html>
<head>
    <title>Example</title>
    <meta name="viewport" content="width=device-width, initial-scale=1">
    <link rel="stylesheet" href="jquery.mobile-1.3.1.css" type="text/css" />
    <script type="text/javascript" src="jquery-1.10.1.js"></script>
    <script type="text/javascript" src="jquery.mobile-1.3.1.js"></script>
</head>
<body>
    <div id="page1" data-role="page">
        <div data-role="header">
           <h1>Jacqui's Shop</h1>
        </div>
        <div data-role="content">
           This is Jacqui's Flower Shop
           <p><a href="#page2">Go to page 2</a></p>
           <p><a href="document2.html"data-ajax="false">Go to document2.html</a></p>
        </div>
    </div>
    <div id="page2" data-role="page">
        <div data-role="header">
           <h1>Jacqui's Shop</h1>
        </div>
        <div data-role="content">
           This is page 2
           <p><a href="#page1">Go to page 1</a></p>
        </div>
   </div>
</body>
</html>
In this example, I have disabled Ajax for the link that navigates to document2.html . As Figure 28-6 shows, this produces the expected navigation sequence.
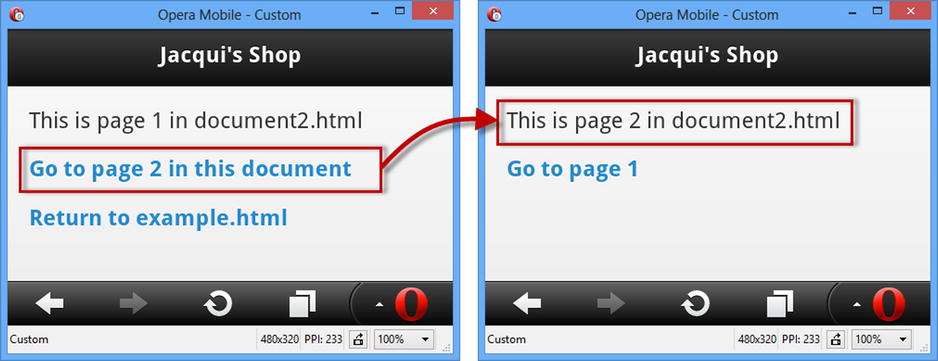
Figure 28-6. Disabling Ajax to avoid an element id conflict
You can turn off Ajax by default using the ajaxEnabled global setting, which is demonstrated in Listing 28-10. When this setting is false, Ajax will not be used for navigation unless you apply the data-ajax attribute to an element with a value of true.
Listing 28-10. Using the global Setting to Disable Ajax
<!DOCTYPE html>
<html>
<head>
    <title>Example</title>
    <meta name="viewport" content="width=device-width, initial-scale=1">
    <link rel="stylesheet" href="jquery.mobile-1.3.1.css" type="text/css" />
    <script type="text/javascript" src="jquery-1.10.1.js"></script>
    <script type="text/javascript">
        $(document).bind("mobileinit", function() {
            $.mobile.ajaxEnable = false
        })
    </script>
    <script type="text/javascript" src="jquery.mobile-1.3.1.js"></script>
</head>
<body>
    <div id="page1" data-role="page">
        <div data-role="header">
           <h1>Jacqui's Shop</h1>
        </div>
        <div data-role="content">
           This is Jacqui's Flower Shop
           <p><a href="#page2">Go to page 2</a></p>
           <p><a href="document2.html">Go to document2.html</a></p>
        </div>
    </div>
    <div id="page2" data-role="page">
        <div data-role="header">
           <h1>Jacqui's Shop</h1>
        </div>
        <div data-role="content">
           This is page 2
           <p><a href="#page1">Go to page 1</a></p>
        </div>
   </div>
</body>
</html>
You can ask jQuery Mobile to prefetch documents so that the pages they contain are immediately available when the user clicks a link. The advantage of this is that you create a more responsive application, but you do so by downloading content that the user may not require. To demonstrate this feature, I created a document called singlepage.html , the content of which is shown in Listing 28-11.
Listing 28-11. The singlepage.html File
<!DOCTYPE html>
<html>
<head>
    <title>Single Page</title>
    <meta name="viewport" content="width=device-width, initial-scale=1">
    <link rel="stylesheet" href="jquery.mobile-1.3.1.css" type="text/css" />
    <script type="text/javascript" src="jquery-1.10.1.js"></script>
    <script type="text/javascript" src="jquery.mobile-1.3.1.js"></script>
</head>
<body>
    <div id="page1" data-role="page">
        <div data-role="header">
           <h1>Jacqui's Shop</h1>
        </div>
        <div data-role="content">
           This is the only page in this document
           <p><a href="example.html">Return to example.html</a></p>
        </div>
    </div>
</body>
</html>
DECIDING WHETHER TO PREFETCH CONTENT
The decision about prefetching content is a difficult one. From the point of view of the application, prefetching can be a great idea because it produces immediate responses when the user navigates between pages. This can be particularly important when mobile connections are slow and coverage is spotty. Users don’t like waiting, and a connection that keeps dropping out will make your application unusable if the content isn’t available.
On the other hand, you run the risk of downloading content in anticipation of navigation actions that the user may not make. This can be unwelcome when mobile data plans charge punitive amounts to download data and have low monthly bandwidth limits. By prefetching content, you are assuming that the user considers your application to be important enough to trade bandwidth (and cost) for performance, something that may well not be the case. The sad fact is that although you may have lived and breathed your project for the last year, it may be nothing more than a mild convenience to your user.
My recommendation is not to prefetch pages. For those users who do consider your application important enough, you can give them an option to enable prefetching.
You enable prefetching by applying the data-prefetch attribute to the a element and setting it to true. Listing 28-12 shows the data-prefetch attribute applied to the example.html document.
Listing 28-12. Prefetching Content
<!DOCTYPE html>
<html>
<head>
    <title>Example</title>
    <meta name="viewport" content="width=device-width, initial-scale=1">
    <link rel="stylesheet" href="jquery.mobile-1.3.1.css" type="text/css" />
    <script type="text/javascript" src="jquery-1.10.1.js"></script>
    <script type="text/javascript" src="jquery.mobile-1.3.1.js"></script>
</head>
<body>
    <div id="page1" data-role="page">
        <div data-role="header">
           <h1>Jacqui's Shop</h1>
        </div>
        <div data-role="content">
           This is Jacqui's Flower Shop
           <p><a href="#page2">Go to page 2</a></p>
           <p>
               <a href="singlepage.html" data-prefetch="true">Go to singlepage.html</a>
           </p>
        </div>
    </div>
    <div id="page2" data-role="page">
        <div data-role="header">
           <h1>Jacqui's Shop</h1>
        </div>
        <div data-role="content">
           This is page 2
           <p><a href="#page1">Go to page 1</a></p>
        </div>
   </div>
</body>
</html>
In this example, I have asked jQuery Mobile to prefetch the target of my URL. When I click the link, jQuery Mobile is able to navigate to the prefetched content, avoiding any delay.
![]() Tip It can be hard to be sure that features such as prefetching are working when you are developing on a fast, reliable network. I like to check these features by using a debugging HTTP proxy, which shows me the requests that are sent from the browser. If you are a Windows user, then I recommend Fiddler, which is an excellent tool that can be endlessly configured and customized. Fiddler can be downloaded from www.fiddler2.com.
Tip It can be hard to be sure that features such as prefetching are working when you are developing on a fast, reliable network. I like to check these features by using a debugging HTTP proxy, which shows me the requests that are sent from the browser. If you are a Windows user, then I recommend Fiddler, which is an excellent tool that can be endlessly configured and customized. Fiddler can be downloaded from www.fiddler2.com.
Using Scripting to Control jQuery Mobile Pages
You don’t always want to rely on the user clicking links to manage page navigation. Fortunately, jQuery Mobile provides you with methods and settings that allow you to control navigation using JavaScript. In the sections that follow, I’ll show you how to take advantage of these methods to get fine-grained control over the navigation in a jQuery Mobile web application.
Changing the Current Page
The changePage method allows you to change the page that jQuery Mobile displays. Listing 28-13 shows the basic use of this method, which changes the displayed page based when a button is clicked.
Listing 28-13. Changing the Page That jQuery Mobile Displays
<!DOCTYPE html>
<html>
<head>
    <title>Example</title>
    <meta name="viewport" content="width=device-width, initial-scale=1">
    <link rel="stylesheet" href="jquery.mobile-1.3.1.css" type="text/css" />
    <script type="text/javascript" src="jquery-1.10.1.js"></script>
    <script type="text/javascript">
        $(document).bind("pageinit", function() {
           $("button").bind("tap", function(e) {
                var target = this.id == "local" ? "#page2" : "document2.html";
                $.mobile.changePage(target)
           })
        });
    </script>
    <script type="text/javascript" src="jquery.mobile-1.3.1.js"></script>
</head>
<body>
    <div id="page1" data-role="page">
        <div data-role="header">
           <h1>Jacqui's Shop</h1>
        </div>
        <div data-role="content">
            <fieldset class="ui-grid-a">
                <div class="ui-block-a"><button id="local">Local</button></div>
                <div class="ui-block-b"><button id="remote">Remote</button></div>
            </fieldset>
        </div>
    </div>
    <div id="page2" data-role="page">
        <div data-role="header">
           <h1>Jacqui's Shop</h1>
        </div>
        <div data-role="content">
           This is page 2
           <p><a href="#page1">Go to page 1</a></p>
        </div>
   </div>
</body>
</html>
In this example, I have added two buttons that cause the changePage method to be called when clicked. The event that I listen for using the bind method is tap, which is one of a small set of helpful custom events that jQuery Mobile defines. This event is triggered when the user taps the screen (or clicks the mouse on a non-touch enabled device). I described this event, along with the rest of the jQuery Mobile events in Chapter 27.
The buttons are standard HTML elements that jQuery Mobile automatically converts into button widgets. I describe the options for configuring jQuery Mobile buttons in Chapter 30. Finally, you will notice that I have assigned some elements to the classes ui-grid-a, ui-block-a, and ui-block-b. These are part of the jQuery Mobile support for creating page layouts, which I describe later in this chapter. The result of this example is pretty simple, as Figure 28-7 shows. When the user clicks one of the buttons, the changePage method is called, passing either the id value of a local page or a URL of another document for jQuery Mobile to display. The content is loaded, and the transition effect is displayed, just as when I was using regular links.
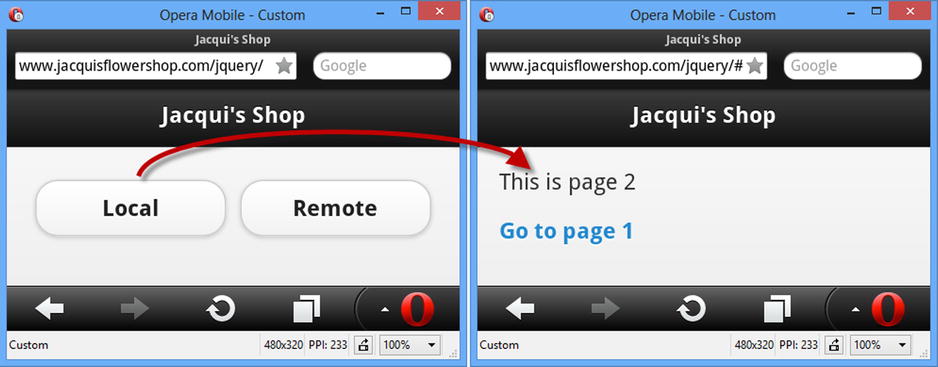
Figure 28-7. Using the changePage method
That’s the basic use of the changePage method, but there are configuration options available. To configure the page transition, you pass a settings object as the second argument to the changePage method, specifying values for one or more settings. Table 28-2 describes the settings that are available. Most of these settings are best left with their defaults, but in the sections that follow, I show two of the settings that it can be useful to modify more frequently.
Table 28-2. Settings for the changePage Method
| Setting | Description |
|---|---|
| allowSamePageTransition | When set to false (the default), jQuery Mobile will ignore changePage requests where the target page is the current page. A value of true allows such requests, although this can cause some problems with the transition animations. |
| changeHash | When true, the hash fragment in the URL bar will be updated to the new location (so that the page identifier is included in the URL). The default is true. |
| data | Specifies data to be included in the Ajax request used to load a document. |
| dataUrl | Specifies the URL used when updating the browser URL bar. The default is no value, which means the value is taken from the id of an internal page or the URL of a remote document. |
| loadMsgDelay | Specifies the number of milliseconds after which the loading image will be displayed to the user. The default is 50. |
| pageContainer | Specifies the element that should contain the new page. |
| reloadPage | When true, jQuery Mobile will reload the contents of a remote document, even if the data is already cached. The default is false. |
| reverse | When true, the transition effect will be played backward. The default is false. |
| role | Sets the data-role value for the new content – you can see this setting in use in Chapter 29. |
| showLoadMsg | A value of true will show the loading image when loading remote documents. The default is true. |
| transition | Specifies the transition effect to be used when displaying the new page. |
| type | Specifies the HTTP method used to request a document. The allowed values are get and post. The default is get. |
![]() Tip These options are also used by the loadPage method, which I describe later in the chapter.
Tip These options are also used by the loadPage method, which I describe later in the chapter.
Controlling the Direction of the Transition Effect
The reverse setting is the one I use most often. jQuery Mobile will always play transition effects in the same way, which doesn’t always make sense when you have presented the user with an action that effectively sends them back to an earlier page or where you are responding to a jQuery Mobile swiperight event. Listing 28-14 shows how to address this problem.
Listing 28-14. Transition Effect Direction Mismatched with Navigation Intent
<!DOCTYPE html>
<html>
<head>
    <title>Example</title>
    <meta name="viewport" content="width=device-width, initial-scale=1">
    <link rel="stylesheet" href="jquery.mobile-1.3.1.css" type="text/css" />
    <script type="text/javascript" src="jquery-1.10.1.js"></script>
    <script type="text/javascript">
        $(document).bind("pageinit", function() {
           $.mobile.defaultPageTransition = "slide";
           $("button").bind("tap", function(e) {
                var target = this.id == "forward" ? "#page2" : "#page1";
                $.mobile.changePage(target, {
                    reverse: (target == "#page1")
                });
           })
        });
    </script>
    <script type="text/javascript" src="jquery.mobile-1.3.1.js"></script>
</head>
<body>
    <div id="page1" data-role="page">
        <div data-role="header">
           <h1>Jacqui's Shop</h1>
        </div>
        <div data-role="content">
            This is page 1
            <button id="forward">Go to Page 2</button>
        </div>
    </div>
    <div id="page2" data-role="page">
        <div data-role="header">
           <h1>Jacqui's Shop</h1>
        </div>
        <div data-role="content">
            This is page 2
            <button id="back">Back to Page 1</button>
        </div>
   </div>
</body>
</html>
There are two pages in this document, each of which contains a button that navigates to the other page. The button on the second page is labeled Back to Page 1. When the button on the second page is clicked, I change the direction of the transition effect by using a reverse value of true. I can’t show this effect on a static page, but the effect feels much more natural. There is some subconscious expectation formed about the animation should be played in based on the navigational cue that you are returning to a previous page, rather than progressing to a new one. You will understand exactly what I mean if you view this example in a browser.
Controlling the Load Animation
jQuery Mobile displays an animated image when it loads a remote document via Ajax for longer than 50 milliseconds. When using a mobile browser emulator and a fast network, jQuery Mobile is able to load the document so quickly that the dialog box is never shown. But if you use an actual mobile data network or, as I have done, introduce a delay into the request, then the dialog remains on the screen long enough to be seen, as Figure 28-8 illustrates.
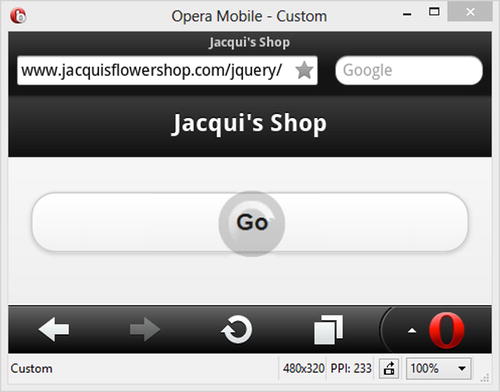
Figure 28-8. The jQuery Mobile loading dialog box
You can change the period after which the dialog is displayed by providing a value for the loadMsgDelay setting, as shown in Listing 28-15.
Listing 28-15. Changing the Delay for the Loading Dialog
<!DOCTYPE html>
<html>
<head>
    <title>Example</title>
    <meta name="viewport" content="width=device-width, initial-scale=1">
    <link rel="stylesheet" href="jquery.mobile-1.3.1.css" type="text/css" />
    <script type="text/javascript" src="jquery-1.10.1.js"></script>
    <script type="text/javascript">

        $(document).bind("mobileinit", function() {
            $.mobile.loadingMessage = "Loading Data..."
        })

        $(document).bind("pageinit", function() {
           $("button").bind("tap", function(e) {
                $.mobile.changePage("document2.html",{
                    loadMsgDelay: 1000
                });
           })
        });
    </script>
    <script type="text/javascript" src="jquery.mobile-1.3.1.js"></script>
</head>
<body>
    <div id="page1" data-role="page">
        <div data-role="header">
           <h1>Jacqui's Shop</h1>
        </div>
        <div data-role="content">
            <button id="forward">Go</button>
        </div>
    </div>
</body>
</html>
In this example, I have specified that jQuery Mobile should wait for one second before displaying the loading dialog to the user.
![]() Tip You can change the text in the loading dialog by setting a new value for the global loadingMessage property, as shown in the example. As with all jQuery Mobile global properties, this should be set in a function executed when the mobileinit event is triggered.
Tip You can change the text in the loading dialog by setting a new value for the global loadingMessage property, as shown in the example. As with all jQuery Mobile global properties, this should be set in a function executed when the mobileinit event is triggered.
You can disable this dialog by specifying false for the showLoadMsg setting when you call the changePage method. This is not something I recommend doing, because providing the user with feedback is always a good thing, but Listing 28-16 shows the setting in use.
Listing 28-16. Disabling the Loading Dialog
<!DOCTYPE html>
<html>
<head>
    <title>Example</title>
    <meta name="viewport" content="width=device-width, initial-scale=1">
    <link rel="stylesheet" href="jquery.mobile-1.3.1.css" type="text/css" />
    <script type="text/javascript" src="jquery-1.10.1.js"></script>
    <script type="text/javascript">
        $(document).bind("pageinit", function() {
           $("button").bind("tap", function(e) {
                $.mobile.changePage("document2.html", {
                    showLoadMsg: false
                });
           })
        });
    </script>
    <script type="text/javascript" src="jquery.mobile-1.3.1.js"></script>
</head>
<body>
    <div id="page1" data-role="page">
        <div data-role="header">
           <h1>Jacqui's Shop</h1>
        </div>
        <div data-role="content">
            <button id="forward">Go</button>
        </div>
    </div>
</body>
</html>
Determining the Current Page
You can use the $.mobile.activePage property to determine the current page that jQuery Mobile is displaying. Listing 28-17 shows the use of the activePage property.
Listing 28-17. Using the activatePage Property
<!DOCTYPE html>
<html>
<head>
    <title>Example</title>
    <meta name="viewport" content="width=device-width, initial-scale=1">
    <link rel="stylesheet" href="jquery.mobile-1.3.1.css" type="text/css" />
    <script type="text/javascript" src="jquery-1.10.1.js"></script>
    <script type="text/javascript">

        var eventHandlerCreated = false;

        $(document).bind("pageinit", function () {
            if (!eventHandlerCreated) {
                $("button").bind("tap", function (e) {
                    var nextPages = {
                        page1: "#page2",
                        page2: "#page3",
                        page3: "#page1"
                    }
                    var currentPageId = $.mobile.activePage.attr("id");
                    $.mobile.changePage(nextPages[currentPageId]);
                })
                eventHandlerCreated = true;
            }
        });
    </script>
    <script type="text/javascript" src="jquery.mobile-1.3.1.js"></script>
</head>
<body>
    <div id="page1" data-role="page">
        <div data-role="header">
           <h1>Jacqui's Shop</h1>
        </div>
        <div data-role="content">
            This is page 1
            <button id="forward">Go</button>
        </div>
    </div>
    <div id="page2" data-role="page">
        <div data-role="header">
           <h1>Jacqui's Shop</h1>
        </div>
        <div data-role="content">
            This is page 2
            <button id="Button1">Go</button>
        </div>
    </div>
    <div id="page3" data-role="page">
        <div data-role="header">
           <h1>Jacqui's Shop</h1>
        </div>
        <div data-role="content">
            This is page 3
            <button id="Button2">Go</button>
        </div>
    </div>
</body>
</html>
There are three pages in this example, each of which has a button. When the button is clicked, I read the activePage property to get the current page. The activePage property returns a jQuery object that contains the current page, so I use the jQuery attr method to get the value of the id attribute.
My script includes a simple map that tells me what the next page should be for each of the pages in my document, and I use the id value obtained from the activePage property as the argument to the changePage method, ensuring that I progress through my pages in the sequence defined by my map.
![]() Tip Notice that I use a variable called eventHandlerCreated to ensure that I only create one handler function for the tap event. The changePage method triggers the pageinit event and this can lead to multiple handler functions being set up – a common problem in jQuery Mobile applications and the likely cause if a single button click results in multiple page transitions. The most reliable way to prevent this problem is to use a variable like the one in the example.
Tip Notice that I use a variable called eventHandlerCreated to ensure that I only create one handler function for the tap event. The changePage method triggers the pageinit event and this can lead to multiple handler functions being set up – a common problem in jQuery Mobile applications and the likely cause if a single button click results in multiple page transitions. The most reliable way to prevent this problem is to use a variable like the one in the example.
Loading Pages in the Background
You can use the loadPage method to load remote documents without displaying them to the user. This is the programmatic equivalent of the prefetching that I demonstrated earlier in the chapter. The loadPage method takes two arguments. The first is the URL of the document to load, and the second is an optional settings object. The loadPage method supports settings as the changePage method, which I described in Table 28-2. Listing 28-18 shows the loadPage method in use.
Listing 28-18. Using the loadPage Method
<!DOCTYPE html>
<html>
<head>
    <title>Example</title>
    <meta name="viewport" content="width=device-width, initial-scale=1">
    <link rel="stylesheet" href="jquery.mobile-1.3.1.css" type="text/css" />
    <script type="text/javascript" src="jquery-1.10.1.js"></script>
    <script type="text/javascript">

        var loadedPages = false;

        $(document).bind("pageinit", function () {
            if (!loadedPages) {
                $.mobile.loadPage("document2.html", {}).done(function () {
                    $("#gobutton").button("enable").bind("tap", function () {
                        $.mobile.changePage("document2.html");
                        loadedPages = true;
                    })
                })
            }
        });
    </script>
    <script type="text/javascript" src="jquery.mobile-1.3.1.js"></script>
</head>
<body>
    <div id="page1" data-role="page">
        <div data-role="header">
           <h1>Jacqui's Shop</h1>
        </div>
        <div data-role="content">
            <button id="gobutton" disabled="disabled">Go</button>
        </div>
    </div>
</body>
</html>
![]() Tip Notice that I have passed an empty settings object ({}) as the second argument to the loadPage method. There is a bug in version 1.3.1 of jQuery that requires a settings object even if no settings are changed.
Tip Notice that I have passed an empty settings object ({}) as the second argument to the loadPage method. There is a bug in version 1.3.1 of jQuery that requires a settings object even if no settings are changed.
In this example, I use the loadPage method to preload the document2.html file. The loadPage method returns a deferred object that you can use to receive notification when the page has loaded. I explain deferred objects in Chapter 35, but for now it is enough to know that you can call the done method on the object returned by the loadPage method, specifying a function that will be executed when the Ajax request started by loadPage has completed.
In this example, I use the enable method on the jQuery UI button widget to enable a button in the page and to register a handle for the tap event. When the button is clicked, I call the changePage method to navigate to the prefetched document. (I describe the jQuery Mobile support for buttons in Chapter 30.)
Notice that I have defined a variable called loadedPages. This addresses the same problem I had when using the changePage method (which calls loadPage internally): the pageinit event is triggered whenever jQuery Mobile initializes a page. This means the event is triggered when the document in the example is loaded and again when loadPage loads document2.html via Ajax. I use the loadedPages variable to ensure that I try to preload the content only once. It wouldn’t be the end of the world to call loadPage twice (which is what would happen without the loadedPages variable) unless I enabled the reload setting. This would cause the cached copy of the document to be ignored and transfer document.html twice. I explain the set of jQuery Mobile page events in the following section.
jQuery Mobile defines a set of events that you can use to receive notifications about change in pages. These events are described in Table 28-3, and I demonstrate some of the more useful ones in the sections that follow.
Table 28-3. jQuery Mobile Page Events
| Event | Description |
|---|---|
| pagebeforecreate | Triggered when the page is being initialized. |
| pagecreate | Triggered when the page has been created but before most automatic enhancement has been performed. |
| pageinit | Triggered when the page has been initialized. |
| pageremove | Triggered before a page is removed. |
| pagebeforeload | Triggered before a page is requested via Ajax. |
| pageload | Triggered when a page has been successfully loaded via Ajax. |
| pageloadfailed | Triggered when a page has failed to load via Ajax. |
| pagebeforechange | Triggered before a page transition is performed. |
| pagechange | Triggered after a page transition has been performed. |
| pagechangefailed | Triggered when a page change fails (this is usually because the requested document cannot be loaded). |
| pagebeforeshow | Triggered before a page is displayed to the user. |
| pagebeforehide | Triggered before a page is removed from the display. |
| pageshow | Triggered after a page has been displayed to the user. |
| pagehide | Triggered after a page has been hidden from the user. |
Handling the Page Initialization Event
The pageinit event is the most useful of the jQuery Mobile page events, as described in Chapter 27. It is this event that you respond to when you want to configure your page using a script. I am not going to demonstrate this event again because you have seen it in every example so far, but I will emphasize that using the standard jQuery $(document).ready() approach is not reliable when working with jQuery Mobile.
The pagebeforeload, pageload, and pageloadfailed events can be useful for monitoring Ajax requests made for remote pages, either automatically generated by jQuery Mobile or programmatically via the changePage and loadPage methods. When demonstrating the loadPage method, I used a deferred object to respond when the page had been loaded, but you can achieve the same result using the pageload method (and, of course, the pageloadfailed method when things go wrong). Listing 28-19 shows the loadPage example updated to use the pageload event.
Listing 28-19. Using the pageload Event
<!DOCTYPE html>
<html>
<head>
    <title>Example</title>
    <meta name="viewport" content="width=device-width, initial-scale=1">
    <link rel="stylesheet" href="jquery.mobile-1.3.1.css" type="text/css" />
    <script type="text/javascript" src="jquery-1.10.1.js"></script>
    <script type="text/javascript">

        $(document).bind("pageload", function(event, data) {
            if (data.url == "document2.html") {
                $("#gobutton").button("enable").bind("tap", function() {
                    $.mobile.changePage("document2.html");
                })
            }
        })

        var loadedPages = false;
        $(document).bind("pageinit", function() {
            if (!loadedPages) {
                loadedPages = true;
                $.mobile.loadPage("document2.html", {});
            }
        });

    </script>
    <script type="text/javascript" src="jquery.mobile-1.3.1.js"></script>
</head>
<body>
    <div id="page1" data-role="page">
        <div data-role="header">
           <h1>Jacqui's Shop</h1>
        </div>
        <div data-role="content">
            <button id="gobutton" disabled>Go</button>
        </div>
    </div>
</body>
</html>
In this example, I have specified a function that will be executed when the pageload event is triggered. jQuery Mobile provides information about the request by passing a data object as the second argument to the function. I use the url property to check that the document that has been loaded is the one I am expecting. The set of properties defined by the data object for the pageload event is described in Table 28-4. You can see from the table that most of the properties correspond to the jQuery Ajax support, which I described in Chapters 14 and 15.
Table 28-4. pageload Data Object Event Properties
| Property | Description |
|---|---|
| url | Returns the URL passed to the loadPage method (this is method is used by jQuery Mobile when it requests pages and by the changePage method). |
| absUrl | The absolute URL that was requested. |
| options | The Ajax request options. See Chapters 14 and 15 for details of configuring Ajax. |
| xhr | The jQuery Ajax request object used for the request. See Chapters 14 and 15 for details of this object. |
| textStatus | The string description of the request status. See Chapters 14 and 15 for details. |
Responding to Page Transitions
You can use the page transition events to be notified when the user navigates from one page to another (or when you do this programmatically using the changePage method). These events (pagebeforehide, pagehide, pagebeforeshow, and pageshow) are triggered for every page transition, even if the page has been displayed to the user before. Listing 28-20 shows the use of one of these events.
Listing 28-20. Responding to a Page Being Hidden
<!DOCTYPE html>
<html>
<head>
    <title>Example</title>
    <meta name="viewport" content="width=device-width, initial-scale=1">
    <link rel="stylesheet" href="jquery.mobile-1.3.1.css" type="text/css" />
    <script type="text/javascript" src="jquery-1.10.1.js"></script>
    <script type="text/javascript">

        var registeredHandlers = false;
        $(document).bind("pageinit", function() {
            if (!registeredHandlers) {
                registeredHandlers = true;
                $("#page1").bind("pagehide", function(event, data) {
                    $.mobile.changePage($("#page1"));
                })
            }
        });

    </script>
    <script type="text/javascript" src="jquery.mobile-1.3.1.js"></script>
</head>
<body>
    <div id="page1" data-role="page">
        <div data-role="header">
           <h1>Jacqui's Shop</h1>
        </div>
        <div data-role="content">
            <a href="document2.html">Go to document2.html</a>
        </div>
    </div>
</body>
</html>
In this example, I register a handler function for the pagehide event on the page1 element, by selecting the element I want and calling the bind method. This means I will receive the event only when that selected page is hidden. This is a pretty dumb example, because it simply uses the changePage method to return to page1 whenever the pagehide event is triggered, but it does demonstrate the use of the event. Notice that I am still using a variable to ensure that I register my handler function only once. If I did not do this, then two functions would be registered for the same event on the same element when document2.html page is loaded.
jQuery Mobile provides support for themes, rather like a simplified version of the themes support offered by jQuery UI. There is a default theme included in the jQuery Mobile files that you downloaded and installed in Chapter 27, and you can create custom themes using the jQuery Mobile ThemeRoller application, which is a variation on the application of the same name you used for jQuery UI.
![]() Note As I mentioned in Chapter 27, I won’t be creating and using a custom theme in this part of the book. The jQuery Mobile ThemeRoller application doesn’t have a collection of pre-built themes, and it is difficult to describe the process to create a theme in writing. I’ll be using the default themes in this chapter, but you can see the jQuery Mobile ThemeRoller at http://jquerymobile.com/themeroller.
Note As I mentioned in Chapter 27, I won’t be creating and using a custom theme in this part of the book. The jQuery Mobile ThemeRoller application doesn’t have a collection of pre-built themes, and it is difficult to describe the process to create a theme in writing. I’ll be using the default themes in this chapter, but you can see the jQuery Mobile ThemeRoller at http://jquerymobile.com/themeroller.
A jQuery Mobile theme consists of one or more swatches, which is a set of styles that are applied to different kinds of elements. Swatches are identified by a single letter, starting with A. The default theme has five swatches, named A through E.
To view the default theme in ThemeRoller, navigate to http://jquerymobile.com/themeroller; click the Import link; and click on the Import Default Theme link, which imports the contents of the jquery.mobile-1.3.1.css file into the dialog (this is the CSS file that you downloaded and installed in Chapter 27). Click the Import button, and the ThemeRoller will process the CSS and display the default swatches, as shown in Figure 28-9.
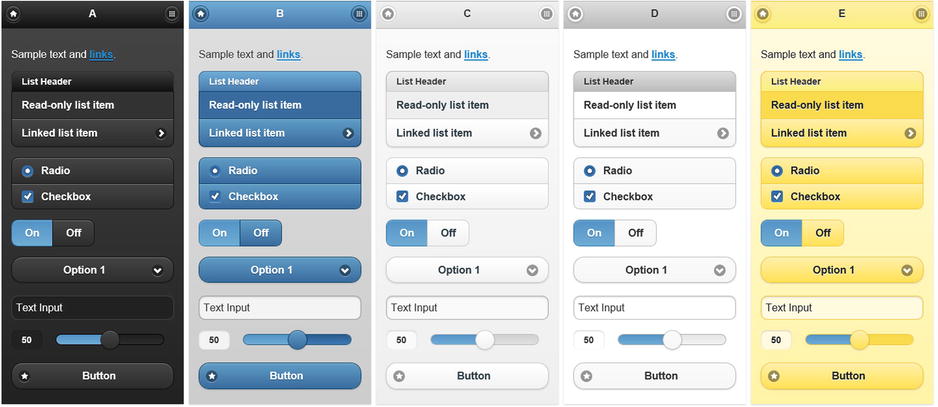
Figure 28-9. The swatches in the default theme
You apply a theme to a jQuery Mobile page by using the data-theme attribute, setting the value to the name of the swatch you want. Listing 28-21 provides an example.
Listing 28-21. Using the Swatches in a Theme
<!DOCTYPE html>
<html>
<head>
    <title>Example</title>
    <meta name="viewport" content="width=device-width, initial-scale=1">
    <link rel="stylesheet" href="jquery.mobile-1.3.1.css" type="text/css" />
    <script type="text/javascript" src="jquery-1.10.1.js"></script>
    <script type="text/javascript" src="jquery.mobile-1.3.1.js"></script>
</head>
<body>
    <div id="page1" data-role="page" data-theme="a">
        <div data-role="header">
           <h1>Jacqui's Shop</h1>
        </div>
        <div data-role="content">
            This is Theme A
            <a href="#page2" data-role="button">Switch Theme</a>
        </div>
    </div>
    <div id="page2" data-role="page" data-theme="b">
        <div data-role="header">
           <h1>Jacqui's Shop</h1>
        </div>
        <div data-role="content">
            This is Theme B
            <a href="#page1" data-role="button">Switch Theme</a>
        </div>
    </div>
</body>
</html>
I have applied the data-theme attribute to the page element, which has the effect of applying the specified swatch to all of the child elements within the page. There are two pages in this example so that I can show how the same content is displayed by a pair of contrasting themes—and to make the point that there is no reliable way in jQuery Mobile to change the theme once a page has been through the automatic enhancement process. The data-theme attribute is transformed into a set of CSS classes that are applied to elements during page initialization, and so changing the value of the attribute doesn’t do anything to change the classes. You can see the two-page example in Figure 28-10.
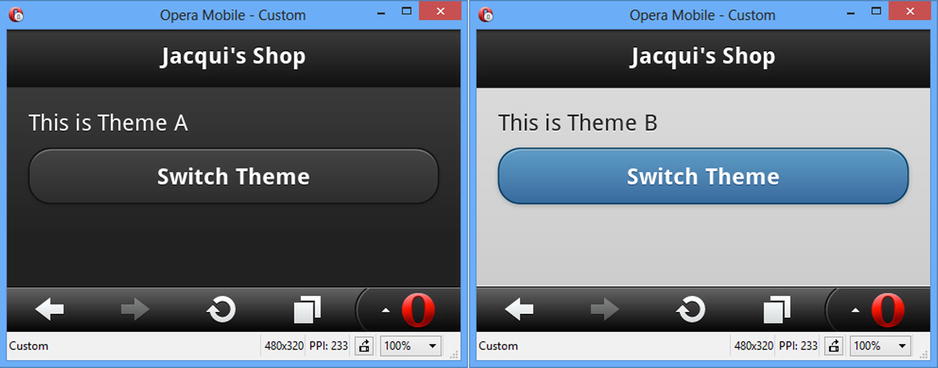
Figure 28-10. Two pages in the same application using different swatches
![]() Tip There is also a swatch called active, which is used to highlight selected buttons. This is applied automatically by jQuery Mobile, but you can use it directly as well. If you do, be sure that you are not confusing the user by creating conflicting active elements.
Tip There is also a swatch called active, which is used to highlight selected buttons. This is applied automatically by jQuery Mobile, but you can use it directly as well. If you do, be sure that you are not confusing the user by creating conflicting active elements.
Applying Swatches to Individual Elements
The previous example shows how you can style entire pages, but you can also apply swatches on a per-element basis, mixing and matching to get a specific effect. Listing 28-22 provides a demonstration.
Listing 28-22. Applying Swatches to Individual Elements
<!DOCTYPE html>
<html>
<head>
    <title>Example</title>
    <meta name="viewport" content="width=device-width, initial-scale=1">
    <link rel="stylesheet" href="jquery.mobile-1.3.1.css" type="text/css" />
    <script type="text/javascript" src="jquery-1.10.1.js"></script>
    <script type="text/javascript" src="jquery.mobile-1.3.1.js"></script>
</head>
<body>
    <div id="page1" data-role="page"data-theme="a">
        <div data-role="header">
           <h1>Jacqui's Shop</h1>
        </div>
        <div data-role="content">
            <a href="document2.html" data-role="button"data-theme="b">Press Me</a>
            <a href="document2.html" data-role="button"data-theme="c">Press Me</a>
            <a href="document2.html" data-role="button"data-theme="e">Press Me</a>
        </div>
    </div>
</body>
</html>
In this example, I have applied the data-theme to the page and to the three button elements, each specifying a different swatch. You can see the effect in Figure 28-11.
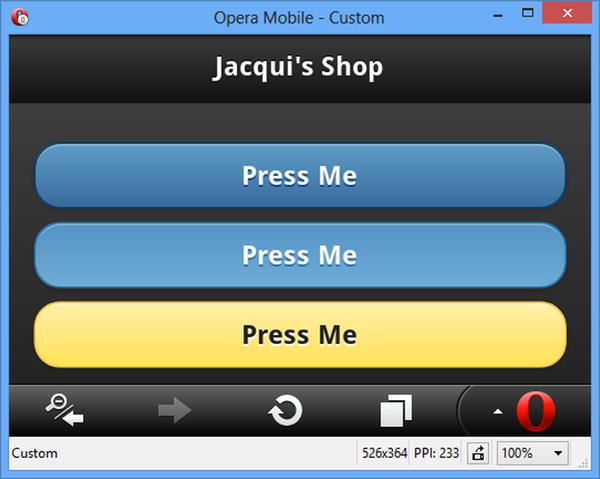
Figure 28-11. Applying different swatches to elements in the same page
The jQuery Mobile support for themes is simple and easy to work with. It would be nice if you were able to change the swatches used by elements on the fly, but even with this omission, you can use swatches to tailor the appearance of your mobile applications.
jQuery Mobile defines some useful CSS classes that you can use to lay out the contents of your mobile pages in grid form. This is something you could do yourself, but having them built into the library is useful and reduces the amount of custom development is needed, especially for simple mobile applications. jQuery Mobile defines four grid classes, each of which contains a different number of columns, as summarized by Table 28-5.
Table 28-5. jQuery Mobile Layout Grid
| CSS Class | Columns |
|---|---|
| ui-grid-a | 2 |
| ui-grid-b | 3 |
| ui-grid-c | 4 |
| ui-grid-d | 5 |
You apply one of the grid classes to a container element and then apply classes to each of the content items within, starting with ui-block-a, ui-block-b, and so on, for each column. Listing 28-23 shows the use of these classes to create a simple grid.
Listing 28-23. Creating a Grid Using the jQuery Mobile Layout Classes
<!DOCTYPE html>
<html>
<head>
    <title>Example</title>
    <meta name="viewport" content="width=device-width, initial-scale=1">
    <link rel="stylesheet" href="jquery.mobile-1.3.1.css" type="text/css" />
    <script type="text/javascript" src="jquery-1.10.1.js"></script>
    <script type="text/javascript" src="jquery.mobile-1.3.1.js"></script>
</head>
<body>
    <div id="page1" data-role="page" data-theme="b">
        <div data-role="header">
           <h1>Jacqui's Shop</h1>
        </div>
        <div data-role="content">
            <divclass="ui-grid-b">
                <divclass="ui-block-a"><button>Press Me</button></div>
                <divclass="ui-block-b"><button>Press Me</button></div>
                <divclass="ui-block-c"><button>Press Me</button></div>
            </div>
            <divclass="ui-grid-a">
                <divclass="ui-block-a"><button>Press Me</button></div>
                <divclass="ui-block-b"><button>Press Me</button></div>
            </div>
            <div><button>Press Me</button></div>
        </div>
    </div>
</body>
</html>
In this example, I have created two grids: one with three columns and one with two columns. Each column contains a button element, and I have added a button outside of the grid to emphasize the default behavior, which is for elements to span the screen. You can see the result in Figure 28-12.
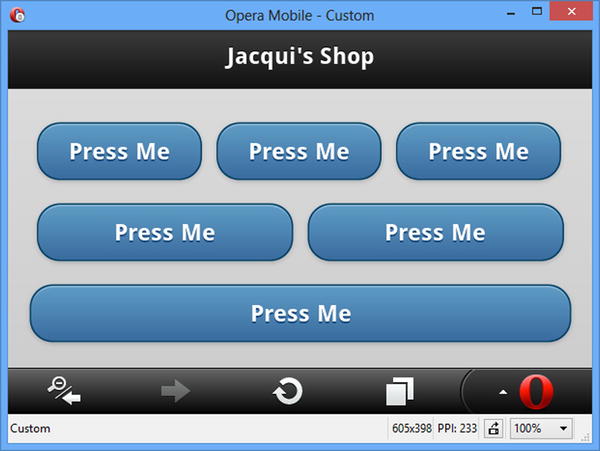
Figure 28-12. Laying out elements in a grid
Summary
In this chapter, I described pages, which are one of the key building blocks of jQuery Mobile. I also described the jQuery Mobile support for themes and grid layouts. These features provide the foundation for the most important jQuery Mobile features: the widgets. In Chapter 29, I start by describing the dialog and popup widgets.