6 Automatic Flash Metering
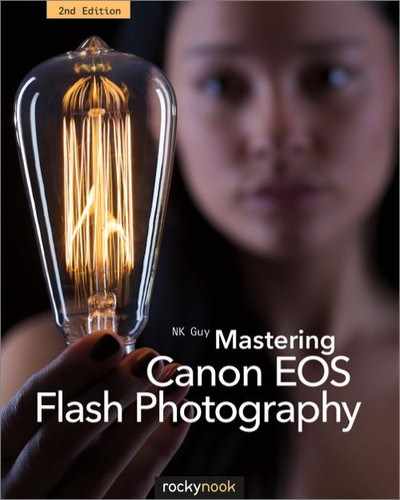
Carters Steam Fair. Carters Royal Berkshire Steam Fair, a traveling English funfair, making a stop at Clissold Park, London, England. This photograph of the circa 1895 steam-powered Gallopers carousel was taken using two 580EX flash units linked by PocketWizard ControlTL radios. The on-camera flash performs light fill, which highlights the gold leaf. The slave unit was handheld camera left to illuminate the frontmost horses. EOS 5D Mark II, 1/6 sec at f/8, ISO 100, 24mm.
This is an example of wireless automatic E-TTL metering, using third party radio wireless devices.
As described in the previous chapter, there are two basic ways in which flash is commonly used today: automatic and manual.
All Canon EOS cameras can use built-in popup flash units, clip-on Canon Speedlites, or other compatible units fully automatically. These devices rely on sophisticated light sensors, complex computer programs built into each device, and the ability of the devices to “talk” with each other. This technology is almost all proprietary to Canon, though a few third-party manufacturers have been able to produce compatible products.
Cameras by other manufacturers work in similar ways, though the specifics and terminology can be a little different.
6.1Enabling internal flash and external Speedlites
Most EOS cameras with built-in flash have a flash button marked with a lightning bolt icon (![]() ), typically on the left side of the camera body. Pressing the button pops up the flash head and charges it almost instantaneously.
), typically on the left side of the camera body. Pressing the button pops up the flash head and charges it almost instantaneously. ![]() 6.1
6.1
An external flash unit isn’t much more difficult to use: just load it with fresh batteries, slide it into the metal bracket on the top of the camera, and turn it on. If it’s a Canon Speedlite or compatible automatic flash unit, the camera will immediately recognize it and adjust itself accordingly. ![]() 6.2
6.2

6.1

6.2
In either case, the camera will fire the flash unit automatically when a photograph is taken. Exactly how the flash will behave depends on a variety of settings and conditions.
6.2Subject and background in flash photography
A photo lit by a single flash unit has two basic regions, which are determined by the distance to the flash tube. The foreground or subject is the part of the scene that is illuminated by flash. It usually, though of course not always, covers the area that is in focus. The background is everywhere else and is often lit entirely or mostly by ambient light rather than by flash.
KEY POINT
The foreground in flash-illuminated photos is usually the area lit by flash.
Foreground versus background is an important distinction because all flash units have a limited range. As noted in the FAQ section, a small flash unit can’t illuminate the Eiffel Tower, the Grand Canyon, or even a large indoor space such as a ballroom. For details, see the section on the inverse square law (section 7.14).

6.3
This picture of the Great Buddha of Kamakura, Japan, shows how on-camera flash can illuminate nearby objects but can’t reach much farther. The result is a somewhat disappointing picture: the foreground is overexposed by the flash while the background is underexposed. ![]() 6.3
6.3
6.3Ambient light metering versus flash metering
From the camera’s point of view there are two light sources being used at the same time when a flash unit is fired. Except in total darkness, there will always be some ambient lighting, which is any available light (such as reflected light from the sun or artificial light sources). The camera has no direct control over this lighting. Instead, the camera—and you, the photographer—can specify how much of that ambient light hits the film or sensor by adjusting the aperture, shutter speed, and ISO settings. But in the case of automatic flash, the output from the flash unit is fully under the camera’s control. The camera can specify when the flash fires and how much light it produces, up to its maximum output.
KEY POINT
Flash photography can be thought of as a kind of double exposure, or a photo with two separate lighting zones. Control over ambient light metering (measuring the amount of light illuminating a scene as is visible to the eye) and control over flash metering (measuring the output of a flash unit) are always handled separately and independently.
6.4Freezing motion
The freezing of motion in a flash photograph is one area where the differences between ambient and flash lighting matter a lot. The duration of the pulse of light from a flash tube is extremely short, often between 1/750 and 1/1000 second. Exposures this brief mean that flash photography can be extremely effective for freezing motion even when a longer shutter speed is used.
This is why a photo taken with flash may seem sharper and crisper than one taken without. Areas of the photo lit predominantly by normal flash essentially have a shorter exposure time because of the flash pulse. The brief exposure allows less time for motion blur to occur. However, areas of the photo lit mainly by ambient light may not appear as sharp if a longer exposure time is used and either subject or camera motion occurs.

6.4

6.5 Although the shutter speed for this photo was only 1/60 second, it was taken in low-light conditions. The brief burst of light from the blue-filtered flash unit behind the model’s shoulder has frozen the spray of water droplets in the air. The spray, incidentally, was accomplished by a very high-tech technique that involved crouching on the floor with a hand-pumped houseplant sprayer. The two bright octagonal areas are actually water drops on the surface of the lens. Each drop has eight sides because the lens has an eight-blade aperture diaphragm.
6.5Normal flash sync
The usual mode for automatic flash operation, especially when light levels are low, is to use a brief shutter speed to keep blurring caused by camera movement to a minimum. The flash unit, controlled by the camera’s flash metering system, then fires enough light to illuminate the foreground. This typically leaves the background dark, which is what most people experience when using flash on a simple point-and-shoot camera.
Canon EOS cameras work this way when in P (Program) mode, in most of the icon modes including green rectangle (![]() ) mode, and when using either a built-in flash or an external Speedlite.
) mode, and when using either a built-in flash or an external Speedlite.
While simple to use because it’s so highly automated, normal flash sync can sometimes yield unattractive results, especially when ambient light levels are low. The way flash lights up the foreground subject, leaving the background veiled in darkness, is the usual reason.
6.6 The classic “Disappointing Tourist Photo,” taken with a normal flash sync. The camera keeps the shutter speed short to allow hand holding and blasts the scene with flash. This picture has such a dark background that it could have been taken anywhere.
6.6Slow shutter sync
Another way to take flash photos when light levels are low is to leave the shutter open longer. This lets more of the background show up while still illuminating the foreground subject.

6.7 Same scene as previous photograph. Here a slow shutter speed of about a second was used to let the background expose properly. Because of the long exposure time, this technique requires that the subject remain absolutely motionless and that the camera be securely attached to a tripod.
This technique is called slow shutter sync, slow sync, or “dragging” the shutter, and it demonstrates the double-exposure nature of flash photography. Some camera systems, notably Nikon, have explicit settings for slow shutter sync. EOS cameras don’t, since it’s basically just a function of long shutter speeds used with flash, but you can use this technique in Tv or Av modes. It’s also available in M mode, if the shutter speed is long enough, as well as in the night icon mode on most Canon consumer cameras. Slow shutter sync is never used in other automatic modes.
Photographing someone in front of a famous landmark at night is a classic scenario for using slow shutter sync. If the shutter speed is kept brief, the result will be a flash-illuminated person standing in front of a pitch-black backdrop (unless the landmark is extremely brightly lit or unless a high ISO or fast film is used). But by specifying a longer exposure setting (shutter speed), you’ll get a photo of a person standing against a properly exposed background.

6.8 This is the result of camera motion during the exposure. The flash-lit areas are sharp and clear, but other parts of the image are badly ghosted and blurred.
Changing shutter speeds in slow shutter sync is a way of adjusting the ambient (background) light levels while the flash-illuminated (foreground) light remains constant. But the drawback is obvious. By slowing the shutter speed, a tripod may be needed to avoid camera motion blur, especially with long shutter speeds like 1/30 second or slower.
6.7EOS flash and icon modes
Most consumer and midrange EOS cameras have a selection of icon modes with pre-programmed settings to make it easier for beginners. Each mode has been crafted by the camera’s engineers to be generally useful for taking the type of photo indicated by the icon.
Icon modes, sometimes called Basic Zone modes, give most of the control of the camera over to its built-in computer and software. You really only have control over when the photo is taken, where the image is focused, and the focal length in the case of a zoom lens.

6.9 Flash icon modes
While quick and convenient, the icon modes aren’t necessarily a good way for beginners to learn how cameras work. Most internal settings can’t be altered and the interaction between those settings isn’t very obvious. In fact, icon modes can arguably be misleading sometimes. For example, the macro icon mode in an SLR can’t alter a lens in any way that makes it better at taking closeup photos.
When using the four modes below, the popup flash will raise and fire if light levels are low enough and there’s nothing attached to the hotshoe. The autofocus assist light (section 9.7) will also go on automatically if required. Night Portrait is the only mode that permits slow shutter sync. All other modes use “normal” flash, much like Program mode.
![]() Full auto (green rectangle),
Full auto (green rectangle), ![]() Portrait,
Portrait, ![]() Macro,
Macro, ![]() Night Portrait
Night Portrait
In the following three modes, the popup flash won’t raise automatically and won’t fire even if raised or turned on. Also, the AF assist light will not go on.
![]() Landscape,
Landscape, ![]() Sports,
Sports, ![]() Flash Off
Flash Off
6.8CA (creative auto) mode
Many recent EOS cameras aimed at the consumer market have a mode known as “CA” for “creative auto.” This is basically an enhanced green rectangle mode, which attempts to explain the consequences of adjusting various settings rather than simply letting the user change them. It’s a kind of an educational tool. For example, altering the lens aperture is described as making the background more “blurred” or more “sharp.”
Flash control in CA mode is limited to auto (flash will pop up if light levels are low), on (flash always fires), or off (flash never fires). In other respects, CA mode operates like P mode and does not use slow shutter sync.
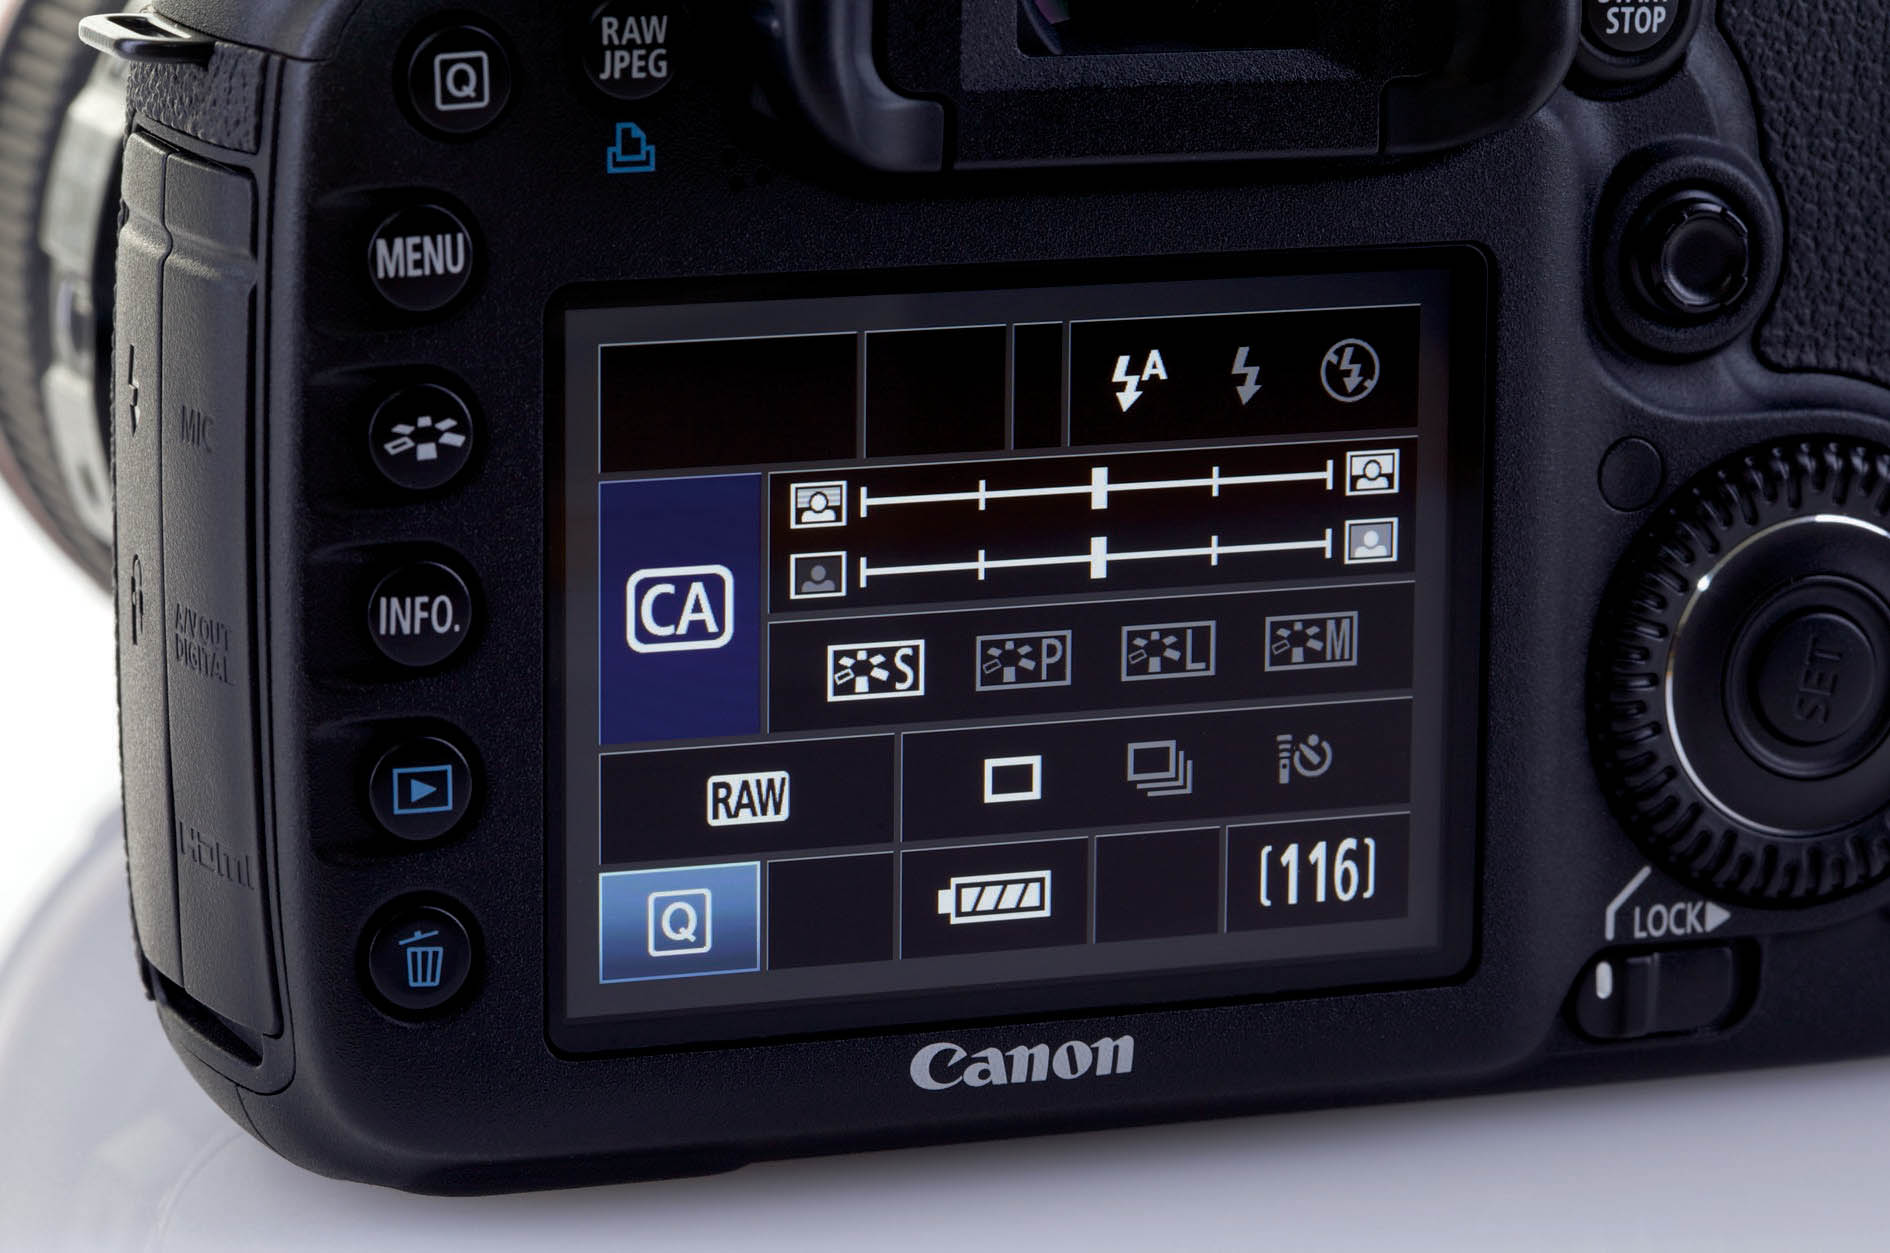
6.10
6.9EOS flash and ambient metering: a source of confusion
Beyond the pre-programmed icon modes, virtually all EOS bodies provide four basic modes for setting the shutter speed or aperture based on ambient or available light levels: P (program auto-exposure), Tv (shutter speed priority or time value), Av (aperture priority or aperture value), and M (metered manual). These four modes, supplemented by DEP / A-DEP and bulb on certain models, are sometimes referred to as the “creative” auto-exposure modes by Canon (not to be confused with “Creative Auto”), since they give you more control.
These different metering modes specify the way available light is measured. They also handle flash differently, especially when ambient light levels are low. While logical in their own way, the differences between ambient metering modes on Canon EOS cameras are the primary source of flash-related confusion for beginners. They can also confuse people used to other camera systems, particularly Nikon, which operate on a different set of assumptions.
Here’s a summary of how the four fundamental exposure modes work when either a built-in flash or an external Speedlite is turned on. This summary assumes that high-speed sync is not enabled (section 7.12). It also refers to a camera’s X-sync value, which is the highest shutter speed a given camera model can use with flash (section 7.11).

6.10Program (P) mode

In Program (P) mode, the camera chooses both shutter speed and aperture settings based on its reading of ambient light levels and according to a software program run by its computer; hence the name. Modern point-and-shoot cameras usually work this way.
When using either a built-in flash unit or an external Speedlite, P mode operates in one of two ways, depending on how bright the ambient (existing) light levels are.
P mode will not allow exposures to be shifted with the main control dial when automatic flash is used.
- If ambient light levels are fairly bright (above 13 EV, see section 7.17), then P mode assumes that you want to gently fill flash (see below) the foreground subject. It meters for ambient light and uses flash, usually at a low-power setting, to fill in (brighten) the foreground with supplementary light.
- If ambient light levels are not bright (below about 10 EV), then P mode assumes that your goal is to illuminate the foreground subject with the flash. It sets a shutter speed between 1/60 sec and the fastest X-sync speed (see above) the camera can reach. The aperture is determined by the camera’s built-in program.
KEY POINT
The overriding principle of Program (P) mode in Canon EOS flash photography is that the camera tries to set a high shutter speed so that the camera can be held by hand without a tripod. If that means the background is dark, so be it.
6.11Tv (shutter speed priority) mode

In this mode, you choose a shutter speed by rotating the main dial next to the shutter release button. The camera then automatically chooses an aperture setting to expose the background correctly. Since you explicitly specify the value of the exposure time, the Canon abbreviation for this mode is “Tv,” for “time value,” though other brands refer to it as “S” for “shutter speed” mode. Flash output is determined automatically and separately by the flash metering system.
If the maximum aperture value of the lens starts blinking in the viewfinder, it means the background of the scene is too dimly lit, and the shutter speed should be decreased to compensate. Otherwise the camera will just try to expose the foreground with flash, and the background will come out dark. Naturally, at slower shutter speeds, a tripod will be needed to avoid blurring caused by camera shake.
If either the built-in flash unit or an external Speedlite is powered on, the camera will prevent you from selecting a shutter speed that exceeds the camera’s maximum flash-safe (X-sync) unless high-speed sync is available and switched on. If the minimum aperture value of the lens starts blinking, the shutter speed is too long even with the lens fully stopped down, meaning that the scene is very bright and will be overexposed. The ways around the problem are to turn on high-speed sync, if it’s available, use a lower ISO setting or slower film, or put a neutral density (light absorbing) filter on the lens. Alternatively, you can turn off flash altogether and simply use a reflector of some type to bounce ambient light onto the subject if required.
KEY POINT
In Tv mode, EOS cameras always try to expose the background adequately, unlike P mode. In low-light conditions, Tv mode uses slow shutter sync.
6.12Av (aperture priority) mode

In this mode, you choose a lens aperture value (f-stop) by rotating the camera’s main dial. The Canon abbreviation is “Av” for “aperture value,” though it’s often called “A” mode by other brands. The camera then chooses a shutter speed ranging from 30 seconds to the camera’s X-sync speed, in order to expose the background correctly. Flash output is automatically determined by the flash metering system.
There is an exception. Many EOS cameras have a custom function that locks the shutter speed to X-sync, letting the camera behave more like P mode when in Av mode. Other models also have a custom function that chooses a shutter speed between 1/60 sec and X-sync, the way P mode does.
If either the built-in flash unit or an external Speedlite is powered on, then the camera won’t exceed its built in X-sync speed unless high speed sync is available and switched on. If a shutter speed time of 30" (30 seconds) blinks in the viewfinder, then there isn’t enough light to expose the background correctly and a larger aperture or higher ISO setting / faster film are required. If the camera’s X-sync value blinks in the viewfinder, then the lens aperture must be decreased, high-speed sync turned on, if it’s available, or a lower ISO / slower film used.
KEY POINT
In Av mode, EOS cameras try to expose the (ambient) background correctly. If that means the shutter speed is a really long value, such that a tripod is needed to avoid camera-shake blur, so be it. In dark conditions Av mode uses slow sync.
6.13M (metered manual) mode

In manual exposure mode, you can specify both the aperture and shutter speed at will. It’s therefore technically not an automated exposure mode, but one assisted by the automatic system since an exposure meter will appear in the viewfinder. However, this meter is just a guide, and the camera does nothing to override any ambient light setting chosen.
Using metered manual mode does not affect the flash system’s control over flash output. Manual mode gives you complete control over ambient metering and assumes you know how to use it.
KEY POINT
In M mode, shutter speed and aperture determine how the background (ambient lighting) is exposed. The foreground, however, will still be illuminated automatically since the flash metering system operates independently of the ambient light metering system.
6.14DEP (depth of field), A-DEP (automatic DEP), and B (Bulb) modes

DEP and A-DEP modes don’t work with flash, and their metering settings revert to P mode if flash is turned on. In B, or bulb mode, the camera behaves as it would in M mode.
6.15Fill flash
If ambient light levels are fairly high, such as outdoors during the day, flash can serve as a supplementary form of light. Flash can lighten shadows, temper the harsh contrast of full sunlight, or brighten up dull images. This is called “fill flash,” “fill-in flash,” “balanced fill flash,” or “daylight synchro.”
Fill flash is often a source of surprise for non-photographers, who don’t expect to see flash units being used outdoors on sunny days or in brightly lit settings. In such situations, the fill flash serves as a sort of portable reflector, adding a little extra light. A backlit subject is a common situation for fill flash: exposure compensation can’t be used to expose the subject correctly, since the background would be overexposed.
Another classic example is a person with long hair or a hat on a sunny day. Hair and hat brims often cast dark shadows over a subject’s face, and a little flash can lighten up these shadows nicely.
As always, the amount of ambient light hitting the film or sensor is controlled by the lens aperture and shutter speed, while flash levels are set by flash metering. Adjusting the output of the flash unit essentially adjusts the ratio between the flash-illuminated subject and the ambient-illuminated scene.
In fact, one could argue that flash as primary light source versus ambient light as primary light source is an artificial distinction, and that all flash photography is fill photography in a sense. It’s just that, in the first case, the ambient lighting is so low as to be insignificant, whereas in the second case it’s the reverse. The distinction is nonetheless useful, particularly when considering the way full auto and P modes work versus Tv, Av, and M modes.
Automatic fill flash was one of the chief technical innovations in flash developed in the 1970s and ’80s. For decades, photographers knew that low levels of flash could be useful for filling in shadowed areas in a daytime photograph, but figuring out the right flash level for suitable fill required a lot of skill and experience before flash automation.
KEY POINT
Canon EOS cameras always default to fill flash mode when the camera is in Tv, Av, and M modes. They also perform fill flash in P mode if ambient light levels are high enough. There’s no separate switch or push button to engage fill flash on EOS cameras.

6.11 Nature photography can benefit from a little fill flash as well. Here, the flash prevented the heron from getting lost in the shade under the trees. The drawback was that it also overexposed the near branches to the right. Heian Jingu temple garden, Kyoto, Japan.

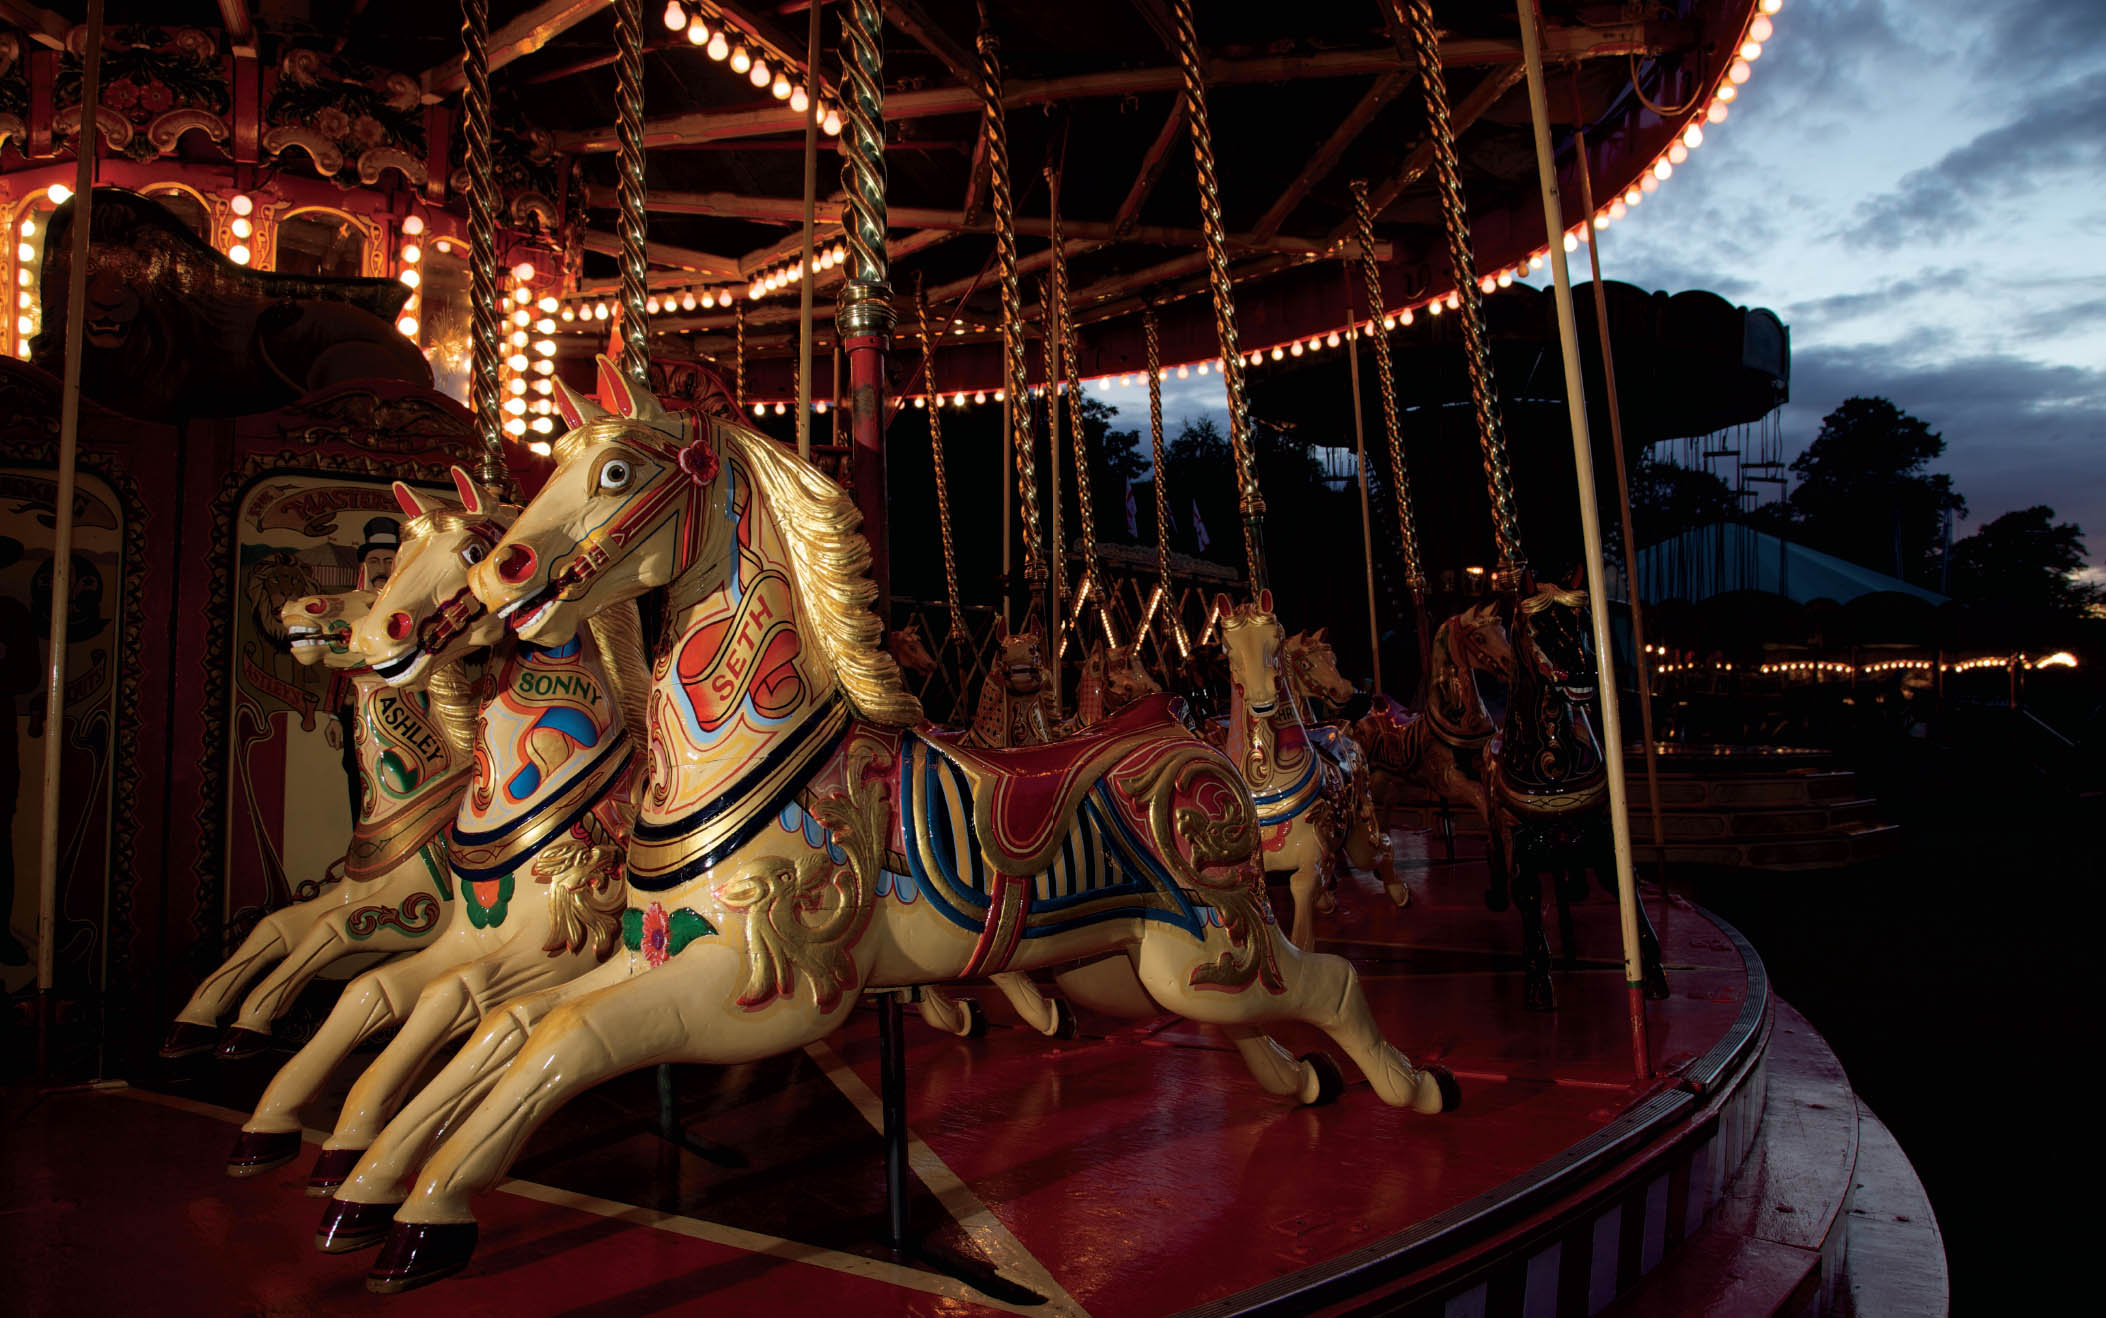
6.12 The Raygun Gothic Rocketship was designed and built by Sean Orlando (shown), David Shulman, and Nathaniel Taylor. The art piece made its debut at the annual Burning Man arts festival in Nevada’s Black Rock Desert.
The first photo, taken at sunset following a dust storm, demonstrates the low foreground light compared with the background (essentially a backlight condition). In the second image, a fairly natural-looking photograph is achieved by applying fill flash to balance the foreground. EOS 5D Mark II, 580EX II, 1/80 sec at f/8, ISO 100, 40mm.

6.16Fill flash ambient light reduction
There’s one non-obvious exception to be aware of when using fill flash. EOS cameras that use E-TTL adjust exposure settings downwards when ambient light levels are low.
To test if a given camera reduces exposure settings, put the camera into Av mode and meter a fairly dark scene. Note the settings the camera wants to use, and then turn on a flash unit. Meter again, and there’ll probably be a drop in the exposure settings of a half to a full stop. This unadvertised feature makes the foreground image pop a little, but may not always be what you might want.
6.17Flash exposure compensation (FEC)
Sometimes you’ll want to adjust a flash unit’s power above or below the mid-tones that the camera anticipates. For example, a scene that’s mainly white or mainly dark can fool automated sensors. A manual shift up or down in flash output is known as flash exposure compensation, or FEC. (It was called “fill-in ratio control” or “flash level control” in older Canon manuals.)
In a sense, FEC can be seen as the opposite of slow shutter sync, since it allows flash-illuminated (foreground) levels to be adjusted while leaving the ambient (background) levels untouched. FEC also differs from ordinary exposure compensation, which adjusts only ambient exposure levels on EOS cameras. Exposure compensation on some other systems, such as Nikon, adjusts both ambient and flash levels simultaneously.
As noted in the section on fill flash, a common use of flash is lightening shadows and toning down high-contrast sunlight. Adding a subtle catchlight or sparkle to the eyes is another. In cases like this, it may be necessary to dial in an additional minus stop or two of flash compensation over the camera’s built-in flash program to avoid blasting out a ton of fill flash that would wash out the subject’s face or cast flash shadows. The camera’s default fill flash settings can be a little too bright and obvious, resulting in a cardboard cutout effect to portraits.
You might also want to override the default flash controls in situations that are hard for the flash system to meter. Wedding photos of a man in a black tuxedo in a large room, or a woman in a white dress next to a white cake, are common metering problems.
Flash compensation is enabled in different ways depending on the camera and flash unit in use (section 9.9).

6.13