
Creating canvas animations in JavaScript is a lot like creating a stop-motion animation. You draw a shape, pause, erase the shape, and then redraw it in a new position. This may sound like a lot of steps, but JavaScript can update the position of the shape very quickly in order to create a smooth animation. In Chapter 10, we learned how to animate DOM elements. In this chapter, we’ll animate our canvas drawings.
Let’s use canvas and setInterval to draw a square and move it slowly across a page. Create a new file called canvasanimation.html and add the following HTML:
<!DOCTYPE html>
<html>
<head>
    <title>Canvas Animation</title>
</head>

<body>
    <canvas id="canvas" width="200" height="200"></canvas>

    <script>
    // We'll fill this in next
    </script>
</body>
</html>
Now add the following JavaScript to the script element:
  var canvas = document.getElementById("canvas");
  var ctx = canvas.getContext("2d");

  var position = 0;

  setInterval(function () {
➊   ctx.clearRect(0, 0, 200, 200);
➋   ctx.fillRect(position, 0, 20, 20);

➌   position++;
➍   if (position > 200) {
       position = 0;
    }
➎ }, 30);
The first two lines in this code create the canvas and the context. Next, we create the variable position and set it to 0, with the code var position = 0. We’ll use this variable to control the left-to-right movement of the square.
Now we call setInterval to start our animation. The first argument to setInterval is a function, which draws a new square each time it’s called.
Inside the function we passed to setInterval, we call clearRect at ➊, which clears a rectangular area on the canvas. The clearRect method takes four arguments, which set the position and size of the rectangle to be cleared. As with fillRect, the first two arguments represent the x- and y-coordinates of the top-left corner of the rectangle, and the last two represent the width and height. Calling ctx.clearRect(0, 0, 200, 200) erases a 200-by-200-pixel rectangle, starting at the very top-left corner of the canvas. Because our canvas is exactly 200 by 200 pixels, this will clear the entire canvas.
Once we’ve cleared the canvas, at ➋ we use ctx.fillRect (position, 0, 20, 20) to draw a 20-pixel square at the point (position, 0). When our program starts, the square will be drawn at (0, 0) because position starts off set to 0.
Next, we increase position by 1, using position++ at ➌. Then at ➍ we ensure that position doesn’t get larger than 200 with the check if (position > 200). If it is, we reset it to 0.
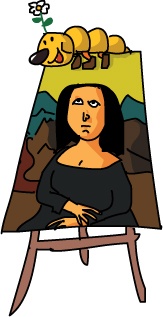
When you load this page in your browser, setInterval will call the supplied function once every 30 milliseconds, or about 33 times a second (this time interval is set by the second argument to setInterval, at ➎). Each time the supplied function is called, it clears the canvas, draws a square at (position, 0), and increments the variable position. As a result, the square gradually moves across the canvas. When the square reaches the end of the canvas (200 pixels to the right), its position is reset to 0.
Figure 14-1 shows the first four steps of the animation, zoomed in to the top-left corner of the canvas.
By making only three changes to the code in the previous section, we can create a square that grows larger instead of moving. Here’s what that code would look like:
var canvas = document.getElementById("canvas");
var ctx = canvas.getContext("2d");

var size = 0;

setInterval(function () {
  ctx.clearRect(0, 0, 200, 200);
  ctx.fillRect(0, 0, size, size);

  size++;
  if (size > 200) {
    size = 0;
  }
}, 30);
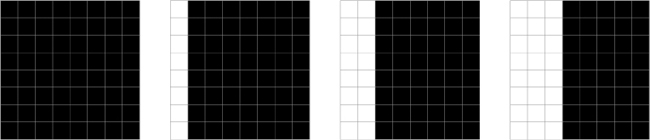
As you can see, we’ve done two things. First, instead of a position variable, we now have a variable named size, which will control the dimensions of the square. Second, instead of using this variable to set the square’s horizontal position, we’re using it to set the square’s width and height with the code ctx.fillRect(0, 0, size, size). This will draw a square at the top-left corner of the canvas, with the width and height both set to match size. Because size starts at 0, the square will start out invisible. The next time the function is called, size will be 1, so the square will be 1 pixel wide and tall. Each time the square is drawn, it grows a pixel wider and a pixel taller. When you run this code, you should see a square appear at the top-left corner of the canvas and grow until it fills the entire canvas. Once it fills the entire canvas—that is, if (size > 200)—the square will disappear and start growing again from the top-left corner.
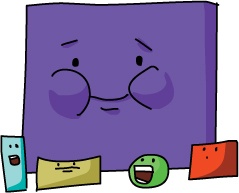
Figure 14-2 shows a close-up of the top-left corner of the canvas for the first four steps of this animation.
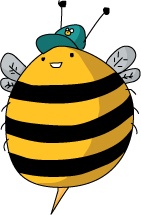
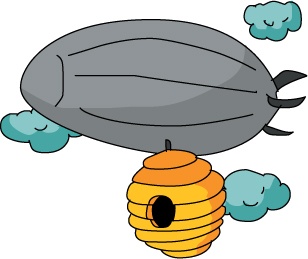
Now that we know how to move and grow objects on our screen, let’s try something a bit more fun. Let’s make a bee that flies randomly around the canvas! We’ll draw our bee using a number of circles, like this:
The animation will work very similarly to the moving square animation: we’ll set a position, and then for every step of the animation, we’ll clear the canvas, draw the bee at that position, and modify the position. The difference is that to make the bee move randomly, we’ll need to use more complex logic for updating the bee’s position than we used for the square animation. We’ll build up the code for this animation in a few sections.
We’ll draw our bee using a few circles, so first we’ll make a circle function to fill or outline circles:
  var circle = function (x, y, radius, fillCircle) {
    ctx.beginPath();
➊   ctx.arc(x, y, radius, 0, Math.PI * 2, false);
➋   if (fillCircle) {
➌     ctx.fill();
    } else {
➍     ctx.stroke();
    }
  };
The function takes four arguments: x, y, radius, and fillCircle. We used a similar circle function in Chapter 13, but here we’ve added fillCircle as an extra argument. When we call this function, this argument should be set to true or false, which determines whether the function draws a filled circle or just an outline.
Inside the function, we use the arc method at ➊ to create the circle with its center at the position (x, y) and a radius of radius. After this, we check to see if the fillCircle argument is true at ➋. If it is true, we fill the circle using ctx.fill at ➌. Otherwise, we outline the circle using ctx.stroke at ➍.
Next, we create the drawBee function to draw the bee. The drawBee function uses the circle function to draw a bee at the coordinates specified by its x and y arguments. It looks like this:
  var drawBee = function (x, y) {
➊   ctx.lineWidth = 2;
    ctx.strokeStyle = "Black";
    ctx.fillStyle = "Gold";

➋   circle(x, y, 8, true);
    circle(x, y, 8, false);
    circle(x - 5, y - 11, 5, false);
    circle(x + 5, y - 11, 5, false);
    circle(x - 2, y - 1, 2, false);
    circle(x + 2, y - 1, 2, false);
  };
In the first section of this code at ➊, we set the lineWidth, strokeStyle, and fillStyle properties for our drawing. We set the lineWidth to 2 pixels and the strokeStyle to Black. This means that our outlined circles, which we’ll use for the bee’s body, wings, and eyes, will have thick black borders. The fillStyle is set to Gold, which will fill the circle for our bee body with a nice yellow color.
In the second section of the code at ➋, we draw a series of circles to create our bee. Let’s go through those one at a time.
The first circle draws the bee’s body using a filled circle with a center at the point (x, y) and a radius of 8 pixels:
circle(x, y, 8, true);Because we set the fillStyle to Gold, this circle will be filled in with yellow like so:
This second circle draws a black outline around the bee’s body that’s the same size and in the same place as the first circle:
circle(x, y, 8, false);Added to the first circle, it looks like this:
Next, we use circles to draw the bee’s wings. The first wing is an outlined circle with its center 5 pixels to the left and 11 pixels above the center of the body, with a radius of 5 pixels. The second wing is the same, except it’s 5 pixels to the right of the body’s center.
circle(x - 5, y - 11, 5, false);
circle(x + 5, y - 11, 5, false);
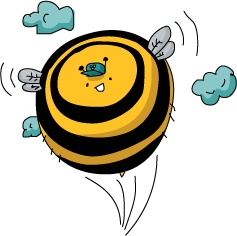
With those circles added, our bee looks like this:
Finally, we draw the eyes. The first one is 2 pixels to the left of the center of the body and 1 pixel above, with a radius of 2 pixels. The second one is the same, except it’s 2 pixels right of center.
circle(x - 2, y - 1, 2, false);
circle(x + 2, y - 1, 2, false);
Together, these circles create a bee, with its body centered around the (x, y) coordinate passed into the drawBee function.
We’ll create an update function to randomly change the bee’s x-and y-coordinates in order to make it appear to buzz around the canvas. The update function takes a single coordinate; we update the x- and y-coordinates one at a time so that the bee will move randomly left and right and up and down. The update function looks like this:
  var update = function (coordinate) {
➊   var offset = Math.random() * 4 - 2;
➋   coordinate += offset;

➌   if (coordinate > 200) {
      coordinate = 200;
    }
➍   if (coordinate < 0) {
      coordinate = 0;
    }

➎   return coordinate;
  };
At ➊, we create a variable called offset, which will determine how much to change the current coordinate. We generate the offset value by calculating Math.random() * 4 - 2. This will give us a random number between –2 and 2. Here’s how: calling Math.random() on its own gives us a random number between 0 and 1, so Math.random() * 4 produces a random number between 0 and 4. Then we subtract 2 to get a random number between –2 and 2.
At ➋ we use coordinate += offset to modify our coordinate with this offset number. If offset is a positive number, coordinate will increase, and if it’s a negative number, coordinate will decrease. For example, if coordinate is set to 100 and offset is 1, then after we run the line at ➋, coordinate will be 101. However, if coordinate is 100 and offset is -1, this would change coordinate to 99.
At ➌ and ➍ we prevent the bee from leaving the canvas by making sure coordinate never increases above 200 or shrinks below 0. If coordinate gets bigger than 200, we set it back to 200, and if it goes below 0, we reset it to 0.
Now that we have the circle, drawBee, and update functions, we can write the animation code for our buzzing bee.
  var canvas = document.getElementById("canvas");
  var ctx = canvas.getContext("2d");

  var x = 100;
  var y = 100;

  setInterval(function () {
➊   ctx.clearRect(0, 0, 200, 200);

➋   drawBee(x, y);
➌   x = update(x);
    y = update(y);

➍   ctx.strokeRect(0, 0, 200, 200);
  }, 30);
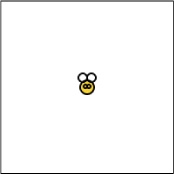
As usual, we start with the var canvas and var ctx lines to get the drawing context. Next, we create the variables x and y and set both to 100. This sets the bee’s starting position at the point (100, 100), which puts it in the middle of the canvas, as shown in Figure 14-3.
Next we call setInterval, passing a function to call every 30 milliseconds. Inside this function, the first thing we do is call clearRect at ➊ to clear the canvas. Next, at ➋ we draw the bee at the point (x, y). The first time the function is called, the bee is drawn at the point (100, 100), as you can see in Figure 14-3, and each time the function is called after that, it will draw the bee at a new, updated (x, y) position.
Next we update the x and y values starting at ➌. The update function takes a number, adds a random number between –2 and 2 to it, and returns that updated number. So the code x = update(x) basically means “change x by a small, random amount.”
Finally, we call strokeRect at ➍ to draw a line around the edge of the canvas. This makes it easier for us to see when the bee is getting close to it. Without the border, the edge of the canvas is invisible.
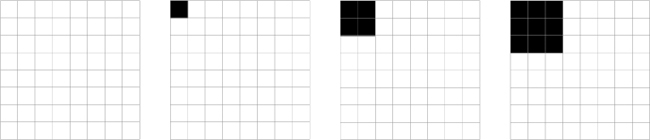
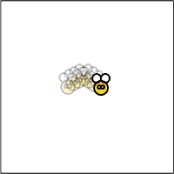
When you run this code, you should see the yellow bee randomly buzz around the canvas. Figure 14-4 shows a few frames from our animation.
Now let’s make a ball that bounces around the canvas. Whenever the ball hits one of the walls, it will bounce off at an angle, as a rubber ball would.
First, we’ll create a JavaScript object to represent our ball with a Ball constructor. This object will store the ball’s speed and direction using two properties, xSpeed and ySpeed. The ball’s horizontal speed will be controlled by xSpeed, and the vertical speed will be controlled by ySpeed.
We’ll make this animation in a new file. Create a new HTML file called ball.html, and add the following HTML:
<!DOCTYPE html>
<html>
<head>
    <title>A Bouncing Ball</title>
</head>

<body>
    <canvas id="canvas" width="200" height="200"></canvas>

    <script>
    // We'll fill this in next
    </script>
</body>
</html>First we’ll create the Ball constructor, which we’ll use to create our bouncing ball. Type the following code into the <script> tags in ball.html:
var Ball = function () {
  this.x = 100;
  this.y = 100;
  this.xSpeed = -2;
  this.ySpeed = 3;
};
Our constructor is very straightforward: it simply sets the starting position of the ball (this.x and this.y), the ball’s horizontal speed (this.xSpeed), and its vertical speed (this.ySpeed). We set the starting position to the point (100, 100), which is the center of our 200-by-200-pixel canvas.
this.xSpeed is set to -2. This will make the ball move 2 pixels to the left for every step of the animation. this.ySpeed is set to 3. This will make the ball move 3 pixels down for every step of the animation. Therefore, the ball will move diagonally down (3 pixels) and to the left (2 pixels) between every frame.
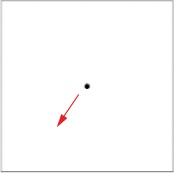
Figure 14-5 shows the starting position of the ball and its direction of movement.
Next we’ll add a draw method to draw the ball. We’ll add this method to the Ball prototype so that any objects created by the Ball constructor can use it:
var circle = function (x, y, radius, fillCircle) {
  ctx.beginPath();
  ctx.arc(x, y, radius, 0, Math.PI * 2, false);
  if (fillCircle) {
    ctx.fill();
  } else {
    ctx.stroke();
  }
};

Ball.prototype.draw = function () {
  circle(this.x, this.y, 3, true);
};
First we include our circle function, the same one we used earlier in A New circle Function. We then add the draw method to Ball.prototype. This method simply calls circle(this.x, this.y, 3, true) to draw a circle. The circle’s center will be at (this.x, this.y): the location of the ball. It will have a radius of 3 pixels. We pass true as the final argument to tell the circle function to fill the circle.
To move the ball, we just have to update the x and y properties based on the current speed. We’ll do that using the following move method:
Ball.prototype.move = function () {
  this.x += this.xSpeed;
  this.y += this.ySpeed;
};
We use this.x += this.xSpeed to add the horizontal speed of the ball to this.x. Then this.y += this.ySpeed adds the vertical speed to this.y. For example, at the beginning of the animation, the ball will be at the point (100, 100), with this.xSpeed set to -2 and this.ySpeed set to 3. When we call the move method, it subtracts 2 from the x value and adds 3 to the y value, which places the ball at the point (98, 103). This moves the ball’s location to the left 2 pixels and down 3 pixels, as illustrated in Figure 14-6.

At every step of the animation, we check to see if the ball has hit one of the walls. If it has, we update the xSpeed or ySpeed property by negating it (multiplying it by –1). For example, if the ball hits the bottom wall, we negate this.ySpeed. So if this.ySpeed is 3, negating it will make it -3. If this.ySpeed is -3, negating it will set it back to 3.
We’ll call this method checkCollision, because it checks to see if the ball has collided with (hit) the wall.
  Ball.prototype.checkCollision = function () {
➊   if (this.x < 0 || this.x > 200) {
      this.xSpeed = -this.xSpeed;
    }
➋   if (this.y < 0 || this.y > 200) {
      this.ySpeed = -this.ySpeed;
    }
  };
At ➊, we determine whether the ball has hit the left wall or the right wall by checking to see if its x property is either less than 0 (meaning it hit the left edge) or greater than 200 (meaning it hit the right edge). If either of these is true, the ball has started to move off the edge of the canvas, so we have to reverse its horizontal direction. We do this by setting this.xSpeed equal to -this.xSpeed. For example, if this.xSpeed was -2 and the ball hit the left wall, this.xSpeed would become 2.
At ➋, we do the same thing for the top and bottom walls. If this.y is less than 0 or greater than 200, we know the ball has hit the top wall or the bottom wall, respectively. In that case, we set this.ySpeed to be equal to -this.ySpeed.
Figure 14-7 shows what happens when the ball hits the left wall. this.xSpeed starts as -2, but after the collision it is changed to 2. However, this.ySpeed remains unchanged at 3.
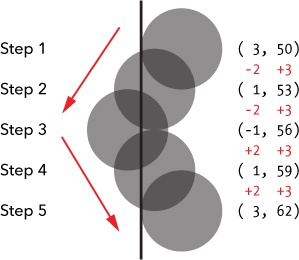
As you can see in Figure 14-7, in this case the center of the ball goes off the edge of the canvas at step 3 when it collides with a wall. During that step, part of the ball will disappear, but this happens so quickly that it’s barely noticeable when the animation is running.
Now we can write the code that gets the animation running. This code sets up the object that represents the ball, and it uses setInterval to call the methods that draw and update the ball for each animation step.
  var canvas = document.getElementById("canvas");
  var ctx = canvas.getContext("2d");

➊ var ball = new Ball();

➋ setInterval(function () {
➌   ctx.clearRect(0, 0, 200, 200);

➍   ball.draw();
    ball.move();
    ball.checkCollision();

➎   ctx.strokeRect(0, 0, 200, 200);
➏ }, 30);
We get the canvas and drawing context as usual on the first two lines. Then we create a ball object using new Ball() and save it in the variable ball at ➊. Next, we call setInterval at ➋, passing a function and the number 30 at ➏. As you’ve seen before, this means “call this function every 30 milliseconds.”
The function we pass to setInterval does several things. First, it clears the canvas, using ctx.clearRect(0, 0, 200, 200) at ➌. After this, it calls the draw, move, and checkCollision methods at ➍ on the ball object. The draw method draws the ball at its current x- and y-coordinates. The move method updates the position of the ball based on its xSpeed and ySpeed properties. Finally, the checkCollision method updates the direction of the ball, if it hits a wall.
The last thing we do in the function passed to setInterval is call ctx.strokeRect(0, 0, 200, 200) at ➎ to draw a line around the edge of the canvas, so we can see the walls the ball is hitting.
When you run this code, the ball should immediately start moving down and to the left. It should hit the bottom wall first, and bounce up and to the left. It will continue to bounce around the canvas as long as you leave the browser window open.
In this chapter, we combined our knowledge of animation from Chapter 11 with our knowledge of the canvas element to create various canvas-based animations. We began simply by moving and growing squares on the canvas. Next, we made a bee buzz randomly around the screen, and we ended with an animation of a bouncing ball.
All of these animations work in basically the same way: we draw a shape of a particular size in a particular position, then we update that size or position, and then we clear the canvas and draw the shape again. For elements moving around a 2D canvas, we generally have to keep track of the x- and y-coordinates of the element. For the bee animation, we added or subtracted a random number from the x- and y-coordinates. For the bouncing ball, we added the current xSpeed and ySpeed to the x- and y-coordinates. In the next chapter, we’ll add interactivity to our canvas, which will let us control what’s drawn to the canvas using the keyboard.
Here are some ways you can build on the bouncing ball animation from this chapter.
#1: BOUNCING THE BALL AROUND A LARGER CANVAS
Our 200-by-200-pixel canvas is a bit small. What if you wanted to increase the canvas size to 400 by 400 pixels or some other arbitrary size?
Instead of entering the width and height of the canvas manually throughout your program, you can create width and height variables and set the variables using the canvas object. Use the following code:
var width = canvas.width;
var height = canvas.height;
Now if you use these variables throughout your program, you only have to change the properties on the canvas element in the HTML if you want to try out a new size. Try changing the size of the canvas to 500 pixels by 300 pixels. Does your program still work?
#2: RANDOMIZING THIS.XSPEED AND THIS.YSPEED
To make the animation more interesting, set this.xSpeed and this.ySpeed to different random numbers (between –5 and 5) in the Ball constructor.
#3: ANIMATING MORE BALLS
Instead of creating just one ball, create an empty array of balls, and use a for loop to add 10 balls to the array. Now, in the setInterval function, use a for loop to draw, move, and check collisions on each of the balls.
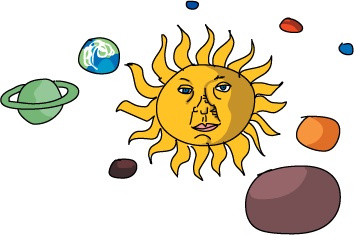
#4: MAKING THE BALLS COLORFUL
How about making some colored bouncing balls? Set a new property in the Ball constructor called color and use it in the draw method. Use the pickRandomWord function from Chapter 8 to give each ball a random color from this array:
var colors = ["Red", "Orange", "Yellow", "Green", "Blue","Purple"];