![]()
Owning a delta printer can be a lot of fun. You should take pride when using your printer to create things for your household, family, and friends. Whether you are creating new gadgets or gifts, making parts to fix things around the house, the enjoyment factor is quite high. However, the enjoyment will fade a bit if your printer starts underperforming or breaking. Fortunately, many common failures and problems can be reduced, and in some cases eliminated if you perform a few key maintenance tasks.
Delta printers are a bit more robust than some of the older RepRap Cartesian designs due, in part, to the frame design and axes orientation. In fact, I’ve found I have to maintain my delta printers far less than my Cartesian printers, some of which are professional-grade, popular brands.
It also helps that, in general, delta printers have fewer parts that need attention. For example, most delta printers do not have to be trammed periodically (also called leveling the print bed). This is because Cartesian printers often have an axis that uses multiple lifting mechanisms that can become askew (not parallel with another axis), whereas delta printers use a bed that is fixed to the frame. To tram the print bed on a Cartesian printer, one has to use a set of adjustment screws to make the print bed level with the axes—an often-neglected task that can make lifting a nightmare.
While delta printers do not have to have their print beds trammed,1 there are a number of other maintenance tasks that you should be prepared to execute over time. That is, keeping your printer running well requires vigilance and the judicious application of proper maintenance. You have to learn to pay attention to the printer mechanicals (sights and sounds) and understand the tasks needed to keep things running properly. Even the best-calibrated printer will eventually have problems if you never adjust or repair it when things go a little wrong (or worse, break).
I like to categorize maintenance tasks into three groups: tasks that you should perform before each print, once each day that you use your printer, or as needed (basic maintenance); tasks that should be performed at certain milestones (periodic maintenance); and tasks that you must perform whenever the printer has a problem or as part wears out (corrective maintenance). The frequency of these depends largely on how much you use your printer, as well as the general reliability of your printer design.
I recommend your reading this chapter before you start using your printer for a long period of time. If you have used your printer for more than 25 hours, take some time to read through this chapter and implement the recommendations for observing, adjusting, and repairing.
Let’s begin by looking at some best practices and advice for maintaining a delta printer.
Getting Started
Maintenance of delta printers involves a lot more than some may think, and yet not nearly as much as others fear. That is, there are certain things you should do every time you use your printer, or as needed, things you need to do regularly (e.g., every 50 hours), and things you need to do after significant use (e.g., every 250 hours). However, none of the maintenance tasks are very difficult or require any extensive skills or familiarity with complex procedures.
Your best tool is the desire to maintain your printer to keep it printing well. Beyond that, you should be aware of certain best practices for maintenance in general. The following sections outline some of the common practices for performing maintenance. These apply to almost any type of maintenance, from automobiles to Zamboni machines.
Keep Your Area Clean and Free of Clutter
Let’s face it: things tend to pile up after a while. This is especially true for hobbies like 3D printers. As you have learned from a previous chapter, there are all manner of tools needed to use and maintain your printer. And it isn’t just the tools that can clutter your work area.
Indeed, it doesn’t take long for printed parts (prototypes or otherwise) and little bits of filament to litter the area around your printer. Be it from discarded rafting, shavings from finishing your pieces, or simply trimmings for cases when things need a little adjustment to fit properly.
Let’s not discount the possibility of personal detritus. I’ve seen some work areas that have more discarded food and drink containers than anything else. Whatever the source, you should avoid the temptation to let things pile up to the point where you are spending time looking for things, or pushing things around from one pile to another.2
Not only does the clutter make it harder to work around your printer, but it can also interfere with the normal operation of your printer. I once forgot to remove a piece of tape I placed on one of the axes that I used to hold a bolt in place. I don’t recall having done so, but I was clearly in a hurry at some point and forgot to remove it. Suffice it to say, it became very obvious when I started the print and heard the roller carriage bump and click as it rode over the tape. Fortunately, no harm was done (other than a slightly lower-quality print), but I learned a valuable lesson: even if you don’t put your tools away, take inventory and survey your printer to make sure that everything is cleared away from the printer.
Consequently, I’ve formed the habit to make sure that the area around my printers is cleaned once per day. That is, I discard unwanted filament and parts, use a vacuum to remove the little bits of filament, and put my tools away. If you do this once per day, you can avoid unexpected surprises and always know where things are stored.
Organize Your Tools for Quick Access
If you have friends and family that are mechanically inclined, you may have encountered a variety of garage and tool organizational styles or methods. There are the compulsive types that like to keep everything in its place—with a place for everything, those that group things in similar yet somewhat disjointed containers, the free spirits who let things fall where they may,3 and of course, everyone in between.
No matter which style you subscribe to, you can make maintenance tasks easier by gathering the tools you need ahead of time and placing them nearby. Not only will this save you time, you won’t have to drop everything—sometimes literally—to find the tool you need. Experience and familiarity with your printer will teach you which tools you need for certain tasks.
You don’t have to lay your tools out like a dental hygienist’s tray,4 but placing them in a shallow basket, or even on the table near the printer, is a good plan. When maintaining or repairing my printers, I like to gather my tools and lay them in front of the printer so that I can reach them easily and quickly.
In fact, as I mentioned in a previous chapter, I keep a complete set of tools to perform all maintenance and repair tasks on my printers in my workshop. I keep them organized into several groups to make it easier for me to select a subset for whatever I want to do. It takes only a small amount of discipline to return the tools to their proper places when the task is complete.
Unplug Your Printer
Most maintenance tasks should be performed while your printer is turned off and unplugged from mains power. This may seem like a very prudent thing to do (and it is), but you would be surprised at how tempting and easy it is to think your off switch can save you from a nasty electrical surprise. In most cases, this simply isn’t true. Even if the switch was designed to interrupt power completely, the fact remains that power is still live on the mains side of the switch.
The best practice is to simply unplug the printer when working on it. For those cases where you need power to manipulate the axes, you should take care to avoid areas of your printer that contain electronics and power connections. If you must come into contact with the electronics, use a grounding strap to avoid ESD damage.
![]() Tip Use an electronics enclosure to help protect against accidental damage to your electronics from foreign objects such as small animals and insects, liquids, solder, stray wire strands, fingers, arms, and other miscellaneous human tissue. Although most of the printer uses 5V and 12V systems, even 5V power should be treated with a degree of caution. Don’t assume low DC voltage is harmless.
Tip Use an electronics enclosure to help protect against accidental damage to your electronics from foreign objects such as small animals and insects, liquids, solder, stray wire strands, fingers, arms, and other miscellaneous human tissue. Although most of the printer uses 5V and 12V systems, even 5V power should be treated with a degree of caution. Don’t assume low DC voltage is harmless.
With the risk of sounding like your grandmother, you should not rush yourself when working on your printer. A rushed task will lead to mistakes and, often, rework. Rushing can also result in misplaced tools, added clutter—or worse, mistakes. While very easy to say (write), this is one area many of us struggle to overcome. I can say with few exceptions that every time I’ve rushed through a procedure, I didn’t do quite as good of a job as I preferred.
The best way to avoid rushing is to give yourself plenty of time to complete your work. For example, if you are planning to do some maintenance on your printer before a print job, plan to set aside an hour so that you can be sure to get your printer going in time to complete whatever print you need. If you find yourself rushing because you have other things to do (be it with family, your job, etc.), take a break and take care of the more important tasks first, and then return to your printer when you are done and can take the time you need to do the task properly.
In the last chapter, I encouraged you to record observations about your printer to help you diagnose and repair something that has broken or become misaligned. The same philosophy applies to performing maintenance on your printer.
Actually, you should make observations about your printer each time you use it. Visually inspect things to make sure that nothing has become unfastened, broken, or loose. As with the diagnostic tasks, I recommend keeping a journal and recording anything you observe about your printer. For example, you may notice a belt starting to get a little loose, or even some buildup of filament on the nozzle. Neither of these things are necessarily things that need to be fixed immediately, but entering the observation in your journal will help you stay aware of what your printer is doing. Not only that, it can also help you spot trouble before it becomes imperative.
For example, if you observe that one of the belts is a little loose one day, and looser still the next day, and then tight the third day, you should stop and check the axis mechanism for loose or broken parts. That is, a gradual decrease in tension may be normal, but a sudden shift from loose to tight or tight to loose means something is wrong.
Visual inspection isn’t the only observation technique you can employ. You can observe your printer by listening for odd sounds, and being aware of odd smells or any strange movements. Sometimes a strange sound is fine, but it can also be a precursor to failure or something that will affect your print quality.
For example, if you hear a clunk, or a knock, or a similar collision sound, it could mean a portion of one of your axes mechanisms has become loose or out of alignment. Checking for this when you observe the behavior may permit you to fix the anomaly before it becomes an issue.
If your printer starts to move strangely, such as extra movement, it doesn’t necessarily mean that the printer is at fault. It could be that the print file contains unusual commands. It can also be caused by intermittent errors in your electronics. The bottom line is: if your printer does something strange, pay close attention to what it is doing, stop your print, and diagnose the problem.
Once again, basic maintenance tasks are those that you should do every time you use your printer and things you should do before each printing session (each day that you use your printer). There are two types of basic maintenance tasks. First, you should inspect your printer for potential problems (loose or broken parts, etc.), and second, there are a few minor adjustments you should perform each time you use your printer, or as needed. I say “as needed” because some of these tasks apply to new or newly built (or upgraded) printers and may not be required each and every time you print on delta printers that have proven to be reliable. I describe each of these types in more detail in the following sections.
The first type of basic maintenance task involves observing the printer: its mechanisms, wiring, frame, filament, and so forth. More specifically, you need to check your printer for anything that looks out of place, and then take action to correct the problem before you start a print. For example, if you observe that one of the belts is loose, you can adjust it so that print quality is not affected. Inspection tasks include the following.
- Frame: Checking for loose bolts and alignment
- Axes: Checking for loose or misaligned mechanisms
- Filament: Measuring the filament to ensure that your slicer options are set correctly
- Extruder: Checking for broken, worn, or loose parts
- Belts: Checking tension
- Wiring: Checking for loose connections or broken wires
- Print surface: Checking the print surface for damage or wear
For new printers, I recommend performing these tasks each time you print. If you have a new delta printer or one that you built yourself, it is important to perform these inspections before each print—at least for the first dozen or so prints. Doing so will help you make minor adjustments to get the printer broken in. Even if the vendor built your printer, inspecting it before each print gives you a better sense of its reliability.
As you become more familiar with your printer, you may be able to perform these tasks less frequently. However, even if you have printed many objects and your printer is reliable, such that adjustments or repairs are infrequent (more than every 50 hours of use), inspecting it can help detect when adjustments or repairs may be needed. For reliable printers, I recommend performing these tasks the first time you use it on a given day. For example, if you are going to print a series of objects, inspect the printer before printing the first object.
Table 7-1 will help you determine when you should perform each of the inspection tasks in the following sections. Notice that I have columns that apply to new printers, including those that are built from a kit (new); printers that are prebuilt or are not used much (low usage); and printers without issues after many hours of printing (reliable).
Table 7-1. Frequency of Inspection Tasks

Frame
Recall from the discussion about building a delta printer that the frame is the foundation upon which all other mechanisms are attached. If the frame (some use the term chassis) is loose or misaligned, these anomalies will translate to the effector, and therefore can affect print quality. For example, if the frame becomes misaligned or loose, it can cause poor print quality, or worse, axis travel failures and ruined prints.
Tighten Bolts
At a minimum, you should check the vertices for tightness. Most delta printer frames will not work loose, but I have seen it once, so it is worth a cursory check on a new printer, especially if you built it yourself. Make an inventory of the sizes of the wrenches, screwdrivers, or hex bits you need to tighten the fasteners, and enter that data in your journal so that the next time you need to do this, you will know what tools to gather.
Check each bolt to make sure that it is tight. Some people suggest using your fingers to loosen a nut or bolt. The idea is that if you can loosen it with your fingers, it isn’t tight enough. I think this is a fine strategy, but it only works for those bolts and nuts that you can get to and grasp.
I prefer to use the appropriate tools to check tightness. Rather than try to loosen things (which is all too easy), I grip the tool lightly and try to turn each nut and bolt to ensure that it is tight. The idea here is that if you can move the bolt or nut with very little effort, it is too loose. When I encounter a bolt or nut like this, I give the tool a one-eighth to no more than a quarter turn to ensure that it is tight. Be sure to not overtighten.
![]() Caution Do not overtighten your frame fasteners. If your frame uses plastic components (printed or injection molded) or wooden parts, overtightening a bolt can compress or break the nut trap and ruin the part. Although it is not as easy to overtighten fasteners on all-metal frames, the consequences of doing so are the same.
Caution Do not overtighten your frame fasteners. If your frame uses plastic components (printed or injection molded) or wooden parts, overtightening a bolt can compress or break the nut trap and ruin the part. Although it is not as easy to overtighten fasteners on all-metal frames, the consequences of doing so are the same.
Repeat the process until all the bolts and nuts are checked. It is not unusual for a new printer to have several bolts or nuts that need tightening. But you should not have to retighten them more than once or twice.
![]() Tip Use Nyloc fasteners where possible for all frame components.
Tip Use Nyloc fasteners where possible for all frame components.
Check Alignment
Aside from tightening the bolts, you should check the alignment of your frame. The frame on a delta printer should not lose alignment, so normally you should not have to do this task. However, if your printer was moved, accidentally bumped, or several parts of the frame have come loose (or you removed them intentionally for an upgrade), there is a chance the frame could have become misaligned or twisted. To check alignment, use a square to check that the vertical frame components are at right angles to the print surface. You should also make sure that all axes move smoothly without binding.
Finally, examine all the plastic parts to ensure that they are not cracked or show any signs of stress. The effects of stress can manifest in a number of ways. Most often, the part shows small cracks between the layers, but in the extreme case, you could see discolored sections—or worse, breaks in the plastic. Replace all parts that show any sign of damage. If the part is still functional and you do not have a spare, you should print a new part immediately to avoid down time while you wait for a friend or vendor to send you a new one.
Once you have performed this inspection to the point where there are no loose bolts and the frame components have not become unaligned, and no parts are broken or loose, you can consider changing the frequency of the inspection. That is, if you haven’t tightened a bolt in three or four prints, try making the inspection once a week. If nothing comes loose or misaligned after several weeks, you can consider making the inspection only when the printer is physically moved.
Delta Mechanisms
Your printer’s delta arms, effector, and carriages are often subjected to small, rapid movements, which can put a lot of stress on the components. New and recently modified printers should be checked frequently to ensure that the delta mechanisms are working properly. Not only should you check for loose parts, you should also check them for cracked or broken parts as well. While this is rare for a delta printer, it can happen if there has been an unusual event (e.g., a print surface crash), the printer has been moved, or you have partially disassembled and reassembled the mechanisms for an upgrade.
Like the frame, check each bolt to make sure that it is tight, that the delta arm joints are not loose, and that there is no excessive backlash in the joints (no free play). Inspect each of the plastic parts carefully to ensure that they are not damaged in any way. That is, if there has been any flexing of the frame, there is the possibility of plastic parts failure in the delta mechanisms.
You should also check the endstops for damage or loose mounts. An endstop that has moved or can move will make homing your printer difficult and could allow hard parts to collide. Endstop holders made from PLA may be more brittle than those made with ABS. Endstop holder breakage most often occurs as a result of a malfunction in axis movement that causes the axis to crash into the endstop on homing. For example, if you set the axis movement speed too high, it can cause the carriages to crash into the endstop, bending or breaking it or its holder.
You should check your delta mechanisms semifrequently (and always after moving the printer from one place to another). Once per each day that you print should be sufficient. On the other hand, if you find you have to adjust the frame, or even realign the axis from loose or worn parts, you should perform this inspection more frequently.
Filament
Filament is one of the areas often overlooked as a source for inspection or adjustment. The diameter of the filament can vary, often changing several times during the spool. Unless your filament vendor has very high standards, it is possible to experience variations that cause issues with printing.
Recall that you measure the diameter of filament with a caliper. If the measurement is more than a few hundredths of a millimeter larger or smaller than what you specified in your software (slicer settings), you may need to change your filament diameter setting, which normally requires reslicing (preparing the .stl file for printing). If you are printing an object you have already sliced, you should consider slicing your object again.
You need to do this to ensure that the correct amount of filament is extruded when laying down runs. If you use too much filament (the actual diameter is larger than your slicer settings), you risk bulges, stringing, and excess filament in smaller and narrower protrusions. If you use too little filament (the actual diameter is smaller than your slicer settings), you risk poor layer adhesion and weak parts.
I recommend changing your slicer settings if you encountered a change in the diameter greater than 0.05mm. Any more than that and you risk the problems stated previously. For example, if you measured your filament at the start of a spool at 1.77mm and find that it varies between 1.74mm and 1.80mm, a setting of 1.76 in your slicer filament settings should be fine.
While you should always check the diameter of the filament before slicing an object for printing, most people forget that the diameter of the filament is a variable in the sliced file. Thus, it is important to make sure that you check the filament diameter regularly and compare it to what is in the sliced file.
If you are working with spools of filament from a reliable vendor, you may only need to check it once every few prints, or even once each time you start a new spool. However, until you are comfortable with the variance of the filament from your vendor (it may require sampling a number of spools), you should check the diameter every time you print.
Extruder
The extruder is the workhorse of the printer. There are several parts to the extruder, all of which need to be checked for wear or damage. The parts of the extruder include the stepper motor, the extruder body, the idler bearing or pulley (if equipped), the drive and driven gears (if equipped), the filament drive gear, and wiring for the stepper motor.
The filament drive gear is one of the top areas that can cause you trouble. This is because it can become clogged with pieces of filament and start to slip. Furthermore, if the extruder uses a set of gears, they will wear over time; thus they should be checked for excessive wear, broken or missing teeth, or loose gears.
The stepper motors in axes are always turning, and therefore get more use than any other stepper motor. There really isn’t any way to visibly observe problems with a stepper motor to tell if it needs replacement or has excessive wear (other than complete shutdown in one or both directions). I have seen stepper motors wear out; but the only symptoms were a loss of holding torque where the stepper could not hold its position, or a lack of torque when stepping, such that it missed steps. When this happens, the stepper motor is easier to turn by hand. However, unless the filament is unloaded, you cannot turn the stepper motor. Fortunately, you don’t normally have to worry about this until your stepper motor has been used for hundreds of hours of printing.
The extruder body should be checked for breaks and wear. The pivot point on the idler can wear over time. The tension on the bolts that press the idler against the drive gear can put stress on the pivot point, eventually making the hole larger. I have seen this myself a couple of times. The telltale sign is a loose idler door. You can see this visibly whenever you change filament, but you can also see the door flex as the extruder moves. If you see any play in the idler door, you should consider replacing it.
Even if the extruder body does not have multiple parts, it is a good idea to check it for breakage. Look for changes to the way it mounts to the frame, loose bolts, or the extruder loosing from its mount. Any of these are warning signs that the extruder body may need replacing.
If your extruder uses a set of gears to drive the filament pulley, and if they are 3D-printed parts, you should check the gears for wear and damage. That is, if the gears wear long enough, it is possible that the teeth can become worn down to the point where there is play in the gears. In rare cases, the teeth could break off of the smaller of the two gears. The telltale sign of worn gears is a light dusting of plastic debris in the valleys of the teeth.
If your extruder uses an idler bearing (sometimes called the idler pulley), you should also check it for play. If the idler bearing uses a modern sealed bearing, you aren’t likely to see it fail, but if the mounting point is a 3D-printed part or is mounted to the same, you should check the bolts for tightness and any play. Play in the idler bearing can cause filament extrusion problems if the play is enough to change the tension on the filament. I have seen a case where the play was no more than about 0.04mm, but that was enough to ease tension and cause an extrusion failure. I originally increased the tension to compensate (which does work temporarily), but that only made the problem worse, and eventually resulted in a cracked idler door.
![]() Tip Any play or loose bolts on the extruder should be corrected immediately.
Tip Any play or loose bolts on the extruder should be corrected immediately.
As mentioned, the filament drive gear is the one spot on all delta printers that eventually requires service. If your extruder is constructed so that you can see the filament drive gear, check it for filament debris in the teeth. If you see any buildup, you should remove the debris from the teeth or grooves. I discuss this in more detail in the Adjustment Tasks section.
In summary, check the extruder’s fixed parts for wear, the gears for play, the filament drive gear for buildup, and the wiring for any breaks.
Since the extruder does so much work, I recommend checking it before every print. At the very minimum, you should do a quick look at the extruder body, the stepper motor, the drive and driven gear (if equipped), and the filament drive gear to ensure that nothing is wrong. Remember, if something goes wrong in the extruder, your print will likely be ruined.
Belts
The belts on your delta printer can loosen over time. The slack or looseness is normally very little, and only after many hours of printing. What is more likely to cause loosening belts is slippage of the securing blocks or clamps. This is especially true for printer designs that use zip ties or press-fit parts on each end of the belt.
Loose belts are those that have more than about 10mm to 30mm5 or more of play (perpendicular to the belt travel). Any more than this and the belt can slip on the drive gear. Not only that, but the extra length of the belt can cause minor layer shifts on that axis. The amount of play or slack in the belt depends on how long the belt is, as well as its type. Check your vendor’s documentation for the correct threshold for your printer.
Checking the belts for tension is a very quick test: just press left and right (sideways) on the belt (or back and forth if you will). I recommend checking belt tension before each print for new printers and for printers that use clamps to secure the belts. If you don’t notice any looseness in the belts, you can delay the check to once every day of printing, and if no looseness is detected then, delay the check to once a month.
Wiring
The wiring on your delta printer is another often overlooked source of problems. Printers built by vendors typically use electronics with connectors that are securely fastened and rarely come loose. However, kit-based printers are more susceptible because most wire connections are press-fit and not secured with tabs, screw terminals, or other forms of keeping the wire in place.
For printers that are assembled from kits, you should make it a priority to check all the wiring for loose connections for at least the first dozen or so prints. A visual inspection is enough to see a connector that is not seated properly. Check slip and press-fit connections to make sure that they have not become unplugged; screw terminals to ensure that wires are still tight; and look for worn insulation or bare or broken wires at any area where the wiring crosses a metal object. Wiring can loosen due to the normal vibrations of a printer, or it can loosen due to accidental stress on the wiring when performing maintenance.
![]() Caution Be sure to check the higher voltage wiring on the heaters. If they become loose, they can overheat and damage the connector.
Caution Be sure to check the higher voltage wiring on the heaters. If they become loose, they can overheat and damage the connector.
But it isn’t just the wiring connections that should be checked. I already mentioned the need to inspect the wiring on the effector for flexing and signs of breakage; but this is just one of the stress points. There is also the other end of that wiring bundle, where it meets or is secured to the frame. Check this end too.
![]() Note While you would rarely be concerned about soldered connections, if you soldered your own connections and have not had a lot of practice soldering, you may want to check these for the first few prints to make sure that the connections are strong.
Note While you would rarely be concerned about soldered connections, if you soldered your own connections and have not had a lot of practice soldering, you may want to check these for the first few prints to make sure that the connections are strong.
At least once each day for a new, unproven printer, I recommend checking all wiring connections to make sure that they are securely fastened. Otherwise, check the wiring on reliable printers once every week until you feel comfortable that no connections are loose.
Print Surface
The print surface is another wear site. When you use blue painter’s tape or Kapton tape without ABS juice, you only need to replace the print surface if there are adhesion problems (sudden lifting after many prints without lifting) or if you have torn or gouged the print surface treatment by removing parts. Figure 7-1 shows a print surface that is in need of replacement.

Figure 7-1. Worn print surface (blue painter’s tape)
Notice here that there are small tears and some discoloring in the print surface. Normally, discoloring won’t affect adhesion, but any tears will affect adhesion. If your print surface starts looking like this, I recommend changing it. On the other hand, you could just move the start of the print to another portion of the print bed. In Figure 7-1, the surface on either side of the wear is still good.
Recall from a previous chapter that if you use narrower strips of tape, you can replace only those strips that are affected. In Figure 7-1, I needed to replace only the centermost strips.
Even if you do not need to replace the print surface, it is a good idea to wipe it with a lint-free cloth to remove any oils caused by touching it with your hands, as well as any dust that may have accumulated. For Kapton tape, a cloth with a small spot of acetone will remove any filament residue, as well as oils and dust. For PLA printed on plain glass, use a good glass cleaner.
![]() Caution If you use a spray-on solution, be sure to cover the electronics to avoid getting them wet with overspray. It is best to first spray the solution on a lint-free cloth or paper towel, and then wipe the surface.
Caution If you use a spray-on solution, be sure to cover the electronics to avoid getting them wet with overspray. It is best to first spray the solution on a lint-free cloth or paper towel, and then wipe the surface.
Checking the print surface is another easy thing you can do; and, in fact, you should do this before every print. Only a brief glance at the print surface is required to tell if it needs replacing.
Adjustment Tasks
The next type of basic maintenance task includes those things that require minor adjustments on a semiregular basis. I recommend checking to see if you need to do these tasks as your first step when using your printer on any given day. Adjustment tasks don’t have to be done before every print (although they can), and printers that have proven to be reliable can have these tasks done on an as-needed basis.
Adjustment tasks are those that are typically needed to keep your printer running well. They are tasks you should perform more often. They include the following (I discuss each in more detail shortly).
- Clean the filament drive gear: Remove debris from the drive gear.
- Clean the nozzle: Remove melted filament and contaminants from the exterior of nozzle.
- Adjust belts and carriages: Ensure that the belts are tight and the carriages are adjusted.
- Set the Z-height: Adjust the height of the first layer with respect to the print surface.
- Calibrate the towers: Keep the print bed adjusted properly to ensure accurate tracking over the print surface.
In the following sections, I provide example procedures for performing these tasks. I have tried to keep them generic enough to be applicable to most delta printers. That said, you may find that slightly different steps are needed for your particular printer. You should still be able to adapt the example to your printer by manually jogging the axes.
Table 7-2 will help you determine when you should perform each of the inspection tasks in the following sections. Notice that I provide columns that apply to new printers, including printers that are built from a kit (new); printers that are prebuilt or not used much (low usage); and printers without issues after many hours of printing (reliable).
Table 7-2. Frequency of Adjustment Tasks

Clean the Filament Drive Gear
Cleaning the filament drive gear is the first line of defense in correcting extrusion failure, because most extrusion failures are related to either slipping filament caused by a dirty drive gear, or a blocked nozzle (or similar filament obstruction). Any time you have an extrusion failure, you should clean the filament drive gear.
The process for cleaning the filament drive gear varies from one printer (extruder) design to another. You saw how to do this in Chapter 6. Most extruders on delta printers have a similar process.
![]() Tip If you are using PLA, check the flexibility of the filament near the end that you removed. You may find that the filament is a bit more flexible than normal. I like to move up the filament (toward the spool) until I find a more brittle place, and then I snap off the filament there, removing the previously heated portion. I’ve found that filament loads a bit easier if it has not been heated and cooled.
Tip If you are using PLA, check the flexibility of the filament near the end that you removed. You may find that the filament is a bit more flexible than normal. I like to move up the filament (toward the spool) until I find a more brittle place, and then I snap off the filament there, removing the previously heated portion. I’ve found that filament loads a bit easier if it has not been heated and cooled.
I recommend checking the filament drive gear once each day that you use the printer. If you do not notice any buildup, you can check it every time you change filament, and clean it when needed. In fact, I always clean the filament drive gear when I encounter an extrusion problem.
Clean the Nozzle
The hot end nozzle is one area that many people neglect. Although there isn’t anything that needs to be adjusted, it is possible for the nozzle to become dirty over many prints—that is, bits of filament can stick to the outside of the nozzle. This can happen whenever there is stringing from the end of a print, oozing from the nozzle due to higher temperatures, or collisions with objects on the print bed. Figure 7-2 shows a Rostock Max v2 hot end with a brass nozzle. While this specimen is reasonably free of debris, there are some small pieces on the side.

Figure 7-2. Hot end nozzle (Rostock Max v2)
![]() Caution You will be working with a hot end that has been brought up to temperature. When moving around inside the printer, be careful to avoid touching the hot end or nozzle. It will burn you. Also, make sure that the printer is off before using any tools near the nozzle.
Caution You will be working with a hot end that has been brought up to temperature. When moving around inside the printer, be careful to avoid touching the hot end or nozzle. It will burn you. Also, make sure that the printer is off before using any tools near the nozzle.
Over time, these bits of filament can harden and turn dark—encrusting the nozzle. Although some users may say that this isn’t a big deal (I suppose I must admit that it could be OK), I don’t like my tools or equipment to get so dirty. And it turns out that if you switch filament often, especially from PLA to ABS and back, some of the extra bits of filament can melt off and fall onto your prints. This is most noticeable when printing with light-colored filament.
I’ve seen it happen on occasion; one particularly gnarly nozzle would leave dark spots on the prints. I observed a very good white-colored print with four or five tiny black spots that despite their small size, made the part look bad.
You can avoid this problem by simply cleaning the outside of your nozzle whenever it gets dirty (filament buildup). Best of all, it does not require you to remove the nozzle. Although it may be easy with some printers, with others it is a very involved process. The process to clean the nozzle in place is as follows. As you will see, it is very straightforward and not difficult. I describe the more involved steps in more detail.
- Home your printer to give yourself room to work.
- Heat the hot end to the temperature for the filament used.
- Turn off the printer and unplug it.
- While the hot end is still hot, use tweezers (ESD-safe) to remove the larger pieces of filament.
- If your nozzle is oozing, wait for it to cool until it no longer oozes.
- Use a soft wire brush to remove loose filament while the nozzle is still warm.
- Vacuum away the loose debris.
- Soak a small portion of a paper towel with acetone and then wipe the nozzle once it has cooled.
I use ESD-safe tweezers to remove hot filament. It removes the majority of the loose filament from the nozzle. Figure 7-3 illustrates this process with a typical J-head hot end, which is very common on Mini Kossel and similar delta printers.

Figure 7-3. Remove loose filament from the nozzle with tweezers
While the hot end is still warm, remove any remaining filament residue with a soft wire brush. Figure 7-4 shows this step in progress.

Figure 7-4. Cleaning the outside of the nozzle with a brush
Be sure to use a metal brush with bristles of the same or softer metal than the nozzle. A wooden or metal handle is a must. In the photos, for example, I used a brash brush to clean a brass nozzle. You can also use a metal scouring pad, but be sure to use the kind without soap! I do not recommend the use of steel wool because it can deposit several small bits of steel into your printer.
You can scrub the burned-on parts harder, but be sure to not put too much pressure on your hot end. Don’t worry about any filament sticking to the brush. You can remove it easily once it has completely cooled.
BURNED FILAMENT? HOW DOES THAT HAPPEN?
If your nozzle has a lot of melted filament buildup, you may be using temperatures that are too high, and so you should consider lowering the temperature. The buildup can also occur when switching from filament that requires lower heat ranges to filament that requires higher heat ranges. Thus, always clean your nozzle before switching filament types.
To complete the cleaning process, use a towel soaked with a small spot of acetone. Fold the towel a couple of times to help absorb the acetone, as well as help protect your fingers if the hot end is still warm. By now, the nozzle should be cool enough to touch. If it is not, wait until it cools some more, and then use the acetone cloth. I use a paper towel to help reduce the temptation to scrub the nozzle. Putting too much force on the nozzle could damage the hot end, its mount, any accessory lighting—or worse, the wiring for the heater core and thermistor. Figure 7-5 shows the use of the towel to clean the nozzle. Notice how close the wiring is to the cloth. Be careful not to damage the wiring.

Figure 7-5. Cleaning the outside of the nozzle with acetone
Once you are done, be sure to vacuum any bits of debris—filament, unidentifiable black flakes (burnt filament), bristles, and so forth, before using the printer. Be sure to cover the electronics with a cloth (or similar covering) to protect them from falling brush bristles.
![]() Tip The nozzle should not be heated to temperature without extruding for extended periods. This is because filament in the nozzle will ooze out and be replaced with an air pocket. This can cause plastic to oxidize inside the nozzle, which can blacken, and in some cases clog the nozzle.
Tip The nozzle should not be heated to temperature without extruding for extended periods. This is because filament in the nozzle will ooze out and be replaced with an air pocket. This can cause plastic to oxidize inside the nozzle, which can blacken, and in some cases clog the nozzle.
I recommend cleaning the outside of the nozzle once each day that you use the printer, or as needed. If you are using the proper temperature for your filament and you haven’t had any extrusion or build failures, you may not need to do this procedure very often. Regardless, buildup is very easy to spot, and except for waiting for the heating and cooling cycles, it is very easy to correct.
Adjust the Belts and Carriages
If your delta printer uses belts to move the carriages, you must ensure that the belts are properly tensioned. Most delta printers have some form of belt tensioner that you can use to tighten the belts. For example, the Mini Kossel design uses a bolt on top of each axis to raise the top frame vertex and therefore tighten the belt. Just loosen the top frame vertex outer bolt and tighten the belt adjustment bolt until the belt has no more than 20mm to 30mm of play.
For newly assembled printers, I like to check the tension for the first three to six prints to ensure that everything is tight. For printers that have proven to be reliable, I check and adjust the belts every 50 to 100 hours of printing.
If your delta printer uses roller carriages or similar carriages that have an adjuster, check the play in the carriages and adjust accordingly. If your roller carriage has four or more rollers, this task can be a bit of a challenge. For example, the roller carriages on the Rostock Max v2 require using two box wrenches to move the two concentric spacers together.
The carriages need to move freely without any play. That is, you should not be able to move the carriage other than up and down. The carriage should float freely so that when you move it up, it immediately falls down (but don’t let it crash into the frame). Carriages that stick or move slowly are too tight. Fortunately, the roller carriages need very little adjustment, and then only occasionally. So far, I’ve only had to do this once.
Thus, you should check the carriages every 50 to 100 hours of printing and adjust them when there is significant play in the carriages. Refer to your vendor’s documentation for the exact procedures for adjusting your printer’s carriages.
Set the Z-Height
The Z-height is another area that normally doesn’t need to be adjusted. However, you may need to make small adjustments if your environment changes or your change the print surface. For example if your work area changes from hot, dry conditions to cool, moist conditions. You may want to adjust the Z-height if you encounter lifting or you want a lower first layer. Wear is another factor in needing to adjust the Z-height.
Recall from Chapter 5 that the purpose of setting the Z-height is to establish the first-layer height. This should be slightly less than your chosen layer height. For example, if your layer height is 0.3mm, you should consider making your first-layer height between 0.1mm and 0.2mm. A good gauge is the thickness of a piece of paper. The paper should be able to slide under the nozzle with only a small amount of friction. The smaller the value, the more pressed or squished the first layer is against the print surface. Generally, a lower Z-height can improve adhesion and reduce lifting.
![]() Tip You can also use a Post-it note. The sticky portion makes holding the paper a bit easier.
Tip You can also use a Post-it note. The sticky portion makes holding the paper a bit easier.
Some printers, like the Rostock Max v2, have a nifty process for setting the Z-height built into the firmware. As you saw in Chapter 5, all you need to do is preheat the nozzle to about 180 to 190 degrees, and the print bed to about 50 to 60 degrees. You also need to ensure that the proper print surface treatment is applied. That is, if you plan to use blue painter’s tape, you must apply it before heating the print bed.
When ready, select Advanced Settings from the menu, and then select Calibrate Z Height. On this menu, you first home the axis with the Home Towers selection. Next, select Z-Position, and then use the rotary knob to lower the effector until the nozzle is close to the print surface. Use a piece of paper to check the gap. When you feel a slight friction from the nozzle touching the paper, press in the knob to return to the previous menu, and then choose Set new Z=0.00.
Printers without this nifty procedure require calculating the Z-height by homing the axes, and then slowly lowering the nozzle to the print surface. If you reach 0 before the nozzle touches the print bed, you may need to increase the Z_MAX_POS or MANUAL_Z_HOME_POS in the firmware, and then try the procedure again. Once you find the position, update the value in the firmware (or EEPROM settings) to set the Z-height.
If your printer has a Z-probe, you can set the Z-height very easily by setting the Z_PROBE_OFFSET_FROM_EXTRUDER value in the firmware. For example, if the Z-height needs to be lower and you have a value of –5.1 for Z_PROBE_OFFSET_FROM_EXTRUDER, you can use –5.15 or –5.20 to lower the nozzle. Some printers save this value in EEPROM so that you can make the change without reloading the firmware.
![]() Note Johann Rocholl’s version of the Marlin G29 autolevel command also accepts an optional Z adjustment. For example, G29 Z-0.15.
Note Johann Rocholl’s version of the Marlin G29 autolevel command also accepts an optional Z adjustment. For example, G29 Z-0.15.
Although you may have to make an adjustment to your Z-height more frequently than you have to calibrate the towers, this task is on an as-needed basis.
Calibrate the Towers
The towers are normally not an area that needs regular adjustment. That is, once the towers are calibrated, you should never have to calibrate them again. Well, almost. If you move your printer, bump into it, or upgrade, you may need to recalibrate the towers. I recommend doing the recalibration if you move your printer or if you encounter any significant lifting in one or more areas along the perimeter of the print bed.
Recall from Chapter 5 that the purpose of calibrating the towers is to ensure that each axis is the same height over the print bed. If anything interferes with the end stops or changes the alignment of the frame (like moving or bumping into the printer), the tower calibration may have been affected.
The process for calibrating the towers is described in detail in Chapter 5. In brief, you will need to home all axes, and then check each tower by lowering the effector to Z=0 positioned at the base of the tower and checking the gap between the nozzle and the print surface.
If you meet any of the criteria listed here, you should perform the calibration. Unlike other adjustment tasks, calibrating the towers is required only as needed.
Now that you have explored the inspection and adjustment tasks, let’s now explore those tasks you can perform to prevent failures and poor print quality.
Preventive Tasks
The goal of preventive maintenance is to execute small tasks frequently to reduce the risk and downtime of equipment failure. More specifically, you take steps to keep your equipment in a condition where it is operating at the highest degree of efficiency possible. This includes making sure that the equipment remains free of debris and dust, that the parts that require lubrication are lubricated properly, and that worn parts are replaced before they fail. Normally these tasks are not time-consuming, but should be performed on a regular basis.
Fortunately, there aren’t many preventive tasks required for maintaining your delta printer. The following sections describe the preventive tasks you should perform on your printer on a regular basis. As you will see, the frequency will vary from one task to another, but they are based on hours of use, and in some cases, influenced by the environment. I begin with the simplest preventive task: keeping the printer clean.
Cleaning the Printer
Keeping your printer clean may not sound like a preventive task. However, dust and dirt can accumulate on your oiled parts, fouling the lubrication to the point of increasing friction and wear on the bearings, wheels, or linear rails. I should note that printers with partial or full enclosures are not immune to these effects. It just means the accumulation will be slower.
![]() Tip You can reduce dust buildup on your print surface if you attach a cover on top of your delta printer. I’ve found that a piece of acrylic or thin plywood works well. If you don’t want to calculate the shape of the panel, you can use a piece of cardboard cut to shape. Remember to leave room for any accessories and the belt tensioners, which are typically on top of each axis.
Tip You can reduce dust buildup on your print surface if you attach a cover on top of your delta printer. I’ve found that a piece of acrylic or thin plywood works well. If you don’t want to calculate the shape of the panel, you can use a piece of cardboard cut to shape. Remember to leave room for any accessories and the belt tensioners, which are typically on top of each axis.
A bigger concern for delta printers is the accumulation of small bits of plastic falling into the build area (the area around the build platform). This can include brim material, run-off filament from a print, oozing filament from the hot end, and so forth. While it may require a lot of plastic bits accumulating in your build area to cause major problems, you should still take the time to clean your build area periodically. However, even a small amount of debris in the belt channel or on the drive pulley can cause issues. Be sure to keep debris away from the axis mechanisms.
More importantly, you mustn’t allow plastic to accumulate on your build platform. Even a small amount of plastic debris on your print surface can cause problems such as uneven first layers and nozzle blockages, leading to extrusion failure.
So how do you clean a delta printer? Resist the temptation to commandeer the household vacuum. Vacuums must be used carefully because they can generate a lot of static electricity and can harm your electronics. Also, you should never use any cleansers whatsoever. The only possible exception would be cleaning the outside of your frame. Even then, you should use a mild cleanser designed for the material of your frame, and do so sparingly. Check your owner’s manual for recommended cleaning procedures and cleansers.
The specific procedure will vary from one printer to another, but there are several areas or subtasks you should do to thoroughly clean your printer. These tasks include the following:
- Dust and clean the frame.
- Remove dust from the electronics.
- Remove plastic debris from the build area.
- Clean vertical frame components and rails.
How frequently you need to clean your printer and which areas you need to clean depends on how dusty and debris-filled your print environment is. I recommend checking for things that need cleaning after every 25 hours of use. At the very least, clean your printer every 50 to 100 hours of printing.
Frame
The frame of the printer is one area that some enthusiasts neglect. That is, the frame isn’t something you think about. Regardless, you should remove any accumulation of dust on your printer. If your delta printer has an enclosed top or bottom section, you can use a simple dry duster to wipe away any accumulation. I find a household-dusting wand or dusting glove works best for most surfaces. If your printer has a skeletal frame, like the Mini Kossel, use a vacuum to remove dust, or use canned air or an air compressor to blow off the dust from the components inside the frame.
![]() Caution If you use a duster, stay away from the electronics! Some dusters can generate electrostatic discharge (ESD), which may damage electronics.
Caution If you use a duster, stay away from the electronics! Some dusters can generate electrostatic discharge (ESD), which may damage electronics.
If your vacuum has a dusting brush, you can use it, but be careful using it around any exposed electronics or ports. While cleaning, you should also avoid removing the oil or grease from any of the axis movements. Remember, the goal is to remove accumulation of dust, not to sanitize it for food consumption.
Electronics
The electronics on your printer must also be free of dust and debris. If you allow it to accumulate on your electronics, you risk overheating because dust can act as insulation. If there is too much heat, the electronics can fail. Admittedly, it would take a lot of dust to become a danger to some components, but that is no excuse to ignore the danger altogether.
However, cleaning electronics is not as easy as cleaning the frame. Electronics are very sensitive and most dusting devices use static to attract dust. Thus, you should never use anything other than compressed air to blow off the dust.
I like to use a can of compressed air known as canned air. It emits a concentrated blast of air that is very effective at removing dust and small debris. However, you should be aware that some canned air suppliers use chemicals in their products. Those that contain chemicals are not generally harmful to electronics, but always check the label for applicability before using. Be sure to purchase canned air that is designed for electronics.
You should also remove any debris that falls into your electronics. Use a pair of ESD-safe tweezers to remove the larger pieces that cannot be removed by using canned or compressed air.
![]() Tip An electronics enclosure can help prevent dust build-up. If you choose to use an enclosure for your electronics, be sure to use one with sufficient documentation or a fan to circulate air over the electronics.
Tip An electronics enclosure can help prevent dust build-up. If you choose to use an enclosure for your electronics, be sure to use one with sufficient documentation or a fan to circulate air over the electronics.
Build Area
One area that can become littered with debris over time (as well as dust) is the build area. This is the area around your print bed. On some delta printers, the print bed is on top of the frame, so debris can fall into the frame but generally cannot accumulate enough to be a problem—but you should still clean it out. Debris can litter the area around delta printers with a print surface on top of an enclosed frame section, such as the SeeMeCNC Orion or Rostock Max v2. This can become a problem. As you use your printer, small pieces of filament are discarded from excess extrusion (before and after a print), which can fall into the build area. If you print with a raft, brim, skirt, or even ABS juice, it is possible for small fragments to break off and fall into the build area.
While none of these situations pose an immediate threat to your printer, you should take the time to periodically clean out the build area. I like to vacuum after each day I use the printer. If you use your printer only occasionally, you may not need to vacuum as often. I recommend cleaning the build area at least once every time you change or clean the print surface. That is, do it weekly.
The best way to do this is to use a small vacuum to remove the debris. I use a long, flat attachment that can reach under the build platform. Be sure to home your printer before turning it off so that you can vacuum underneath it.
![]() Caution Take care when vacuuming your build area. Some vacuums can cause ESD, which can damage electronics.
Caution Take care when vacuuming your build area. Some vacuums can cause ESD, which can damage electronics.
You should also take the time to vacuum the area around your printer and the floor underneath your desk or workbench. Small pieces of plastic and similar small particles can pose a threat to children and small animals.
Vertical Frame Members
Your delta printer’s vertical frame members host the axis mechanisms. As you saw in Chapter 2, this can be a set of roller carriages or similar rollers that travel up and down using a channel in the frame. Other mechanisms include linear rails or smooth rods.
![]() Tip If you have an older delta printer design that uses smooth rods, see Chapter 10 in my book Maintaining and Troubleshooting Your 3D Printer (Apress, 2014) for a complete description and process for cleaning and lubricating smooth rods.
Tip If you have an older delta printer design that uses smooth rods, see Chapter 10 in my book Maintaining and Troubleshooting Your 3D Printer (Apress, 2014) for a complete description and process for cleaning and lubricating smooth rods.
If your printer uses roller carriages, you need to keep the channels completely free of debris. Unlike bearings that have seals that can push dust away, channels and tracks generally do not have anything to push away debris. Given that the axes are mounted vertically, dust may not be a problem, but other obstructions can be.
That is, if a piece of plastic falls into the channel or track, it can cause the carriage to bounce over the obstacle, thereby shifting the axis momentarily. If the piece is large enough, it can cause the axis to stop—or worse, derail. Thus, you should keep your frame channels and tracks clean, checking them before each print and cleaning them whenever you find any debris.
However, debris isn’t the only hazard. I’ve found that delta printers with roller carriages can wear eventually, leaving a small amount of debris from the wheels in the channel. So far, this hasn’t proven to be a problem, but I recommend cleaning the channels or tracks periodically to remove this debris.
To clean the linear rail, position your axes at the top (by homing the printer), and then use a lint-free cloth dappled with a bit of light machine oil, as shown in Figure 7-6. Wipe the linear rail from top to bottom with the oiled cloth. Turn the cloth a few times to ensure that you wipe away all the dirt. Position your axes a bit lower to ensure that you clean the top part of the linear rail.

Figure 7-6. Oiled cloth for cleaning linear rails
Be sure to not use too much oil on the cloth, as this will make the situation worse. You only need a small amount of oil to clean the linear rail. You will see how to properly lubricate the linear rail carriage in the next section.
In summary, you should clean your vertical frame members every 50 hours of printing, or sooner if you notice dust and dirt buildup in the channels, tracks, or linear rails.
All delta printers have metal and other parts that need lubrication. Some are designed to use light oil, and others are constructed so that they contain some form of lubrication. For example, linear rails require light oil, some bearings without seals require light oil, and sealed bearings have lubrication inside the seals.
If your printer uses tracks or grooved channels, the wheels or rollers that ride in them may need lubrication. If sealed bearings are used, you may not need to lubricate at all. It is best to check your documentation to make sure.
Linear rails are one form of axis mechanism that needs special mention. Some people believe the linear rails do not need lubrication. This is misleading. While it is true you do not need to oil the linear rail other than cleaning it with a lightly oiled cloth, the carriages need lubrication. Some people use grease and pack it into the carriage, but I prefer light machine oil added very judiciously.
I like to use small paint dabbers (also called micro dabbers), which you can get from most automotive supply stores. These dabbers have a short wand, tipped with a small, round brush or bristles. I like to use the ones from Automotive Touchup (automotivetouchup.com/store/accessories/micro_dabbers.aspx), but any that are designed for small paint application work well. Figure 7-7 shows an example of these dabbers.

Figure 7-7. Micro dabbers
To lubricate the linear rails, first clean them with an oiled cloth, as described in the previous section. Then use the paint dabber to absorb some of the same light machine oil. Place the dabber into the carriage mechanism and slowly move the carriage while holding the dabber in place. Figure 7-8 shows the position of the dabber on a typical linear rail.

Figure 7-8. Lubricating a linear rail
You may want to pause every 1 or 2 centimeters to reapply the oil, but don’t use too much. Repeat this for each side of the carriage and each axis. If you see oil running or pooling, you’ve used too much. If this happens, just use a clean, dry, lint-free cloth to wipe away the excess oil.
If you do not want to use a dabber or do not have one, you can apply light machine oil with an oil dispenser that has a long tip. Bottles of 3-IN-ONE lubricant are available with long applicator tubes. You can use this, but be careful to apply only a small drop at a time. Be sure to wipe away the excess if you apply too much oil. Remember, you just want to keep the carriage lightly oiled. It does not need to be bathed in oil. That would be a mess.
There is one other possible area where you may need lubrication. Delta printers use belts, cables, and sometimes chains with one or more idler pulleys in the axis mechanism. These idler pulleys may need lubrication. If your idler pulley requires lubrication (check your documentation), I recommend cleaning the idler pulley and reapplying the grease or oil at the same interval you clean them, every 100 hours.
Replacing Worn Parts
You should replace any worn part when you discover the problem. As I discussed in an earlier section, periodic inspections can help you find parts that are worn. Whenever you discover a worn part, you should replace it as soon as you can. Continuing to use your printer with worn parts can risk problems with print quality. Some of the most common wear parts include the following:
- Print surface treatments
- Fans
- Belts
- Bearings
Of course, print surface treatments wear most of these things. I have already discussed the specifics of inspecting and replacing the print surface. Recall that the print surface treatment (blue painter’s tape, glue stick, or Kapton tape) should be replaced any time you see breaks or damage (like those caused by removing parts). You should also replace or reapply the print surface treatment when you begin to see more lifting than normal.
![]() Tip Lifting may also be caused by incorrect Z-height or environmental factors; it may not necessarily be related to the print surface treatment. Some people replace the print surface treatment as soon as they see any lift. If you replace the treatment and the lifting issue doesn’t get any better, check the Z-height.
Tip Lifting may also be caused by incorrect Z-height or environmental factors; it may not necessarily be related to the print surface treatment. Some people replace the print surface treatment as soon as they see any lift. If you replace the treatment and the lifting issue doesn’t get any better, check the Z-height.
Fans are one of my pet peeves. I’ve had numerous electronics projects and a good number of manufactured gear (some very expensive) fail because a small, insignificant fan stopped working. Fans typically broadcast potential trouble in the form of slow startup or excessive noises, such as high-pitched squeals or rattling. When you encounter these symptoms, replace the fan as soon as you can. Fortunately, most delta printer fans are used in only three areas: the hot end, part cooling, and the electronics. Thus, they are easy to get to and normally easy to replace.
Belts are also wear items that may need replacing, but they wear after many hours of printing. Indeed, I have printers with hundreds of hours of printing and the belts look like new. Some of my Cartesian printers seem to need the belts replaced every 500 hours.
However, the wear isn’t normally from friction (but can be if your drive gear is misaligned), but rather because belts can stretch—eventually fouling the mating of the teeth and the drive gear. In rare cases, belts can lose teeth or break. However, these are very unlikely events. In fact, unless you use your printer for hundreds to thousands of hours, you may never encounter a problem with worn belts. However, I have seen it happen at least once.
Bearings wear down as well, but like belts, they are unlikely to need replacing. However, when bearings wear, they can start making noises (from lack of lubrication), have excessive play, or even bind or break apart. These events are even less likely than worn belts; but again, if you use your printer a lot or if you fail to keep the bearings lubricated (or they fail from a manufacturing defect), they can fail. Check the bearings at least every 100 hours to ensure that they are in good order.
Now that you know some of the maintenance tasks that you should perform regularly, and before I describe the common corrective tasks, I want to discuss the spare parts that you should have on hand for things that wear or break.
Gather Spare Parts
Having a store of spare parts is key to keeping your printer running in the long term. Indeed, having spare parts on hand means you won’t suffer extended downtime should a part wear or fail.
Sadly, some vendors do not mention spare parts at all. That is unfortunate because there are a small number of spares you may want to have on hand if you plan to use your printer for many hundreds of hours. Fortunately, some vendors offer spare parts for sale. Two such examples are SeeMeCNC and TriDPrinting.
SeeMeCNC (http://seemecnc.com/collections/parts-accesories) offers a long list of spare parts that you can buy, including fans, belts, frame extrusions, and extruder parts—everything you need to keep your printer in top shape. In fact, they also offer parts for repairing the roller carriages, which is a wear item. (As you will see in the next section, there are must-have spares to keep on hand.) SeeMeCNC even has those dastardly fans that fail far too often. Pick up a couple the next time you visit the site.
TriDPrinting (tridprinting.com/BOM/Kossel-Mini/) is actually a Mini Kossel (and other designs) parts vendor. They offer a complete list of replacement parts, such as the printed parts, wiring, and more.
Don’t assume that just because your vendor doesn’t offer spares that you will never need to repair your printer. Even if you print only a few hours a week, you will eventually need a spare part. A lot depends on how well the components in your printer were made, how often you perform the required preventive maintenance, and whether events occur that can damage a component.
I suggest certain spares in the following sections. The lists are based on my experiences with a wide variety of printers. The lists for your specific printer may vary from what is presented here. However, you should be able to use the lists to construct your own spares inventory.
But take care to think through what you need. Taken to the extreme, you could end up with enough parts to build a second printer.6 Of course, once a part has failed, I tend to keep a second one on hand—just in case it fails again.
![]() Tip I suggest setting a budget for buying spares. Sometimes a spare part may be too expensive to keep on hand. For example, the electronics board is one of the more expensive parts and it (fortunately) rarely fails. On the other hand, if you rely on your printer for your business, you may want to have one on hand so that you don’t encounter significant downtime.
Tip I suggest setting a budget for buying spares. Sometimes a spare part may be too expensive to keep on hand. For example, the electronics board is one of the more expensive parts and it (fortunately) rarely fails. On the other hand, if you rely on your printer for your business, you may want to have one on hand so that you don’t encounter significant downtime.
Recommended List of Spares
In this section, I present a set of spares you should consider having on hand. If you have the budget to buy a complete set of spares, you should do so. However, if you are budget conscious, you may want to consider finding a source for the spares and saving that information so that when you do need the spares, you can get them quickly. On the other hand, if you are using your printer for a business or cannot afford the downtime to wait for a spare, you should consider investing in a set of spares as soon as your budget permits.
Printed Parts
Delta printers generally do not wear or break their printed parts unlike some early Cartesian designs. However, there are some parts that are known to fail occasionally. The following lists the printable spare parts that you should keep on hand. This list is based on the Mini Kossel RepRap delta printer, but other RepRap variants are similar. Take some time to examine your printer and locate any similar part to determine whether you can print it or must buy it from your vendor. (If your printer does not use printed parts, you may not need any of these.)
- Endstop holders: Endstop holders can take some abuse. Most are rather flimsy, which doesn’t help. If your printer uses the same holder for all axes, just print one; otherwise, print a set.
- Belt clamps: Some older designs use belt clamps that can slip. The natural treatment is to tighten them down, but this act has a tendency to damage the clamps. If you have had to tighten your belt clamps more than once, I recommend that you print an extra set or look for an improved version to replace the existing clamps.
- Other: I would print a spare of any part that breaks. That is, if a part breaks, print two new ones so that you have a spare.
The following is a list of the spares that you should consider buying if you want to keep your printer running over the long term. Once again, these spares may not apply to all delta printers; you should buy those parts that do apply to your printer.
- Fans: As mentioned, fans can wear out surprisingly early with little warning. Unless your printer is built with exceptionally high-quality fans, you will eventually need a new one.
- Belts: Belts are long-wear items. I recommend buying a new set once you have had to adjust them a couple of times since the initial calibration. That is, if you were able to print for 100 or more hours without having to adjust the belts, and then suddenly you had to adjust them, you should obtain a spare. Replace the belt once it begins to need adjustment every few prints.
- Rollers or roller covers for roller carriages: These are long-wear items, but when they begin to fail, they may fail quickly. Get a complete set if your budget allows. Replacing them can take time and require recalibrating the towers, so be prepared for an extended service time.
- Nozzle: The hot-end nozzle is an item that many people have as a spare so that they can change it when it gets clogged. As you will see in the next section, you can clean even the most stubborn clogs. Regardless, having at least one spare nozzle will help you keep your printer running should you encounter a clog that cannot be cleared with the cold pull method.
- Stepper motor: This is another long-wear item. If you want a complete spare parts supply, I recommend having one of these on hand. You should not need a complete set unless your printer uses different sizes for each axis (not likely, but I have seen it at least once).
- Stepper driver: The stepper driver boards are susceptible to ESD and have been known to fail on occasion. I’ve had three fail over several hundred hours among different printers. If you have a RepRap delta printer or a printer that has separate stepper drivers, I recommend having at least one spare.
- Endstop: Endstops are simple switches and generally have a very long life. However, if the endstop is subjected to axis crashes (where the axis runs into the endstop violently), you could damage the endstop. Given its role, I recommend having at least one spare.
- Electronics board: Commercial- and professional-grade printers generally have proprietary electronics boards that are usually very expensive. If your printer uses one of the more popular general options (RAMPS, Rambo, etc.), and you must rely on your printer, you should have a spare to avoid a lengthy downtime.
If you cannot buy the part from your vendor directly, you want to ensure that you are getting the correct part for your printer. If you have any concern, be sure to compare the new spare part to the matching existing part. In those cases where the new spare is somewhat different (e.g., not the same supplier), I install the new part and test it, and then put the original part back in when I confirm the replacement is compatible.
Another factor is the cost of the spare part. Some spare parts can be expensive. To decide if you should buy one, you need to balance the cost of the spare with the availability and time to get the part.
Now that I have discussed the spare parts needed for long-term use, in the next section I discuss some common and not-so-common repair tasks.
Corrective Tasks
This section describes a number of corrective maintenance tasks (repairs) that you may need to do to keep your printer in good working order. I have tried to keep this discussion general, but some of the examples may feature specific printers or components. However, you should be able to draw parallels and knowledge from the examples should you need to fix a similar problem.
![]() Caution When repairing your printer, be sure to turn it off and disconnect the power and the USB cable. Unless you are diagnosing a problem, you should not need power to repair your printer.
Caution When repairing your printer, be sure to turn it off and disconnect the power and the USB cable. Unless you are diagnosing a problem, you should not need power to repair your printer.
Also, I recommend removing any access panels, enclosure panels, hoods, fans, and so forth, so that you can access the area for the repair. It is also a good idea to remove the build plate if it can be detached—especially if it is made of glass or other materials that are easily scratched or broken. It is all too easy to accidentally drop a sharp tool or part onto the print surface. LCD panels are another fragile item that should be removed if possible. Most panels have a clear plastic or glass cover, which can scratch easily.7 Even if you aren’t concerned about the print surface treatment, the build plate itself may be fragile.
As I mentioned in Chapter 4, it is also a good idea to gather the tools you need and place them nearby. If your printer is positioned where access to the repair area requires you to lean over the printer or reach behind it, move the printer to a place where you can access the area more easily. I use a small vintage typewriter stand with a piece of plywood on top as a workstand. Not only does this allow me to move the printer around, it also means I can push the stand out of the way if I don’t finish the repair in one sitting.
Corrective tasks—hence, repairs—can take many forms: removing obstructions from the axis movement, cleaning out a hot end, replacing a worn or broken part, or replacing consumables like print surfaces and filters. I discuss some common corrective tasks (repairs) in the following sections.
One of the most frustrating experiences I’ve encountered is a series of extrusion failures over a short period of time. For example, not being able to complete a print without having an extrusion failure. I discussed the causes of this problem in an earlier chapter. Recall that most of these problems are caused by obstructions in some form: the filament cannot exit the nozzle, the filament tension is too high, or a foreign object has found its way into the hot end. In the last case, the object is larger than the opening in the nozzle, and hence clogs it from within.
If you encounter this problem but the cold pull method does not work, you may have to remove the nozzle and clean it out. There are several techniques for doing this. What I present here is the most reliable procedure, but it requires care to execute it safely.
You will need a pair of heat-resistant gloves, the proper tools to remove the nozzle, metal tongs or pliers to hold the nozzle, canned air, a butane torch, a metal trivet or heat-safe area to place the heated nozzle during the procedure, and two drill bits—one that is the exact size of your nozzle opening and another that is the same size as the filament chamber (1.75mm or 3mm).
I recommend purchasing a set of small drills like those shown in Figure 7-9. You should buy several of each size because they are very easy to break.

Figure 7-9. Micro drills
These kits often come in several sizes. If you have multiple printers with differing nozzle sizes, or want to try different nozzle sizes, get a variety pack. I use drills in the 0.3mm–0.5mm range to match the nozzles I use. On the other hand, if you only have one nozzle size (or printer), get several of the correct size. The best are the ones packaged in a protective case with a large plastic ring to aid in identifying the size and holding the drill.
If you do not have any heat-resistant gloves, a good option is the Tuff Glove, which is found in most kitchen supplies stores. They come in a variety of colors and prove handy when you need to pick up or move a hot piece of metal. They can resist temperatures up to 500 degrees Fahrenheit (260 degrees Celsius) for short periods. Figure 7-10 shows my Tuff Glove.
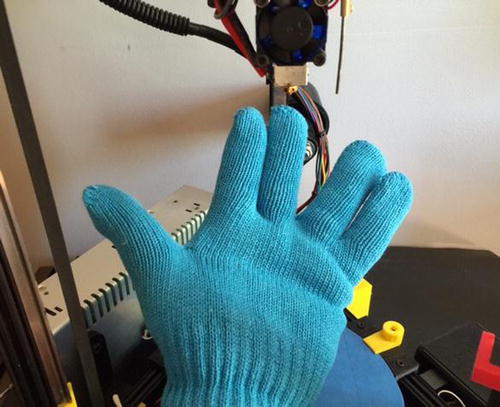
Figure 7-10. Heat-resistant glove8
![]() Caution Never, ever use a powered drill to drive the drill bit. You are only using the bit to grab the plastic, not change the internal structure of the nozzle. You only want to grip plastic; do not remove any metal. You should practice on a nozzle that you have considered a lost cause before trying it on your only nozzle.
Caution Never, ever use a powered drill to drive the drill bit. You are only using the bit to grab the plastic, not change the internal structure of the nozzle. You only want to grip plastic; do not remove any metal. You should practice on a nozzle that you have considered a lost cause before trying it on your only nozzle.
The procedure is as follows. I explain each step in more detail afterward.
- Remove the nozzle.
- Place the torch on a workbench in an area where there are no combustible liquids or flammable material.
- Pick up the nozzle with a pair of metal tongs or pliers.
- Turn on the torch and turn it up to about a medium setting.
- Place the nozzle in the flame. Do not heat the nozzle more than a few seconds. You do not want to use so high a flame that you burn the plastic.
- After 10 to 20 seconds, remove the nozzle from the heat and use the larger drill bit to pull out melted plastic. Let the drill bit and nozzle cool.
- Reheat the nozzle and repeat step 6 until you cannot get any more plastic.
- Let the nozzle cool, and then use the small drill bit to clear the nozzle opening.
- Reheat the nozzle and use canned air to blow out any remaining filament.
- If you printed with ABS, soak the nozzle in acetone to remove any traces of filament.
You may need to disconnect the heater element, temperature sensor, wiring, and so forth, to remove the nozzle. Some hot ends do not have a removable nozzle and may require removal of the hot end. Others may require you to disassemble the hot end to get to the core since the nozzle and core are all one piece. Consult your hot end’s documentation for the precise procedure for removing the nozzle.
When you place the nozzle in the flame, move it back and forth to heat the entire nozzle. I like to grip the nozzle by the bottom and let the flame flow over the body. The filament melts quickly. Some filament may ooze from the opening. This is normal. Figure 7-11 shows how to position the nozzle.
Figure 7-11. Place the nozzle in the flame
![]() Caution You must wear protective gloves while using the torch. Proper eye protection is also prudent, as is having a fire extinguisher nearby in case something goes awry.
Caution You must wear protective gloves while using the torch. Proper eye protection is also prudent, as is having a fire extinguisher nearby in case something goes awry.
Next, use a drill bit that is the same size as the chamber and press it into the melted filament, and then pull it out. Don’t use a drill or electric driver for this step. This mimics the cold pull procedure, but in this case you’re using the cold drill bit to help grip the plastic and remove it. Figure 7-12 shows the proper size and position of the drill bit. You want to use the drill bit with one hand while holding the heated nozzle with the tongs or pliers.

Figure 7-12. Proper size and location of drill bit for removing plastic
You can also use a piece of higher-temperature filament such as nylon or similar to press into the heated nozzle and pull out quickly. You can use this technique as an alternative to using a drill bit, but it may not remove all the plastic. Another alternative is to turn the nozzle upside down and let the heated plastic drip from the nozzle. Be sure to direct the flame away from the plastic so that it doesn’t burn on exit.
![]() Caution Be very careful when handling the heated nozzle. The nozzle—as well as the tool you use to hold it in the flame—gets very hot. Also, never use any form of electric driver or drill in this step. Use your hands to manipulate the drill bit.
Caution Be very careful when handling the heated nozzle. The nozzle—as well as the tool you use to hold it in the flame—gets very hot. Also, never use any form of electric driver or drill in this step. Use your hands to manipulate the drill bit.
Remember, you hold the heated nozzle with one hand while your other hand manipulates the drill bit. Once you have removed some plastic, place the nozzle on a safe surface (e.g., a metal trivet), allow the drill bit to cool, and then remove the plastic from the drill bit. Reheat the nozzle and try removing more plastic. Do this a few times until no more plastic can be removed.
![]() Caution The goal is to remove plastic, not reshape the interior of the nozzle. Thus, you should apply only enough pressure to grasp the filament. If you see metal shavings, you’ve gone too far.
Caution The goal is to remove plastic, not reshape the interior of the nozzle. Thus, you should apply only enough pressure to grasp the filament. If you see metal shavings, you’ve gone too far.
Once you can no longer get any plastic from inside the chamber, use the small drill bit to gently drill out any plastic from the opening. This step requires a bit of patience and the proper drill size. Be sure to get the properly sized micro drill that matches your nozzle. Figure 7-13 shows the properly sized drill bit and orientation for cleaning the opening.

Figure 7-13. Proper size and location of drill bit for cleaning opening
Don’t apply a lot of pressure here. The drill bit is very small and can break easily. You want to drill out the plastic, not reshape the opening (although you can do that if the opening has been damaged from a crash into the build plate). If this step makes you a bit nervous, that’s OK. In that case, try using a drill bit that is slightly smaller than the opening to remove the plastic, and then switch to the correct size once the opening is clear.
At this point, the foreign object should be removed. You should also be able to hold the nozzle up to the light and see a pinpoint of light coming through the opening. If you do not, repeat both drill bit steps until you see light through the opening.
Return the nozzle to the heat again. Let it heat up for about 20 to 30 seconds, and then position the nozzle so that the opening is facing you and the chamber is facing the workbench (cement or metal floor, metal trash can, etc.) or some area that is safe for melted plastic. Use canned air to blow through the opening. Direct the air through the opening (reverse of the extrusion direction). This will remove the larger of the remaining bits of plastic, such as shavings from the drill bit.
At this point, your nozzle should be completely unclogged. You should clean the nozzle thoroughly with a wire brush before reinstalling it.
If you print with ABS, and ABS was indeed the filament used last, you should consider soaking the nozzle in acetone for about an hour. This will completely remove any stray bits of plastic that the previous steps missed. Figure 7-14 demonstrates this step. Notice there is enough acetone to completely submerge the nozzle. Also, the acetone is placed in a glass jar. Any acetone-safe container will work.

Figure 7-14. Soaking the nozzle in acetone (ABS only)
Now that wasn’t so bad, was it? As you can see, this procedure is not for the faint of heart. Indeed, if you have any concerns about performing the procedure, you can always take the easier route and simply replace the nozzle. Replacement nozzles are generally less expensive than an entire hot end (if it is a separate part, like the J-head or E3D hot ends), but they are not cheap by any measure.
I recommend buying a replacement nozzle first and then trying this procedure on the original. If you dig too deeply with the drill bit or experience some similar mishap, you will gain practice without so much risk.
![]() Tip Until you perfect the procedure, don’t try this procedure on your only nozzle!
Tip Until you perfect the procedure, don’t try this procedure on your only nozzle!
Recall that the belts used in your printer are designed to have teeth or grooves that allow the drive gear to move the belt consistently. If the belt is worn or there are teeth missing, the belt can slip and cause problems with axis shift. If you have monitored your printer over time and notice that the belts become worn (or worse, break), you should replace the belts.
Some printers use a length of belt with the ends secured to the carriage; whereas others use continuous or closed belts (they have no break). Open belts are much more common but some Mini Kossel printer kits come with closed belts. Check your printer’s manual or the vendor’s web site for the specifics on replacing your belts.
Belts are typically a long-wear item. Depending on how much you use your printer, you may never have to replace the belts. You may have to adjust the tension periodically, but replacing belts is normally for those who use their printers for hundreds of hours per month. I include the procedures in this chapter for completeness.
Open belts are easier to fix. I like to clamp the carriage in position so that the effector isn’t allowed to flop around. That is, once you disconnect the belt, the carriage drops to the bottom of the frame. It is best to secure the carriage in position by placing a small clamp under it. Don’t grip the frame tightly. Use only enough tension to hold the carriage in place.
Once the carriage is secured, you need only to loosen the belt tensioner, disconnect the belt at both ends, and then pull it out. To install the new belt, thread it over the drive gear and idler, and then attach the ends with the existing clamps. You should pull the belt as tight as possible before securing the second end. If you find there is too much slack in the belt—your tension adjustment is at its maximum position—you should remove one end and pull it tighter before securing it.
Replacing Closed Belts
Closed belts can be a bit more difficult to replace. This is because the belt must be removed from the axis mechanism by partially (or completely) disassembling the axis. Depending on the delta printer design, you may not need to do this. For example, Mini Kossel printers with closed belts have enough room to remove the belt from the drive pulley, but you must remove the idler pulley to remove the belt completely.
If the axis mechanism can be disassembled without removing it from the printer, things aren’t so difficult; but if you must remove the axis mechanism, be prepared for a potentially lengthy repair. I recommend taking your time and making notes (assuming your documentation doesn’t cover this procedure) so that you can reassemble the mechanism properly. If you must disconnect the axis or frame members, you will have to recalibrate the towers (as described in Chapter 5).
Delta Arms and Joints
The delta arms—or more precisely, the delta joints—are another area that can wear on a delta printer. If your delta printer uses typical metal rod ends, these rod ends can wear over time and eventually become loose. This can lead to backlash, or more commonly, the delta arm blues. It can be treated with tension mechanisms such as springs or rubber and elastic bands.
One telltale sign of wear is a buildup of debris on the metal parts of the joint. For example, the swivel part of the rod end will accumulate dirt and dust. This can form a dark sludge-like residue on the perimeter, which can occur more frequently if you have been lubricating them more than necessary. Another common symptom is irregularities or artifacts appearing on the surface of your prints. If bad enough, you could see small layer inconsistencies.
You may need to tighten the delta joint bolts on newly assembled printers. Thus, you should check them for the first few prints to ensure that they are not working loose.
If you find that the delta arm joints are getting worn, you should replace them to ensure good print quality. Be sure to measure your existing delta rods to ensure that you get the same length rods. Replacing your delta arms with slightly smaller or larger arms will require recalibration, or at a minimum, firmware changes to compensate.
Fortunately, delta joint wear occurs infrequently and can vary from one solution to another. I’ve found that the Traxxas rod ends tend to need replacing after about 250 to 500 hours of printing. Unless you do a lot of printing, you may not encounter this problem; and even if you do, it is after many hours of printing. Thus, noticing wear is likely to be a result of print quality rather than measuring or noticing any play in the arms.
That said, I recommend checking the play in your delta joints after every 50 hours of printing.
Bearings, Bushings, and Rods
Bearings and bushings are typically made of metal and can withstand many hours of use. There are many forms of bearings and bushings. Most printers use several types. Bearings are typically designed for use on a shaft and have internal parts designed to rotate freely. Bushings are typically a solid part designed to slide over a rod or similar uniform rail. Figure 7-15 shows a number of the bearings and bushings that you may find in your printer. There are also many types of plastic bearings and bushings with similar designs and applications.

Figure 7-15. Bearings and bushings
Each of these bearings has a standard size that equates to its number, including bore (inner diameter), outer diameter, and length (perpendicular to the shaft or bore). For round bearings, the width is the outer diameter; and for linear bearings and bushings, it is the length. Table 7-3 describes each of the bearings shown. Note that Item F is an oil-infused brass bushing.
Table 7-3. Some Common Bearings Found in Delta Printers

![]() Note Some manufacturers specify “width” as the outer diameter and “thickness” for length.
Note Some manufacturers specify “width” as the outer diameter and “thickness” for length.
The bearings in your printer are typically of high quality and more than capable of handling the task. Unless you encounter a defective bearing or the bearing is subjected to lack of lubrication, you should not need to replace bearings very often. However, if your printer starts making squeaks, grinding, or other metal-on-metal noises, you may have a bad bearing.
Replacing the bearings or bushings can take time. Most bearings are located in the belt idler pulley; roller carriages typically use bearings in the rollers; and some extruders use a bearing in the idler door. Also, most delta printers use sealed bearings that do not need lubrication. Bearing failure is rare but it can happen. Always pay attention to any strange sounds that your printer makes and try to isolate the noise. If it is coming from any of the bearings, replace them as soon as you can.
There is a device designed to wrap around the filament to remove dust and debris from it. These cleaners (sometimes incorrectly called filters) are made from a variety of materials. After filament has passed through the foam, it can be damaged by friction. However, it is more likely that if the filament is dusty, the foam will become dirty, and since there is relatively little surface area, it may require frequent replacement. Figure 7-16 shows an example of a filament cleaner that needs replacing. The foam in the cleaner was used for more than 30 hours.

Figure 7-16. Dirty filament cleaner foam
This filament cleaner is made from a kitchen sponge and placed inside a printed cylinder casing (thingiverse.com/thing:16483). The sponge is cut half way through longitudinally, and then wrapped around the filament and inserted into the casing. I like this version because it fits just about any printer.
Notice in Figure 7-16 that there is a bit of debris inside the foam. This is mostly trapped dust and small particles. Had I not used the cleaner, all of this would have been sent through my hot end. Any one of the small particles in the foam could have easily caused an extrusion failure. This is clear evidence that filament cleaners really do work. If you don’t have one, I suggest that you make it a top priority to add one as soon as you can print it.
If your printer has a filament cleaner, I recommend checking it after every 10 hours of printing, and replacing it every time you change the filament, or every 25 hours, whichever comes first.
Firmware Updates
There is one other corrective task you may want to consider—upgrading the firmware. Sometimes printer manufacturers release a new version of the firmware that has fixes or enhancements for the printing process or quality. However, most vendors do not release new versions very often. Firmware changes were common a few years ago, but not so much now.
It is generally a good idea to keep your firmware current, but I would not do it unless I encountered a need for the changes. Check your vendor’s support web site for any changes to the firmware, and read the change notes carefully before deciding to upgrade.
If you own a RepRap delta printer, the firmware is really up to you since it is very much a DIY affair. The same philosophy applies: don’t upgrade unless you find changes that you need. If you find that the latest variant of your firmware supports some nifty feature that you want, then upgrade; otherwise, wait. For example, if you want to add Z-probing or a new hot end or extruder, you will likely need to upgrade the firmware.
Summary
Keeping your delta printer running well requires some patience and discipline to perform some simple routine tasks. Whereas some tasks make sense and are quite clearly needed, like setting the Z-height or keeping the belts tight, other tasks—like tightening the frame—may seem mundane; and tasks like keeping the print bed clean and free from debris may not seem to have a lot of benefit. The periodic tasks that reduce the chance of failures and degradation of print quality may also seem mundane.
However, failure to do any of these tasks can have a cumulative effect on your printer, and you will eventually see some degradation of print quality. That is, if it doesn’t break first! Ultimately, you save a lot of time by keeping up with the needs of your printer through inspection and adjustment.
In this chapter, you saw the more common inspection tasks that help you determine when things need adjustment or repair. This chapter also covered preventive and corrective tasks associated with delta printers. Preventive tasks keep parts from wearing and eventually failing; these tasks include keeping the printer clean, and the metal parts lubricated and adjusted correctly. Corrective tasks are repairs to fix the printer when it fails.
The next chapter covers one of my favorite things to do with my delta printers: upgrading to improve usability and quality. I present a number of useful upgrades, as well as some must-have items.
_________________________
1Loosely equivalent is calibrating the towers, but this only needs to be done when something changes, like moving or upgrading the printer.
2Else you could earn your own PhD—piled higher and deeper.
3Which means you can always tell what they worked on last.
4But there’s nothing wrong with that. I do it occasionally when no one is watching.
5Sometimes as much as 40mm can be OK. It mostly depends on how smoothly the carriages move and how much work the stepper motors must do to move them.
6An event that seems to occur more often than you think. I’ve built another Mini Kossel from my set of spares and I think I have enough to build another. All I need are the frame members. Will the circle ever be broken?
7Can you guess how I know this?
8Rest in peace, Mr. Nimoy. May your Katra endure forever.