
During the entire book you have been executing the Maven command spring-boot:run and I haven’t covered it in too much detail, but when you execute it, you are actually executing the Spring Boot Maven plugin goals. These normally have a particular flow. They will compile your application (classes), execute the unit tests, and run your application taking the target/classes (where the compilation phase output all the compiled classes into) directory as the working directory.
This chapter discusses another Maven command that will allow you to create standalone applications or executable JARs. If you prefer, you can create WARs from your web application and run them using an external application container.
Before getting into the details, you need to set up the main project, which will help you understand the Spring Boot deployment better.
Setting Up the Spring Boot Journal App
You have been working with this application throughout the entire book, and you are going to get most of it from Chapter 9. Let’s get started.
Execute the following commands in a terminal window:
$ mkdir spring-boot-journal$ cd spring-boot-journal$ spring init -d=web,thymeleaf,data-jpa,data-rest,mysql,actuator,security,actuator-docs -g=com.apress.spring -a=spring-boot-journal --package-name=com.apress.spring -name=spring-boot-journal -x
As you can see, you are adding most of the dependencies that you already know. Listing 12-1 shows the resultant pom.xml.
Listing 12-1. pom.xml
<?xml version="1.0" encoding="UTF-8"?><project xmlns="http://maven.apache.org/POM/4.0.0" xmlns:xsi="http://www.w3.org/2001/XMLSchema-instance"xsi:schemaLocation="http://maven.apache.org/POM/4.0.0 http://maven.apache.org/xsd/maven-4.0.0.xsd"><modelVersion>4.0.0</modelVersion><groupId>com.apress.spring</groupId><artifactId>spring-boot-journal</artifactId><version>0.0.1-SNAPSHOT</version><packaging>jar</packaging><name>spring-boot-journal</name><description>Demo project for Spring Boot</description><parent><groupId>org.springframework.boot</groupId><artifactId>spring-boot-starter-parent</artifactId><version>1.3.2.RELEASE</version><relativePath /> <!-- lookup parent from repository --></parent><properties><project.build.sourceEncoding>UTF-8</project.build.sourceEncoding><java.version>1.8</java.version></properties><dependencies><dependency><groupId>org.springframework.boot</groupId><artifactId>spring-boot-starter-actuator</artifactId></dependency><dependency><groupId>org.springframework.boot</groupId><artifactId>spring-boot-actuator-docs</artifactId></dependency><dependency><groupId>org.springframework.boot</groupId><artifactId>spring-boot-starter-data-jpa</artifactId></dependency><dependency><groupId>org.springframework.boot</groupId><artifactId>spring-boot-starter-data-rest</artifactId></dependency><dependency><groupId>org.springframework.boot</groupId><artifactId>spring-boot-starter-security</artifactId></dependency><dependency><groupId>org.springframework.boot</groupId><artifactId>spring-boot-starter-thymeleaf</artifactId></dependency><dependency><groupId>org.springframework.boot</groupId><artifactId>spring-boot-starter-web</artifactId></dependency><dependency><groupId>org.springframework.security</groupId><artifactId>spring-security-taglibs</artifactId></dependency><dependency><groupId>org.thymeleaf.extras</groupId><artifactId>thymeleaf-extras-springsecurity4</artifactId></dependency><dependency><groupId>org.springframework.hateoas</groupId><artifactId>spring-hateoas</artifactId></dependency><dependency><groupId>mysql</groupId><artifactId>mysql-connector-java</artifactId></dependency><dependency><groupId>org.springframework.boot</groupId><artifactId>spring-boot-starter-test</artifactId><scope>test</scope></dependency></dependencies><build><plugins><plugin><groupId>org.springframework.boot</groupId><artifactId>spring-boot-maven-plugin</artifactId></plugin></plugins></build></project>
Listing 12-1 shows the pom.xml that you are going to use. Review in detail this pom.xml and notice that you are adding different dependencies from various chapters. You can copy some of the files from Chapter 9 (from the spring-boot-journal-secure project), because the application will be secure. Even so, I didn’t explain that you can use SSL and connect through HTTPS. Now is a perfect time to create it, so when you deploy it, SSL will be integrated.
Take a look at the final directory structure of this version of the journal app, shown in Figure 12-1.

Figure 12-1. Journal app directory structure
Figure 12-1 shows the directory structure of the journal app, but which classes will be the same as the ones in Chapter 9? Table 12-1 describes the packages and includes some notes. I don’t want to repeat all the code here, just the classes that change and the new additions.
Table 12-1. Reusable Code Summary
Package/Directory | Class/File | Notes |
|---|---|---|
com.apress.spring | SpringBootJournalApplication | No changes |
com.apress.spring.domain | JournalEntry | No changes |
com.apress.spring.repository | JournalRepository | No changes |
com.apress.spring.utils | JsonDateDeserializer JsonDateSerializer | No changes |
com.apress.spring.web | JournalController | No changes |
com.apress.spring.config | InMemorySecurityConfig SecurityConfig | There is a change in both classes |
src/main/resources/ | application.properties | There are some new properties |
src/main/resources/ | keystore.jks | This is a new file that you will generate |
src/main/resources/static src/main/resources/template | css/* index.html login.html | No changes |
Note
You can find the book’s source code on the Apress site. Or you can go to my GitHub account at https://github.com/felipeg48/pro-spring-boot to get the latest code.
Let’s start by checking out all the files that will be modified and the new keystore.jks that you will create to use SSL. Listings 12-2 and 12-3 show InMemorySecurityand SecurityConfig, respectively.
Listing 12-2. src/main/java/com/apress/spring/config/InMemorySecurityConfig.java
package com.apress.spring.config;import org.springframework.beans.factory.annotation.Autowired;import org.springframework.context.annotation.Configuration;import org.springframework.security.config.annotation.authentication.builders.AuthenticationManagerBuilder;import org.springframework.security.config.annotation.authentication.configuration.EnableGlobalAuthentication;@Configuration@EnableGlobalAuthenticationpublic class InMemorySecurityConfig {@Autowiredpublic void configureGlobal(AuthenticationManagerBuilder auth) throws Exception {auth.inMemoryAuthentication().withUser("spring").password("boot").roles("USER").and().withUser("admin").password("password").roles("USER", "ADMIN");}}
Listing 12-2 shows the InMemorySecurityConfig class, which is very similar to Chapter 9, but now you are changing the username and password and of course the users are going to be in-memory. Of course you can change this to point to a database. (You can do this as an exercise.)
Listing 12-3. src/main/java/com/apress/spring/config/SecurityConfig.java
package com.apress.spring.config;import org.springframework.context.annotation.Configuration;import org.springframework.security.config.annotation.web.builders.HttpSecurity;import org.springframework.security.config.annotation.web.configuration.WebSecurityConfigurerAdapter;import org.springframework.web.servlet.config.annotation.ViewControllerRegistry;import org.springframework.web.servlet.config.annotation.WebMvcConfigurerAdapter;@Configurationpublic class SecurityConfig extends WebSecurityConfigurerAdapter{@Overrideprotected void configure(HttpSecurity http) throws Exception {http.authorizeRequests().antMatchers("/**").authenticated().and().formLogin().loginPage("/login").permitAll().and().logout().permitAll().and().csrf().disable();}@Configurationstatic protected class LoginController extends WebMvcConfigurerAdapter{@Overridepublic void addViewControllers(ViewControllerRegistry registry) {registry.addViewController("/login").setViewName("login");}}}
Listing 12-3 shows the SecurityConfig.java, which is where you add the HTTP security. As you can see in detail, you are securing everything now and providing a login page and a way to log out. You are also adding a LoginController class that configures just the controller (from spring-security /login) and setting its view (templates/login.html). Also notice that you are disabling the CORS (Cross-Origin Http Request) by using the csrf().disable(). You already know about Spring Security and the entire configuration, so I omit some of the details and continue with the other files.
Next, let’s see the application.properties, shown in Listing 12-4.
Listing 12-4. src/main/resources/applications.properties
spring.datasource.url = jdbc:mysql://localhost:3306/journalspring.datasource.username = springbootspring.datasource.password = springbootspring.datasource.testWhileIdle = truespring.datasource.validationQuery = SELECT 1spring.jpa.show-sql = truespring.jpa.hibernate.ddl-auto = create-dropspring.jpa.hibernate.naming-strategy = org.hibernate.cfg.ImprovedNamingStrategyspring.jpa.properties.hibernate.dialect = org.hibernate.dialect.MySQL5Dialectspring.data.rest.basePath=/apimanagement.context-path=/monitorendpoints.shutdown.enabled=trueserver.port=8443server.ssl.key-store=classpath:keystore.jksserver.ssl.key-store-password=tomcatserver.ssl.key-password=tomcat
Listing 12-4 shows the new application.properties. As you can see, it contains all the information from previous chapters, including the actuator management.context-path and the enabling of the shutdown endpoint. It also includes the new server properties with a different username and password. As you can see, it uses the server.ssl.<properties> to enable a secure socket layer, by providing the keystore, the keystore’s password, and the key password. Also notice that the server port is 8443, so now you will connect to the https://localhost:8443 URL.
Creating the SSL Self-Signed Keystore
In order to get the SSL working in your application, you need to create a self-signed keystore file. If you already have a CA (Certificate Authority), you can import it as your keystore file.
This example assumes that you will do the self-certificate keystore, so open a terminal window (go to your project’s root) and execute the following commands:
$ keytool -genkey -alias tomcat -keyalg RSA -keystore src/main/resources/keystore.jksEnter keystore password: tomcatRe-enter new password: tomcatWhat is your first and last name?[Unknown]: apress mediaWhat is the name of your organizational unit?[Unknown]: publishingWhat is the name of your organization?[Unknown]: apressWhat is the name of your City or Locality?[Unknown]: nyWhat is the name of your State or Province?[Unknown]: nyWhat is the two-letter country code for this unit?[Unknown]: usIs CN=apress media, OU=publishing, O=apress, L=ny, ST=ny, C=us correct?[no]: yesEnter key password for <tomcat>(RETURN if same as keystore password):
The keytool command comes with your Java distribution, so you should not have any issues. This command creates a keystore.jks and places it in src/main/resources directory. You can add any values for your common name, organizational unit, and so on, but keep in mind that you need to remember the passwords because they are needed in the application.properties file. In this example, the password for the keystore and the key is tomcat.
Testing SSL
All the other files remain the same, so it’s time to test the new SSL part. Remember that you need to have your MySQL server up and running. Then, you can run your application as usual:
$ ./mvnw spring-boot:runAfter you execute this command, you should have in your logs information about the Tomcat listening in port 8443. You can go to https://localhost:8443. Since this should be the first time you do this, you should see something similar (depending on your browser) to Figure 12-2.

Figure 12-2. Google Chrome’s version of https://localhost:8443
Figure 12-2 shows the result of going to the https://localhost:8443, and because there is a cert that cannot be authenticated, you will get that warning. So you can click Proceed to Localhost (depending of your browser) or add a Security exception so you are allowed to use this site. After that, you should see what’s shown in Figure 12-3.
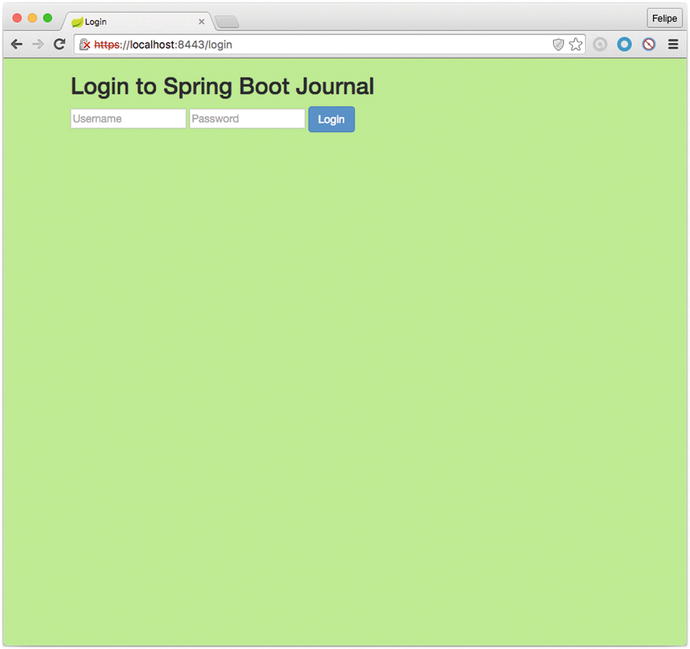
Figure 12-3. https://localhost:8443/login
Figure 12-3 shows the /login endpoint and this is because even the index page is secured (it was secured in Listing 12-3), so you need to provide the username and password. You can use the ones you set up in memory for example: spring as username and boot as password. After providing the credentials, you should be redirected to the index page. See Figure 12-4.

Figure 12-4. https://localhost:8443 after the /login page
Figure 12-4 shows the index page after you submit your credentials. Now you have a secured web application. Maybe you are wondering why I didn’t add this example in the security chapter. Well, right now it makes perfect sense to add it because you are going to start deploying your application and running it in standalone mode or as a service, and what you are looking for is to have your app secured.
Creating Executable JARs
Now that you have your journal app tested and ready, let’s create a standalone application. This means that it will be portable and you can ship it knowing that you still need a way to connect to a database. You can think about it as a desktop application that runs in your web browser and can be distributed to different users.
The Java Way
When you create a Java application and you want to run it, normally you need to know about the class that has the public static void main method to get executed. You would do something like this:
$ java -cp .;lib/3rdparty.jar com.sample.MyAppNormally you specify the classpath with the -cp option to get your dependencies (if needed) or if you package your application as a JAR file, you must provide a MANIFEST.MF where you need to declare the Main-Class declaration. (This declaration indicates which class within the JAR file is your application’s entry point.) You also must declare the Start-Class declaration, so you can do something like this:
$ java -cp .;lib/3rdparty.jar -jar myapp.jarYou can add the classpath for third-party libraries (if needed).
The Spring Boot Way
Spring Boot works the same way as Java (but simpler) when you want to create an executable application. It will identify which class has the public static void main method and it will generate everything that you need to create an executable app. Let’s see how it’s done.
To create the standalone and executable journal app, execute the following command:
$ ./mvnw packageThis command will create a target/spring-boot-journal-0.0.1-SNAPSHOT.jar file. And that’s it! That’s your executable application, an executable JAR. Now you can run it with the following:
$ java -jar target/spring-boot-journal-0.0.1-SNAPSHOT.jarYour journal application will start. This is awesome. Now you can ship your application to your users so they run it even without any third-party libraries. Wait, what? Remember that the journal app has some dependencies, yet in this command there is no -cp (classpath) option.
When you run the Maven package goal, it will package all the dependencies within the same JAR (normally called “Fat JAR”) and will create the MANIFEST.MF file that has all the information related to your app. It will also include the Main-Class and the Start-Class declarations set with the name of the main classes that will start up your application.
If you are curious about it, you can see the contents of the JAR file generated with the following:
$ jar tvf target/spring-boot-journal-0.0.1-SNAPSHOT.jar(The jar command is another tool that comes with the JDK installation.) This command prints out the JAR structure. You can see that there is a lib/ folder where all the dependencies are and some Spring Boot classes that are helpers to run your application . If you want to see the MANIFEST.MF file, you can extract and view it using the following commands:
$ jar xvf target/spring-boot-journal-0.0.1-SNAPSHOT.jar META-INF/MANIFEST.MF$ cat META-INF/MANIFES.MFManifest-Version: 1.0Implementation-Title: spring-boot-journalImplementation-Version: 0.0.1-SNAPSHOTArchiver-Version: Plexus ArchiverBuilt-By: felipegStart-Class: com.apress.spring.SpringBootJournalApplicationImplementation-Vendor-Id: com.apress.springSpring-Boot-Version: 1.3.2.RELEASECreated-By: Apache Maven 3.0.4Build-Jdk: 1.8.0_66Implementation-Vendor: Pivotal Software, Inc.Main-Class: org.springframework.boot.loader.JarLauncher
As you can see from the MANIFEST.MF file, the Start-Class declaration points to your Spring BootJournalApplication class and the Main-Class declaration points to the run helper JarLauncher from Spring Boot that will be in charge of bootstrapping your application.
Now you know how to create a Spring Boot standalone executable JAR.
Note
I know that sometimes you don’t want to run the tests when you are creating the executable JAR. You can execute $ ./mvnw package -DskipTests=true to skip the tests.
Creating Executable and Deployable WARs
You now know how to create an executable standalone JAR app—a portable way to distribute your application—but what happens when you already have application servers like Pivotal tc Server , Tomcat , JBoss , or Web Sphere, and are used to deploying WAR files?
With Spring Boot apps, it’s really easy. You need to change two things:
1.Modify pom.xml (or build.gradle).
Change the <packaging> tag from jar to war (or apply the plugin war if you are using Gradle).
Add the spring-boot-starter-tomcat dependency to your pom.xml and set the scope to provided (or in your build.gradle set the name in the configurations section to a providedRuntime if you are using Gradle).
See Listing 12-5 for the pom.xml and Listing 12-6 for Gradle version.
Listing 12-5. Snippet of pom.xml
<?xml version="1.0" encoding="UTF-8"?><project xmlns="http://maven.apache.org/POM/4.0.0" xmlns:xsi="http://www.w3.org/2001/XMLSchema-instance"xsi:schemaLocation="http://maven.apache.org/POM/4.0.0 http://maven.apache.org/xsd/maven-4.0.0.xsd"><modelVersion>4.0.0</modelVersion><groupId>com.apress.spring</groupId><artifactId>spring-boot-journal</artifactId><version>0.0.1-SNAPSHOT</version><packaging>war</packaging><!-- ... --><dependencies><dependency><groupId>org.springframework.boot</groupId><artifactId>spring-boot-starter-web</artifactId></dependency><!-- ... --><dependency><groupId>org.springframework.boot</groupId><artifactId>spring-boot-starter-tomcat</artifactId><scope>provided</scope></dependency><!-- ... --></dependencies></project>
Listing 12-5 shows a snippet of the journal app’s pom.xml, where you change the packaging tag to WAR and then you add the spring-boot-starter-tomcat dependency with the <scope> tag set to provided. I know that the starter Tomcat is not in the original pom.xml because all the Tomcat dependencies are downloaded by the spring-boot-starter-web pom, but you are adding the Tomcat dependency here. This means that, when you package your application, all the libraries will now be placed in the WEB-INF/lib and the WEB-INF/lib-provided for the Tomcat libraries within the “Fat JAR”.
This will make your application executable as standalone app and container-ready. There is a reason why in a WAR the tomcat libraries are placed in the WEB-INF-lib-provided directory—remember that everything that you add in the WEB-INF/libwill be taken by the application container, so if you leave the Tomcat JAR in this directory (WEB-INF/lib), the application container will fail because of duplicate JARs. That’s why Spring Boot creates WEB-INF/lib-provided so it can run outside and inside of a container.
Next, let’s see the build.gradle changes in Listing 12-6.
Listing 12-6. Snippet of build.gradle
// more configuration hereapply plugin: 'war'war {baseName = 'spring-boot-journal'version = '0.0.1-SNAPSHOT'}repositories {mavenCentral()}configurations {providedRuntime}dependencies {compile("org.springframework.boot:spring-boot-starter-web")providedRuntime("org.springframework.boot:spring-boot-starter-tomcat")...}
Listing 12-6 shows build.gradle(if you are using Gradle to build and run your Spring Boot apps). You modify the main application to extend from the SpringBootServletInitializerabstract class. This is required because the Spring web is using the Servlet 3.0 support and it’s necessary to bootstrap your application when it’s being deployed by the container.
Let’s see the final version of the main app. See Listing 12-7.
Listing 12-7. src/main/java/com/apress/spring/SpringBootJournalApplication.java
package com.apress.spring;import org.springframework.boot.SpringApplication;import org.springframework.boot.autoconfigure.SpringBootApplication;import org.springframework.boot.builder.SpringApplicationBuilder;import org.springframework.boot.context.web.SpringBootServletInitializer;@SpringBootApplicationpublic class SpringBootJournalApplication extends SpringBootServletInitializer {@Overrideprotected SpringApplicationBuilder configure(SpringApplicationBuilder application) {return application.sources(SpringBootJournalApplication.class);}public static void main(String[] args) {SpringApplication.run(SpringBootJournalApplication.class, args);}}
Listing 12-7 shows the main app. This class extends from the SpringBootServletInitializerand it’s overriding the configure(SpringApplicationBuilder application) method. That will help to bootstrap the application. Again, this is important if you want to deploy it in application container like Pivotal tcServer, Tomcat, etc.
So, after modifying the pom.xml and the main app, you are ready to create your container-ready journal application. Execute the following command:
$ ./mvnw clean package -DskipTests=trueNow you will have your target/spring-boot-journal-0.0.1-SNAPSHOT.war file ready to be executed with the following command:
$ java -jar target/spring-boot-journal-0.0.1-SNAPSHOT.warAfter executing this command, you can go to https://localhost:8443. You will be redirected to the /login page. Enter your credentials (spring/boot) to see the home page.
Excellent! You have now a distributable and executable WAR journal app. Next, let’s deploy the same WAR to a Tomcat-based container.
Note
As a recommendation, you can always create a WAR file and extend from the SpringBootServletInitializer and override the configure method in your main application. This way, you can create an executable and container-ready Spring Boot application.
If you want to create a WAR when you are starting a new project with spring init, you can execute the following command (your journal app):
$ spring init -d=web,thymeleaf,data-jpa,data-rest,actuator,security,actuator-docs -g=com.apress.spring -a=spring-boot-journal --package-name=com.apress.spring -name=spring-boot-journal --packaging=war -x The only difference is that you added the --packaging=war option, which will configure everything that you need (your pom.xml <packaging> tag will be set to war). Even the SpringBootServletInitializer configuration will be created as separate class file.
Deploying to a Tomcat-Based Server
If you don’t have a Tomcat-based server you can installing it by using brew (if you have Mac OS/Linux), or you can get the binaries from the Apache Tomcat web site ( http://tomcat.apache.org/ ).
$ brew update && brew install tomcatI personally recommend the Pivotal’s tc server, a Tomcat server on steroids! You can find all the information at https://network.pivotal.io/products/pivotal-tcserver . Some of its cool features are:
You can install Spring Insight, an embedded tool for monitoring and tracing your Spring applications.
It includes several add-ons such as GemFire (In-Memory Data Grid) and Redis (Key-Value Store Database) for session-management. These are very handy when you have a cluster of servers and want to centralize the session management.
Highly configurable and very easy to use.
Excellent documentation found at http://tcserver.docs.pivotal.io/docs/index.html .
You can install it with brew by executing the following command:
$ brew update && brew tap pivotal/tap && brew install tcserverOnce the brew finishes installing the tc server, follow these steps to deploy the journal app:
Go to your installation and you should see a tcruntime-instance.sh file (/usr/local/Cellar/tcserver/<version>/libexec/ for the Mac). Execute the following command:
$ ./tcruntime-instance.sh create -i . myserver -v 8.0.30.C.RELEASE
This command will create in the current folder the myserver directory with all the Tomcat installation based on the 8.0.30.C.RELEASE (this version is the same as the name of the Tomcat folder that should be in the current path and you should have at least 2 tomcat-<version>).
Go to the myserver directory and copy the spring-boot-journal-0.0.1-SNAPSHOT.war in the webapps folder with the name journal.war.
$ cd myserver$ cd webapps$ cp ∼/pro-spring-boot/ch12/spring-boot-journal/target/spring-boot-journal-0.0.1-SNAPSHOT.war ./journal.war. Remember that you need to have your MySQL server up and running.Next, go to the bin directory and start the tc server.
$ cd ..$ cd bin$ ./tcruntime-ctl.sh start
After executing these commands, the tc server should start. Now you can see the logs:
$ tail -f ../logs/catalina.outYou should see the familiar Spring Boot banner and all the logs about the journal app. Now you are ready to use it. Go to http://localhost:8080/journal and you should see the /login page (it will redirect to http://localhost:8080/journal/login). Enter your credentials (spring/boot) and your will see the journal.
Remember that the main context for your app is now /journal because you are using an application container . You can start testing all the other endpoints like /journal/monitor and /journal/api.
Congratulations! You deployed your WAR journal app to an application container. Well done!
Activating Profiles
Have you noticed the difference between running the journal app as standalone app vs. in the tc server? When running the journal app as standalone, you are using the https://localhost:8443 URL, which is a SSL connection. But when you are using the tc server, you are not using the SSL/HTTPS. Spring Boot will identify when you are deploying to a container and it will omit some of the properties that are valid only when running in standalone mode. This means that if you want to secure the Tomcat server, you need to do it in a different way. If you need more information about securing Tomcat, visit https://tomcat.apache.org/tomcat-8.0-doc/ssl-howto.html . This link is generic for all Tomcats version 8.x.
Also, what happens if you want to connect to a different database, such as a production database, or have some other configuration that you want to expose when you are running in a container?
The good thing is that you can use the Spring profiles, something that you read about in earlier chapters. One of the recommended ways is to have several application-<profile>.properties files, so you can activate them in standalone mode or in the container.
You can create, for example, a new application-container.properties file. It will be identical to the other. Maybe you can create a new database and use that one as an example. Its contents are shown in Listing 12-8.
Listing 12-8. src/main/resources/application-container.properties
spring.datasource.url = jdbc:mysql://localhost:3306/calendarspring.datasource.username = springbootspring.datasource.password = springbootspring.datasource.testWhileIdle = truespring.datasource.validationQuery = SELECT 1spring.jpa.show-sql = truespring.jpa.hibernate.ddl-auto = create-dropspring.jpa.hibernate.naming-strategy = org.hibernate.cfg.ImprovedNamingStrategyspring.jpa.properties.hibernate.dialect = org.hibernate.dialect.MySQL5Dialectspring.data.rest.basePath=/restmanagement.context-path=/insightendpoints.shutdown.enabled=true
Listing 12-8 shows the new application-container.properties file. The only changes are the name of the database from journal to calendar (remember that you need to create the calendar database in the MySQL server), and the paths for the rest, from /api to /rest and the management context-path, from /monitor to /insight. The SSL properties are no longer required.
Now, let’s package the app and run it as standalone, activating the profile to container.
$ ./mvnw clean package -DskipTests=true$ java -Dspring.profiles.active="container" -jar target/spring-boot-journal-0.0.1-SNAPSHOT.war
In the logs you can see (in the first three lines) the legend: "The following profiles are active: container". You can also review all the endpoints and even in your MySQL to see if the journal app created the entry table.
Note
If you want to run it first, meaning with the spring-boot:run, you can do so by executing $ ./mvnw spring-boot:run -Dspring.profiles.active="container" to activate the container profile.
Now the question is, how can you activate the profiles in a Tomcat-based container? It’s as simple as adding the property spring.profiles.active=container in the <tomcat-installation>/conf/catalina.properties file.
If you are using the tc server, you can go to the same path (the following commands are based on a Mac installation):
$ cd /usr/local/Cellar/tcserver/<version>/libexec/$ cd myserver/conf$ echo spring.profiles.active=container >> catalina.properties
This command will append the properties to the catalina.properties file (see the double >>). Next you can start your tc server and see the activated logs and the profile container.
Note
Remember that to create a container-ready WAR executable, you need to modify your pom.xml and subclass from the SpringBootServletInitializer. This is only for containers that support the Servlet API 3.0+ versions. For older version or legacy containers, you can get more info in the Spring Boot reference documentation.
Creating Spring Boot Apps as a Service
Another amazing feature of Spring Boot is that you can run your app as a service. Running a Spring Boot as a service has its benefits. It’s easy to install and manage, and if the server restarts, your app will start automatically without you having to do it manually.
If you are using Unix, the only thing you need to do is add a configuration declaration to the Spring Boot plugin in the pom.xml file and in build.gradle. See Listings 12-9 and 12-10
Listing 12-9. pom.xml
<?xml version="1.0" encoding="UTF-8"?><project xmlns="http://maven.apache.org/POM/4.0.0" xmlns:xsi="http://www.w3.org/2001/XMLSchema-instance"xsi:schemaLocation="http://maven.apache.org/POM/4.0.0 http://maven.apache.org/xsd/maven-4.0.0.xsd"><modelVersion>4.0.0</modelVersion><!-- ...all the previous code --><build><plugins><plugin><groupId>org.springframework.boot</groupId><artifactId>spring-boot-maven-plugin</artifactId><configuration><executable>true</executable></configuration></plugin></plugins></build></project>
Listing 12-9 shows the pom.xml file. The only thing that’s new is in the <plugin> tag, the <configuration> tag that is making the WAR or JAR executable.
Listing 12-10. build.gradle
...apply plugin: 'spring-boot'springBoot {executable = true}...
Listing 12-10 shows the build.gradle. The only thing you need to add is the springBoot declaration. Now, when you package your application with the following:
$ ./mvnw clean package -DskipTests=trueYou can execute the JAR directly:
$ target/spring-boot-journal-0.0.1-SNAPSHOT.warAnd it will run! So, if you are running a UNIX environment you can just bind it to the /etc/init.d (in a Debian environment, assuming you have the executable in the /opt folder):
$ ln -s /opt/spring-boot-journal-0.0.1-SNAPSHOT.war /etc/init.d/journalThen you can start your application with the following:
$ service journal startSo simple! You’ll probably need to set up the run levels where the app might run. You can take a look at your UNIX distribution to see what else you need to do in order to enable the journal app as a service.
Maybe you are wondering how is this possible. You can take a peek at the file. If you execute the following command:
$ head -n 242 target/spring-boot-journal-0.0.1-SNAPSHOT.war#!/bin/bash......
You will see that the first 242 lines of the file are a BASH script. So, that’s how it runs.
Spring Boot Apps as Windows Service
If you are looking to do this in a Windows environment, you can take a look at this URL at https://github.com/snicoll-scratches/spring-boot-daemon , which contains all the information you need to create a Spring Boot application and run it as a Windows service.
Spring Boot with Docker
In the past years, Docker has become one of the emergent technologies that is gaining a lot of popularity, because you can have multiple containers that can run a Linux-based OS in the same box. This is very similar to a virtualized environment but without all the footprint of a VM. If you are not familiar with Docker, I suggest reading some tutorials on the web at https://www.docker.com , https://docs.docker.com/mac , https://docs.docker.com/linux and https://docs.docker.com/windows/ . Let’s get started and create a Docker container that will include your journal app.
Make sure you have Docker up and running. Before you build the image that will contain the journal app, let’s use profiles again and add a new dependency to the pom.xml file. See Listing 12-11.
Listing 12-11. src/main/resources/application-docker.properties
spring.datasource.url=jdbc:h2:mem:testdb;MODE=Oracle;DB_CLOSE_DELAY=-1;DB_CLOSE_ON_EXIT=FALSEspring.datasource.username=saspring.datasource.password=spring.datasource.driverClassName=org.h2.Driverspring.data.rest.basePath=/apimanagement.context-path=/monitorendpoints.shutdown.enabled=trueserver.port=8443server.ssl.key-store=classpath:keystore.jksserver.ssl.key-store-password=tomcatserver.ssl.key-password=tomcat
Listing 12-11 shows the application-docker.properites. All the spring.datasource properties are new. It has defined the H2 database that will run in-memory and also contains the SSL. Remember that in order to use the H2 database you must include this dependency in the pom.xml file:
<dependency><groupId>com.h2database</groupId><artifactId>h2</artifactId></dependency>
Now, you can create in the root folder the Dockerfile (this file helps create Docker images). See Listing 12-12.
Listing 12-12. Dockerfile
FROM java:8VOLUME /tmpADD target/spring-boot-journal-0.0.1-SNAPSHOT.war journal.warENV SPRING_PROFILES_ACTIVE dockerEXPOSE 8443ENTRYPOINT ["java","-Djava.security.egd=file:/dev/./urandom","-jar","/journal.war"]
Listing 12-11 shows the Dockerfile that will be used to create the container. Let’s examine it:
FROM java:8. This line pulls a Debian 8 image (jessie) that contains the OpenJDK version 8.
VOLUME. Needed to create a volume, because Spring Boot creates working directories for Tomcat by default.
ADD. Copies the WAR (or JAR) file as journal.war (or Jar) in the root of the container.
ENV. Needed to add the environment variable that will activate the Docker profile.
EXPOSE. It’s exposing the port 8443. Remember that this is the port for the SSL.
ENTRYPOINT. This declaration determines how the container will execute when it starts up. To reduce the Tomcat startup time, you need a system property pointing to "/dev/./urandom" as a source of entropy.
Next, execute the following command to build the Docker image:
$ docker build -t springboot/journalThis command will build an image with the springboot/journal tag name. After it finishes building, you can run it with this command:
$ docker run -p 8443:8443 springboot/journalThis command will run the container using the springboot/journal image. Now you can go to your browser and open the journal app. If you are running this example in Linux, just go to https://localhost:8443. If you are using a Mac or a Windows machine, use the Docker IP:
$ docker-machine ip192.168.99.100
Now you can go to https://192.168.99.100:8443 (or any Docker IP) and voilà! You have your journal app running in a Docker container!
Maybe you are wondering if there is another way to automate (at least a little) the creation of the Docker image, and the answer is yes there is. There are Maven and Gradle plugins that incorporate the creating of the images based on a Docker file.
What you need to do is create a Dockerfile (I suggest in the src/main/resources folder) and add the plugin to the pom.xml (or Gradle) file. See Listing 12-13 for the pom.xml example.
Listing 12-13. Snippet of pom.xml
<?xml version="1.0" encoding="UTF-8"?><project xmlns="http://maven.apache.org/POM/4.0.0" xmlns:xsi="http://www.w3.org/2001/XMLSchema-instance"xsi:schemaLocation="http://maven.apache.org/POM/4.0.0 http://maven.apache.org/xsd/maven-4.0.0.xsd"><modelVersion>4.0.0</modelVersion><groupId>com.apress.spring</groupId><artifactId>spring-boot-journal</artifactId><version>0.0.1-SNAPSHOT</version><packaging>war</packaging><!-- ... More tags here --><properties><project.build.sourceEncoding>UTF-8</project.build.sourceEncoding><java.version>1.8</java.version><docker.image.prefix>springboot</docker.image.prefix></properties><!-- Dependencies here --><build><plugins><plugin><groupId>org.springframework.boot</groupId><artifactId>spring-boot-maven-plugin</artifactId></plugin><plugin><groupId>com.spotify</groupId><artifactId>docker-maven-plugin</artifactId><version>0.4.1</version><configuration><imageName>${docker.image.prefix}/${project.artifactId}</imageName><dockerDirectory>src/main/resources/docker</dockerDirectory><resources><resource><targetPath>/</targetPath><directory>${project.build.directory}</directory><include>${project.build.finalName}.war</include></resource></resources></configuration></plugin></plugins></build></project>
Listing 12-13 shows the pom.xml and the new declarations , the Docker plugin and the Docker property prefix . The important part of the Docker plugin is the tag <dockerDirectory>, where the Dockerfile will live. Next, let’s see the Dockerfile in Listing 12-14.
Listing 12-14. src/main/resources/docker/Dockerfile
FROM java:8VOLUME /tmpADD spring-boot-journal-0.0.1-SNAPSHOT.war journal.warENV SPRING_PROFILES_ACTIVE dockerEXPOSE 8443ENTRYPOINT ["java","-Djava.security.egd=file:/dev/./urandom","-jar","/journal.war"]
Listing 12-14 shows the Dockerfile that will be used by the Maven Docker plugin . What is the difference between this and Listing 12-12? One of the differences is the ADD declaration and the name, which will be the same as the artifactId + version + extension. The other declarations remain the same. The other difference is that the name of the Docker image will be springboot/spring-boot-journal, because it will take only the artifactId as a name.
Now you can build it and create the image in the same line with:
$ ./mvnw clean package docker:build -DskipTests=trueThis command creates a new Docker image called springboot/spring-boot-journal. Now you can run it with:
$ docker run -p 8443:8443 springboot/spring-boot-journalYou can go to your browser and take a look at your journal app. Congrats! You “Dockerized” your journal application!
Note
A quick note. In this Docker example you have two Dockerfile files—one in the root and another in the src/main/resources/docker directory. The only difference is the ADD declaration. This src/main/resources/docker/Dockerfile file will be picked up only by the Docker plugin in your pom.xml and it won’t affect the other file in the root.
Summary
This chapter explained how to deploy your Spring Boot apps by using the command line, creating executable and container-ready WARs, how to use profiles for deployment, and how to deploy to Docker containers. As a developer, you have a lot of options for deployment.
The next chapter shows you a little more of the deployment, but focuses on cloud environments. It discusses the new technology architectural trend: Microservices.