
Developers and software architects are often looking for design patterns to apply, new algorithms to implement, reusable components that are easy to use and maintain, and new ways to improve development. It’s not always easy to find a unique or perfect solution and it’s necessary to use different technologies and methodologies to accomplish the goal of having an application that runs and never fails.
This chapter explains how the Spring and Spring Boot teams created a pattern for reusable components that are easy to use and implement. Actually, you have been learning about this pattern in the entire book, and especially in the Spring Boot Configuration chapter.
This chapter covers in detail the auto-configuration, including how you can extend and create new Spring Boot modules that can be reusable. Let’s get started.
Custom Spring Boot Module
As you already know, the spring-boot-starter-<module> is an important piece for the Spring Boot engine to auto-configure your application based on the dependencies that the starter that you defined brings to the applications. This section discusses how you create your custom starter.
Imagine for a moment that your Spring Boot journal app has a very good acceptance between your colleagues and now you want to create a journal starter pom. How can you do that? You are going to create a special project where you include three modules:
spring-boot-journal. This is the project that you have been working on during the book. I will show you which pieces you need to include in the following sections.
journal-spring-boot-starter. This is your definition of your journal module. Every time you want to include part of the journal in a new application, you need to use this starter.
journal-spring-boot-autoconfigure. This project brings the journal module to life because you will create a special auto-configure configuration to set everything up when another project includes journal-spring-boot-starter.
The spring-boot-journal Project
You are going to use the journal app as a module. Choose a directory and create a folder named spring-boot-journal. Use the well known Spring Initializr command:
$ mkdir spring-boot-journal$ cd spring-boot-journal$ spring init -d=web,thymeleaf,data-jpa,data-rest,h2,mysql -g=com.apress.spring -a=spring-boot-journal --package-name=com.apress.spring -name=spring-boot-journal -x
Next you can copy some of the files that you have been using during the chapters. Don’t worry too much; I’ll tell you what to include. You need to have the structure shown in Figure 14-1.

Figure 14-1. The spring-boot-journal directory structure
Figure 14-1 shows the files that you need to copy over this new structure. The JournalEntry, JournalRepository, and JsonDateSerializer classes haven’t change at all. Just make sure that your JournalEntry has the @Entity annotations because that’s what you will use. The contents of the applications.properties file is simple, as shown in Listing 14-1.
Listing 14-1. src/main/resources/application.properties
spring.data.rest.basePath=/apiThe journal.html page is identical to the index.html of the other versions; there is no security enabled. I will explain why you needed to rename it later. The data.sql contains some of the records for the entry table. See Listing 14-2.
Listing 14-2. src/main/resources/data.sql
INSERT INTO ENTRY(title,summary,created) VALUES('Get to know Spring Boot','Today I will learn Spring Boot','2016-01-02 00:00:00.00');INSERT INTO ENTRY(title,summary,created) VALUES('Simple Spring Boot Project','I will do my first Spring Boot project','2016-01-03 00:00:00.00');INSERT INTO ENTRY(title,summary,created) VALUES('Spring Boot Reading','Read more about Spring Boot','2016-02-02 00:00:00.00');INSERT INTO ENTRY(title,summary,created) VALUES('Spring Boot in the Cloud','Learn Spring Boot using Cloud Foundry','2016-02-05 00:00:00.00');
Note
Remember that you can get all the code from the Apress web site or from the GitHub repository at https://github.com/felipeg48/pro-spring-boot .
If you run this app:
$ ./mvnw spring-boot:runYou won’t see the home page, but why? The web controller class is missing (JournalController), but there is a reason for that and I will discuss it in the next sections. You can still go to the REST API, but remember that it is included because you added (data-rest) in the Spring init command . So you can go to http://localhost:8080/api/ and it should give you a result. (Remember to test it in the Chrome web browser with the JSONView add-on installed, so you can see the response JSON+HAL.)
The journal-spring-boot-starter Project
Now you are going to define a starter that any new project will use to include the journal functionality. Remember that you are in the spring-boot-journal directory, so go back one level and create the directory journal-spring-boot-starter and add a pom.xml.
$ pwd/journal/spring-boot-journal$ cd ..$ mkdir journal-spring-boot-starter$ cd journal-spring-boot-starter
Now copy the pom.xml file shown in Listing 14-3. You’ll need it for your starter.
Listing 14-3. pom.xml
<?xml version="1.0" encoding="UTF-8"?><project xmlns="http://maven.apache.org/POM/4.0.0" xmlns:xsi="http://www.w3.org/2001/XMLSchema-instance"xsi:schemaLocation="http://maven.apache.org/POM/4.0.0 http://maven.apache.org/xsd/maven-4.0.0.xsd"><modelVersion>4.0.0</modelVersion><groupId>com.apress.spring</groupId><artifactId>journal-spring-boot-starter</artifactId><version>0.0.1-SNAPSHOT</version><packaging>jar</packaging><name>journal-spring-boot-starter</name><description> Spring Boot Journal Starter</description><properties><project.build.sourceEncoding>UTF-8</project.build.sourceEncoding><java.version>1.8</java.version></properties><dependencies><dependency><groupId>com.apress.spring</groupId><artifactId>journal-spring-boot-autoconfigure</artifactId><version>0.0.1-SNAPSHOT</version></dependency></dependencies><build><plugins><plugin><groupId>org.springframework.boot</groupId><artifactId>spring-boot-maven-plugin</artifactId></plugin></plugins></build></project>
Listing 14-3 shows the pom.xml that defines only one dependency this time. The journal-spring-boot-autoconfigure dependency is the project that you will create in the next section.
For creating a starter, that’s it, you just define the project that you have the dependencies on and that’s pretty much what you will be doing here. Of course, the important part is to have the dependencies ready. The journal functionality is defined in the journal-spring-boot-autoconfigure project.
Before you go to the next section, did you notice the name of the project? The Spring Boot team already put in place a naming convention for any new starter project pom. This naming is in this form: <module>-spring-boot-starter. If you are creating an auto-config project, the conventions is <module>-spring-boot-autoconfigure. This is because some of the modules are based on this naming convention.
The journal-spring-boot-autoconfigure Project
This project will contain configuration that will allow the journal functionality to be active in any new project that includes the journal-spring-boot-starter. Let’s start by creating the folder and initializing the project with the Spring Initializr command.
$ pwd/journal/journal-spring-boot-starter$ cd ..$ mkdir journal-spring-boot-autoconfigure$ cd journal-spring-boot-autoconfigure$ spring init -d=web,thymeleaf,data-jpa,data-rest,h2,mysql -g=com.apress.spring -a=journal-spring-boot-autoconfigure --package-name=com.apress.spring -name=journal-spring-boot-autoconfigure –x
Next you need to add an extra dependencies to the pom.xml that you just created by executing the previous command. See Listing 14-4.
Listing 14-4. pom.xml
<?xml version="1.0" encoding="UTF-8"?><project xmlns="http://maven.apache.org/POM/4.0.0" xmlns:xsi="http://www.w3.org/2001/XMLSchema-instance"xsi:schemaLocation="http://maven.apache.org/POM/4.0.0 http://maven.apache.org/xsd/maven-4.0.0.xsd"><modelVersion>4.0.0</modelVersion><groupId>com.apress.spring</groupId><artifactId>journal-spring-boot-autoconfigure</artifactId><version>0.0.1-SNAPSHOT</version><packaging>jar</packaging><name>journal-spring-boot-autoconfigure</name><description>Demo project for Spring Boot</description><parent><groupId>org.springframework.boot</groupId><artifactId>spring-boot-starter-parent</artifactId><version>1.3.3.RELEASE</version><relativePath/> <!-- lookup parent from repository --></parent><properties><project.build.sourceEncoding>UTF-8</project.build.sourceEncoding><java.version>1.8</java.version><journal.version>0.0.1-SNAPSHOT</journal.version></properties><dependencies><dependency><groupId>org.springframework.boot</groupId><artifactId>spring-boot-autoconfigure</artifactId></dependency><dependency><groupId>com.apress.spring</groupId><artifactId>spring-boot-journal</artifactId><version>${journal.version}</version></dependency><dependency><groupId>org.springframework.boot</groupId><artifactId>spring-boot-starter-data-jpa</artifactId></dependency><dependency><groupId>org.springframework.boot</groupId><artifactId>spring-boot-starter-data-rest</artifactId></dependency><dependency><groupId>org.springframework.boot</groupId><artifactId>spring-boot-starter-thymeleaf</artifactId></dependency><dependency><groupId>org.springframework.boot</groupId><artifactId>spring-boot-starter-web</artifactId></dependency><dependency><groupId>com.h2database</groupId><artifactId>h2</artifactId><scope>runtime</scope></dependency><dependency><groupId>mysql</groupId><artifactId>mysql-connector-java</artifactId><scope>runtime</scope></dependency><dependency><groupId>org.springframework.boot</groupId><artifactId>spring-boot-starter-test</artifactId><scope>test</scope></dependency><dependency><groupId>org.springframework.boot</groupId><artifactId>spring-boot-configuration-processor</artifactId><optional>true</optional></dependency></dependencies><build><plugins><plugin><groupId>org.springframework.boot</groupId><artifactId>spring-boot-maven-plugin</artifactId></plugin></plugins></build></project>
Listing 14-4 shows the pom.xml that you will be using in your journal-spring-boot-autoconfigure project. Next let’s create a class that will hold some properties that will part of the configuration for the journal functionality. See Listing 14-5.
Listing 14-5. src/main/java/com/apress/spring/config/JournalProperties.java
package com.apress.spring.config;import org.springframework.boot.context.properties.ConfigurationProperties;@ConfigurationProperties(prefix="journal")public class JournalProperties {private String contextPath = "/spring-boot-journal";private String banner;private String apiPath;public String getContextPath() {return contextPath;}public void setContextPath(String contextPath) {this.contextPath = contextPath;}public String getBanner() {return banner;}public void setBanner(String banner) {this.banner = banner;}public String getApiPath() {return apiPath;}public void setApiPath(String apiPath) {this.apiPath = apiPath;}}
Listing 14-5 shows the JournalProperties class. You are already familiar with this type of class, because I showed you in the first chapters that you can externalize your custom properties and can use your own prefix. In this case you will have three properties:
journal.context-path. Sets by default the context path of the journal home page, which in this case is reachable at /spring-boot-journal. You give your users of the journal-spring-boot-starter a chance to change the context path by setting this property in the application.properties file.
journal.banner. Displays a banner about the journal being configured. I know that this functionality won’t be a real value, but it just proves the point that you can do a lot with the auto-configuration feature that Spring Boot provides. This property accepts the location of the journal.txt file; the default is at /META-INF/banner/journal.txt. You will create this file later. This allows your users that create their own banners and use them with this journal property.
journal.api-path. Sets the REST API context path. Remember that by default you have the spring.data.rest.basePath when you include the spring-data-rest pom and that you can change its path. Here you will expose the option to your users to modify the path as well, but using your custom journal property.
The next code example shows that all these properties will be used to configure the journal functionality. The JournalAutoConfigurationclass is the most important class in this project, as shown in Listing 14-6.
Listing 14-6. src/main/java/com/apress/spring/config/JournalAutoConfiguration.java
package com.apress.spring.config;import java.util.Properties;import javax.servlet.http.HttpServletRequest;import javax.servlet.http.HttpServletResponse;import org.springframework.beans.factory.InitializingBean;import org.springframework.beans.factory.annotation.Autowired;import org.springframework.boot.Banner;import org.springframework.boot.ResourceBanner;import org.springframework.boot.autoconfigure.condition.ConditionalOnClass;import org.springframework.boot.autoconfigure.condition.ConditionalOnProperty;import org.springframework.boot.autoconfigure.condition.ConditionalOnWebApplication;import org.springframework.boot.context.properties.EnableConfigurationProperties;import org.springframework.context.annotation.Bean;import org.springframework.context.annotation.Configuration;import org.springframework.core.env.Environment;import org.springframework.core.io.DefaultResourceLoader;import org.springframework.core.io.Resource;import org.springframework.core.io.ResourceLoader;import org.springframework.data.rest.core.config.RepositoryRestConfiguration;import org.springframework.data.rest.webmvc.config.RepositoryRestMvcConfiguration;import org.springframework.util.ClassUtils;import org.springframework.web.servlet.ModelAndView;import org.springframework.web.servlet.handler.SimpleUrlHandlerMapping;import org.springframework.web.servlet.mvc.AbstractController;import com.apress.spring.repository.JournalRepository;@Configuration@ConditionalOnWebApplication@ConditionalOnClass(JournalRepository.class)@EnableConfigurationProperties(JournalProperties.class)@ConditionalOnProperty(prefix = "journal", name = { "context-path", "banner" }, matchIfMissing = true)public class JournalAutoConfiguration extends RepositoryRestMvcConfiguration {private final String API_PATH = "/api";private final String BANNER = "/META-INF/banner/journal.txt";@AutowiredJournalProperties journal;@AutowiredEnvironment environment;@BeanInitializingBean simple() {return () -> {Banner banner = null;ResourceLoader resourceLoader = new DefaultResourceLoader(ClassUtils.getDefaultClassLoader());Resource resource = resourceLoader.getResource(BANNER);if (null == journal.getBanner()) {banner = new ResourceBanner(resource);} else {Resource _resource = resourceLoader.getResource(journal.getBanner());if (resource.exists()) {banner = new ResourceBanner(_resource);}}banner.printBanner(environment, environment.getClass(), System.out);};}@Overrideprotected void configureRepositoryRestConfiguration(RepositoryRestConfiguration config) {if (null == journal.getApiPath())config.setBasePath(API_PATH);elseconfig.setBasePath(journal.getApiPath());}@AutowiredJournalRepository repo;@BeanAbstractController journalController() {return new AbstractController() {@Overrideprotected ModelAndView handleRequestInternal(HttpServletRequest request,HttpServletResponse response)throws Exception {ModelAndView model = new ModelAndView();model.setViewName("journal");model.addObject("journal", repo.findAll());return model;}};}@Beanpublic SimpleUrlHandlerMapping urlHandler() {SimpleUrlHandlerMapping handler = new SimpleUrlHandlerMapping();handler.setOrder(Integer.MAX_VALUE - 2);Properties mappings = new Properties();mappings.put(journal.getContextPath(), "journalController");handler.setMappings(mappings);return handler;}}
Listing 14-6 shows the main class that will be picked up by Spring Boot auto-configuration pattern. It will try to configure the journal app to work as was specified by the properties and other configurations. Let’s examine the class:
@Configuration. As you know, this annotation will be picked up by the Spring Boot auto-configuration.
@ConditionalOnWebApplication. This annotation will tell the auto-configuration to execute the configuration only if it’s a web application. If not, it will skip it. This is useful when you have an application that doesn’t have the spring-boot-starter-web pom.
@ConditionalOnClass(JournalRepository.class). This annotation tells the auto-configuration that this configuration will be accepted only if in the classpath exists the JournalRepository.class. Note that the JournalRepository will be configured as a REST endpoint through the spring data-rest auto-configuration, so that’s why you are adding this particular condition.
@EnableConfigurationProperties(JournalProperties.class). This annotation tells the auto-configuration that you will be using the JournalProperties as a custom property. Remember that you have access at all times by using the @Autowired or the @Value for a specific property.
@ConditionalOnProperty(prefix = "journal", name = { "context-path", "banner" }, matchIfMissing = true). This annotation tells the auto-configuration that if you don’t have the journal.context-path or the journal.banner properties defined, it can execute the configuration anyway.
RepositoryRestMvcConfiguration. The JournalAutoConfiguration class is extending from the RepositoryRestMvcConfiguration class, which is helpful because you are going to override the REST endpoints by using your journal.api-path.
API_PATH, BANNER. These are the final variables that will be the default values for the journal.api-path and journal.banner properties, if none is provided in the application.properties file.
@Bean InitializingBean simple(). This method will be executed when this class is created. This method will print out the banner at the console based on the journal.banner property. If none is provided, it will print out what you have in the /META-INF/banner/journal.txt classpath.
configureRepositoryRestConfiguration(RepositoryRestConfiguration config). This method belongs to the RepositoryRestMvcConfiguration class and it’s overridden by setting the REST endpoint’s context path based on the journal.api-path property. If none is provided in the application properties, the default is /api.
@Bean AbstractController journalController(). This method is the replacement of the JournalController that you didn’t use in the journal application. Here you are returning an AbstractController instance and you are overriding the handleRequestInternal method by adding the journal view (this will be from the journal project at templates/journal.html; this page is not an index.html page, because you don’t want to have a collision name for other projects; I will explain this later). You are also adding the model setting its value with the repo.findAll() method call. The repo instance is the result of the @Autowired JournalRepository. This means that you should have the JournalRepository class in your classpath.
@Bean SimpleUrlHandlerMapping urlHandler(). This method will set the handler for the final context path where the journal.html will be requested. You are returning a SimpleUrlHandlerMapping instance that sets the correspondent mapping, the URL (based on the journal.context-path property). and the controller (the journalController method call). It’s very important to mention that in order to create your own URL handler programmatically it’s mandatory to add this call: handler.setOrder(Integer.MAX_VALUE - 2);. This is because the mappings are in order, so they have the lowest order making the ResourceHttpRequestHandler (this resource handler takes all in /**) to have precedence over your mapping. That’s why it’s necessary to set the order in that way.
Before you continue, take moment to analyze this more in detail. Try to look the meaning of every class. Now, it’s worth mentioning that there are more @Conditional* annotation that allow you to execute the configuration class.
How does Spring Boot load this auto-configuration class? In order to use the power of the auto-configuration, you need to create it in the META-INF/spring.factories file. You specify the class that holds the auto-configuration. See Listing 14-7.
Listing 14-7. src/main/resources/META-INF/spring.factories
org.springframework.boot.autoconfigure.EnableAutoConfiguration=com.apress.spring.config.JournalAutoConfiguration
Listing 14-6 shows the contents of the spring.factories file. You need to specify the class that will be picked up by the EnableAutoConfiguration class . This class imports the EnableAutoConfigurationImportSelector that will inspect the spring.factories and loads the class and executes the declaration. That’s the secret behind the auto-configuration. If you see the source code of spring-boot-autoconfigure module itself you will find out that it contains a lot of the auto-configuration classes defined. Here is a sneak peak of the spring-boot-autoconfigure spring.factories contents:
# Initializersorg.springframework.context.ApplicationContextInitializer=org.springframework.boot.autoconfigure.logging.AutoConfigurationReportLoggingInitializer# Application Listenersorg.springframework.context.ApplicationListener=org.springframework.boot.autoconfigure.BackgroundPreinitializer# Auto Configureorg.springframework.boot.autoconfigure.EnableAutoConfiguration=org.springframework.boot.autoconfigure.admin.SpringApplicationAdminJmxAutoConfiguration,org.springframework.boot.autoconfigure.aop.AopAutoConfiguration,org.springframework.boot.autoconfigure.amqp.RabbitAutoConfiguration,org.springframework.boot.autoconfigure.MessageSourceAutoConfiguration,org.springframework.boot.autoconfigure.PropertyPlaceholderAutoConfiguration,org.springframework.boot.autoconfigure.batch.BatchAutoConfiguration,org.springframework.boot.autoconfigure.cache.CacheAutoConfiguration,org.springframework.boot.autoconfigure.cassandra.CassandraAutoConfiguration,org.springframework.boot.autoconfigure.cloud.CloudAutoConfiguration,org.springframework.boot.autoconfigure.context.ConfigurationPropertiesAutoConfiguration,org.springframework.boot.autoconfigure.dao.PersistenceExceptionTranslationAutoConfiguration,org.springframework.boot.autoconfigure.data.cassandra.CassandraDataAutoConfiguration,org.springframework.boot.autoconfigure.data.cassandra.CassandraRepositoriesAutoConfiguration,org.springframework.boot.autoconfigure.data.elasticsearch.ElasticsearchAutoConfiguration,org.springframework.boot.autoconfigure.data.elasticsearch.ElasticsearchDataAutoConfiguration,......
Remember that you can use --debug when you running your application. You can run it to see if your starter is being picked up by the auto-configuration engine.
Package and Install the Journal Project
Now you have your three projects ready to be packaged and installed in your computer; but first let’s create a pom.xml that will treat the three projects as modules. Go one level up and create a pom.xml file. See Figure 14-2.

Figure 14-2. The directory structure
Next, let’s see the pom.xml. See Listing 14-8.
Listing 14-8. pom.xml
<?xml version="1.0" encoding="UTF-8"?><project xmlns="http://maven.apache.org/POM/4.0.0" xmlns:xsi="http://www.w3.org/2001/XMLSchema-instance"xsi:schemaLocation="http://maven.apache.org/POM/4.0.0 http://maven.apache.org/xsd/maven-4.0.0.xsd"><modelVersion>4.0.0</modelVersion><groupId>com.apress.spring</groupId><artifactId>journal</artifactId><version>0.0.1-SNAPSHOT</version><packaging>pom</packaging><name>Extending Spring Boot</name><modules><module>spring-boot-journal</module><module>journal-spring-boot-autoconfigure</module><module>journal-spring-boot-starter</module></modules></project>
Listing 14-8 shows the master pom that includes the three projects as modules. This will allow you to package and install them. If you have Maven already installed, you can skip this part. If not, remember that you are using the Spring init and this brings the Maven wrapper that you don’t have in the journal folder. You have only the pom.xml, so in order to use the maven wrapper, execute the following commands:
$ pwd/journal$ cp -r spring-boot-journal/.mvn .$ cp spring-boot-journal/mvn* .
If you have now the Maven wrapper, execute the next command to package and install the journal project:
$ ./mvnw clean package install -DskipTests=trueOr if you have Maven installed, just execute this command:
$ mvn clean package install -DskipTests=trueThat will install the three projects (in your home directory under .m2/repository), which means that you are ready to use them in any new project you want to include with the journal starter.
The spring-boot-calendar Project
I know that I told you about creating only three projects— spring-boot-journal, journal-spring-boot-starter, and journal-spring-boot-autoconfigure—but of course you need to test them too. You need to see if the auto-configuration really accesses the JournalAutoConfiguration class.
You can create a new project that can be outside of the journal solution (the three projects) and create just a default Spring boot app using the spring init command:
$ pwd/journal$ cd /$ mkdir calendar$ cd calendar$ spring init -g=com.apress.spring -a= spring-boot-calendar --package-name=com.apress.spring -name= spring-boot-calendar –x
This command will create your calendar project. Basically, this project will use the journal-spring-boot-starter and that’s it. The project will only have an index page just to make the point that you can create any application and use the journal starter. The final pom.xml for this project is shown in Listing 14-9.
Listing 14-9. pom.xml
<?xml version="1.0" encoding="UTF-8"?><project xmlns="http://maven.apache.org/POM/4.0.0" xmlns:xsi="http://www.w3.org/2001/XMLSchema-instance"xsi:schemaLocation="http://maven.apache.org/POM/4.0.0 http://maven.apache.org/xsd/maven-4.0.0.xsd"><modelVersion>4.0.0</modelVersion><groupId>com.apress.spring</groupId><artifactId>spring-boot-calendar</artifactId><version>0.0.1-SNAPSHOT</version><packaging>jar</packaging><name>spring-boot-calendar</name><description>Demo project for Spring Boot</description><parent><groupId>org.springframework.boot</groupId><artifactId>spring-boot-starter-parent</artifactId><version>1.3.3.RELEASE</version><relativePath/> <!-- lookup parent from repository --></parent><properties><project.build.sourceEncoding>UTF-8</project.build.sourceEncoding><java.version>1.8</java.version></properties><dependencies><dependency><groupId>com.apress.spring</groupId><artifactId>journal-spring-boot-starter</artifactId><version>0.0.1-SNAPSHOT</version></dependency><dependency><groupId>org.springframework.boot</groupId><artifactId>spring-boot-starter-test</artifactId><scope>test</scope></dependency></dependencies><build><plugins><plugin><groupId>org.springframework.boot</groupId><artifactId>spring-boot-maven-plugin</artifactId></plugin></plugins></build></project>
Listing 14-9 shows the pom.xml that you will use for the calendar project. See that you are only including the journal-spring-boot-starter. If you run it right away, you should be able to see the banner (with the legend Journal) and all the default endpoints (/api, /spring-boot-journal). Remember that these default values now can be overridden, and that’s what you going to do in the next sections. You can run your app as usual:
$ ./mvnw spring-boot:runAfter running the calendar project just make sure that the journal is working. Now, let’s create a controller in the main app and start adding some other details like an index.html page (that’s why you have a journal.html in the spring-boot-journal module, so it won’t collide with this one).
Listing 14-10 shows the main application.
Listing 14-10. src/main/java/com/apress/spring/SpringBootCalendarApplication.java
package com.apress.spring;import org.springframework.beans.factory.annotation.Autowired;import org.springframework.boot.SpringApplication;import org.springframework.boot.autoconfigure.SpringBootApplication;import org.springframework.web.bind.annotation.RequestMapping;import org.springframework.web.bind.annotation.RequestMethod;import org.springframework.web.bind.annotation.RestController;import org.springframework.web.servlet.ModelAndView;import com.apress.spring.config.JournalProperties;@SpringBootApplication@RestControllerpublic class SpringBootCalendarApplication {public static void main(String[] args) {SpringApplication.run(SpringBootCalendarApplication.class, args);}private static final String VIEW_INDEX = "index";@AutowiredJournalProperties journal;@RequestMapping(value="/", method = RequestMethod.GET)public ModelAndView index(ModelAndView modelAndView){modelAndView.setViewName(VIEW_INDEX);modelAndView.addObject("journal", journal);return modelAndView;}}
Listing 14-10 shows the main application. You basically already know all the annotations in this class, but it’s good to mention that the JournalProperties instance is available and you will be using it to access its values in the index page.
Next, let’s see the application.properties. Remember that you can now override those properties as well. Its content is shown in Listing 14-11.
Listing 14-11. src/main/resources/application.properties
journal.api-path=/myapijournal.context-path=/myjournal
Listing 14-11 shows the application.properties that you will use in this second run to see if the defaults can be overridden. For now it doesn’t have the journal.banner property (with the value /META-INF/banner/journal.txt); you can play around with it later.
Now let’s see the index.html page (you need to create the templates folder). See Listing 14-12.
Listing 14-12. src/main/resource/templates/index.html
<!DOCTYPE html><html lang="en" xmlns:th="http://www.thymeleaf.org"><head><meta charset="utf-8"></meta><meta http-equiv="X-UA-Compatible" content="IE=edge"></meta><meta name="viewport" content="width=device-width, initial-scale=1"></meta><meta name="description" content=""></meta><meta name="author" content=""></meta><title>Spring Boot Calendar</title><link href="css/bootstrap.min.css" rel="stylesheet"></link><link href="css/cover.css" rel="stylesheet"></link></head><body><div class="site-wrapper"><div class="site-wrapper-inner"><div class="cover-container"><div class="masthead clearfix"><div class="inner"><h3 class="masthead-brand">Spring Boot Calendar</h3><nav><ul class="nav masthead-nav"><li class="active"><a href="#">Home</a></li><li><a th:href="${journal.contextPath}">Journal</a></li><li><a th:href="${journal.apiPath}">API</a></li><li><a th:href="${journal.apiPath} + '/journal/search'">Search</a></li></ul></nav></div></div><div class="inner cover"><h1 class="cover-heading">Spring Boot Calendar</h1><p class="lead">This is a small Calendar application, showing the power of Spring Boot auto-configuration features.This Calendar application also provides you a full access to the Journal Web UI</p><p class="lead"><a th:href="${journal.contextPath}" class="btn btn-lg btn-default">Journal</a></p></div><div class="mastfoot"><div class="inner"><p>Spring Boot Calendar, powered by <a href="http://projects.spring.io/spring-boot/">Spring Boot</a>.</p></div></div></div></div></div></body></html>
Listing 14-12 shows index.html and the important part is the usage of the journal object that is sent from the controller (the JournalProperties instance). Regardless of which path you add for the API or the journal you will be always have the right endpoint.
Before you run it, you need to have the cover.css file that is located in the static/css folder (you need to create the static folder as well). The bootstrap.min.css is being picked up from the journal module, so you don’t need it here. You can get this code from the Apress site. (Or you can get it from the GitHub at https://github.com/felipeg48/pro-spring-boot ).
Now you are ready to run it:
$ ./mvnw spring-boot:runIf you go directly to the root at http://localhost:8080/, you will see something like Figure 14-3.
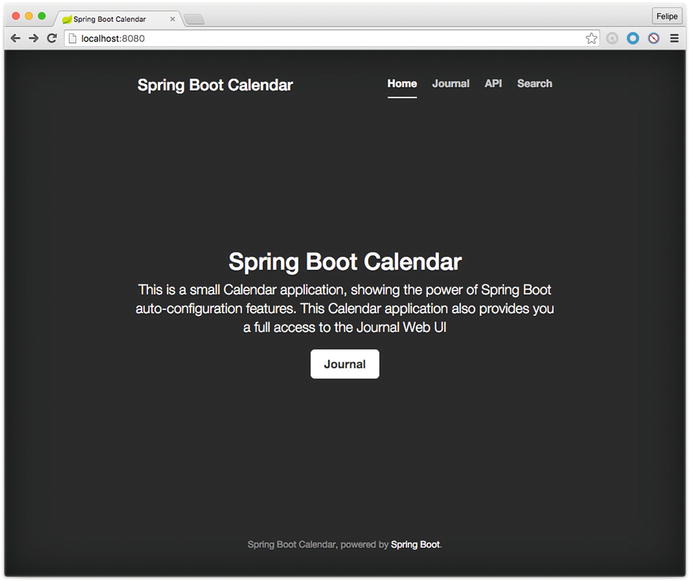
Figure 14-3. The calendar application home page
Figure 14-3 shows the calendar app. You can test the links declared in the index.html file and see if the endpoints actually work because they should have taken the values of the properties specified in the application.properties file. So, click the Journal button and you should get sent to the /myjournal endpoint. If you click at the top of the page in the navigation bar, the API menu option, you should be sent to the /myapi endpoint and be able to read all about the RESTful services.
Congratulations! You have just created your custom Spring Boot starter!
Custom Health Indicator
Another way to extend your Spring Boot application is to add your own health indicator when you are using the spring-boot-actuator module. It would be nice to have a way to monitor specific requirements; for example, imagine that you want your calendar be able to monitor how many entries you have in your journal. In other words, you can have customers who want to use your calendar application and you want to limit the entries per journal. You’ll build a quota health monitor for that purpose.
You will continue using the Calendar project. The spring-boot-starter-actuator is missing in your pom.xml in order to activate the health endpoints. So add this to your pom.xml:
<dependency><groupId>org.springframework.boot</groupId><artifactId>spring-boot-starter-actuator</artifactId></dependency>
Next, let’s create two classes that will define the quota monitor. The first class is a standard exception handler. See Listing 14-13.
Listing 14-13. src/main/java/com/apress/spring/health/QuotaException.java
package com.apress.spring.heatlh;public class QuotaException extends Exception {private static final long serialVersionUID = -1L;public QuotaException(String ex){super(ex);}}
Listing 14-13 shows a simple class that extends from exception and overrides the constructor with a String parameter; this is nothing new that you don’t already know. Next is the most important part to create the monitor. See Listing 14-14.
Listing 14-14. src/main/java/com/apress/spring/health/QuotaHealthIndicator.java
package com.apress.spring.heatlh;import org.springframework.beans.factory.annotation.Autowired;import org.springframework.boot.actuate.health.Health;import org.springframework.boot.actuate.health.HealthIndicator;import org.springframework.stereotype.Component;import com.apress.spring.repository.JournalRepository;@Componentpublic class QuotaHealthIndicator implements HealthIndicator{private static final Long QUOTA_MAX_SIZE = 10L;@AutowiredJournalRepository repo;@Overridepublic Health health() {long size = repo.count();if(size <= QUOTA_MAX_SIZE)return Health.up().withDetail("quota.entries", size).build();elsereturn Health.down().withDetail("quota.entries", size).withException(new QuotaException("Quota Exceeded. Max allow: " + QUOTA_MAX_SIZE + ". See your Administrator for Quota policies.")).build();}}
Listing 14-14 shows the QuotaHealthIndicator class . Let’s examine it:
HealthIndicator. This is the main interface that you need to implement in order to create your custom health monitor. You need to implement the health method that returns a health instance.
Health health(). This method is an implementation method from the HealthIndicator interface, and it returns a health instance. This instance has a fluent API that allows you to create the necessary response for your monitor. Take a look at the code and see that you can set the health up or down depending on your own business rules. Also note that you are using the JournalRepository instance (repo) and using just the count() method that will bring the number of records you have. This will help to decide what to do in your health monitor.
As you can see, is very trivial to create a custom health indicator or monitor. You only need to implement the HealthIndicator instances. As a naming convention, you need to append the HealthIndicator postfix to your class, so the Actuator can use the name. In this example the quota name will be used in the response of the /health endpoint. In order to make this work, you need to annotate this class with the @Component annotation so that the Spring engine can recognize the health actuator endpoint.
It’s worth mentioning that there is another class that can be extended from: org.springframework.boot.actuate.health.AbstractHealthIndicator. You need to implement the abstract method called doHealthCheck. See the Actuator’s documentation for more information about this class.
Now it’s time to run it:
$ ./mvnw spring-boot:runAfter executing this command, you should see the Actuator endpoint displayed. You can go to the http://localhost:8080/health endpoint. See Figure 14-4.

Figure 14-4. http://localhost:8080/health is showing the quota health monitor UP
Figure 14-4 shows the result of going to the /health endpoint, and as you can see you have your own quota health monitor where the status is UP with the quota.entries key and a value of 4. I’m assuming that you still have the data.sql in one of your projects, which is why you have the four entries.
Now, if you don’t want to add more entries, and want to see the monitor status change to down, you can set the variable QUOTA_MAX_SIZE to 3 and then rerun the application. Then you can refresh the endpoint and see the results shown in Figure 14-5.

Figure 14-5. http://localhost:8080/health is showing the quota health monitor DOWN
Figure 14-5 shows the result of the whole health DOWN, because your quota status returns an exception.
Congratulations! You created your own quota health monitor!
Note
Another alternative is to use the STS IDE and import the projects—in this case the journal master (the one that contains the modules) and the calendar—so you can test better and use the code completion that the IDE offers you. Also you don’t need to package and install the project every time you do a modification; just make the change and the IDE will take care of the rest.
Summary
This chapter showed you how to create a module for Spring Boot by using the auto-configuration pattern. It showed you how to create your custom health monitor. As you can see, it’s very simple to extend Spring Boot apps, so feel free to modify the code and experiment with them.
We didn’t do much if any unit or integration testing and it would be good homework for you to practice all the detail that I showed you. I think it will help you understand how Spring Boot works even better. Repeat and you will master!