
This chapter talks about the Spring Boot features that involve configuration. First it shows you how Spring Boot works when it’s using the auto-configuration feature (in detail) when you add the @EnableAutoConfiguration annotation. Then the chapter shows you some of Spring Boot’s extra features, such as externalizing your configuration properties, its enable and disable features, and more.
Auto-Configuration
The previous chapter explained that auto-configuration is one of the important features in Spring Boot because it will try to do its best to configure your Spring Boot application according to your classpath (this will be according to your maven pom.xml or gradle build.gradle files), annotations, and any Java configuration declarations.
The example in Listing 3-1 is the same one from previous chapters, but in this case I want to use it to explain what happens behind the scenes when Spring Boot runs it.
Listing 3-1. app.groovy
@RestControllerclass WebApp{@RequestMapping("/")String greetings(){"Spring Boot Rocks"}}
You can run this program using the Spring Boot CLI (Command Line Interface) with this command:
$ spring run app.groovySpring Boot won’t generate any code (no output), but will add some on the fly. This is one of the advantages of Groovy, in that you can have access to the AST (Abstract Syntax Tree) at running time. For Java, this normally happens using proxy classes. Spring Boot will start by importing missing dependencies, like importing the org.springframework.web.bind.annotation.RestController annotation, among others.
Next, it will identify that you need a Web Spring Boot Starter (I will talk more about it in the following sections) because you marked your class and your method with the @RestController and the @RequestMappingannotations, so it will add to the code the @Grab("spring-boot-web-starter") annotation.
Next, it will add the necessary annotation that will trigger some auto-configuration, the @EnableAutoConfiguration annotation, and last, it will add the main method that will be the entry point for the application. You can see the resultant code in Listing 3-2.
Listing 3-2. app.groovy modified by Spring Boot
import org.springframework.web.bind.annotation.RestController;// Other Imports@Grab("spring-boot-web-starter")@EnableAutoConfiguration@RestControllerclass WebApp{@RequestMapping("/")String greetings(){"Spring Boot Rocks"}public static void main(String[] args) {SpringApplication.run(WebApp.class, args);}}
Listing 3-2 shows the actual modified program that Spring Boot will run. All this “build-up” is happening in memory. You can see in action how the auto-configuration works, by running Listing 3-1 with the --debug parameter. Take a look:
$ spring run app.groovy --debug...DEBUG 49009 --- [] autoConfigurationReportLoggingInitializer :===========================AUTO-CONFIGURATION REPORT===========================Positive matches:-----------------//You will see all the conditions that were met to enable a web application. And this is because you have the //@RestController annotation.Negative matches:-----------------//You will find all the conditions that failed. For example you will find that the ActiveMQAutoConfiguration class did //not match, because you don't have any reference of the ActiveMQConnectionFactory.
Review the output from the command in your terminal and you’ll see all the positive and negative matches that Spring Boot did before running this simple application. Because you are running the Spring Boot CLI, it’s doing a lot by trying to guess what kind of application you want to run. When you create a Maven or Gradle project and specify some dependencies (pom.xml or build.gradle), you are helping Spring Boot make decisions based on your dependencies.
Disabling a Specific Auto-Configuration
Recall that Chapter 2 covered the @SpringBootApplication annotation a bit. This annotation is equivalent to the @Configuration, @ComponentScan, and @EnableAutoConfiguration annotations. You can disable a specific auto-configuration by adding the @EnableAutoConfiguration annotation to your class with the exclude parameter. Listing 3-3 shows an example.
Listing 3-3. app.groovy
import org.springframework.boot.autoconfigure.jms.activemq.ActiveMQAutoConfiguration@RestController@EnableAutoConfiguration(exclude=[ActiveMQAutoConfiguration.class])class WebApp{@RequestMapping("/")String greetings(){"Spring Boot Rocks"}}
Listing 3-3 shows the @EnableAutoConfiguration annotation with the exclude parameter. This parameter receives an array of auto-configuration classes. If you run this again with the following command:
$ spring run app.groovy --debug...Exclusions:-----------org.springframework.boot.autoconfigure.jms.activemq.ActiveMQAutoConfiguration...
You will see the exclusion of the ActiveMQAutoConfiguration class. This is a very useful technique for Groovy scripts, when you want Spring Boot to skip certain and unnecessary auto-configurations. You might wonder why you would want to exclude a configuration. Well, sometimes you will have dependencies that work in two different types of applications—web and non-web for example—and you want to use the jackson-core library that handles JSON objects to create a non-web app. This library can work in web or non-web apps, but the auto-configuration will guess that, based on this dependency, your application is a web app. In that case, you can exclude the web auto-configuration from happening. This is one example of many where you might use the auto-configuration exclusion.
Listing 3-4 shows this exclusion on a Java Spring Boot app.
Listing 3-4. DemoApplication.java—Spring Boot snippet
package com.example;import org.springframework.boot.SpringApplication;import org.springframework.boot.autoconfigure.SpringBootApplication;import org.springframework.boot.autoconfigure.jdbc.DataSourceAutoConfiguration;import org.springframework.boot.autoconfigure.jms.activemq.ActiveMQAutoConfiguration;@SpringBootApplication(exclude={ActiveMQAutoConfiguration.class,DataSourceAutoConfiguration.class})public class DemoApplication {public static void main(String[] args) {SpringApplication.run(DemoApplication.class, args);}}
Listing 3-4 shows you a Java version. In this example the main class is declaring only the @SpringBootApplication annotation, and within this annotation you can exclude the auto-configuration classes. Listing 3-4 shows two classes being excluded—the ActiveMQAutoConfigurationand DataSourceAutoConfigurationclasses. Why is @EnableAutoConfiguration annotation not being used? Remember that the @SpringBootApplication annotation inherits @EnableAutoConfiguration, @Configuration, and @ComponentScan, which is why you can use the exclude parameter within the @SpringBootApplication.
If you run a Maven or Gradle project (using the example in Listing 3-4) with the debug option, you will see output like this:
$ spring run DemoApplication.java --debug...Exclusions:-----------org.springframework.boot.autoconfigure.jms.activemq.ActiveMQAutoConfigurationorg.springframework.boot.autoconfigure.jdbc.DataSourceAutoConfiguration...
Note
Groovy handles the arrays in a different way from Java. The example in Listing 3-3 (app.groovy) uses in the exclude parameter [ ] (square brackets) to handle arrays, which is the Groovy way. Listing 3-4 (DemoApplication.java) uses in the exclude parameter and { } (curly braces) to handle the arrays, which is the Java way.
You can find all the book’s source code at the Apress web site or by going to https://github.com/felipeg48/pro-spring-boot .
@EnableAutoConfiguration and @Enable<Technology> Annotations
You will find that the Spring Framework and some of its modules—like Spring Core, Spring Data, Spring AMQP, and Spring Integration—provide @Enable<Technology> annotations. For example, @EnableTransactionManagement, @EnableRabbit, and @EnableIntegration are part of the modules mentioned. Within Spring applications, you can use these annotations to follow the pattern “convention over configuration,” thus making your apps even easier to develop and maintain without worrying too much about configuration.
Spring Boot can also take advantage of these annotations. These annotations are used in the @EnableAutoConfiguration annotation to do the auto-configuration. Let’s take a closer look at the @EnableAutoConfiguration annotation and see the logic behind it. You’ll see where the @Enable<Technology> annotations fit. It’s worth mentioning that in other chapters you will be learning more about these annotations. See Listing 3-5.
Listing 3-5. Snippet of org.springframework.boot.autoconfigure.EnableAutoConfiguration.java
...// More declarations here ......@Import(EnableAutoConfigurationImportSelector.class)public @interface EnableAutoConfiguration {Class<?>[] exclude() default {};String[] excludeName() default {};}
Listing 3-5 shows you the @EnableAutoConfiguration annotation. As you already know, this class will attempt to guess and configure the beans that your application will need. The auto-configuration classes are applied based on the classpath and which beans your app has defined, but what this makes more powerful is the org.springframework.boot.autoconfigure.EnableAutoConfigurationImportSelector class that finds all the necessary configuration classes.
The EnableAutoConfigurationImportSelector class has a several methods, but one of the most important for the auto-configuration to happen is the getCandidateConfiguration method. See Listing 3-6.
Listing 3-6. Snippet of org.springframework.boot.autoconfigure.EnableAutoConfigurationImportSelector
...protected List<String> getCandidateConfigurations(AnnotationMetadata metadata,AnnotationAttributes attributes) {return SpringFactoriesLoader.loadFactoryNames(getSpringFactoriesLoaderFactoryClass(), getBeanClassLoader());}...
Listing 3-6 shows you a snippet of the EnableAutoConfigurationImportSelector class, where the getCandidateConfigurations method returns SpringFactoriesLoader.loadFactoryNames. The SpringFactoriesLoader.loadFactories will look for the META-INF/spring.factories defined in the spring-boot-autoconfigure JAR. See Listing 3-7 for its contents.
Listing 3-7. Snippet of spring-boot-autoconfigure-<version>.jar#META-INF/spring.factories
# Initializersorg.springframework.context.ApplicationContextInitializer=org.springframework.boot.autoconfigure.logging.AutoConfigurationReportLoggingInitializer...# Application Listenersorg.springframework.context.ApplicationListener=org.springframework.boot.autoconfigure.BackgroundPreinitializer# Auto Configureorg.springframework.boot.autoconfigure.EnableAutoConfiguration=org.springframework.boot.autoconfigure.admin.SpringApplicationAdminJmxAutoConfiguration,org.springframework.boot.autoconfigure.aop.AopAutoConfiguration,org.springframework.boot.autoconfigure.amqp.RabbitAutoConfiguration,org.springframework.boot.autoconfigure.MessageSourceAutoConfiguration,org.springframework.boot.autoconfigure.PropertyPlaceholderAutoConfiguration,org.springframework.boot.autoconfigure.batch.BatchAutoConfiguration,org.springframework.boot.autoconfigure.cache.CacheAutoConfiguration,org.springframework.boot.autoconfigure.cassandra.CassandraAutoConfiguration,org.springframework.boot.autoconfigure.cloud.CloudAutoConfiguration,........
As you can see from Listing 3-7, the spring.factories defined all the auto-configuration classes that will be used to guess what kind of application you are running. Let’s take a look at the CloudAutoConfiguration class. See Listing 3-8.
Listing 3-8. org.springframework.boot.autoconfigure.cloud.CloudAutoConfiguration.java
package org.springframework.boot.autoconfigure.cloud;import org.springframework.boot.autoconfigure.AutoConfigureOrder;import org.springframework.boot.autoconfigure.EnableAutoConfiguration;import org.springframework.boot.autoconfigure.condition.ConditionalOnClass;import org.springframework.boot.autoconfigure.condition.ConditionalOnMissingBean;import org.springframework.boot.autoconfigure.condition.ConditionalOnProperty;import org.springframework.cloud.Cloud;import org.springframework.cloud.app.ApplicationInstanceInfo;import org.springframework.cloud.config.java.CloudScan;import org.springframework.cloud.config.java.CloudScanConfiguration;import org.springframework.context.annotation.Configuration;import org.springframework.context.annotation.Import;import org.springframework.context.annotation.Profile;import org.springframework.core.Ordered;@Configuration@Profile("cloud")@AutoConfigureOrder(CloudAutoConfiguration.ORDER)@ConditionalOnClass(CloudScanConfiguration.class)@ConditionalOnMissingBean(Cloud.class)@ConditionalOnProperty(prefix = "spring.cloud", name = "enabled", havingValue = "true", matchIfMissing = true)@Import(CloudScanConfiguration.class)public class CloudAutoConfiguration {// Cloud configuration needs to happen early (before data, mongo etc.)public static final int ORDER = Ordered.HIGHEST_PRECEDENCE + 20;}
Listing 3-8 shows you the CloudAutoConfiguration class. As you can see, it’s very short class, but it will configure a cloud application if it finds the spring-cloud classes. But how? It will use the @ConditionalOnClass and @ConditionalOnMissingBean annotations to decide if the application is a cloud app. Don’t worry too much about this, because you are going to use these annotations when you create your own auto-configuration class in the last chapter of the book.
Another thing to note in Listing 3-8 is the use of the @ConditionalOnProperty, which applies only if the spring.cloud property is enabled. It’s worth mentioning that this auto-configuration will be executed in a cloud profile, denoted by the @Profile annotation. The @Import annotation will be applied only if the other annotations met their conditions, meaning that the import of the CloudScanConfiguration class will be executed if the spring-cloud classes are in the classpath.
Spring Boot Features
This section shows you some of the Spring Boot features. Spring Boot is highly customizable, from the auto-configuration that guesses what kind of application you are trying to run (explained in the previous section), to customize how it starts, what to show, and what to enable or disable based on its own properties. So let’s get started.
Let’s create a Spring Boot Java project with the spring init command. (Make sure you have the Spring Boot installed on your system. If not, you can review the previous chapter on how to install it.) Execute the following command in a terminal window:
$ spring init -g=com.apres.spring -a=spring-boot-simple --package=com.apress.spring -name=spring-boot-simple -xThis command will create a Maven Java project with a groupId=com.apress.spring, an artifactId=spring-boot-simple, and a package=com.apress.spring with a project’s name=spring-boot-simple. It will be created in the current directory (-x). Don’t worry too much about the parameters; you’ll learn more about them in the next chapter. This command will generate the structure shown in Figure 3-1.

Figure 3-1. Spring Boot project—directory structure
Figure 3-1 shows you the project structure after running the spring init command. Let’s run the application and see what happens. You will see (in the next chapter in more detail) that the Spring Initializr includes a Maven wrapper that you can use. To run it, execute the following command in the same terminal window:
$ ./mvnw spring-boot:run. ____ _ __ _ _/\ / ___'_ __ _ _(_)_ __ __ _( ( )\___ | '_ | '_| | '_ / _` |\/ ___)| |_)| | | | | || (_| | ) ) ) )' |____| .__|_| |_|_| |_\__, | / / / /=========|_|==============|___/=/_/_/_/:: Spring Boot :: (v1.3.3.RELEASE)INFO[main] c.a.spring.SpringBootSimpleApplication : Starting SpringBootSimpleApplication on liukang.local with PID 75712 (/Books/pro-spring-boot/spring-boot-simple-java/target/classes started by felipeg in /Books/pro-spring-boot/spring-boot-simple-java)INFO[main] c.a.spring.SpringBootSimpleApplication : No active profile set, falling back to default profiles: defaultINFO[main] s.c.a.AnnotationConfigApplicationContext : Refreshing org.springframework.context.annotation.AnnotationConfigApplicationContext@203f6b5: startup date [Thu Feb 25 19:00:34 MST 2016]; root of context hierarchyINFO[main] o.s.j.e.a.AnnotationMBeanExporter : Registering beans for JMX exposure on startupINFO[main] c.a.spring.SpringBootSimpleApplication : Started SpringBootSimpleApplication in 0.789 seconds (JVM running for 4.295)INFO[Th-1] s.c.a.AnnotationConfigApplicationContext : Closing org.springframework.context.annotation.AnnotationConfigApplicationContext@203f6b5: startup date [Thu Feb 25 19:00:34 MST 2016]; root of context hierarchyINFO[Th-1] o.s.j.e.a.AnnotationMBeanExporter : Unregistering JMX-exposed beans on shutdown
You should see something similar to the output above. It will show you a banner (“Spring”) and some logs. The main application is shown in Listing 3-9.
Listing 3-9. src/main/java/com/apress/spring/SpringBootSimpleApplication.java
package com.apress.spring;import org.springframework.boot.SpringApplication;import org.springframework.boot.autoconfigure.SpringBootApplication;@SpringBootApplicationpublic class SpringBootSimpleApplication {public static void main(String[] args) {SpringApplication.run(SpringBootSimpleApplication.class, args);}}
Listing 3-9 shows you the main application. You already know about it from the previous chapters, but let’s review it again:
@SpringBootApplication. This annotation is actually the @ComponentScan, @Configuration, and @EnableAutoConfiguration annotations. You already know everything about @EnableAutoConfiguration from the previous sections.
SpringApplication. This class provides the bootstrap for the Spring Boot application that is executed in the main method. You need to pass the class that will be executed.
Now, you are ready to start customizing the Spring Boot app.
SpringApplication Class
You can have a more advanced configuration using the Spring application, because you can create an instance out of it and do a lot more. See Listing 3-10.
Listing 3-10. Version 2 of src/main/java/com/apress/spring/SpringBootSimpleApplication.java
package com.apress.spring;import org.springframework.boot.SpringApplication;import org.springframework.boot.autoconfigure.SpringBootApplication;@SpringBootApplicationpublic class SpringBootSimpleApplication {public static void main(String[] args) {SpringApplication app = new SpringApplication(SpringBootSimpleApplication.class);//add more features here.app.run(args);}}
Custom Banner
Every time you run your application, you can see a banner being displayed at the beginning of the application. That banner can be customized in different ways. Listing 3-11 shows how to implement the org.springframework.boot.Banner interface.
Listing 3-11. Version 3 of src/main/java/com/apress/spring/SpringBootSimpleApplication.java
package com.apress.spring;import java.io.PrintStream;import org.springframework.boot.Banner;import org.springframework.boot.SpringApplication;import org.springframework.boot.autoconfigure.SpringBootApplication;import org.springframework.core.env.Environment;@SpringBootApplicationpublic class SpringBootSimpleApplication {public static void main(String[] args) {SpringApplication app = new SpringApplication(SpringBootSimpleApplication.class);app.setBanner(new Banner() {@Overridepublic void printBanner(Environment environment, Class<?> sourceClass, PrintStream out) {out.print(" This is my own banner! ".toUpperCase());}});app.run(args);}}
When you run the application, you will see something like this:
$ ./mvnw spring-boot:runTHIS IS MY OWN BANNER!INFO[main] c.a.spring.SpringBootSimpleApplication : Starting SpringBootSimpleApplication on liukang.local with PID 75712 (/Books/pro-spring-boot/spring-boot-simple-java/target/classes started by felipeg in /Books/pro-spring-boot/spring-boot-simple-java)......INFO[main] c.a.spring.SpringBootSimpleApplication : Started SpringBootSimpleApplication in 0.789 seconds (JVM running for 4.295)INFO[Th-1] s.c.a.AnnotationConfigApplicationContext : Closing org.springframework.context.annotation.AnnotationConfigApplicationContext@203f6b5: startup date [Thu Feb 25 19:00:34 MST 2016]; root of context hierarchyINFO[Th-1] o.s.j.e.a.AnnotationMBeanExporter : Unregistering JMX-exposed beans on shutdown
You can also create your own ASCII banner and display it. There is a very cool site that creates ASCII art from text ( http://patorjk.com ). See Figure 3-2.

Figure 3-2. http://patorjk.com—text to ASCII art generator
Figure 3-2 shows you the http://patorjk.com site. You can click the “Text to ASCII Art Generator” link. Once you are there, add the text “Pro Spring Boot” in the text field (or whatever you want). Then click Test All to see all the different ASCII art. See Figure 3-3.

Figure 3-3. ASCII art
Figure 3-3 shows you all the ASCII art (around 314 different drawings). Select your favorite and click the button Select Text. Copy it (Ctrl+C Windows/Cmd+C Mac) and then create a file named banner.txt in the src/main/resources/ directory. See Figure 3-4.
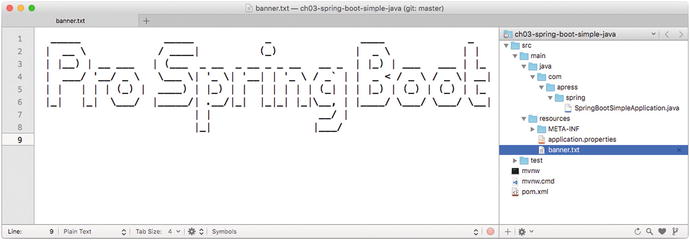
Figure 3-4. The content of src/main/resource/banner.txt
You can run your application again using this command:
$ ./mvnw spring-boot:runYou will see the ASCII art you added to the banner.txt file. If you run your app using Listing 3-11 (where you are setting the banner), it will override it and use the banner.txt file that is in your classpath. That’s the default.
By default, Spring Boot will look for the banner.txt in the classpath. But you can change its location. Create another banner.txt file (or copy the one you have already) in the src/main/resources/META-INF/ directory. Then you can run the application by passing a -D parameter. Execute the following command:
$ ./mvnw spring-boot:run -Dbanner.location=classpath:/META-INF/banner.txtThis command is using the -D flag to pass the banner.location property that is pointing to the new classpath location: /META-INF/banner.txt. You can declare this property in the src/main/resources/application.properties file, as follows:
banner.location=classpath:/META-INF/banner.txtAnd run it like this:
$ ./mvnw spring-boot:runYou have several options for the setting up the banner.txt file. You can remove completely the banner. You can define it in src/main/resources/applications.property like this:
spring.main.banner-mode=offThis command has precedence over the default banner.txt located at the classpath:banner.txt location. You can also do this programmatically. See Listing 3-12.
Listing 3-12. Version 4 of src/main/java/com/apress/spring/SpringBootSimpleApplication.java
package com.apress.spring;import org.springframework.boot.Banner.Mode;import org.springframework.boot.SpringApplication;import org.springframework.boot.autoconfigure.SpringBootApplication;@SpringBootApplicationpublic class SpringBootSimpleApplication {public static void main(String[] args) {SpringApplication app = new SpringApplication(SpringBootSimpleApplication.class);app.setBannerMode(Mode.OFF);app.run(args);}}
SpringApplicationBuilder
The SpringApplicationBuilder class provides a fluent API and is a builder for the SpringApplication and ApplicationContext instances. It also provides hierarchy support. Everything that I showed you so far (with the SpringApplication) can be set with this builder. This is another way to configure your Spring Boot application. You use the other approach or maybe you are more comfortable with the fluent API where you can have more readable code. See Listing 3-13.
Listing 3-13. Version 5 of src/main/java/com/apress/spring/SpringBootSimpleApplication.java
package com.apress.spring;import org.springframework.boot.Banner;import org.springframework.boot.autoconfigure.SpringBootApplication;import org.springframework.boot.builder.SpringApplicationBuilder;@SpringBootApplicationpublic class SpringBootSimpleApplication {public static void main(String[] args) {new SpringApplicationBuilder().bannerMode(Banner.Mode.OFF).sources(SpringBootSimpleApplication.class).run(args);}}
Listing 3-13 shows you the SpringApplicationBuilder fluent API. Next, let’s consider more examples.
You can have a hierarchy when you’re creating a Spring app (If you want to know more about application context in Spring, I recommend you read the Apress book called “Pro Spring 4th Edition”) and you can create this with the SpringApplicationBuilder.
new SpringApplicationBuilder(SpringBootSimpleApplication.class).child(MyConfig.class).run(args);
If you have a web configuration, make sure it’s being declared as a child. All the web configuration must depend on a main Spring context, which is why it needs to be declared as a child. Also parent and children must share the same org.springframework.core.Environment interface (this represents the environment in which the current application is running and is related to profiles and properties declarations).
You can log the info at startup or not; by default, this is set to true:
new SpringApplicationBuilder(SpringBootSimpleApplication.class).logStartupInfo(false).run(args);
You can activate profiles:
new SpringApplicationBuilder(SpringBootSimpleApplication.class).profiles("prod","cloud").run(args);
You’ll learn more about profiles later, so you can make sense of the line above.
You can attach listeners for some of the ApplicationEvent events:
Logger log = LoggerFactory.getLogger(SpringBootSimpleApplication.class);new SpringApplicationBuilder(SpringBootSimpleApplication.class).listeners(new ApplicationListener<ApplicationEvent>() {@Overridepublic void onApplicationEvent(ApplicationEvent event) {log.info("#### > " + event.getClass().getCanonicalName());}}).run(args);
When you run your application, you should see at least the following output:
...#### > org.springframework.boot.context.event.ApplicationPreparedEvent...#### > org.springframework.context.event.ContextRefreshedEvent#### > org.springframework.boot.context.event.ApplicationReadyEvent...#### > org.springframework.context.event.ContextClosedEvent...
Then your application can add the necessary logic to handle those events. In addition, you can have these events: ApplicationStartedEvent (sent at the start), ApplicationEnvironmentPreparedEvent (sent when the environment is known), ApplicationPreparedEvent (sent after the bean definitions), ApplicationReadyEvent (sent when the application is ready), ApplicationFailedEvent (sent in case of exception during the startup), and the other I showed you in the output (related to the Spring container). All these events can be useful when you want to set up your application (database, check up for some services, etc.) before it runs, or if your application fails during a start (ApplicationFailedEvent), because you’ll probably want to send a notification somewhere.
You can remove any web environment auto-configuration. Remember that Spring Boot will try to guess what kind of app you are running based on the classpath, and for a web app, the algorithm is very simple. Imagine that you are using some libraries that actually can run without a web environment and your app is not a web app; however, Spring Boot tries to configure it as such:
new SpringApplicationBuilder(SpringBootSimpleApplication.class).web(false).run(args);
The previous section showed you how to you use @EnableAutoConfiguration and its parameter exclude, by passing the auto-configuration classes that you don’t want to be checked on. The above code is where you set the web(false) and it’s the same idea as the exclude parameter. As you can see, you have many options for configuring Spring Boot .
Application Arguments
Spring Boot allows you to get the arguments passed to the application. When you have this:
SpringApplication.run(SpringBootSimpleApplication.class, args); You can access the args in your beans. See Listing 3-14.
Listing 3-14. Version 10 of src/main/java/com/apress/spring/SpringBootSimpleApplication.java
package com.apress.spring;import java.io.IOException;import java.util.List;import org.slf4j.Logger;import org.slf4j.LoggerFactory;import org.springframework.beans.factory.annotation.Autowired;import org.springframework.boot.ApplicationArguments;import org.springframework.boot.SpringApplication;import org.springframework.boot.autoconfigure.SpringBootApplication;import org.springframework.stereotype.Component;@SpringBootApplicationpublic class SpringBootSimpleApplication {public static void main(String[] args) throws IOException {SpringApplication.run(SpringBootSimpleApplication.class, args);}}@Componentclass MyComponent {private static final Logger log = LoggerFactory.getLogger(MyComponent.class);@Autowiredpublic MyComponent(ApplicationArguments args) {boolean enable = args.containsOption("enable");if(enable)log.info("## > You are enable!");List<String> _args = args.getNonOptionArgs();log.info("## > extra args ...");if(!_args.isEmpty())_args.forEach(file -> log.info(file));}}
When you execute args.containsOption("enable"), it will expect the argument as --<arg>, so in Listing 3-14 it will be expecting --enable. The getNonOptionArgs will take other arguments. To test it, you can execute the following command:
$ ./mvnw spring-boot:run -Drun.arguments="--enable"You should see the text: ## > You are enable. Also you can run it like this :
$ ./mvnw spring-boot:run -Drun.arguments="arg1,arg2"Accessing Arguments with an Executable JAR
You have the option to create a standalone app, in the form of an executable JAR (you will see more about this). To create a executable JAR, simply execute the following command:
$ ./mvnw packageThis command will create an executable JAR, meaning that you can run it like this:
$ java -jar target/spring-boot-simple-0.0.1-SNAPSHOT.jarYou can pass arguments like this:
$ java -jar target/spring-boot-simple-0.0.1-SNAPSHOT.jar --enable arg1 arg2You should get the same text for the enable arg and a list of arg1 and arg2.
ApplicationRunner and CommandLineRunner
Spring Boot allows you to execute code before your application starts. Spring Boot has the ApplicationRunner and the CommandLineRunner interfaces that expose the run methods. See Listing 3-15.
Listing 3-15. Version 11 of src/main/java/com/apress/spring/SpringBootSimpleApplication.java
package com.apress.spring;import java.io.IOException;import org.slf4j.Logger;import org.slf4j.LoggerFactory;import org.springframework.beans.factory.annotation.Autowired;import org.springframework.boot.ApplicationArguments;import org.springframework.boot.ApplicationRunner;import org.springframework.boot.CommandLineRunner;import org.springframework.boot.SpringApplication;import org.springframework.boot.autoconfigure.SpringBootApplication;import org.springframework.context.annotation.Bean;@SpringBootApplicationpublic class SpringBootSimpleApplication implements CommandLineRunner, ApplicationRunner{private static final Logger log = LoggerFactory.getLogger(SpringBootSimpleApplication.class);public static void main(String[] args) throws IOException {SpringApplication.run(SpringBootSimpleApplication.class, args);}@BeanString info(){return "Just a simple String bean";}@AutowiredString info;@Overridepublic void run(ApplicationArguments args) throws Exception {log.info("## > ApplicationRunner Implementation...");log.info("Accessing the Info bean: " + info);args.getNonOptionArgs().forEach(file -> log.info(file));}@Overridepublic void run(String... args) throws Exception {log.info("## > CommandLineRunner Implementation...");log.info("Accessing the Info bean: " + info);for(String arg:args)log.info(arg);}}
Listing 3-15 shows you the CommandLineRunner and ApplicationRunner interfaces and their implementations. CommandLineRunner exposes the public void(String... args) method and ApplicationRunner exposes the public void run(ApplicationArguments args) method. These are practically the same. It’s not necessary to implement both at the same time; if you want to have more control over the arguments, implement the ApplicationRunner interface. You can run Listing 3-15 with the following command:
$ ./mvnw spring-boot:run -Drun.arguments="arg1,arg2"You should see the the logs for the info bean and the printout of the arguments passed. Listing 3-16 shows another way to use the CommandLineRunner interface.
Listing 3-16. Version 12 of src/main/java/com/apress/spring/SpringBootSimpleApplication.java
package com.apress.spring;import java.io.IOException;import org.slf4j.Logger;import org.slf4j.LoggerFactory;import org.springframework.beans.factory.annotation.Autowired;import org.springframework.boot.CommandLineRunner;import org.springframework.boot.SpringApplication;import org.springframework.boot.autoconfigure.SpringBootApplication;import org.springframework.context.annotation.Bean;@SpringBootApplicationpublic class SpringBootSimpleApplication {private static final Logger log = LoggerFactory.getLogger(SpringBootSimpleApplication.class);public static void main(String[] args) throws IOException {SpringApplication.run(SpringBootSimpleApplication.class, args);}@BeanString info(){return "Just a simple String bean";}@AutowiredString info;@BeanCommandLineRunner myMethod(){return args -> {log.info("## > CommandLineRunner Implementation...");log.info("Accessing the Info bean: " + info);for(String arg:args)log.info(arg);};}}
Listing 3-16 shows a method that’s annotated with the @Bean annotation returning a CommandLineRunner implementation. This example uses the Java 8 syntax (lambda) to do the return. You can add as many methods that return a CommandLineRunner as you want. If you want to execute these in certain order, you can use the @Order annotation. If you want to run Listing 3-16 just execute the same command as before:
$ ./mvnw spring-boot:run -Drun.arguments="arg1,arg2"Application Configuration
Developers know that they are never going to get rid of some application configuration. They will always be looking where they can persist URLs, IPs, credentials, and database information, for example. Basically any data that they normally use quite often in their applications. They know as a best practice that they need to avoid to hardcode this kind of configuration information. That’s why they need to externalize it so it can be secure and easy to use and deploy.
With Spring you can use XML and the <context:property-placeholder/> tag, or you can use the @PropertySource annotation to declare your properties. You simply point to a file that has them declared. Spring Boot offers you the same mechanism but with improvements:
Spring Boot has different options for saving your application configuration:
You can use a file named application.properties, which should be located in the root classpath of your application (there are more places where you can add this file that you’ll learn about later).
You can use a YAML notation file named application.yml that also needs to be located in the root classpath (there are more places where you can add this file that you’ll learn about later).
You can use environment variables. This is becoming the default practices for cloud scenarios.
You can use command-line arguments.
Remember that Spring Boot is an opinionated technology, so most of its application configuration is based on a common application.properties or application.yml file. If none is specified, it already has those property’s values as defaults. You can get the complete list of the common application properties here: https://docs.spring.io/spring-boot/docs/current/reference/html/common-application-properties.html .
One of the best features from Spring (and of course from Spring Boot as well) is that you can access the properties values by using the @Value annotation (with the name of the property) or from the org.springframework.core.env.Environment interface, which extends from the org.springframework.core.env.PropertyResolver interface. For example, if you have a src/main/resources/application.properties file with the following content:
data.server=remoteserver:3030You can access the data.server property in your application by using the @Value annotation, as shown in the following snippet:
//...@Servicepublic class MyService {@Value("${data.server}")private String server;//...}
This code snippet shows you the usage of the @Value annotation. Spring Boot will inject the data.server property value from the application.properties file in the server variable with its value: remoteserver:3030.
If you don’t want to use the application.properties, you can inject the properties via the command line:
$ java -jar target/myapp.jar --data.server=remoteserver:3030You will get the same result. If you don’t like the application.properties file or you hate the YAML syntax, you can also use a specialized environment variable named SPRING_APPLICATION_JSON to expose the same properties and its values. For example:
$ SPRING_APPLICATION_JSON='{ "data":{"server":"remoteserver:3030"}}' java -jar target/myapp.jar(You must put the SRPING_APPLICATION_JSON variable before you execute the java -jar or the Maven command.) Again, you will get the same result. As you can see, Spring Boot gives you several ways to expose application properties.
Configuration Properties Examples
Let’s create a simple project that will help you understand the application configuration:
$ spring init -g=com.apres.spring -a=spring-boot-config --package=com.apress.spring -name=spring-boot-config -xThis command will create a simple Maven Java project. Before continuing with the project, you must know that Spring Boot uses an order if you want to override your application configuration properties:
Command-line arguments
SPRING_APPLICATION_JSON
JNDI (java:comp/env)
System.getProperties()
OS environment variables
RandomValuePropertySource (random.*)
Profile-specific (application-{profile}.jar) outside of the package JAR
Profile-specific (application-{profile}.jar) inside of the package JAR
Application properties (application.properties) outside of the package JAR
Application properties (application.properties) inside of the package JAR
@PropertySource
SpringApplication.setDefaultProperties
As you can see, that’s the order for overriding the application properties. I’ll clarify a little on the “outside” and “inside” package JAR. This means that if you have a JAR library dependency that has an application.properties (or YAML file) in it and it’s being used in your application, then your application with its own application.properties file will have precedence over the application.properties that is in the JAR library.
Let’s start with some examples.
Command-Line Arguments
Go to your project (that you did with the Spring init command) and edit the main class to look like Listing 3-17.
Listing 3-17. src/main/java/com/apress/spring/SpringBootConfigApplication.java
package com.apress.spring;import org.slf4j.Logger;import org.slf4j.LoggerFactory;import org.springframework.beans.factory.annotation.Value;import org.springframework.boot.CommandLineRunner;import org.springframework.boot.SpringApplication;import org.springframework.boot.autoconfigure.SpringBootApplication;import org.springframework.context.annotation.Bean;@SpringBootApplicationpublic class SpringBootConfigApplication {private static Logger log = LoggerFactory.getLogger(SpringBootConfigApplication.class);public static void main(String[] args) {SpringApplication.run(SpringBootConfigApplication.class, args);}@Value("${server.ip}")String serverIp;@BeanCommandLineRunner values(){return args -> {log.info(" > The Server IP is: " + serverIp);};}}
Listing 3-17 shows you the main class. As you can see, it is using the @Value("${server.ip}") annotation. This annotation will translate the text "${server.ip}" and will look for this property and its value in the order mentioned earlier.
You can run this example by executing the following command in the root of your project:
$ ./mvnw spring-boot:run -Dserver.ip=192.168.12.1If you package first your app (to create an executable JAR) and then run it with this:
$ ./mvnw package -DskipTests=true$ java -jar target/spring-boot-config-0.0.1-SNAPSHOT.jar --server.ip=192.168.12.1
In either case, you will see something similar to the following output:
. ____ _ __ _ _/\ / ___'_ __ _ _(_)_ __ __ _( ( )\___ | '_ | '_| | '_ / _` |\/ ___)| |_)| | | | | || (_| | ) ) ) )' |____| .__|_| |_|_| |_\__, | / / / /=========|_|==============|___/=/_/_/_/:: Spring Boot :: (v1.3.3.RELEASE)INFO 97094 -[m] c.a.spring.SpringBootConfigApplication : Starting SpringBootConfigApplication v0.0.1-SNAPSHOT on liukang.local with PID 97094INFO 97094 -[m] c.a.spring.SpringBootConfigApplication : No active profile set, falling back to default profiles: defaultINFO 97094 -[m] s.c.a.AnnotationConfigApplicationContext : Refreshing startup date [Sat Feb 27 10:44:24 MST 2016]; root of context hierarchyINFO 97094 -[m] o.s.j.e.a.AnnotationMBeanExporter : Registering beans for JMX exposure on startupINFO 97094 -[m] c.a.spring.SpringBootConfigApplication : > The Server IP is: 192.168.12.1INFO 97094 -[m] c.a.spring.SpringBootConfigApplication : Started SpringBootConfigApplication in 1.624 seconds (JVM running for 2.255)INFO 97094 -[t] s.c.a.AnnotationConfigApplicationContext : Closing startup date [Sat Feb 27 10:44:24 MST 2016]; root of context hierarchyINFO 97094 -[t] o.s.j.e.a.AnnotationMBeanExporter : Unregistering JMX-exposed beans on shutdown
You can see from this output the text " > The Server IP is: 1921.68.12.1". Now, let’s create the application.properties file. See Listing 3-18.
Listing 3-18. src/main/resources/application.properties
server.ip=192.168.23.4If you run the application with the same command-line arguments, you will see that the arguments have precedence over the application.properties file. If you run it without the arguments, such as:
$ ./mvnw spring-boot:runor
$ ./mvnw package$ java -jar target/spring-boot-config-0.0.1-SNAPSHOT.jar
You get the text: "> The Server IP is: 192.168.3.4". If you are used to JSON formatting, perhaps you are interested in passing your properties in this format. You can use the spring.application.json property. You can run it like this:
$ ./mvnw spring-boot:run -Dspring.application.json='{"server":{"ip":"192.168.145.78"}}'or
$ java -jar target/spring-boot-config-0.0.1-SNAPSHOT.jar --spring.application.json='{"server":{"ip":"192.168.145.78"}}'Or you can also add it as environment variable:
$ SPRING_APPLICATION_JSON='{"server":{"ip":"192.168.145.78"}}' java -jar target/spring-boot-config-0.0.1-SNAPSHOT.jarYou will see the text: "> The Server IP is: 192.168.145.78". You can also add your environment variable that refers to your property like this:
$ SERVER_IP=192.168.150.46 ./mvnw spring-boot:runor
$ SERVER_IP=192.168.150.46 java -jar target/spring-boot-config-0.0.1-SNAPSHOT.jarYou will see the text "> The Server IP is: 192.168.150.46". How does Spring Boot know that the environment variable is related to the server.ip property?
Note
If you are using Windows OS, all the environment variables must have the keyword SET before the variable. For example: C:> SET SERVER_IP=192.168.150.46 java -jar target/spring-boot-config-0.0.1-SNAPSHOT.jar
Relaxed Binding
Spring Boot uses relaxed rules for binding. See Table 3-1.
Table 3-1. Spring Boot Relaxed Binding
Property | Description |
|---|---|
message.destinationName | Standard camel case. |
message.destination-name | Dashed notation, which is the recommended way to add the application.properties or YML file. |
MESSAGE_DESTINATION_NAME | Uppercase, which is the recommended way to denote OS environment variables. |
Table 3-1 shows you the relaxed rules that apply to property names. That’s why in the previous example, the server.ip property is recognized also as SERVER_IP. These relaxed rules help you avoid collision names. They have to do with the @ConfigurationProperties annotation and its prefix, which you see in a later section.
Changing Location and Name
Spring Boot has an order to find the application.properties or YAML file. It will look in:
The /config subdirectory located in the current directory
The current directory
A classpath /config package
The classpath root
You can test this by creating a /config subdirectory in your current directory and adding a new application.properties, and then test that the order is true. Remember that you should already have a application.properties file in the classpath root (src/main/resources).
Spring Boot allows you to change the name and location of the properties file. So for example, imagine that you will use the /config subdirectory and the name of the properties file is now mycfg.properties (its content is server.ip=127.0.0.1). Then you can run the app with the following command:
$./mvnw spring-boot:run -Dspring.config.name=mycfgor
$ ./mvnw package -DskipTests=true$ java -jar target/spring-boot-config-0.0.1-SNAPSHOT.jar --spring.config.name=mycfg
or
$ SPRING_CONFIG_NAME=mycfg java -jar target/spring-boot-config-0.0.1-SNAPSHOT.jarYou should see the text: "> The Server IP is: 127.0.0.1". It’s not necessary to include the .properties with the name because it will automatically use it (same for a YAML file; you don’t need to specify the extension). And as said before, you can also change its location. For example, create a subdirectory named app and add a mycfg.properties file (its content is server.ip=localhost). Then you can run or execute your app with the following:
$ ./mvnw spring-boot:run -Dspring.config.name=mycfg -Dspring.config.location=file:app/or
$ java -jar target/spring-boot-config-0.0.1-SNAPSHOT.jar --spring.config.location=file:app/ --spring.config.name=mycfgYou can add the mycfg.properties file to the src/main/resources/META-INF/conf (you can create it) and execute this:
$ mkdir -p src/main/resources/META-INF/conf$ cp config/mycfg.properties src/main/resources/META-INF/conf/$ ./mvnw clean spring-boot:run -Dspring.config.name=mycfg -Dspring.config.location=classpath:META-INF/conf/
You should see the text: "> The Server IP is: 127.0.0.1". Try to change the value of the property so you can see that it is looking in the classpath. (Normally it will print an error that says Resource or File not found in the classpath.) Spring Boot also has an order to search for the properties file:
classpath
classpath:/config
file:
file:config/
Unless you change the order with the spring.config.location property. To change the location of the properties file, you need to set the SPRING_CONFIG_LOCATION environment variable.
Note
If you are using Windows OS, the slash is for creating directories or copying files.
Profile Based
Since version 3.1, the Spring Framework added a cool feature that allows developers to create custom properties and beans based on profiles. This is a useful way to separate environments without having to recompile or package a Spring app. You simply have to specify the active profile with the @ActiveProfiles annotation (when you are testing classes) or get the current environment and use the setActiveProfiles method. You can also use the SPRING_PROFILES_ACTIVE environment variable or the spring.profiles.active property.
You can use the properties file using this format: application-{profile}.properties. Create two files in your config/ subdirectory: application-qa.properties and application-prod.properties. Here are the contents of each one:
application-qa.properties
server.ip=localhostapplication-prod.properties
server.ip=http://my-remote.server.com
Now you can run your example with the following:
$ ./mvnw clean spring-boot:run -Dspring.profiles.active=prodWhen you execute this command, take a look at the beginning of the logs. You should see something similar to the following output:
. ____ _ __ _ _/\ / ___'_ __ _ _(_)_ __ __ _( ( )\___ | '_ | '_| | '_ / _` |\/ ___)| |_)| | | | | || (_| | ) ) ) )' |____| .__|_| |_|_| |_\__, | / / / /=========|_|==============|___/=/_/_/_/:: Spring Boot :: (v1.3.3.RELEASE)INFO 2242 -[m] ...ConfigApplication : Starting SpringBootConfigApplication on liukang.local with PID 2242INFO 2242 -[m] ...ConfigApplication : The following profiles are active: prodINFO 2242 -[m] ...gApplicationContext : Refreshing AnnotationConfigApplicationContext@696a03a3yINFO 2242 -[m] ...BeanExporter : Registering beans for JMX exposure on startupINFO 2242 -[m] ...ConfigApplication : > The Server IP is: http://my-remote.server.comINFO 2242 -[m] ...ConfigApplication : Started SpringBootConfigApplication in 1.586 secondsINFO 2242 -[ t] ...gApplicationContext : Closing @696a03a3INFO 2242 -[ t] ...BeanExporter : Unregistering JMX-exposed beans on shutdown
You should see the legend that reads "The following profiles are active: prod" and of course the profile application properties active (application-prod.properties) value: "> The Server IP is: http://my-remote.server.com ". As an exercise, try to change the name of the application-prod.properties to mycfg-prod.properties and the application-qa.properties to mycfg-qa.properties, and use the Spring properties that will get the new name. If you don’t set any active profiles, it will get the default, which means that it will grab the application.properties.
Custom Properties Prefix
Spring Boot allows you to write and use your own custom property prefix for your properties. The only thing you need to do is annotate with the @ConfigurationProperties annotation a Java class that will have setters and getters as their properties.
If you are using the STS IDE, I recommend including a dependency in your pom.xml. This dependency will create a code insight and it will trigger the editor’s code completion for the properties. So add the next dependency in your pom.xml:
<dependency><groupId>org.springframework.boot</groupId><artifactId>spring-boot-configuration-processor</artifactId><optional>true</optional></dependency>
This dependency will allow you to process your custom properties and have a code completion. Now, let’s see the example. Modify your src/main/resource/application.properties file to look like Listing 3-19.
Listing 3-19. src/main/resources/application.properties
server.ip=192.168.3.5myapp.server-ip=192.168.34.56myapp.name=My Config Appmyapp.description=This is an example
Listing 3-19 shows you the application.properties file. What is new is the second block, where the custom properties with myapp as the prefix are defined. Next, open your main app class and edit it to look like Listing 3-20.
Listing 3-20. Version2 of src/main/java/com/apress/spring/SpringBootConfigApplication.java
package com.apress.spring;import org.slf4j.Logger;import org.slf4j.LoggerFactory;import org.springframework.beans.factory.annotation.Autowired;import org.springframework.beans.factory.annotation.Value;import org.springframework.boot.CommandLineRunner;import org.springframework.boot.SpringApplication;import org.springframework.boot.autoconfigure.SpringBootApplication;import org.springframework.boot.context.properties.ConfigurationProperties;import org.springframework.context.annotation.Bean;import org.springframework.stereotype.Component;@SpringBootApplicationpublic class SpringBootConfigApplication {private static Logger log = LoggerFactory.getLogger(SpringBootConfigApplication.class);public static void main(String[] args) {SpringApplication.run(SpringBootConfigApplication.class, args);}@Value("${myapp.server-ip}")String serverIp;@AutowiredMyAppProperties props;@BeanCommandLineRunner values(){return args -> {log.info(" > The Server IP is: " + serverIp);log.info(" > App Name: " + props.getName());log.info(" > App Info: " + props.getDescription());};}@Component@ConfigurationProperties(prefix="myapp")public static class MyAppProperties {private String name;private String description;private String serverIp;public String getName() {return name;}public void setName(String name) {this.name = name;}public String getDescription() {return description;}public void setDescription(String description) {this.description = description;}public String getServerIp() {return serverIp;}public void setServerIp(String serverIp) {this.serverIp = serverIp;}}}
Listing 3-20 shows you the main app class. Let’s examine it:
@Value("${myapp.server-ip}"). The annotation now has a myapp.server-ip, which means that the value will be equal to 192.168.34.56.
@Autowired MyAppProperties props. This is creating an instance of the MyAppProperties type.
@Component @ConfigurationProperties(prefix="myapp"). The @ConfigurationProperties annotation tells Spring Boot that the class will be used for all the properties defined in the application.properties file that has the myapp prefix. Meaning that it will recognized when you have myapp.serverIp (or myapp.server-ip), myapp.name, and myapp.description. The @Component annotation is used to make sure that the class is picked up as a bean.
The Spring Boot uses relaxed rules to bind environment properties to the @ConfigurationProperties beans, so you don’t have any collision names.
Now if you run your app, you should see all your myapp properties:
$ ./mvnw clean spring-boot:run...> The Server IP is: 192.168.34.56> App Name: My Config App> App Info: This is an example...
As you can see, you have plenty of options for using your application configuration properties. You haven’t seen any YAML examples though, and if you want to use the YAML syntax, refer to the Spring Boot documentation for examples.
Summary
This chapter gave you a tour of the Spring Boot insights by explaining the auto-configuration feature, including how the @EnableAutoConfiguration annotation works behind the scenes. You learned how to exclude some of the auto-configuration classes as well.
You learned about some of the Spring Boot features and how to use the application configuration properties. You also learned how to customize your application configuration properties by adding a prefix.
The next chapter covers the Spring CLI in more detail.