It would be nice to be able to jump right into building projects and using our microcontroller. However, before we do so, we need to properly set up our environment for working. This chapter is catered to people who have used microcontroller platforms such as Arduino, PICAXE, or Basic Stamp-based platforms and want to build barebones microcontroller systems. Beginners should have no trouble following along though. If you have experience breadboarding circuits or using ICSP tools or have previously used PIC® microcontrollers, you may skip this chapter. However, I strongly recommend that you read this chapter, as it provides a lot of insight as to what you need as well as getting everything prepared.
Gathering Your Hardware
This is the first chapter on your journey to embedded systems design with PIC® microcontrollers and XC8. The first thing we will do is gather the necessary components you will need to follow along with this book. Long gone are the days where a couple thousands of dollars would be needed to begin microcontroller development. For relatively little money, you can experiment with microcontroller development. This is especially true of PIC® microcontrollers, where for a few pennies, you can purchase one of these ubiquitous beasts.
People familiar with programming place emphasis on writing programs, while people with a background in electronics place emphasis on building the circuits for the controllers. I have found that both are equally important and, as you follow along with this book, remember that not everything can be solved using software. If you correctly learn how the hardware operates, you could potentially write very little code that combines hardware in unique ways to get the desired result.
Let’s jump into it and look at the things you will need.
Microcontroller
Although the book generally assumes that you have some experience with microcontrollers, this section reviews the basic microcontroller technology. Read this section thoroughly if you’re a first-time user of microcontrollers. The information you learn in this section will not only be applicable to PIC® microcontrollers, but also to other microcontrollers you may use.
General-purpose computers such as the smartphones, tablets, laptops, and desktops are designed to perform a variety of tasks. A laptop or tablet can be used to read books, watch movies, and even write programs and web applications. This is because they were designed for that purpose, thanks to the integration of the microprocessors into these units that allow them to perform these many different tasks.
The microprocessor, however, is not an island. It is dependent on supporting circuitry in order to work properly. These include RAM chips, SSD, and other peripherals. While it is revolutionary, the strength of the microprocessor is also its shortcoming. Although it can perform general tasks, it may not be the best solution for performing a single task.
Let’s take the example of an electric toothbrush. If we want to design a basic electric toothbrush, then some basic considerations must go into its function. The toothbrush must turn on a motor when the user pushes a button and alert the user if they have been brushing their teeth too long. In such an instance, a minimum of processing power is needed to adequately perform this task. Yes, it is possible to program a board that contains a 4GHz 64-bit processor with 16GB of RAM running the latest OS to do this task, but that would be akin to using a lawnmower to shave your legs. It would be better for many reasons to use a microcontroller.
So what exactly is a microcontroller? A microcontroller is a self-contained unit that has a microprocessor with RAM, ROM, I/O, and a host of other peripherals onboard. Thus a microcontroller contains all the processing power necessary to perform the specific task at hand and that task alone. Back to the toothbrush example, it would be more feasible to use a 4-bit microcontroller with a few bytes of RAM and ROM to check the switch, turn on the motor, keep track of how long the user has been brushing, and sound an alarm if that time exceeds some preset value.
Microcontrollers are used for applications that have specific requirements such as low-cost, low-power consumption and systems that require real-time performance. It is thanks to these features that a world where computers are becoming increasingly ubiquitous is now possible.
At the time of writing, there are 4-, 8-, 16-, and 32-bit microcontrollers. Anyone looking to start a new design should realistically choose an 8-bit or a 32-bit microcontroller. Large volume, low-cost, and lowest power consumption 8-bit devices generally tend to have an edge. Whereas for higher performance applications, 32-bit devices are the obvious choice. It is very important that you do not get attached to one particular microcontroller. There are people who insist that they can do anything with 8-bits, whereas others only use 32-bit parts. You must realize that microcontrollers are simply tools applied to the particular task, so it stands to reason that some tasks are better suited to 8-bit microcontrollers and others to 32-bit ones.
The microcontroller we use in this book is the 8-bit PIC16F1717 (see Figure 1-1). The PIC® microcontroller was chosen because it has a relatively simple architecture. Once you understand 8-bit PIC® microcontrollers, it’s easy to understand more complex micros. I chose this particular PIC® microcontroller because it is a modern device and has a lot of onboard peripherals. It also has a relatively large amount of RAM and program memory and, most importantly, a lot of onboard peripherals. There are members of its family with the same features that have a smaller pin count.

Figure 1-1 PIC16F1717 in DIP package
A benefit of this particular microcontroller is that, in addition to being modern, it is produced in a DIP package, which makes it very easy for prototyping on a breadboard. Therefore, you use it to test your design and use an SMD version in the final version of your product.
Programmer
A microcontroller is a blank slate without a program. Microcontrollers and other stored program devices rely on a programmer to load the program to the chip. I have found that using a microchip makes it easiest to understand how to program devices. Many device vendors have extremely expensive tools that are hard to find, even on their own web site! In order to program PIC® microcontrollers, you need a PICkit™ 3 or an MPLAB® ICD 3.
I personally have used both and highly recommend that you buy an ICD 3. The reason is that the ICD 3 is much faster and saves you a lot of time in programming and debugging, especially if you plan on moving up to the larger devices. However, you should only buy the ICD 3 if you are certain that you will be working with PIC® microcontrollers for a long time, as at the time of writing, it costs over $200. The PICkit™ 3 may be used if you are evaluating the PIC microcontroller series, as it is available for $50.00. Generally, get the PICkit™ 3 if you are evaluating PIC® microcontrollers and the ICD 3 if you intend to work with these devices for a while.
Figure 1-2 shows the PICkit™ 3 and Figure 1-3 shows the ICD 3 .

Figure 1-2 PICkit 3
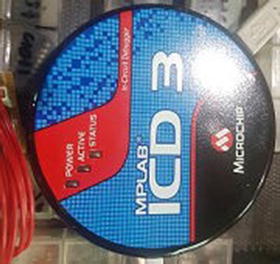
Figure 1-3 ICD 3
The ICD 3 uses an RJ-11 type adapter. I recommend that you get this programmer as well as an adapter to allow for easy breadboaring from RJ-11 to ICSP.
Gathering the Software
The hardware is necessary for building the circuits. However, we are not fiddling with 555 timers here! We need software to make everything work. All the software needed to program PIC microcontrollers can be found on the Microchip Technology web site.
MPLAB® X IDE
I have heard people complain about the old IDE microchip thousands of times. Let me assure you that MPLAB® X is nothing like MPLAB® IDE (see Figure 1-4). It is a lot better. Microchip technology has come a long way. I have used a lot of vendor tools and Microchip offers the most effective plug-and-play functionality I have come across. Some rather pricey compilers don’t offer much more over the ones provided for PIC® microcontrollers. In fact, Microchip even offers an IDE that is cloud based! This cloud-based MPLAB® Xpress IDE is best suited for new users or if you want to program the microcontroller on a machine that you need special permissions for. A good example of this is would-be students or a corporate environment where going through the IT department would be a lengthy process.
If you purchased an Xpress evaluation board and are still not sure if you want to use the PIC® microcontroller, then you may use the cloud-based IDE to get up and running quickly. However, if you decided on using PIC® microcontrollers then the on-premises software for microcontroller development is a lot better. The primary reason is that if something goes wrong, you can be assured that it is not a connection problem. The other reason is that as your code grows and your skills develop, you will need all the features of MPLAB® X, which has the power of NetBeans behind it. Stick with the on-premises software.
I know there are going to be those among you who prefer to use a command-line interface and text editor. In fact, I also enjoy that method of doing things, when there is no IDE available. I like the KISS principle—let’s not make things more complicated than they need to be. This book takes a pragmatic approach. IDEs are simple to use. Thus we use them.
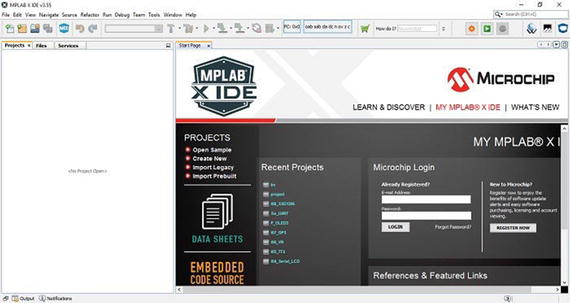
Figure 1-4 MPLAB X IDE
XC Compilers
A lot of people don’t value compilers. Many vendors boast about how easy it is to get started with their chips and pack mouthwatering goodies into every bite of silicon. However, they make the compilers so expensive that they aren’t worth it in the end. Microchip offers the XC compilers to get started with PIC® microcontrollers. The best part is it’s free of charge. In this book, I focus on XC8. However, be rest assured that once you get over the learning curve of how this compiler operates, you will be thankful that you chose to use PIC® microcontrollers. This is because it is easy to transition from 8- to 16- and 32-bit microcontrollers without having to learn a totally different environment. The XC8 compiler is available for download on the Microchip technology web site.
Setting Up Shop
In this book, I interface the microcontroller to a lot of modules and design a lot of circuits. However, if you want to do likewise, it is very important that you acquire at least a minimum of equipment to be able to get the most of this book. Recommended equipment is covered in the following sections.
Multimeter
The multimeter is a staple of electronics. Therefore I highly recommend you invest in at least two multimeters. The reason you need at least two is because you need to measure voltage and current at the same time. For this book, any multimeter that has the ability to measure DC voltage, current, and resistance should suffice.
Oscilloscope
No electronics workbench, lab, or shop is complete without an oscilloscope. This device is undoubtedly one on the most important test instruments you’ll have, particularly when you’re working with microcontroller-based circuits. Even if you do not want a full scope, I recommend you get the Velleman pocket oscilloscope. It is reasonably priced and works rather well for basic work.
Power Supply
Make sure to get a good bench power supply. The 1.2v-15v range and at least a 5 amp rating will suffice.
Shopping for Supplies
When starting with microcontrollers and electronics in general, people often wonder where they can buy supplies and items. In general, you can buy most of these items from Amazon, eBay, Digi-Key, Mouser Electronics, or and AliExpress. I recommend you buy passives from sites like AliExpress and eBay, as you are likely to get better deals on these in the Chinese market. However microcontrollers, active devices in general, and programmers should always be bought from reputable suppliers, as they may not be genuine or may not function as required. In fact, there are instances where companies bought chips (namely ATmega328p) from the Chinese market and it turned out that these chips were total imitations and did not work.
To sum it all up: be vigilant when purchasing electronic components and equipment. If it’s too good to be true, then stay away. Do not buy it.
In general you need to set up a basic electronic shop. You need various resistors, capacitors, and a few semiconductors and of course your basic side cutters, pliers, and screwdrivers.
Table 1-1 lists the components you need to purchase to get the most out of this book.
Table 1-1 Recommended Hardware for This Book
Item | Quantity | Vendors | Product Numbers |
|---|---|---|---|
ICD 3/PICkit 3 | 1 | Digi-Key Electronics | PG164130-ND (PICkit™ 3) DV164035-ND (ICD 3) |
Mouser Electronics | 579-PG164130 (PICkit™ 3) 579-DV164035 (ICD 3) | ||
PIC 16F1717 | 1 | Digi-Key Electronics | PIC16F1717-I/P-ND |
Mouser Electronics | 579-PIC16F1717-I/P | ||
ESP8266 Wi-Fi Module | 1 | Digi-Key Electronics | 1188-1154-ND |
Mouser Electronics | 909-MOD-WIFI-ESP8266 | ||
Logic Level Converter Module | 2 | Digi-Key Electronics | 1568-1209-ND |
Mouser Electronics | 474-BOB-12009 | ||
2n2222 or Similar (2N3904) | 2 | Digi-Key Electronics | 2N3904FS-ND |
Mouser Electronics | 610-2N3904 | ||
LM34 Temperature Sensor | 1 | Digi-Key Electronics | LM34DZ/NOPB-ND |
Mouser Electronics | 926-LM34DZ/NOPB | ||
Nextion NX3224T024_11 Touch LCD | 1 | ITEAD Studio | IM150416002 |
Amazon ASIN | B015DMP45K | ||
SSD1306 OLED (I2C) | 1 | Amazon ASIN | B01G6SAWNY |
AliExpress (Various Sellers) | |||
24LC16B EEPROM | 1 | Digi-Key Electronics | 24LC16B-I/P-ND |
Arrow Electronics | 24LC16B-E/P | ||
HD44780 Character LCD | 1 | Digi-Key Electronics | 1528-1502-ND |
Adafruit Industries | 181 | ||
MCP4131 Digital Potentiometer | 1 | Digi-Key Electronics | MCP4131-104E/P-ND |
Arrow Electronics | MCP4131-103E/P | ||
SIM800L GSM Module | 1 | Amazon ASIN | B01A8DQ53E |
AliExpress (Various Sellers) | |||
UBLOX Neo-6M GPS Module | 1 | Amazon ASIN | B071GGZDDR |
AliExpress (Various Sellers) | |||
EMIC 2 TTS Module | 1 | Parallax Inc. | 30016 |
SparkFun Electronics | DEV-11711 | ||
Serial LCD Module | 1 | Parallax Inc. | 27977 |
Digi-Key Electronics | 27977-ND | ||
RGB LED | 1 | Digi-Key Electronics | 754-1492-ND |
Mouser Electronics | 604-WP154A4SUREQBFZW | ||
SN754410NE | 1 | Digi-Key Electronics | 296-9911-5-ND |
Mouser Electronics | 595-SN754410NE | ||
ULN2003 | 1 | Digi-Key Electronics | 497-2344-5-ND |
Mouser Electronics | 511-ULN2003A | ||
Servo Motor | 1 | Jameco Electronics | 1528-1075-ND |
Mouser Electronics | 485-154 | ||
5v Stepper Motor | 1 | Jameco Electronics | 237825 |
Brushed DC Motor | 1 | Digi-Key Electronics | 1528-1150-ND |
Mouser Electronics | 485-711 | ||
Seven Segment Displays | 2 | Digi-Key Electronics | 754-1467-5-ND |
Mouser Electronics | 630-HDSP-513E | ||
Pushbuttons | 5 | Digi-Key Electronics | P8011S-ND |
Mouser Electronics | 667-EVQ-PAC07K | ||
LEDs | 10 | Digi-Key Electronics | C503B-RCN-CW0Z0AA1-ND |
Mouser Electronics | 941-C503BAANCY0B025 | ||
1N4001 Diode | 2 | Digi-Key Electronics | 641-1310-3-ND |
Mouser Electronics | 821-1N4001 | ||
10 uF Capacitors | 2 | Digi-Key Electronics | 493-4771-1-ND |
Mouser Electronics | 647-UCA2G100MPD1TD | ||
1k Resistors | 10 | Digi-Key Electronics | CF14JT1K00CT-ND |
Mouser Electronics | 71-PTF561K0000BZEK | ||
10k Resistors | 10 | Digi-Key Electronics | CF14JT10K0CT-ND |
Mouser Electronics | 279-YR1B10KCC |
In addition, you need an HC-05 Bluetooth module, which can be found on various sellers on AliExpress and Amazon. Make sure to have a bench to dedicate solely to electronics work and you will also need to buy some storage containers for all your components. Unlike using platforms, where everything is on a board that you can simply pack away in a kit, setting up your chip on a breadboard requires time. Therefore, having a dedicated workbench will save you a lot of time.
Conclusion
That brings us to the end of the first chapter. In this chapter, we covered gathering the required hardware and software to get started with PIC® microcontroller development. This chapter laid the ground work required to continue your fascinating journey. While you are waiting for your items to arrive, you may take a look at the next chapter, which focuses on getting you acquainted with the C programming language.