
Xamarin Forms is an awesome cross platform environment from which to build iOS, Android, and UWP apps, as well as other potential platforms in the future.
Project Overview
In this chapter, you’ll get your feet wet with Xamarin Forms via five projects. Each project builds on the prior one. Several topics will be covered in this introductory chapter, including how to create a Xamarin Forms solution, as well as emulator tips, navigation, images, event handlers, device form factors, and list views. The result will be a typical app with a main navigation page, a list view page, and a detail page that you can use as a template for building future apps! We will be creating a book list project that has a main navigation page that looks like that in Figure 2-1.
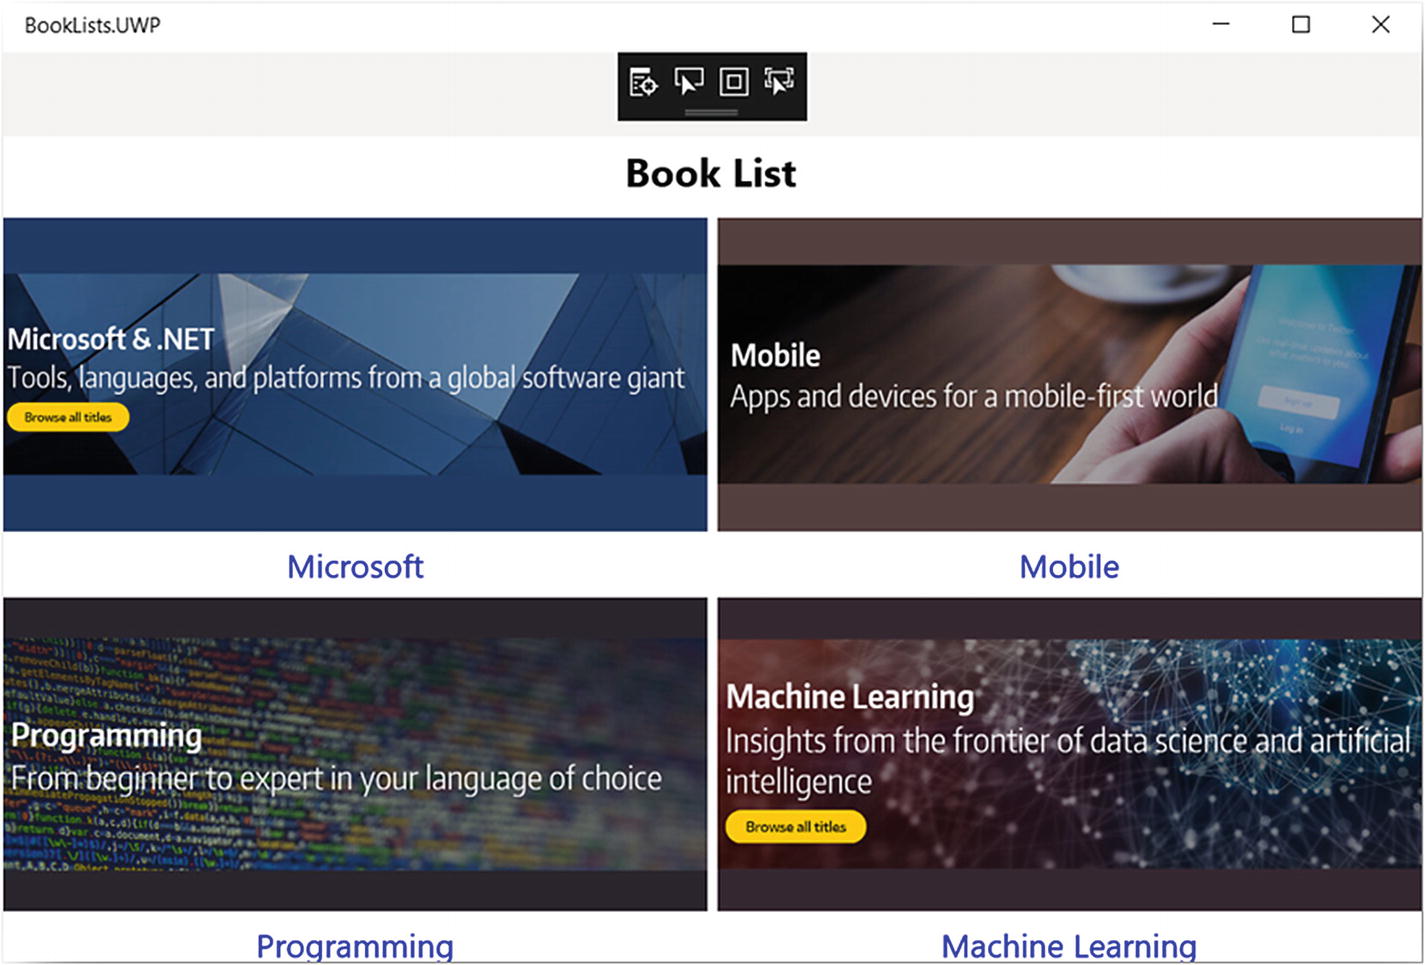
Figure 2-1 Main navigation page in the completed project
It has a list view page that looks like that in Figure 2-2.
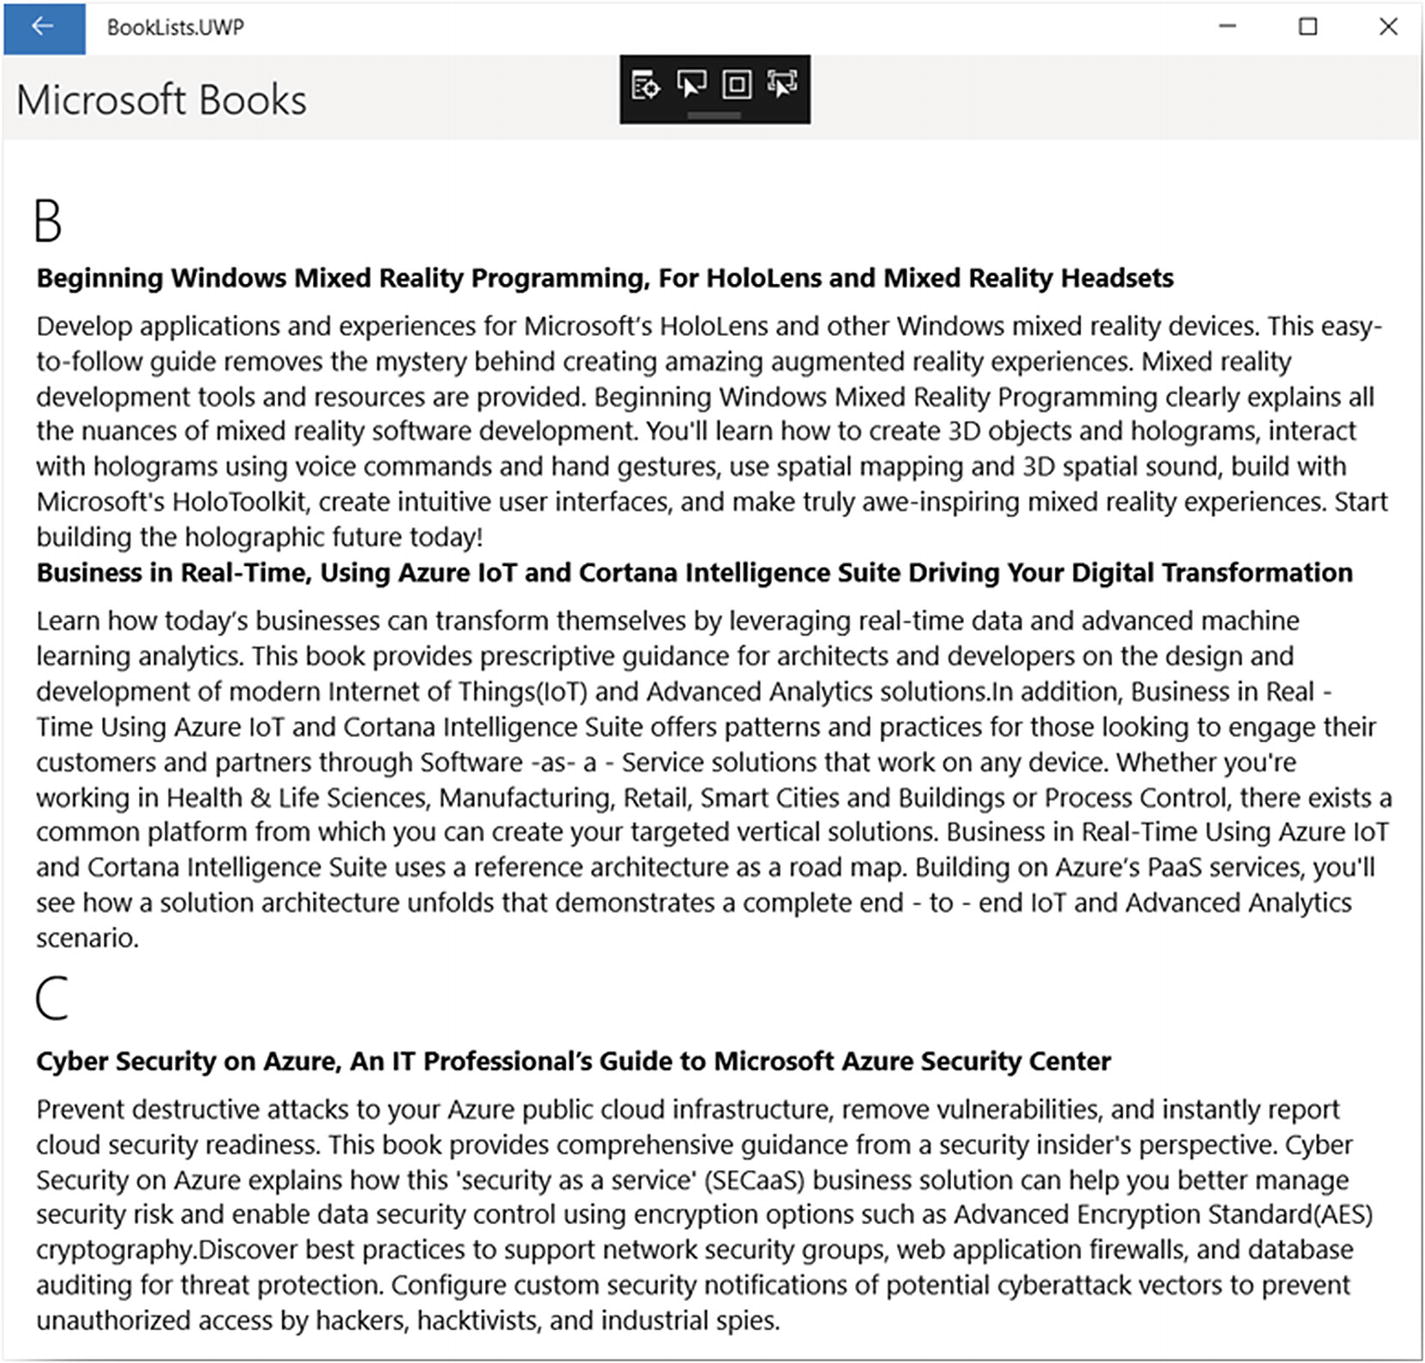
Figure 2-2 ListView page in the completed project
The app will navigate to a detail page on the Apress site for the book selected from a list such as that in Figure 2-3.

Figure 2-3 Detail page in the completed project
We’ll first create a new Xamarin Forms application and review the structure of the solution. We’ll then run the application for Android, UWP, and, optionally, iOS, if connected with a Mac server. As this is a cross platform app, you can use any mix of the platform projects, depending on your development environment (Mac or Windows).
We will then enhance the app, to have a main navigation page, with StackLayout and GridLayout, which considers device form factors for phones and tablets, using device-specific logic.
We will use XAML and code behind to control your layout form factors for tablets and phones.
We will also use embedded resource images of the MainPage.
A ListView page will be added with a selection event handler. You can also run these examples on Visual Studio (VS) for Mac; however, this does not support UWP.
Note
Run all the exercises in this book from your laptop/PC and not an Azure virtual machine.
Time Estimate
70 Minutes
Project 2-1: Creating Your First Xamarin Forms Application
Time Estimate
20 Minutes
In this project, you will create your first Xamarin Forms application. You will see how to get started in Visual Studio 2017 and build a Xamarin Forms application by choosing a built-in template to get stated with. Then you will get your emulators working and add a page and navigate between the two.
Start Visual Studio 2017. Sign in with the same credentials as your Azure or developer account. Figure 2-4 shows Sign in.
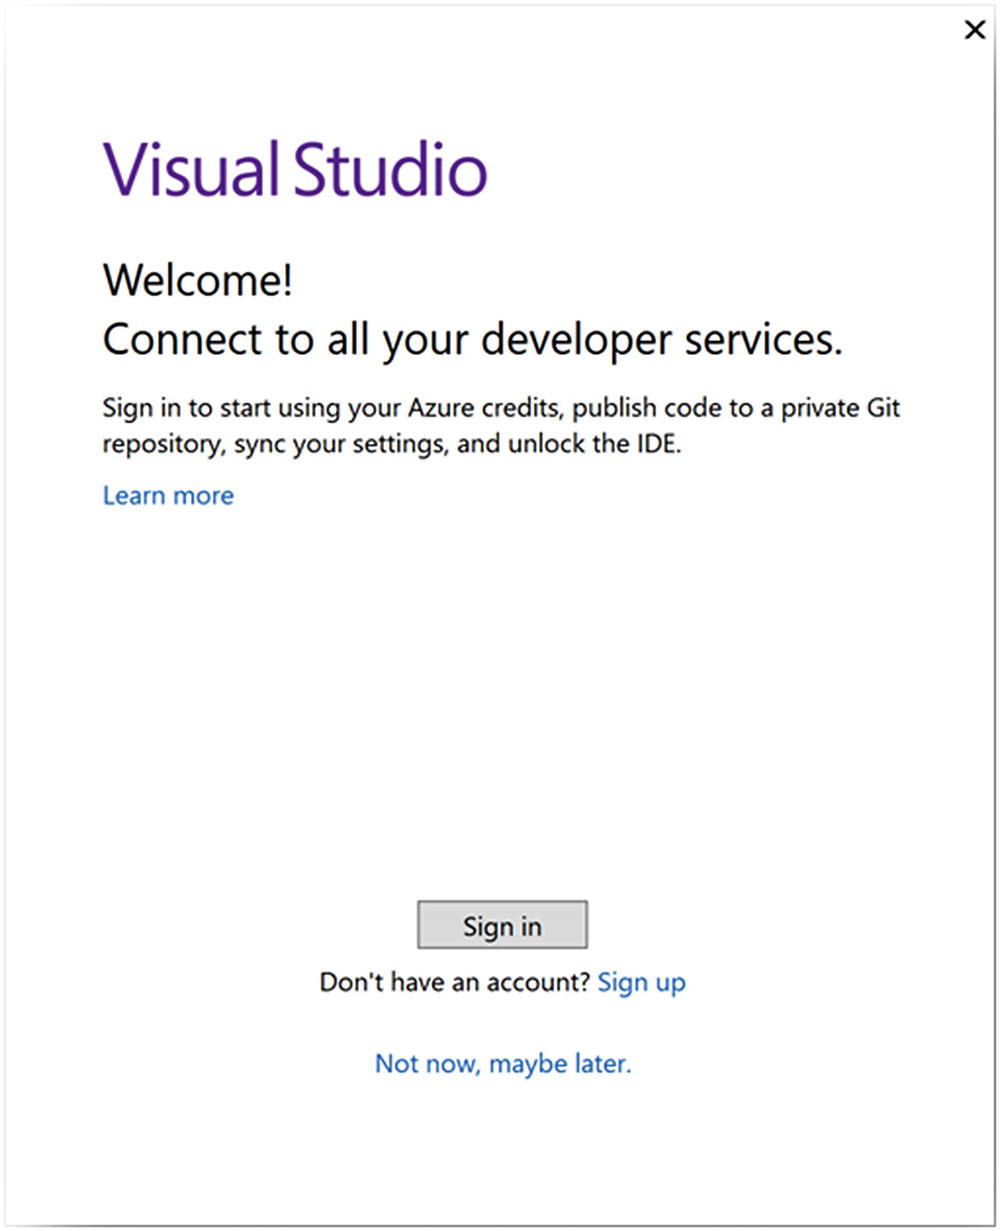
Figure 2-4 Visual Studio Welcome screen sign in
From the File menu, select New ➤ Project. See Figure 2-5.
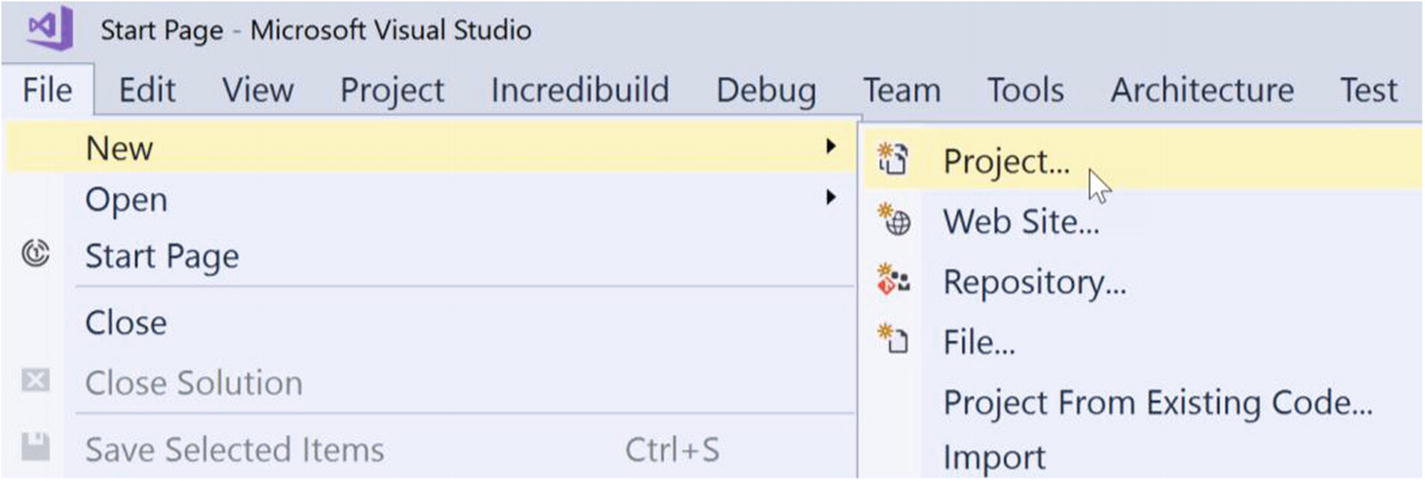
Figure 2-5 Visual Studio File ➤ New ➤ Project
Expand Templates ➤ Visual C# ➤ Cross-Platform and select Cross Platform App and use BookLists as the Name at a location near your root (CDemo). It is always advisable to select a Location near your root, as Android will often complain about the file path being too long. See Figure 2-6.
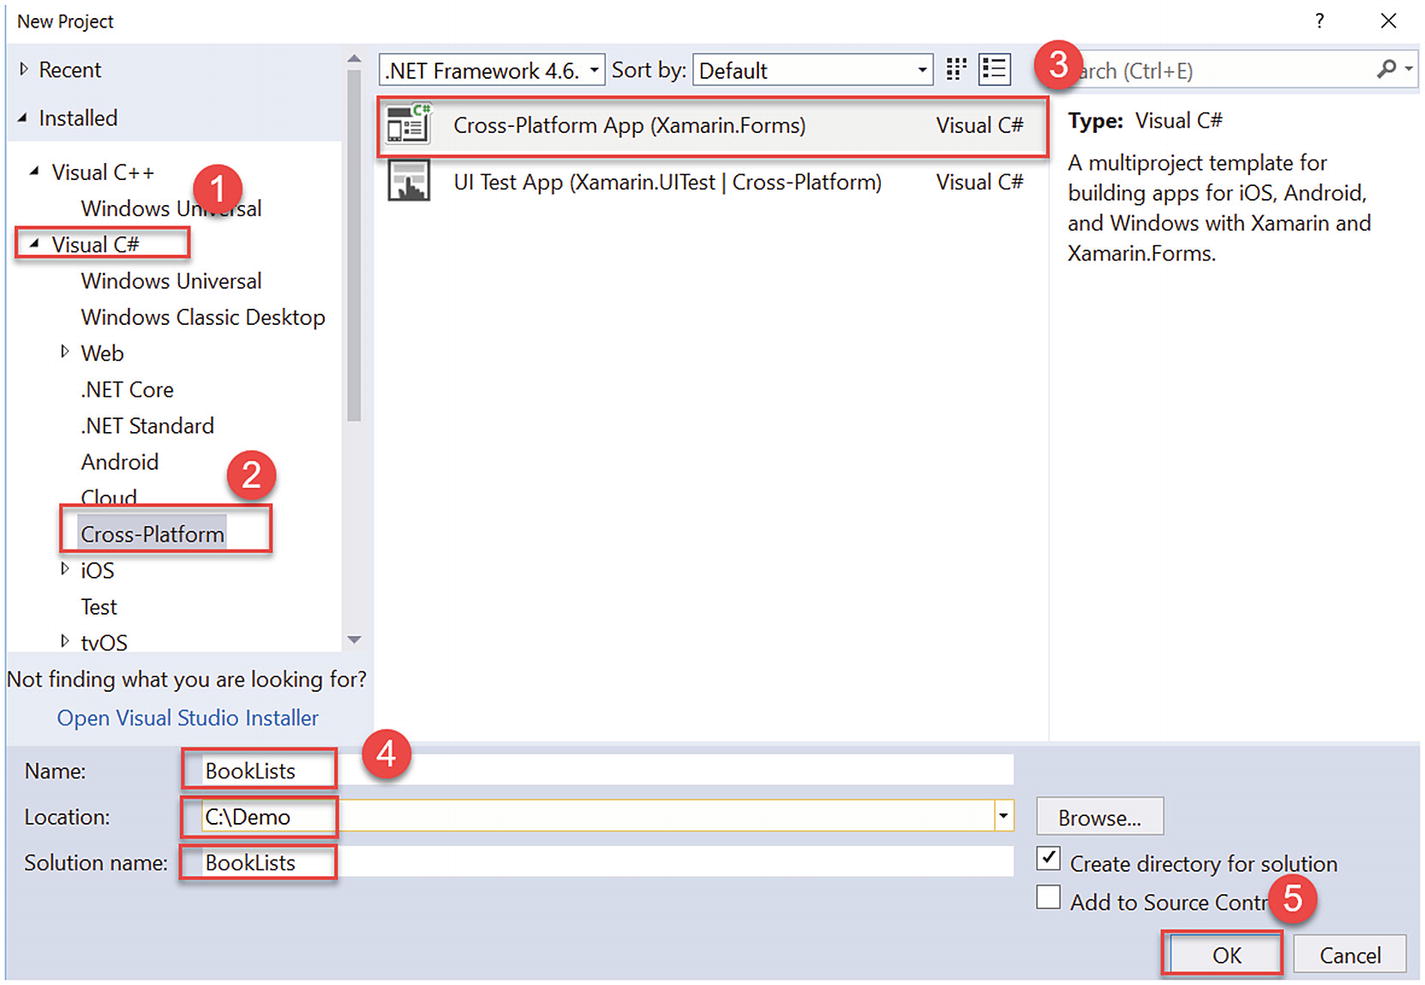
Figure 2-6 Open the Cross-Platform Xamarin.Forms application template.
If you get prompted by a Windows Security Alert, select both the private and public options and click Allow access. See Figure 2-7.
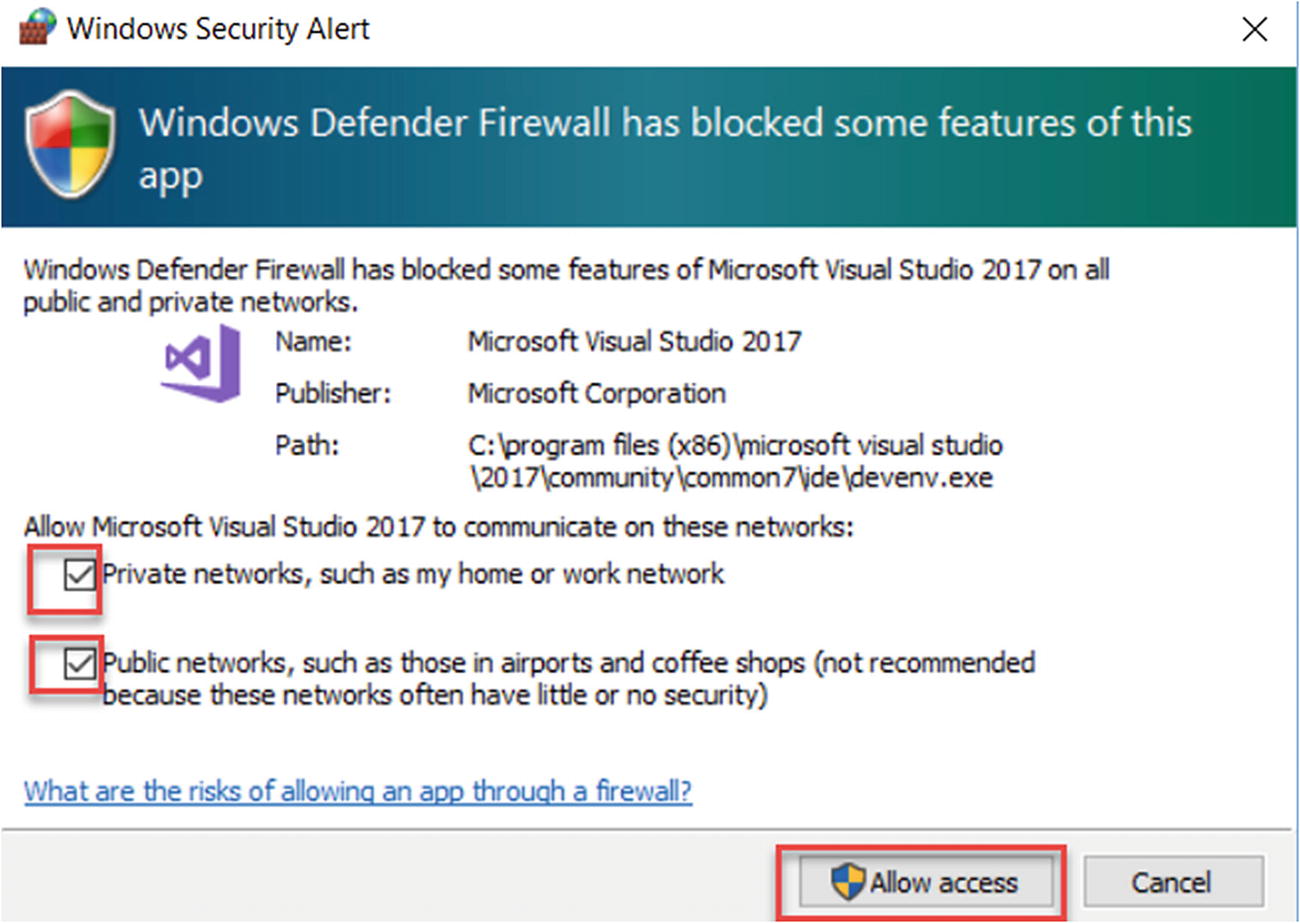
Figure 2-7 Allowing access to a security alert
A screen similar to that in Figure 2-8 appears. Choose the Blank App template, and the shared .NET Standard Code Sharing Strategy options. Then click OK.
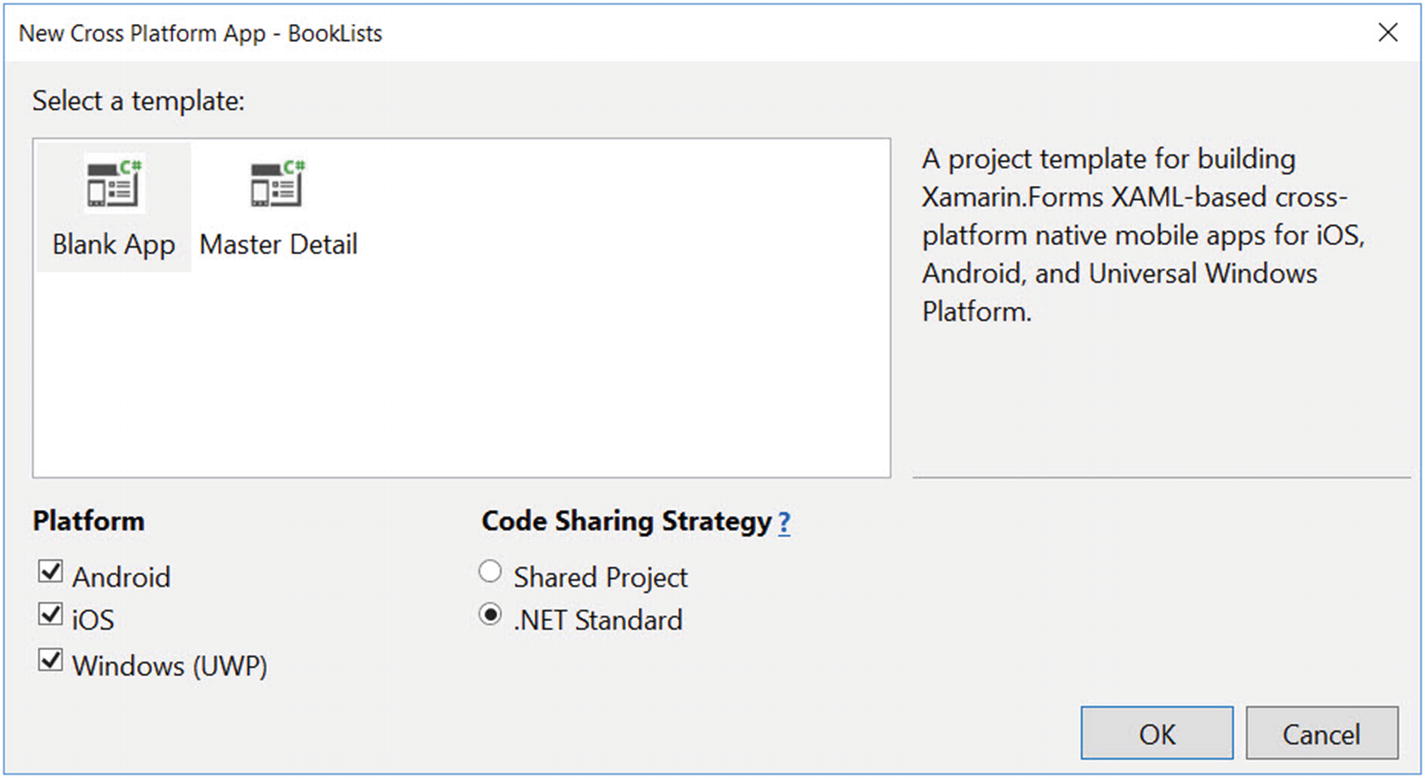
Figure 2-8 Choosing the Blank App template, and the .NET Standard Code Sharing Strategy options
If prompted for UWP versions, accept the defaults and click OK. See Figure 2-9.
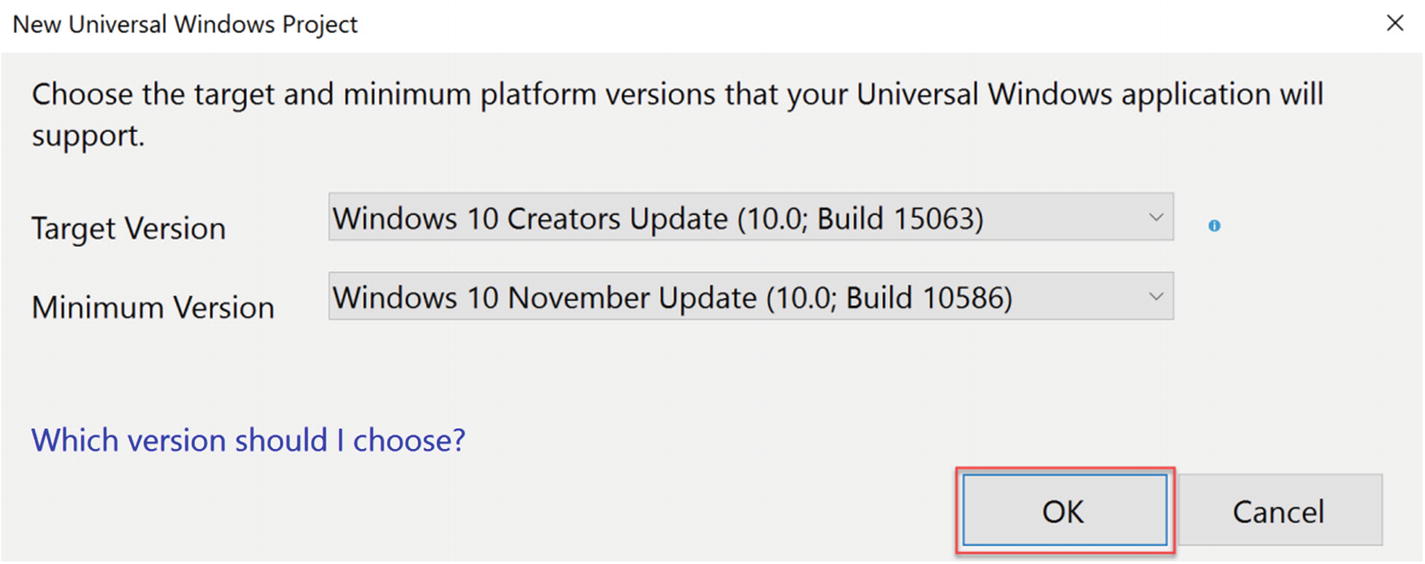
Figure 2-9 Accepting the defaults for Target Version and Minimum Version UWP application support
If prompted to use the User developer features, select Developer mode when your settings are displayed. This will allow you to deploy to devices. See Figure 2-10.
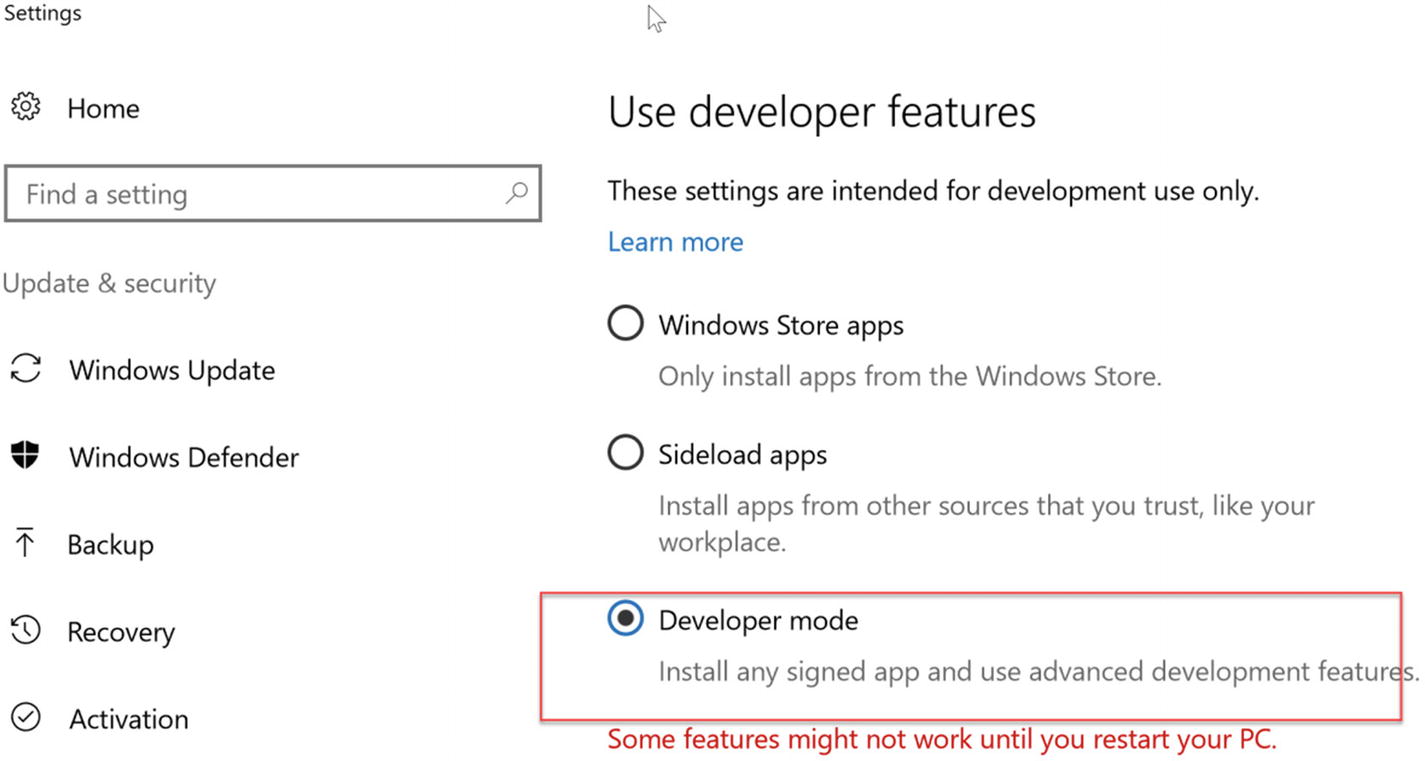
Figure 2-10 If prompted, select Developer mode in your settings
If you are prompted for the Mac Server, ignore it or, if you have the required setup on the Mac, connect it. This is an optional setup for this book. Details can be found here: https://developer.xamarin.com/guides/ios/getting_started/installation/mac/ . You will require a Mac, to compile, emulate, and deploy your iOS applications. You can also use VS for Mac, but UWP is not supported there.
Review the solution architecture in the Solution Explorer window (Figure 2-11). You will see four projects in this solution: one for each of the head projects—Android, iOS, and Universal Windows (UWP)—and one for shared projects. The head projects are for your startup projects to select from, depending on which platform you want to run. The shared .NET Standard project is where you will put most of your code. This could be more than 95 percent.
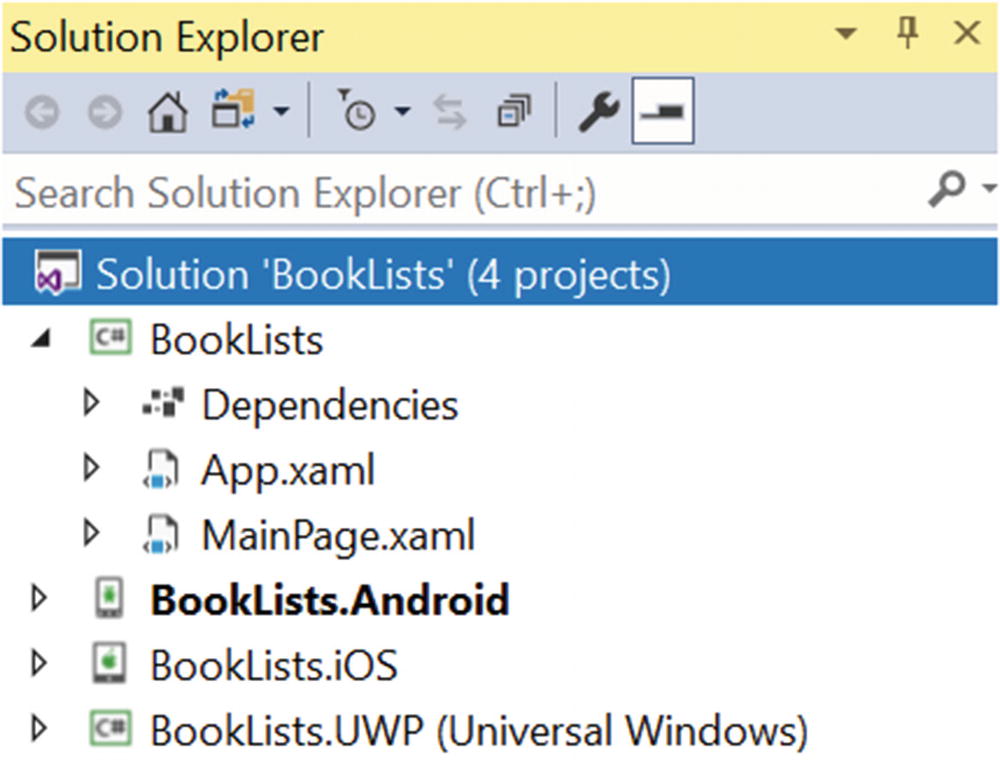
Figure 2-11 Solution Explorer contains shared, Android, iOS, and UWP projects
Select BookLists.Android as the project you wish to run, right-click it, and select Set as StartUp Project, as shown in Figure 2-12.
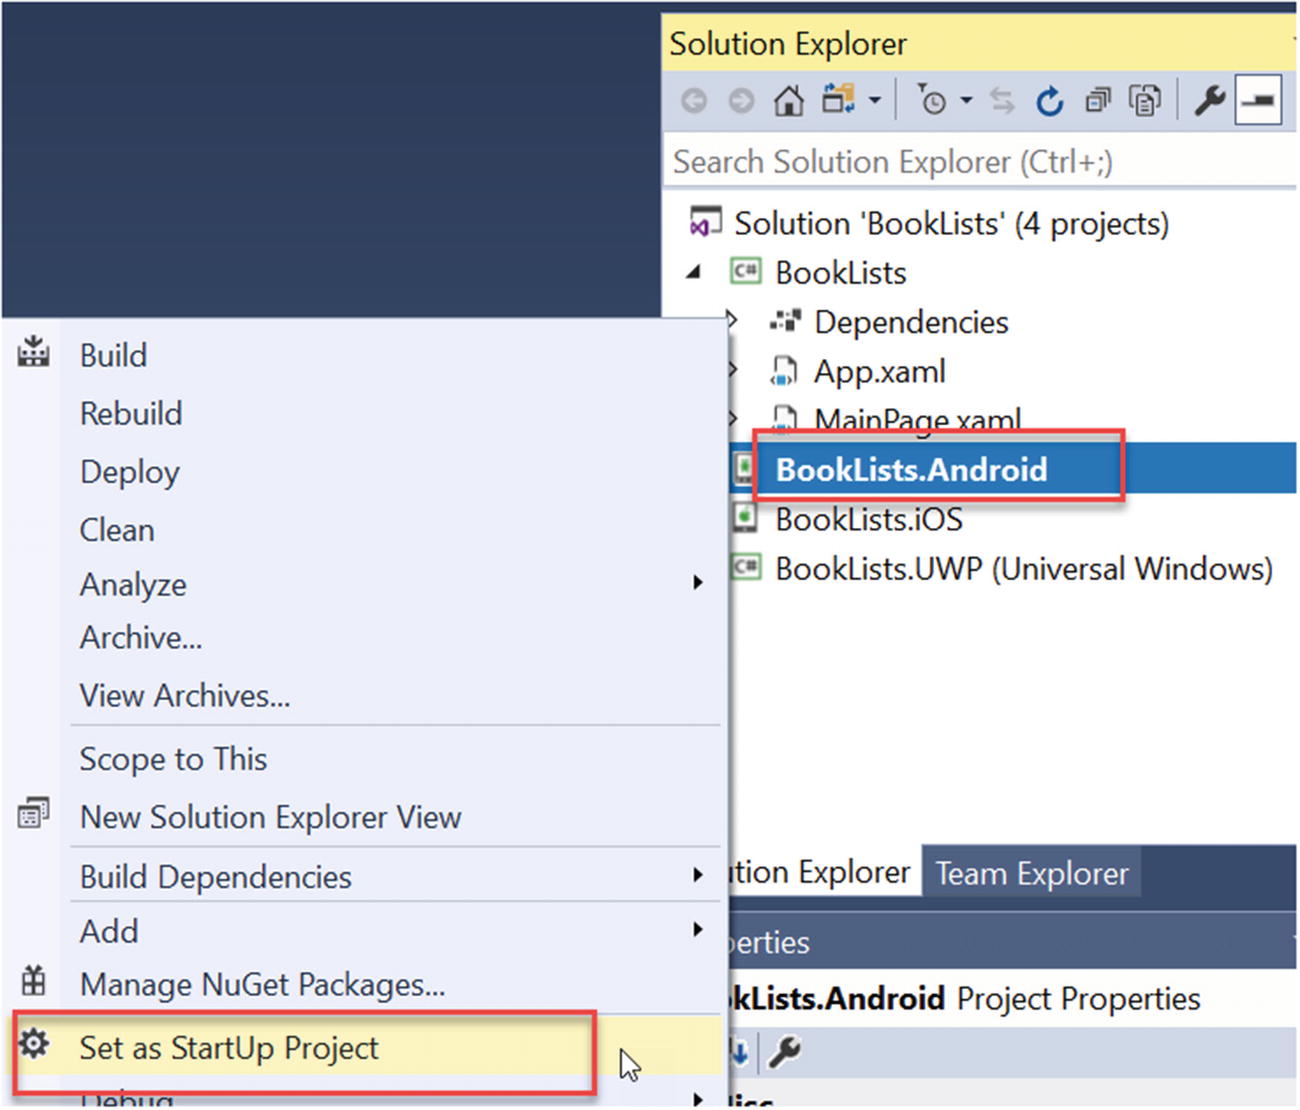
Figure 2-12 Android Set as StartUp Project
Note You will see the sections “Try{…}” and “Catch{…}” in among the following steps.
In code, we often use Try/Catch in error-handling. For those of you who are unfamiliar with this, try some code, and if it does not work, handle it in the Catch clause.
In instructions throughout this book, you also may see these terms without text in braces following. In such cases, the terms suggest that you try something, and if this does not work, to check the Catch section(s) that immediately follow, for a possible solution.
Try: Run the app, selecting the emulator for the 5" KitKat. The emulators that begin with the size of the device are the VS 2017 Android emulators. These are the fastest Android emulators. See Figure 2-13.
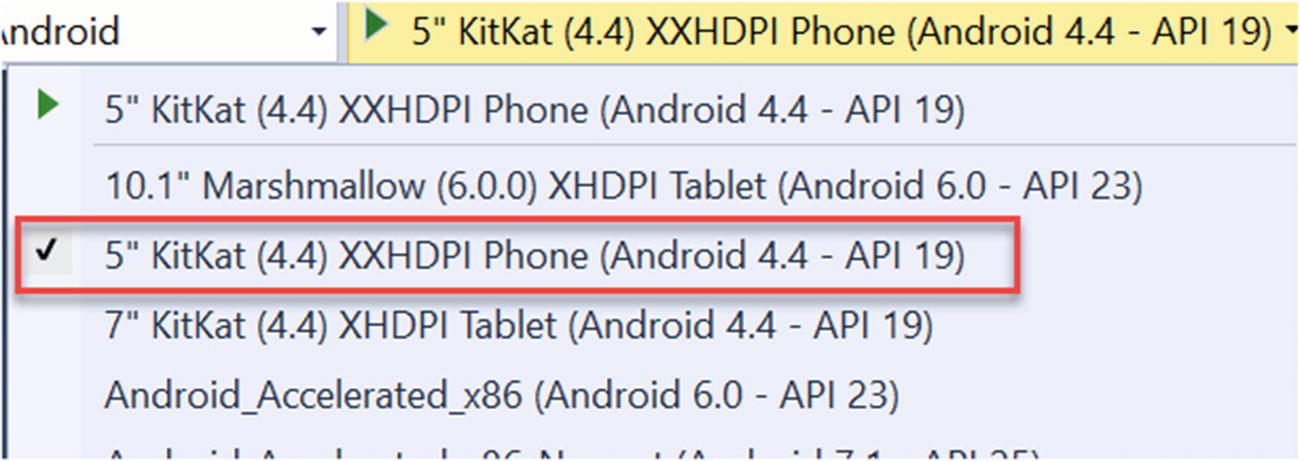
Figure 2-13 5" KitKat selected
Catch: If you do not see the VS 2017 Android emulators, you will have to run the VS 2017 Installer Program, modify it for your installed version, and select the Individual Components tab. Scroll down until you see the Emulators section. Check Visual Studio Emulator for Android. This will take several minutes to install, and you may have to reboot. See Figure 2-14.
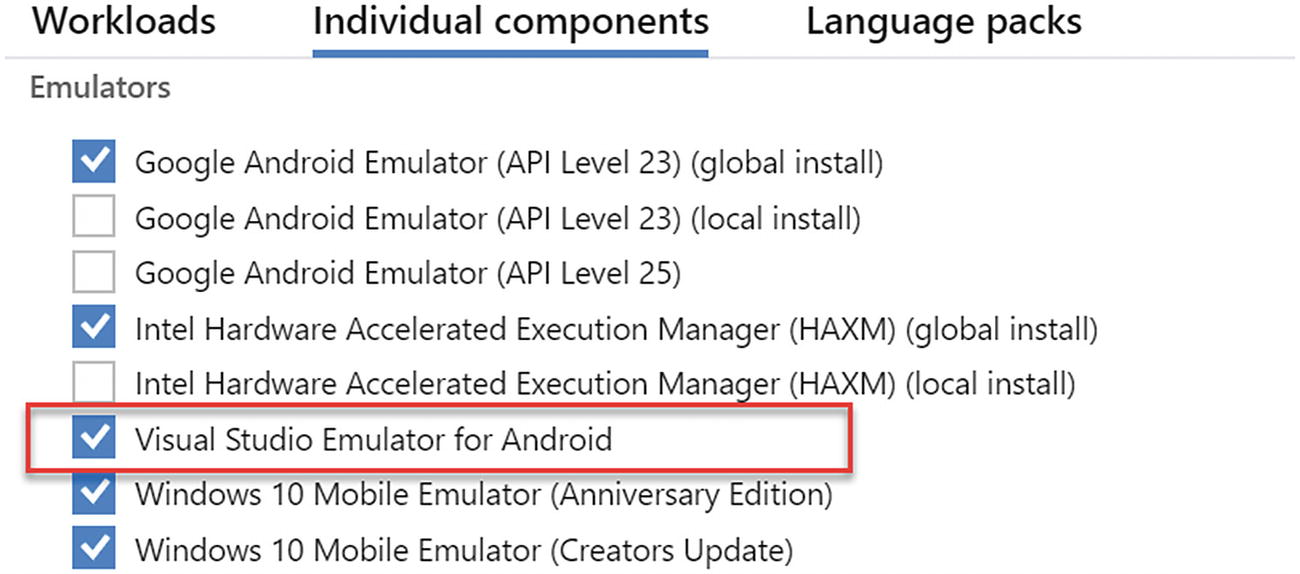
Figure 2-14 Selecting Visual Studio Emulator for Android in VS Installer
Catch: {If you do not see the Visual Studio Emulator for Android in the list, this means that you are not running Hyper-V. To run Hyper-V, you must change your bios settings to support virtualization. Close all applications. Right-click the start button and select Run. Type “shutdown/r/o.” This will reboot your machine with options and allow you to troubleshoot advanced options, to bring up the firmware settings for the bios. Once in the bios, use the arrow keys to navigate to the desired section and look for an option to enable virtualization. Then repeat the step above.} See Figures 2-15 and 2-16.
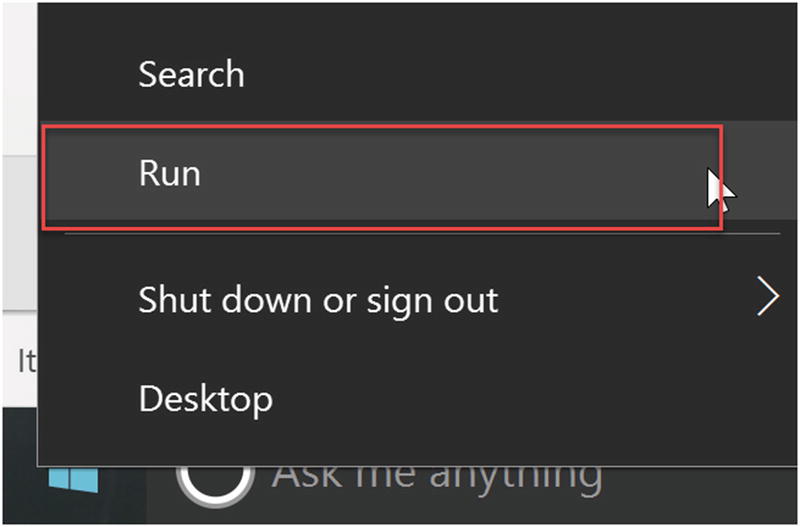
Figure 2-15 Right-click Start and select Run
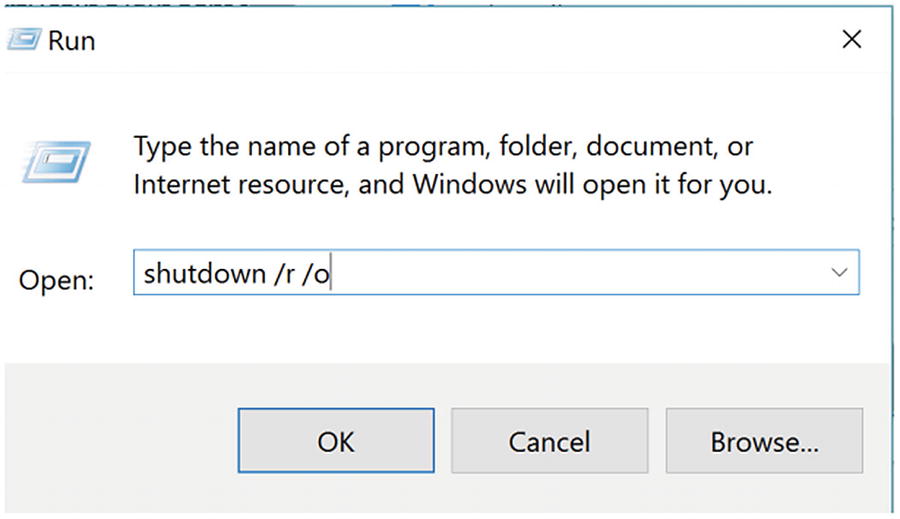
Figure 2-16 Type “shutdown/r/o” to restart with options
Catch: {Some machines are too fast for the emulator. If your app starts in the VS Android emulator but exits quickly, perform the following steps (Android app starts and immediately closes, debugging stops):
Close the Android simulator window, to shut down the virtual machine.
Go to the properties of the Android project, hit tab Android options, and unselect Use Fast Deployment.
Start Hyper-V Manager (This is the Microsoft program to manage virtual machines in Windows; you have it installed.)
Select the emulator you are trying to use. If the desired emulator does not appear, you must either launch it first from either Visual Studio or from the Visual Studio Emulator for Android.
Right-click for context menu, then hit Settings.
In the Settings dialog, expand Processor.
Click Compatibility.
In the right pane set check box “Migrate to a physical computer with a different processor version”
Start the debugging in Visual Studio to restart the simulator.}See Figure 2-17.

Figure 2-17 In Hyper-V Manager, select the emulator that ends the app quickly, select Settings ➤ Compatibility, and check the Migrate option
Rotate the phone, slide the lock to unlock it, and you should see “Welcome to Xamarin Forms.” See Figures 2-18 and 2-19.
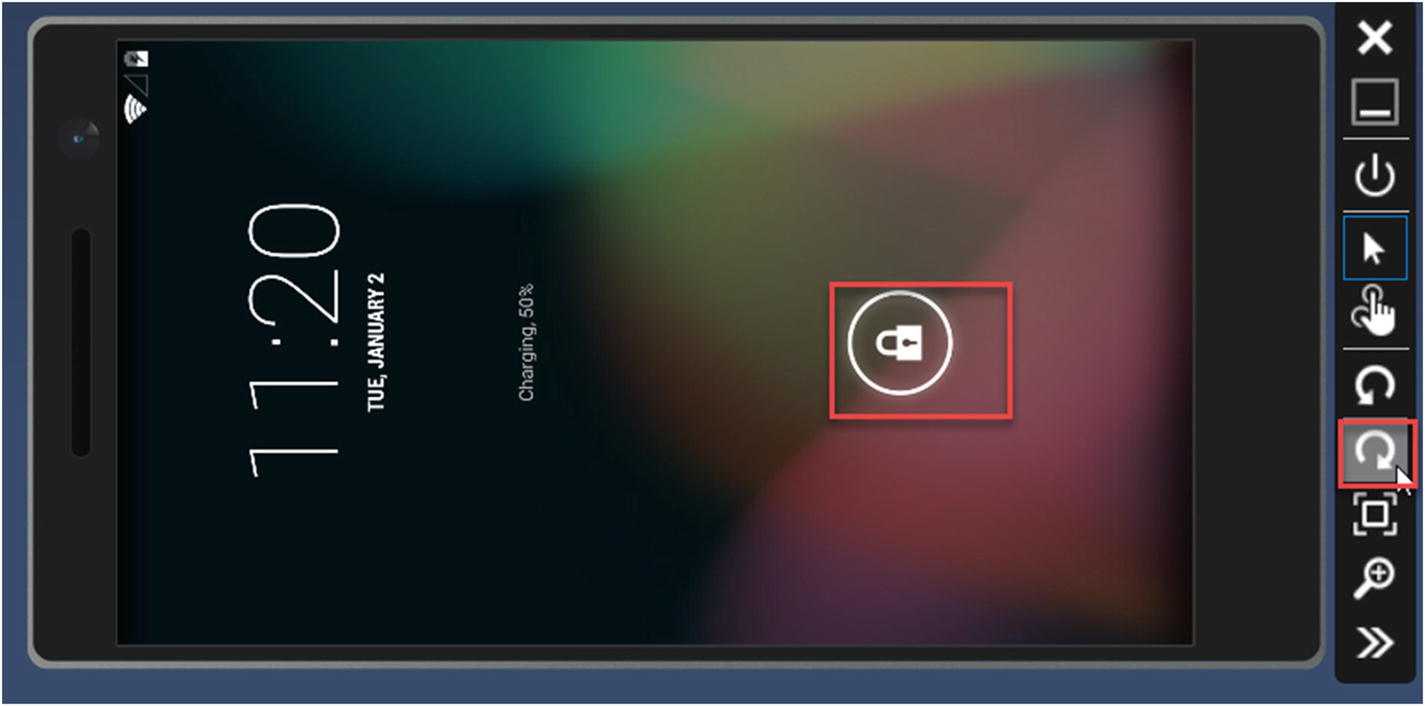
Figure 2-18 Selecting the rotate to right button and sliding up the lock
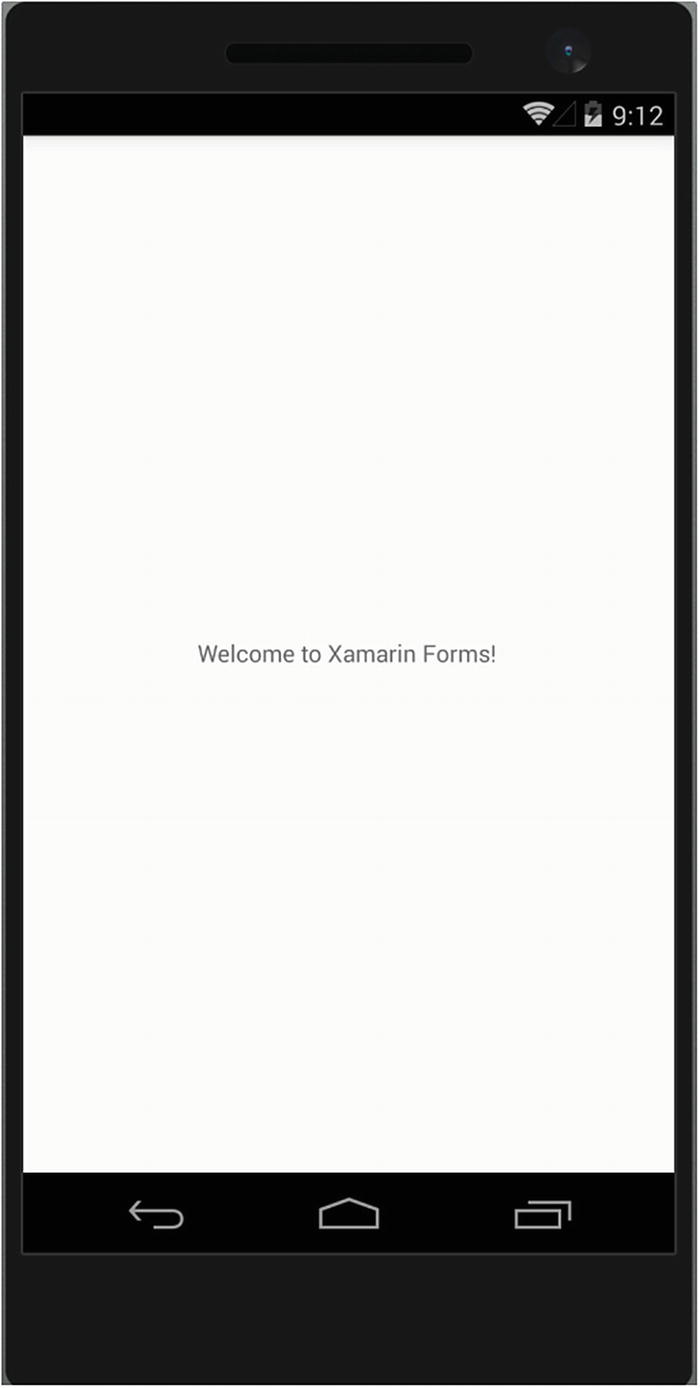
Figure 2-19 Your first app appears in Android, using Xamarin Forms!
Now right-click and select the UWP project and make it the Startup project. See Figure 2-20.
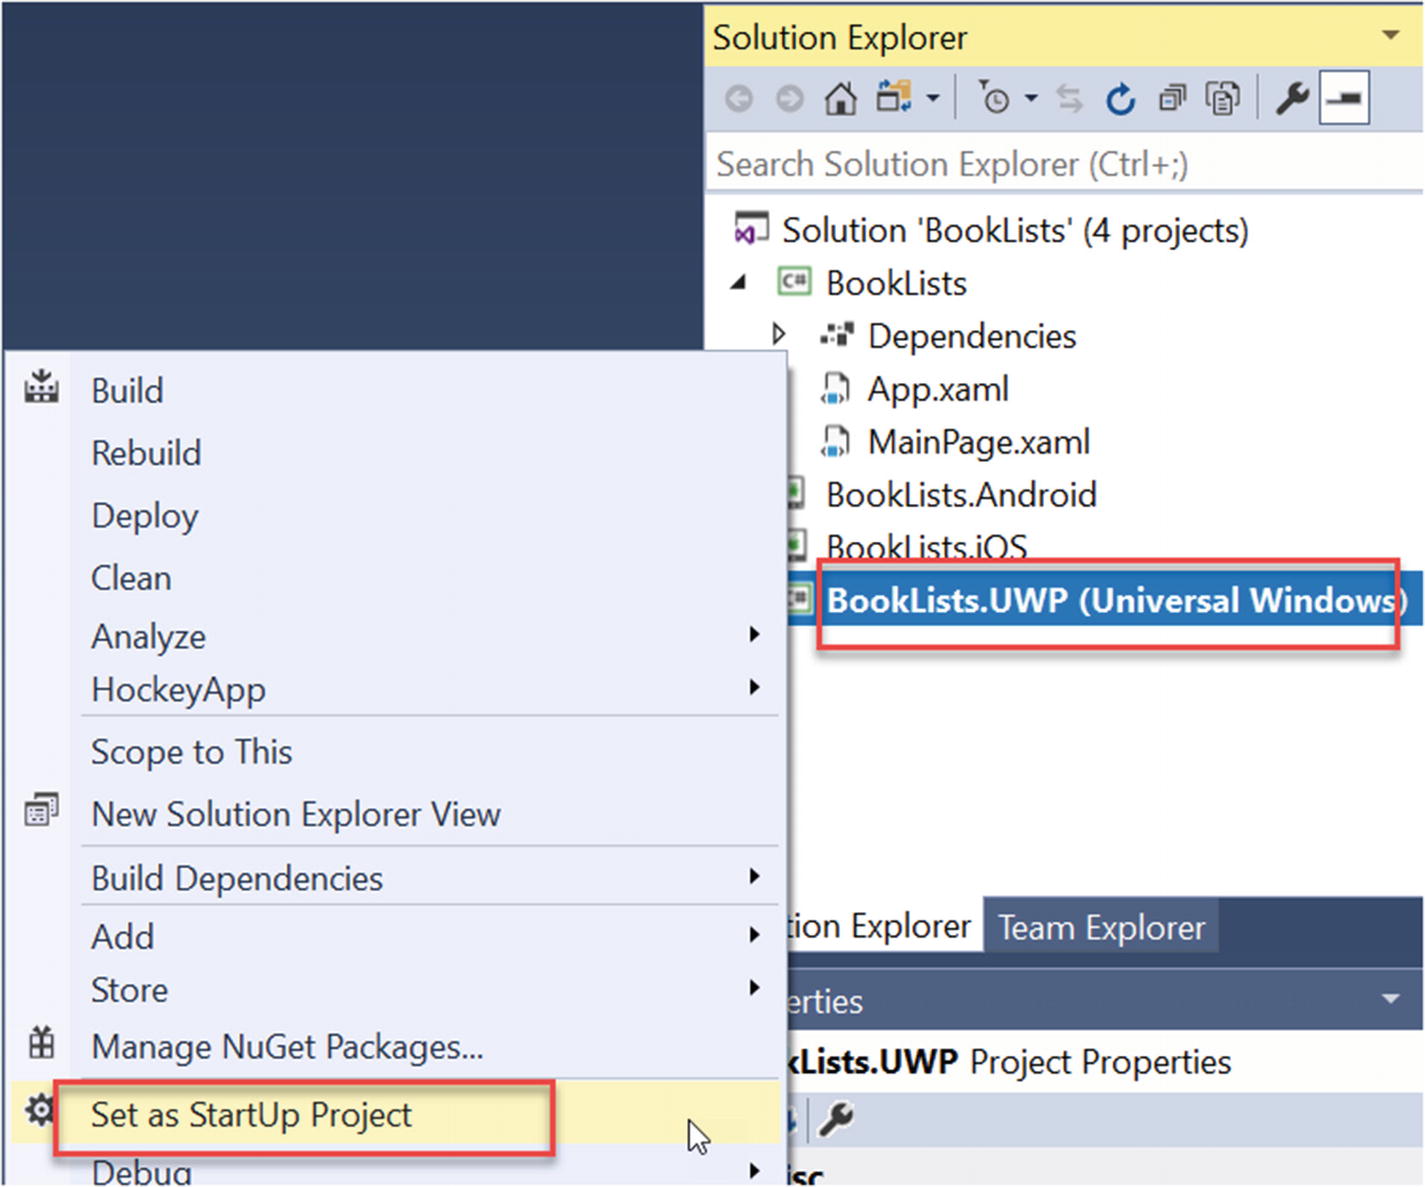
Figure 2-20 Select UWP as the Startup project
Try: Run the app on the Local Machine. See Figures 2-21 and 2-22.

Figure 2-21 Selecting Local Machine
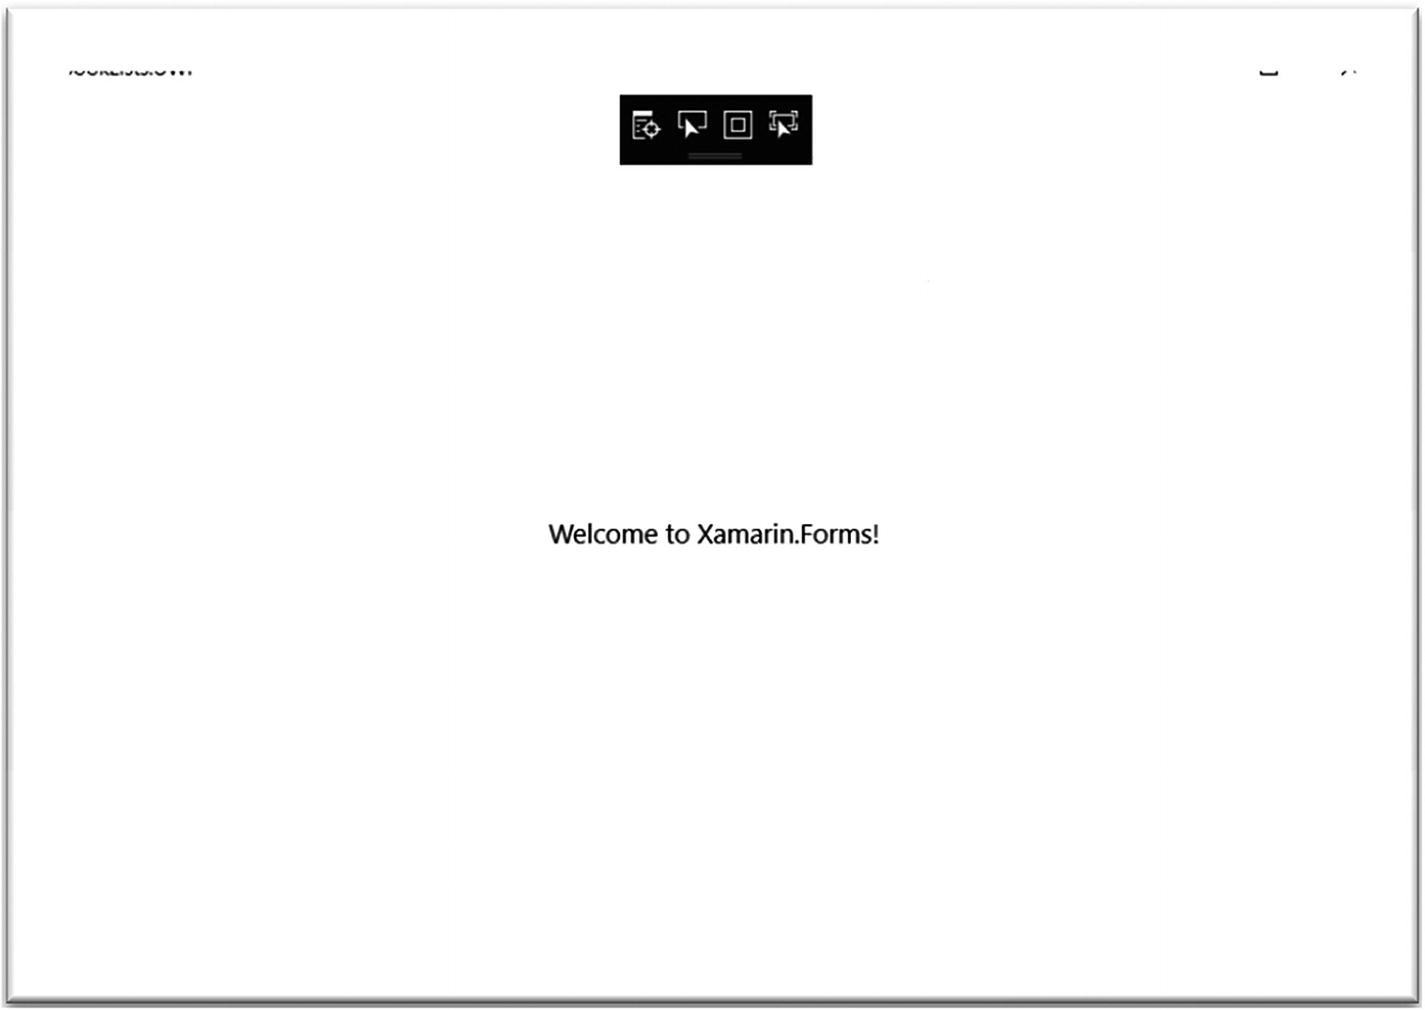
Figure 2-22 Your first app on UWP, using Xamarin Forms
Catch: {The first time you go to run a project on UWP, you may have to check the build configuration first and make sure that the deploy and build options are checked and are x64. Under the Build menu, select Configuration Manager…} See Figures 2-23 and 2-24.
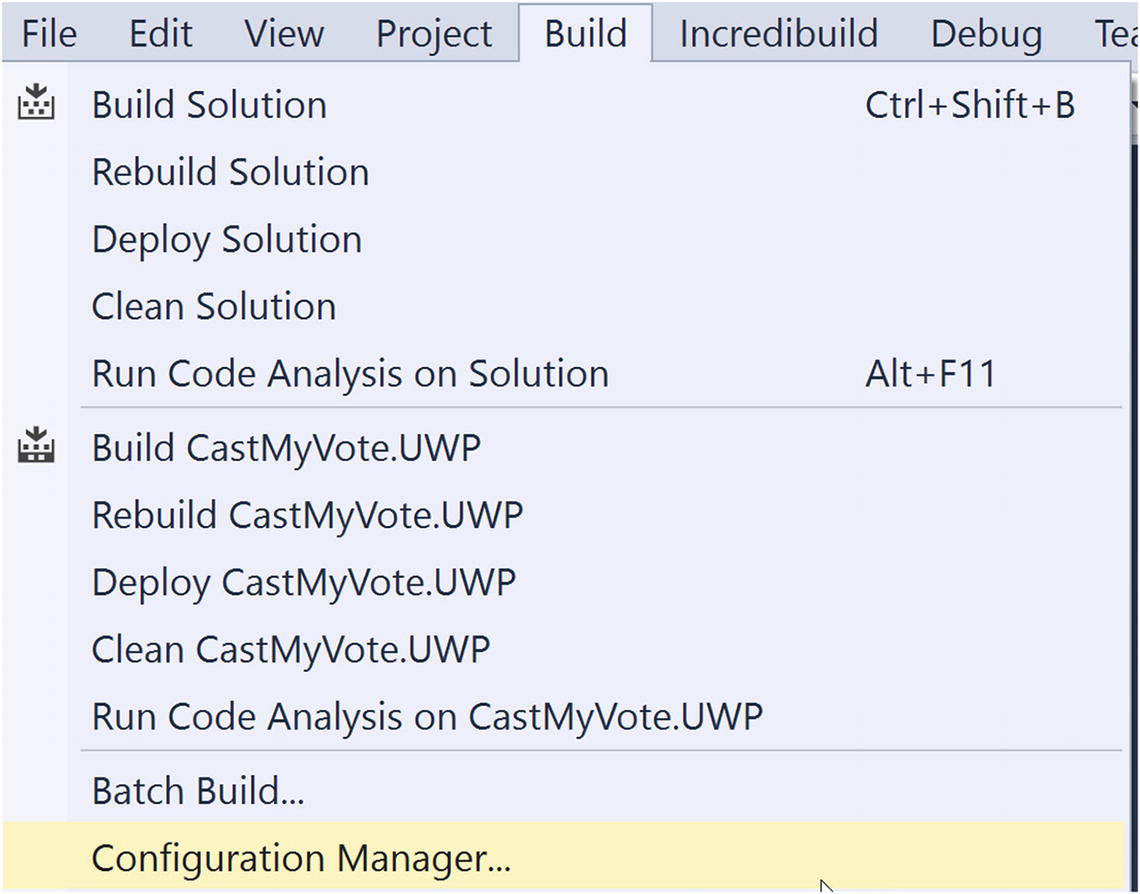
Figure 2-23 Selecting the Build ➤ Configuration Manager… option
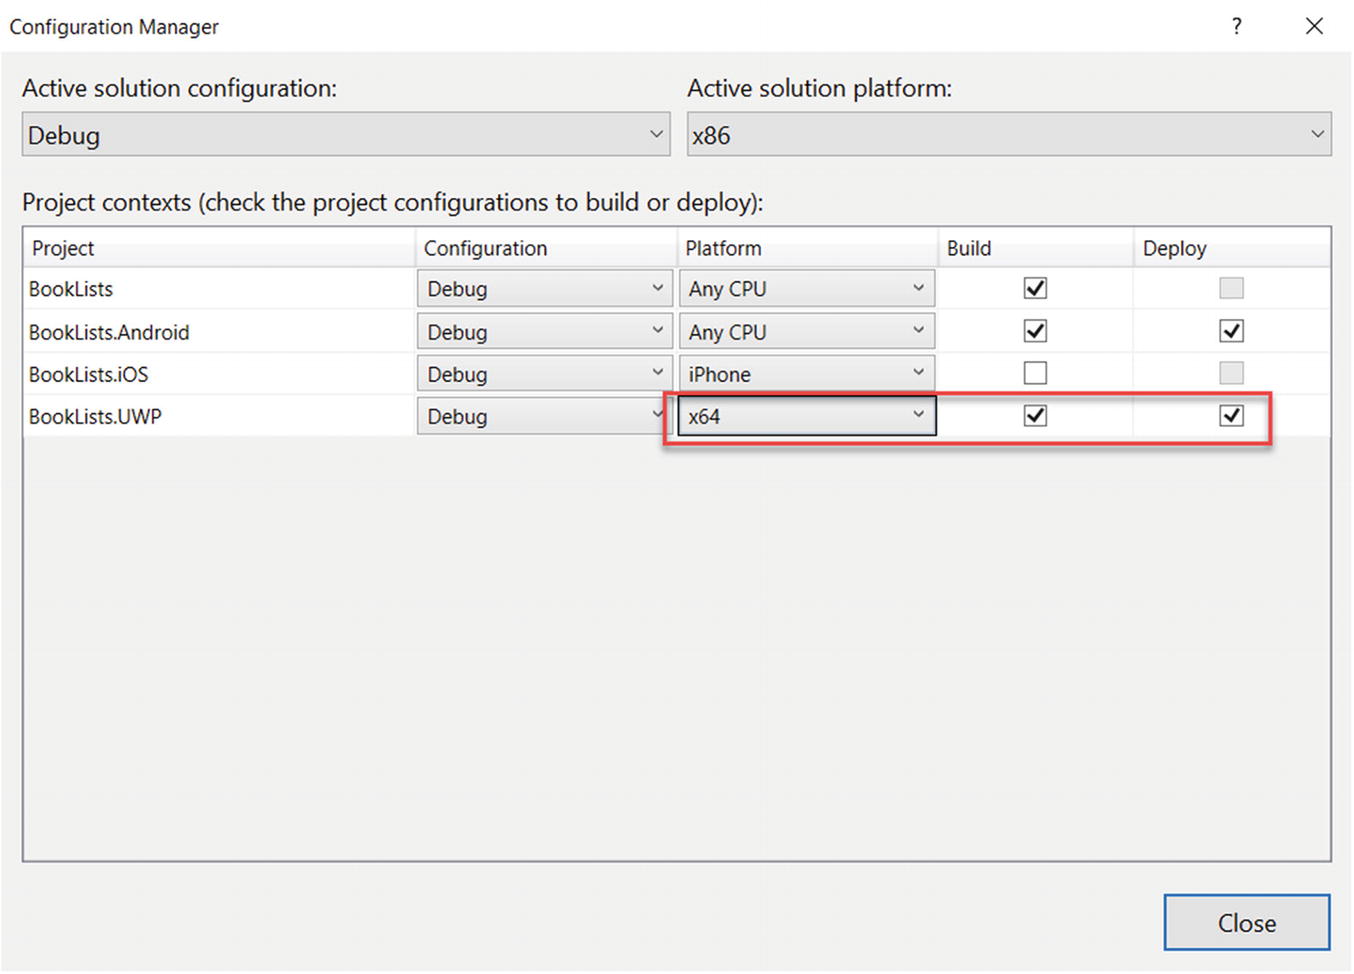
Figure 2-24 Selecting Build and Deploy for UWP
If you have optionally installed VS for the Mac, follow the next few steps; otherwise, skip to step 25.
Right-click the iOS project in the solution and set as Startup Project.
Select Tools ➤ Options ➤ Xamarin ➤ iOS and check off Remote Simulator to Windows, which will allow you to see the simulator on the PC when you run. Then select Find Xamarin Mac Agent and read the three-step procedure for remote login on the Mac. See Figures 2-25 through 2-28.
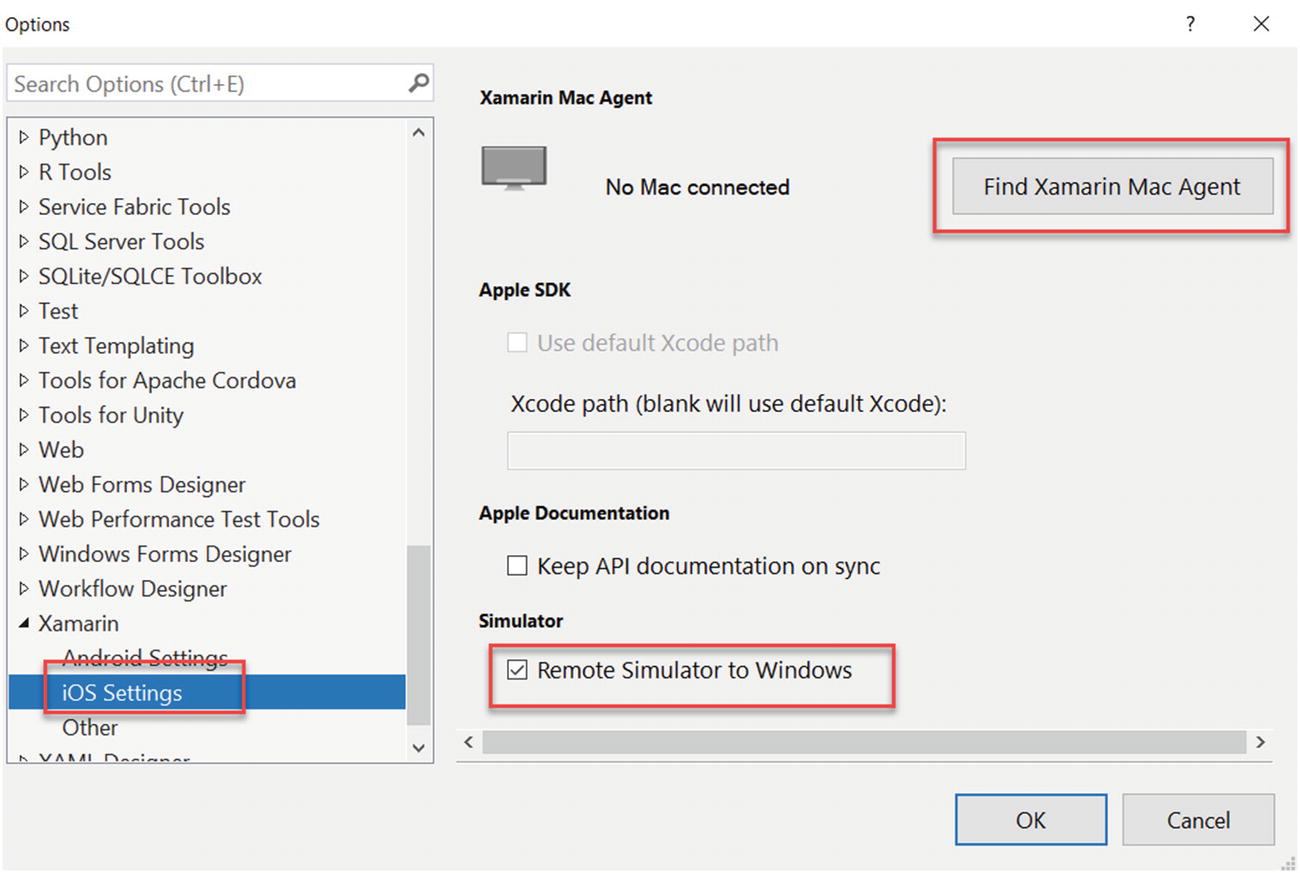
Figure 2-25 Select Tools, Options, Xamarin, and iOS Settings. Check Remote Simulator and click Find Xamarin Mac Agent.
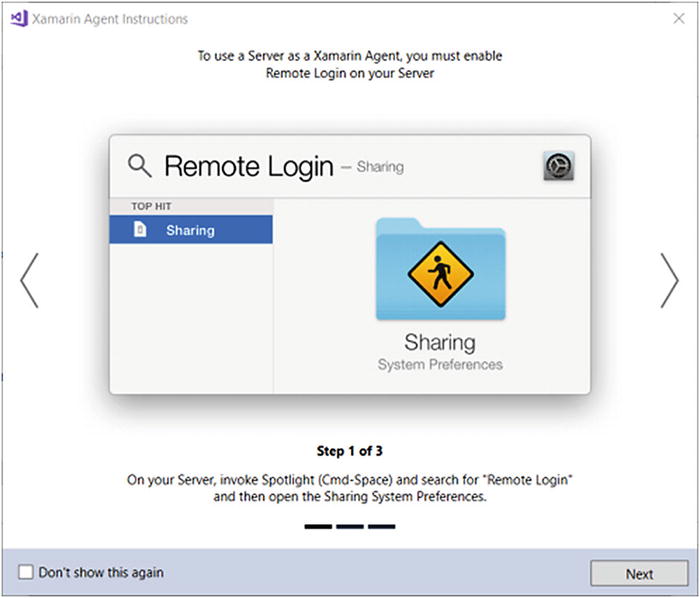
Figure 2-26 Step 1 of 3 for Remote Login
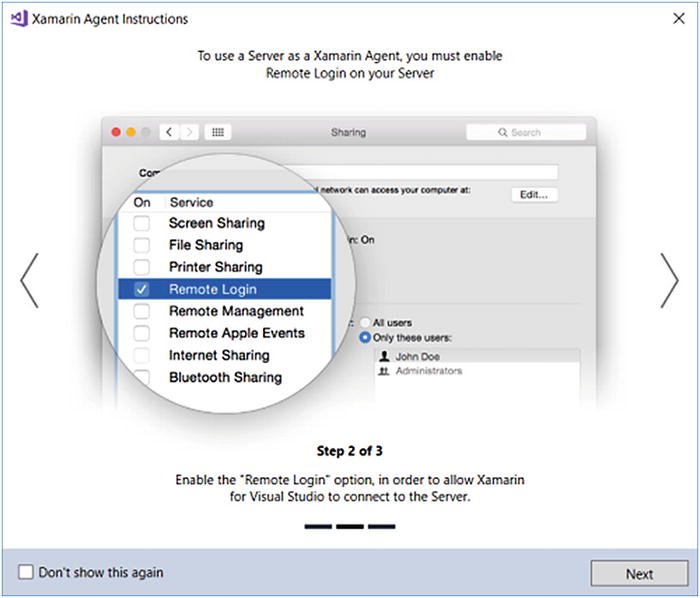
Figure 2-27 Step 2 of 3 for Remote Login
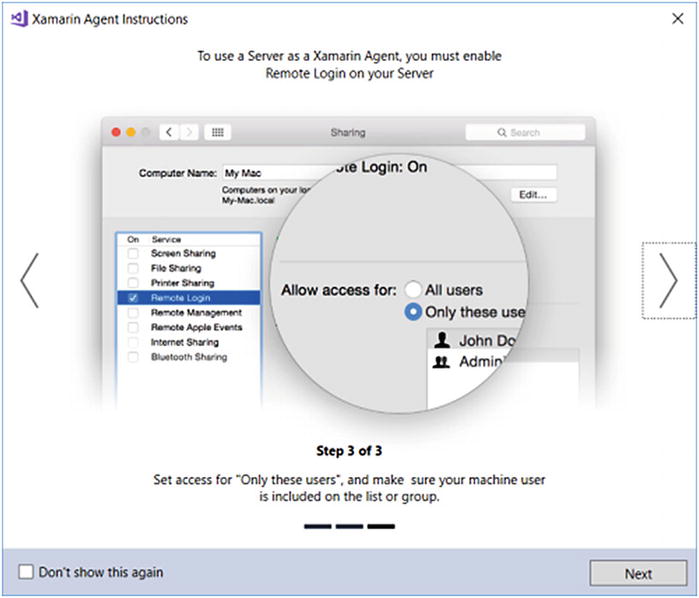
Figure 2-28 Step 3 of 3 for Remote Login
On the Mac, find the IP address by clicking the Apple logo in the upper-left corner and then select System Preferences and Network. Copy the IP address. Back on the PC, click Add Server and enter the Mac IP address. You will be prompted for your username and password on the Mac. You should see the connection machine turn green. See Figure 2-29.
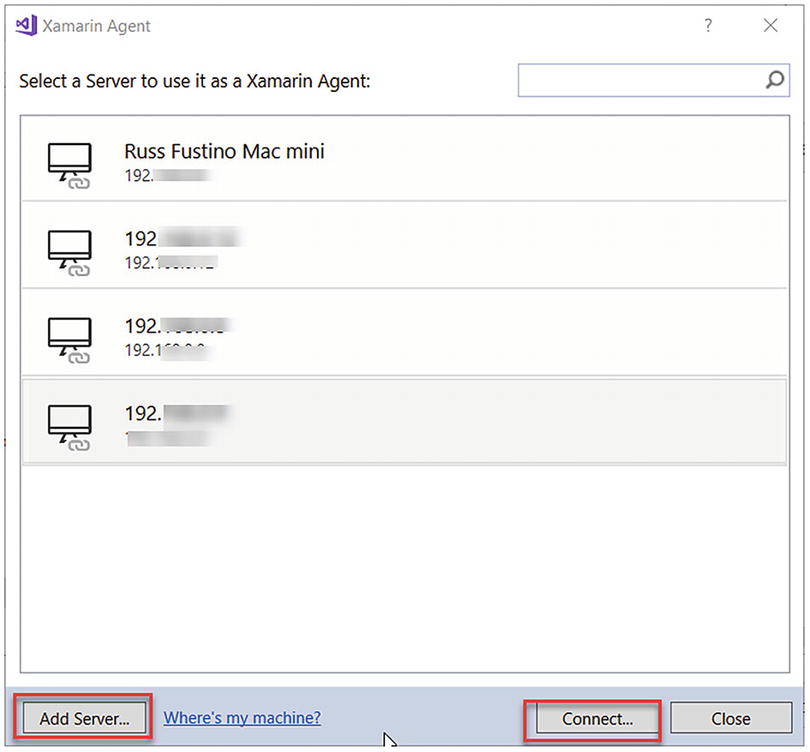
Figure 2-29 Select Add Server, or Connect, if you have a previous connection
To run in the iOS simulator, select iPhoneSimulator, the small drop-down arrow will provide a list of simulators. Select iPhone 8 iOS. You may have to close the simulator once, if it does not start up the first time in a minute or two, and rerun. (See Figures 2-30 and 2-31.) If the simulator does not appear, know that it sometimes runs behind your Visual Studio window. So just move windows around till you see it, or cycle through your open apps using an Alt+Tab key combination.
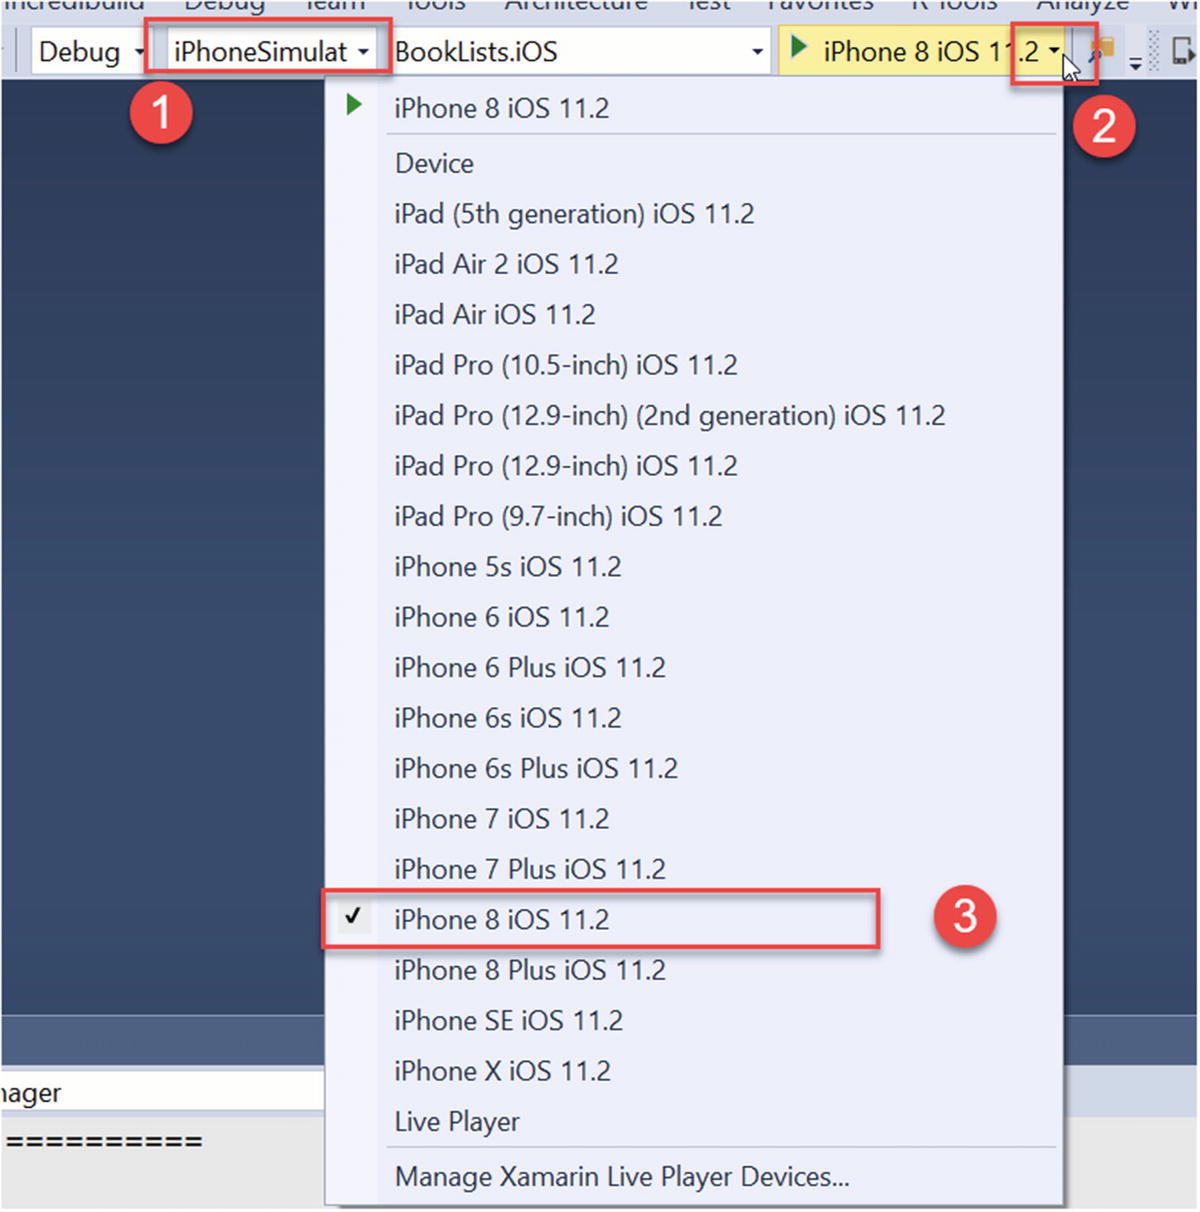
Figure 2-30 Select iPhoneSimulator (1), the tiny drop-down arrow (2), and the simulator model, such as iPhone 8 iOS (3)
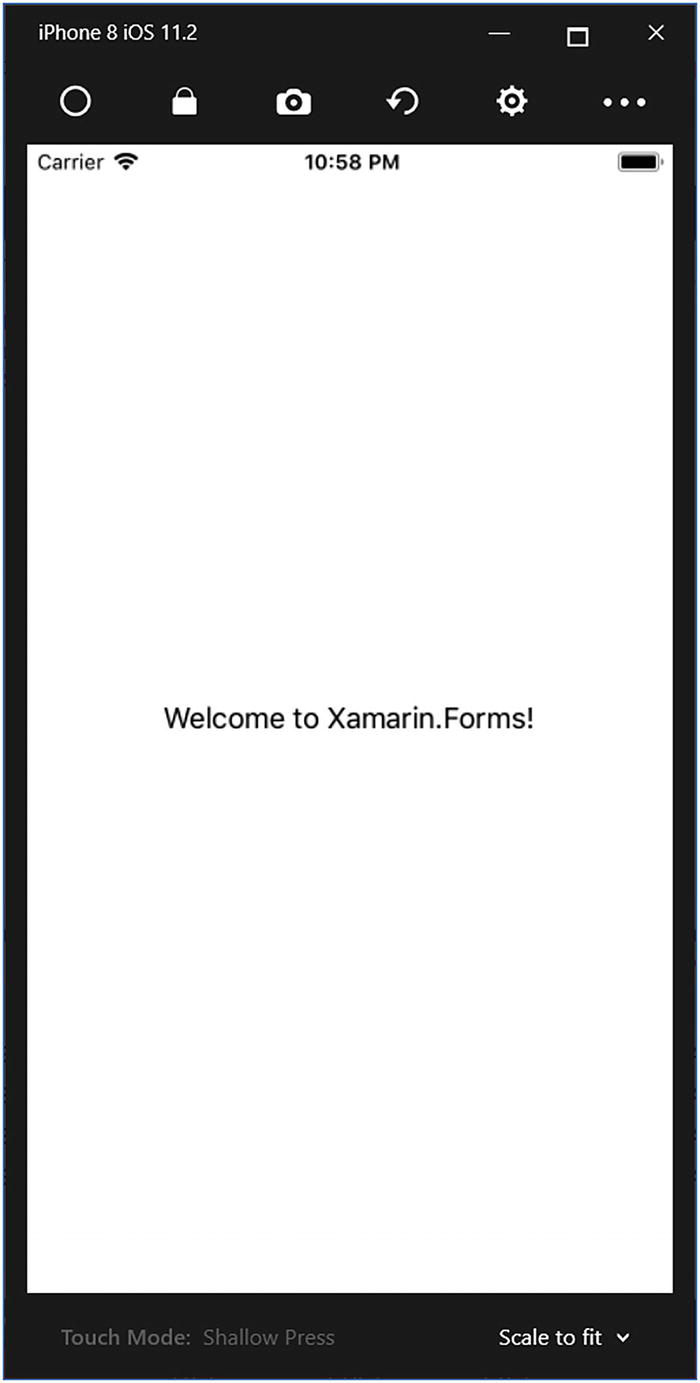
Figure 2-31 The iPhoneSimulator displays running the app
Stop the app. Add a new page to the shared .NET Standard project. Right-click the shared .NET Standard project, select Add ➤ New Item. See Figure 2-32.
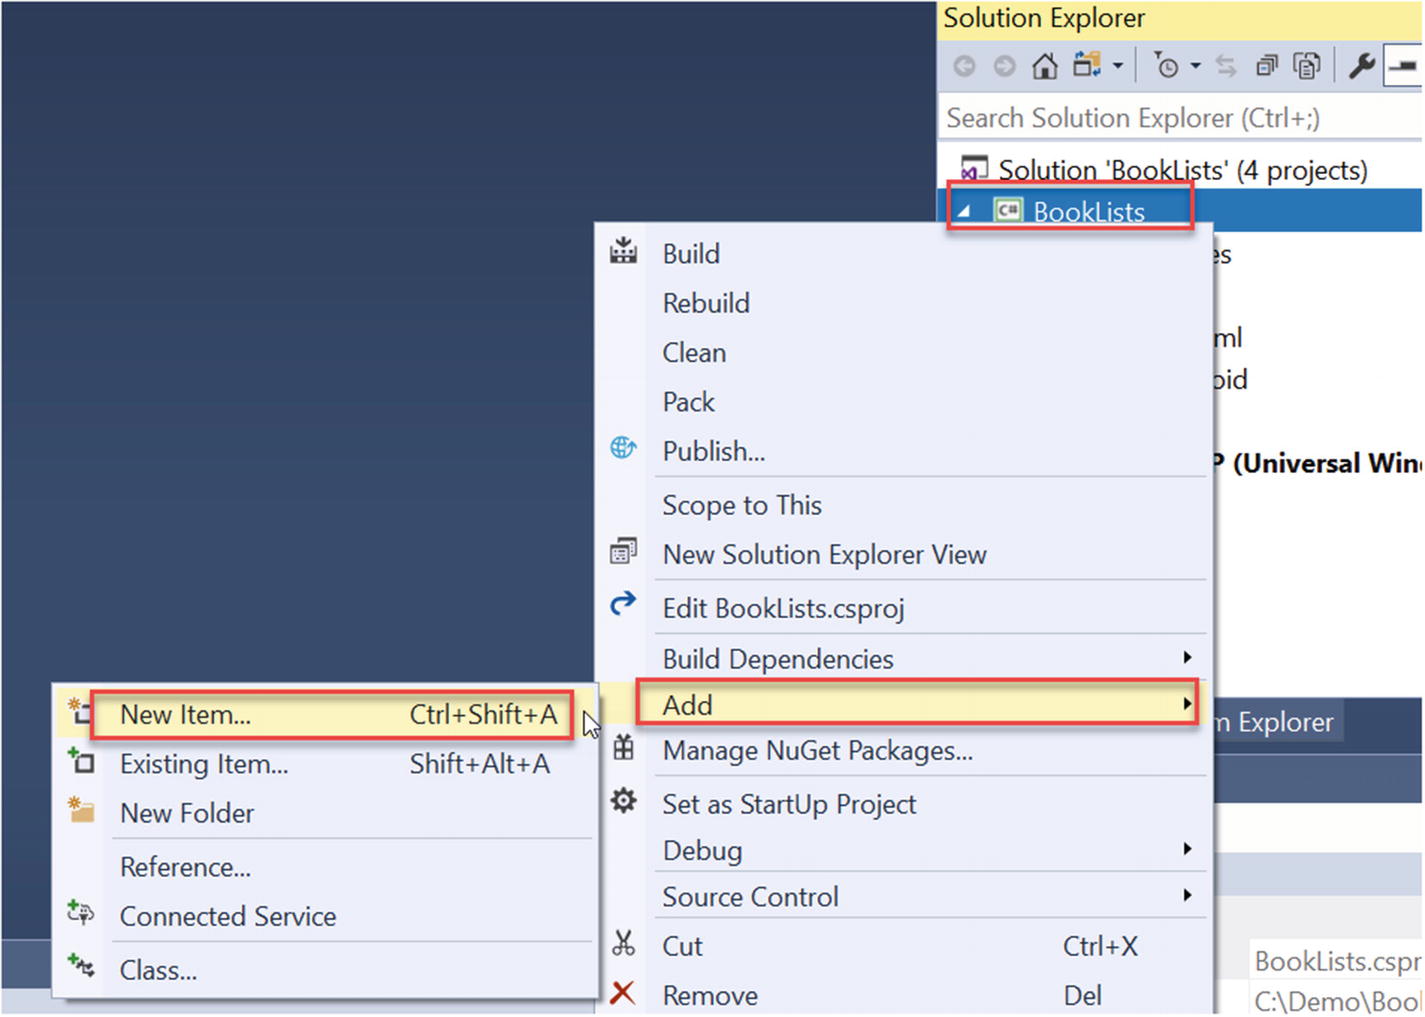
Figure 2-32 Right-click BookLists and select Add ➤ New Item….
Select Visual C# Items ➤ List View Page and name the page Microsoft.xaml. See Figure 2-33.
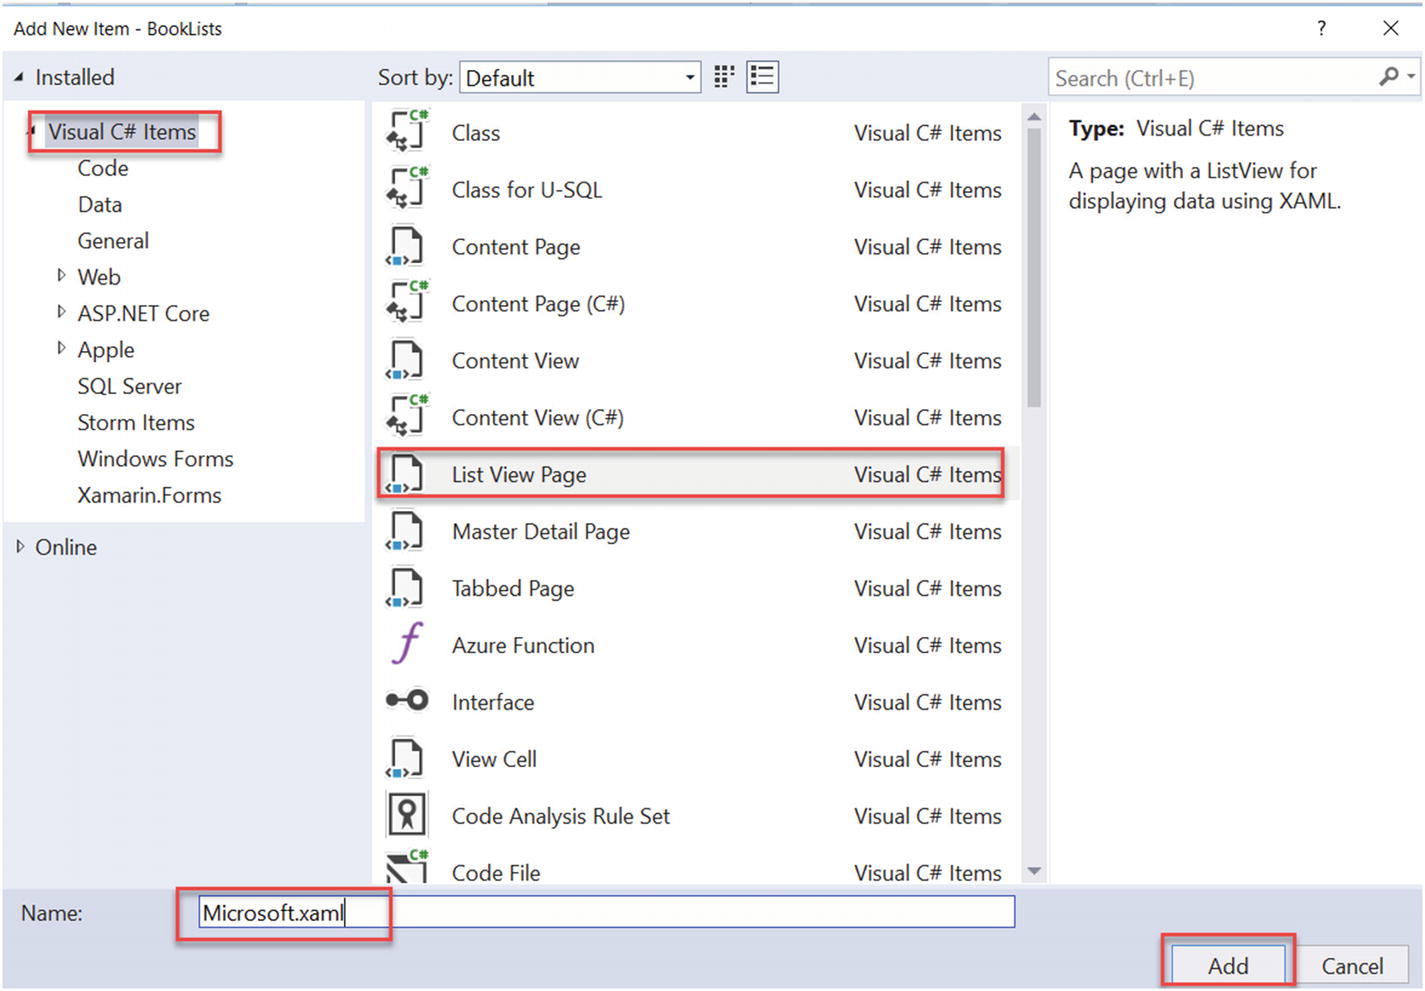
Figure 2-33 Select the List View Page template and name the page Microsoft.xaml
Open Microsoft.xaml and set the following: Padding = "20,20" and Title = "Microsoft Books". This will provide some spacing around the children views of the content page and give it a title. Always use double quotes around values in XAML. See Figure 2-34.
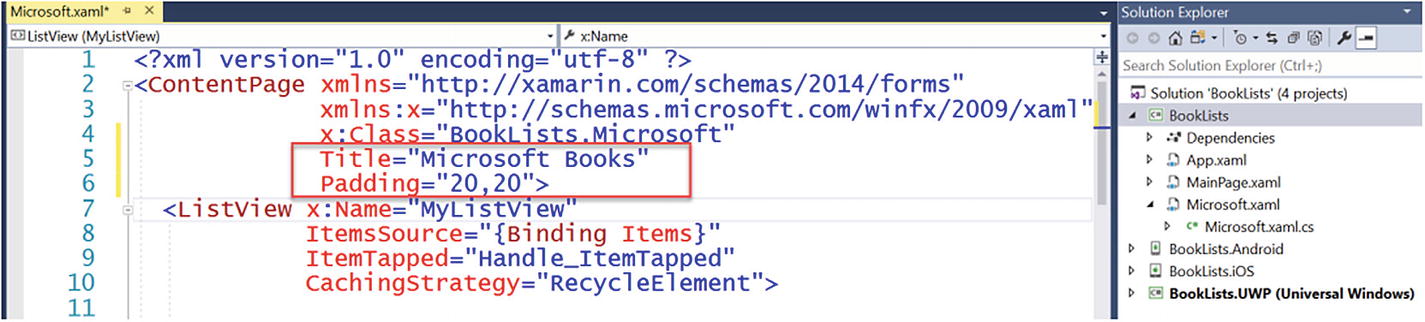
Figure 2-34 Add Title = " Microsoft Books" and Padding = "20,20"
In Solution Explorer, double-click the MainPage.xaml page in the shared .NET Standard project, to see the XAML. Also, note that when you expand the XAML page, there is a code behind file associated with it in Solution Explorer. See Figure 2-35.
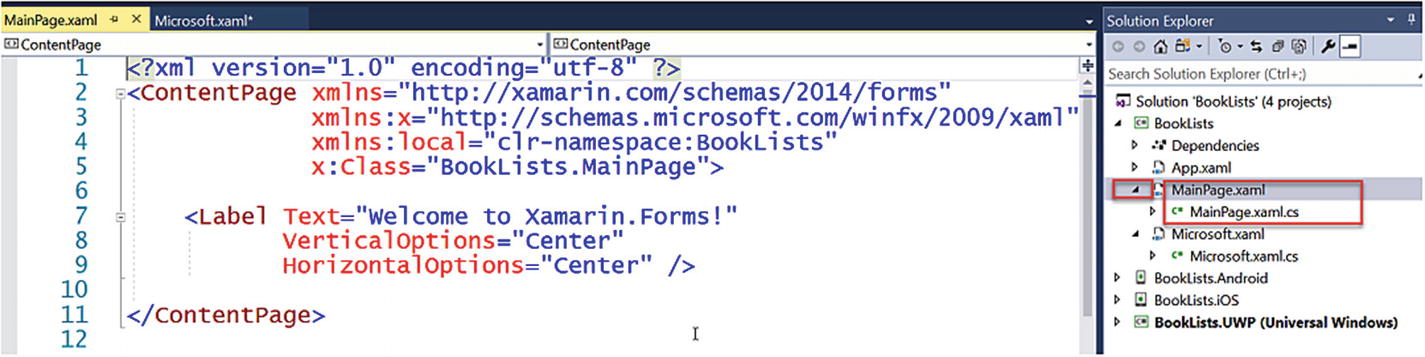
Figure 2-35 Each XAML file has a related code behind the xaml.cs file
Replace the Label view with a StackLayout that contains a button with the following markup.
Replace this
<Label Text="Welcome to Xamarin.Forms!"VerticalOptions="Center"HorizontalOptions="Center" />with this
<StackLayout><Button Margin="20,20"WidthRequest="100"Text="Press to see ListView Page"></Button></StackLayout>Note Newer versions of Visual Studio may already have the StackLayout on the default template. If so, just replace the Label with the Button and keep the existing StackLayout.
Now add a clicked event to the button…
Your code should now look like this in MainPage.xaml:
<StackLayout><Button Margin="20,20"WidthRequest="100"Text="Press to see ListView Page"Clicked="MicrosoftBooks_Clicked"></Button></StackLayout>Open the code behind page, MainPage.xaml.cs, and add an event handler for MicrosoftBooks_Clicked after the MainPage constructor, if one is not already there, as follows:
using System;using System.Collections.Generic;using System.Linq;using System.Text;using System.Threading.Tasks;using Xamarin.Forms;namespace BookLists{public partial class MainPage : ContentPage{public MainPage(){InitializeComponent();}private void MicrosoftBooks_Clicked(object sender, EventArgs e){Navigation.PushAsync(new Microsoft());}}}Open App.xaml.cs and comment out the code to start the MainPage and replace it by starting a NavigationPage. You can find pages in the solution by typing in the search window in Solution Explorer. Here you see two app.xaml files: one in the shared .NET Standard project, and one in the UWP project. The user interface (UI) code goes in the shared .NET Standard project. See Figure 2-36.
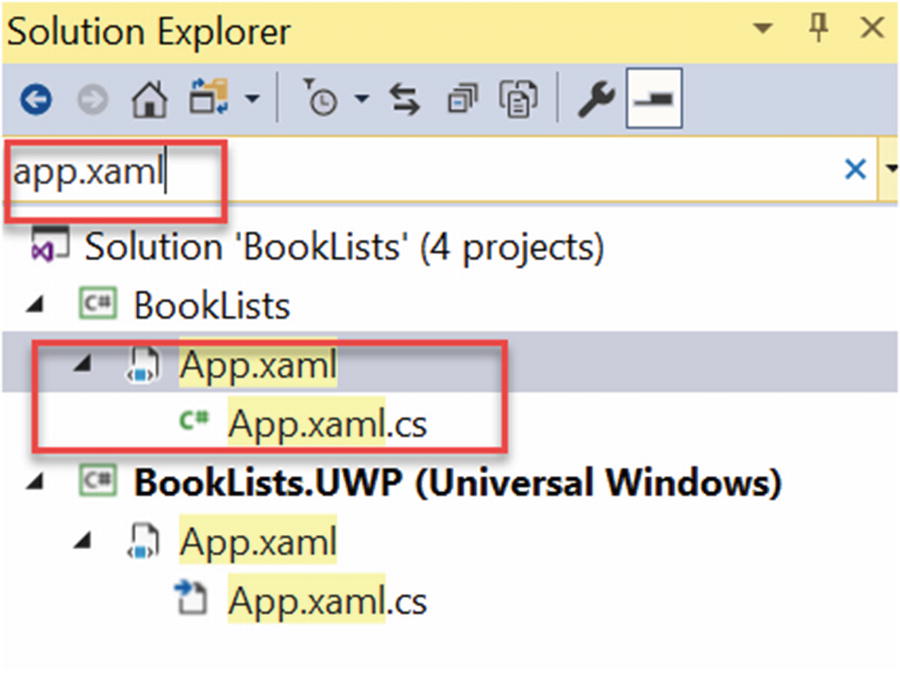
Figure 2-36 Searching on app.xaml in Solution Explorer yields two sets. Use the one in BookLists.
public App (){InitializeComponent();// MainPage = new BookLists.MainPage();MainPage = new NavigationPage(new MainPage());}Select the UWP head project, or whichever head project you desire as the Startup project. Run the app, and you should be able to navigate to the ListPage and back to the MainPage.
Open MainPage. xaml and modify the text property to "Microsoft Books"
<StackLayout><Button Margin=" 20,20"Text="Microsoft Books"Clicked="MicrosoftBooks_Clicked"></Button></StackLayout>Run the app and click the Microsoft Books button. Then navigate to the Microsoft Books ListView page. See Figure 2-37.
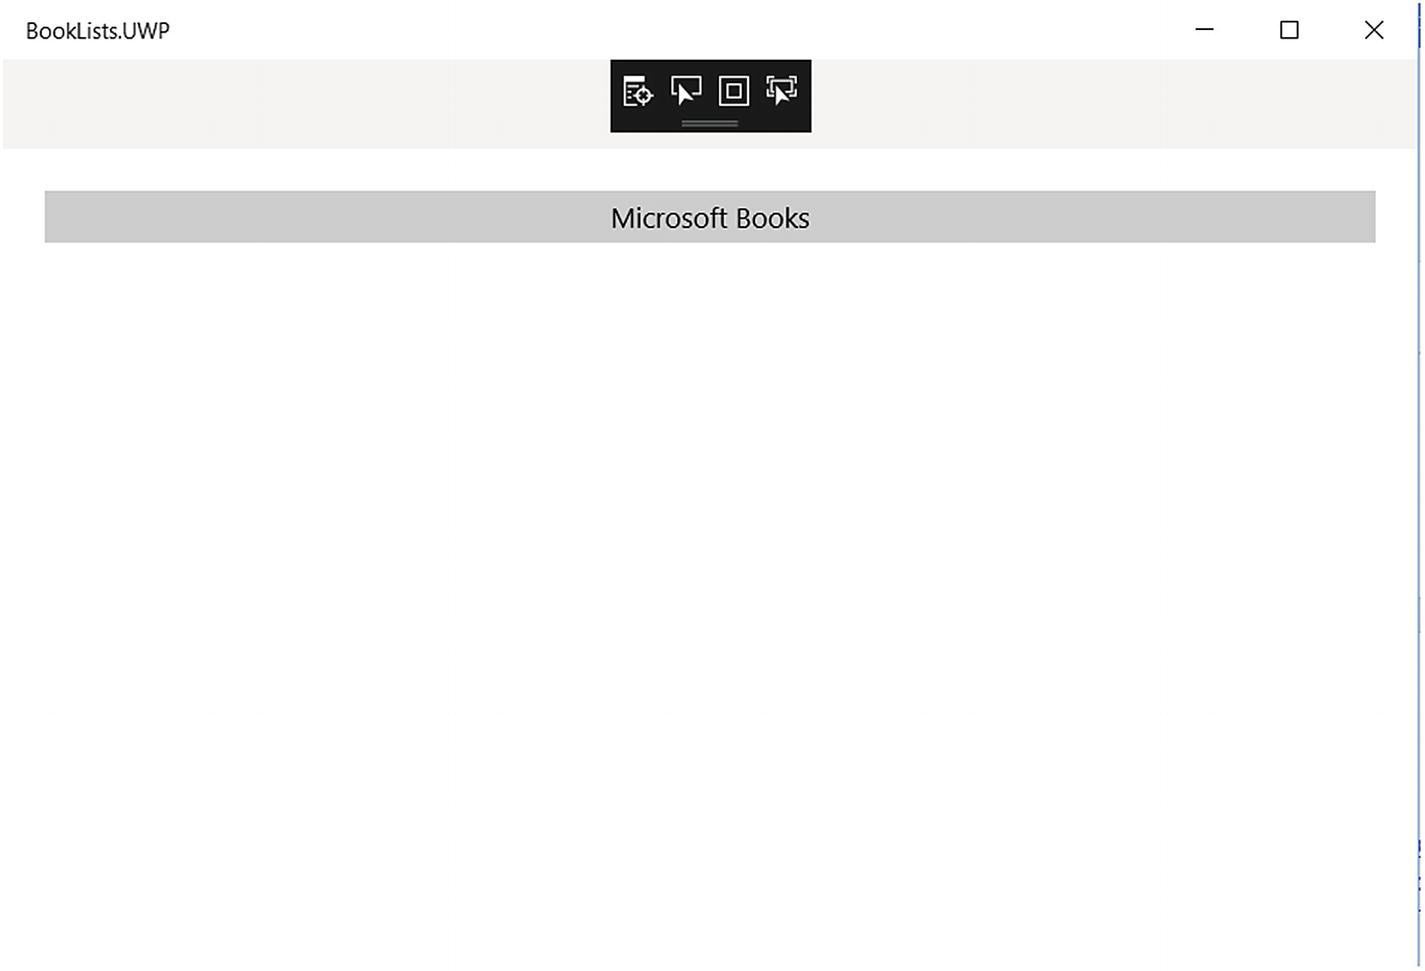
Figure 2-37 See the home Navigation page MainPage.xaml
You should see the Microsoft Books ListView page and a list of items, as well as a tapped event handler, when you click on an item. See Figure 2-38.
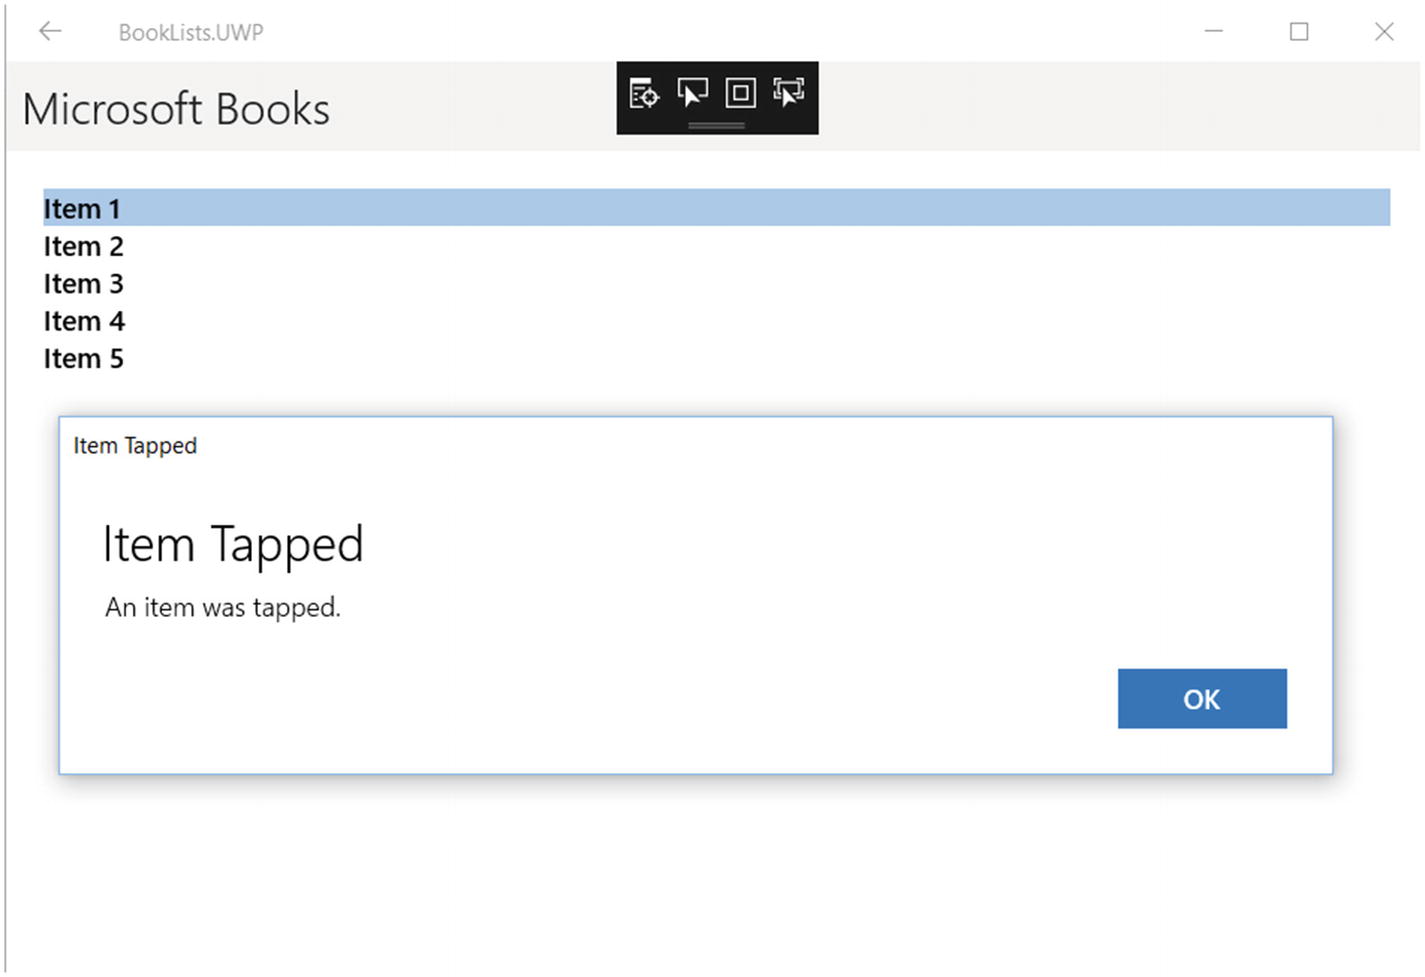
Figure 2-38 By selecting Item, you will see a message that an item was tapped
Congratulations! You have just created your first Xamarin app.
Project 2-2: Working with the User Interface
Time Estimate
15 Minutes
In this project, you will create a user interface (UI) and employ the StackLayout and GridLayout classes. These are very popular building blocks for your UI. StackLayout flows similarly to an HTML page, with UI items that relate to each other, in a vertical or horizontal stack, for example. GridLayout is useful for layouts that are best defined by rows and columns. For example, StackLayout might be good for the phone, as you typically scroll up and down in a phone app, whereas GridLayout might be good for a tablet, to help users take advantage of all the additional real estate on the device.
Continue with the same app. We will now place four buttons on the main page. Replace the StackLayout markup XAML in MainPage.xaml with the following markup:
<StackLayout><Button Margin="20,20"WidthRequest="100"Text="Microsoft Books"Clicked="MicrosoftBooks_Clicked"></Button><Button Margin="20,20"WidthRequest="100"Text="Programming"Clicked="Programming_Clicked"></Button><Button Margin="20,20"WidthRequest="100"Text="Mobile"Clicked="Mobile_Clicked"></Button><Button Margin="20,20"WidthRequest="100"Text="Machine Learning"Clicked="MachineLearning_Clicked"></Button></StackLayout>Create clicked event handlers for each button and leave the new handlers empty for now, as follows in MainPage.xaml.cs:
namespace BookLists{public partial class MainPage : ContentPage{public MainPage(){InitializeComponent();}private void MicrosoftBooks_Clicked(object sender, EventArgs e){Navigation.PushAsync(new Microsoft());}private void Programming_Clicked(object sender, EventArgs e){}private void Mobile_Clicked(object sender, EventArgs e){}private void MachineLearning_Clicked(object sender, EventArgs e){}}}In a stack layout, the children are displayed in the order they appear in the XAML. Also, the default StackLayout orientation is vertical. Run the app, and you should see the buttons listed vertically, as in Figure 2-39.
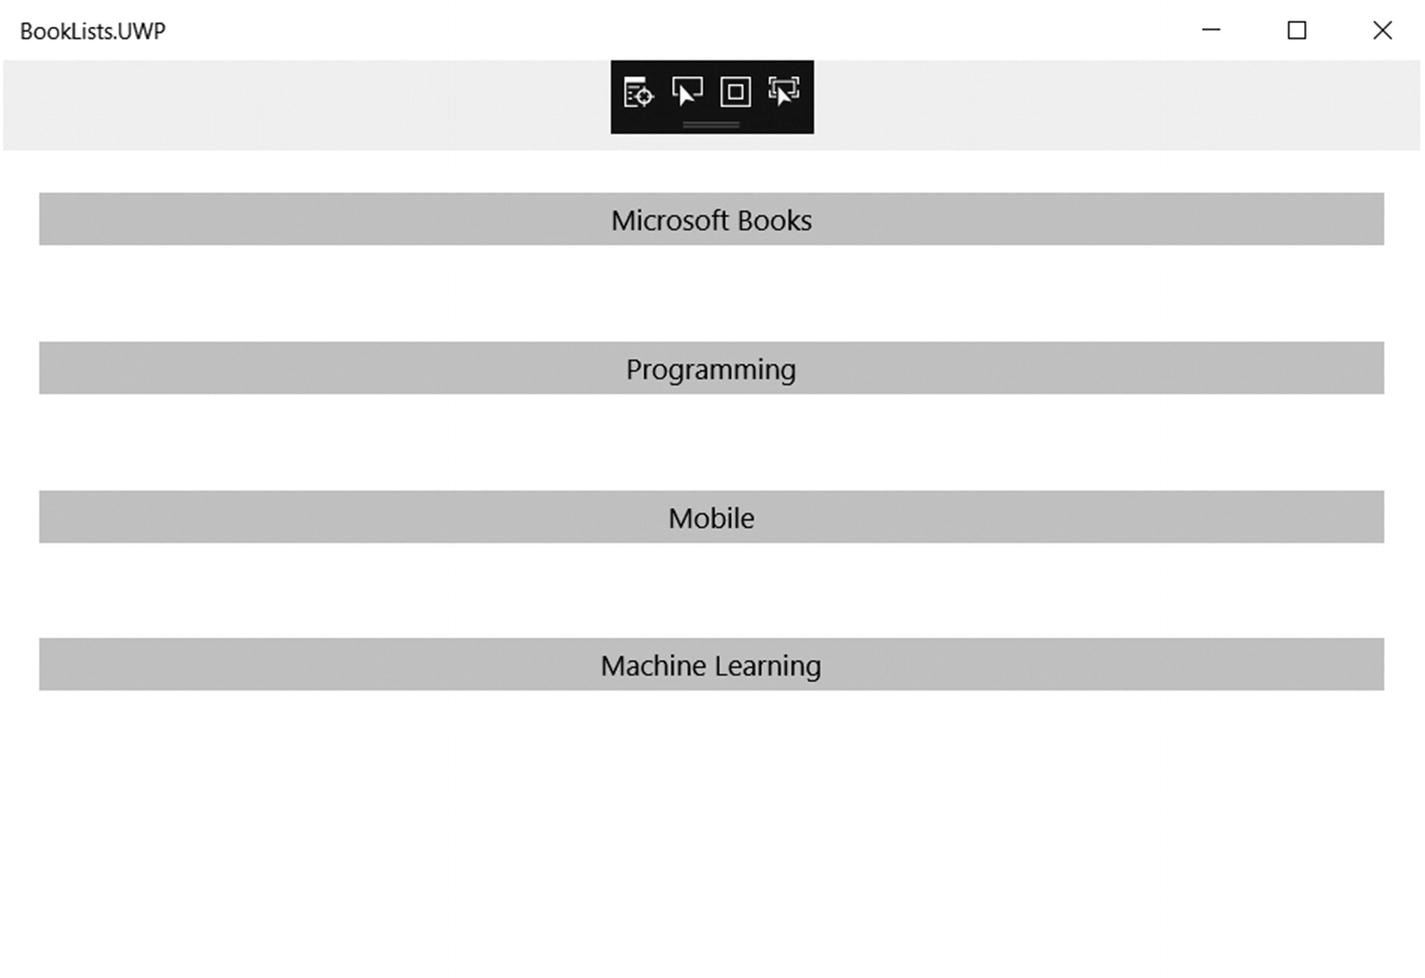
Figure 2-39 All the new buttons are displayed
You may be wondering why the buttons stretch across the width of the page, although we have specified WidthRequest only to 100. That is because the default value for StackLayout HorizontalOptions with a vertical orientation is FillAndExpand. These sizes are not pixels. Instead, they are device-independent units recognized independently by each platform. Let’s modify each button to include the following:
HorizontalOptions="Center"WidthRequest ="300"This StackLayout XAML should look like the following:
<StackLayout><Button Margin="20,20"WidthRequest="300"HorizontalOptions="Center"Text="Microsoft Books"Clicked="MicrosoftBooks_Clicked"></Button><Button Margin="20,20"WidthRequest="300"HorizontalOptions="Center"Text="Programming"Clicked="Programming_Clicked"></Button><Button Margin="20,20"WidthRequest="300"HorizontalOptions="Center"Text="Mobile"Clicked="Mobile_Clicked"></Button><Button Margin="20,20"WidthRequest="300"HorizontalOptions="Center"Text="Machine Learning"Clicked="MachineLearning_Clicked"></Button></StackLayout>Now run it to see the resized buttons in Figure 2-40.
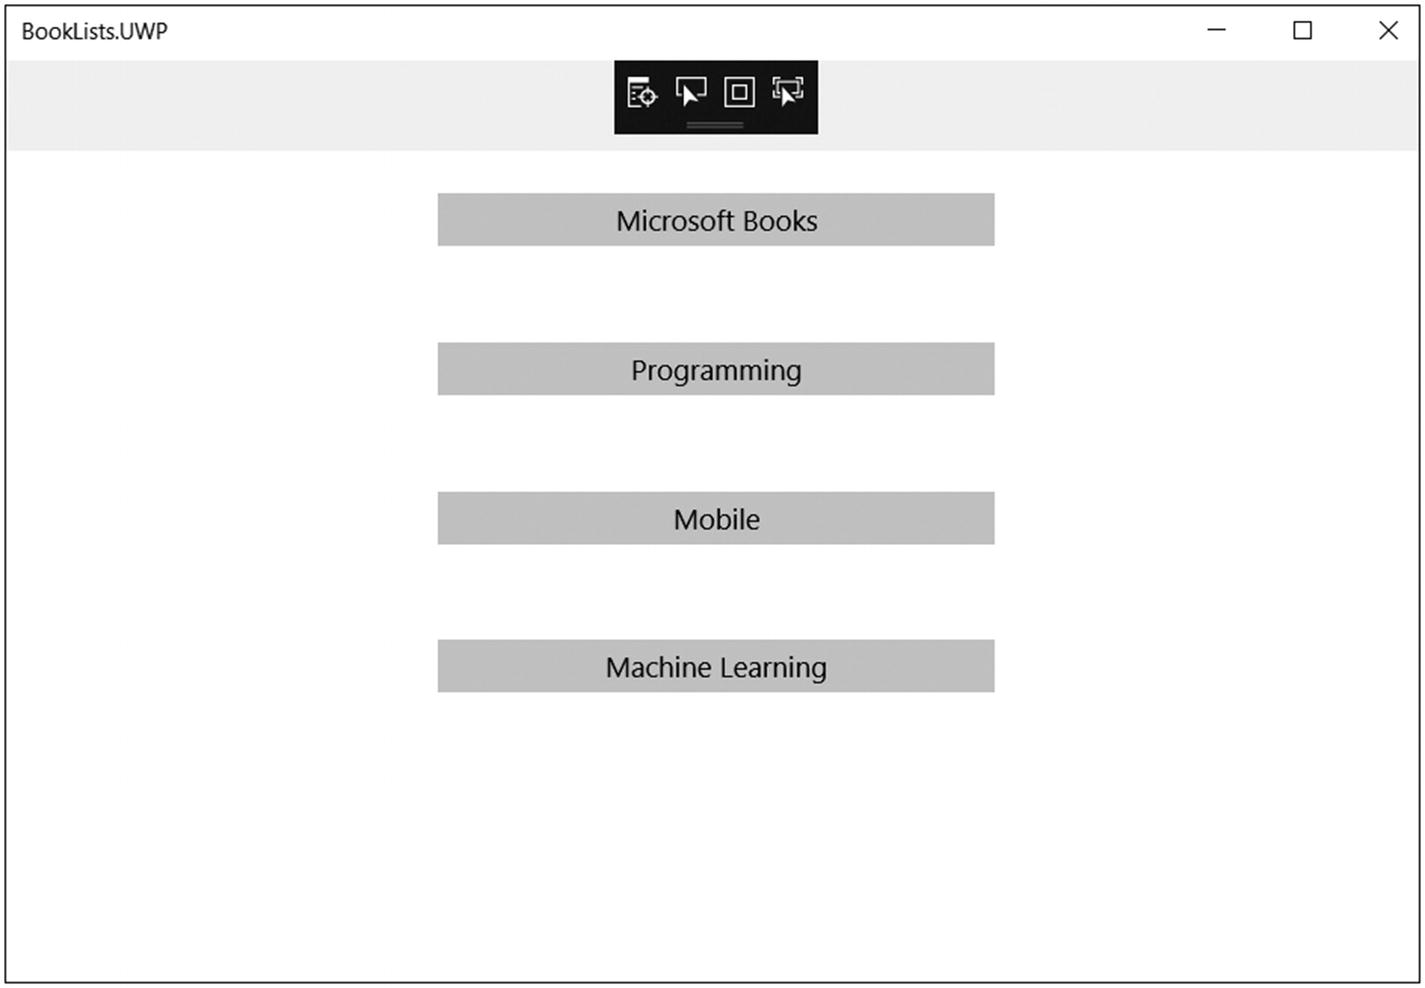
Figure 2-40 Buttons are now displayed centered, with a width of 300
Comment out the StackLayout XAML, as we will use this later. To comment out a section of code in Visual Studio, select the desired code that you want to comment and then press CTRL+K and then CTRL+C. (To uncomment, use CTRL+K, CTRL+U.)
<!--<StackLayout><Button Margin="20,20"WidthRequest="300"HorizontalOptions="Center"Text="Microsoft Books"Clicked="MicrosoftBooks_Clicked"></Button><Button Margin="20,20"WidthRequest="300"HorizontalOptions="Center"Text="Programming"Clicked="Programming_Clicked"></Button><Button Margin="20,20"WidthRequest="300"HorizontalOptions="Center"Text="Mobile"Clicked="Mobile_Clicked"></Button><Button Margin="20,20"WidthRequest="300"HorizontalOptions="Center"Text="Machine Learning"Clicked="MachineLearning_Clicked"></Button></StackLayout>-->Now let’s add a grid, as follows, directly below the commented StackLayout XAML. GridLayout uses row definitions and column definitions to set up the format of the grid. Star (*) sizing means the row or column will use up all the available space proportionally. For example, if you have two columns that use * and *, each will be 50 percent of the available width. If you specify the first as * and the second as 2*, the first will be one-third of the width and the second will be two-thirds of the width available. A height or width set to Auto in the definitions will size automatically to the largest value in the row or column.
<Grid><Grid.RowDefinitions><RowDefinition Height="200"></RowDefinition><RowDefinition Height="200"></RowDefinition></Grid.RowDefinitions><Grid.ColumnDefinitions><ColumnDefinition Width="*"></ColumnDefinition><ColumnDefinition Width="*"></ColumnDefinition></Grid.ColumnDefinitions><Button Grid.Row="0" Grid.Column="0" Margin="20,20"HorizontalOptions="Center"WidthRequest="300"Text="Microsoft Books"Clicked="MicrosoftBooks_Clicked"></Button><Button Grid.Row="0" Grid.Column="1" Margin="20,20"HorizontalOptions="Center"WidthRequest="300"Text="Programming"Clicked="Programming_Clicked"></Button><Button Grid.Row="1" Grid.Column="0" Margin="20,20"HorizontalOptions="Center"WidthRequest="300"Text="Mobile"Clicked="Mobile_Clicked"></Button><Button Grid.Row="1" Grid.Column="1" Margin="20,20"HorizontalOptions="Center"WidthRequest="300"Text="Machine Learning"Clicked="MachineLearning_Clicked"></Button></Grid>Run it, and you should see something like Figure 2-41.
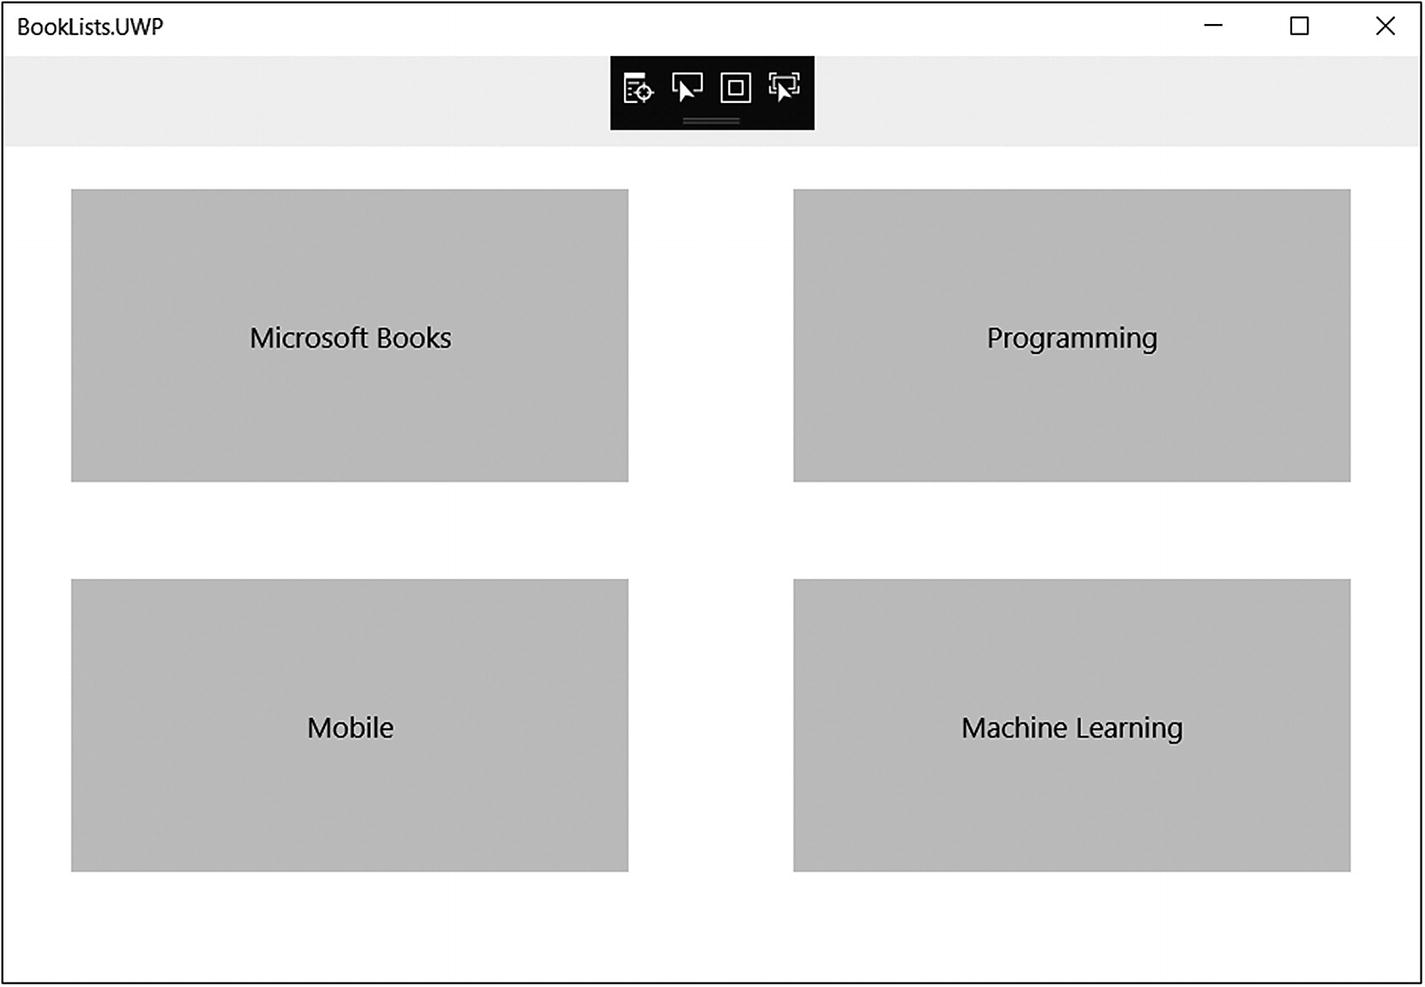
Figure 2-41 Using GridLayout for buttons
Now let’s look at how we use these in tablet and phone form factors.
Project 2-3: Dealing with Tablet and Phone Form Factors
Time Estimate
10 Minutes
In this task, you will use XAML and code behind to control your layout form factors for a tablet and a phone. ScrollView can be used in a phone form factor to represent the main page of an application. Many phone apps are typically used in portrait or landscape mode and have a single column which you must scroll down to see all the content. In a tablet form factor, the screen is wider, and a grid view on a main page can be used to maximize the real estate, because one can easily create columns. With that said, it is not uncommon to mix and match grid and stack layouts to achieve the desired interface throughout the application.
Uncomment the StackLayout code, so that both the grid and stack layouts are uncommented and run the app. You will only see the grid layout, if it is below the stack layout. This is because only one view can be returned for a page, and the last one in wins. We will fix that next. See Figure 2-42.
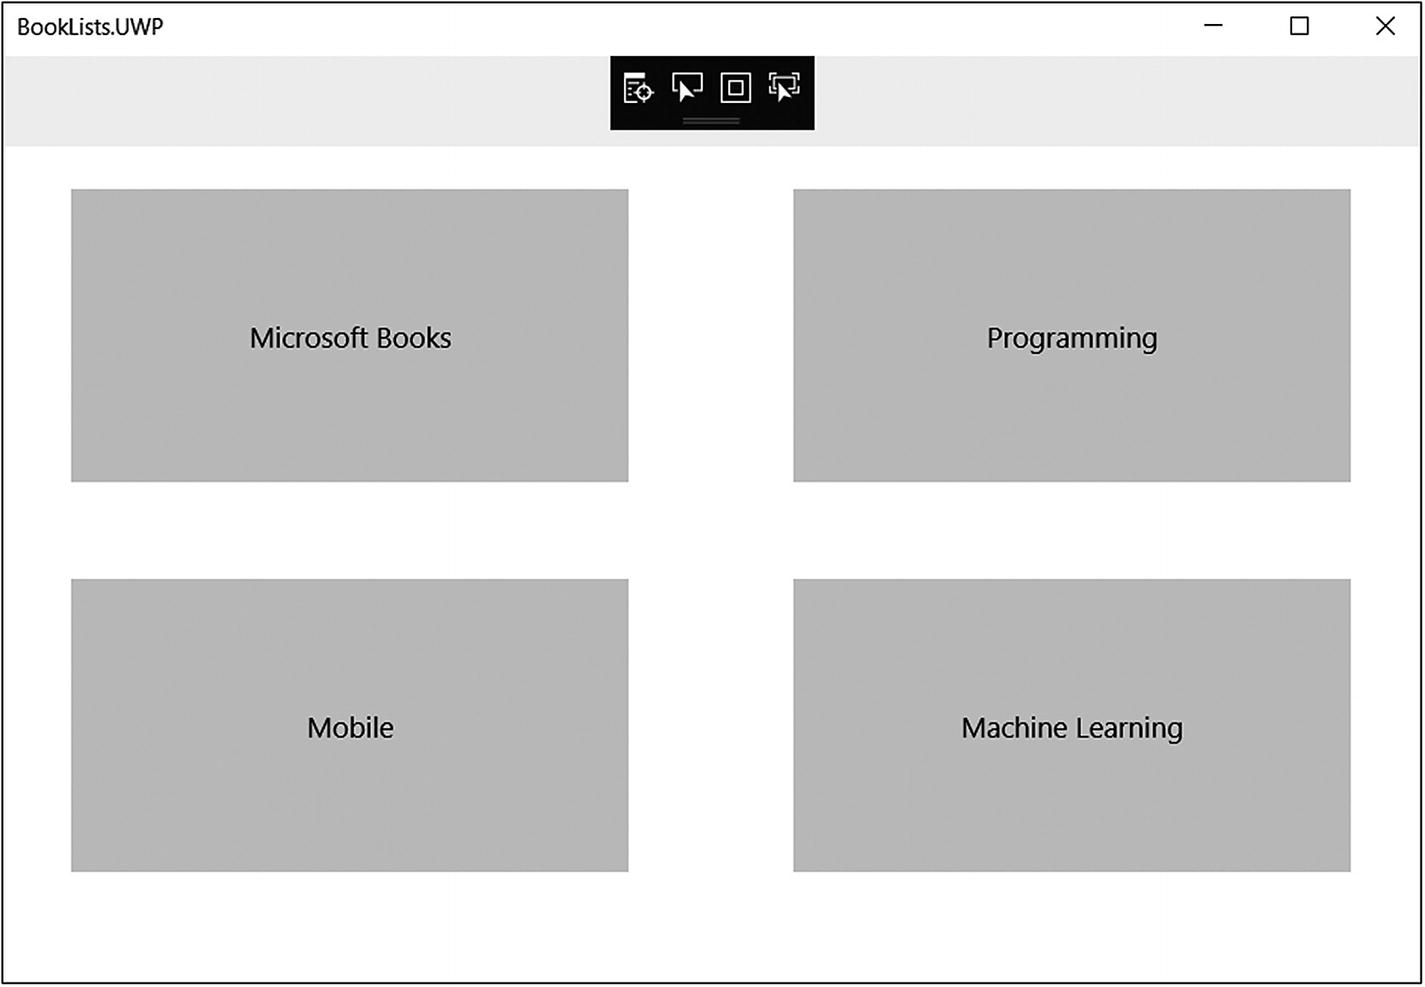
Figure 2-42 Only the grid view shows when both layouts are uncommented. The last one in wins.
Try: {What we would like to do is use the stack layout for the phone and the grid layout for the tablet. First, let’s wrap both the grid and stack layout into one StackLayout view. Each section of the XAML can expand or contract using the – and + symbols on the left edge. Contract both grid and stack Layout sections, select both sections contracted, right-click and select Surround With… StackLayout.} See Figure 2-43.
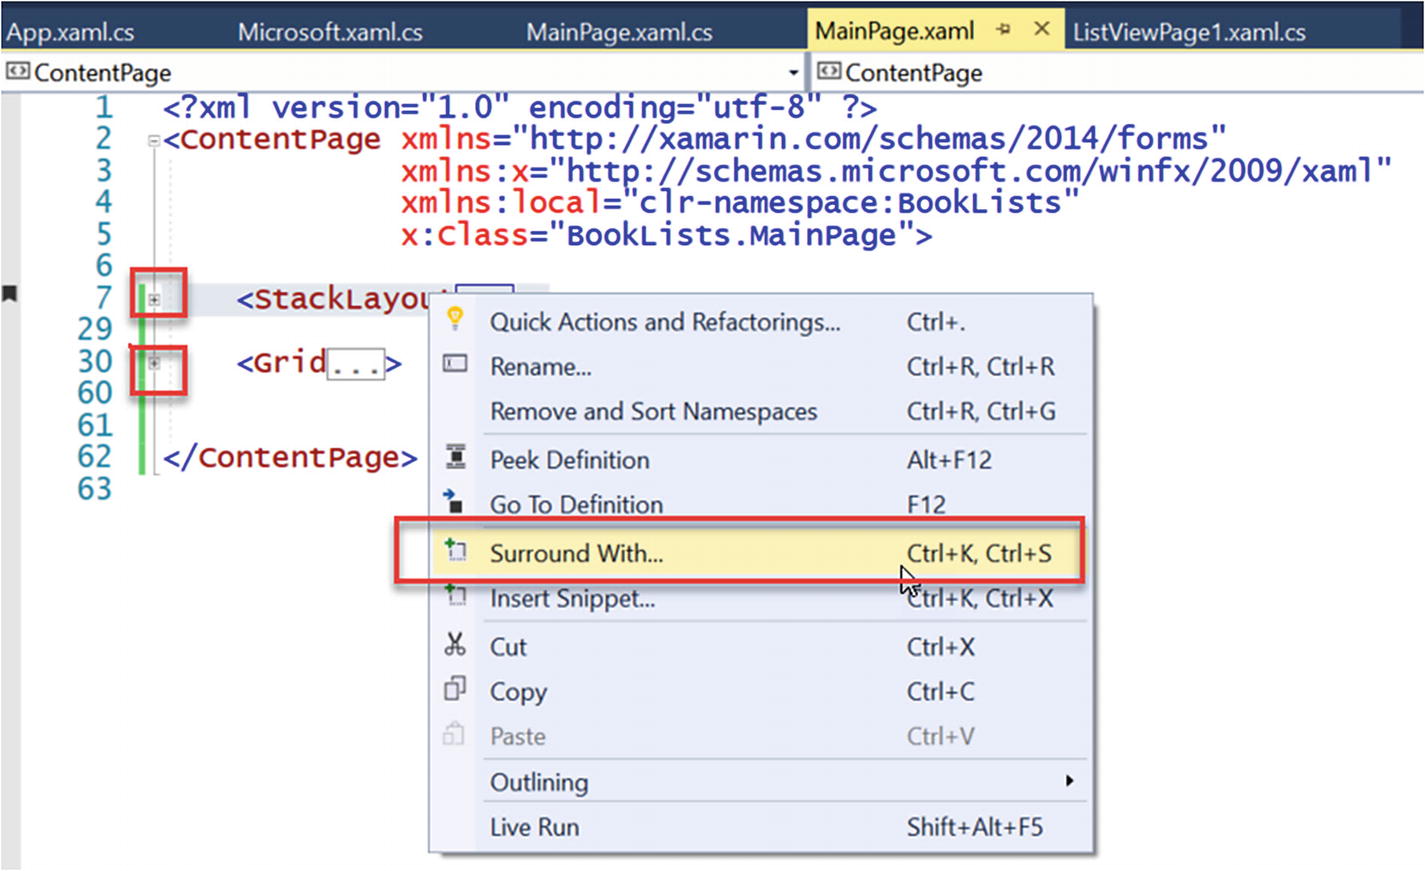
Figure 2-43 Selecting Surround With…
Catch: {Visual Studio may surround the code with a grid by default. Change it to a stack layout.} See Figure 2-44.
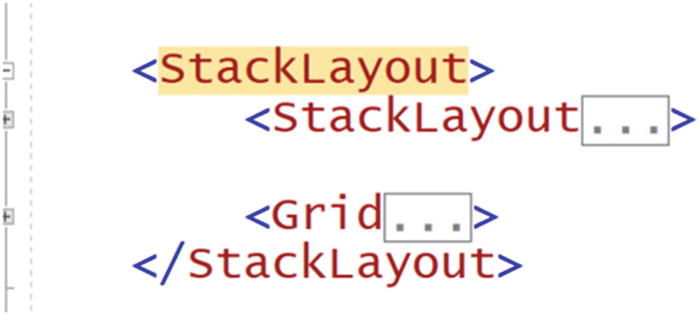
Figure 2-44 StackLayout surrounds both StackLayout and Grid
Run the app, and you will see that both sections are displayed on the page, which is almost where we want to be. See Figure 2-45.
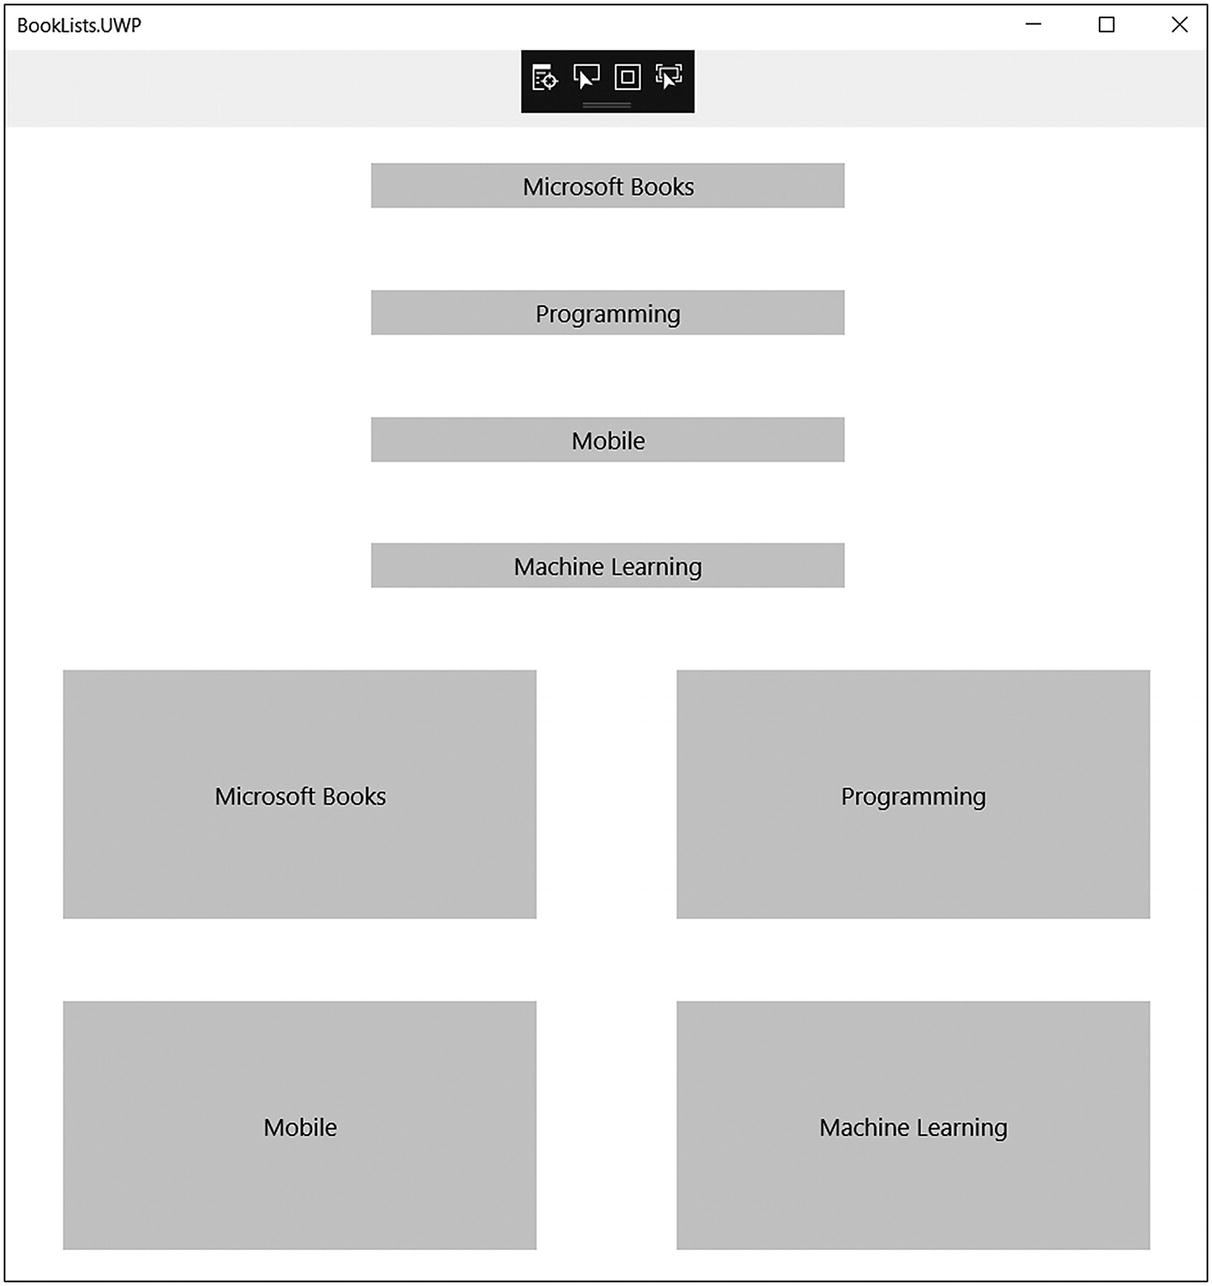
Figure 2-45 Both the Grid and StackLayout views are displayed when wrapped into a StackLayout
Now let’s make only the phone version view available on the phone and hide the tablet view, then make only the tablet view display on a tablet and hide the phone view. To do so, add a Name to the Tablet section called TabletView and the Phone section called PhoneView in the XAML, so we can refer to it in the code behind.
<StackLayout><StackLayout x:Name="PhoneView">...<Grid x:Name="TabletView"></StackLayout>After collapsing the buttons, it should look like Figure 2-46.
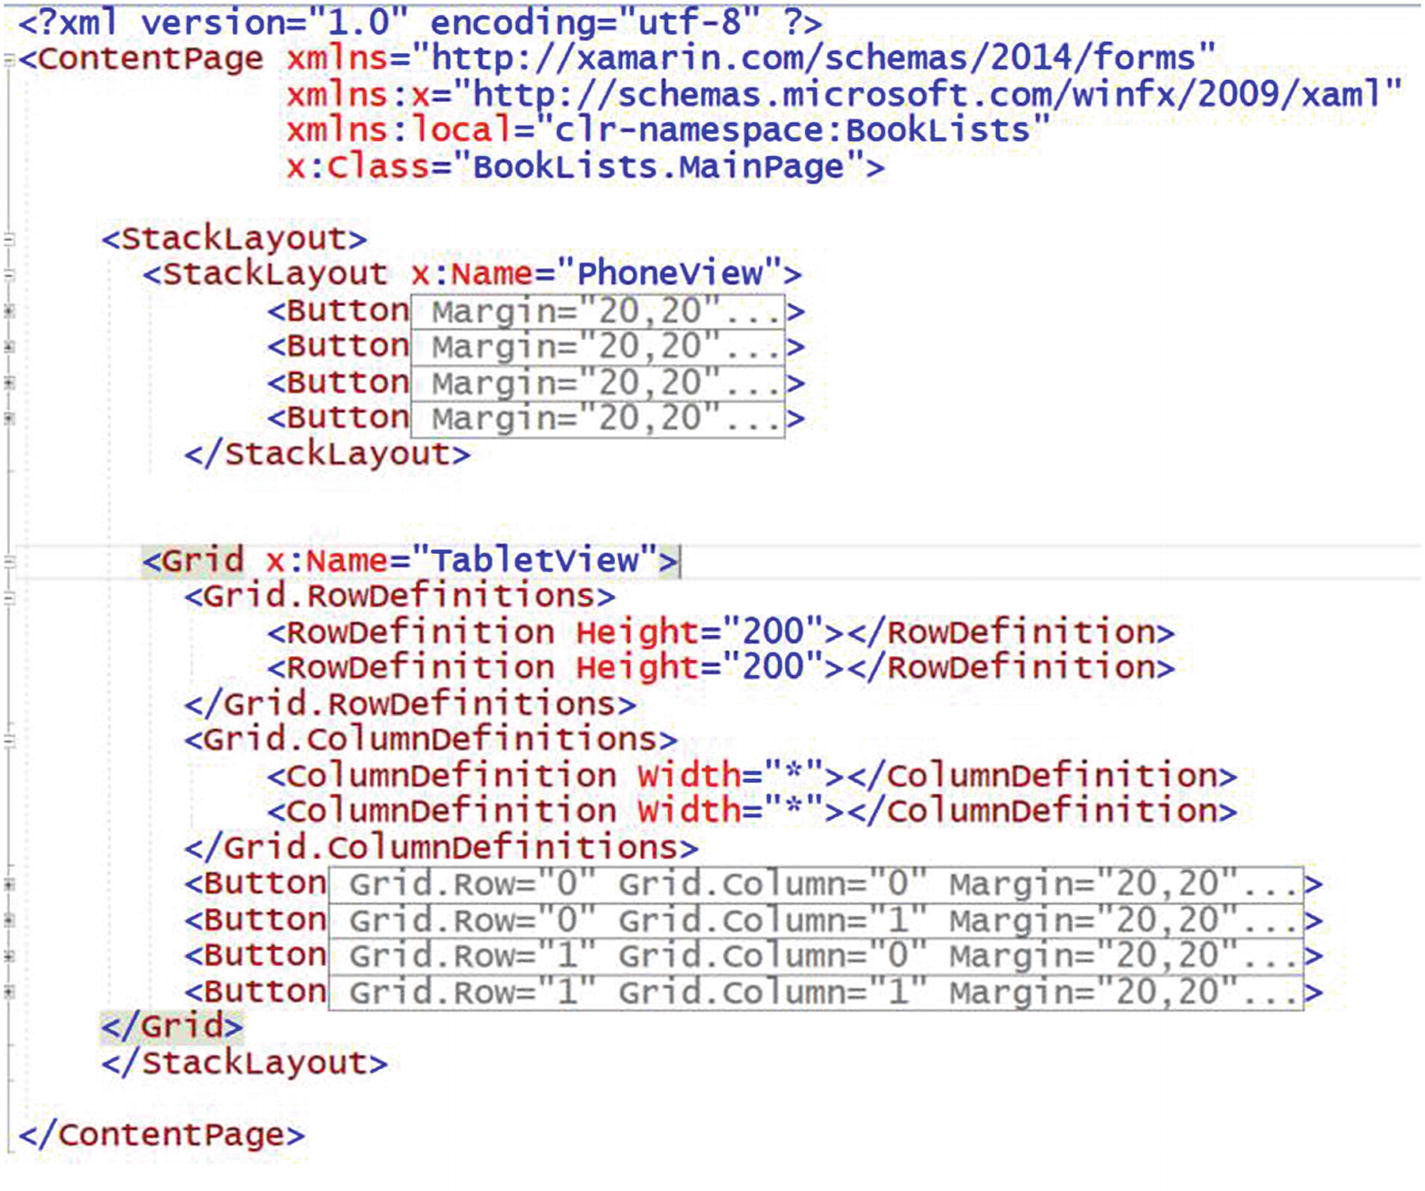
Figure 2-46 MainPage.xaml should look like this
Use Device.Idiom to detect if the device running this app is a phone in the code behind. In MainPage.xaml.cs, add this code in the constructor, right after InitializeComponent(). If it is a phone that is running the app, we are going to hide the tablet view and show the phone view and vice-versa.
if (Device.Idiom == TargetIdiom.Phone){TabletView.IsVisible = false;PhoneView.IsVisible = true;}else{TabletView.IsVisible = true;PhoneView.IsVisible = false;}Build the .NET Standard project and run the app in the desired phone and tablet emulators or attached devices. For example, right-click the Android project and select as startup, then select the 5" KitKat. Run. See Figures 2-47 and 2-48.
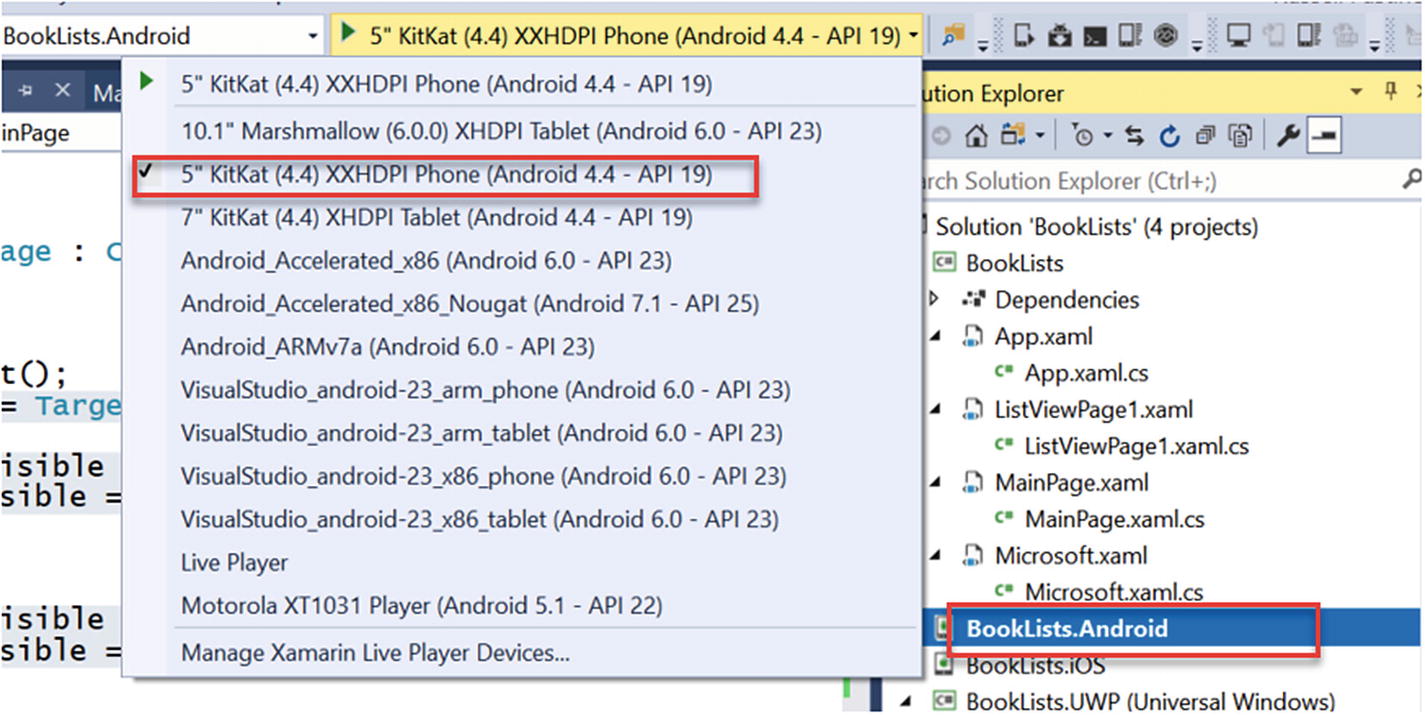
Figure 2-47 Right-click Android project, set to startup, and then Select 5" KitKat from the drop-down menu
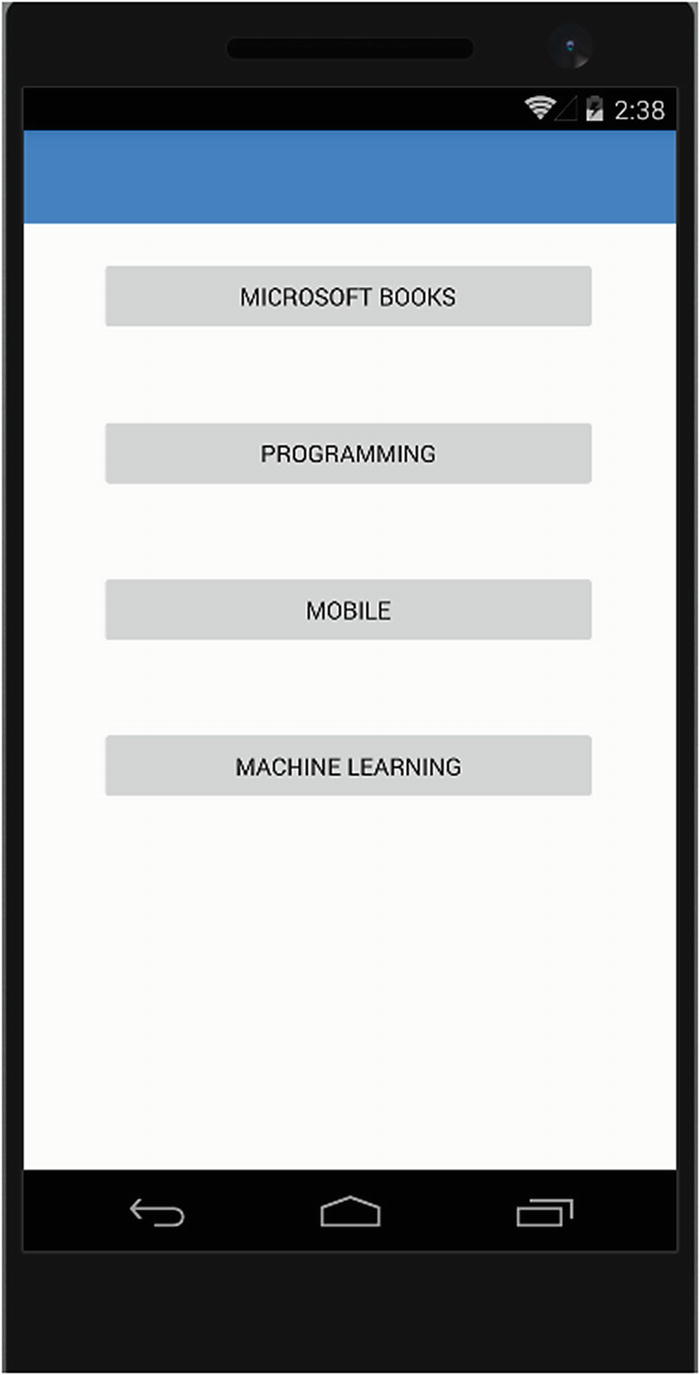
Figure 2-48 The Android phone view shows a stack layout
Then select UWP as the startup project and select Local Machine to run the tablet view on your laptop or desktop. See Figure 2-49.
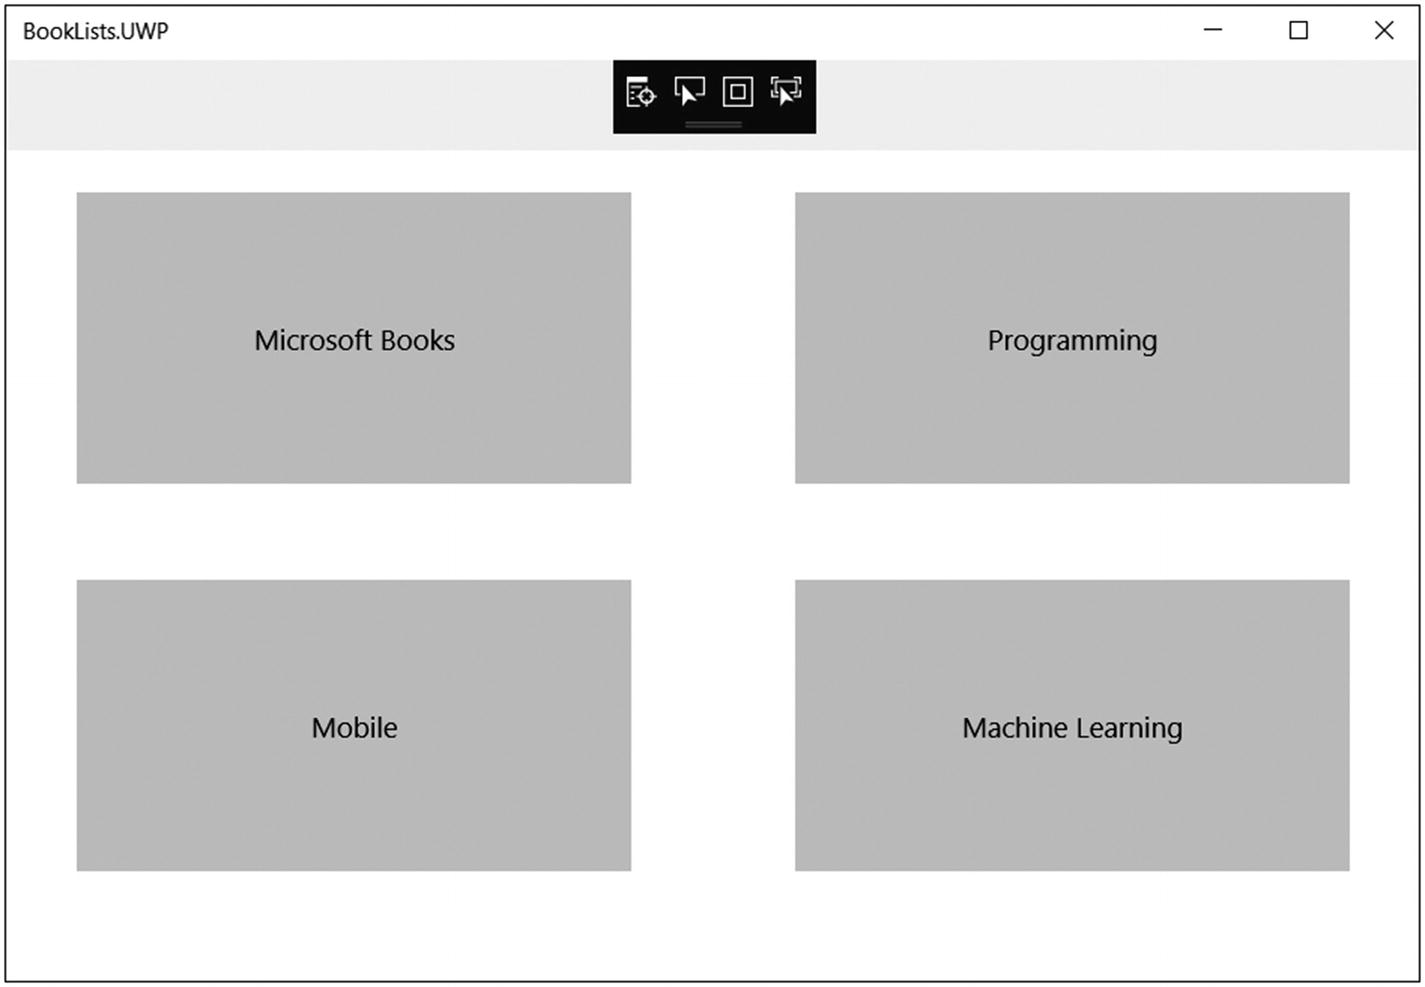
Figure 2-49 Tablet view shows a grid layout
Right-click Android project and set as startup. Select the 10.1" Marshmallow Tablet in Android from the emulator drop-down. See Figure 2-50.
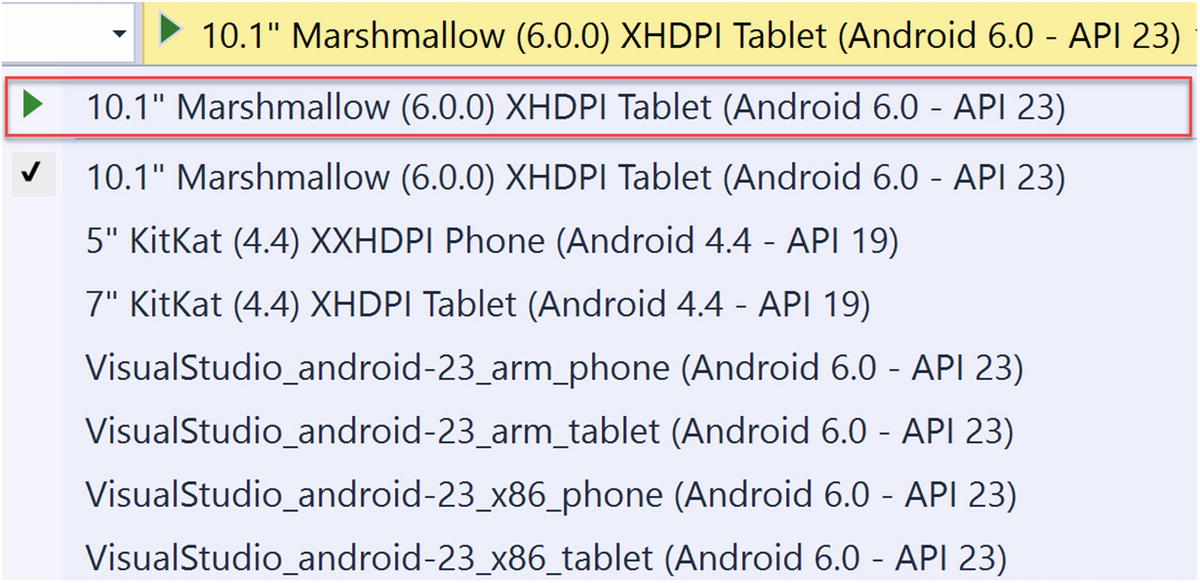
Figure 2-50 Selecting the 10.1" Marshmallow tablet
Note
Some emulators for older tablet models may not report back the expected device idiom, as in the case of older actual devices, such as the 7" KitKat tablet. For testing Android device tablet idioms, use the 10.1" Marshmallow tablet in Android. If you do not see this listed in the Android emulators drop-down, you may have to download it in the Visual Studio Emulator for Android app. See Figures 2-51 and 2-52.
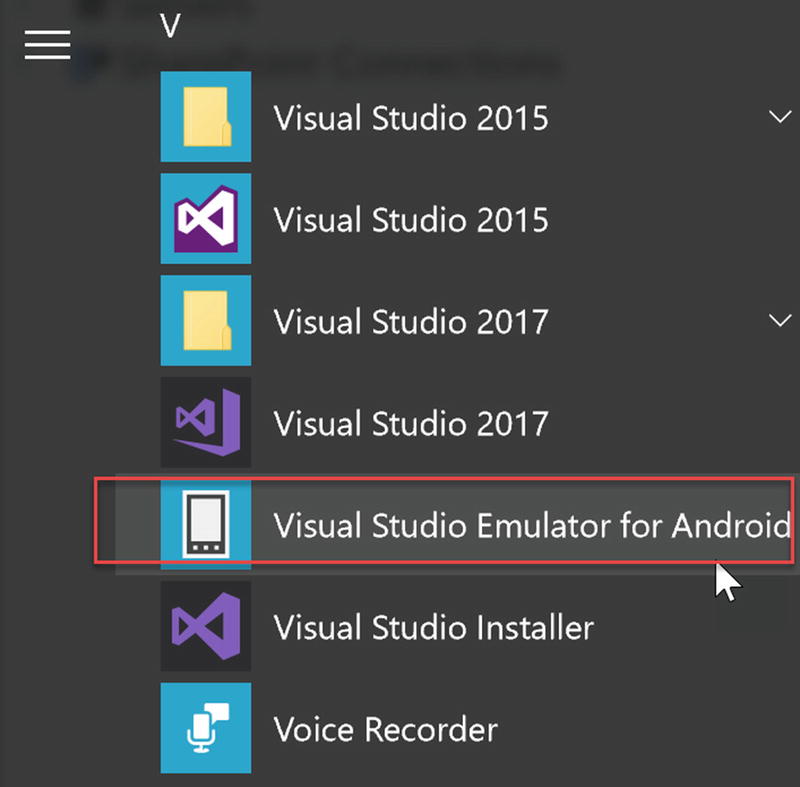
Figure 2-51 Start the Visual Studio Emulator for Android app, if needed, to download and install a 10.1" Marshmallow emulator
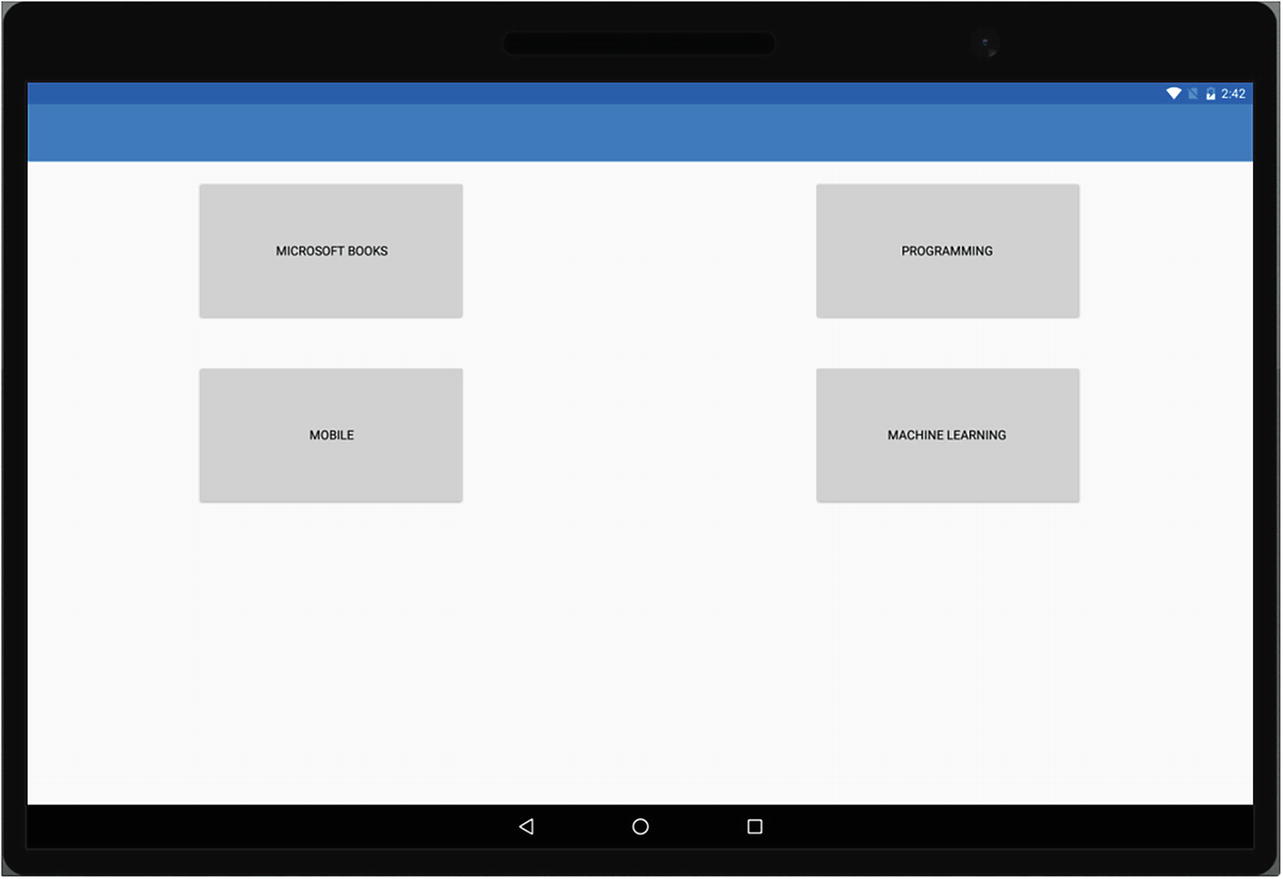
Figure 2-52 Android tablet shows Grid view
Project 2-4: Working with Images
Time Estimate
15 Minutes
In this project, you will learn how to access images locally, as embedded resources and Uniform Resource Identifiers (URIs). Also, you will use gesture recognizers to provide click event handlers. You could set the Button Image property to the image file name, but this really behaves differently across the platforms and causes many headaches. Plus, you cannot easily use aspect ratios on a button image. It is simpler to replace the buttons with image views. One problem, however, is that the image does not have a click event. So, we can use a gesture handler for this on the image, which will provide us a tapped event handler.
Let’s replace the button text with images. But how? Images can be read locally from file or as embedded resources or can be downloaded from a URI.
To access local images from files, each file can be added to each application project and referenced from Xamarin Forms’ shared .NET Standard code. To use a single image across all apps, the same file name must be used on every platform, and it should be a valid Android resource name (i.e., only lowercase letters, numerals, underscores, and periods are allowed. Also, the image cannot begin with a number).
For iOS, place images in the Resources folder with Build Action: BundleResource. Retina versions of the image should also be supplied—at two and three times the resolution, with @2x or @3x suffixes on the file name, before the file extension (e.g., [email protected] and [email protected]).
For Android, place images in the Resources/drawable directory with Build Action: AndroidResource. High- and low-DPI versions of an image can also be supplied (in appropriately named resources subdirectories, such as drawable-ldpi, drawable-hdpi, and drawable-xhdpi).
For Windows/UWP, place images in the application’s root directory with Build Action: Content.
We are going to use embedded resources in our example. Create a new folder in the .NET Standard project called Images by right-clicking the project and selecting Add ➤ New Folder. See Figure 2-53.
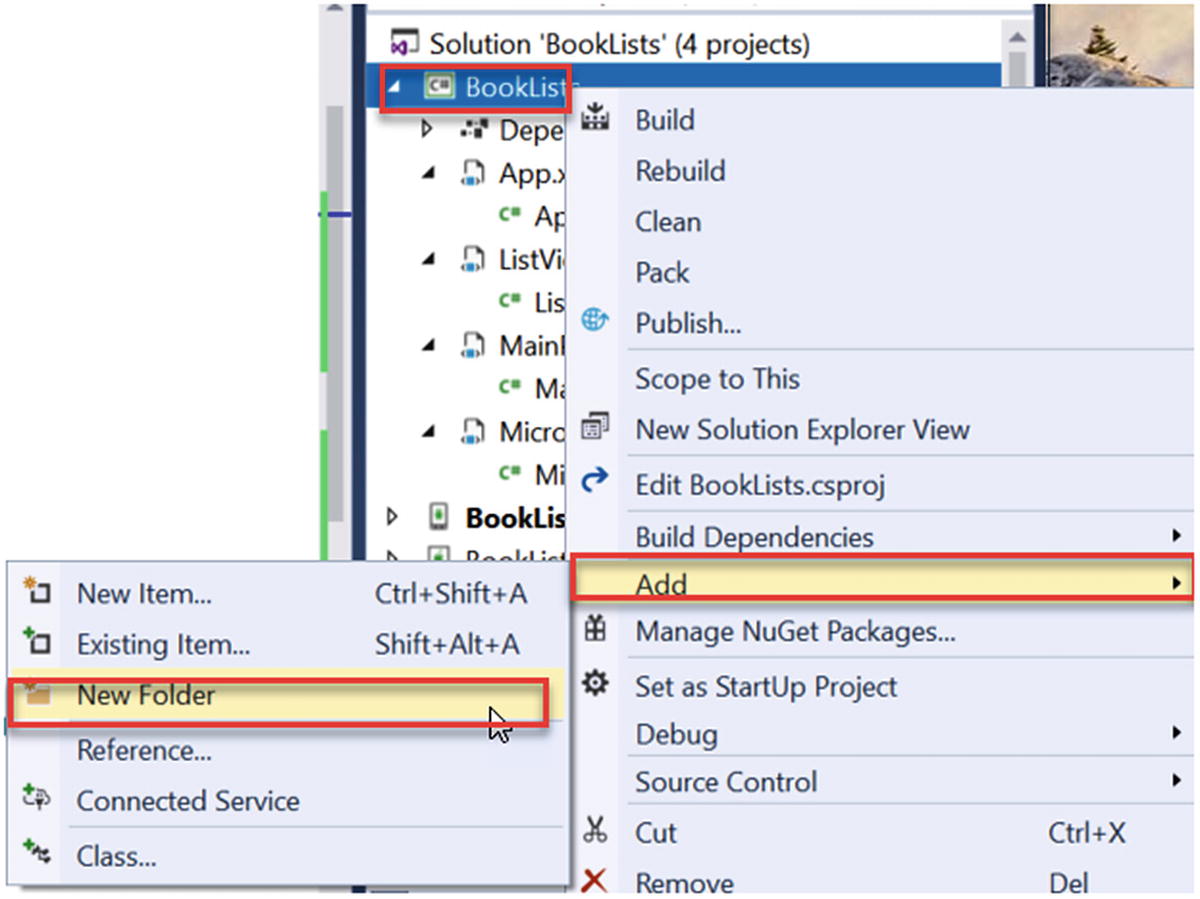
Figure 2-53 Add New Folder and call it Images
Add all four existing images to the Images folder in the Shared .NET Standard project from the book’s /Assets folder or any set of four images that are of the dimensions 800 wide × 450 high. Right-click the Images folder and select Add ➤ Existing Item. See Figure 2-54.
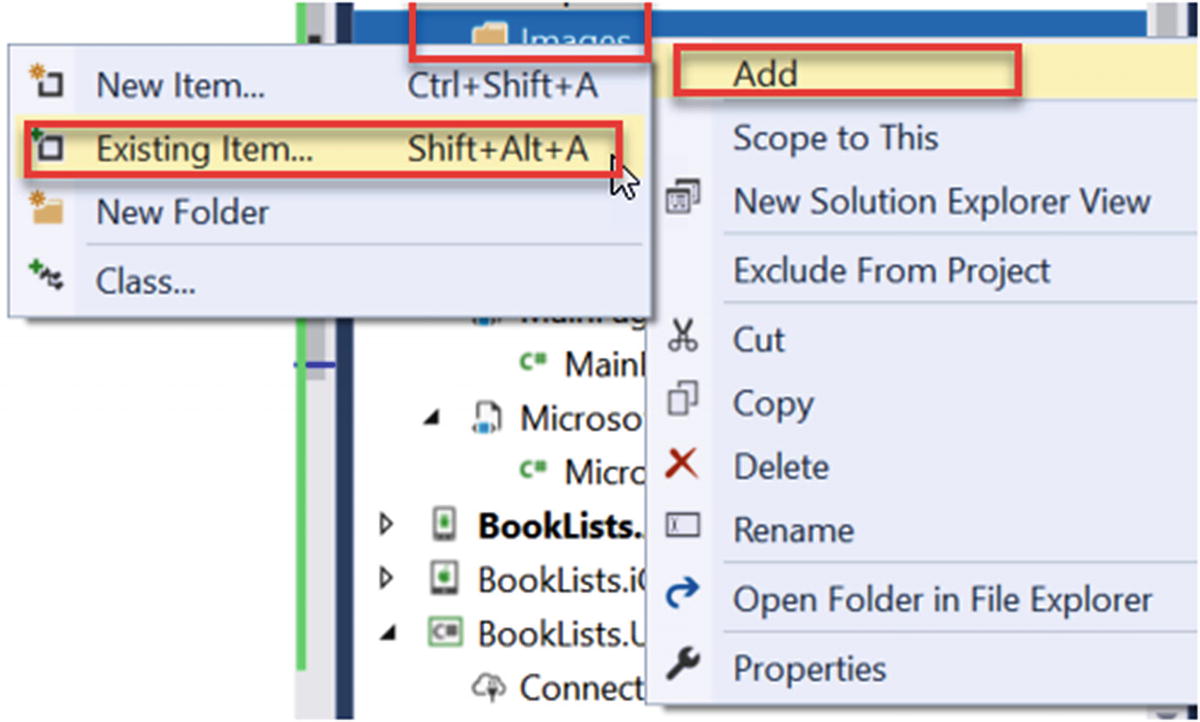
Figure 2-54 Adding existing images to the project Images folder from book /Assets folder
Select all four images in the .NET Standard Images folder and set the Build Action to Embedded resource. See Figure 2-55.
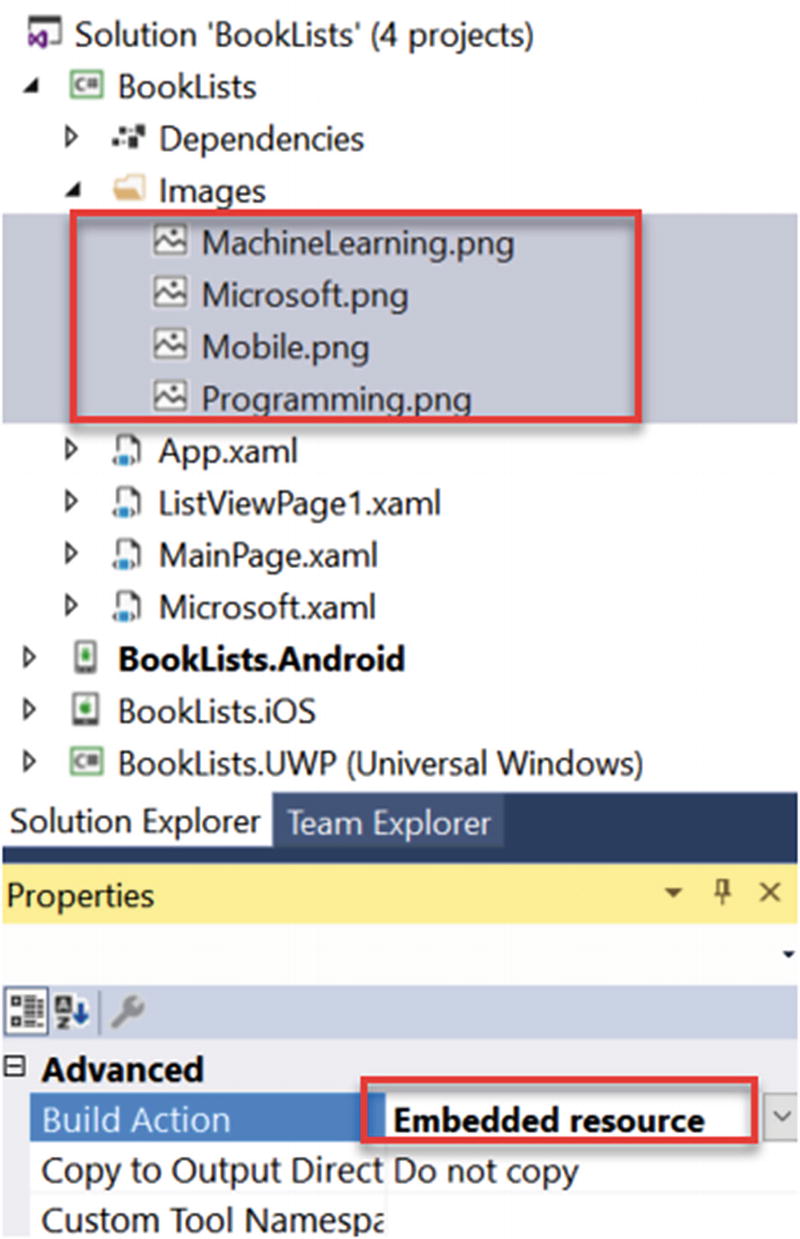
Figure 2-55 Setting all four images to the Embedded resource Build Action
Add a class to the .NET Standard project and call it ImageResourceExtension. See Figure 2-56.
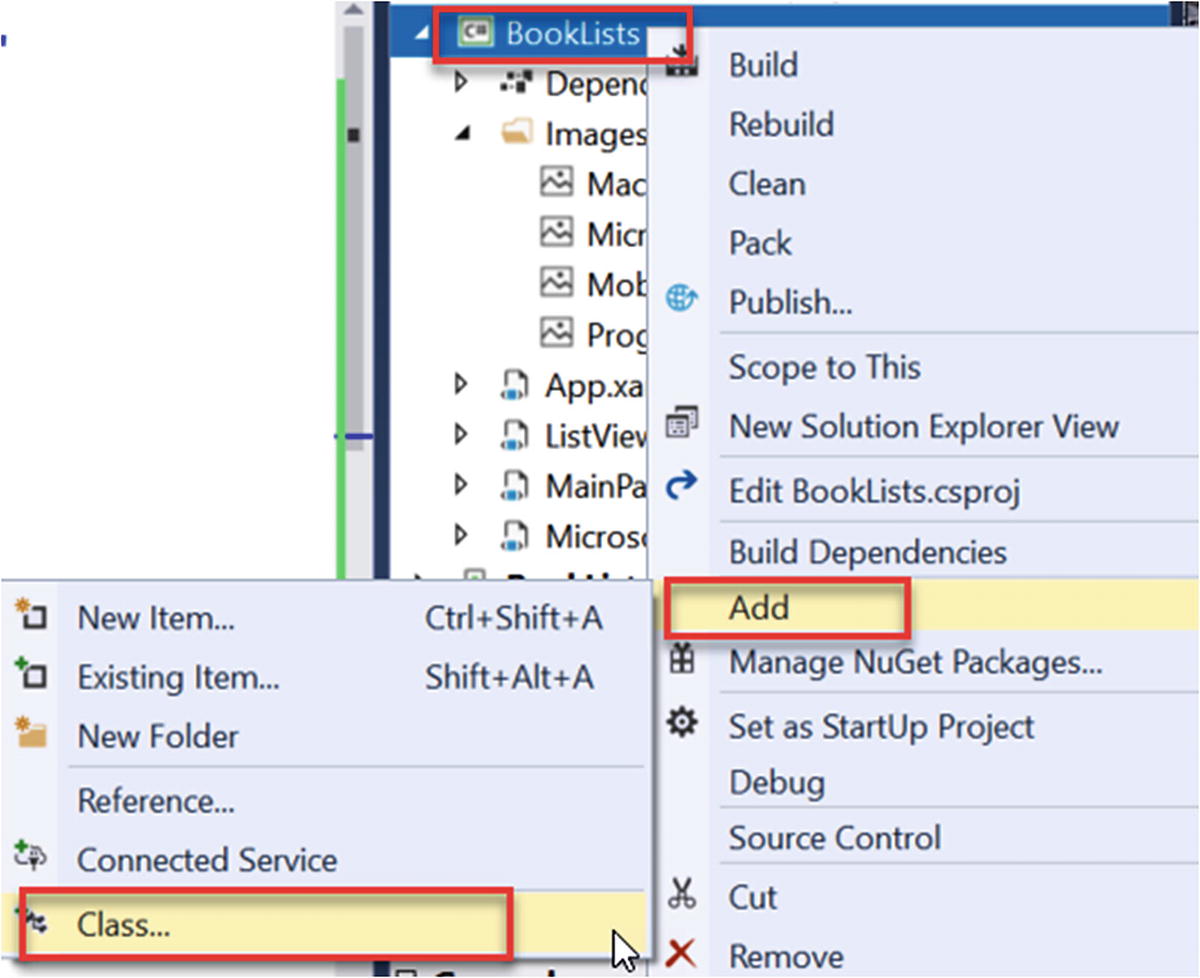
Figure 2-56 Adding a new class to the project called ImageResourceExtension.cs
We must add a method to do a translation lookup for the XAML markup, by inheriting IMarkupExtension. Change the class to public and add the following code and using statements:
using System;using Xamarin.Forms;using Xamarin.Forms.Internals;using Xamarin.Forms.Xaml;using System.Reflection;namespace BookLists{// You exclude the 'Extension' suffix when using in // XAML markup[Preserve(AllMembers = true)][ContentProperty("Source")]public class ImageResourceExtension : IMarkupExtension{public string Source { get; set; }public object ProvideValue(IServiceProvider serviceProvider){if (Source == null)return null;// Do your translation lookup here, using // whatever method you requirevar imageSource = ImageSource.FromResource(Source, Assembly.GetExecutingAssembly());return imageSource;}}}Here is the new grid markup for the tablet version, using images, gesture recognizers, and labels. Verify your XAML and copy it, if necessary, to match for TabletView:
<Grid x:Name="TabletView" VerticalOptions="FillAndExpand" HorizontalOptions="FillAndExpand"><Grid.RowDefinitions><RowDefinition Height="40"></RowDefinition><RowDefinition Height="*"></RowDefinition><RowDefinition Height="Auto"></RowDefinition><RowDefinition Height="*"></RowDefinition><RowDefinition Height="Auto"></RowDefinition></Grid.RowDefinitions><Grid.ColumnDefinitions><ColumnDefinition Width="*"></ColumnDefinition><ColumnDefinition Width="*"></ColumnDefinition></Grid.ColumnDefinitions><Label Grid.Row="0" Grid.Column="0" Grid.ColumnSpan="2" VerticalOptions="Center" HorizontalOptions="Center" FontSize="Medium" FontAttributes="Bold" Text="Book List"></Label><Image Grid.Row="1" Grid.Column="0" Aspect="AspectFill" Source="{local:ImageResource BookLists.Images.Microsoft.png}" ><Image.GestureRecognizers><TapGestureRecognizerNumberOfTapsRequired="1"Tapped="MicrosoftBooks_Clicked"/></Image.GestureRecognizers></Image><Label Grid.Row="2" Grid.Column="0" VerticalOptions="Center" FontSize="Small" HorizontalTextAlignment="Center" TextColor="Blue" Text="Microsoft"></Label><Image Grid.Row="3" Grid.Column="0" Aspect="AspectFill" Source="{local:ImageResource BookLists.Images.Programming.png}" ><Image.GestureRecognizers><TapGestureRecognizerNumberOfTapsRequired="1"Tapped="Programming_Clicked"/></Image.GestureRecognizers></Image><Label Grid.Row="4" Grid.Column="0" VerticalOptions="Center" FontSize="Small" HorizontalTextAlignment="Center" TextColor="Blue" Text="Programming"></Label><Image Grid.Row="1" Grid.Column="1" Aspect="AspectFill" Source="{local:ImageResource BookLists.Images.Mobile.png}" ><Image.GestureRecognizers><TapGestureRecognizerNumberOfTapsRequired="1"Tapped="Mobile_Clicked"/></Image.GestureRecognizers></Image><Label Grid.Row="2" Grid.Column="1" VerticalOptions="Center" FontSize="Small" HorizontalTextAlignment="Center" TextColor="Blue" Text="Mobile"></Label><Image Grid.Row="3" Grid.Column="1" Aspect="AspectFill" Source="{local:ImageResource BookLists.Images.MachineLearning.png}" ><Image.GestureRecognizers><TapGestureRecognizerNumberOfTapsRequired="1"Tapped="MachineLearning_Clicked"/></Image.GestureRecognizers></Image><Label Grid.Row="4" Grid.Column="1" VerticalOptions="Center" FontSize="Small" HorizontalTextAlignment="Center" TextColor="Blue" Text="Machine Learning"></Label></Grid>Run the app and click the Microsoft image on the home screen. You will see the mocked-up data ListView page. See Figure 2-57.

Figure 2-57 Embedded images now show on MainPage and are clickable
Project 2-5: Working with ListView
Time Estimate
10 Minutes
In this project, you will use the ListViewPage template with TextCell and ViewCell and the Caching strategy for recycling elements. You will use the ListView item, header, and footer templates.
Add a folder called ViewModels to the Booklists project. See Figure 2-58.
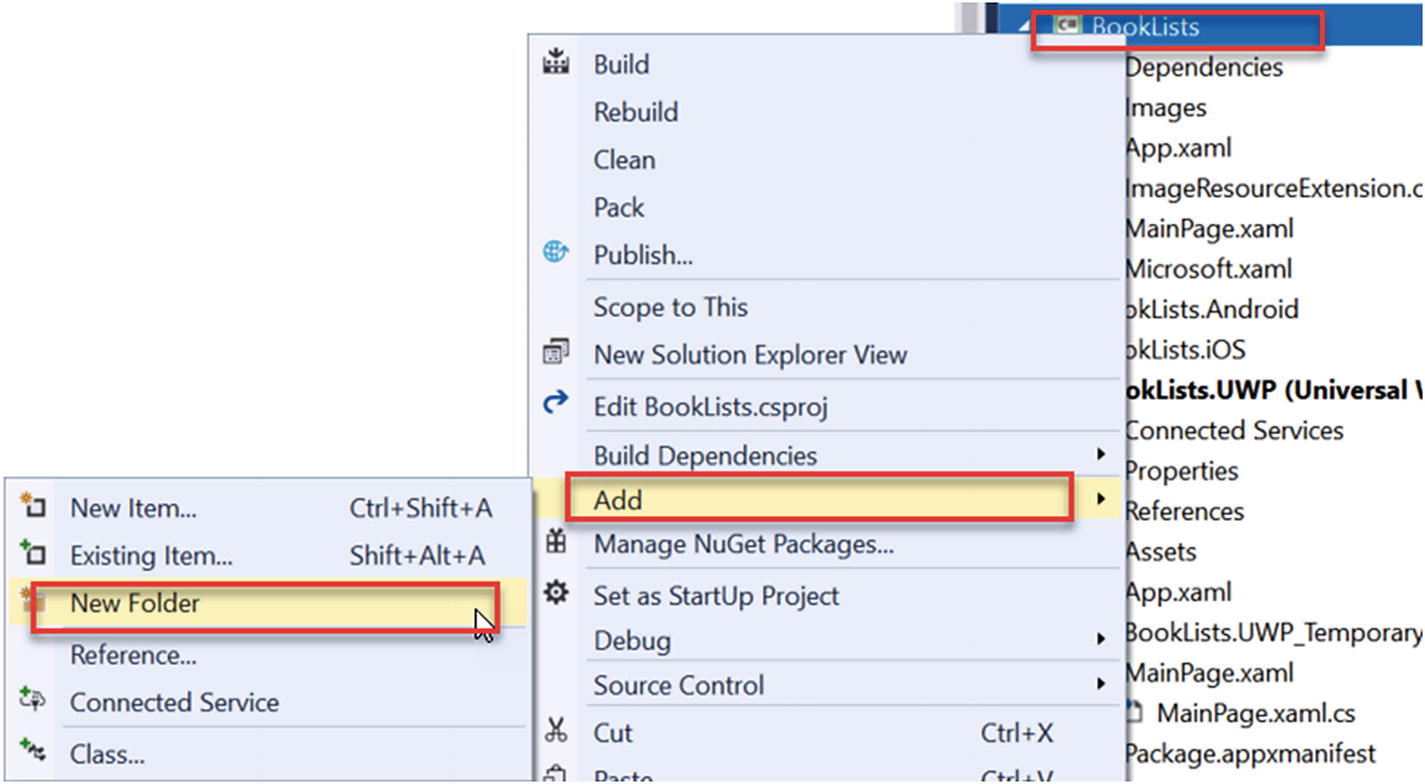
Figure 2-58 Adding new folder called ViewModels
Add exiting item from the /Assets folder for the book called BookViewModel.cs. This code contains a public class called Item, which has values for Item, Detail, and URL. It also has ObservableCollection, which has populated a few sample data records for Books. See Figure 2-59.

Figure 2-59 Add existing item BookViewModel.cs to ViewModels folder
Here is the code in BookViewModel.cs that uses MVVM and Databinding. The MVVM pattern enforces a separation between three software layers. The underlying data is called the Model. The XAML user interface is called the View, and an intermediary that sits between the View and the Model is called the ViewModel. The View and the ViewModel are often connected through data bindings that are defined in the XAML file. BindingContext for View is usually an instance of ViewModel. Note the use of the INotifyPropertyChanged interface. The class doesn’t invoke the PropertyChanged event unless the property has actually changed.
using System;using System.Collections.Generic;using System.Collections.ObjectModel;using System.ComponentModel;using System.Runtime.CompilerServices;using System.Text;using System.Threading.Tasks;using System.Windows.Input;using Xamarin.Forms;using System.Linq;namespace BookLists.ViewModels{public class MicrosoftBooksViewModel : INotifyPropertyChanged{public ObservableCollection<Item> Items { get; }public ObservableCollection<Grouping<string, Item>> ItemsGrouped { get; }public MicrosoftBooksViewModel(){Items = new ObservableCollection<Item>(new[]{new Item { Text = "Beginning Entity Framework Core 2.0",URL ="https://www.apress.com/us/book/9781484233740",Detail = "Use the valuable Entity Framework Core 2.0 tool in ASP.NET and the .NET Framework to eliminate the tedium around accessing databases and the data they contain. Entity Framework Core 2.0 greatly simplifies access to relational databases such as SQL Server that are commonly deployed in corporate settings. By eliminating tedious data access code that developers are otherwise forced to use, Entity Framework Core 2.0 enables you to work directly with the data in a database through domain-specific objects and methods." },new Item { Text = "Beginning Windows Mixed Reality Programming, For HoloLens and Mixed Reality Headsets",URL ="https://www.apress.com/us/book/9781484227688",Detail = "Develop applications and experiences for Microsoft’s HoloLens and other Windows mixed reality devices. This easy-to-follow guide removes the mystery behind creating amazing augmented reality experiences. Mixed reality development tools and resources are provided. Beginning Windows Mixed Reality Programming clearly explains all the nuances of mixed reality software development. You'll learn how to create 3D objects and holograms, interact with holograms using voice commands and hand gestures, use spatial mapping and 3D spatial sound, build with Microsoft's HoloToolkit, create intuitive user interfaces, and make truly awe-inspiring mixed reality experiences. Start building the holographic future today!" },new Item { Text = "Business in Real-Time, Using Azure IoT and Cortana Intelligence Suite Driving Your Digital Transformation",URL ="https://www.apress.com/us/book/9781484226490",Detail = "Learn how today’s businesses can transform themselves by leveraging real-time data and advanced machine learning analytics. This book provides prescriptive guidance for architects and developers on the design and development of modern Internet of Things(IoT) and Advanced Analytics solutions.In addition, Business in Real - Time Using Azure IoT and Cortana Intelligence Suite offers patterns and practices for those looking to engage their customers and partners through Software -as- a - Service solutions that work on any device. Whether you're working in Health & Life Sciences, Manufacturing, Retail, Smart Cities and Buildings or Process Control, there exists a common platform from which you can create your targeted vertical solutions. Business in Real-Time Using Azure IoT and Cortana Intelligence Suite uses a reference architecture as a road map. Building on Azure’s PaaS services, you'll see how a solution architecture unfolds that demonstrates a complete end - to - end IoT and Advanced Analytics scenario." },new Item { Text = "Cyber Security on Azure, An IT Professional’s Guide to Microsoft Azure Security Center",URL ="https://www.apress.com/us/book/9781484227398",Detail = "Prevent destructive attacks to your Azure public cloud infrastructure, remove vulnerabilities, and instantly report cloud security readiness. This book provides comprehensive guidance from a security insider's perspective. Cyber Security on Azure explains how this 'security as a service' (SECaaS) business solution can help you better manage security risk and enable data security control using encryption options such as Advanced Encryption Standard(AES) cryptography.Discover best practices to support network security groups, web application firewalls, and database auditing for threat protection. Configure custom security notifications of potential cyberattack vectors to prevent unauthorized access by hackers, hacktivists, and industrial spies." },new Item { Text = "Essential Angular for ASP.NET Core MVC",URL ="https://www.apress.com/us/book/9781484229156",Detail = "Angular 5 and .NET Core 2 updates for this book are now available. Follow the Download Source Code link for this book on the Apress website. Discover Angular, the leading client-side web framework, from the point of view of an ASP.NET Core MVC developer. Best-selling author Adam Freeman brings these two key technologies together and explains how to use ASP.NET Core MVC to provide back-end services for Angular applications. This fast - paced, practical guide starts from the nuts and bolt and gives you the knowledge you need to combine Angular(from version 2.0 up) and ASP.NET Core MVC in your projects. " },});var sorted = from item in Itemsorderby item.Textgroup item by item.Text[0].ToString() into itemGroupselect new Grouping<string, Item>(itemGroup.Key, itemGroup);ItemsGrouped = new ObservableCollection<Grouping<string, Item>>(sorted);RefreshDataCommand = new Command(async () => await RefreshData());}public ICommand RefreshDataCommand { get; }async Task RefreshData(){IsBusy = true;//Load Data Hereawait Task.Delay(2000);IsBusy = false;}bool busy;public bool IsBusy{get { return busy; }set{busy = value;OnPropertyChanged();((Command)RefreshDataCommand).ChangeCanExecute();}}public event PropertyChangedEventHandler PropertyChanged;void OnPropertyChanged([CallerMemberName]string propertyName = "") =>PropertyChanged?.Invoke(this, new PropertyChangedEventArgs(propertyName));public class Item{public string Text { get; set; }public string Detail { get; set; }public string URL { get; set; }public override string ToString() => URL;}public class Grouping<K, T> : ObservableCollection<T>{public K Key { get; private set; }public Grouping(K key, IEnumerable<T> items){Key = key;foreach (var item in items)this.Items.Add(item);}}}}Open the code behind page Microsoft.xaml.cs.
Add this line under InitializeComponent():
BindingContext = new MicrosoftBooksViewModel();You will also need to add this using statement:
using BookLists.ViewModels;Comment out the following lines:
// Items = new ObservableCollection<string>// {// "Item 1",// "Item 2",// "Item 3",// "Item 4",// "Item 5"// };//MyListView.ItemsSource = Items;Comment out the Handle_ItemTapped event code and add the Handle_ItemSelected event handler with this code:
void Handle_ItemSelected(object sender, SelectedItemChangedEventArgs e){if (e.SelectedItem == null)return;// await DisplayAlert("Selected", // e.SelectedItem.ToString(), "OK");// navigate to the URL with the native // browserDevice.OpenUri(new Uri(e.SelectedItem.ToString()));//Deselect Item((ListView)sender).SelectedItem = null;}}Your Microsoft.xaml.cs file should now look like this:
using BookLists.ViewModels;using System;using Xamarin.Forms;using Xamarin.Forms.Xaml;namespace BookLists{[XamlCompilation(XamlCompilationOptions.Compile)]public partial class Microsoft : ContentPage{public Microsoft(){InitializeComponent();BindingContext = new MicrosoftBooksViewModel();// Items = new // ObservableCollection<string>// {// "Item 1",// "Item 2",// "Item 3",// "Item 4",// "Item 5"// };//MyListView.ItemsSource = Items;}void Handle_ItemSelected(object sender, SelectedItemChangedEventArgs e){if (e.SelectedItem == null)return;// await DisplayAlert("Selected", // e.SelectedItem.ToString(), "OK");// navigate to the URL with the native browserDevice.OpenUri(new Uri(e.SelectedItem.ToString()));}}}Open Microsoft.xaml and replace the ListView with the following XAML (note that it uses a custom ViewCell with a Header, ItemTemplate, and Footer).
<ListView x:Name="BookListView" ItemsSource="{Binding ItemsGrouped}"ItemSelected="Handle_ItemSelected"HasUnevenRows="true"GroupShortNameBinding="{Binding Key}"IsGroupingEnabled="true"GroupDisplayBinding="{Binding Key}"IsPullToRefreshEnabled="true"CachingStrategy="RecycleElement"IsRefreshing="{Binding IsBusy, Mode=OneWay}"RefreshCommand="{Binding RefreshDataCommand}"><!--Built in Cells--><!--<ListView.ItemTemplate><DataTemplate><TextCell Text="{Binding .}" /></DataTemplate></ListView.ItemTemplate>--><!--Custom View Cells--><ListView.Header><StackLayout Padding="10"Orientation="Horizontal"HorizontalOptions="FillAndExpand"BackgroundColor="#dadada"><Label Text="Microsoft and .NET Books"HorizontalTextAlignment="Center"HorizontalOptions="FillAndExpand"TextColor="Black"FontAttributes="Bold"/></StackLayout></ListView.Header><ListView.ItemTemplate><DataTemplate><ViewCell><StackLayout><Label Text="{Binding Text}"Style="{DynamicResource ListItemTextStyle}"FontAttributes="Bold"/><Label Text="{Binding Detail}"Style="{DynamicResource ListItemDetailTextStyle}"/></StackLayout></ViewCell></DataTemplate></ListView.ItemTemplate><ListView.Footer><StackLayout Padding="10"Orientation="Horizontal"HorizontalOptions="FillAndExpand"BackgroundColor="#dadada"><Label Text="Visit www.apress.com"HorizontalTextAlignment="Center"HorizontalOptions="FillAndExpand"TextColor="Black"FontAttributes="Bold"/></StackLayout></ListView.Footer></ListView>Run the app and click the Microsoft image on the home screen. You will see something like Figures 2-60 and 2-61.
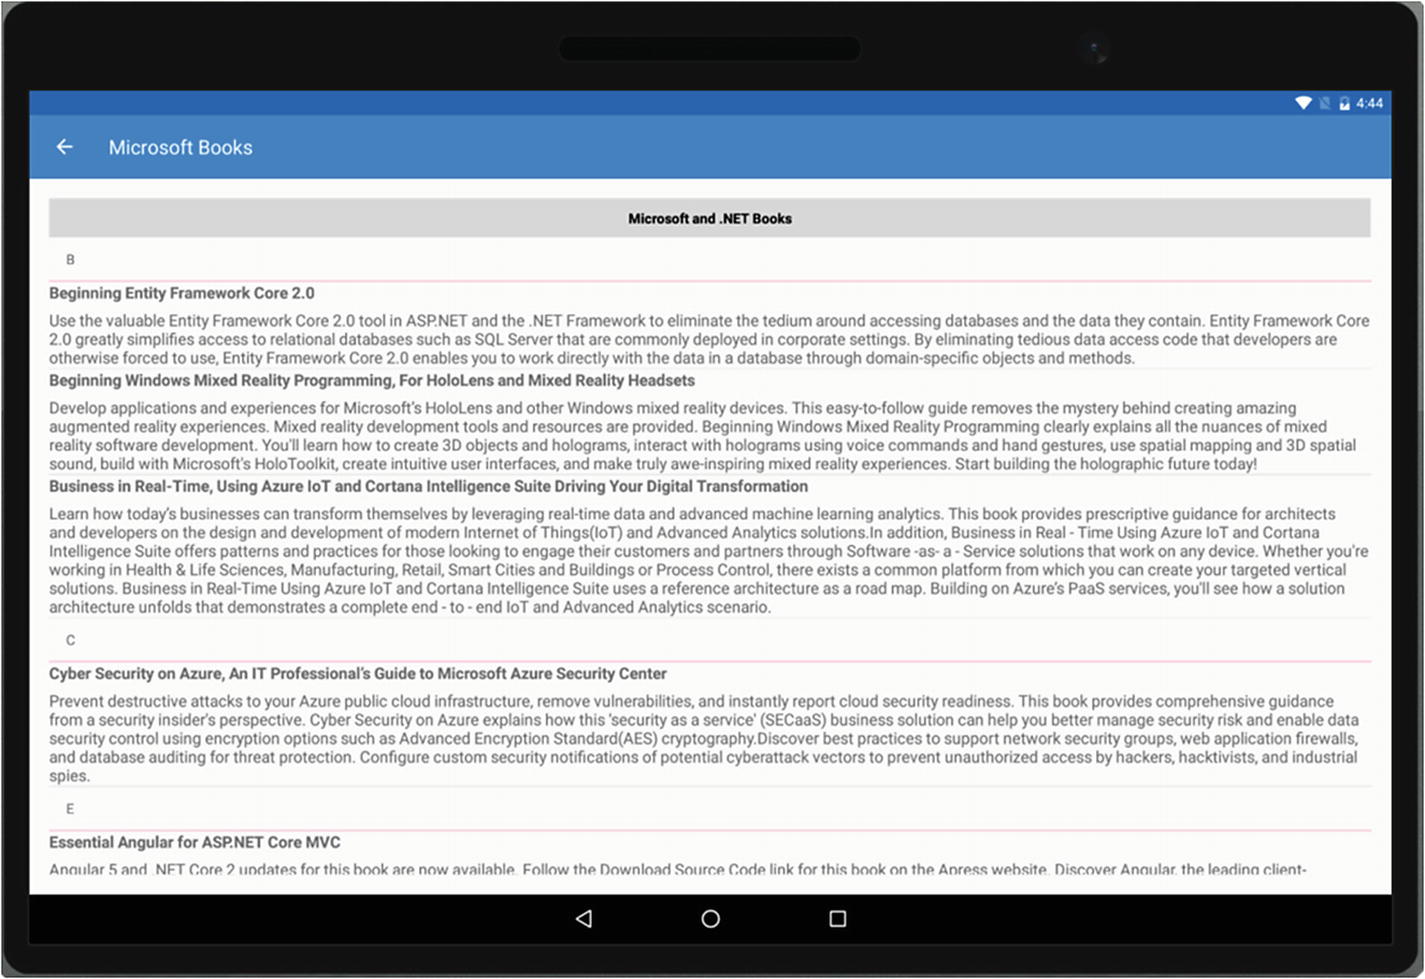
Figure 2-60 ListView on Android tablet with header, groupings, and footer
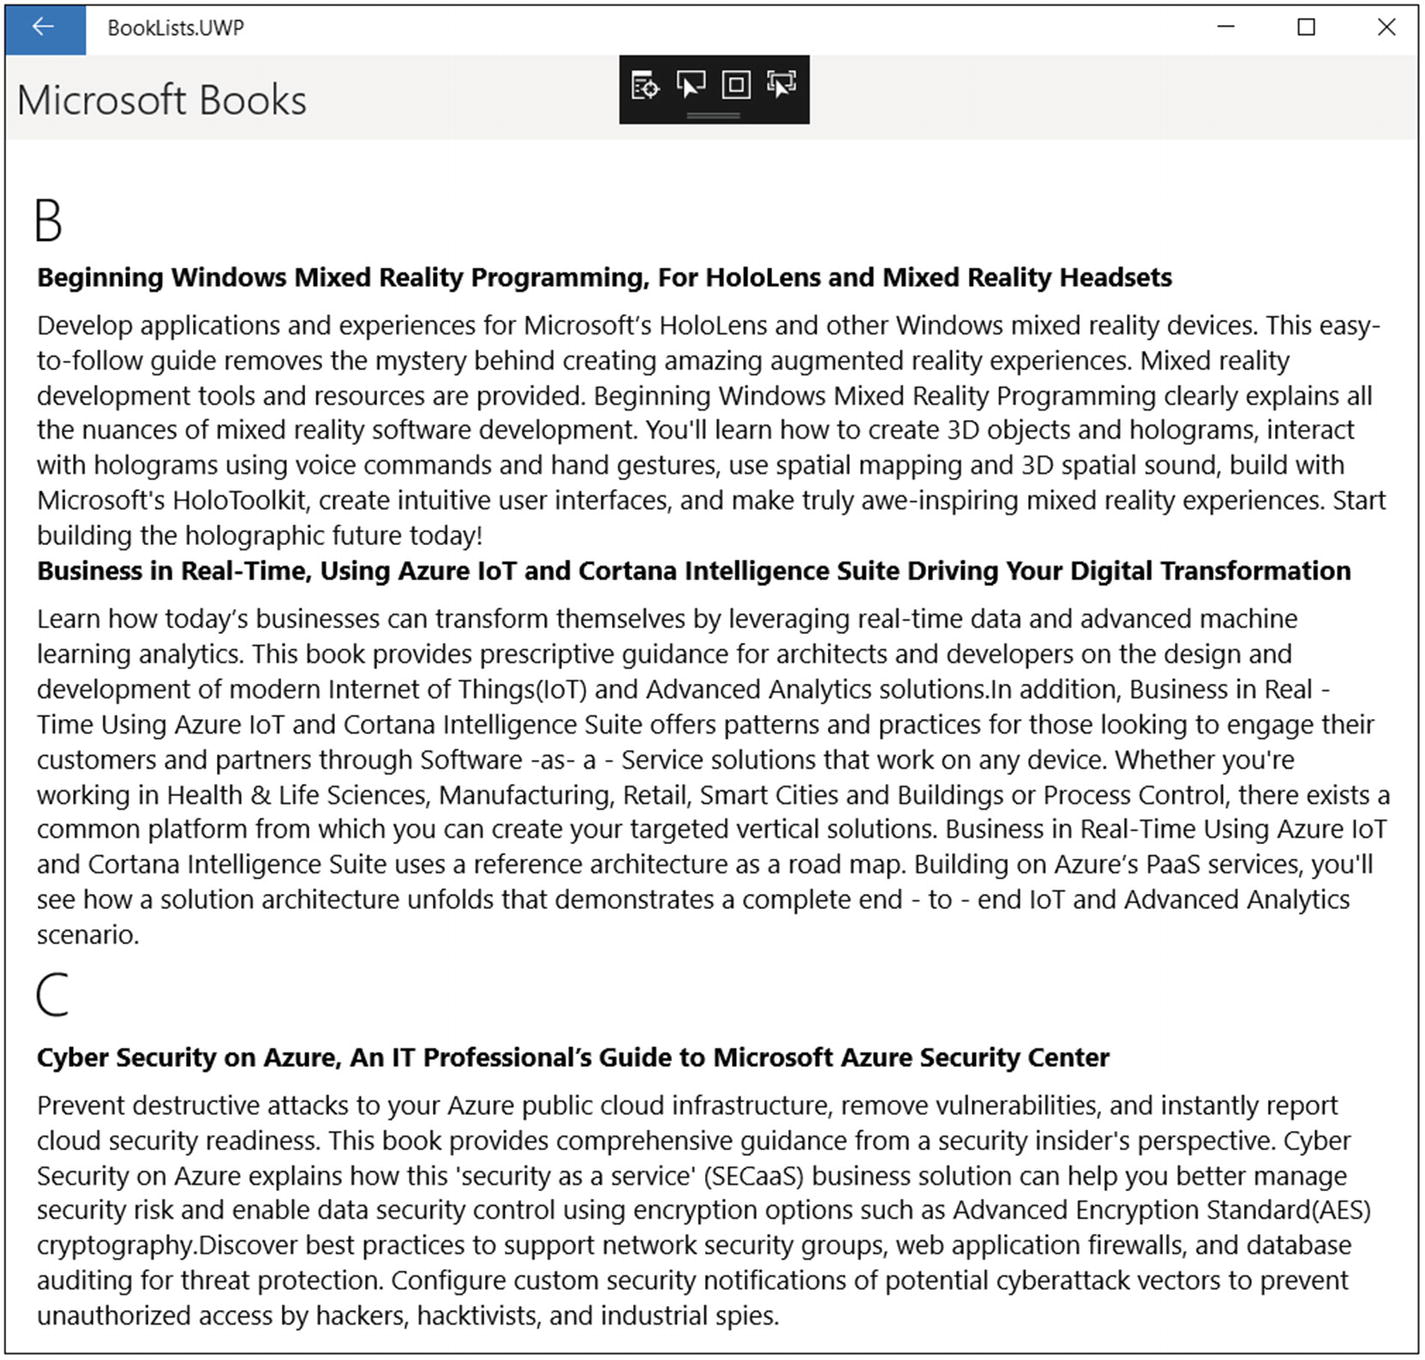
Figure 2-61 ListView on UWP with header, groupings, and footer
Try: Click an item in the list, and it will open an external browser to the desired URL. See Figure 2-62.
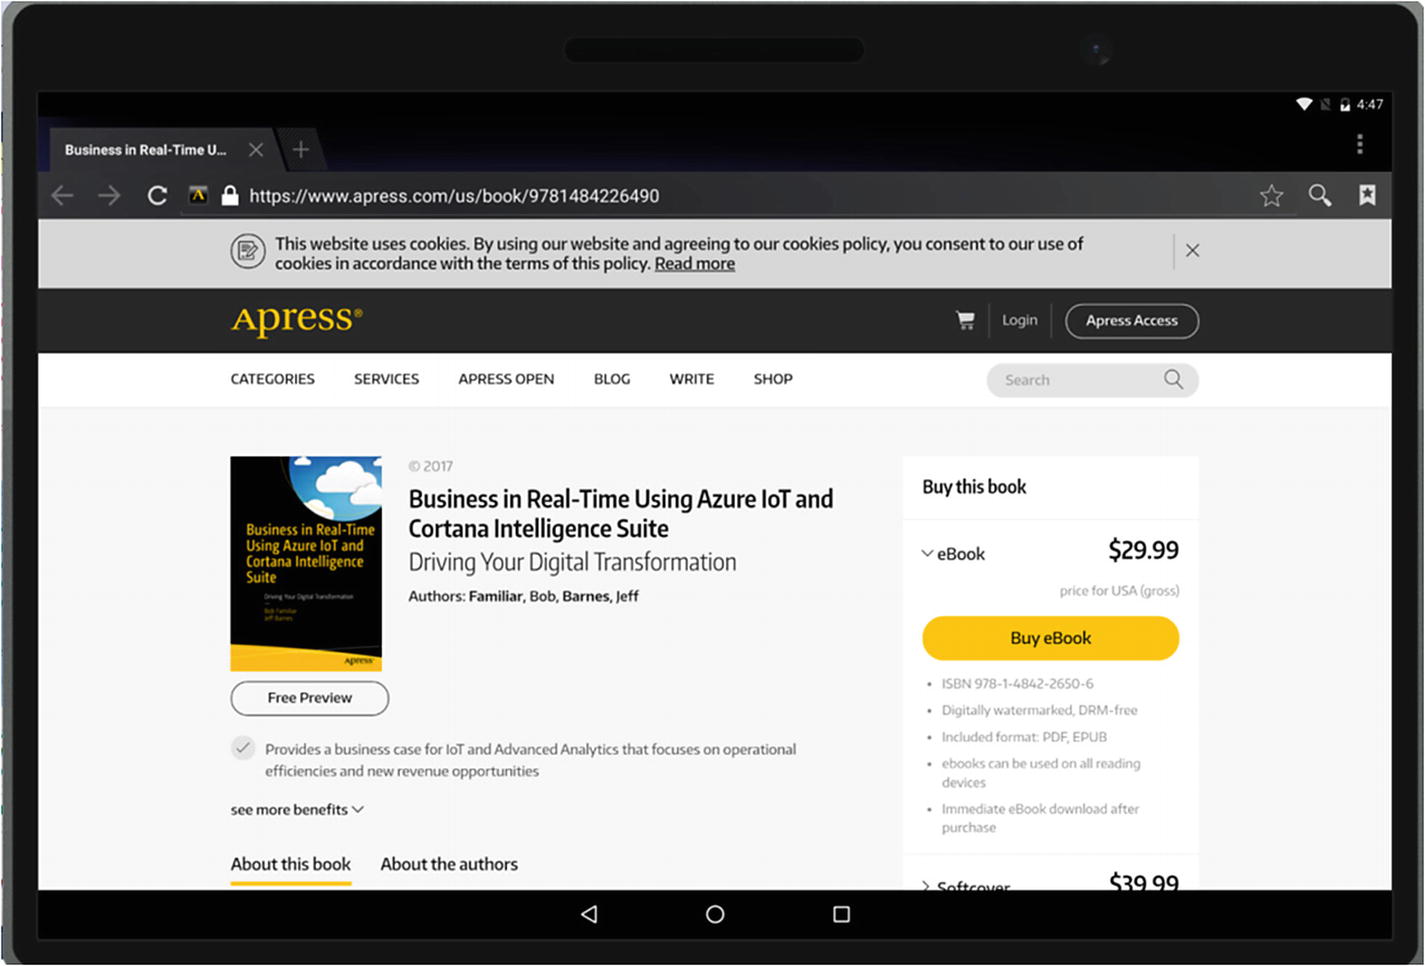
Figure 2-62 URL displayed in native browser on device
Catch: The UWP ListView may have an error only on clicking and getting the correct selected item in the list when using the ListView group optionally. (Android and iOS should work.) This has been fixed with version 2.5.0.280555 of Xamarin Forms. Right-click the solution and select Manage NuGet Packages to verify that you have a minimum version of 2.5.0.280555. If not, check the updates panel to install. See Figure 2-63.
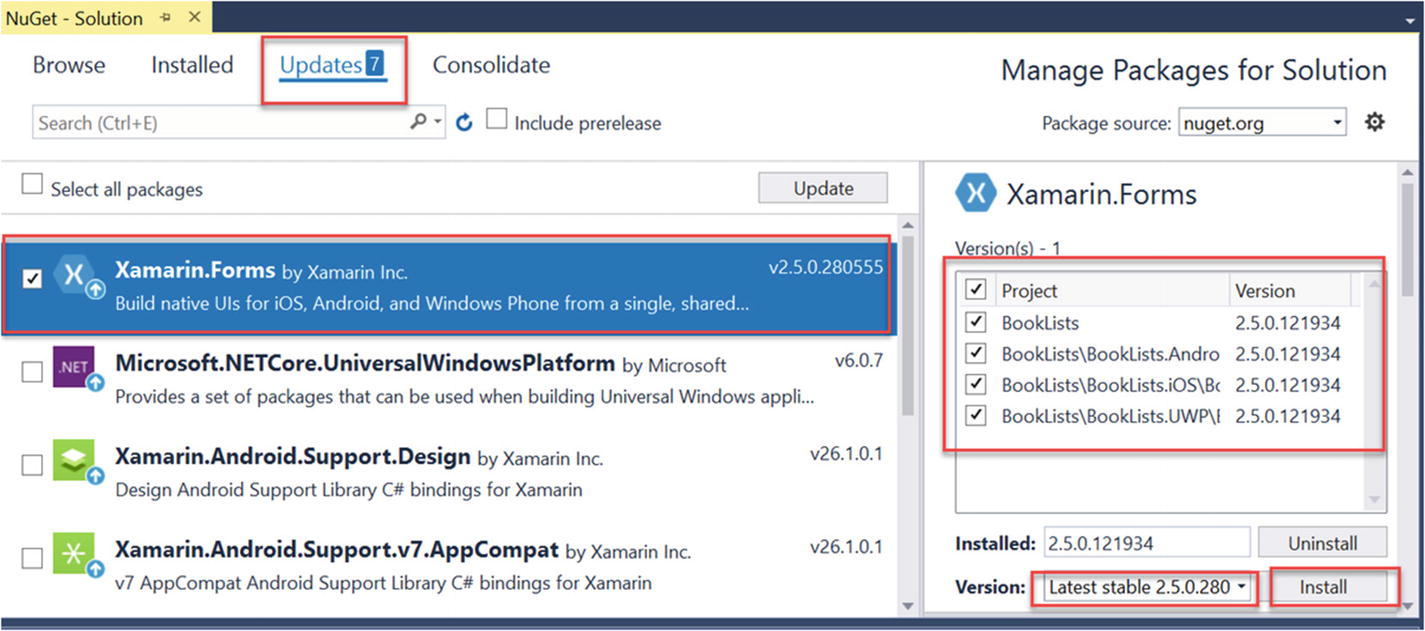
Figure 2-63 Verifying that the installed Xamarin Forms NuGet package is a minimum version of 2.5.0.280555. If not, select the Updates tab and intall it.
One important property on the ListView, especially for Android apps, is CachingStrategy. Note that the ListView template page has it set to "RecycleElement". This is not the default on ListView for backward compatibility and must be specified to take effect. This option provides significant performance improvements, particularly in Android. RetainElement is the default, and it’s not optimal, especially when dealing with large lists. However, the UWP platform ignores ListViewCachingStrategy.RetainElement, because it always uses caching to improve performance. See Figure 2-64.
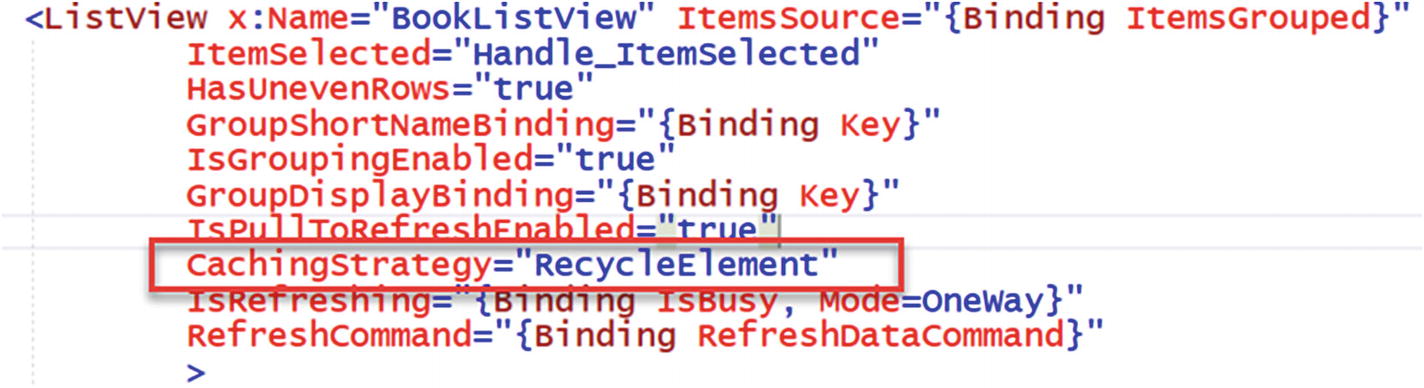
Figure 2-64 Specify CachingStrategy="RecycleElement", as it is not a default
Summary
In this chapter, you created a new Xamarin Forms application. The application can run on Android, UWP, and, optionally, iOS, if connected with a Mac server. As this is a cross platform app, you can use any mix of the platform projects, depending on your development environment (Mac or Windows). You enhanced the app with StackLayout and GridLayout to have a main navigation page and used device form factors for phones and tablets, with device specific logic. The main page uses embedded resource images. A ListView page template was added with a customization for selection event handlers and content. Next up? You get to learn Azure. Let the games begin!