With the introduction of MonoGame and your development environment configuration behind us, we are now ready to deep dive into MonoGame’s architecture. Understanding the architecture in detail will help you to understand not only future chapters but enable you to extend MonoGame as you develop your skills.
Learn about the MonoGame Pipeline app
Learn about MonoGame’s Game Class
Render your first pixels in MonoGame
MonoGame Architecture
Pipeline App
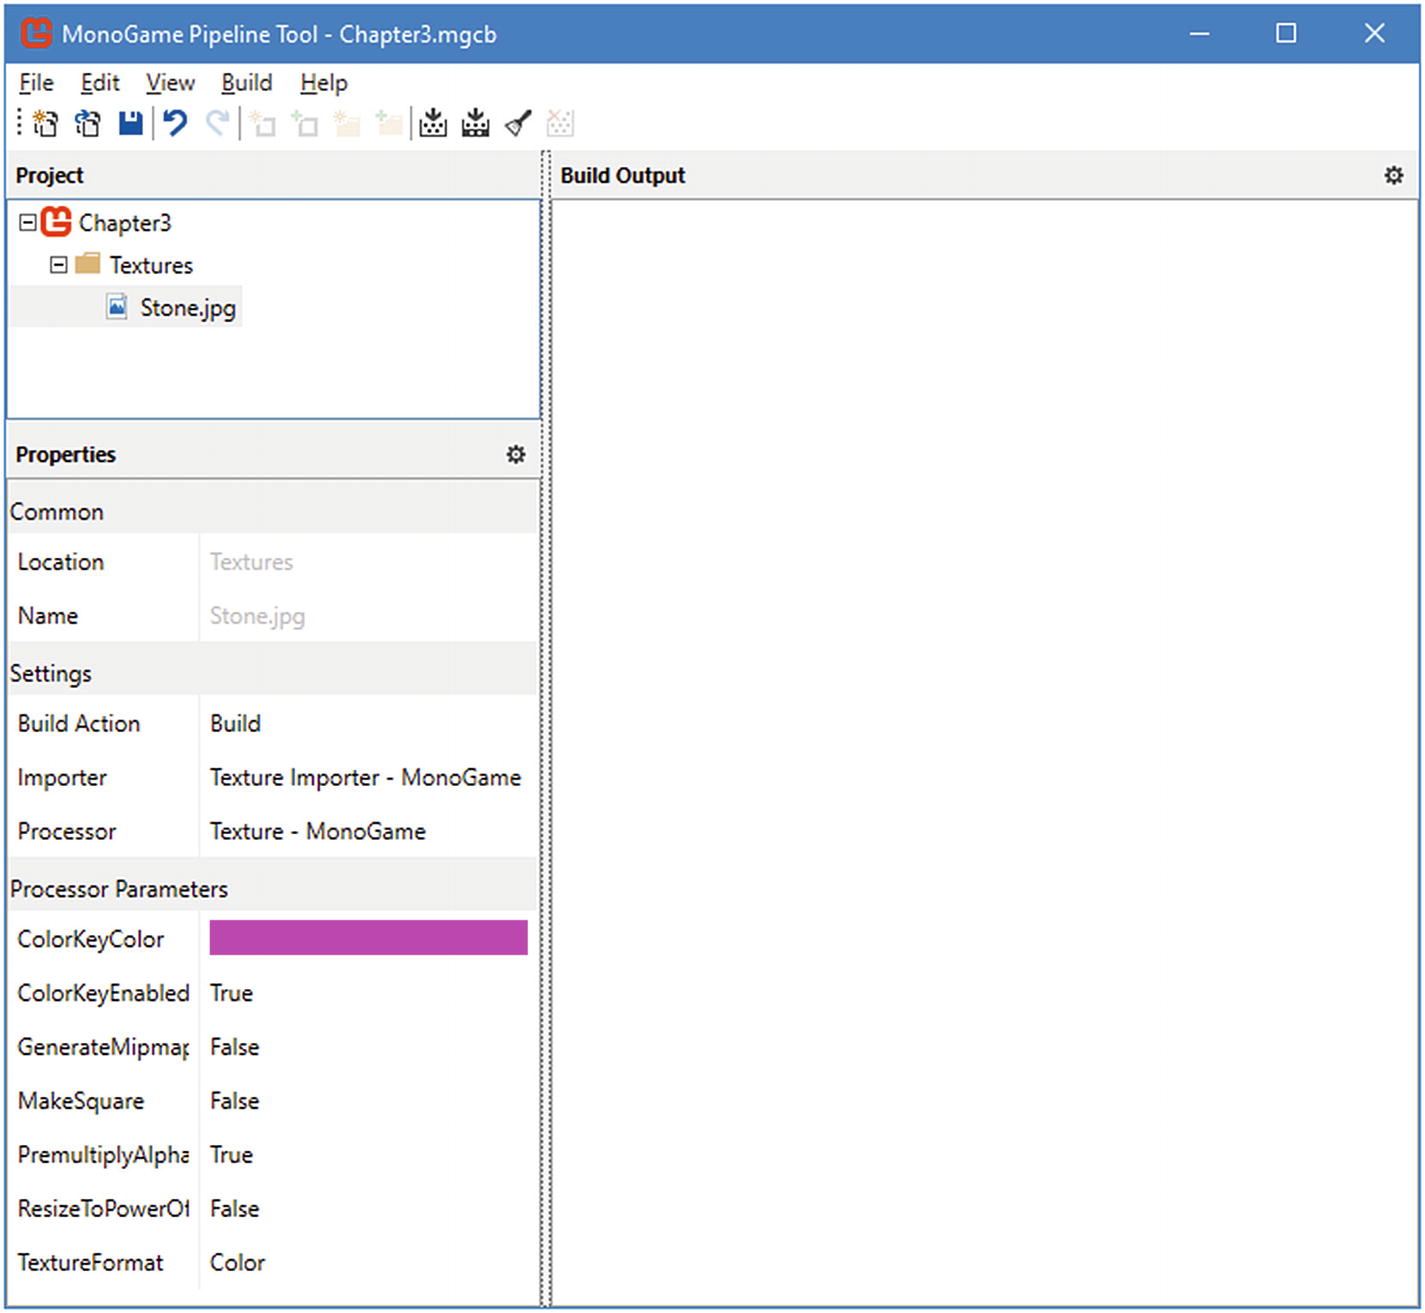
When thinking about a game, some of the biggest components are the assets such as textures, music, sprites, and sound effects. MonoGame makes this extremely easy, fortunately. At the heart of MonoGame’s asset pipeline is the MonoGame Pipeline app , a tool that takes game assets like texture images, sound files, or text fonts and transforms them into binary files that can be consumed easily by the game. In addition, the asset pipeline enables the game programmer to easily reference their game assets in the code.
For those with XNA experience, building and compiling game assets was part of the build process and caused extremely long build times for almost every project. Thankfully, MonoGame allows you to use the asset pipeline app to compile the assets into a MGCB (MonoGame Content Binary) file independently from compiling the game code in Visual Studio. That way, any code change does not force your assets to be rebuilt as well.
MonoGame Pipeline app
Effects (or shaders), which are small programs that are meant to run on your graphics card and serve to change the color of existing pixels on the screen
3D models in the .fbx, .X, or Open Asset Import Library formats
Fonts, to allow the game developer to draw text on the screen
Video files in the H.264 or .wmv formats
Audio files in the .mp3, .ogg, .wav, or .wma formats
Texture files
XML files
For asset types not supported by the asset pipeline, MonoGame allows developers to create their own, custom importers and processors.
Generally, for all of your noncode assets, you will manually add the files in this application and rebuild your assets. In the case of textures as shown in Figure 3-1, the application will also compress, resize, and generate mipmaps for you, which are a collection of images at different resolutions. Chapter 5 will go into how to use this application in more detail for our purposes.
Game Class
At the heart of MonoGame’s Framework is the Game class, which is the entry point into a game. Its main utility is to set up the game’s window, with a graphics device used to draw to the screen, and to set up the important game loop. The game loop is at the heart of all video games in the wild. It is essentially an infinite loop that continuously calls the game code responsible for updating the state of the game and the code that draws things on the screen via methods that are called Update() and Draw().
The game loop must be fast and efficient. Just like a cartoon, where animation frames must be displayed at 24 frames per second to achieve the illusion of movement, a video game must appear smooth and react quickly to the player’s commands. Most games try to achieve 60 frames per seconds, which means each call to both Update() and Draw() within one iteration of the game loop must take at most 1/60th of a second. When things are faster than this, MonoGame will pause to ensure that it took exactly 1/60th of a second to run through the loop and ensure a consistent output to the screen. When things are slower than this, MonoGame will try to skip the Draw() method a few times to allow the updates to catch up, which can cause the game to stutter a little. It could also drop to a lower frame rate automatically.
To create a game, we must create our own game class, which will inherit from MonoGame’s Game class.
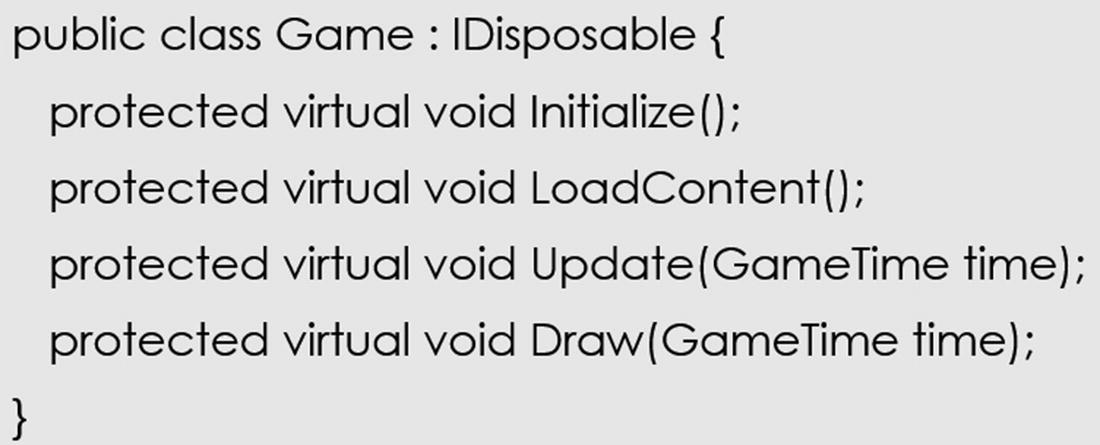
Game class main methods
The Initialize() method provides the entry point to initializing background threads, the graphics device, and other noncontent-related managers. The LoadContent() method provides the entry point for creating the SpriteBatch, the object that we will use to draw our game objects to the screen. It is also used to load Content from the aforementioned MGCB file.
As we discussed in our quick game loop introduction earlier, the Update() and Draw() methods are called successively within the game loop. Update() provides the entry point for handling game input, physics, and other non-graphics-related updates on the game timer. On the other hand, the Draw() method provides the entry point to handle all of the graphical rendering.
Over the course of this book, we will be adding manager classes to handle these scenarios in a dynamic and powerful way to create the book’s game project and allow you to expand for your own creations.
Your First Rendered Pixels
Now that you have a basic understanding of the MonoGame architecture, it is finally time to create your first MonoGame Project in Visual Studio. Those who want the pre-setup project can look at the chapter3 folder for the Visual Studio Solution and Project and skip to the subsection, “Diving into the Project.”
Creating the Solution and Project
For this step by step, I will be using Visual Studio 2019 on Windows as configured in Chapter 2. If you have not either installed and configured Visual Studio or MonoGame, please return to Chapter 2 and then come back to this section.
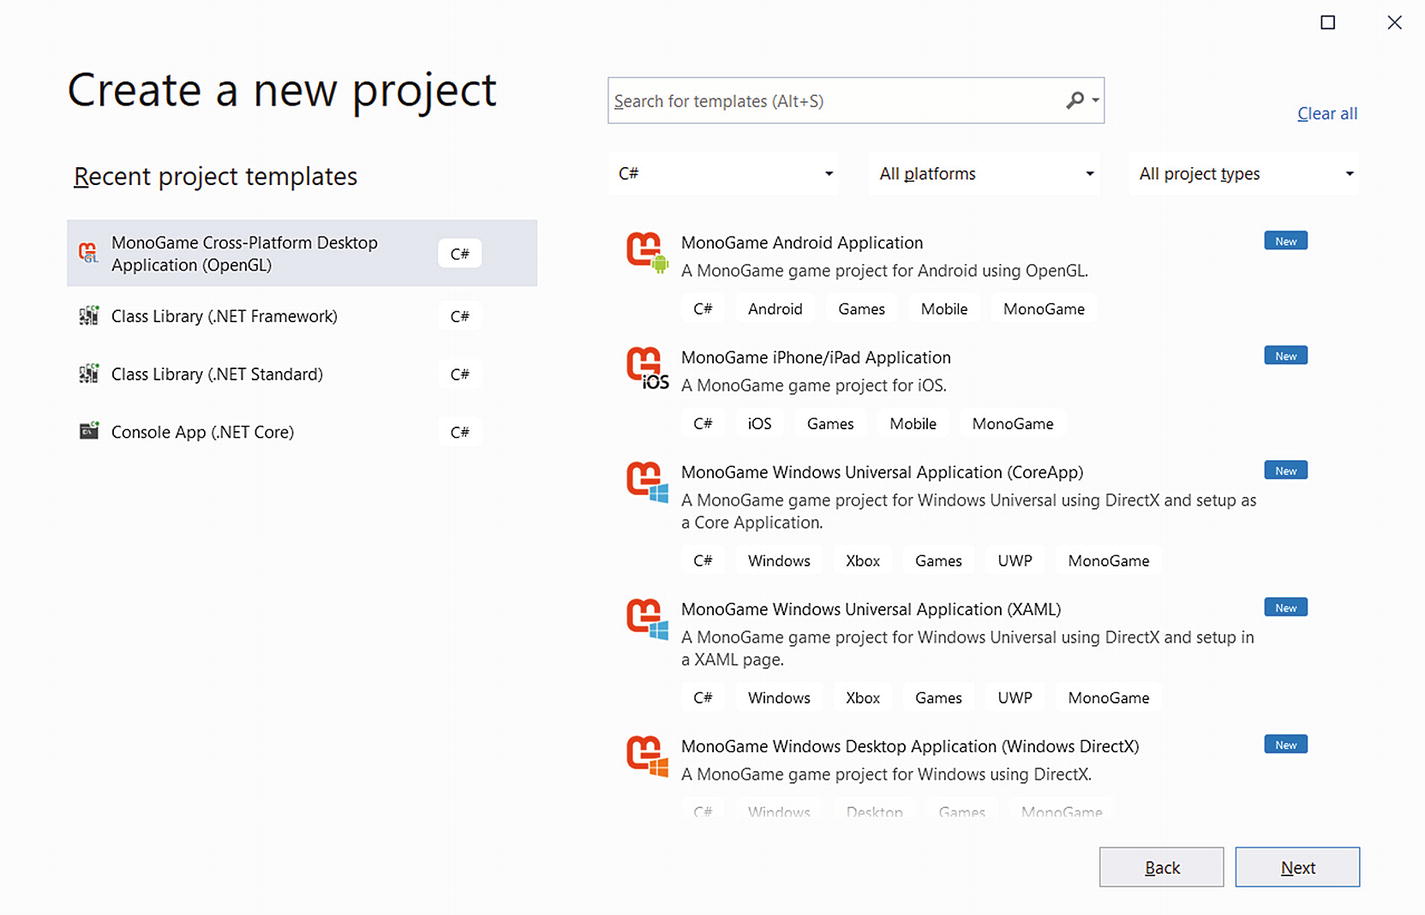
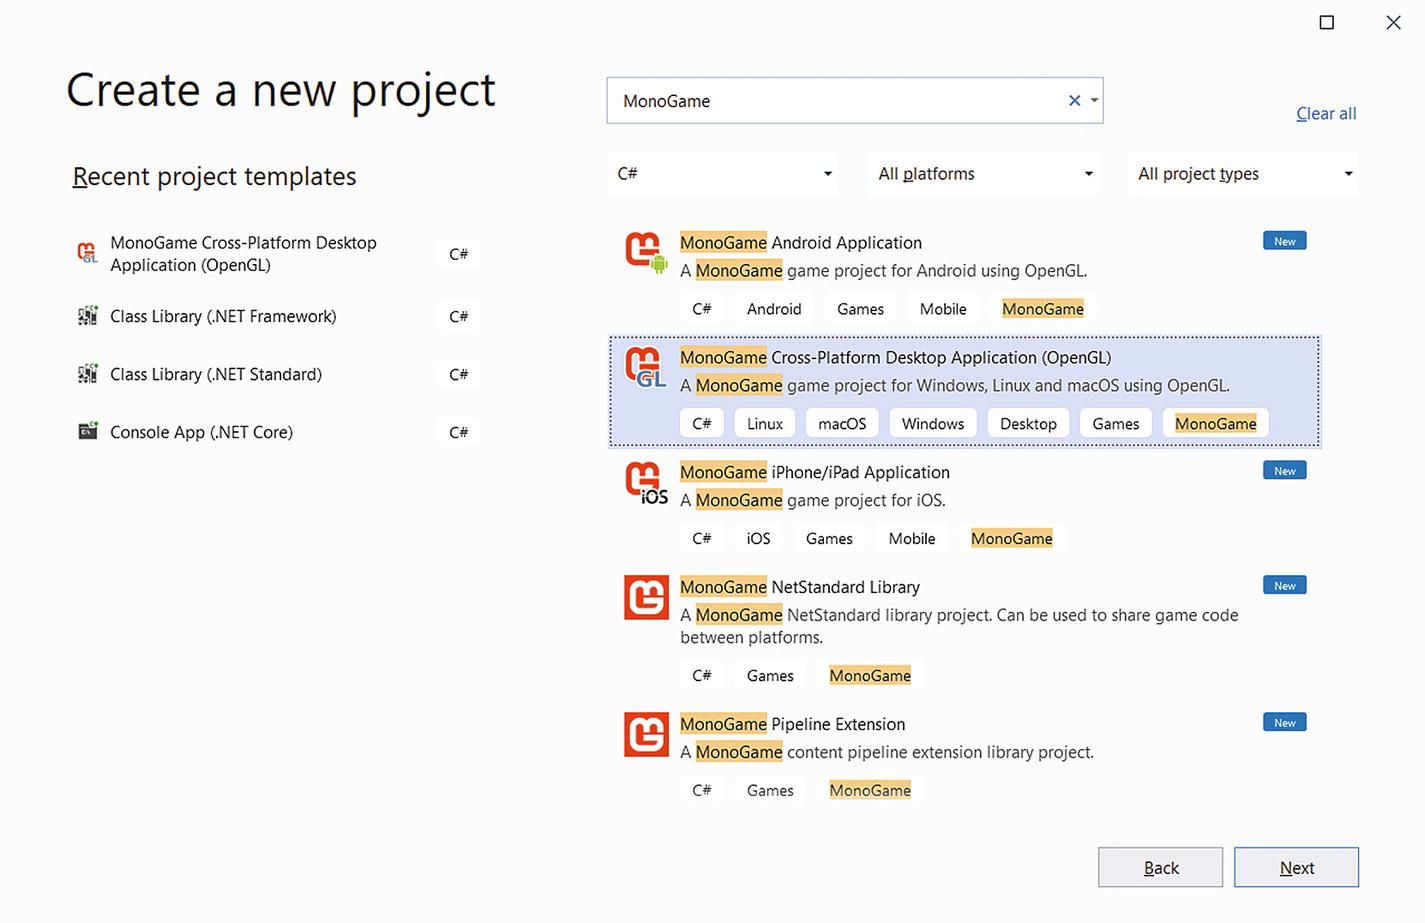
Visual Studio 2019 Create a new project dialog
In the Search bar at the top, type “MonoGame”. If Visual Studio does not return any results, please verify you have properly installed MonoGame as detailed in Chapter 2. Otherwise, you will see many different options. MonoGame is a cross-platform library and can be used to create video games on phones, tablets, on Linux or MacOS, on Windows, and on consoles, such as the Nintendo Switch, the Xbox, or the PlayStation. But because some of these options require some platform-specific code, you must choose the project that satisfies your goals.
Visual Studio 2019 Create a new project dialog with the MonoGame Cross-Platform Desktop Application (OpenGL) template selected
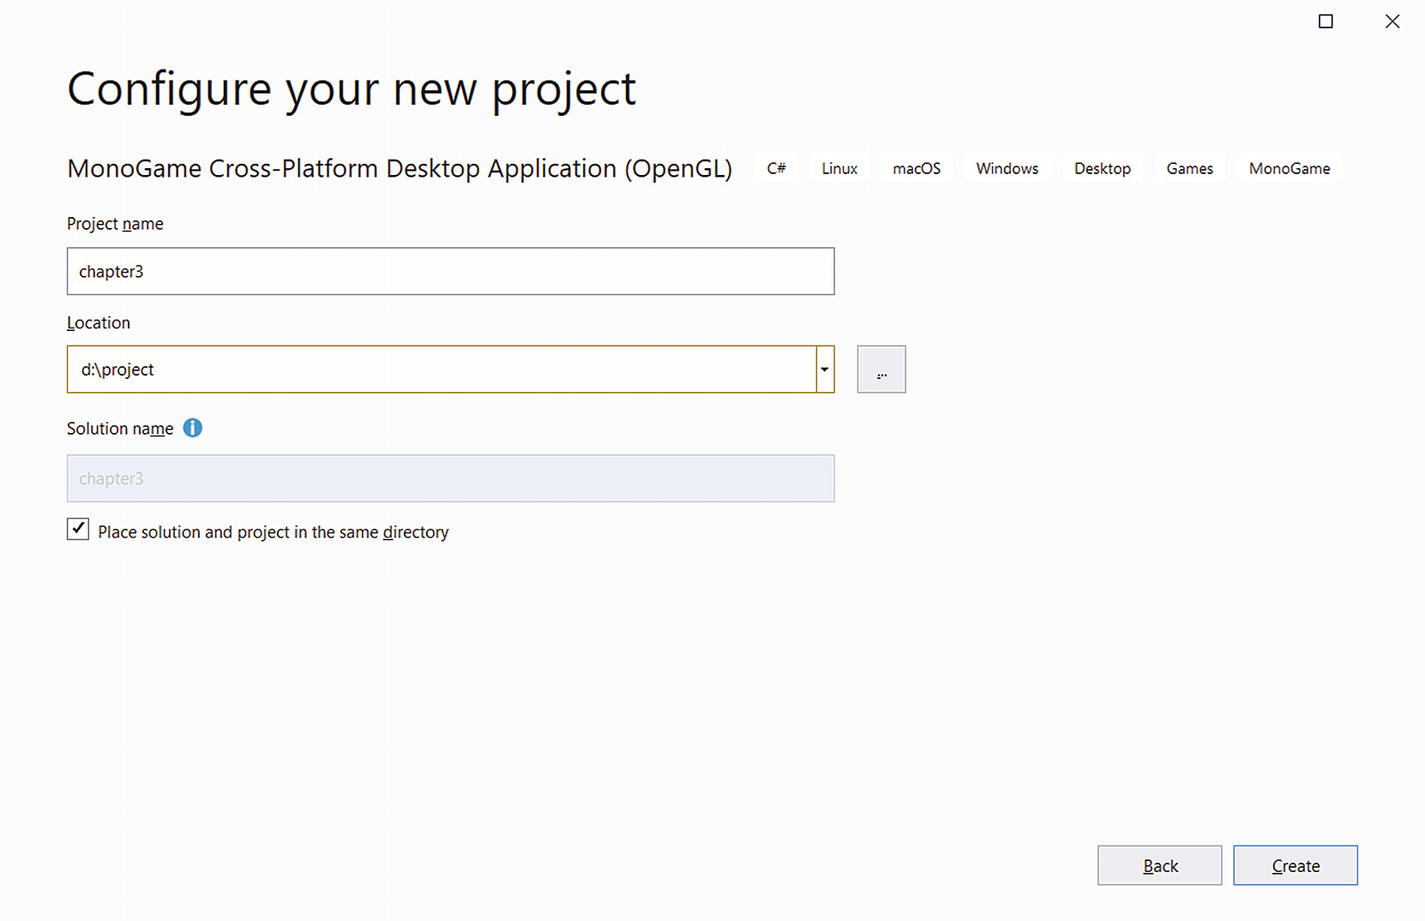
Visual Studio 2019 Configure your new project dialog
After entering your project name, click Create. You will then be presented with a blank canvas for MonoGame.
Diving into the Project
Now that we have the project and solution created, let us review all of the files that come in the basic MonoGame template. The exact files may vary based on the platform and future revision, but I have personally not seen much variation between versions over the years.
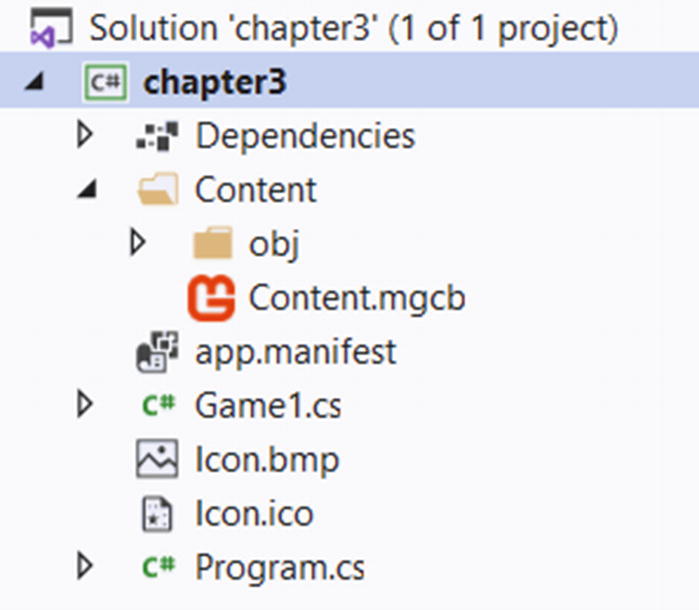
Visual Studio 2019 Solution Explorer MonoGame for Desktop Template
Content.mgcb: The file that contains all of your assets, such as textures, music, and sound effects, among others. In the template and for the sake of this chapter, it will remain empty.
Game1.cs: A default extended Game class implementation that will update later in this chapter.
Icon.ico: Icon for the project (defaulted to the MonoGame Icon)
Program.cs: Contains the Program’s Main method and call to the Game1 class

Diving into MainGame.cs
The reasoning for keeping the old XNA name in place is that the abundance of documentation, samples, and existing code that would need to be updated would be a huge undertaking for an open source project. It had been discussed possibly changing it for a future major version, but nothing at the time of this writing has been put in place.
The GraphicsDeviceManager class provides the MonoGame interface to the graphics card. For those who have done DirectX 12 or Vulkan, this is akin to enumerating a device and having a single class object to request commands. In addition, the class also provides device information exposed in the GraphicsDevice.Adapter property. A graphics device is a low-level module that is responsible for rendering graphical objects and sending them to the screen. In the next chapter, we will dive into some of the other properties of the GraphicsDeviceManager such as requesting the video resolution, full screen or not, and multisampling.
The SpriteBatch class provides the main interface to the extremely powerful 2D Rendering Engine provided in the MonoGame Framework. While the name implies it is only used for sprites, it actually provides a rendering interface for all 2D rendering.
In line 3, the graphics variable is initialized, and on line 4, the Root Directory is set to Content. Referring back to Figure 3-6, you will notice the Content.mgcb file resides in the Content subfolder. If you rename this folder, be sure to update this line. This book and all examples will retain this name.
In line 4, the spriteBatch is initialized. Traditionally, this LoadContent method also gives us with the opportunity to load our assets from the pipeline tool, which we will do in Chapter 5.
Line 3 in the preceding code block as you probably guessed checks to see if the Escape button has been hit and, if so, exits the game.
The TODO comment on line 6 earlier typically gets expanded to include calls to collision detection, AI, physics, and other non-graphics-related components in video games. This is where the state of the game is maintained, where game object coordinates in the game world are updated, where enemy game objects’ movement speeds are updated based on some acceleration variable, or where verifying if the player died takes place. A lot can happen here, but we will make sure to structure our code so this method doesn’t get overwhelmed with too many details and responsibilities.
Line 8 calls the Game class’s Update method, which for the scope of this book we will retain as we will use the Game class for simplicity.
The call to the GraphicsDevice.Clear method on line 3 in the preceding code block clears the screen to CornflowerBlue. Clearing the screen before rendering new objects is important to avoid previously drawn artifacts from remaining on the screen and avoiding objects from creating trails as they move. For most of the book, we will be clearing to Black, but to demonstrate actual rendering has occurred, the default template clears to CornflowerBlue.
The TODO comment on line 5 earlier is where we will be calling our single call to render all of the objects in the next chapter.
Lastly, the call to base.Draw on line 7 calls the base Draw method of the Game class, which is important for MonoGame programmers that want to use Game Components in their code. While this won’t be the case for us in this book, we recommend leaving the base call in place, just in case.
Execution Order
A common question I often ask myself when using a new framework, especially when extending or first deep diving, is in what order should the methods be called?
- 1.
Program Class ➤ Creates Game object ➤ Calls Run on the Game object
- 2.
MainGame Constructor
- 3.
MainGame.Initialize
- 4.
MainGame.LoadContent
- 5.
Game Loop ➤ (MainGame.Update and then MainGame.Draw)
- 6.
MainGame.UnloadContent
- 7.
MainGame.Finalizer
Knowing this order, receiving null exceptions, content issues, or other rendering anomalies may be due to doing operations out of order.
Summary
In this chapter, you learned about the MonoGame architecture and you dove into the default template and set up your first project. In addition, you ran and rendered your first pixels with the MonoGame Framework!
Up next is planning the architecture for the rest of the book with MonoGame.