Learn how the MonoGame Asset Pipeline works
Learn how to use the MonoGame Asset Tool
Integrate the Asset Pipeline into our engine
Add a player sprite to the game
MonoGame Asset Pipeline
For those with XNA experience, the Asset Pipeline will be very familiar to you as MonoGame builds upon the XNA Asset Pipeline. The major change is that XNA required the assets to be compressed and packed at build time. This caused a major issue for larger projects where the build and testing times were considerable. Thankfully, MonoGame switched this to split the building of the Asset Pipeline and building of your code by providing the MonoGame Pipeline Tool (to be discussed in the next section).
- 1.
Extensibility to support custom file formats
- 2.
Built-in support for XML, video, music, sound, and image
- 3.
Image compression optimizations for each platform (DXTC, for instance, on PCs)
- 4.
Loading system utilizing C#'s generics
- 1.
PCs (Windows, Linux, MacOS X)
- 2.
Consoles (Xbox 360, Xbox One, Switch, PS Vita, PSP, PS4)
- 3.
Mobile (iOS and Android)
- 4.
Raspberry Pi
ContentManager Class
At the core of the Asset Pipeline inside our engine that we will be continuing to evolve throughout this book is the ContentManager class . This class will provide the main interface to both load and retrieve content of various types such as sound, graphics, and levels. At a high level, the following methods are the main methods to provide this functionality. As a reminder, the source code for this class and all examples found in this book are available at www.apress.com/ISBN.
T LoadLocalized<T>(string assetName)
where cultureName is derived from both the CultureInfo.CurrentCulture.Name and CultureInfo.CurrentCulture.TwoLetterISOLanguageName. For example, the former would return “en-US” and the latter would return “en”. For localized fonts, text graphics and audio files using the LoadLocalized should be used instead of Load.
I should note, if no localized assets are found, MonoGame automatically falls back to the Load method.
T Load<T>(string assetName)
The Load method takes a type of T and internally calls the ReadAsset method. Unfortunately, at this time there are no constraints on the type of T; therefore, I should caution the types passed in. Upon successful reading of the asset, the object is added to the internal loadedAssets dictionary based on the assetName (it is used as the key). Not commonly known, if the type of T and the assetName match a preexisting key/value pair, the call to ReadAsset is avoided and the object is simply returned.
void Unload()
The Unload method as the name implies calls the dispose method on all of the disposable assets that were previously loaded. In addition, both the loadedAssets Dictionary and disposableAlerts List collection are also cleared.
In the Game class that we have and will utilize throughout this book, the ContentManager class is accessible via the Content property.
MonoGame Pipeline Tool
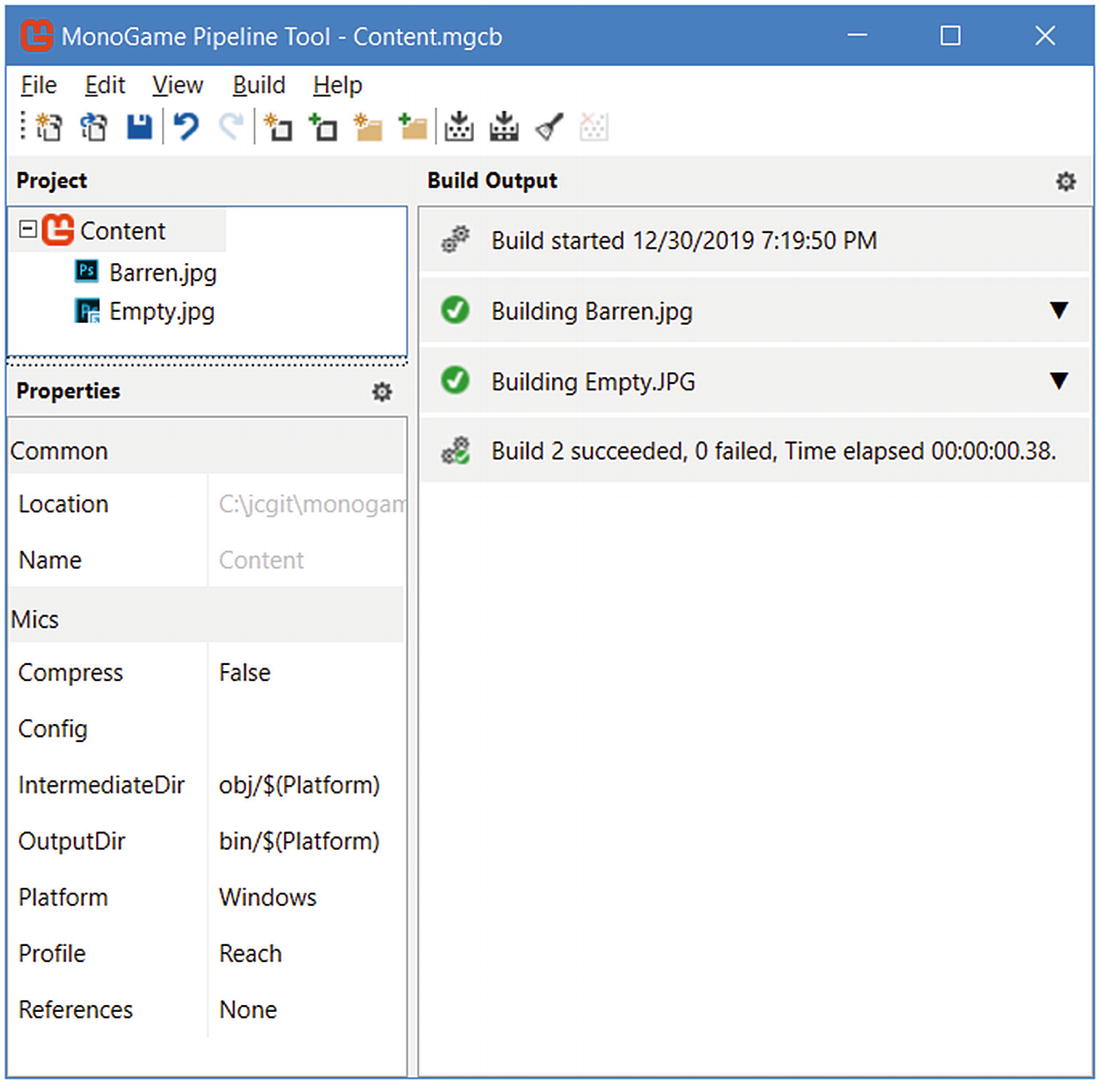
MonoGame Pipeline Tool
For those curious, the pipeline tool as of the 3.10 release supports MacOS X and Linux, whereas prior to that release the tool was for Windows only. The same functionality exists on all three platforms with no known differences as of this writing.
Integrate the Asset Pipeline into the Engine
Now that we have reviewed MonoGame's built-in Asset pipeline functionality, let us implement a proper way to handle asset loading and unloading in our engine.
You may recall in previous examples we simply referenced the ContentManager inside the LoadContent and UnloadContent methods in our Game States. This has the benefit of following a singleton pattern, but also doesn't provide any way to handle global assets. The reason being, when calling Unload on the ContentManager, all assets are unloaded. In a game, you more than likely have common assets such as fonts, sounds, and graphics that you wouldn't want to have to reload on every game state. You might be wondering why the ContentManager doesn't provide a way to unload certain objects – this has been discussed and requested as a feature in a future version.
To work around this limitation in the current version of MonoGame, the widely accepted solution is to simply pass in the main ContentManager and create a local copy within each Game State. For the scope of this chapter, that is the solution we will apply.
Now let us dive into the enhancements to our engine!
BaseGameState
You may recall, the abstract BaseGameState class is the primary class powering all of our game engine's states to derive from. For the scope of the chapter, we will be making several changes to support the new content loading.
As noted in the ContentManager class deep dive, this approach to wrapping the texture loading avoids accidentally passing an incompatible type of T to the Load<T> method of the ContentManager and thereby causing an exception to be thrown.
With these changes in place, we can now shift focus to the next class changes.
MainGame
With the majority of changes occurring in the BaseGameState, there are a few changes required to the MainGame class .
The reason for this change from the previously used resolution of 1024x768 is a true splash screen asset being loaded in the next section.
With these changes, the engine now provides a clear method to load a texture and proper clearing of content as game states change. The changes and new assets to complete this work are discussed in the next section. In future chapters, we will expand this functionality to include audio, fonts, and XML files.
Add a Player Sprite to the Game
Now that the engine has been updated to support texture loading, we will only need to make a few small adjustments to our game code. Remember, you can access the source code by going to www.apress.com/ISBN.
- 1.
assets
- 2.
start
- 3.
end
The assets folder contains both the Adobe Photoshop (PSD) and PNG files for the new splash screen, the sample texture, and the new fighter sprite. These files have been provided for use in this chapter and for future use in other projects.
The start folder contains the code prior to any changes made in this chapter for you to follow along. Conversely, the end folder contains the completed code if you wish to simply refer back to the chapter.
Reviewing the New Assets
To demonstrate the new texture loading functionality, three new assets have been added to the solution.

Splash screen asset
This image will act as the image in our SplashState class.

Fallback texture
This approach will make it easy to see quickly if an asset fails to load. In your future projects, I strongly suggest either using this graphic or something not used anywhere else in your project to call out that an error occurred when testing.

Player sprite
This will be used as our player sprite in future chapters and, as you might have seen, contains transparency which MonoGame will automatically pick up during the Asset Pipeline.
Adding the New Assets to Our Content
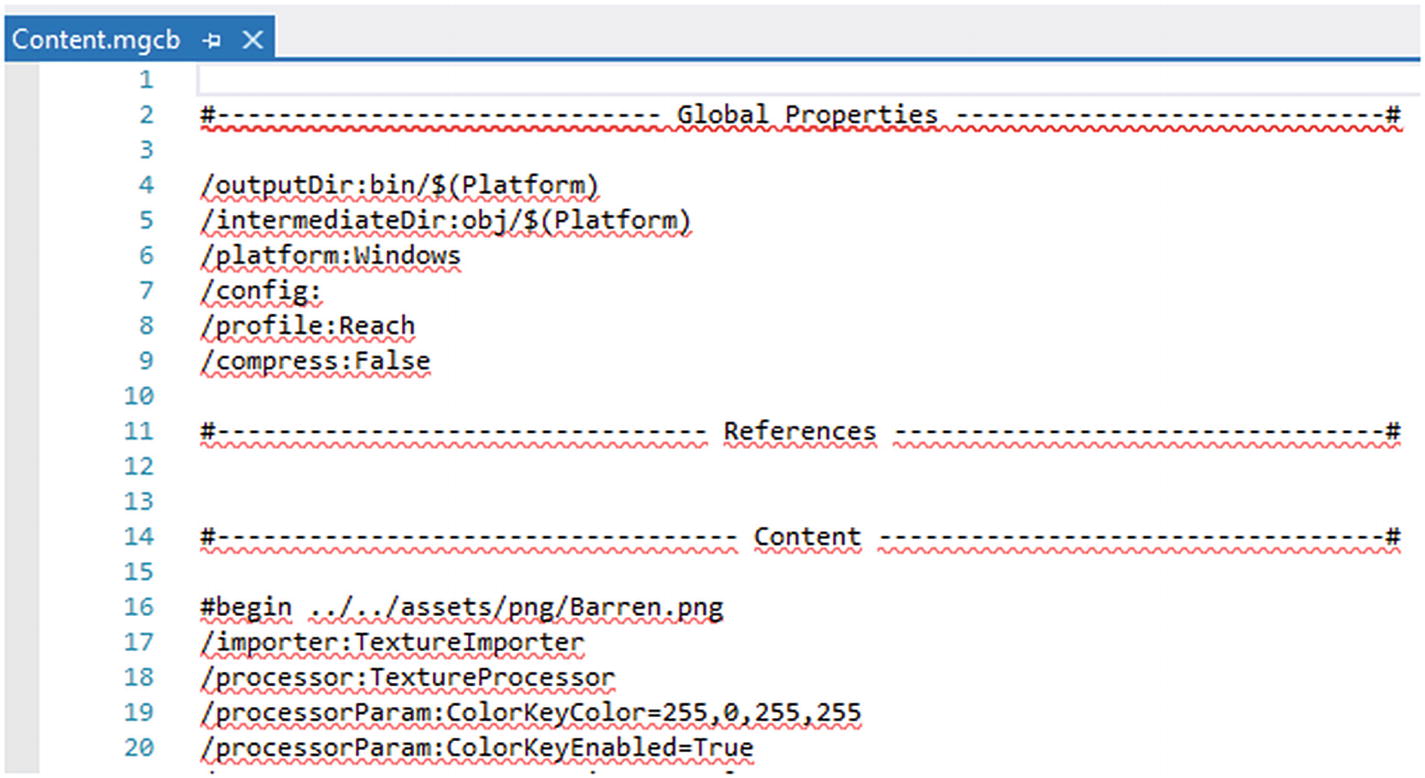
Content.mgcb opened incorrectly as an XML file

Visual Studio Context Menu on Content.mgcb

Visual Studio Open With dialog
Once selected, click Set as Default (to avoid having this occur again) and then click OK. After clicking OK, the MonoGame Pipeline Tool will open.
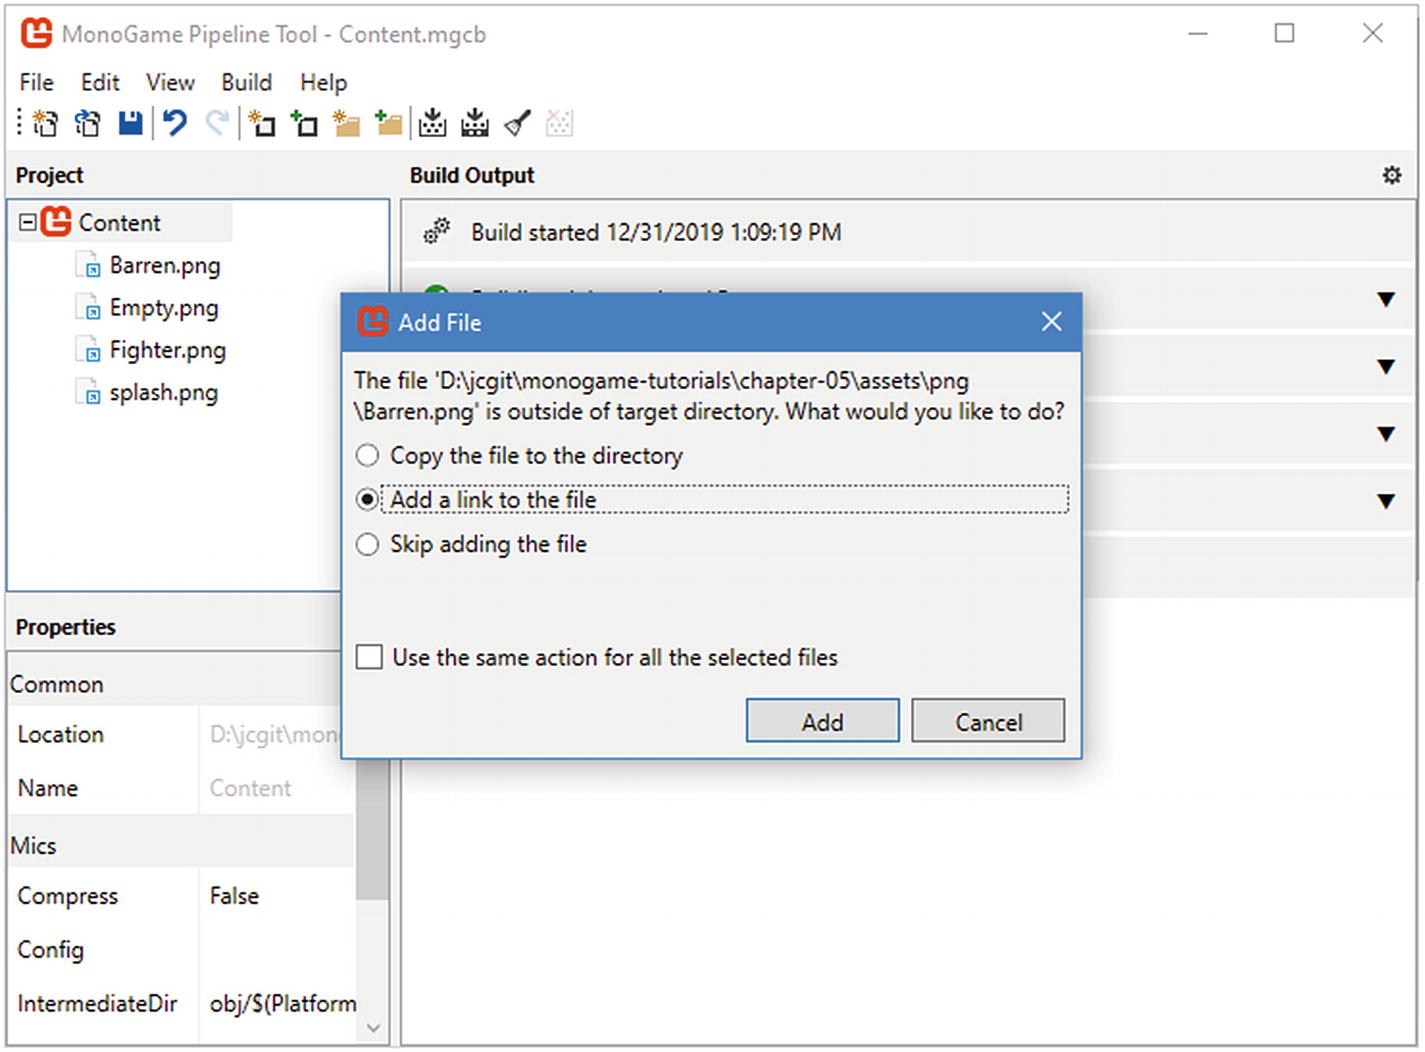
MonoGame Pipeline Tool Add File dialog
By clicking the “Add a link to the file” option, we will avoid having duplicate content locations. When working on a multiperson team or simply wanting one source of truth, this process avoids unnecessary churn forgetting to update multiple locations.
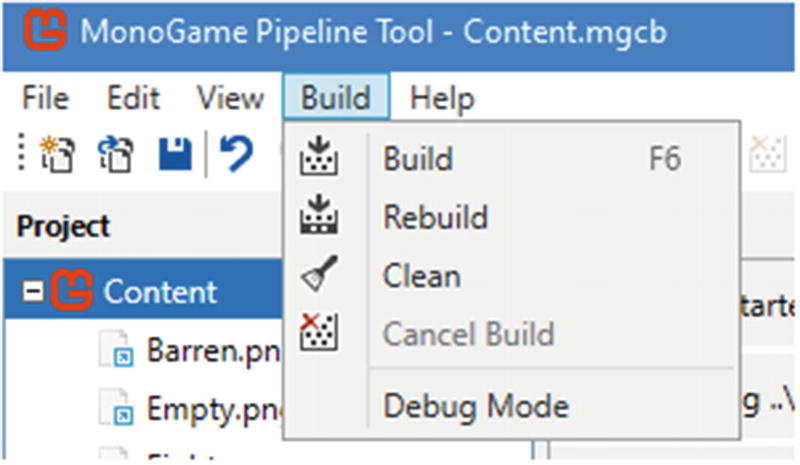
MonoGame Pipeline Tool Build Menu

MonoGame Pipeline Tool showing the build completes
Game Code Changes
With the changes to our engine completed in the previous section, there are only a handful of changes required to change in our game code.
SplashState
The SplashState class as you might recall is the state that launches when our game launches. In future chapters, we will expand the functionality to include transition effects and music.
For the scope of this chapter, there are three changes required. If the following code is not clear, please refer back to Chapter 4 or follow along with the included complete source code for this chapter.
The first change is the removal of the UnloadContent method with the engine handling the unloading of content automatically inside the BaseGameState class. This removal will simplify and reduce the duplicated code as we continue to add more game states (following the don’t repeat yourself mantra).
The second change is in the LoadContent method. Previously, we were using the MonoGame ContentManager class directly to load a texture. As reviewed earlier in this chapter, the LoadTexture method provides an abstraction between MonoGame and our engine. There are several reasons for this, but a few include better handling of changes to MonoGame (i.e., if the syntax changes for how to load a texture, it can be handled in one location vs. all throughout your code) in addition to extensibility within your own code.
GameplayState
The GameplayState class as you might recall is the state that will hold our main gameplay as we progress through the chapters.
For the scope of this chapter, four changes are required.
In future chapters, we will convert these constants to utilizing JSON files to create more flexibility and avoid having to hard-code textures.
The second change, like in the SplashState class, is the removal of the UnloadContent method since it is being handled inside the base class.
In the next chapter, we will overhaul this to not be tied specifically to just keyboard input; however, for now we are mapped to only the keyboard.
Running the Application
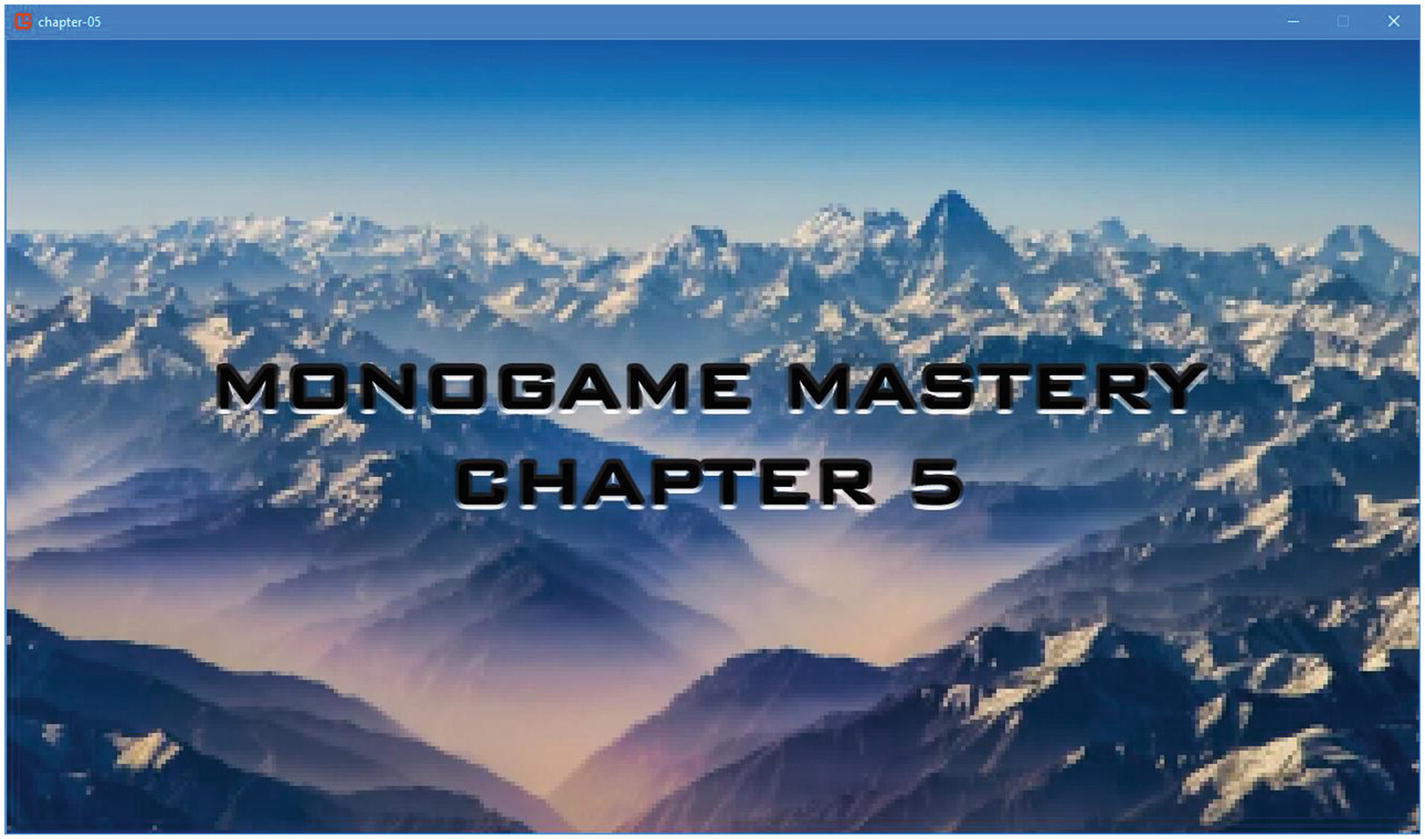
Chapter 5 example showing the splash screen

Chapter 5 example showing the player sprite overlaid on top of the barren sprite
To exit, tap the Escape key on your keyboard or click the X to close the window.
Summary
In this chapter, you learned about the MonoGame Asset Pipeline. We also dove into integrating the Asset Pipeline into our engine to support textures and creating an approach that we will use in the coming chapters to quickly add audio and video support. Lastly, we demonstrated how to use our new functionality to load a splash image in addition to our player sprite into our evolving game engine.
In the next chapter, we will dive into the handling of input in our game engine by adding support for touch, keyboard, mouse, and controller types of input.