
Chapter 2. JSON Clients
“All my books started out as extravagant and ended up pure and plain.”
Annie Dillard
Now that we have a fully functional JSON web API (covered in Chapter 1), we’re ready to build the client app. Since the web API we’re targeting is an RPC-CRUD API, we’ll need to consult the documentation and be sure to build into the app all the rules for constructing URLs, handling unique response objects and collections, and knowing the full details on how to execute all the operations for filtering, displaying, and modifying service data (almost 20 of them in our TPS app).
Also, after building and releasing our API client, we’ll simulate some real-life scenarios and update the backend service to see how that affects our client in production. Ideally, we’d like that client to support any new features of the updated backend. But anyone who has built these RPC-CRUD clients knows that’s not very likely. At least we’d like the app to not crash when the backend changes and even that is an iffy proposition depending on how we implement the client. We’ll work through the changes needed to keep our web API client up-to-date and close the chapter with some observations before we move on to our next project.
So, let’s get started.
The JSON Web API Client
For many readers, the typical JSON web API client is nothing new—it’s the style that most web APIs are designed to support right now. We’ll review some of the basic elements of this client and then, after a short detour into the service code to explore JSON API output, we’ll work through the coding needed to create a fully functional JSON web API client. Along the way, we’ll learn how the JSON client needs to handle important elements such as:
-
Recognizing the Objects in responses
-
Constructing Addresses (the URLs) for interacting with the service
-
Handling ACTIONS such as filtering, editing, or deleting data
Let’s take a minute to review each of these three elements before starting to look at the way client apps deal with them.
The OAA Challenge
Throughout the book, I’ll refer to this as the OAA Challenge (as in Objects, Addresses, and ACTIONS). We’ll see that every web API client app needs to deal with them and, especially when we start looking at the hypermedia-style clients, that there are varying ways to handle this challenge.
Objects
One of the most important things that JSON web API clients need to deal with are the JSON objects that appear in responses. Most JSON web APIs expose a unique object model via the responses. Before you can even start using the API in any meaningful way, your client app needs to understand the object model.
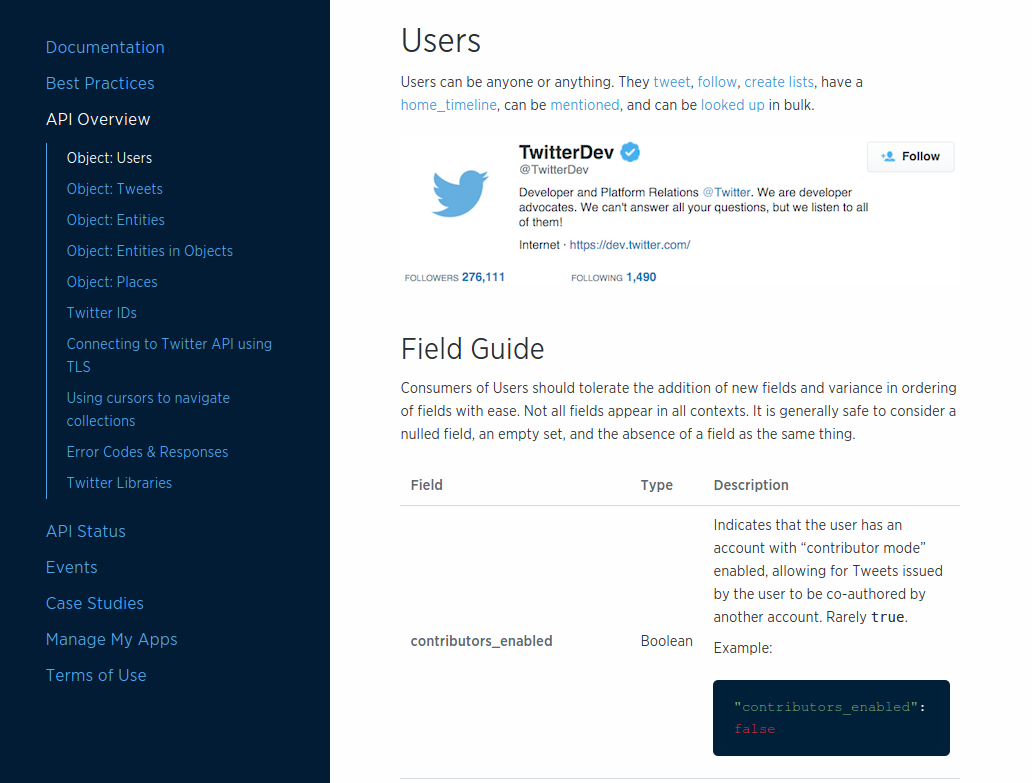
Figure 2-1. Twitter’s JSON object documentation
For example, as of this writing, the Twitter API Overview page lists five baseline objects:
-
Users
-
Tweets
-
Entities
-
Entities in Objects
-
Places
Many of these objects contain nested dictionary and array objects, too. And there are several complete sets of JSON objects in addition to these for related Twitter APIs such as streaming services, ad services, and others.
Recognizing objects
Lucky for us, the TPS web API has only two main objects (Task and User) and each of them are just a set of name–value pairs. This simple design makes our sample apps easy to work with and explore. However, most non-trivial production apps are likely to have several objects and tens (possibly hundreds) of properties.
As we saw in Chapter 1, the TPS web API responses are simple arrays:
{"task":[{"id":"137h96l7mpv","title":"LAX","completeFlag":"true","assignedUser":"bob","dateCreated":"2016-01-14T17:48:42.083Z","dateUpdated":"2016-01-27T22:03:02.850Z"},{"id":"1gg1v4x46cf","title":"YVR","completeFlag":"false","assignedUser":"carol","dateCreated":"2016-01-14T18:03:18.804Z","dateUpdated":"2016-01-27T17:45:46.597Z"},....moreTASKobjectshere]}
Our client app will need to recognize the "task" array name and act accordingly at runtime. One good way to do this is to use the object identifier as a context switch. When our app sees "task":[…] in the response, it will switch to “task-mode” and display the data (and possible actions) related to tasks. When the server response contains "user":[…], the app can switch to “user-mode.” Of course, our app won’t know what to do if a service response contains "note
":[…] or some other unknown context value. For now, we’ll need to ignore anything we don’t recognize.
Tip
“Ignore anything you don’t recognize” is a valuable implementation pattern for writing robust client apps. I’ll cover this and other patterns for creating resilient client apps in Chapter 7.
Displaying data
Just knowing the objects and their properties is not enough. Client applications also need to know how to deal with them when they show up in an API response. For example, whether to show the data item at all, and if so, which properties to display, the human prompts associated with the properties, and so on.
For example, the Task object emitted by the TPS web API looks like this:
{"id":"137h96l7mpv","title":"Review API Design","completeFlag":"false","assignedUser":"bob","dateCreated":"2016-05-14T17:48:42.083Z","dateUpdated":"2016-05-27T22:03:02.850Z"},
For our client app, we’ve decided to not display the dateCreated and dateUpdated fields. In fact, we’ll need to keep track of which fields to hide and which to show for all the TPS objects.
We also need to decide which prompts to display for each property in the TPS Task and User objects. Most of the time, client-side developers need to keep an internal set of prompts (possibly even tagged for more than one language) and map those prompts to the property names at runtime. For our simple app, we’ll just use a CSS trick to capitalize the property names when displaying them as prompts (see ![]() in the code provided in Example 2-1).
in the code provided in Example 2-1).
Example 2-1. Using CSS to generate UI prompts
span.prompt{display:block;width:125px;font-weight:bold;text-align:right;text-transform:capitalize;}
This works because we only need to support a single language and we’re just working with a simple demo app. Production apps will need more attention to detail on this point. We’ll see a more robust way to handle onscreen displays in Chapter 6, Siren Clients.
So, our client app will keep track of all the important JSON objects coming from the server, know how to handle each of them, and know which properties to display and what prompts are associated with them.
The next thing to deal with is the object’s Addresses—their URLs.
Addresses
Most JSON RPC-CRUD API responses don’t include URLs—the addresses of the objects and arrays the client application is processing. Instead, the URL information is written up in human-readable documentation and it is up to the developer to work out the details. Often this involves hardcoding URLs (or URL templates) into the app, associating those addresses with objects and collections at runtime, and resolving any parameters in the URL templates before actually using them in the app.
The number of URLs and templates in an API can be very large. For example, using the Twitter API (mentioned previously) as an example, there are close to 100 URL endpoints displayed on just one page of the Twitter API documentation (see Figure 2-2). While it is likely that a single API client will not need to handle all 97 of the URLs listed on that page, any useful Twitter client app will likely need to deal with dozens of them.
For the TPS web API, there are 17 URLs and templates to deal with. They’re listed in Table 1-2. We’ll need to sort out which addresses belong to each context object (Task or User) and which of them are more than simple read actions (e.g., HTTP POST, PUT, and DELETE actions).
There are many different ways of handling URLs and templates for JSON web APIs. The approach I’ll use in our sample app is to create a JSON dictionary of all the URLs for each object. For example, Example 2-2 shows how I’ll “memorize” some of the Task operations (Note that I included a prompt element for use when displaying these URLs as links in the client UI).
Example 2-2. Coding URLs into the JSON Web API Client
actions.task = {
  tasks:   {href:"/task/", prompt:"All Tasks"},
  active:  {href:"/task/?completeFlag=false", prompt:"Active Tasks"},
  closed:  {href:"/task/?completeFlag=true", prompt:"Completed Tasks"},
}
I’ll also need to keep some information on when to display links. Should they appear on every page? Just on the pages associated with tasks? Only when a single task is displayed? Various client-side JavaScript frameworks deal with these details in different ways. Since I’m not tying my client or server to any single framework, my solution is to use an additional property of my address list, called target, which is set to values such as "all" or "list" or "single-item", etc. We’ll see that later in this chapter.
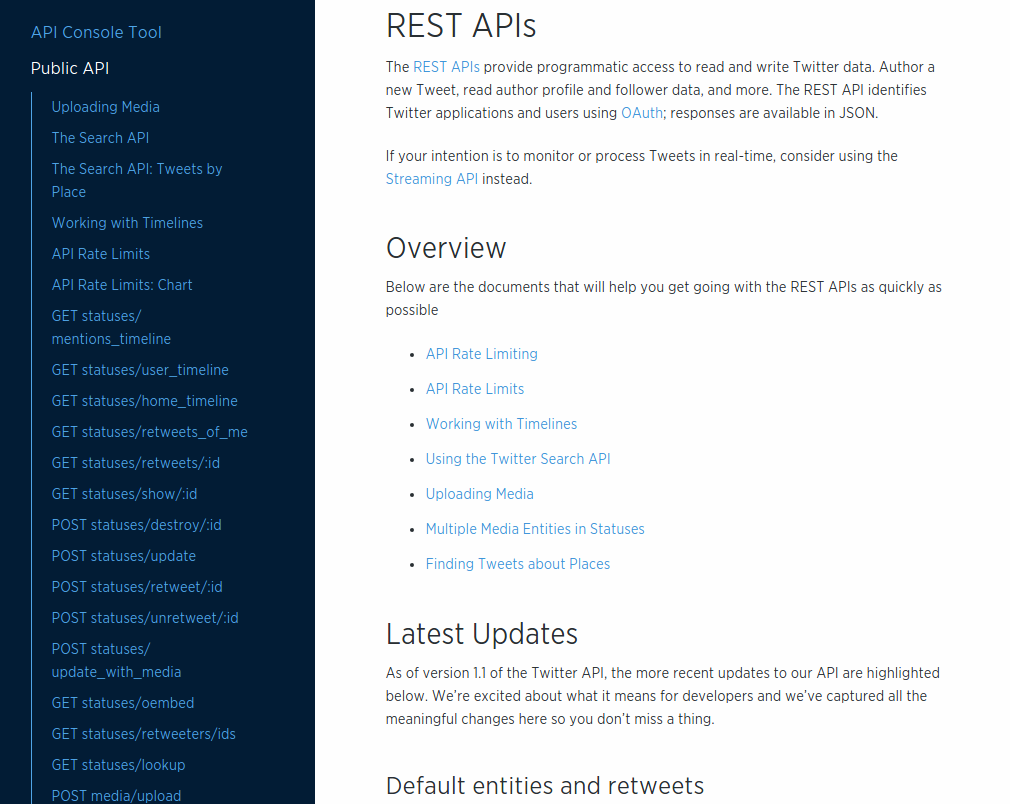
Figure 2-2. Twitter’s JSON endpoint documentation
So,
Objects and
Addresses. That’s pretty good, but it’s not enough. We also need to know the details on
Actions that involve query parameters and actions that require construction of request bodies (e.g., POST and PUT).
Actions
The third important element that web API clients need to deal with are filters and write operations of a web API. Just like the URL construction rules, this information is typically written up in human-readable documentation and then translated into client-side code by a developer. For example, Twitter’s API for updating existing lists takes up to seven parameters and looks like Figure 2-3 in the documentation.
The documentation for our TPS web API appears in Table 1-2. Similar to the Twitter API documentation, the TPS docs show the URL, the method, and the set of parameters. This all needs to be “baked” into the web API client app, too.

Figure 2-3. Twitter’s update list API documentation
Tip
You can find the complete TPS web API docs in the associated repository on GitHub.
There are many different ways to encode action information into client apps—from hardcoding it into the app, keeping it as metadata in a separate local file, or even as a remote configuration file sent with the JSON response. For our TPS client, I’ll use an approach similar to the one I used when handling simple URLs (see Example 2-2).
For example, Table 2-1 shows what the UserAdd action looks like in the TPS documentation.
| Operation | URL | Method | Returns | Inputs |
|---|---|---|---|---|
|
|
|
|
|
And the web API client app will store that information in the actions element (see the following code). Note that the pattern property information comes from another part of the TPS documentation (provided earlier in Table 1-5).
actions.user={add:{href:"/user/",prompt:"Add User",method:"POST",args:{nick:{value:"",prompt:"Nickname",required:true,pattern:"[a-zA-Z0-9]+"},password:{value:"",prompt:"Password",required:true,pattern:"[a-zA-Z0-9!@#$%^&*-]+"},name:{value:"",prompt:"Full Name",required:true}}}}
And this kind of information needs to be handled for all the actions your client app needs to perform. In the TPS web API, that is 17 actions. A nontrivial app will need to handle quite a few more.
Tip
I’ll show a more robust way to handle describing these kinds of interactions in Chapter 4.
Quick Summary
So now we have a good sense of what a web API client for a JSON RPC-CRUD style API will need to deal with. Along with the usual code for requests, parsing, and rendering responses, every JSON API client will also need to know how to handle:
-
Objects unique to each API
-
Addresses (URLs and URL templates) for all the actions of the API
-
ACTION details including HTTP methods and arguments for all non-trivial actions including HTTP
POST,PUT, andDELETErequests.
With this in mind, we can now dig into the actual code for the JSON web API client.
The JSON SPA Client
Now we’re ready to walk through the JSON web API client app code. We’ll look at the HTML container for the single-page app (SPA), the top-level request, parse, render loop, and check out how this client app handles the three things we reviewed earlier: Objects, Addresses, and ACTIONS. Along the way, we’ll see the JSON client in action and look ahead to see how it will deal with backend API changes.
Tip
The source code for the TPS JSON web API client can be found in the associated GitHub repo. A running version of the app described in this chapter can be found online.
Throughout the book, I’ll be showing examples of single-page apps, or SPAs, hosted within a browser. Also, I chose to build all the apps for this book without using one of the many JavaScript frameworks in order to make it easier for you to see the code that matters. So, the code here is not production-ready because I wrote it for this book. But making it production-ready is just a matter of making it bulletproof, and you don’t need any fancy frameworks for that.
The HTML Container
The SPA client created for the TPS web API starts with a single HTML document. This document acts as the container for the entire API client application. Once the initial HTML is loaded, all other requests and responses will be handled by the running JavaScript code parsing and rendering the JSON objects returned from the TPS web API service.
The HTML container looks like this:
<!DOCTYPE html><html><head><title>JSON</title><linkhref="json-client.css"rel="stylesheet"/></head><body><h1id="title"></h1><divid="toplinks"></div><divid="content"></div><divid="actions"></div><divid="form"></div><divid="items"></div><div><preid="dump"></pre></div></body><scriptsrc="dom-help.js">//na</script><scriptsrc="json-client.js">//na</script><script>window.onload=function(){varpg=json();pg.init("/home/","TPS - Task Processing System");}</script></html>
As you can see from the preceding HTML listing, there is not much to talk about in this document. The part that all the code will be paying attention to starts at ![]() —the seven
—the seven DIV elements. Each of them has a unique identifier and purpose at runtime. You can figure most of that out just by reading the names. The last DIV actually encloses a <pre> tag that will hold the full “dump” of the JSON responses at runtime. This is a handy kind of debug display and isn’t needed for production.
Along with the HTML, there is a single CSS file (![]() ) and two JavaScript references; a simple DOM library (
) and two JavaScript references; a simple DOM library (![]() ) and the complete client-side code (
) and the complete client-side code (![]() ). We’ll inspect the
). We’ll inspect the json-client.js library throughout this section of the chapter.
Tip
I’m using a small helper library (dom-help.js) to reduce tedious HTML DOM manipulation in the client code. This is usually handled by other JS frameworks like JQuery, etc. I used this one just to get rid of library dependency and make it easy to see that there is no ‘magic’ going on in some library.
Finally, once the page is loaded, a single function is executed (see ![]() ). This initializes the client with a starting URL and (optionally) a title string. The URL shown here works fine when the client app is hosted in the same web domain as the TPS web API. If you want to run the client app from a separate domain, all you need to do is update this initial URL and the app will work just fine.
). This initializes the client with a starting URL and (optionally) a title string. The URL shown here works fine when the client app is hosted in the same web domain as the TPS web API. If you want to run the client app from a separate domain, all you need to do is update this initial URL and the app will work just fine.
So, let’s look inside the json-client.js library and see how it works.
The Top-Level Parse Loop
The client app is designed to act in a simple, repeating loop that looks like this:
-
Execute an HTTP request.
-
Store the JSON response in memory.
-
Inspect the response for context.
-
Walk through the response and render the context-related information on screen.
We talked about context earlier in the chapter. This client is expecting multiple custom object models from the TPS web API (Task, User, and Home) and uses the returned object model as context in deciding how to parse and render the response.
// init library and startfunctioninit(url,title){if(!url||url===''){alert('*** ERROR: MUST pass starting URL to the library');}else{global.title=title||"JSON Client";global.url=url;req(global.url,"get");}}// process loopfunctionparseMsg(){setContext();toplinks();content();items();actions();}
When the app first loads, the init function is called (![]() ). That validates the initial URL, stores it, and eventually makes the first HTTP request to that URL (
). That validates the initial URL, stores it, and eventually makes the first HTTP request to that URL (![]() ). Once the response returns (not shown here) the
). Once the response returns (not shown here) the parseMsg function is called (![]() ) and that starts the parse/render loop.
) and that starts the parse/render loop.
The parseMsg function does a handful of things. First, it calls setContext to inspect the response and set the app’s current context so that it knows how to interpret the response. For our app, a global context variable is set to "task", "user", or "home". Next, the page’s top links are located and rendered (toplinks), and any HTML content is displayed (content). The items function finds all the objects in the response (Task or User) and renders them on the screen, and the actions function constructs all the links and forms appropriate for the current context.
That’s quite a bit in a single function and we’ll get into some details of that in just a bit. But first, let’s look at how the JSON client keeps track of the TPS objects, addresses, and actions that were written up in the human documentation.
Objects, Addresses, and Actions
Since the TPS web API is just returning custom JSON objects and arrays, our client app needs to know what those objects are, how to address them, and what actions are possible with them.
TPS objects
The TPS objects (Task and User) are simple name–value pairs. So, all our client app needs to know are the properties of each object that need to be rendered on screen. For example, all TPS objects have dateCreated and dateUpdated properties, but our client doesn’t need to deal with them.
This app uses a simple array to contain all the object properties it needs to know about:
global.fields.task=["id","title","completeFlag","assignedUser"];global.fields.user=["nick","name","password"];
Now, whenever parsing incoming objects, the client app will compare the property on the object with its own list of properties and ignore any incoming property it doesn’t already know about.
An example of how this works can be seen in the code that handles on-screen rendering of objects in the response:
// g = global storage// d = domHelper library// handle item collectionfunctionitems(){varrsp,flds,elm,coll;varul,li,dl,dt,dd,p;rsp=g.rsp[g.context];flds=g.fields[g.context];elm=d.find("items");d.clear(elm);ul=d.node("ul");coll=rsp;for(varitemofcoll){li=d.node("li");dl=d.node("dl");dt=d.node("dt");// emit the data elementsdd=d.node("dd");for(varfofflds){p=d.data({text:f,value:item[f]});d.push(p,dd);}d.push(dt,dl,dd,li,lu);}d.push(ul,elm);}
Note (in ![]() ) the first step in the routine is to use the shared context value to locate the data in the response (
) the first step in the routine is to use the shared context value to locate the data in the response (rsp) and select the internal properties to use when inspecting the data (flds). This information is used (in ![]() ) to make sure to only render the fields the client decides is appropriate (see Figure 2-4).
) to make sure to only render the fields the client decides is appropriate (see Figure 2-4).
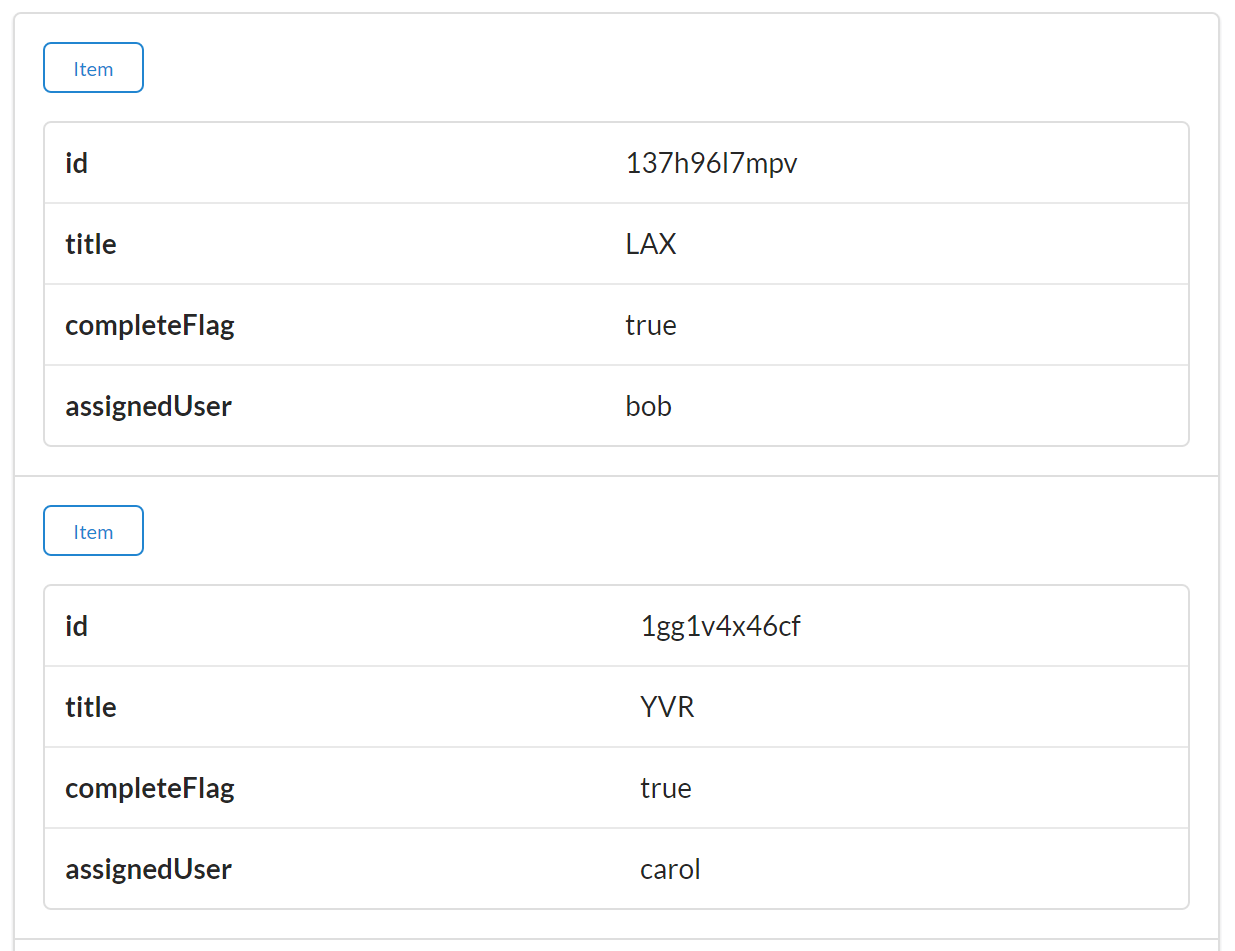
Figure 2-4. Rendering task items in the JSON client
Warning
The code examples for this book use the ES6 for..of iterator. When this book first went to press for..of was supported in some browsers, but not all. I used the Chrome browser (both the Google release and the Chromium open source release) while writing the examples and they all ran fine. Be sure to check your browser’s support for the for..of iterator.
Addresses and actions
This client app stores both the addresses (URLs) and actions (HTTP method and parameter information) in a single internal collection called actions. There is additional metadata about each action that indicates when it should be rendered (based on context information) and how it should be executed (e.g., as a simple link, form, or direct HTTP method call).
The list of actions for the TPS web API is rather long (17 separate actions), but the following code snippet gives you a good idea of how they are stored in the client app:
// task context actionsglobal.actions.task={tasks:{target:"app",func:httpGet,href:"/task/",prompt:"Tasks"},active:{target:"list",func:httpGet,href:"/task/?completeFlag=false",prompt:"Active Tasks"},byTitle:{target:"list",func:jsonForm,href:"/task",prompt:"By Title",method:"GET",args:{title:{value:"",prompt:"Title",required:true}}},add:{target:"list",func:jsonForm,href:"/task/",prompt:"Add Task",method:"POST",args:{title:{value:"",prompt:"Title",required:true},completeFlag:{value:"",prompt:"completeFlag"}}},item:{target:"item",func:httpGet,href:"/task/{id}",prompt:"Item"},edit:{target:"single",func:jsonForm,href:"/task/{id}",prompt:"Edit",method:"PUT",args:{id:{value:"{id}",prompt:"Id",readOnly:true},title:{value:"{title}",prompt:"Title",required:true},completeFlag:{value:"{completeFlag}",prompt:"completeFlag"}}},del:{target:"single",func:httpDelete,href:"/task/{id}",prompt:"Delete",method:"DELETE",args:{}},};
In the preceding code snippet, you can see a simple, safe, read-only action (![]() ) as well as a safe action that requires user input (
) as well as a safe action that requires user input (![]() ). There are also the classic CRUD actions (
). There are also the classic CRUD actions (![]() ,
, ![]() , and
, and ![]() ) with the expected HTTP method names, prompts, and (where appropriate) argument lists. These action definitions are selected based on runtime context information. For example, the
) with the expected HTTP method names, prompts, and (where appropriate) argument lists. These action definitions are selected based on runtime context information. For example, the target property indicates which actions are appropriate for app-level, list-level, item-level, and even single-item level context.
Here’s an example of the code that uses context information and scans the list of actions to render list-level links:
// d = domHelper library// handle list-level actionsfunctionactions(){varactions;varelm,coll;varul,li,a;elm=d.find("actions");d.clear(elm);ul=d.node("ul");actions=g.actions[g.context];for(varactinactions){link=actions[act];if(link.target==="list"){li=d.node("li");a=d.anchor({href:link.href,rel:"collection",className:"action",text:link.prompt});a.onclick=link.func;a.setAttribute("method",(link.method||"GET"));a.setAttribute("args",(link.args?JSON.stringify(link.args):"{}"));d.push(a,li);d.push(li,ul);}}d.push(ul,elm);}
You can see in this code that both the object context (![]() ) and the internal render context (
) and the internal render context (![]() ) are used to select only the links appropriate for display at the moment.
) are used to select only the links appropriate for display at the moment.
The actions that contain argument details will be rendered at runtime using HTML <form> elements (see Figure 2-5). The code that handles this is shown here:
// d = domHelper library// render inputscoll=JSON.parse(link.getAttribute("args"));for(varpropincoll){val=coll[prop].value;if(rsp[0][prop]){val=val.replace("{"+prop+"}",rsp[0][prop]);}p=d.input({prompt:coll[prop].prompt,name:prop,value:val,required:coll[prop].required,readOnly:coll[prop].readOnly,pattern:coll[prop].pattern});d.push(p,fs);}
In the small snippet just shown, you can see the collection of args (![]() ) from the
) from the action definition is used to create HTML form inputs. At ![]() you can see that any current object is used to populate the value of the inputs before the actual HTML
you can see that any current object is used to populate the value of the inputs before the actual HTML input element is created (![]() ). Note the inclusion of the HTML5 properties
). Note the inclusion of the HTML5 properties required, readonly, and pattern in order to improve the client-side user experience, too.
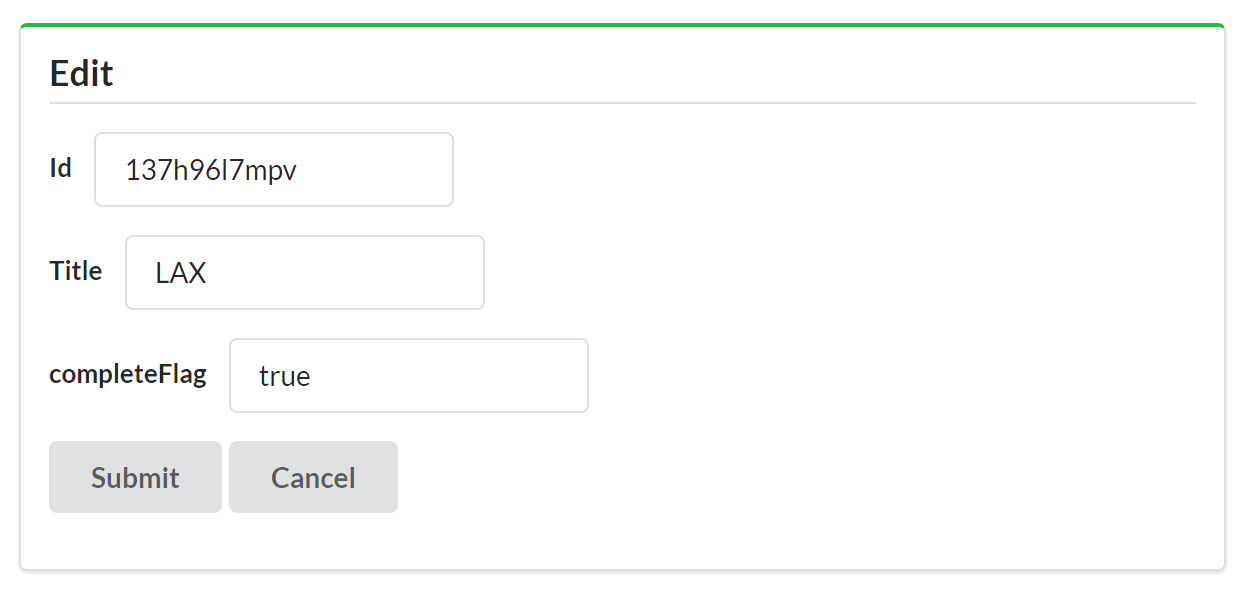
Figure 2-5. JSON client rendering a form
Quick summary
There is more to the json-client.js library that we won’t cover here, including all the Ajax-related code to handle HTTP requests and responses. Even with all the low-level HTTP code, the total size of the library is around 500 lines of JavaScript—and that includes extensive comments. In fact, the breakdown of the various parts of the client are worth noting.
- HTTP-level handlers
-
For example, the Ajax-related low-level HTTP code takes up about 100 lines. This code would typically be handled by jQuery or other framework libraries. Also, this code will not grow or shrink as the number of unique objects, addresses, and actions changes within the web API. The HTTP-handling code is a fixed size.
- Parsing and rendering
-
The heart of the JSON client code is about 300 lines that handle the parsing and rendering of the user interface. That content is also unlikely to change as the web API objects and functionality changes. However, this part of the codebase could grow as more client-side UX features are added to the library.
- Web API objects, and actions
-
Finally, the other large portion of the code library is the 150 or so lines of JavaScript used to declare the TPS web API objects, address, and action configuration. This is the part of the library that will be directly affected by the web API objects and actions. As the API functionality grows, this code must grow, too.
This last item points to an important aspect of JSON API clients: changing the backend API will force the client frontend to change, too. I’ve done my best to isolate those changes to a single section of the library, but I can’t eliminate the need for these changes to occur since the client code has all the service’s Objects, Addresses, and Actions baked directly into the code.
So, let’s make some changes to the backend web API and see how this JSON client handles it.
Dealing with Change
Change is a fundamental part of the Web. Several key design aspects of the HTTP protocol and HTML make change not only easy to do but also easy to support without breaking existing HTTP clients. The content of HTML pages can change without the need to recode and release new HTML browsers. The HTTP protocol has undergone a handful of updates over the last 25 years without crashing existing web servers or requiring them to all be updated at the same time. Change is essentially “designed in” to the WWW. I’ll review this topic in more detail in Chapter 7.
Unfortunately, most web APIs today do not share this fundamental ability to support change over time. Changes on the server side of a web API usually require changes on the client side. Sometimes existing production API clients will even crash or operate improperly once the server-side code has been changed. The problem has become so common that most web developers resort to using explicit version numbers on web APIs in order to make it easy for developers to know when something has changed—usually so developers can recode and deploy their production client apps in order to maintain compatibility with the service.
Throughout the book, I’ll be introducing backend changes to service APIs after the client application has been completed (and presumably released into production). I’m doing this to explore how various API client implementations deal with change and to see what it takes to create API clients that can adapt to selected changes in the API at runtime.
So, let’s make some changes to the TPS web API and see how our JSON client reacts.
Adding a Field and Filter
A common change that can occur in a production API is adding a new field to the data storage. For example, the team at BigCo working on the web API might decide to add a tag field to the Task storage object. This will allow users to tag tasks with common keywords and then recall all the tasks with the same keyword.
Tip
The source code for the updated (v2) TPS JSON web API service can be found in the associated GitHub repo. A running version of the service can be found online.
Adding the tag field means we’ll probably need a new search option, too: TaskFilterByTag. It would take a single parameter (a string) and use that to search all the task record’s tag fields, returning all Task objects where the search value is contained in the tag field.
Changing the TPS web API
The process of changing the TPS web API to support the new tag functionality is not too complex. We’ll need to:
-
Add the
tagproperty to theTaskstorage definition. -
Introduce a new query for
Taskstorage and export that via HTTP.
To add the new tag field to the server’s storage support, we first need to update a line of code that defines the valid fields for the Task object (![]() ).
).
// task-component.js// valid fields for this recordprops=["id","title","tag","completeFlag","assignedUser","dateCreated","dateUpdated"];
Next, we need to modify the validation rules for adding and updating Task objects on the server. The following code snippet shows the addTask routine with the new tag field (![]() ). A similar change was made to the
). A similar change was made to the updateTask routine, too.
functionaddTask(elm,task,props){varrtn,item;item={}item.tags=(task.tags||"");item.title=(task.title||"");item.assignedUser=(task.assignedUser||"");item.completeFlag=(task.completeFlag||"false");if(item.completeFlag!=="false"&&item.completeFlag!=="true"){item.completeFlag="false";}if(item.title===""){rtn=utils.exception("Missing Title");}else{storage(elm,'add',utils.setProps(item,props));}returnrtn;}
Testing the Updated TPS web API
With these changes in place, we can use the curl command-line app to validate our changes. A command to create a record with the tag value set to "test" looks like this:
curl -X POST -H "content-type:application/json" -d
  '{"title":"Run remote client tests","tags":"test"}'
  http://localhost:8181/task/
and creates a new task record that looks like this:
{"id":"1sog9t9g1ob","title":"Run server-side tests","tags":"test","completeFlag":"false","assignedUser":"","dateCreated":"2016-01-28T07:16:53.044Z","dateUpdated":"2016-01-28T07:16:53.044Z"}
Assuming several new records were created, executing the filter query would look like this:
curl http://localhost:8181/task/?tags=test
and would return one or more task records with the tag value that contains "test":
{"task":[{"id":"1m80s2qgsv5","title":"Run client-side tests","tags":"test client","completeFlag":"false","assignedUser":"","dateCreated":"2016-01-28T07:14:07.775Z","dateUpdated":"2016-01-28T07:14:07.775Z"},{"id":"1sog9t9g1ob","title":"Run server-side tests","tags":"test","completeFlag":"false","assignedUser":"","dateCreated":"2016-01-28T07:16:53.044Z","dateUpdated":"2016-01-28T07:16:53.044Z"},{"id":"242hnkcko0f","title":"Run remote client tests","tags":"test remote","completeFlag":"false","assignedUser":"","dateCreated":"2016-01-28T07:19:47.916Z","dateUpdated":"2016-01-28T07:19:47.916Z"}]}
With the TPS web API updated and validated, we next need to see how the JSON API client handles the change in production.
Note
For completeness, we should also update the TPS web API documentation. We’ll skip that step right now, though.
Testing the JSON API client
The easiest way to test the JSON API client’s support for the new tag field and filter option is to simply run the existing client and check the results. Figure 2-6 shows a screenshot from the JSON API client making a request to the new TPS web API server.
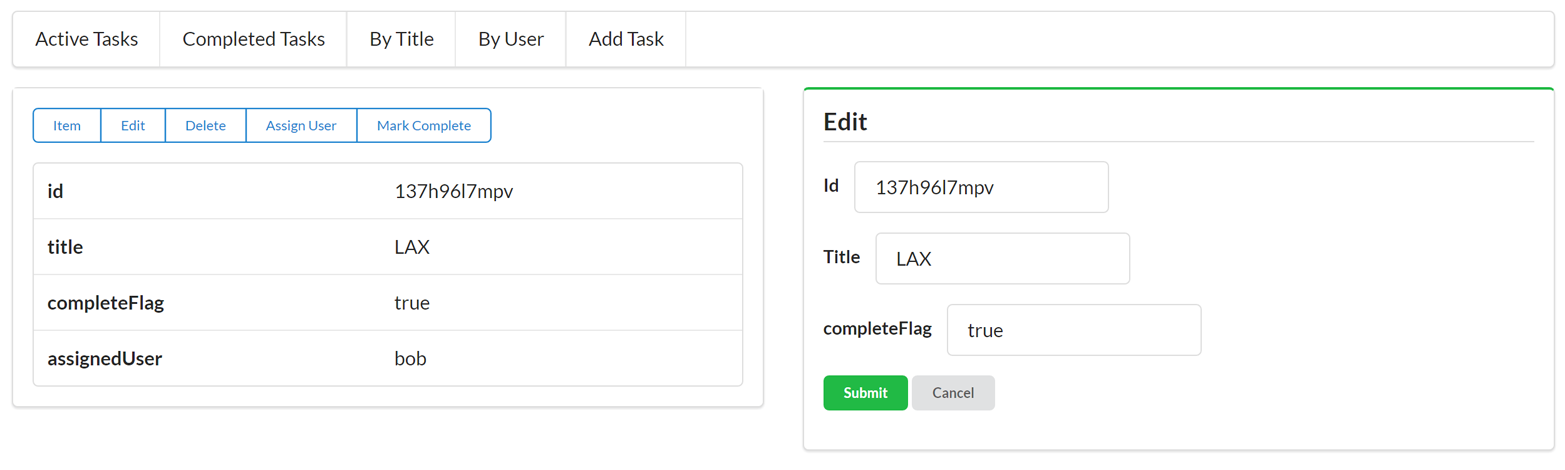
Figure 2-6. JSON API client without tag support
As you can see from the screenshot, even though the new task records appear in the client, the tag field is missing from the display as well as the new filter option. The good news is our JSON client didn’t crash when the new feature was added. The bad news is our client simply ignored the new functionality.
Tip
The source code for the updated (v2) TPS JSON Web Client can be found in the associated GitHub repo. A running version of the service can be found online.
The only way our JSON client will be able to take advantage of this new option is to recode and redeploy a new version of the app into production.
Coding a New Client
To get the JSON API client to reflect the new tag support, we need to update the client’s object and action data. The client needs to know about the tag feature before it can use it. Because our JSON client was designed to keep the object and action data separate from the rest of the library, adding the new feature is relatively easy.
First, we need to update the client’s object properties (![]() ):
):
// task fieldsg.fields.task=["id","title","tags","completeFlag","assignedUser"];
Next, we need to add the new filter option to the list of the client’s task.actions:
byTags:{target:"list",func:jsonForm,href:"/task",prompt:"By Tag",method:"GET",args:{tags:{value:"",prompt:"Tags",required:true}}}
and update the addTask and updateTask action definitions (![]() and
and ![]() ):
):
add:{target:"list",func:jsonForm,href:"/task/",prompt:"Add Task",method:"POST",args:{title:{value:"",prompt:"Title",required:true},tags:{value:"",prompt:"Tags"},completeFlag:{value:"",prompt:"completeFlag"}}},edit:{target:"single",func:jsonForm,href:"/task/{id}",prompt:"Edit",method:"PUT",args:{id:{value:"{id}",prompt:"Id",readOnly:true},title:{value:"{title}",prompt:"Title",required:true},tags:{value:"{tags}",prompt:"Tags"},completeFlag:{value:"{completeFlag}",prompt:"completeFlag"}}}
With these changes in place, we can now see that the JSON client supports the new tag features of the TPS web API, as shown in Figure 2-7.
You may have noticed that the changes we made to the client app look similar to the changes we made in the server API. That’s not by accident. Typical JSON APIs require that the client app and the server-side code share the same Object/Address/Action profiles in order to keep in step with each other. That means every new feature on the service requires a new release for the client.
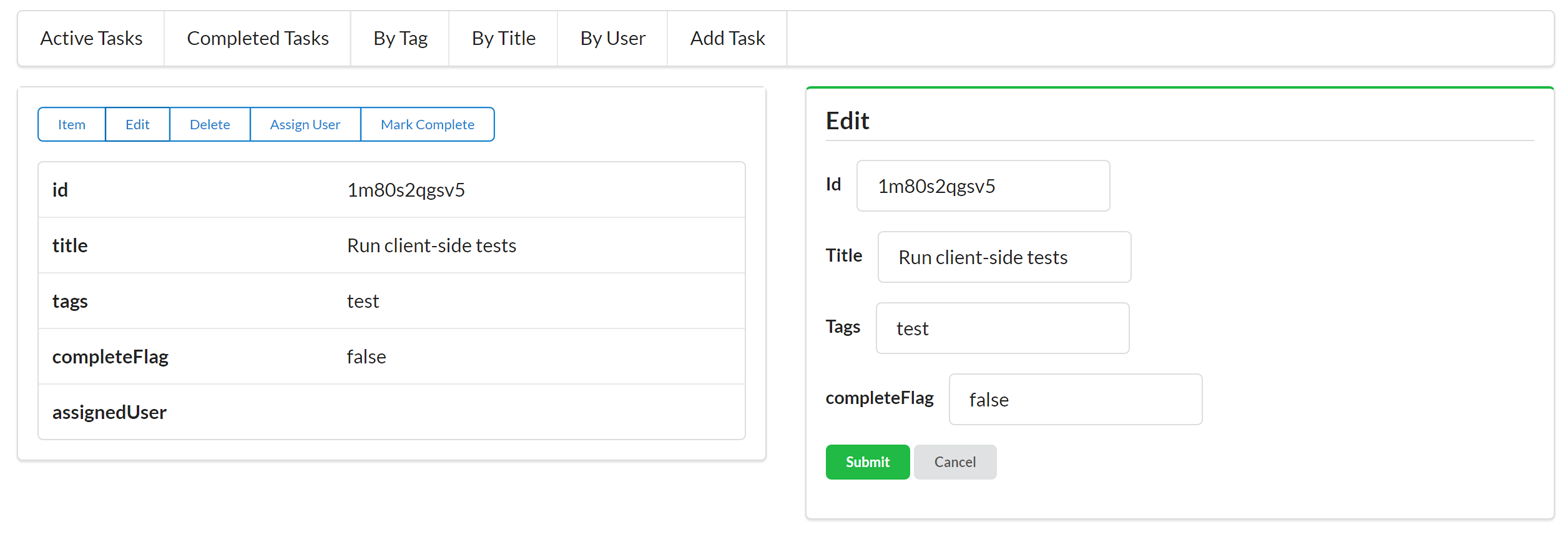
Figure 2-7. JSON client v2 supports tagging
The original JSON client app we created was able to keep offering the same functionality without an update because the TPS web API didn’t introduce breaking changes. If, for example, the service had changed the addTask and updateTask operations to make the tag field required when adding/editing Task objects, the original client app would no longer be able to save Tasks. Since the service made the tag field an optional input, the initial client app was still able to function; it just couldn’t take advantage of the new feature. Essentially, when API services change, the best client apps can hope for is that services will not make breaking changes to the API (e.g., removing fields/functions, changing existing functions, or adding new required fields, etc.).
However, there are ways to design service APIs that allow clients to adapt to changing responses—even have the ability to expose new features (like the tag field and filter) without the need for recoding the client. We’ll explore that in future chapters.
Summary
In this chapter we reviewed the key aspects of JSON API clients—namely, the need to:
-
Handle key Objects in the service model
-
Construct and manage service Addresses or URLs
-
Know all the ACTIONS metadata, such as parameters, HTTP methods, and input rules
We then did a walk-through of our sample JSON client and saw how it handled the OAA Challenge. We also noted that the client app was written using a simple loop pattern that made a request, parsed the response, and (based on context information) rendered information to the screen for a human to deal with. The fully functional SPA client requires just over 500 lines of JavaScript—even with all the low-level HTTP routines.
JSON Clients and the OAA Challenge
It turns out clients that receive only plain JSON responses don’t do well on our OAA Challenge. These clients either break or ignore changes to any of the three elements. They need to be recoded and redeployed any time an Object, Address, or ACTION is added, removed, or changed.
Finally, we introduced a new feature on the TPS web API service and saw that our JSON client ignored the new feature. Luckily, the service was updated in a backward-compatible way and our client didn’t crash or lose functionality. But we had to recode and redeploy the client in order to take advantage of the new tag feature.
References
-
You can learn more about Twitter’s API by reviewing the online documentation.
-
There is a nice ECMAScript compatibility chart hosted on GitHub.