
Chapter 6. Siren Clients
“First you will come to the Sirens who enchant all who come near them.”
The Odyssey, Circe
It’s time to move along in our quest for a hypermedia type that handles the three aspects of API client applications: Objects, Addresses, and Actions. We learned in Chapter 2, JSON Clients that developers relying on plain JSON responses need to hardcode details for all three aspects. That means changing just one of these aspects on the server can cause problems for client apps (the best case being the client ignores the changes). This is when developers, in an effort to at least identify changes in the API, resort to “versioning” tactics. Of course, adding a version to the API doesn’t help the client adapt to the changes; it just protects the client from ever seeing them.
Note
We’ll take an in-depth look at dealing with change over time and the technique of versioning in Chapter 7, Versioning and the Web.
In Chapter 4, HAL Clients we explored a media type that does a good job handling the
Addresses aspect of the OAA Challenge. Since HAL is designed to include link objects in responses, client apps receive not only the URL but also lots of metadata about the URL including link identifiers, names, titles, and other important information. This means changes to the URL values themselves (e.g., moving the service to a new server, changing the folder hierarchy or a particular resource name, etc.) can be done safely and quietly without bothering clients with versioning information. In fact, as long as the new URLs don’t introduce unknown variables (like a new variable in a URI Template), HAL clients can successfully adapt to the backend URL changes without the need for any additional code/test/deploy cycles.
But HAL doesn’t do well with the other two aspects of the OAA Challenge: Objects and Actions. So, in this chapter we’ll explore another hypermedia format design—the Structured Interface for Representing Entities, aka Siren. And, as in previous chapters, we’ll go beyond a review of the format. We’ll cover the code behind a server-side Siren representor. Then we’ll create a general-use Siren client. Finally, we’ll introduce changes to the backend API to see how Siren clients hold up when APIs change over time.
The Siren Format
Siren was registered with the IANA in November of 2012. Designed by Kevin Swiber, Siren focuses on providing rich metadata on the Actions element of web APIs. In an online discussion comparing different hypermedia formats, Swiber said:
The biggest differentiator of Siren is Actions. … Siren also has a concept of “class.” The class attribute may contain multiple descriptors of the current representation. I’ve avoided calling these “type descriptors.” They act more like “mixin descriptors.”
The preceding quote points out another valuable feature of Siren—the class concept. This maps rather well to the
Object aspect of our OAA Challenge. So, in theory, Siren has features for all three of our OAA elements.
Warning
It is important to point out that Siren’s class identifier is not the equivalent of the typical source code class keyword. For Siren, the class identifier is roughly the same as the HTML class attribute. This is actually a broader use of the term than the code-centric use, which makes it possible to use Siren’s class identifiers as both an
Object type and as a more general way to “tag” entities as belonging to a category.
The Siren design (illustrated in Figure 6-1) also has Links (the
Address aspect of our OAA Challenge) and they look very similar to HAL’s _links. There is the concept of Properties for name–value pairs, and Entities that can be nested collections of JSON objects (called SubEntities), which may also have Class, Links, and Properties elements. And the nesting can continue—it’s Entities all the way down.

Figure 6-1. The Siren design model
Here’s a simple Siren message that we’ll dive into in the next section of this chapter:
{"class":["order"],"properties":{"orderNumber":42,"itemCount":3,"status":"pending"},"entities":[{"class":["items","collection"],"rel":["http://x.io/rels/order-items"],"href":"http://api.x.io/orders/42/items"},{"class":["info","customer"],"rel":["http://x.io/rels/customer"],"properties":{"customerId":"pj123","name":"Peter Joseph"},"links":[{"rel":["self"],"href":"http://api.x.io/customers/pj123"}]}],"actions":[{"name":"add-item","title":"Add Item","method":"POST","href":"http://api.x.io/orders/42/items","type":"application/x-www-form-urlencoded","fields":[{"name":"orderNumber","type":"hidden","value":"42"},{"name":"productCode","type":"text"},{"name":"quantity","type":"number"}]}],"links":[{"rel":["self"],"href":"http://api.x.io/orders/42"},{"rel":["previous"],"href":"http://api.x.io/orders/41"},{"rel":["next"],"href":"http://api.x.io/orders/43"}]}
Tip
I won’t dig too deep into the Siren media type design here. You can get a much better picture of Siren and the tooling that has grown up around it by reading the Siren docs mentioned in “References”.
The Siren message design is slightly more involved than the HAL model and that makes it both more powerful and a bit more of a challenge to understand and put into practice. But the added effort can really pay off.
Let’s review the key design elements a bit more.
Entities
Each Siren response is an addressable entity resource. In Siren terms, the response is a “root” Entity. Entities usually have one or more Links and several Properties. They may have one or more Action elements and possibly some nested entities (called SubEntities). Finally, an Entity may have one or more associated Class elements.
Here is what the basic structure of a Siren Entity looks like:
{"class":[...],"properties":{...}."entities":[...],"actions":[...],"links":[...]}
The Entity is the thing that gets returned when an API call is made to a valid URL.
Class
Siren’s Class element is used to identify the kind of entity. The Siren docs are careful to say the class array is not a type descriptor (e.g., source code class) and emphasizes that it is used to “describe the nature of the entity.” Since it is an array, it is common for the class element to contain a list of descriptors. For example, this is how a Siren class element can be used to indicate that the current entity is representing both a customer and a person:
"class":["person","customer"]
The consuming client application can use this information to decide when and where to render the entity. It is also important to point out the Siren docs say the valid values of the class element are “implementation-dependent and should be documented.” In other words, the client should know ahead of time what class values will appear in responses. This will come up when we work on our Siren client implementation later in the chapter.
Note
The Siren documentation makes it a point to explain that the class property identifies “the nature of the element” and the rel property defines the “relationship between two resources.” Siren is the only hypermedia type covered in this book that makes a clear distinction between annotating
Addresses (with rel) and annotating
Objects (with class).
Properties
The Siren Properties object is a simple JSON set of name–value pairs. For example, here is a set of properties for a Siren Entity:
"properties":{"id":"8f06d3ef-4c67-4a2c-ae8e-1e7d23ab793f","hubId":"001788fffe10857f","ipAddress":"10.1.10.12","auth":"3dac9ce5182f73e727d2b0b11c280b13","colorValue":[255,255,255],"other":{"type":"huehub","name":"Hue Hub","state":"on"}}
Note that the value of a property may be an array or even another set of name–value pairs. Essentially, the properties element is a JSON graph.
Links
The Links array in a Siren document contains one or more link elements. A single link element has the following JSON properties:
"links":[{"class":["customer","person"],"href":"http://api.example.org/customers/q1w23e","rel":["item"],"title":"Moab","type":"application/vnd.siren+json"},...morelinkshere]
You’ll notice that looks very similar to the HAL _links collection (see “Links”).
Actions
The Siren Actions array contains a collection of valid operations for the associated entity. They look and behave much the same as HTML FORM elements. They indicate the operation’s internal name, HTTP method, associated href, type of content body to send, and possibly a set of field objects that describe the arguments for the operation.
Here’s an example Siren Action element:
"actions":[{"name":"add-item","title":"Add Item","method":"POST","href":"http://api.x.io/orders/42/items","type":"application/x-www-form-urlencoded","fields":[{"name":"orderNumber","type":"hidden","value":"42"},{"name":"productCode","type":"text"},{"name":"quantity","type":"number"}]}],
It’s worth pointing out that Siren has a very rich set of field objects. Basically, Siren’s field list matches the full set of HTML5 input types (currently up to 19 different input types). It also has name, title, value, and class properties.
Tip
Check out all the possible field types in the Siren online docs listed at the end of this chapter.
That completes the basic set of elements for Siren responses except one that we’ll turn to in the following section: the SubEntities collection.
SubEntities
Siren SubEntities are simply Siren Entity objects nested within a Siren representation. That means all the properties just listed (Class, Properties, Actions, and Links) are valid elements of SubEntities. All of these elements are optional for a SubEntity. However, there are two additional required properties: rel and href. Every SubEntity must have these two properties.
Warning
The name for the element that holds the SubEntities in a Siren response is "entities". That might be a bit confusing, but it makes sense. The response is an Entity and it can have an entities property that contains one or more “sub” entities.
Of course, Siren Entities can be nested infinitely within Siren Entities. That means something like the following is a valid Siren response:
{"class":["item"],"properties":{"name":"value"},"actions":[{"name":"search-box","method":"GET","href":"/search-results/","fields":[{"name":"search","value":"","title":"Search"}]}],"links":[{"rel":["self"],"href":"."}],"entities":[{"rel":["item"],"href":"/search-page1/","class":["item"],"properties":{"name":"value"},"actions":[{"name":"search-box","method":"GET","href":"/search-results/","fields":[{"name":"search","value":"","title":"Search"}]}],"links":[{"rel":["self"],"href":"."}],"entities":[{"rel":["item"],"href":"/search-page2/","class":["item"],"properties":{"name":"value"},"actions":[{"name":"search-box","method":"GET","href":"/search-results/","fields":[{"name":"search","value":"","title":"Search"}]}],"links":[{"rel":["self"],"href":"."}]}]}]}
Quick Summary
So, a Siren message has four basic elements:
-
class -
properties -
actions -
links
There is a fifth element: entities that can also contain all the first four elements. Siren has a recursive design that allows for expressing very intricate object trees with a concise set of elements.
Armed with our basic understanding of the Siren hypermedia type, it’s time to implement our Siren representor for the TPS web API.
The Siren Representor
Again, we’ll get a chance to create a new representor for our TPS web API—the one that converts the internal WeSTL document that represents the collection of valid actions and data for a request into a Siren document to be shared with the outside world. And, just like our Siren review, the Siren representor will handle the five elements of a Siren document:
-
class -
properties -
actions -
links -
entities
Tip
The source code for the Siren representor can be found in the associated GitHub repo. A running version of the Siren-generating TPS API described in this chapter can be found online.
The Top-Level Loop
The top-level loop for the Siren representor creates a valid Siren JSON object and then walks through the WeSTL document to produce a valid Siren document for output via the HTTP server. Here’s the routine followed by some comments:
// emit valid siren bodyfunctionsiren(wstlObject,root){varsiren;siren={};for(varsegmentinwstlObject){if(!siren.class){siren.class=[];}siren.class.push(segment);if(wstlObject[segment].data){if(wstlObject[segment].data.length===1){siren=getProperties(siren,wstlObject[segment].data,o);}else{siren.entities=getSubEntities(wstlObject[segment],o);}}if(wstlObject[segment].actions){siren.actions=getActions(wstlObject[segment].actions,o);siren.links=getLinks(wstlObject[segment].actions,o);}}returnJSON.stringify(siren,null,2);}

We first create an empty Siren object.

Then insert the current WesTL object name as the Siren
class.
If there is only one data element, emit that object as a Siren
Propertiesobject.
Otherwise, emit the collection of data objects as
SubEntities.
Then if the WeSTL document has any action elements, emit the ones that require arguments as Siren
Actions.
And then emit any other actions as Siren
Links.
Finally, convert the JSON graph into a string for returning to the API caller.
Simple, but Effective
I took a few shortcuts in creating this representor. First, it never outputs both properties and entities in the same response. That’s technically valid, but simplifies support a bit. Also, this representor does not support nested entities collections. I left these out to keep the code simple for the book and to give you, the reader, a little project to work on.
Properties
The getProperties routine handles cases where the internal data collection has only one element. As I mentioned before, this is a simplification of the possible Siren representor and is perfectly valid.
The code looks like this:
// handle single entityfunctiongetProperties(siren,data,segment){varprops,properties;props=data[0];properties={};for(varpinprops){properties[p]=props[p];}siren.class=[segment]siren.properties=properties;returnsiren;}
The highlights are:
Create an empty
propertyobject.Fill it with the internal data object’s name–value pairs.
Set the
classvalue for this collection.After updating the
sirenobject, return it to the caller.
Again, more could be done here, but this generates valid Siren content for our API.
Entities
The getSubEntities routine in our Siren representor handles cases where the internal WeSTL document holds more than one data object for the current representation response. This is a pattern that uses Siren’s entities element to return a list of objects while we use Siren’s properties element to return a single object.
Here’s what the code looks like:
// handle collection of subentitiesfunctiongetSubEntities(wstlObject,segment){varitems,item,i,x,data,actions;data=wstlObject.data;actions=wstlObject.actions;items=[];if(data){for(i=0,x=data.length;i<x;i++){item={};item.class=[segment];item.href="#";item.rel=[];item.type=g.atype;for(varpindata[i]){item[p]=data[i][p];}if(actions){link=getItemLink(actions);if(link){item.href=link.href.replace(/{key}/g,item.id);item.rel=link.rel;item.type=link.contentType||g.atype;}}items.push(item);}}returnitems;}
The important points in this routine are:
Loop through the collection of internal data objects.
Create an empty
itemelement for each Siren subentity.Fill that
itemwith the data object’s properties.Get the associated
ItemActiontransition.Update the
itemwith the transition details.Add that
itemto the list of subentities.Return the completed list to the caller for including in the Siren response.
We now have covered Siren’s class, properties, and entities elements. All we have left are the two hypermedia-centric elements: actions and links.
Actions
Siren’s Actions element is the one that carries all the information needed to perform an API action—such as add a record, update the existing record, remove a record, etc. In the HAL media type (see Chapter 4), all this information was left in the human-readable documentation and developers were responsible for encoding those details into the client app and figuring out how to associate the details with user clicks at runtime.
But Siren makes it the responsibility of the API service to share the appropriate
Action details at runtime via the Siren action collection in the response. This lightens the burden for client developers because they only need to recognize the action elements as they appear in responses. The Siren model allows clients to focus on the parsing and rendering steps for actions.
The representor code for handling
Actions in Siren responses is detailed, but not complicated. Essentially, the representor needs to figure out if there are any forms that are needed for the current response and, if there are, send them as valid Siren action elements.
Here’s the getActions function that does that:
// handle actionsfunctiongetActions(actions,segment){varcoll,form,action,input,i,x;coll=[];for(i=0,x=actions.length;i<x;i++){if(actions[i].inputs&&actions[i].inputs.length!==0){action=actions[i];form={};form.name=action.name;form.title=action.prompt||action.name;form.href=action.href||"#";if(action.type!=="safe"){form.type=action.contentType||g.ctype;form.method=utils.actionMethod(action.action)}else{form.method="GET";}form.fields=[];for(j=0,y=action.inputs.length;j<y;j++){input=action.inputs[j];field={};if(input.name){field.name=input.name;field.type=input.type||"text"field.value=input.value||"";field.title=input.prompt||input.name;field.class=[segment];form.fields.push(field);}}coll.push(form);}}returncoll;}
There is a good deal of activity in this routine. It’s the most involved one of the Siren representor because Siren’s support for the Action aspect of hypermedia is very rich. Here’s the breakdown:
Loop through the list of all the WeSTL document’s
actionelements for this resource responseIf the WeSTL
actionhas one or moreinputobjects associated, we’ll convert that to a Sirenaction.Start an empty
formobject.After some basic setup, determine the property HTTP
methodto use from the WeSTL metadata.Loop through the WeSTL
inputobjects for thisaction.Use the WeSTL
inputdata to populate a Sirenfieldelement.After loading up all the
fields, add the completedformto the Sirenactioncollection.
Finally, return the resulting
actioncollection to the caller to add to thesirenobject.
Tip
It’s worth noting that the code at ![]() is the first time we’ve actually populated an API response with an HTTP
is the first time we’ve actually populated an API response with an HTTP method value. The Siren hypermedia type happens to be the only media type we’re using in this book that allows service to indicate HTTP methods directly.
OK, just one more Siren element left: the Links collection.
Links
Like the _links element in the HAL hypermedia type, the Siren links collection carries all the immutable links (the unchangeable ones with no query arguments) associated with the current response. And, like HAL, Siren supports a number of metadata properties for each link such as rel, title, and others.
The code for the getLinks routine in our Siren representor is pretty simple and looks like this:
// handle linksfunctiongetLinks(actions,segment){varcoll,link,action,i,x;coll=[];for(i=0,x=actions.length;i<x;i++){if(actions[i].type==="safe"&&(actions[i].inputs===undefined||actions[i].inputs.length===0)){action=actions[i];link={};link.rel=action.rel;link.href=action.href||"#";link.class=[segment];link.title=action.prompt||"";link.type=action.contentType||g.atype;coll.push(link);}}returncoll;}
There is only one interesting line of code in the getLinks routine and that’s at ![]() —making sure the WeSTL
—making sure the WeSTL action object represents a “safe” operation (e.g., HTTP GET) and that there are no input objects associated with the action. The rest is pretty basic:
Loop through the available WeSTL
actionobjects.Make sure the WesTL
actionis both “safe” and has no associated arguments.Start an empty
linkelement and populate it with WeSTLactiondata.Add the resulting
linkto the Siren collection.Finally, return the completed collection to the caller to insert into the Siren response.
And that’s the high-level review of our Siren representor. There are a few support routines in the representor, but we don’t need to review them here. You can check out the source code for details.
Sample TPS Output from the Siren Representor
With the Siren representor up and running, the TPS web API now emits proper Siren representations. Here’s the output from the TPS server for the Home resource:
{"class":["home"],"properties":{"content":"<div class="ui segment"><h3>Welcome to TPS at BigCo!</h3><p><b>Select one of the links above.</b></p></div>"},"entities":[],"actions":[],"links":[{"rel":["self","home","collection"],"href":"http://rwcbook09.herokuapp.com/home/","class":["home"],"title":"Home","type":"application/vnd.siren+json"},{"rel":["task","collection"],"href":"http://rwcbook09.herokuapp.com/task/","class":["home"],"title":"Tasks","type":"application/vnd.siren+json"},{"rel":["user","collection"],"href":"http://rwcbook09.herokuapp.com/user/","class":["home"],"title":"Users","type":"application/vnd.siren+json"}]}
And here is the Siren output for a single Task object:
{"class":["task"],"properties":{"content":"<div class="ui segment">...</div>","id":"1l9fz7bhaho","title":"extension","tags":"forms testing","completeFlag":"false","assignedUser":"fred","dateCreated":"2016-02-01T01:08:15.205Z","dateUpdated":"2016-02-06T20:02:24.929Z"},"actions":[{"name":"taskFormEdit","title":"Edit Task","href":"http://rwcbook09.herokuapp.com/task/1l9fz7bhaho","type":"application/x-www-form-urlencoded","method":"PUT","fields":[{"name":"id","type":"text","value":"","title":"ID","class":["task"]},{"name":"title","type":"text","value":"","title":"Title","class":["task"]},{"name":"tags","type":"text","value":"","title":"Tags","class":["task"]},{"name":"completeFlag","type":"select","value":"false","title":"Complete","class":["task"]}]},{"name":"taskFormRemove","title":"Remove Task","href":"http://rwcbook09.herokuapp.com/task/1l9fz7bhaho","type":"application/x-www-form-urlencoded","method":"DELETE","fields":[{"name":"id","type":"text","value":"","title":"ID","class":["task"]}]},{"name":"taskCompletedForm","title":"Mark Completed","href":"http://rwcbook09.herokuapp.com/task/completed/1l9fz7bhaho","type":"application/x-www-form-urlencoded","method":"POST","fields":[{"name":"id","type":"text","value":"","title":"ID","class":["task"]}]},{"name":"taskAssignForm","title":"Assign User","href":"http://rwcbook09.herokuapp.com/task/assign/1l9fz7bhaho","type":"application/x-www-form-urlencoded","method":"POST","fields":[{"name":"id","type":"text","value":"","title":"ID","class":["task"]},{"name":"assignedUser","type":"select","value":"","title":"User Nickname","class":["task"]}]},{"name":"taskActiveForm","title":"Mark Active","href":"http://rwcbook09.herokuapp.com/task/active/1l9fz7bhaho","type":"application/x-www-form-urlencoded","method":"POST","fields":[{"name":"id","type":"text","value":"","title":"ID","class":["task"]}]}],"links":[{"rel":["home","collection"],"href":"http://rwcbook09.herokuapp.com/home/","class":["task"],"title":"Home"},{"rel":["self","task","collection"],"href":"http://rwcbook09.herokuapp.com/task/","class":["task"],"title":"Tasks"},{"rel":["user","collection"],"href":"http://rwcbook09.herokuapp.com/user/","class":["task"],"title":"Users"},{"rel":["item"],"href":"http://rwcbook09.herokuapp.com/task/1l9fz7bhaho","class":["task"],"title":"Detail"}]}
You can compare this output with that of the HAL representor (see Example 4-4 in Chapter 4) and recognize that a big difference is the existence of the actions section in the Siren response. As I mentioned at the start of this chapter, one of the key strengths of the Siren format is its ability to describe the available
Actions for the current API response. We’ll take advantage of this feature when we build the Siren SPA client next.
The Siren SPA Client
OK, just as we did in Chapter 2, JSON Clients, and Chapter 4, HAL Clients, let’s walk through the code for the Siren SPA client. We’ll hit the highlights of the tour including the HTML container, the top-level parse loop, and the key Siren elements (Class, Properties, SubEntities, Actions, and Links). We’ll also see how Siren can handle error displays—something we left out of the HAL client.
Tip
The source code for the HAL client can be found in the associated GitHub repo. A running version of the app can be found online.
The HTML Container
Again, like all the sample apps in this book, we’re using the single-page app (SPA) pattern to keep things simple and transparent. Here is the static HTML for our Siren SPA:
<!DOCTYPE html><html><head><title>Siren</title><linkhref="siren-client.css"rel="stylesheet"/></head><body><h1id="title"></h1><divid="links"></div><divid="error"></div><divid="content"></div><divid="properties"></div><divid="entities"></div><divid="actions"></div><div><preid="dump"></pre></div></body><scriptsrc="dom-help.js">//na</script><scriptsrc="siren-client.js">//na</script><script>window.onload=function(){varpg=siren();pg.init("/home/","TPS - Task Processing System");}</script></html>
This is our third SPA, so things should look very familiar. The Siren layout starts at ![]() and you can see DIVs to hold each of the major Siren elements (
and you can see DIVs to hold each of the major Siren elements (links, properties, entities, and actions) along with a couple other DIVs to help the SPA manage things like the title, errors, content, and the debug dump.
There is only one major script file to deal with (siren-client.js at ![]() ) and we kick off the client with a relative URL call to the
) and we kick off the client with a relative URL call to the /home/ resource of the TPS web API.
The Top-Level Parse Loop
The initial code for the siren-client.js library fires off the first HTTP request and then, when the response comes in, calls the top-level routine (parseSiren) to render the page for humans. Here’s the code:
// init library and startfunctioninit(url,title){global.title=title||"Siren Client";if(!url||url===''){alert('*** ERROR: MUST pass starting URL to the library');}else{global.url=url;req(global.url,"get");}}// primary loopfunctionparseSiren(){sirenClear();title();getContent();links();entities();properties();actions();dump();}
Not much to talk about here. You can see the parseSiren routine handles the incoming response (![]() ) and, after some local cleanup and state-handling, the Siren message is rendered (
) and, after some local cleanup and state-handling, the Siren message is rendered (![]() ,
, ![]() ,
, ![]() , and
, and ![]() ). Note that this top-level parser doesn’t show handling of the Siren
). Note that this top-level parser doesn’t show handling of the Siren class element—that’s taken care of within each of the other routines since the class element can appear in multiple places within the Siren response.
Links
Handling the link elements that appear in Siren responses is pretty simple. Just loop through them and render them as HTML anchor tags (<a>…</a>) with all the associated attributes:
// linksfunctionlinks(){varelm,coll;elm=domHelp.find("links");domHelp.clear(elm);if(global.msg.links){ul=domHelp.node("ul");ul.onclick=httpGet;coll=global.msg.links;for(varlinkofcoll){li=domHelp.node("li");a=domHelp.anchor({rel:link.rel.join(" "),href:link.href,text:link.title||link.href,className:link.class.join(" "),type:link.type||""});domHelp.push(a,li,ul);}domHelp.push(ul,elm);}}
The main points are:
Make sure we have links in the Siren response.
If we do, loop through the collection to create
<a>tagsAnd add the resulting collection to the HTML DOM.
Note (in ![]() ) that the
) that the <ul> gets registered to capture user clicks with the httpGet routine. This is a shortcut way to allow all child clicks to “bubble up” to the enclosing <ul> tag.
Figure 6-2 shows what the rendered links look like in the running client app.

Figure 6-2. Rendering links in the Siren SPA
Entities
As I mentioned earlier in this chapter, the TPS web API uses Siren’s entities element to hold a collection of similar TPS objects (Task and User). So, parsing the Siren document here means generating a list of objects to display. That code looks a bit interesting, too:
// entitiesfunctionentities(){varelm,coll,cls;varul,li,dl,dt,dd,a,p;elm=domHelp.find("entities");domHelp.clear(elm);if(global.msg.entities){ul=domHelp.node("ul");coll=global.msg.entities;for(varitemofcoll){cls=item.class[0];if(g.fields[cls]){li=domHelp.node("li");dl=domHelp.node("dl");dt=domHelp.node("dt");a=domHelp.anchor({href:item.href,rel:item.rel.join(" "),className:item.class.join(" "),text:item.title||item.href});a.onclick=httpGet;domHelp.push(a,dt,dl);dd=domHelp.node("dd");for(varpropinitem){if(global.fields[cls].indexOf(prop)!==-1){p=domHelp.data({className:"item "+item.class.join(" "),text:prop+" ",value:item[prop]+" "});domHelp.push(p,dd);}}domHelp.push(dd,dl,li,ul);}}domHelp.push(ul,elm);}}
And the tour is:
Make sure you have some entities to deal with.
If so, start looping through them.
Right away, capture the
classvalue for each rendered object (we’ll use this in).Generate an “Item” link for each rendered object.
Loop through the object properties and only render the ones this client “knows about” (see the following explanation).
Finally, after rendering each object and all its properties, add the results to the HTML DOM and exit.
The line of code at ![]() compares the properties returned from the server to the internal list of properties the client “knows” about (based on the human-readable documentation). This “knowledge” is captured in some initialization code at the start of the
compares the properties returned from the server to the internal list of properties the client “knows” about (based on the human-readable documentation). This “knowledge” is captured in some initialization code at the start of the siren-client.js file and looks like this:
global.fields={};global.fields.home=[];global.fields.task=["id","title","tags","completeFlag","assignedUser"];global.fields.user=["nick","password","name"];global.fields.error=["code","message","title","url"];
You can see that this client has been told to watch out for four possible objects (home, task, user, and error) and that three of those objects have fields worth showing on the screen to humans. These object values will appear in Siren responses as class values—that’s how our client knows what each object is about and how to render them (see Figure 6-3). Our TPS API uses simple, flat name–value pairs as class objects. If we had a more involved set of objects with arrays and additional nested elements, we’d need to teach our clients how to recognize all those elements, too.

Figure 6-3. Rendering objects in the Siren client
Properties
The client deals with Siren properties pretty much the same way it handles entities, but there is a twist. For the TPS API, Siren responses usually have a content property (this TPS-specific object property is described in the TPS documentation). And the content property gets special treatment. Here’s how the code does it:
// get response contentfunctiongetContent(){varelm,coll;if(global.msg.properties){coll=global.msg.properties;for(varpropincoll){if(prop==="content"){elm=domHelp.find("content");elm.innerHTML=coll[prop];break;}}}}
Basically, the getContent routine loops through all the properties in the response and if there is one named content, the value of that property is rendered in the user’s content area of the HTML page (see Figure 6-4).
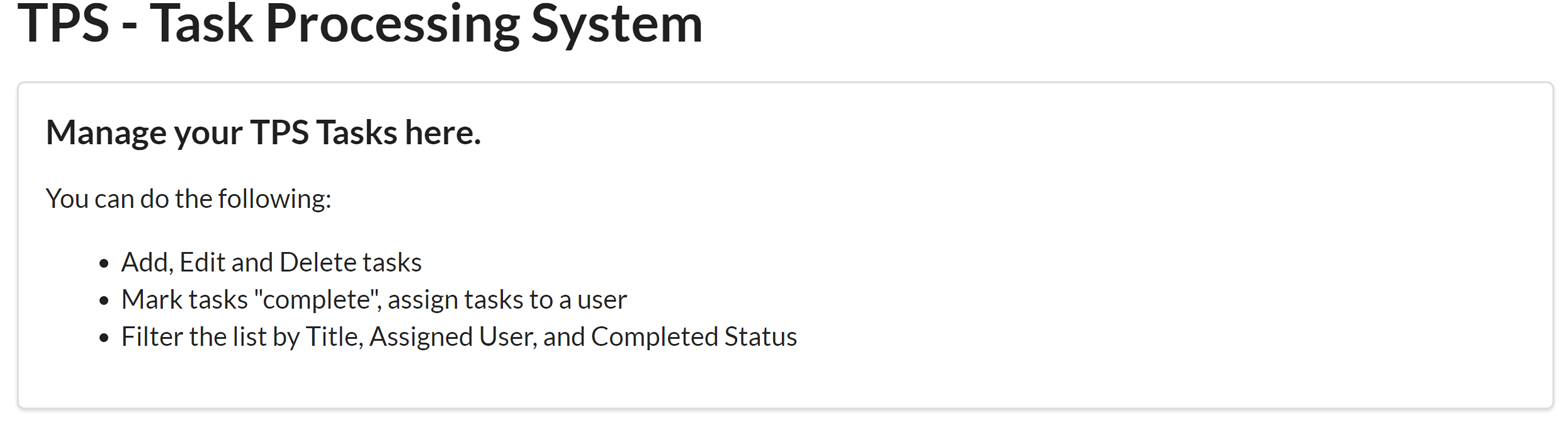
Figure 6-4. Rendering the content property
With this special property taken care of, our Siren client can go on working with the Siren properties element (see the following code). You’ll notice another bit of special handling going on this this routine, too:
// propertiesfunctionproperties(){varelm,coll,cls;vartable,a,tr_data;elm=domHelp.find("properties");domHelp.clear(elm);if(global.msg.class){cls=g.msg.class[0];}if(global.msg.properties){table=domHelp.node("table");table.className="ui table";if(cls==="error"){a=domHelp.anchor({href:g.url,rel:"error",className:"error",text:"Reload"});a.onclick=httpGet;domHelp.push(a,elm);}coll=g.msg.properties;for(varpropincoll){if(global.fields[cls].indexOf(prop)!==-1){tr_data=domHelp.data_row({className:"item "+global.msg.class.join(" ")||"",text:prop+" ",value:coll[prop]+" "});domHelp.push(tr_data,table);}}if(table.hasChildNodes()){domHelp.push(table,elm);}if(elm.hasChildNodes()){elm.style.display="block";}else{elm.style.display="none";}}}
Capture any
classelement associated with thepropertiescollection.If it turns out the
classvalue is set to"error", emit a Reload link for the user.Now loop through all the name–value pairs and render them on screen as long as the object is one we “know” about.
Finally, after all the properties are processed, add the results to the HTML DOM for display.
You may recall from some discussion early in the chapter (see Simple, but Effective) that the TPS web API emits single item responses (e.g., a request for a single Task or User) via the Siren properties element and emits lists of items using the Siren entities element. One of the reasons for this is that it is a pattern that makes handling error responses relatively easy. Here is what one of those error responses looks like in Siren:
{"class":["error"],"properties":{"code":404,"message":"File Not Found","url":"http://rwcbook09.herokuapp.com/task/pc-load-letter"}}
Figure 6-5 shows how that would look in the Siren client.

Figure 6-5. Rendering an error in the Siren client
That leaves one more major Siren element to work out: the actions element.
Actions
The code that parses Siren’s action element is the one with the most moving parts. This one not only handles the form rendering but also populates the values in the form if they are available:
// actionsfunctionactions(){varelm,coll;varsegment,frm,header,field,submit;elm=d.find("actions");d.clear(elm);if(g.msg.actions){coll=g.msg.actions;for(varactofcoll){segment=d.node("div");segment.className="ui green segment";frm=d.node("form");frm.className="ui form";frm.id=act.name;frm.setAttribute("smethod",act.method);frm.method=act.method;frm.action=act.href;frm.onsubmit=httpForm;header=d.node("div");header.className="ui dividing header";header.innerHTML=act.title;d.push(header,frm);for(varfldofact.fields){field=d.node("p");field.className="inline field";input=d.input({"prompt":fld.title||fld.name,"name":fld.name,"className":fld.class.join(" "),"value":g.msg.properties[fld.name]||fld.value,"type":fld.type||"text","required":fld.required||false,"readOnly":fld.readOnly||false,"pattern":fld.pattern||""});d.push(input,field);d.push(field,frm);}submit=d.node("input");submit.className="ui positive mini submit button";submit.type="submit";d.push(submit,frm);d.push(frm,segment);d.push(segment,elm);}}}
OK, one more walk-through:
Assuming you have discovered that there are
actionelements to deal with, start looping through them here.Stash the HTTP method in a custom attribute of the HTML
FORMelement (HTML ignores any value exceptGETandPOSTif you try to save it to the defaultFORM.methodproperty).Loop through the input arguments (fields) defined for this Siren
actionand be sure to include any object values, if they are available.Be sure to include a
"submit"button to each HTMLFORMyou render.Add the complete
FORMset to the collection.Push the results into the HTML DOM for rendering.
Figure 6-6 shows what a set of rendered forms looks like in the client.

Figure 6-6. Rendering user forms in the Siren client
There are a few other client-side routines to fill out all the Siren client’s functionality, but I won’t take up pages reviewing them. You can scan the source code if you’re interested in the details.
Quick Summary
So, building a Siren SPA was not too complicated. We had to parse and render the key Siren document elements into the HTML DOM.
They are:
Links-
Any static links that appear in the Siren
linksection are rendered as simple HTML<a>…</a>tags. Entities-
The TPS web API uses the Siren
entitiessection to hold a list of one or more domain objects. These are marked with the Sirenclassproperty and our client knows just which objects to expect ahead of time (home,task,user, anderror). Properties-
Siren’s
propertiesholds a set of name–value pairs associated with the response. The TPS API uses this to return any single objects in the response (e.g., a singleTaskorUser) as well as returning the pagecontentelement. Our client was taught to look for thecontentelement specifically—this is domain-specific information. Actions-
This is the Siren section that includes all the details handling parameterized reads and writes for the API. The Siren format has very rich support for describing forms and our client took advantage of that.
Now that we have a fully functional Siren client, it’s time to see how it deals with change over time.
Dealing with Change
From our experience building the Siren client, we know that we can safely add new Actions (forms) and Addresses (links) to the API responses and, as long as we make the changes backward-compatible, the client should have no problem handling them. So that’s what we’ll do. This time, we’ll update the interface to allow people to enter an email address for the user screen and filter the list of users based on email address.
Tip
The source code for this updated TPS API and Siren client can be found in the associated GitHub repo. A running version of the app described in this section can be found online.
You probably expect this to go quite easily, but there’s a hitch. Can you guess what it will be?
Adding the Email Field and Filter
So, we just need to update the WeSTL document on the server to add the email field to the userFormAdd and userFormEdit, as well as create a new WeSTL entry to describe the userFormListByEmail operation. Once that’s done, we can see how the Siren client deals with this change to the backend API.
Here are two updates to the WeSTL document that add the new email field to the User operations:
trans.push({name:"userFormAdd",type:"unsafe",action:"append",kind:"user",target:"list add hal siren",prompt:"Add User",inputs:[{name:"nick",prompt:"Nickname",required:true,pattern:"[a-zA-Z0-9]+"},{name:"email",prompt:"Email",value:"",type:"email"},{name:"name",prompt:"Full Name",value:"",required:true},{name:"password",prompt:"Password",value:"",required:true,pattern:"[a-zA-Z0-9!@#$%^&*-]+"}]});trans.push({name:"userFormEdit",type:"unsafe",action:"replace",kind:"user",prompt:"Edit User",target:"item edit form hal siren",inputs:[{name:"nick",prompt:"Nickname",value:"",readOnly:true},{name:"email",prompt:"Email",value:"",type:"email"},{name:"name",prompt:"Full Name",value:""}]});
Scanning the WeSTL document, you can see the new email field (![]() and
and ![]() ). Notice that there is a new property on the
). Notice that there is a new property on the input element: the type property. Siren automatically supports the expanded set of HTML5 input types (about 20 in all) and we can take advantage of this by setting the email field description to force the Siren client to validate the inputs for us.
The other thing we need to add to the WeSTL document is the new userFormListByEmail transition. Here it is:
trans.push({name:"userFormListByEmail",type:"safe",action:"read",kind:"task",target:"list query hal siren",prompt:"Search By Email",inputs:[{name:"email",prompt:"Email",value:""}]});
You might notice that, this time, I did not include the type:"email" property. This will allow us to search using only a partial email address—and that’s what we want to be able to do.
We’re almost done updating the API. We need just one more step—to modify the backend User component code to recognize (and validate) the new email field. For our simple service, that means we need to add the field name (see ![]() in the following code) to the list of valid fields to read/write:
in the following code) to the list of valid fields to read/write:
props=["id","nick","email","password","name","dateCreated","dateUpdated"];
And we need to update the component’s validation code (see ![]() ) to make sure we store and return the new
) to make sure we store and return the new email field:
item={}item.nick=(body.nick||"");item.name=(body.name||"");item.=(body.||"");item.password=(body.password||"");
With these changes in place, we can spin up the client and see how it handles the new field.
Testing the Email Field
First, if you make a direct call to the TPS Server, you can see that the new email field does appear in Siren’s actions section (see ![]() ):
):
{"class":["user"],..."actions":[{"name":"userFormAdd","title":"Add User","href":"http://localhost:8181/user/","type":"application/x-www-form-urlencoded","method":"POST","fields":[{"name":"nick","type":"text","value":"","title":"Nickname","class":["user"],"readOnly":false,"required":true,"pattern":"[a-zA-Z0-9]+"},{"name":"email","type":"email","value":"","title":"Email","class":["user"],"readOnly":false,"required":false},{"name":"name","type":"text","value":"","title":"Full Name","class":["user"],"readOnly":false,"required":true},{"name":"password","type":"text","value":"","title":"Password","class":["user"],"readOnly":false,"required":true,"pattern":"[a-zA-Z0-9!@#$%^&*-]+"}]}]}
Also, when you load up the UI, both the userFormListByEmail (see Figure 6-7) and userFormAdd (Figure 6-8) show the email field on screen. When filling out the Add User screen, you can even see the “validate user” functionality for the add operation.

Figure 6-7. Viewing the new email field on the Search by Email screen

Figure 6-8. Viewing the new email field on the Add User screen
However, once you save the email data, you discover that the Siren client is not displaying the email field in the UI (see Figure 6-9).
It turns out the Siren client successfully supports the email field for Add and Search operations because the TPS API service sends the complete description of Add and Search forms (e.g., the URL, method, and field details) with each response. However, the Siren format does not include metadata details for entities and properties elements. And that’s where the trouble starts.

Figure 6-9. Email field is missing on the Siren User dislplay
This “bug” in our Siren clients is due to a mismatch between client and server on the definition of the User object. Even though the server sends the same class value ("user") it has previously been sending, the server’s definition of User has changed (it has a new email field). However, the Siren client’s definition (the one in the client code) is no longer in sync with the TPS API (the client code does not have the email field). So the client just ignores the new field when it displays properties for a User.
This confusion is all because the Siren format is not designed to send Object metadata in responses, it is designed to only send metadata for Action and Address elements. So, for our Siren client apps, we still need to “bake” the object definition into the client source code.
Remember these lines in the client code review?
global.fields={};global.fields.home=[];global.fields.task=["id","title","tags","completeFlag","assignedUser"];global.fields.user=["nick","password","name"];global.fields.error=["code","message","title","url"];
This is the object description information the client will need for displays. That was an implementation decision I made when coding this Siren client. I hardcoded the field names into the app in order to make sure I only handled fields the client already knows about. I did this mostly for safety. I also did it because I wanted to be able to select which fields to not render even when they appear in the response (e.g., dateCreated and dateUpdated). Again, Siren doesn’t make it easy for servers to send these kind of rendering hints directly in the API response, so I added this “smarts” to the client code.
So, right now, my TPS API that emits Siren responses doesn’t have a way to send object and property metadata to client apps. To solve my problem, I’ll get beyond this design feature of Siren by creating a custom extension that allows the TPS API to send metadata about the User and Task objects, too.
The Profile Object Description (POD) Extension
Since Siren does not (by design) pass
Object metadata in responses, if we want to be able to make backward-compatible changes to the service objects, we need to figure out a way to pass this information to the client at runtime. The good news is that Siren already has the hooks for this in the baseline design. We can use the class value to point to a description of the API’s objects.
Sharing the object metadata in a standardized way means we can teach the Siren client to use the metadata shared at runtime instead of relying on the metadata stored in the client code. We need to convert the client’s internal knowledge about objects into external knowledge.
Tip
The source code for the Siren client that supports the POD extension can be found in the associated GitHub repo. A running version of the app described in this section can be found online.
The POD Specification
What we need at this point is a reliable way to share object information between client and server—a way that the client can use at runtime to adjust the display of entities and properties in Siren responses. For this book, I’ll outline a very simple solution. In a production app, you would likely need a more robust design. Even better, you might want to use one designed and reviewed by the Siren community.
Note
Siren’s creator, Kevin Swiber, uses a convention in many of his implementations that is quite similar to the POD spec I’m using here. Essentially, clients can look for (and dereference) a link that indicates there is available metadata for the response.
I’ll also take the time to expand the object metadata to include not just the object’s property name but also a suggested human-readable prompt and a flag on whether the field should be displayed or hidden.
The Siren Profile Object Display (POD) document
My POD document design has three elements:
-
The field identifier (e.g.,
nick) -
The
promptstring (e.g.,"Nickname") -
The
renderflag (e.g.,"text","embedded","link", or"none")
All of that is wrapped in a JSON element whose name can be matched to the Siren class value (which is the object name). The complete POD document for the TPS User object looks like this:
{"user":{"id":{"prompt":"ID","render":"none"},"nick":{"prompt":"Nickname","render":"text"},"email":{"prompt":"Email","render":"text"},"name":{"prompt":"Full Name","render":"text"},"password":{"prompt":"Password","render":"text"},"dateCreated":{"prompt":"Created","render":"none"},"dateUpdated":{"prompt":"Updated","render":"none"}}}
Tip
You can find the Profile Object Display (POD) specification in the associated GitHub repo and at this web page.
Now we need a way to retrieve it from the server.
Retrieving POD documents
To be able to retrieve the document, we’ll add a new link element with the rel value of "profile" and we’ll teach the Siren client to look for this link and use it to retrieve the POD for the currently loaded class. For example, if the Siren response contains the following profile link:
{"rel":["profile"],"href":"/files/user.pod","class":["user"]"type":"application/prs.profile-object-desc+json"}
then the Siren client will know it can attempt to retrieve an SOP document as follows:
GET /files/user.pod HTTP/1.1
accept: application/prs.profile-object-desc+json
...
If it exists, the server responds with a POD document like this:
HTTP/1.1 200 OK
content-type: application/prs.profile-object-desc+json
....
{
  ... POD document here
}
Tip
The prs in the media type string is part of the IANA registration standard for media types covered in RFC6838. It indicates a personal registration. As this book goes to press, I’ve applied for the registration but it has not yet been completed.
Once the document is loaded, it can be parsed and then the contents used to control the display of the objects in the Siren response.
Let’s see how a working version looks.
The Implementation
Adding support for the POD Siren extension takes a little bit of work on the server and a few modifications on the Siren client app. Similar to the way we implemented the HAL-FORMS extension (see “The HAL-FORMS Extension”), we are implementing a custom extension that doesn’t require changes to the Siren specification itself.
I just need to modify the low-level HTTP calls for the client app so that it “knows” about the new application/prs.profile-object-desc+json media type calls and integrates the object profile into the rest of the parse/render process.
Here’s the snippet that handles the profile responses (![]() ).
).
functionrsp(ajax){if(ajax.readyState===4){if(ajax.getResponseHeader("content-type").toLowerCase()===global.podType){global.profile=JSON.parse(ajax.responseText);parseSiren();}else{global.msg=JSON.parse(ajax.responseText);parseMsg();}}}
The new top-level code for the client follows. Now, after the initial load of the Siren response, we’ll check to see if there is a profile link (![]() ) and, after completing the profile call (or not, depending on the response) we go ahead and finish up the Siren parse and render work (at
) and, after completing the profile call (or not, depending on the response) we go ahead and finish up the Siren parse and render work (at ![]() ):
):
// primary loopfunctionparseMsg(){varprofile;sirenClear();title();dump();profile=getProfileLink();if(profile){req(profile.href,"get",null,null,global.podType);}else{parseSiren();}}// finish parsing the Siren responsefunctionparseSiren(){getContent();links();entities();properties();actions();}
Again, there are other minor changes to the client to make it match the class value to the profile object in memory and some updates to the service to make sure it returns Profile Object Display (POD) documents when requested. You can check out the source code for the Siren-POD client for a deeper look into this custom extension.
Displaying Objects in Siren Using POD
Now that I’ve updated my Siren client to optionally support the Profile Object Display (POD) extension, services can send along metadata for things like Task and User objects. That means, as the service modifies the object definitions (e.g., adding fields, changing the field prompt strings, etc.), my Siren client app will be able to find this information via a request for a POD document and no longer needs to have the object metadata stored with the client source code.
For example, the current TPS API exposes four objects that the Siren client needs to deal with:
-
Home
-
Task
-
User
-
Error
That means that the TPS API service can now serve up the following four POD documents:
-
home.pod -
task.pod -
user.pod -
error.pod
Now, when the TPS API service adds the email field to the user.pod document (see “The Siren Profile Object Display (POD) document”), the updated Siren client will be able to display it as expected (see Figure 6-10).

Figure 6-10. Email field now appears on the Siren User display
Notice that the new POD specification allows the TPS API server to provide updated field prompts ("Full Name" instead of "name"), too. Also, the POD specification could be expanded to support client-side input validators similar to those supported by HTML5 such as:
-
Data types (
"email","url","number", etc.) -
Existence (
"required") -
Regular expression matching (e.g., HTML5’s
patternproperty)
I’ll leave these handy additions to the POD spec and Siren client as a project for the reader to explore.
Quick Summary
In this section on extending Siren, we learned that even though Siren does a great job sending metadata about
Addresses and
Actions in responses, it doesn’t send much information about the
Objects (just identifiers in the class element). So we extended Siren by defining a Profile Object Display (POD) document and establishing a private convention in the Siren client that asks servers to send a representation of the
Object definitions (via the “profile” URL) and uses that external data as a guide in dealing with the identified objects that appear in Siren responses.
This is a handy extension but, like all custom extensions and private conventions, it is not a solution I can expect all Siren services and clients to know about or support. It has a limited reach since it is just something I made up to solve my local problem.
Summary
OK, let’s summarize what we learned about Siren and creating Siren clients:
- Changing Addresses is Safe
-
Siren does a great job supporting the Addresses aspect of our OAA Challenge. Changing the URL values of any of the operations at runtime will not cause problems for Siren clients. The only URL that needs to stay constant is the initial starting URL, which is the one used to launch the app.
- Changing Actions is Safe
-
We also learned that Siren has excellent support for describing Actions for an API. Adding and changing Siren
Actionelements (like arguments or even entirely new operations) will not break the Siren client as long as they are done in a backward-compatible way. - Changing Objects is Not Supported
-
Siren does a good job of including object identifiers in responses (the
classelement) but does not (by design) support object metadata. For this reason, when a service changes an object (e.g., adds fields), the Siren client may not discover that at runtime unless it has been specifically coded to emit all unknown objects and properties (not always a safe approach). If the client is coded to only parse objects and properties it already knows about, any new fields in a response will be ignored until the client app is recoded and redeployed. We were able to create a custom extension for Siren to get around this (the POD extension), but that is a private convention, not a Siren standard shared by all Siren clients and services.
Siren and the OAA Challenge
In our review of hypermedia types that make it possible for API clients to adapt at runtime, Siren does rather well. It clearly supports the
Address aspect with its links collection. And the actions collection handles our
Actions exactly. But Siren’s class element, which supports the
Object aspect, falls a bit short of our goal. Our Siren client was not be able to handle a new
Object added to the backend API because, as the Siren documentation points out, “Possible values are implementation-dependent and should be documented.” Our Siren extension to support the POD document helped us get over the hurdle, but that is a custom extension that general Siren clients cannot be expected to support.
Siren definitely gets us much further along on the path to a standalone API client that can support all three aspects (Objects, Addresses, and Actions). But we’re not quite there yet. We have one more hypermedia standard to explore (Collection+JSON) to see how well it does in our OAA Challenge.
References
-
The IANA registration for Siren is available online.
-
The GitHub conversation “What’s different/better/worse than other JSON hypermedia media types?” from 2013 contains lots of interesting observations from some key hypermedia API players.
-
As I am writing this, the most recent official documentation for Siren is hosted at Kevin Swiber’s GitHub account.
-
The current set of the HTML5
inputelements are documenting in the HTML5 documentation.
Image Credits
-
Diogo Lucas: Figure 6-1