
Chapter 2. Structuring The Web Content with HTML
Now that you have your hosting company and your very first web page, it’s time to take a closer look at exactly what it is you uploaded.
The page you uploaded in Chapter 1 consisted of the markup shown in Example 2-1.
Example 2-1. Your first web page
<!DOCTYPE html><htmllang="en"><head><metacharset="utf-8"><title>Blip de Bit</title><metaname="description"content="Blip de Bit!"></head><body><h1>Hello, World!</h1><p>How do you like my new site, eh?</p></body></html>
In this chapter, I’m going to cover the very basic HTML elements in the page, as well as some others you’ll see used universally throughout the Web.
Basic Page Structure
Hypertext Markup Language, or HTML, is the language of the Web. It consists of elements—text components enclosed in angle brackets (<, >), each of which has its own meaning and default appearance. Browsers have the ability to read the markup elements, such as <head> or <p> and know exactly what to do with the contents. Some of the elements provide information; others provide structuring for the page contents.
In Example 2-1, the basic page structure is defined by four overall elements:
- The doctype declaration
- The html element
- The head element
- The body element
The doctype
The doctype element (<!DOCTYPE html>) tells the browser what type of markup is being used in the page. In Example 2-1, the markup is HTML5, the fifth version of the most common type of HTML. Other common doctype declarations are ones for HTML 4.01 transitional:
<!DOCTYPE HTML PUBLIC "-//W3C//DTD HTML 4.01 Transitional//EN"
   "http://www.w3.org/TR/html4/loose.dtd">
and XHTML 1.1:
<!DOCTYPE html PUBLIC "-//W3C//DTD XHTML Basic 1.1//EN"
    "http://www.w3.org/TR/xhtml-basic/xhtml-basic11.dtd">
The doctype is important because it gives the browser a heads-up about what to expect, and also how to treat the individual markup elements. Take the XHTML 1.1 doctype. XHTML, or Extensible Markup Language, is another variation of web page markup. The rules governing its use are much stricter and less forgiving of mistakes (which is one reason it’s not as popular as HTML). If you don’t adhere to the XHTML rules, the page just won’t display. On the other hand, HTML5, which we’re using in the book, is very forgiving of minor mistakes, as long as you use the correct spelling for the element tags.
Lowercase Versus Uppercase Elements
In Example 2-1, doctype is in all-caps, but the other HTML elements are lowercase. HTML5 works with both. However, the common usage is all lowercase elements. My use of all-caps for doctype is more of a habit than a recommendation.
The html Element
The first element after the doctype in Example 2-1 is the html element. It’s also known as the document’s root element. It’s not a required element, but, as we’ll soon see, it is very useful.
In the example, the html element consists of opening and closing tags:
<html lang="en">...</html>
The opening tag consists of the element’s name (and any attributes—more on these later), enclosed in angle brackets. The closing tag is also enclosed in angle brackets, but the element name is preceded by a forward slash (/). The closing tag isn’t mandatory in HTML5, as it is for other document types (e.g, XHTML). In HTML5, tools that process the HTML documents use cues, such as open tags for other elements, as indicators it should treat the element as closed. The closing cue for the html element’s closing is the end of the web page. If you do use the closing tag, it must be the last piece of content in the web page.
Use Closing Tags
It’s a good idea to use closing tags, if for no other reason than ensuring no errors that can impact the page’s visual display are introduced. It also helps to keep your markup visually organized.
The html element has content within the opening tag. This content is known as an attribute. HTML attributes provide additional information about the element, separate from its content. In Example 2-1, the html attribute is lang="en". It lets the browser know that English is the primary language used in the web document. Browsers are usually smart enough to figure this out, but it helps to be as precise as possible in the markup. The more information you provide, the less the browser has to guess (and possibly guess incorrectly).
HTML is a hierarchical language, which means that elements are contained within elements, and the overall document forms a tree-like structure of nested elements. The html element wraps all of the other web page elements, some of which also contain nested elements, and so on. The first html nested element is the head element.
The head Element and an Introduction to Empty Elements
The head element isn’t required, but I strongly recommend you include it, if for no other reason than to give your web page a title. The head element is used to organize the metadata for the web page. Metadata literally means data about data, and the metadata in the head element provides information about the web page.
The most common of the elements nested in the head element is the title. The title element provides a title for the web page. It may be the same as the web page’s article title, but it usually reflects the website name in some form. In Example 2-1, the title is Blip de Bit. If you open the website in a browser, the title displays in the tab at the top of the page. Figure 2-1 shows Firefox with two opened tabs: one to blipdebit.com, and one to another of my sites, burningbird.net.

Figure 2-1. Web page title elements on display
The second metadata element is meta. It’s a generic element for marking metadata that isn’t marked with a custom element. In the example, the meta element is used to provide two pieces of information:
- Charset—the character encoding used for the document
- A web page description, given with the name and content attributes
The character encoding for a web page document tells the browser what kind of encoding scheme is used for the special characters, like the copyright ©. When the browser encounters a character sequence, such as or ©, it knows to display a single space or the copyright character, respectively. The most common character encoding for the Web is UTF-8, as shown in Example 2-1.
The name and content attributes in the second meta element are used to designate name/value pairs permitted in HTML5. From the W3C HTML5 specification, the following are allowed:
application-name- When the name attribute is set to
application-name, the value of the content attribute must be a string representing the name of the web application that the page represents. author- When the name attribute is set to
author, the value of the content attribute must be a string that gives the name of one of the authors of the document. description- When the name attribute is set to
description, the value of the content attribute must be a string that describes the page. generator- When the name attribute is set to
generator, the value of the content attribute must be a string that identifies the software used to generate the document. keywords- When the name attribute is set to
keywords, the value of the content attribute must be a set of comma-separated strings, each of which is a keyword relevant to the document.
The example is providing a page description using the meta element.
Myths About Meta
A common myth about the meta element is that it can aid your search engine results. Search engines have progressed beyond the need of utilizing the meta element for useful information.
Notice that the meta elements don’t have any closing tags. They wouldn’t regardless of doctype used, because they’re known as void, or empty, elements. In other words, they are elements whose function comes in via their attributes, not their contents.
Another way empty elements can be displayed is as self-closing tags:
<metacharset="utf-8"/><metaname="description"content="Blip de Bit!"/>
The element tags have been modified with an ending backslash (/). The self-closing tag markup is required with XHTML, but not HTML5. You can use the self-closing markup in HTML5, but it isn’t required and is rarely used nowadays.
That’s the last of the elements included in the head element for Example 2-1. Later, we’ll see some other commonly occurring elements. For now, let’s finish off the rest of the page structure.
The body Element
The body element contains the web page contents. In Example 2-1, the contents consist of an h1 header element and a paragraph (p) element. The contents in the two elements are displayed in the page, but as was demonstrated in Figure 1-8 in Chapter 1, how the contents are displayed differs.
The HTML specification provides minimal display characteristics for the HTML elements. The different header elements, ranging from h1 all the way to h6, are bold by default, have a specific font type and size (decreasing in size from h1 to h6). More importantly, they have a semantic meaning. When search engines parse the page, they can recognize the text that forms the heading for a story or article. When screen readers interpret the page, they can determine which text should be spoken, first. You could use a paragraph as a header, and use CSS (discussed later) to style it to look the same as a header element, but then you’ll lose the semantic advantage of using the proper element.
The same applies to the paragraph (p) element. Like the header, it has a default styling. It inherits the default font type and size defined in the default browser stylesheet—the document that contains the styling instructions for the page contents. It’s also a block element, like the headers, which means that the elements expand to fit the width of the space containing it and begin a new line at the point where they’re inserted. In the following code block, two headers are divided by two paragraphs:
<h1>The Big Header</h1><p>The h1 header is equivalent to a chapter title, while the headers (h2 through h6) progressively nested subtitles and section headers.</p><h2>The Sub-Heading</h2><p>Notice how each if you have two elements, one following the other, how you end one element, first...</p><p>...before starting another</p>
Figure 2-2 shows the page contents, as loaded in Chrome and using the default Chrome stylesheet. Even though the h2 header starts on the same line as the paragraph preceding it, it begins a new line in the actual display. The same with the paragraph elements.

Figure 2-2. Two headers (h1 and h2) with three different paragraphs
Some elements can nest in other elements, as the >body and >head elements do in >html, and the >h1 and >p elements nest in the >body. But when the elements are nested in another, the entire element must be contained in the outer element, and that includes both the opening and closing tags if you use both. >
<body>
   <p>paragraph...</p>
</body>
If you use closing tags, the closing tag for the paragraph must occur before the closing tag for the body element.
You can do a lot with just headers and paragraphs in a web page, but you’re going to need more at some point. Some of the more commonly used HTML elements are introduced in the next section.
Commonly Occurring HTML Elements
There are a large number of HTML elements in addition to those we’ve covered, but there are a core set you’ll frequently encounter. We’ll take a look at these commonly occurring elements in this section. HTML5 introduced new categorization schemes, but most of us split the HTML elements into as block-level elements, or inline elements, which I’ll cover first.
Newer Semantic Elements
The HTML elements I cover in this chapter are all old friends who have been with us past editions of HTML. I cover newer, semantically rich elements introduced in HTML5 in Chapter 4.
Inline Elements
As you might expect with the name, inline elements are those are used within blocks of text, to modify or add additional information to sections of text within the block.
The most common inline element has to be the link, the a element. Without it, the Web wouldn’t be the Web. Links are what we use to connect web pages to other web pages. A web page link is a very simple thing. The information about the link is defined in attributes, while the text the link surrounds is displayed as the link text:
My publisher is <a href="http://oreilly.com">O'Reilly</a>.
By default, the text enclosed in the link element is underlined, and offset with a different color (typically blue by default). Clicking the link opens the web page defined in the href attribute.
Another very popular inline element is the img element, which allows us to embed an image in the web page. All browsers support PNG, GIF, or JPEG image files, while some support other types, such as SVG (scalar vector graphics). An example of an img element for a JPEG is the following:
<img src="http://yourdomain.com/yourimage.jpg"
  alt="Image showing..." />
The URL for the image is given in the src attribute. In the HTML, the image source file has already been uploaded to your site, and the location of the image is relative to your site’s primary content folder. If your main website pages are loaded into the subdirectory named public_html, and you create a new subdirectory named images in public_html, then the image URL would be http://yourdomain.com/images/image.jpg.
Avoid Hot Linking
You can link images in other websites, a technique known as hot linking, but doing so is frowned on, and many sites block others from directly linking their images.
The alt attribute is a brief description of what’s displayed in the image. It’s used to provide a textual description of the contents for people using screen readers or other assistive technologies. It’s not mandatory to provide the alt attribute, but it is strongly encouraged.
Also note that the img element is an empty element. All of the necessary information comes from the attributes. I used the end forward slash in the element, but you don’t have to include it as long as your document is HTML5.
Several inline elements provide textual semantics, as well as some default formatting. Among the most popular are the strong, b, em, i, and small elements. They’re wrapped around the text you want to highlight in some way.
This is a paragraph and I want to <em>emphasize this text</em>.
You do need the ending tag for these inline elements, as well as the other inline elements that are not empty.
The strong element is used to indicate serious or important material. By default, it’s portrayed in bold text. If you’re only interested in bold text, and aren’t interested in highlighting text because it’s essential or important, you can use the b element instead.
The em element is used to emphasize the text. It’s displayed as italic text, by default. If you just want to display text in italics, and aren’t interested in attaching semantic importance, use the i element, instead.
The small element is used to designate small print, such as copyrights, contact information, legalese, and so on. By default, it’s displayed in a smaller font than the other web page text.
Example 2-2 utilizes all of the inline elements we’ve covered by modifying our original HTML document and adding new content.
Example 2-2. Blip de Bit web page modified with new inline elements
<!doctype html><htmllang="en"><head><metacharset="utf-8"><title>Blip de Bit</title><metaname="description"content="Blip de Bit!"></head><body><h1>Hello, World!</h1><p>How do you like my new site, eh?</p><p>I want you to feel<em>welcome</em>when you visit my website. I don't<strong>ever</strong>want you to feel you came to the wrong place. There is no better place to<b>Blip de Bit</b>like<i>blipdebit.com</i>.</p><p><small>Blip de Bip is not a registered trademark name.</small></p></body></html>
Figure 2-3 shows the web page, loaded into Firefox.
Earlier I mentioned about closing tags and nested elements, and how the order of the tags should be maintained. This is even more crucial for inline elements. As an example, if you’re using both bold and italic markup at the same time, you need to ensure that the order of closing tags follows the order of the opening tags, or you could end up with an unexpected web page display.

Figure 2-3. Blip de Bit web page with inline elements loaded into Firefox
The following demonstrates how not to close inline elements:
<p>This is <b>a big <i>chunk</b> of text</i>.</p>
while a proper use of tags is demonstrated in the following:
<p>This is <b>a big <i>chunk</i> of text</b>.</p>
Returning to the inline elements, a very common element is an inline element that has characteristics of a block-level element: the br, or break, element. It inserts a new line into the web page, and that’s all it does:
Some text<br />Some other text
The web page would show the first part of the web contents on one line, the second part (after the br) on another line. It’s an empty element, and in HTML5 you can skip the last forward slash if you wish.
Another popular inline element is the span; I’ll cover it, as well as the ubiquitous div element, in the last section in this chapter.
Common Block-Level Elements
Block-level elements are ones that expand to fit the container width, and insert a line break, both before and after the element, in the page flow. Other than these two shared characteristics, most are significantly different from each other.
The paragraph (p) is the most common of the block-level elements, and you’ve seen it demonstrated in both Examples 2-2 and 2-3. Two other common elements frequently found in web pages are the ordered list (ol) and the unordered list (ul). They’re used for listing information, but they’re also used to create menus and drop-down option lists. The difference between the two is that the order of list items in an unordered list is irrelevant, while the order of the list items in an ordered list are very relevant.
Two lists in a body element are created in the following code to demonstrate how the list contents are displayed in a web page. Note that the list items in both lists are delimited by a third element, the aptly named list item (li). The list item can be text, or it can be other HTML elements, including new lists:
<body><ul><li>Apples</li><li>Oranges</li><li>Bananas</li><li>Berries:<ul><li>Strawberry</li><li>Blueberry</li></ul></li><li>Pineapples</li></ul><ol><li>First item</li><li>Second item</li><li>Sub-items:<ol><li>First sub-item</li><li>Second sub-item</li></ol></li><li>Fourth item</li></ol></body>
Figure 2-4 displays the result of this HTML in a Firefox browser. The ul list items are indicated with a closed circle in the outer list, and an open circle in the nested ul element. The symbol used with the list items changes for each level of nesting. The ol contents are annotated with a number representing their position within their parent container. The nested ol items numbering starts over from the beginning. The list items are indented in their parent element (whether body or li), by default.

Figure 2-4. Unordered and ordered lists and nested lists
Another popular block-level element is blockquote. You can use it to embed longer quotations in a web page:
<blockquote><p>Another popular block-level element is blockquote. You can use it to embed longer quotations in a web page, and include an optional citation for the quote.</p></blockquote>
The quoted text is embedded in a paragraph element, which is then nested in the blockquote element. By default, the blockquote contents are indented before being displayed, as shown in Figure 2-5, where the blockquote is embedded between two paragraphs and displayed in Chrome.
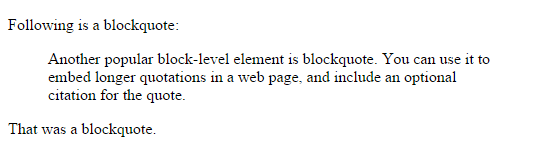
Figure 2-5. Blockquote demonstrated in Chrome
One element that used to be ubiquitous in web pages before CSS is the table. It was ubiquitous because it was a simple way to organize a web page’s structure. Now, its use is strictly for organization and presentation of data.
A simple HTML table consists of table rows (via the tr element), which contain the data in cells (enclosed in td elements), with column headers (managed with th elements). An example of a simple three-column, three-row table is shown in Example 2-3.
Example 2-3. A simple three-column, three-row HTML table
<table><tr><th>Column 1</th><th>Column 2</th><th>Column 3</th></tr><tr><td>4.56</td><td>98.12</td><td>100.66</td></tr><tr><td>35.77</td><td>98.01</td><td>3906.04</td></tr><tr><td>45.77</td><td>3.45</td><td>356.99</td></tr></table>
The default display for this table in IE is shown in Figure 2-6. Note that the th contents are in bold text, and that the data in the table is aligned by column and row.
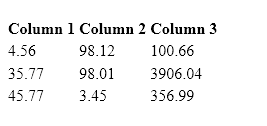
Figure 2-6. A basic three-column, three-row HTML table
The table has no outline. If you want to give it an outline, and don’t want to use CSS, you can do so by using the border attribute in the table element:
<table border="1">
The browser draws a border around the table, and around each table data cell and column header (as shown in Figure 2-7), after the example is modified with the addition of the border attribute and opened in Firefox.

Figure 2-7. HTML table with the addition of the border attribute
Other common block-level elements are form elements, which I’ll introduce in Chapter 4, and the div element, covered later in its own section. Before leaving the block-level elements, I did want to point out the use of whitespace (the new lines and indentation) in the HTML, and what it means to the page layout.
In the HTML table code, the data cells for two of the table rows are defined on one line, while in the third, the individual td elements are separated by new lines. In addition, indentation is used with the nested elements. None of this use of whitespace impacts on the display, because for the most part, whitespace outside of attribute values is treated the same in HTML: it’s all equivalent to a single space. If we use three consecutive tabs, they appear as a single space in the web page. If you separate two elements by several new lines, they also appear only as a single space.
The only reason we use the whitespace is that it makes the HTML more readable. Readable HTML is HTML we can more easily modify or correct. However, with so many content management systems (CMS) creating web pages automatically, the HTML for many web pages is compressed—sometimes completely, with most new lines and indentation stripped out.
It doesn’t matter to the browser if you use new lines and indentation. It does matter to people trying to edit the HTML.
The div and span Elements
Two elements used in most web pages are the div and the span element. Their only purpose is to group: either elements (div), or text (span). They provide a way to do something with the group without attaching any semantics to the grouping.
Many web pages use the div element to mark sections of the web page, such as the sidebar, main content, footers, etc. Before HTML5, the div element was the only way to mark off sections of the web page for a specific purpose. They provided a way to apply CSS styling (covered in Chapter 3) to a group of elements as a whole:
<div id="sidebar">
   <p>some content</p>
   <p>some other content</p>
</div>
The div element frequently has either the class or id attribute, in order to identify the element (or group of elements), for styling.
The same use of attributes and grouping applies to the span. The span element allows us to provide styling for a block of text without having to use semantic elements (e.g., strong or em). The span element also allows us to provide other, arbitrary styling (provide a background color, change font, etc.).
Without CSS, neither the span or div element would be that much use, so it’s time to leave our very quick introduction to HTML and spend some time with this capability.
Additional Reading
For a more detailed look at HTML, I recommend Creating a Website: The Missing Manual by Matthew MacDonald (O’Reilly). Mozilla also provides a nice introduction to learning HTML.