
Chapter 4. Going Beyond the Basics
Now that you’ve had a chance to work with some basic CSS and HTML, let’s get into some more advanced web page construction topics and design: using the new semantic HTML5 elements, working with web forms, incorporating multimedia, and utilizing pre-made design templates.
The New Accessible/Semantic HTML5 Elements
Chapter 2 introduced the div element, a versatile element that, until recently, has been the layout and grouping tool of choice in most web page designs. What the div element does not provide, however, is semantics. A web page filled with div elements is basically a web page filled with undifferentiated blocks of formatted text.
This changed with HTML5, and the introduction of new elements that not only give us the ability to design the page’s layout, but also add both semantics and accessibility for the page contents. I’ll introduce the elements, and then we’ll look at some examples.
The article, section, header, and footer Elements
The first element we’ll look at is article. It’s self-explanatory: an article is a completely contained piece of writing that can be extracted independent of the context. It’s equivalent to newspaper and magazine articles, weblog posts, or an entire how-to explanation. This chapter could be considered an article.
The next new element is the section. A section is inherently a component of an article. It’s a block of text subordinate to the overall content of its parent element, but with enough independence to exist as its own entity. If the article is a topic, the sections are subtopics. Each of the components of this chapter delimited by titled content are equivalent to a section.
In both the article and section, the heading for each (if one is needed) is defined by the appropriately named header element. If there’s any ancillary information, for a section or an article, it can be included in a footer element.
Let’s see how these elements hold together. In Example 4-1, a web page representing a typical weblog post is created using the new HTML5 semantic elements. The section elements are nested within the article, and a header element is used to group together the opening h2 and p elements for the article. One of the section elements has a footer, as does the article.
Example 4-1. Using the new HTML5 elements for a weblog post
<!doctype html><htmllang="en"><head><metacharset="utf-8"><title>Blip de Bit</title><metaname="description"content="Blip de Bit!"></head><body><h1>Welcome to my fantastic weblog</h1><article><header><h2>A Typical Weblog Post</h2><p>Author: Shelley Powers</p></header><p>Writing about stuff.</p><section><h3>Good stuff</h3><p>This is the good stuff. Kittens and unicorns.</p><footer><p>More about the good stuff...</p></footer></section><section><h3>Bad stuff</h3><p>And now the bad stuff. Daleks and Weeping Angels.</p></section><footer><p>Additional information about stuff in general.</p></footer></article></body></html>
As with all HTML5, none of the closing tags for the new elements are required, but I think they help keep the contents organized and make the document easier to read and modify.
Figure 4-1 shows the web page. As you can see, the new elements don’t have a default display different than the previously used div elements. Like the div element, they’re block-level elements, meaning their content expands to fit the width of the container element, and a new line is inserted in the web page just before their position.
The only purpose for the new elements is to add semantics to the web page markup, making it easier for search engines and other automated tools to correctly process the contents. If you want a unique display for each type of element, you’ll need to use CSS.
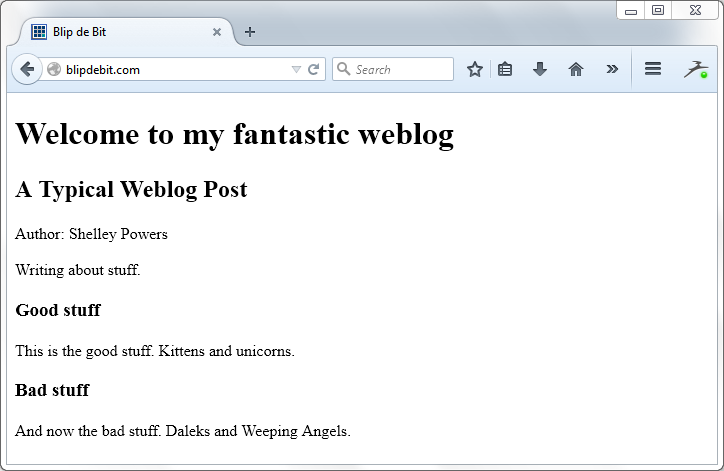
Figure 4-1. A web page using the new HTML5 article, section, header, and footer elements
The new elements also make the page more accessible. Screen readers need assistance in determining which content should be read, and in what order. We can use a specialized set of attributes and markup, known as the Accessible Rich Internet Applications (WAI-ARIA) to mark the HTML, but doing so adds an additional level of work. If we use the new HTML5 semantic elements, the necessary accessibility indicators are incorporated by default.
The nav, aside, and figure Elements
Three other new elements work with the ones just covered, to provide other semantically meaningful annotation of the web page content.
The new nav element is used to indicate navigation and is a natural for wrapping around navigational menus created using an unordered list (ul):
<nav><ul><li><ahref="/about.html">About Blip de Bit</a></li><li><ahref="/contact.html">Contact Blip de Bit</a></li><li><ahref="/shop.html">Shop for great stuff</a></li></ul></nav>
The nav element isn’t used with any set of links: it’s intended purpose is to wrap links used for the website’s internal navigation.
The aside element is an oddly named element primarily because the more appropriate name, sidebar, is already used in web page terminology. The aside is equivalent to the sidebar that we find in books—not the sidebar located in the side of web pages and containing links to recent stories, ads, etc. The aside element can be used for pull quotes, for digressions related to an article topic, yet not essential to the topic, or for any other use similar to how sidebars are used in other publications.
Use the aside as you would normally use a div element:
<p>Other material on topic.</p><aside><h2>Optional header if appropriate</h2><p>Whatever is the text of the aside.</p></aside><p>Continuing with topic material, as if the aside didn't happen.</p>
If you want the material in the aside to stand out in some way, you’ll need to modify the contents with CSS. A popular approach for pull quotes is to have the material float to the left or write and appear in larger font.
Figure 4-2 displays a web page with contents generated using a Lorem Ipsum generator. Lorem Ipsum is dummy text used in the print industry as filler when testing new type. It’s been used since the 1500s, and the web industry has gleefully adopted it as our own. The page also uses a nav element, for navigation, as well as article, header, footer, and section. Lastly, it makes use of the aside as a pull quote.

Figure 4-2. Web page demonstrating both nav and aside elements, styled with CSS
Example 4-2 contains the page HTML, except for the generated Lorem Ipsum, which would only make the example too messy to read. It does show all of the elements and the CSS to style them.
Example 4-2. Demonstrating aside and nav element, and CSS to style them
<!doctype html><htmllang="en"><head><metacharset="utf-8"><title>Blip de Bit</title><metaname="description"content="Blip de Bit!"><style>navulli{display:inline-block;padding-right:10px;}navullia{text-decoration:none;color:black;}navul{list-style-type:none;padding:10px;background-color:yellow;}article{margin:20px;}#first{float:left;width:300px;padding:10px;margin-right:10px;color:gray;border:1pxsolidblack;font-size:larger;}</style></head><body><nav><ul><li><ahref="/about.html">About Blip de Bit</a></li><li><ahref="/contact.html">Contact Blip de Bit</a></li><li><ahref="/shop.html">Shop for great stuff</a></li></ul></nav><h1>Welcome to my fantastic weblog!</h1><article><header><h2>A Typical Weblog Post</h2><p>Author: Shelley Powers</p></header><section><p>Lorem ipsum dolor...</p><asideid="first"><h2>Pay attention</h2><p>Vestibulum dictum gravida magna...</p></aside><p>Cras at dictum lectus...</p><p>Nullam dignissim ligula eu ...</p></section></article></body></html>
The figure element and its related figcaption provide a long-needed method of pairing captions with figures. The img element allows us to embed images in the web page, but not associate a caption directly with that image. The figure and figcaption elements work with img to correct this missing markup.
You still use the img element, as you always have, but now you wrap the img element within a figure element and provide an optional caption using figcaption:
<figure><imgsrc="someimage.jpg"alt="Description of image"/><figcaption>Caption for the image</figcaption></figure>
The caption is not the same as the alt text in the img element. The alt text is used to provide an alternative textual description of the image for assistive technologies, while the caption can be anything you wish.
Unstyled, the figcaption text is printed out beneath the image in plain text. You can use CSS to style it in italics, smaller print, or in whatever way you wish. The software I’m using for writing this book uses figure and figcaption as ways of attaching the captions to the images in all of the figures.
Adding Links to Video and Audio Files
HTML5 brought us two game-changing new elements: the audio and video elements. Not only do the new elements free us from having to use proprietary (and frequently problematical) technology, they’re also quite simple to use.
The audio and video elements are similar. Both take a src attribute for the primary (or possibly only video or audio file). Both also have a controls attribute, which determines whether a control panel is displayed or not. Both elements also support a child source element, if you’re providing videos or audio files in multiple formats. Not all browsers support all formats for both type of multimedia, and the way to ensure the farthest reach is providing multiple file formats.
An example of an audio element is:
<audiosrc="soundfile.mp3"controlspreload="auto"></audio>
The source file is an MP3 file, which should work in all the major browsers, except Opera. The control panel is displayed. The controls attribute doesn’t need to have a value assigned to—it’s very presence is all that’s necessary. The preload attribute is set to auto to buffer the file before playing. Other values for this attribute are none (for no buffering) and metadata (for pre-loading metadata only).
Other audio file formats supported are WAV and OGG. If you have a source file in one format, such as MP3, there are conversion tools to transform it into the other formats. If you want the audio file to work in all of the browsers, then you’ll need to use the source element and should provide (at minimum) the MP3 and the OGG formats:
<audiocontrols><sourcesrc="audiofile.mp3"type="audio/mpeg"/><sourcesrc="audiofile.ogg"type="audio/ogg"/>Your browser doesn't support the audio element</audio>
The source element gets the source file name in the src attribute, and the type of audio file in the type attribute. Providing both MP3 and OGG files ensures the audio file is now playable in all of the major browsers. For the rare instance when the browser/client doesn’t support either MP3 or OGG, the text contained in the audio element is displayed, as backup.
There are several audio element attributes, but the only other ones I want to cover in this introduction are the loop, muted, and autoplay attributes. Use the following setting if you want an audio file to play as soon as the page loads and the sound to continuously loop:
<audiocontrolsloopautoplay><sourcesrc="audiofile.mp3"type="audio/mpeg"/><sourcesrc="audiofile.ogg"type="audio/ogg"/>Your browser doesn't support the audio element</audio>
I’d go easy on this type of setting, though. Many people access web pages in an environment where sound blaring out suddenly, and continuously, could be a problem. Of course you could add in the muted attribute, which means the sound file will automatically play and loop, but you can’t hear it until you turn on the sound.
Each browser company provides a different control display. Figure 4-3 shows a montage of browsers (Opera, Chrome, IE, and Firefox) and their default audio controls.

Figure 4-3. Default audio control in IE, Opera, Chrome, and Firefox on Windows 7
The video element is very similar to the audio. Again, you can specify a default video file, or use the source element to provide alternatives. Use the controls attribute to display a control panel, preload to buffer the file, autoplay to automatically play on loading, loop to continuously loop, and muted to start it silently. Three other attributes of interest at this time are poster, width, and height. Since a video has a display, you can control the element’s width and height in the page. You can also provide a static image to display before the video is played:
<videocontrolswidth="640"height="480"poster="birdcageposter.jpg"><sourcesrc="birdcage.mp4"type="video/mp4"/><sourcesrc="birdcage.webm"type="video/webm"/></video>
You can set the source of the video using the src attribute, but just as with the audio element, not all browsers (and browser versions) support the same video type. You’ll typically use the source element.
Most browsers (and Opera, with a later version) support the MP4 video type. Chrome, Opera, and Firefox also support the OGG and WebM video types. In the example, both the MP4 and the WebM versions of the video are provided, covering all our bases. There are software and websites that provide free video type conversion if you only have video in one format.
Figure 4-4 shows a web page with a video element loaded into Internet Explorer. Note both the poster image that displays when the video is first loaded, as well as the controls.

Figure 4-4. Video element loaded into IE
The media elements support one other child element I wanted to briefly touch on: the track element. It can be used to provide foreign language versions of a media file, as well as subtitles and captioning for accessibility. The following video element uses several track elements to provide both foreign language subtitles and captioning:
<videocontrolswidth="640"height="480"poster="birdcageposter.jpg"><sourcesrc="birdcage.mp4"type="video/mp4"/><sourcesrc="birdcage.webm"type="video/webm"/><trackkind="subtitles"src="birdcage.fr.vtt"srclang="fr"lang="fr"label="Français"/><trackkind="captions"src="birdcage.en.hoh.vtt"srclang="en"label="English Captioning"></video>
More on Video and Audio
The Mozilla Developer Network provides a good overview of audio and video, including more detail on the media types. Sitepoint has an article exploring the track element, including its benefits for search engine optimization.
Using a Static Page Template
In Chapter 2 we created a fairly simple web page. It’s readable, and not too nasty. But it’s not really a web page you’re going to want to keep around forever.
You can take a shot at creating your own design, but it’s easier to start with an existing design and then modify it to suit your taste. Thankfully, there are several locations for freely available design templates. When you find one you like, you’ll download a ZIP file with HTML, CSS, and graphics, adding your own content into the HTML file(s).
As an example, one site that provides hundreds of thousands of free static page templates is the Open Design Community. You can browse through the designs or search for a design based on purpose, keyword, color, etc.
One of the more popular designs is HTML5 Streets. It’s a good design to use when learning how to use a template, as the HTML and CSS are clean and easy to read.
Once the template’s zipped file is downloaded and the contents are extracted, open up the template folder. You’ll find subdirectories labeled js, fonts, images, and css. In the css subdirectory is a file, style.css, containing the CSS for the design. When you get a chance, take a look at the style settings, because an excellent way to learn CSS or HTML is from example.
In the main directory are the template’s HTML files:
- contact.html
- index.html
- ourwork.html
- projects.html
- testimonials.html
They’re just a beginning set of HTML files. Links to each are included in the main index.html. You can change the files, the link text, or remove one or more of the files and links. If you open the index.html file in your favorite text editor, you’ll see the web page structure with content that you can replace with your own text.
Once you’re finished with changing the text, upload all the template files and subdirectories to your site, and see how it looks. Figure 4-5 shows the template uploaded to the blipdebit.com website, opened in Firefox.
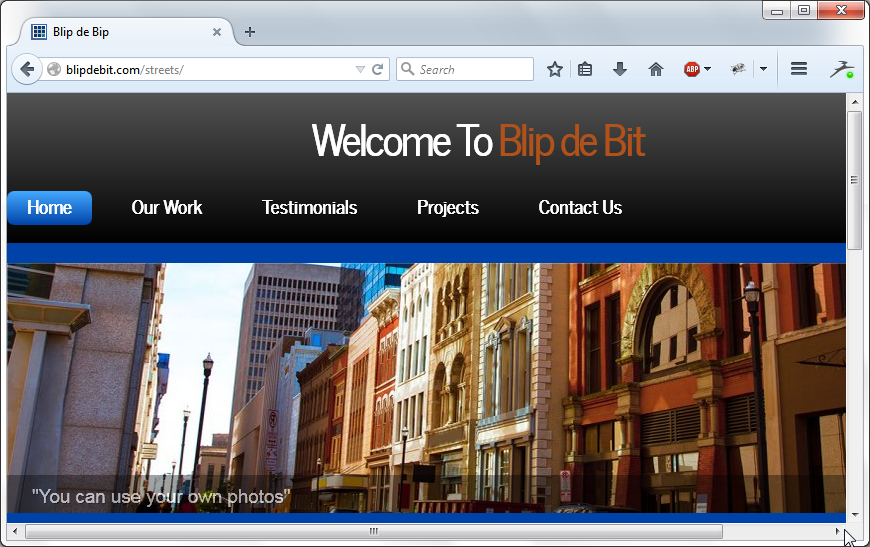
Figure 4-5. Using a static template to create a website
There are templates for any purpose and many different types of businesses. They’re a good way to jump-start your static website, eventually modifying it until it is uniquely your own.
Static Versus Dynamic Websites
I keep mentioning static websites, templates, and pages. Static web pages are ones hand edited with information that only changes when you manually change it. In Chapter 5, I’ll demonstrate how you can use software to create dynamic websites and pages.
Adding a Simple Mail-To Form
Most websites, even the simplest, provide a way for your people to contact you. You can embed your email address in the web page, but that’s opening you up for a significant increase in spam (junk) email.
A better approach is a contact or mail-to form. Thankfully, most shared hosting companies provide a simple one button solution for building a mail-to form. BlueHost calls their mail-to form Bluemail, and it starts in cPanel.
In the cPanel interface, you’ll find a set of options under the label Software/Services. Within these options is one labeled CGI Center. CGI stands for Common Gateway Interface; it is the oldest form of web technology and still in wide use. Clicking it opens a page that describes the BlueMail CGI application.
As the page notes when you open it, you must have at least some familiarity with web forms, which is what I’m going to provide in this section. BlueHost provides the backend processing of the mail-to form, but you’ll need to add the HTML form to your own web page. BlueHost provides a sample form already created, which we can copy and paste into our web page and modify as needed.
The sample code provided is:
<formaction="http://www.bluehost.com/bluemail"enctype="multipart/form-data"method="POST">Name:<inputtype="text"name="Name"><br>Email:<inputtype="text"name="mailfrom"><br>Street Address:<inputtype="text"name="StreetAddress"><br>City:<inputtype="text"name="City"><br>Zip:<inputtype="text"name="Zip"><br>Phone:<inputtype="text"name="Phone"><br><inputtype="hidden"name="sendtoemail"value="[email protected]"><br><inputtype="submit"value="Send Email"></form>
Let’s explore each of the elements in the sample form, in turn.
To start, all of the form component elements are enclosed in the outer form element. It has three attributes, which we need to leave as is for the BlueMail mail-to form to work. The first is the action attribute. This is the attribute that instructs the browser what to do when the web form is submitted. In this case, the form data is sent to the pre-built BlueMail CGI application. The second attribute is enctype. It specifies the encoding scheme used for the form, in this instance, multipart/form-data. This is the most commonly used encoding scheme, and is essential if one of the form elements is a file to be uploaded. The last attribute is the form method. It tells the browser whether the form is sent using a POST method or GET. Since you’re uploading data to the server, you’ll typically use POST. The GET method is used primarily when you’re retrieving data from the server to display in the page.
What follows next is a series of text labels and input elements. The input elements are where the web page form user types in the values sent in the mail-to form. In the form, the input types are all text, but input elements can have the types described in Table 4-1.
| Type | Description | Visual control |
|---|---|---|
hidden |
Provides a means to send data to server without user input | None |
text |
Sending arbitrary text (no line breaks) | Text field |
search |
Sending search text (no line breaks) | Search field |
tel |
A telephone number | Text field |
url |
A URL | Text field |
email |
An email | Text field |
password |
Arbitrary text with no line breaks | Input is obscured |
date |
A date (day, month, year) | Date control |
time |
A time (hour, minute, seconds, fraction of seconds) | Time control |
number |
A number | Text field or number spinner |
range |
A numerical value | Some form of slider |
color |
An RGB (red-green-blue) color | Color picker |
checkbox |
Zero or more options | Check boxes |
radio |
Zero or one option | Radio buttons |
file |
For uploading a file | Button and label |
submit |
To submit the form | Button |
image |
An image | Clickable image or button |
reset |
To reset the form fields | Button |
button |
Do some action | Button |
Some of the input types, such as color, date, and time, are new with HTML5 and aren’t supported in all of the major browsers. Others, such as email and tel, will not only accept text formatted as an email or telephone number but also issue an error message to users if they type in incorrect text.
The BlueHost mail-to form uses text, hidden, and submit input types. The text fields are for the user to type in contact information, the hidden field contains the email that receives the contact information, and the submit button submits the form. You can modify the email address used in the hidden field, and you can add the following field to redirect to a specific web page when the form has been processed:
<inputtype="hidden"name="redirect"value="http://www.**redirect url**">
Change the URL to the one you want.
Copy the entire HTML form and fields and paste it into the contact web page or wherever you want to place this mail-to form. Now anyone who wants to contact you can, without you having to embed your email into the web page. It also provides a clean point of contact.
You can modify the form and use CSS to style its appearance. Most hosting companies provide one or more CGI applications you can incorporate into your website without once having to touch the code. Just look for the CGI icon in cPanel.