Chapter 5. IP Control Plane Security
In this chapter, you learn about the following:
• Security techniques that may be used to protect the IP control plane
• Security techniques that may be used to protect the control plane of Layer 2 switched Ethernet networks
This chapter describes techniques available to mitigate the risks of unauthorized traffic reaching the IP control plane. As control plane protocols enable IP host connectivity across a routed network, it is critical that:
• Control plane resources within an IP router are protected to mitigate the risk of DoS attacks because most control plane packets are handled at the IOS process level
• Control plane protocols are secured to mitigate the risk of protocol attacks, which may result in unauthorized traffic redirection to a black hole or, alternatively, to an insecure network where an attacker may eavesdrop on conversations and manipulate packet content
Several of the control plane techniques described here were previously referenced in Chapter 4, “Data Plane Security,” given exception IP data plane traffic may require control plane processing. This includes data plane packets requiring ICMP handling, IP multicast state creation, or IP options header processing. Further, although data plane techniques such as infrastructure ACLs may help to protect internal control plane protocols such as OSPF, they offer limited protection for external control plane protocols that, by definition, peer with external devices. This chapter reviews the various IOS techniques available to protect BGP and to protect the router from ICMP attacks within the control plane. ICMP attacks that leverage the IP data plane were described in Chapter 4. Chapter 6, “Management Plane Security,” and Chapter 7, “Services Plane Security,” will review techniques to secure and mitigate attacks within the IP management and services planes, respectively.
As described previously, no single technology (or technique) makes an effective security solution. This applies not only to your wider IP network but also to individual IP traffic planes. Following the defense in depth and breadth principles outlined in Chapter 3, “IP Network Traffic Plane Security Concepts,” you may consider deploying multiple complementary techniques, as described in this chapter, to mitigate the risk of control plane attacks.
Disabling Unused Control Plane Services
It is widely considered a network security best common practice (BCP) to disable any unused services and protocols on each device in the IP network. Unused services and protocols are generally not secured, and thus may be leveraged within an attack. The following services and protocols that are enabled by default within Cisco IOS represent a potential security risk. If you do not need these services, you should disable them. (Management plane services and protocols that should also be disabled if not used are described in Chapter 6.)
• Gratuitous ARP: To disable the transmission of gratuitous Address Resolution Protocol (ARP) messages on PPP/SLIP interfaces for an address in a local pool, use the no ip gratuitous-arps command in IOS global configuration mode.
• IP source routing: To disable source routing, enter the no ip source-route command in IOS global configuration mode. With IP source routing disabled, any IP packet containing a strict or loose source-route option (per RFC 791) will be discarded. Additional techniques available to mitigate the risk of IP options-based DoS attacks were reviewed in Chapter 4.
• Maintenance Operation Protocol (MOP): MOP is enabled on Ethernet interfaces and disabled on all other interface types by default within IOS. To disable MOP, use the no mop enabled command within IOS interface configuration mode.
• Proxy ARP: Proxy ARP is enabled for all interfaces by default within Cisco IOS. To disable it, use the no ip proxy-arp command in IOS interface configuration mode. Proxy ARP is generally only required for broadcast (or shared LAN) networks that connect IP routers with:
— IP hosts that do not have a statically configured default gateway
— IP hosts that do not use a dynamic routing protocol
— IP hosts that do not use ICMP Router Discovery Messages (RFC 1256)
Most other control plane services and protocols are disabled by default within Cisco IOS. IOS management plane services that are enabled by default are described in Chapter 6. The IOS AutoSecure feature provides an automated mechanism to disable unnecessary IOS services. For more information on AutoSecure, refer to Chapter 6. Nevertheless, you should verify against your specific IOS devices and software releases that all unused services and protocols are disabled either by default or through the router configuration.
ICMP Techniques
ICMP, by its very definition per RFC 792, is a control plane protocol. However, it is generally used to report error conditions within IP data plane processing. As discussed in Chapter 2, “Threat Models for IP Networks,” ICMP may be used as an attack vector for IP data plane DoS attacks. By triggering packet failures within the IP data plane, for example, using crafted IP packets with insufficient TTL values, attackers may adversely impact the IP control plane of affected routers. Because many of the attacks that target ICMP control plane functions are data plane attacks, the ICMP security techniques available to mitigate the risk of ICMP-related data plane attacks were described in Chapter 4. Refer to Chapter 4 for a detailed review of ICMP security techniques.
Nevertheless, there are specific techniques that you may use to mitigate the risk of control plane attacks that specifically use ICMP messages versus native IP data plane packet failures, per Chapter 4, including:
• no ip information-reply: Disables the router from generating ICMP Information Reply (Type 16) messages when it receives unsolicited ICMP Information Request (Type 15) messages. This command is applied by default within IOS interface configuration mode; hence, IOS routers will not respond to unsolicited ICMP Information Request messages. This command applies only to ICMP Information Request messages received. Example 5-1 illustrates how to explicitly disable the generation of ICMP Information Reply messages on an Ethernet interface, which again is the default IOS behavior.
Example 5-1. IOS Interface Configuration for Disabling ICMP Information Replies
interface Ethernet 0
no ip information-reply
ICMP Information Request messages are not widely used. However, an attacker may use this IETF standard ICMP message type to conduct reconnaissance, as well as to spike the router CPU and potentially trigger a DoS condition. For these reasons, the default behavior of no ip information-reply should not be changed.
• no ip mask-reply: Disables the router from generating ICMP Address Mask Reply (Type 18) messages when it receives unsolicited ICMP Address Mask Request (Type 17) messages. This command is applied by default within IOS interface configuration mode; hence, IOS routers will not respond to unsolicited ICMP Address Mask Request messages. This command applies only to ICMP Address Mask Request messages received. Example 5-2 illustrates how to explicitly disable the generation of ICMP Address Mask Reply messages on an Ethernet interface, which again is the default IOS behavior.
Example 5-2. Sample IOS Interface Configuration for Disabling ICMP Address Mask Replies
interface Ethernet 0
no ip mask-reply
ICMP Address Mask Request messages are not widely used. However, an attacker may use this IETF standard ICMP message type to conduct reconnaissance, as well as to spike the router CPU and potentially trigger a DoS condition. For these reasons, the default behavior of no ip mask-reply should not be changed.
• Interface ACLs: Infrastructure and transit ACLs, as described in Chapter 4, may be used to filter unnecessary ICMP messages destined to network infrastructure, including but not limited to ICMP Source Quench (Type 4), ICMP Echo (Type 8; in other words, ping), and ICMP Timestamp (Type 13) messages. If it is not necessary for external devices to send ICMP messages to your network infrastructure, you should filter them at your network edge. Only those ICMP messages that are specifically needed should be permitted—for example, ICMP Destination Unreachable (Type 3) and ICMP Echo Reply (Type 0) messages. Denying ICMP Echo Requests and permitting ICMP Echo Replies allows you to ping external hosts, such as a public Internet web server, but prevents external hosts from pinging your network infrastructure. If you wish to permit external pings to your DMZ that hosts public servers such as web and e-mail servers, be sure to make the ACL statement restrictive such that only pings are permitted to host addresses within the DMZ and not your wider network infrastructure. Further, you may use rate limiting to permit ICMP messages up to a configurable maximum rate. This allows specific ICMP messages to pass while limiting their potential impact as described in Chapter 4. In addition to interface ACLs and rate limiting, IP Receive ACLs (IP rACL) and Control Plane Policing (CoPP) may be used to filter and, optionally, rate limit ICMP messages from unauthorized sources. IP rACLs and CoPP are described in detail later in the chapter, in the sections “IP Receive ACLs” and “Control Plane Policing,” respectively.
Selective Packet Discard
Selective Packet Discard (SPD) is an internal mechanism supported by many Cisco IOS platforms that manages ingress packets that are enqueued within the IOS process level input queues. SPD prioritizes control plane packets and other important traffic during periods of process level queue congestion. Prior to the advent of Cisco Express Forwarding (CEF), as described in Chapter 1, “Internet Protocol Operations Fundamentals,” significant numbers of transit packets were forwarded by the IOS process level in order to populate the fast-switching cache. Consequently, SPD was required to prioritize the routing protocol packets over the transit packets that share the same process level queues. On modern platforms running CEF, only receive packets and some exception packets are handled at the IOS process level. Examples of these types of packets include but are not limited to the following:
• Example receive adjacency IP and non-IP packets:
— IP control plane and routing protocol packets (for example, BGP, OSPF, and HSRP)
— ICMP messages (for example, Echo Request/Reply and Information Request/Reply)
— MPLS control protocol packets (for example, LDP and RSVP/MPLS-TE)
— Management protocol packets (for example, Telnet, SSH, SNMP, TFTP, RADIUS, and TACACS+)
— Multicast routing protocol packets (for example, PIM, DVMRP, and IGMP)
— Layer 2 keepalives (for example, PPP, Frame Relay LMI, BFD, and ATM OAM)
— ARP packets
• Example transit IP and non-IP exception packets:
— Multicast data plane packets (in other words, first packet of a multicast flow is punted to IOS process level for state creation, per Chapter 2)
— IP options packets (for example, router alert)
— MPLS packets with router alert label
— IP packets resulting in ICMP handling (for example, TTL expiry, IP Fragmentation Needed but Don’t Fragment (bit) was Set)
After packets are punted and placed into the ingress queues, and before IOS starts processing those packets, the SPD mechanism takes place. SPD is an additional tool that ensures certain important packets are handled with higher priority, while in situations of high traffic load at the IOS process level, the less-important packets are discarded. For example, when an interface flap occurs, routing protocol traffic must be guaranteed a high priority and not discarded while the interface recovers. At a high level, the SPD mechanism can be illustrated as shown in Figure 5-1. Here, packets ingressing the router are first placed within ingress queues (left side of figure). From there, input queue checks are made against the per-hardware interface hold queues (middle of figure). Finally, they are enqueued into the IOS process queues (right side of figure). How these packets move from the ingress queue to the IOS process queue is managed by the SPD mechanisms.

SPD State Check
As stated in the preceding section, after packets are placed in the ingress queues, they are classified by SPD as normal, high, and top priority, as illustrated in the left side of Figure 5-1. It is during this classification process that the SPD state check is made. The SPD state check is the first of two checks during which time SPD is capable of discarding packets. To understand how SPD makes this state check, note in Figure 5-1 that the IOS process level reads packets from the process queue (on the right side of the figure), and that there are two queues from which it reads packets: the general queue and the priority queue. These queues will be covered in more detail shortly. At the moment, it is important to recognize that these queues will contain a certain number of packets at any given time. Further, SPD maintains a state machine that can be in one of three states, and whose state is predicated on the number of packets in the general queue. This is referred to as the SPD state check.
During the SPD classification process, packets with IP precedence 5 and below are classified as normal priority and are subject to the SPD state check and can be discarded. Packets with IP precedence 6 or 7 are classified as high priority and are not subject to the SPD state check. These high priority packets are never discarded by the SPD state check. Finally, non-IP packets are classified as top priority, and are also never subject to discard by the SPD state check. This concept of SPD classification queues is illustrated in Figure 5-2.
Figure 5-2. IOS SPD Classification Process

Whether packets classified as “normal” are discarded or not depends on the current depth of the general queue and the state of SPD. At any moment, the SPD state machine can be in one of three states:
• Normal: SPD is in this state when the number of normal priority packets in the general queue is less than the minimum threshold value (default 73) set for the general queue. In the NORMAL state, SPD will never drop any packets.
• Random Drop: SPD is in this state when the number of normal priority packets in the general queue is greater than the minimum threshold but less than the maximum threshold (default 74) set for the general queue. In the RANDOM DROP state, SPD randomly drops well-formed packets. If SPD aggressive mode is configured (defined shortly), all malformed IP packets are discarded in this mode as well. Otherwise, all packets are treated as well-formed packets.
• Full Drop: SPD is in this state when the number of normal priority packets in the general queue is greater than or equal to the maximum threshold for the general queue. In the FULL DROP state, all well-formed and malformed packets are discarded.
As just noted, SPD can be configured for normal (default) mode or aggressive mode. The only difference between the two is how the router accounts for malformed packets. SPD considers a malformed packet as one with an invalid checksum, incorrect version, incorrect header length, or incorrect packet length. When SPD is in normal mode (the default), all IP packets are treated as well formed. When SPD is in aggressive mode, which is configured using the ip spd mode aggressive command in IOS global configuration mode, malformed packets are recognized and discarded per the preceding rules. The SPD states and drop rules are illustrated in Figure 5-3.
Figure 5-3. IOS SPD State Check IP General Queue Treatment
Note
Aggressive mode is not required on the Cisco 12000 Series Router, because malformed IP packets are discarded directly by the ingress line card, and these packets are not punted to the IOS process level.
Further, on the Cisco 12000 Series, only packets punted to the central Route Processor (RP) are subject to the SPD functions outlined here. Packets handled exclusively by the distributed line card CPUs are not subjected to SPD handling.
The size of the general queue is set by default to 75 packets given the default minimum and maximum threshold values. The general queue minimum and maximum threshold default values are 73 and 74 packets, respectively. These values can be changed, however, using the ip spd queue min-threshold {size} and ip spd queue max-threshold {size} commands, respectively, in global configuration mode.
SPD Input Queue Check
Once IOS process level packets are classified and the SPD state check has completed, the packets are compared against the per-hardware interface hold queue (which are really just counters). It is at this point that SPD makes its second check and again has the capability of dropping packets. An input queue is maintained on a per-hardware interface basis, with its resources being shared among all subinterfaces. Maintaining SPD statistics on a per-hardware interface prevents any one interface from obtaining more that its fair share of IOS process level resources.
The concept of the per-hardware interface queue is illustrated in Figure 5-4. As shown, each per-hardware interface queue maintains counters in three regions: the hold queue region, the SPD headroom region, and the SPD extended headroom region. Packets classified as normal priority are copied into the IOS process generation queue only if there are free buffers available in the hold queue region; otherwise they are discarded. Packets classified as high priority are copied into the IOS process generation queue only if there are free counters available in either the hold queue region or in the SPD headroom region; otherwise they are discarded. Packets classified as top priority are copied into the IOS process priority queue if there are free counters available in any of hold queue region, SPD headroom region, or SPD extended headroom region; otherwise they are discarded. From that point, the IOS IP input processes dequeue packets in order of priority for protocol processing.
Figure 5-4. IOS SPD Headroom and Extended Headroom

SPD Monitoring and Tuning
There are several important concepts that will aid in the understanding of SPD in operational environments. First, the input hold queue described in the preceding section is effectively a packet counter that IOS maintains per hardware (physical or channel) interface. The current and maximum depth of this queue may be viewed using the show interface command, as illustrated in Example 5-3.
Example 5-3. Display of Current and Maximum Depth of Input Hold Queue
Router# show interfaces ethernet 0
Ethernet0 is up, line protocol is up
Hardware is Lance, address is 0060.3ef1.702b (bia 0060.3ef1.702b)
Internet address is 172.21.102.33/24
MTU 1500 bytes, BW 10000 Kbit, DLY 1000 usec, rely 255/255, load 1/255
Encapsulation ARPA, loopback not set, keepalive set (10 sec)
ARP type: ARPA, ARP Timeout 04:00:00
Last input 00:00:20, output 00:00:06, output hang never
Last clearing of "show interface" counters never
Queueing strategy: fifo
Output queue 0/40, 0 drops; input queue 0/75, 0 drops
5 minute input rate 0 bits/sec, 0 packets/sec
5 minute output rate 0 bits/sec, 0 packets/sec
115331 packets input, 27282407 bytes, 0 no buffer
Received 93567 broadcasts, 0 runts, 0 giants, 0 throttles
0 input errors, 0 CRC, 0 frame, 0 overrun, 0 ignored, 0 abort
0 input packets with dribble condition detected
143782 packets output, 14482169 bytes, 0 underruns
0 output errors, 1 collisions, 5 interface resets
0 babbles, 0 late collision, 7 deferred
0 lost carrier, 0 no carrier
0 output buffer failures, 0 output buffers swapped out
The input hold queue tracks the number of packets enqueued at the IOS process level for the associated physical (or channel) interface. As packets destined for the IOS process level arrive, the associated interface input hold queue counter is incremented by 1 for each packet enqueued. As these packets are dequeued and processed by IOS, the associated interface input hold queue counter is decremented by 1 for each packet dequeued. Without SPD enabled, when the current depth of an interface input hold queue equals its maximum configured limit, any new IOS process level packets received on that specific interface are silently discarded.
As previously stated, an input hold queue is available per physical or channel interface. It is not maintained per logical subinterface. Hence, all of the VLANs, DLCIs, and virtual circuits (VC) of an Ethernet, Frame Relay, and ATM interface, respectively, share the same input hold queue. Consequently, if one VLAN is flooded with IOS process level packets, for example, other VLANs on the same physical Ethernet interface may be starved of IOS control (and management) plane processing.
Operationally, SPD allows for prioritization of IOS process level packets while maintaining fairness among interfaces through the following mechanisms:
• Hold queue: The per-interface hold queue specifies the number of normal priority process level packets that may be enqueued to the interface hold queue region. To configure the size of the input hold queue for an interface, use the hold-queue {length} in command in IOS interface configuration mode. The IOS default size is 75 packets, except for asynchronous interfaces, which have a default size of 10 packets.
— Up to 75 packets, irrespective of their priority, may be enqueued at one time, assuming available IOS process level system buffers. Once the interface input hold queue limit of 75 packets is reached for a given interface, normal priority process level packets received on the interface will be silently discarded.
• SPD headroom: SPD headroom specifies the number of high priority process level packets that may be enqueued beyond an interface’s input hold queue limit. With the default interface input hold queue limit of 75 packets and the IOS 12.0(32)S default SPD headroom of 2000 packets:
— An additional 2000 high priority and top priority process level packets may be enqueued into the SPD headroom region. Once the combined 2075 packet limit is reached for a given interface, high priority process level packets received on the interface will also be silently discarded.
SPD headroom is configured using the spd headroom command in IOS global configuration mode and thus affects the size of the headroom region for all interface hold queues. The configured value for SPD headroom may be seen in the output of the show spd or show ip spd IOS commands, as illustrated in Example 5-4. The default value for SPD headroom varies across IOS releases because the percentage of IP traffic handled at the IOS process level varies across IOS releases and IOS router platforms.
Example 5-4. Display of SPD Parameter Settings
Router# show spd
Headroom: 2000, Extended Headroom: 10
Router# show ip spd
Current mode: normal
Queue min/max thresholds: 73/74, Headroom: 2000, Extended Headroom: 10
IP normal queue: 0, priority queue: 0.
SPD special drop mode: none
• SPD extended headroom: SPD extended headroom specifies the number of top priority process level packets that may be enqueued within the process level input queues above and beyond an interface’s combined input hold queue and SPD headroom limits. Similar to the SPD headroom example just presented, given an interface input hold queue limit of 75 packets, an SPD headroom of 2000 packets, and the IOS 12.0(32)S SPD extended headroom default value of 10 packets:
— An additional 10 top priority process level packets may be enqueued into the SPD extended headroom region. Once the combined 2085 packet limit is reached for a given interface, top priority process level priority packets received on the interface will also be silently discarded.
SPD extended headroom is configured using the spd extended command in IOS global configuration mode and thus affects the size of the extended headroom region for all interface hold queues. The configured value for SPD extended headroom may also be seen in the output of the show spd or show ip spd IOS commands, as illustrated in Example 5-4. The default value for SPD extended headroom is typically 10 packets, but it may also vary across IOS releases, as previously explained for SPD headroom.
SPD is enabled by default within IOS and may be disabled using the no spd enable command in IOS global configuration mode. It applies only to ingress packets destined to the IOS process level and not to locally sourced router packets. SPD functions have proven effective during heavy IOS process level packet floods, because it gives priority service to important packets and ensures fairness among router interfaces of IOS process level router resources. The SPD headroom and extended headroom help to facilitate continuous operation of control plane protocols under such conditions. To mitigate the risk of attacks crafted as important packets (in other words, using IP precedence values 6 and 7), IP recoloring, as described in Chapters 4 and 7, may be applied as well as IP Receive ACL or Control Plane Policing techniques (or both) as described in the following sections. For additional information on SPD, refer to the references in the “Further Reading” section.
IP Receive ACLs
Chapter 2 described the different applications of IP interface ACLs, including infrastructure protection, antispoofing, classification, and transit packet filtering. IP interface ACLs are, as aptly named, applied directly to an IOS network interface, including a physical port, channel port (for example, T1 within a CT3), or logical port (for example, Ethernet VLAN, ATM VC, or Frame Relay DLCI). Consider, however, that when an IOS router interface has an input IP interface ACL applied, every packet that ingresses the interface is subject to the applied input ACL policy. (Similarly, every packet that egresses the interface is subject to any output IP interface ACL policy applied.) Consequently, IP interface ACLs apply not only to data plane traffic, but also to control plane, management plane, and services plane traffic. That is, even if the intended use of the ACL is to filter control plane traffic, when applied to an interface, any IP packet that passes through the interface is subject to the ACL policy applied in the corresponding direction (input versus output). There are two primary issues with the application of interface ACLs for the protection of control plane traffic:
• To protect the IP network infrastructure from security attacks, IP interface ACLs are generally applied on the external interfaces of all edge routers. In the event an attacker is able to bypass edge IP interface ACL policies, they may be able to attack IP core routers directly. IP interface ACLs may be applied on the internal interfaces of IP edge and core routers to mitigate this external threat and the potential risk of internal attacks. However, notwithstanding the potential performance impacts (if any), managing static IP interface ACL policies for both edge and core routers and for the many external and internal interfaces is operationally complex, as outlined in Chapter 4. Considering that some SP edge routers may have thousands of external interfaces, the operational challenges become all the more apparent.
• The actual construction of the ACL entries can be exceedingly challenging when interface ACLs are used to protect the control plane. For example, each router has a set of unique receive IP addresses associated with its own physical and logical interfaces, as described in Chapter 3. Thus, preventing attacks against receive addresses from spoofed sources purporting to be peer addresses requires the construction of unique ACLs for each interface on the platform. This is highly complex for large-scale routers and SP networks.
To simplify the operational security of IP routers, IOS Software Release 12.0S introduced IP Receive ACLs (rACL) as an interim step at solving a largely SP-related infrastructure protection issue. As such, IP rACLs were introduced in 12.0S only for the Cisco 7500, Cisco 12000 GSR, and, later, Cisco 10720 routers. (The long-term strategy that implements comparable but enhanced capabilities and that is included in most Cisco IOS releases and platforms is Control Plane Policing. CoPP is described in the next section.)
IP rACLs further improve the resistance of IOS devices from security attacks by filtering unauthorized traffic sent directly to the control plane of an IOS router using a single and interface-independent (in other words, global) ACL policy. That is, only ingress packets with an IP next hop of receive (otherwise known as a CEF receive adjacency) are subjected to the IP rACL policy, irrespective of the ingress interface. IP prefixes having a CEF receive adjacency include:
• /32 IP addresses automatically assigned to the local router IP interfaces after applying the ip address command within IOS interface configuration mode. After configuring 172.16.128.5/30 on a router interface, for example, 172.16.128.5/32 is automatically installed as a CEF receive adjacency. Note, this applies to physical, channel, logical, and loopback interfaces, as well as interfaces assigned to a VRF instance associated with an MPLS VPN. MPLS and IPsec VPNs are further described in Chapter 7.
• Broadcast addresses, including the all 1s IP address (255.255.255.255/32) and the all 1s IP subnets associated with the /32 IP addresses assigned to the local router interfaces (see the first bullet). For example, if a router interface is assigned IP address 172.16.128.5/30 (per the first bullet), the broadcast 172.16.128.7/32 address is treated as a CEF receive adjacency.
• Network addresses, including the all 0s IP subnets associated with the /32 IP addresses assigned to the local router interfaces (see the first bullet). As described in Chapter 4, if a router interface is assigned IP address 172.16.128.5/30 (per the first bullet), the subnet 172.16.128.4/32 address is treated as a CEF receive adjacency.
• Internet Assigned Numbers Authority (IANA) reserved IP multicast addresses in the range between 224.0.0.0 and 224.0.0.255, inclusive. This range of addresses is reserved for the use of routing protocols and other low-level topology discovery or maintenance protocols, such as gateway discovery and group membership reporting. Such multicast addresses are not IP routable and serve local network functions only. Hence, any packets destined to an address within this range are treated as CEF receive adjacencies.
Each of the above IP addresses are considered assigned to the router, and hence have an IP next hop of receive. CEF receive adjacencies may be viewed using the show ip cef IOS command, as illustrated in Example 5-5.
Example 5-5. Sample Output from the show ip cef Command
Router# show ip cef | include receive
0.0.0.0/32 receive
10.0.0.16/32 receive
10.0.1.4/32 receive
10.0.1.5/32 receive
10.0.1.7/32 receive
10.0.2.16/32 receive
10.0.2.17/32 receive
10.0.2.19/32 receive
10.82.69.0/32 receive
10.82.69.16/32 receive
10.82.69.255/32 receive
224.0.0.0/24 receive
255.255.255.255/32 receive
Router#
Given that IP rACL policies apply only to ingress IP packets destined to an IP prefix with a CEF receive adjacency—that is, to IP packets that are punted to the local IOS process level—they affect only the IP control and management planes (and possibly services plane traffic) associated with that specific router, and not data plane traffic that is transiting the router. Data plane traffic, whether CEF switched or IOS process level switched (slow path), is not affected by IP rACL policies. Ingress packets destined to an IP prefix having a receive IP next hop are always handled at the IOS process level and, hence, are often leveraged within router security attacks (whether purposefully or randomly as might occur during a worm outbreak).
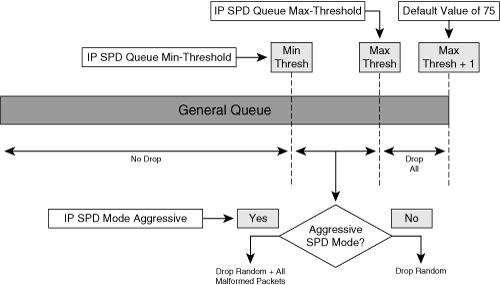
IP rACL functions are implemented at the IOS process level in router CPU software (as opposed to hardware logic). On distributed router platforms (in other words, the Cisco 7500 and Cisco 12000 series routers), IP rACL functions are implemented on the distributed interface line card CPUs and unauthorized packets are filtered on the ingress distributed line card(s) without any central RP support. Figure 5-5 illustrates this concept of distributed support for IP rACLs. Thus, IP rACL filtered packets are prevented from adversely impacting the RP, protecting its ability to execute control and management plane services. Hence, under a DoS attack directed at a Cisco 7500 or 12000 series router, the distributed line card CPU utilization may increase because it absorbs the attack; however, the RP that serves as the master controller of the router will be unaffected. (Note that if the attack traffic is permitted by the IP rACL policy and is able to reach the RP, a DoS attack can obviously impact the RP.) Conversely, IP rACLs do not see transit traffic (DoS or otherwise). The Cisco 10720 router also supports IP rACLs, but only in the central RP CPU and not within the PXF hardware logic. IP rACL functions on the Cisco 7500 and 12000 series routers also operate on the RP to filter unauthorized IP traffic received on the out-of-band management interfaces. Security techniques relating to the management plane are described in Chapter 6.
Figure 5-5. IP Receive ACL Operations on Distributed Routing Platforms
IP Receive ACL Deployment Techniques
This section reviews best practices and implementation techniques necessary to deploy IP rACLs including the following:
• IP Receive ACL activation
• Configuration guidelines for IP Receive ACLs
• IOS feature support for IP Receive ACLs
Activating an IP Receive ACL
To activate an IP rACL, use the ip receive access-list {number} command in IOS global configuration mode. The {number} parameter represents a standard or extended numbered IP ACL. Named IP ACLs are not supported. Further, because IP rACLs are implemented at the IOS process level in router CPU software, when the ip receive access-list command is entered on a Cisco 12000 or 7500 series router, the rACLs are built by the central RP and pushed out to each of the distributed line cards. Therefore, when changes are required, the entire rACL must first be removed using the no ip receive access-list command, and then reapplied after the required changes are made in order for them to become effective.
Example 5-6 shows a simple example of how to enable an IP rACL that permits only non-fragmented Telnet, OSPF, BGP, and ICMP Echo Reply (in other words, ping reply) packets. Any other packets destined to any one of the local IOS router’s IP addresses described previously are silently discarded. (This example is provided simply to show how IP rACLs are deployed and should not be taken as representative of an operationally accurate deployment scenario. Additional information on deployment techniques follows.)
Example 5-6. Sample IOS IP Receive ACL Configuration
! - Create the access list entries---
access-list 100 deny ip any any fragments
access-list 100 permit tcp any any eq 23 precedence internet
access-list 100 permit ospf any any precedence internet
access-list 100 permit tcp any any eq bgp precedence internet
access-list 100 permit tcp any eq bgp any precedence internet
access-list 100 permit icmp any any echo-reply
access-list 100 deny ip any any
! - Apply the access list to the receive path
ip receive access-list 100
!
IP rACLs can be used to complement rather than replace IP interface ACLs. Deployed in combination, they support the defense in depth and breadth principles outlined in Chapter 3. A common IP ACL deployment model includes:
• IP interface ACLs applied on input to the external interfaces of all edge routers that are designed to protect the network infrastructure from attacks. That is, externally sourced packets with destination IP addresses belonging to internal infrastructure address space, for example, should be denied.
• IP rACLs applied on all capable edge and core routers to protect the RP on each individual router from attacks. This provides an additional layer of protection, for example, in the event that the IP interface ACLs (described in the first bullet) are bypassed. IP rACLs are also useful in protecting the RP in case of a reflection attack. (Reflection attacks against the IP infrastructure were described in Chapter 2.) In this way, IP rACLs also eliminate the need for IP interface ACLs on internal router interfaces.
IP Receive ACL Configuration Guidelines
IP rACLs are widely deployed within SP networks today. They are a proven technique for improving a router’s resistance to attacks and, hence, are considered a network security BCP. Ideally, IP rACL policies should be made as restrictive as possible to prevent unauthorized sources and packet types from hitting the IOS process level of an IP router. During the initial IP rACL deployment phase, however, you must exercise caution to ensure that authorized traffic is not inadvertently filtered. Mistakenly filtering BGP or IGP protocol packets, for example, may cause a more detrimental impact than an attack itself. Therefore, when constructing IP rACL policies in a new deployment, it is recommended that IP rACL policies begin from a permissive state and gradually become more restrictive over time after gaining operational experience. Lab deployments and pilot deployments are also recommended to gain operational and router performance knowledge prior to full, network-wide IP rACL deployments.
The following guidelines have proven effective and may be used when deploying IP rACL policies.
Identify Protocols and Port Numbers Used
Identifying the protocols and port numbers used may be done by using a classification style IP rACL. As you learned in Chapter 4, classification ACLs consist of permit-only access control entries (ACE) and are useful for identifying types of traffic flowing on the network. In the case of IP rACLs, the classification ACL is applied to the receive path and, hence, identifies all IP traffic destined to the router itself. Thus, it simply serves as an informational logging mechanism to identify necessary IP protocols and TCP/UDP port numbers that must be considered before tightening the IP rACL policy per the “Filter Unnecessary Protocols and Port Numbers” section below. As a best practice, be sure to insert a permit ip any any log rule as the very last receive ACE so that any missed protocols not explicitly configured within the IP rACL policy are permitted and identified. Otherwise, CEF receive adjacency traffic may be inadvertently filtered by the implicit deny ip any any applied to the end of all IOS ACL policies.
Filter Unnecessary Protocols and Port Numbers
Filter unnecessary IP protocols and TCP/UDP port numbers. Using the information gathered in the preceding section, you may begin to construct your IP rACL policy. The IP rACL should be purposefully built to permit or deny IP traffic destined to CEF receive adjacency addresses. Begin constructing your IP rACL policy to allow only traffic associated with necessary IP protocols and TCP/UDP port numbers. Now that you have deny statements in the IP rACL, you can initially keep the permit ip any any log as the last ACL entry so that any traffic that does not match any explicit permit entries in the IP rACL policy will not be denied. As you gain experience with the IP rACL deployment and find that no legitimate packets end up hitting this permit ip any any log rule, you should strive to change the last line to a deny ip any any log rule so that all unauthorized packets are discarded and no legitimate traffic is discarded. Although there is an implicit deny ip any any at the end of the IP rACL policy, you should consider explicitly configuring a deny ip any any (log) at the end to ease configuration readability and to provide counters and, optionally, logging for denied packets. Note, a high volume of logged packets may overwhelm the distributed line card CPUs, hence use the log keyword option with caution. Other items you may consider include:
• IP fragments: As discussed in Chapter 2, IP reassembly is handled at the IOS process level with a limited number of reassembly packet buffers. This presents a potential DoS attack vector because IP fragment DoS attacks may exhaust reassembly buffers, starving legitimate IP fragments. Further, IP reassembly functions reduce available IOS process level CPU cycles for control and management plane protocols. Within properly architected networks, control plane traffic should never be fragmented, and it is a BCP to drop all IP fragments destined to the IOS process level. Therefore, the very first entries within the IP rACL policy should deny IP fragments. Typically, separate entries are applied for TCP, UDP, ICMP, and IP, as illustrated in the ACE configuration shown in Example 5-7. If only a single entry for IP fragments was included, you would achieve the same effect, but lose the information provided by the ACE counters that are maintained for each entry.
Example 5-7. Sample IOS ACL Entries that Filter Noninitial IP Fragments
! Add these lines to the IP rACL policy to drop all fragments
! These must be the first lines in the ACL!
!---Deny TCP, UDP, ICMP, and IP fragments---
access-list 100 deny tcp any any fragments
access-list 100 deny udp any any fragments
access-list 100 deny icmp any any fragments
access-list 100 deny ip any any fragments
!
Note that these IP fragment filters must be the very first set of configuration rules within the IP rACL policy. Otherwise, non-initial fragments may inadvertently match a permit ACE statement earlier within the IP rACL policy.
• IP ToS: IP control and management plane protocol standards often specify the use of a specific IP precedence value. The default IOS behavior with respect to the marking of router sourced traffic uses IP precedence value 6 for BGP, OSPF, RIP, ICMP, DVMRP, PIM, IGMP, HSRP, MPLS LDP, RSVP, SSH, and Telnet protocol packets. IP precedence value 0 is used for RADIUS, TACACS+, SNMP, and syslog protocol packets. IP rACL policies should consider these default IP precedence values when permitting such protocol packets. The IP rACL configuration shown in Example 5-6 permits Telnet, OSPF, and BGP protocol packets but only if the IP precedence value is 6 (Internetwork Control, per RFC 795). With IP QoS recoloring (for example, MQC set ip dscp 0) applied uniformly across the network edge, as described in Chapter 4, even if an attacker is able to bypass edge IP interface ACLs and hit infrastructure routers with, for example, Telnet, OSPF, and BGP protocol packets, if the IP precedence value of these external packets was recolored, they will be discarded by the IP rACL policy illustrated in Example 5-6. IP rACL policies that include IP precedence value filtering are very effective because attackers are not able to spoof IP precedence values when IP QoS recoloring is deployed across the network edge. The use of edge recoloring and IP precedence-aware IP rACL policies is another example of defense in depth and breadth security principles.
• ICMP: Although ICMP is integral to the IP protocol and traffic planes, as described in Chapter 2, not all ICMP message types are required within an IP network. Further, ICMP messages destined to an IP router are by default handled at the IOS process level and, hence, are often leveraged within an attack. Therefore, IP rACL policies should filter unnecessary ICMP message types (for example, Source Quench, Address Mask Request/Reply, and so on) to mitigate the risk of spoofed attacks.
Limit Permitted IP Source Addresses
Limit permitted IP source addresses to known source addresses and limit permitted IP router destination addresses. Using the guidelines previously described, you constructed your IP rACL policy to permit authorized protocols and port numbers from any IP source address. You can now start tightening this policy by specifying only the authorized IP source addresses from which authorized protocols and port numbers will be permitted. In addition, you can specify specific destination addresses as well. Each authorized protocol must be considered separately, however, as each may have a distinct set of authorized source and destination addresses. Consider the following protocols:
• BGP: Only valid eBGP peers and iBGP peers should be permitted within the IP rACL policy. Valid peers are statically defined using the neighbor remote-as command in IOS router configuration mode, so all source addresses should be easily identifiable. If you have taken care to summarize blocks of IP addresses for loopback interfaces from which iBGP is sourced, one strategy for IP rACL construction would be to use this address block in the ACL permit statements for iBGP, rather than use individual iBGP host addresses. This makes the IP rACL far easier to deploy by allowing for a single IP rACL policy for all routers. However, this adds some risk from spoofed attacks. That said, eBGP peers rarely fall within a consistent address block, making summarization for these connections improbable. Thus, some customization is likely to be required per router to achieve the most secure IP rACL policy. If a customized IP rACL policy can be deployed on each router, only the configured BGP peers should be permitted within the IP rACL policy, per Example 5-8.
Example 5-8. IOS IP Receive ACL to Permit BGP from Static Peers Only
! Add lines like these to the IP rACL policy to permit BGP protocol messages from
authorized peers only
!---iBGP Peers---
access-list 177 permit tcp host 10.0.10.1 gt 1024 host 10.0.10.11 eq bgp
access-list 177 permit tcp host 10.0.10.1 eq bgp host 10.0.10.11 gt 1024 established
access-list 177 permit tcp host 10.0.20.1 gt 1024 host 10.0.20.11 eq bgp
access-list 177 permit tcp host 10.0.20.1 eq bgp host 10.0.20.11 gt 1024 established
!---eBGP Peers---
access-list 177 permit tcp host 209.165.200.13 gt 1024 host 209.165.201.1 eq bgp
access-list 177 permit tcp host 209.165.200.13 eq bgp host 209.165.201.1 gt 1024
established
!
• IGP protocols: Unlike BGP, IGP peers are not statically configured within IOS router configuration mode. However, IGP peers generally fall within the same aggregate address range (in other words, classless inter-domain routing [CIDR] block) unlike eBGP peers. Because BGP peers typically include external sources, which are easier to spoof than internal sources, it makes sense to make the IP rACL policy for BGP as restrictive as possible using the /32 BGP peer addresses to reduce the risk of an external BGP attack. Conversely, because IGP peers are typically internal, fall within the same CIDR block, and are more difficult for external sources to spoof, an aggregate source address (for example, /24 as opposed to /32) may be specified as the permitted IGP peer source address range. This simplifies the IP rACL IGP policy rules significantly. This concept is illustrated in the IP rACL policy configuration shown in Example 5-9, which permits only OSPF packets sourced from the internal CIDR block 10.0.0.0/16.
Example 5-9. IOS IP Receive ACL to Permit OSPF Messages from Internal 10.0.0.0/16 Sources Only
! Add this line to the IP rACL policy to permit internal OSPF protocol messages
access-list 100 permit ospf 10.0.0.0 0.0.255.255 any precedence internet
!
You should also remember that uRPF or antispoofing ACL mechanisms can be deployed at the network edge, as described in Chapter 4, to prevent external sources from spoofing an address within an internal address range. Without antispoofing protection at the network edge, an attacker may be able to spoof an internal IP address within the permitted CIDR block specified by the IP rACL IGP policy rules. Hence, the combination of antispoofing protection at the edge and source-address-based IP rACL IGP policy rules narrows the scope for IGP attacks by preventing external ones. This is yet another example of defense in depth and breadth principles.
• Management protocols: Most organizations restrict by source IP address the management stations that have administrative access to infrastructure IP routers. (Management plane security is reviewed in detail in Chapter 6.) When IP rACLs are deployed, they must be constructed to permit specific management protocols, and you should also limit which IP hosts have management connectivity to IP routers. This includes limiting management protocol traffic such as Telnet, SSH, SNMP, ping, TACACS+, RADIUS, and NTP from only known network operations and security operations sources. As stated previously, IP rACLs apply to both the control and management planes and, optionally, the services plane. Therefore, IP rACL policies should also consider the known sources associated with each necessary management protocol. This concept is illustrated in the IP rACL policy configuration shown in Example 5-10, which permits only SSH, SNMP, DNS, TACACS+, NTP, FTP, ICMP, and traceroute. In this example, the 10.0.20.0/24 block is the aggregate address (CIDR) block associated with router management loopback interfaces, and 10.0.30.0/24 and 10.0.40.0/24 represent the network operations center (NOC) CIDR blocks.
Example 5-10. Sample IOS IP Receive ACL Entries to Permit Management Traffic from Explicit Sources
! Add lines such as these to the IP rACL policy to permit management protocols
!---SSH---(no telnet allowed!)
access-list 100 permit tcp 10.0.30.0 0.0.0.255 10.0.20.0 0.0.0.255 eq 22
access-list 100 permit tcp 10.0.30.0 eq 22 0.0.0.255 10.0.20.0 0.0.0.255 established
!--SNMP---
access-list 100 permit udp 10.0.30.0 0.0.0.255 10.0.20.0 0.0.0.255 eq snmp
!---DNS---
access-list 100 permit udp host 10.0.40.1 eq domain 10.0.20.0 0.0.0.255
!---TACACS+---
access-list 100 permit tcp host 10.0.40.2 10.0.20.0 0.0.0.255 established
!---NTP---
access-list 100 permit udp host 10.0.40.3 10.0.20.0 0.0.0.255 eq ntp
!---FTP---
access-list 100 permit tcp host 10.0.40.4 eq ftp 10.0.20.0 0.0.0.255
!---ICMP---
access-list 100 permit icmp any any echo-reply
access-list 100 permit icmp any any ttl-exceeded
access-list 100 permit icmp any any unreachable
access-list 100 permit icmp any any echo
!---TRACEROUTE---(this plus above icmp)
access-list 100 permit udp any gt 10000 any gt 10000
!
Limit Permitted IP Destination Addresses
A final phase of IP rACL configuration tightening is to limit permitted IP destination addresses. You may note that IP rACLs can be and often are written differently from typical interface ACLs due to their unique application point. That is, IP rACLs are applied on the receive path to the IOS process level. Because of their application point, IP rACLs only see IP packets with a destination of receive, and hence it is not mandatory that you explicitly define an IP destination address. The destination IP address can always be listed as any within the rACL. This difference from iACL construction can make IP rACLs simpler to deploy. However, specifying an explicit destination IP address, as is done in Examples 5-8 and 5-10 above, narrows the scope of spoofing attacks because the attacker must now know both the source and destination addresses associated with a permitted connection.
As outlined previously, a single IP router has many distinct IP addresses. Some are explicitly configured on an interface, as is the case with the 10.0.0.0/8 host addresses shown in Example 5-5. Others are implicitly assigned, such as the IANA-designated router multicast addresses (224.0.0.0 through 224.0.0.255), and the IP network and IP broadcast addresses associated with CIDR blocks (the .0 and .255 addresses for a /24 CIDR block, for example). Protocols based on TCP, such as BGP, Telnet, and SSH, as well as tunnel protocols such as GRE and IPsec, for example, use operator-configured IP addresses for protocol connections. It is quite common, for example, that router eBGP sessions use external interface IP addresses, whereas iBGP sessions use internal loopback IP addresses. Nevertheless, these protocols associate received protocol packets with (new or existing) connections using a 5-tuple representation including source address, destination address, source port, destination port, and IP protocol. Protocol packets having a 5-tuple that does not match a configured peer connection are discarded. TCP-based protocols also verify the integrity of the connection sequence numbers. These packet integrity checks, however, are performed at the IOS process level. Hence, a flood of invalid protocol packets that is discarded at the IOS process level may still adversely affect the router CPU.
This final phase of IP rACL configuration tightening is meant to limit the range of router destination addresses that will accept traffic for a permitted protocol. In this way, packets are filtered on the distributed line cards of the Cisco 7500 and 12000 series routers without any adverse impact on the router RP CPU. Router IP destination address integrity checks are not limited to static peer-defined TCP and tunnel protocols alone. They also apply to non-TCP protocols such as ICMP, OSPF, RIP, IGMP, PIM, and so on. One important difference with some (not all) of these protocols is the use of IANA-designated router multicast addresses (224.0.0.0 through 224.0.0.255). Any packets destined to an address within this range are automatically treated as CEF receive adjacencies. Individual protocols, however, use only specific addresses within this range. OSPF, for example, is designated the 224.0.0.5/32 and 224.0.0.6/32 addresses. Similarly, EIGRP and IGRP are designated the 224.0.0.10/32 address. Note that some protocols such as MPLS LDP have a UDP component for peer discovery as well as a TCP connection for reliable information exchange. Similar considerations must be applied for other protocols (for example, Multicast Source Discovery Protocol [MSDP]).
These guidelines provide an effective approach for deploying IP rACLs. You must also be sure to revisit IP rACL policies periodically to accommodate any network and configuration changes.
IP Receive ACL Feature Support
IP rACLs are widely deployed within IP networks today and have proven effective for filtering unauthorized traffic and packet types and for improving a router’s resistance to attacks. Thus, IP rACLs are considered a network security BCP. They also complement other security techniques by adding an additional layer of protection in support of the defense in depth and breadth principles outlined in Chapter 3. Lastly, as stated at the beginning of this section, IP rACLs are supported only within IOS Software Release 12.0S and for selected routers. The long-term strategy for control plane protection that implements enhanced capabilities and that is included in most Cisco IOS releases and platforms is Control Plane Policing (CoPP), as described in the next section.
Control Plane Policing
The IP rACL policies described in the previous section provide filtering granularity that either permits or denies traffic flows destined to the local IOS router itself (in other words, CEF receive adjacencies). In some cases, this is too limited because you may wish to permit a particular traffic stream but limit the rate at which you accept packets. CoPP does exactly this by taking IP rACLs a step further and leveraging the IOS Modular Quality of Service CLI (MQC) to provide filtering and rate-limiting capabilities for control plane packets. This allows you to specify a maximum rate for ingress control and management plane traffic flows, as opposed to simply permitting without limits the same traffic flow. You may, for example, want to permit SNMP requests but only up to a specific maximum rate so as to not adversely impact the router.
In addition, CoPP is capable of protecting the IOS process level from a broader range of traffic. Whereas IP rACLs apply strictly to packets with CEF receive adjacencies (for example, control and management plane packets destined for the local router), CoPP is also capable of enforcing policies against all packet types that are handled by the IOS process level. For example, and as described in Chapter 2, certain IP data plane (transit) packets are punted to the IOS process level for handling (for example, IP router alert option). Because these are transit packets, they do not have receive adjacencies and thus are not seen by IP rACLs. However, they are handled by the IOS process level and can potentially impact router performance. Thus, CoPP provides broader support for policing data plane exception packets and, as such, is effective for mitigating the transit DoS attacks that were described in Chapter 2.
CoPP is also widely available within IOS, including Cisco IOS 12.0S, 12.2S, 12.2SX, 12.2SBC, 12.3T, and later releases. There are some obvious and some subtle CoPP feature differences between these supported IOS releases and between IOS router platforms. For example, the Cisco 12000 series is capable of deploying CoPP at both an aggregate level and a distributed level (per line card). Many other platforms are capable of deploying CoPP both for input and for output rate limiting. However, the goal of CoPP across all of these releases and platforms is consistent. That is, CoPP is intended to manage the traffic flow of packets capable of reaching the IOS process level so that control and management plane states are maintained in the face of an attack or heavy process level traffic loads on the router. Some of these differences are described further in the “Platform-specific CoPP Implementation Details” section below. These concepts of operation for CoPP are illustrated in Figure 5-6.
Figure 5-6. Control Plane Policing Conceptual View

Before reviewing these variations, however, the basic techniques used to design and deploy CoPP policies must be discussed.
CoPP Configuration Guidelines
To protect an IOS router from an attack or heavy process level traffic loads, CoPP policies are applied to the receive interface, as described in Chapter 3, which is the forwarding path to the IOS process level from router network interfaces (both physical and channel ports). All traffic destined to the IOS process level is passed through this logical interface. In addition, locally sourced router traffic generated by the router egresses the IOS process level through this logical interface. CoPP input policies can be applied to traffic that ingresses this logical receive interface and, in certain routers, CoPP output policies can be applied to traffic that egresses this logical receive interface.
The general guidelines for deploying CoPP are similar to those for IP rACLs. Begin by creating fairly permissive policies, and gradually tighten them over time, after gaining operational experience. You should strive to make CoPP policies as restrictive as possible to prevent any unauthorized sources and packet types from hitting the IOS process level. In addition, use caution when creating CoPP policies to ensure that authorized traffic is not inadvertently filtered. Mistakenly filtering BGP or IGP protocol packets, for example, may cause a more detrimental impact than an attack itself. Lab deployments and pilot deployments are also recommended, to gain operational and router performance knowledge prior to full, network-wide CoPP deployments.
Defining CoPP Policies
CoPP leverages both IP ACLs and MQC to define its policies. Therefore, some of the steps for deployment are similar to those defined for IP rACLs. However, some additional steps are required, mainly to define traffic rates for authorized flows. Specific tasks to perform when deploying CoPP include the following:
Step 1. Identify appropriate traffic that is to be handled by CoPP for your network.
Step 2. Define packet classification ACLs.
Step 3. Define packet classification MQC class maps.
Step 4. Define the CoPP service policy.
Step 5. Apply the service policy to the control plane.
These steps are explained separately in the following sections.
Step 1: Identify Appropriate Traffic to Be Handled by CoPP for Your Network
This is analogous to the first of the IP rACL deployment guidelines detailed in the “IP Receive ACLs” section, but with some exceptions. Because CoPP sees all packet types that are handled by the IOS process level on the RP, you must identify not only the same receive adjacency traffic as before, but also the exception IP transit traffic and certain non-IP traffic that also hits the IOS process level. It is recommended that a classification ACL be used within a simple CoPP policy (as you will learn about in Steps 2 and 3 below) to identify IP traffic that is handled by the IOS process level on the RP. This will be useful for identifying both receive and punted transit IP traffic. As for non-IP traffic, the only protocol capable of being classified directly by CoPP today is ARP. As you will see in Step 4, all other non-IP packets (such as Layer 2 keepalives, and so on) are handled by the MQC-defined class-default traffic class.
Note
The process of identifying acceptable traffic to be handled by CoPP is a bit of a chicken-or-egg problem. How do you create a CoPP policy without identifying traffic hitting the IOS process level on the RP? And how do you identify traffic hitting the IOS process level without creating a CoPP policy? The answer is to create a very simple, single-class policy using a classification ACL (all permits), and then apply this classification CoPP policy to the logical receive interface for a period of time sufficient to collect the data required to build the formal CoPP policy.
Step 2: Define Packet Classification ACLs
Because the focus of CoPP is to provide rate limits (some of which could be to drop at any rate) to different traffic types, the prime focus of this step is to organize traffic that hits the IOS process level into groups of like priority. That is, some types of traffic, BGP and whatever IGP is being used, will always be allowed to reach the IOS process level with a rate limit, while others, such as ICMP, SNMP, and so on, will be allowed to reach the IOS process level but with a very restricted rate. Thus, the traffic types identified in Step 1 are separated into different traffic classes, and a suggested starting point includes the following:
• Routing: Control plane traffic that is crucial to the operation of the network, such as iBGP, eBGP, and whatever IGP is being used in the network.
• Management: Management plane traffic that is necessary for day-to-day operations, such as SSH, SNMP, NTP, FTP, DNS, Syslog, and so on, but that you may wish to constrain to some maximum rate limit.
• Normal: Other identifiable IP or non-IP (ARP) traffic that is expected, but that is not essential for network operations and that setting some rate limit for is appropriate.
• Undesirable: Traffic that can be identified as explicitly bad or malicious (for example, IP fragments or known worms, and so on) and that should be denied access to the IOS process level on the RP.
• Remaining IP: Because CoPP sees all traffic handled by the IOS process level, there will almost always be some exception transit IP traffic that cannot be identified ahead of time. This traffic must be permitted, but should definitely be rate limited to ensure that the RP CPU is not overrun.
Similar to MQC interface policies, CoPP policies use MQC traffic classes defined by the MQC class-map command in IOS global configuration mode. CoPP policies support the following MQC classification (match) criteria:
• Standard and extended IP ACLs using the match access-group keyword.
• IP ToS values including match ip dscp and match ip precedence keywords. Similar to the IP rACL deployment guidelines described previously, CoPP deployments should also consider IP precedence values within the policy configuration. The Cisco 10720 also supports match mpls experimental and match qos-group.
• ARP protocol packets using the match protocol arp command. Note, the match protocol arp command is not supported within the Cisco IOS 12.2SX release. The Cisco 10720 also supports the MQC match protocol ipv6 command.
• Ingress router interface using match input-interface. This is supported only on the Cisco 10720 Internet router.
The most general approach within MQC for matching traffic types is to use classification ACLs. As you will recall in MQC, when ACLs are used to match traffic, a permit entry is equivalent to a match, and a deny entry is equivalent to a match not. For CoPP, you will most likely create classification ACLs that contain only permit statements. Therefore, you need to create a unique ACL for each traffic category (or class) defined. These ACLs should be as specific as possible, including protocol, source address, and destination address criteria, because this is how traffic types will be classified within the CoPP traffic classes. The definition of these ACLs is one of the most critical steps in the CoPP deployment process. MQC uses these ACLs to define the traffic classes, which in turn become the object of the policy actions (that is, policing). Appropriate granularity in the distribution of protocols within these ACLs also allows for better protection of the RP CPU.
Using the same traffic examples used for the IP rACL descriptions previously shown, Example 5-11 illustrates sample ACL policies that will be used for the routing, management, normal, undesirable and remaining IP traffic classes described previously.
Example 5-11. Sample IOS CoPP Packet Classification ACLs
! ROUTING ----------------- Defined as routing protocols this routing will process
!---iBGP Peers---
access-list 120 permit tcp host 10.0.10.1 gt 1024 host 10.0.10.11 eq bgp
access-list 120 permit tcp host 10.0.10.1 eq bgp host 10.0.10.11 gt 1024 established
access-list 120 permit tcp host 10.0.20.1 gt 1024 host 10.0.20.11 eq bgp
access-list 120 permit tcp host 10.0.20.1 eq bgp host 10.0.20.11 gt 1024 established
!---eBGP Peers---
access-list 120 permit tcp host 209.165.200.13 gt 1024 host 209.165.201.1 eq bgp
access-list 120 permit tcp host 209.165.200.13 eq bgp host 209.165.201.1 gt 1024
established
!---OSPF protocol messages---
access-list 120 permit ospf 10.0.0.0 0.0.255.255 any precedence internet
!
! MANAGEMENT ------ Defined as traffic required to access and manage the router
!---SSH---(no telnet allowed!)
access-list 121 permit tcp 10.0.30.0 0.0.0.255 10.0.20.0 0.0.0.255 eq 22
access-list 121 permit tcp 10.0.30.0 0.0.0.255 eq 22 10.0.20.0 0.0.0.255 established
!---SNMP---
access-list 121 permit udp 10.0.30.0 0.0.0.255 10.0.20.0 0.0.0.255 eq snmp
!---DNS---
access-list 121 permit udp host 10.0.40.1 eq domain 10.0.20.0 0.0.0.255
!---TACACS+---
access-list 121 permit tcp host 10.0.40.2 10.0.20.0 0.0.0.255 established
!---NTP---
access-list 121 permit udp host 10.0.40.3 10.0.20.0 0.0.0.255 eq ntp
!---FTP---
access-list 121 permit tcp host 10.0.40.4 eq ftp 10.0.20.0 0.0.0.255
!---TRACEROUTE---(this plus below ICMP)
access-list 121 permit udp any gt 10000 any gt 10000
!
! NORMAL ------ Defined as other traffic destined to the router to track and limit
!---ICMP---
access-list 122 permit icmp any any echo
access-list 122 permit icmp any any echo-reply
access-list 122 permit icmp any any ttl-exceeded
access-list 122 permit icmp any any unreachable
access-list 122 permit icmp any any port-unreachable
access-list 122 permit icmp any any packet-too-big
!
! UNDESIRABLE -------------- Defined as traffic explicitly blocked (known malicious)
access-list 123 permit tcp any any fragments
access-list 123 permit udp any any fragments
access-list 123 permit icmp any any fragments
access-list 123 permit ip any any fragments
access-list 123 permit udp any any eq 1434
!
! REMAINING IP --------------- Defined as all previously unclassified packets
access-list 124 permit ip any any
!
As previously mentioned, these classification ACLs use only permit statements. Hence, all traffic that you want to explicitly group within a given class must be selected with a permit statement. The best example of this is the undesirable traffic class, as illustrated in Example 5-11. In this ACL (123), the use of the permit statement specifies that all IP noninitial fragments and SQL Slammer packets (in this case) are classified as undesirable. These packets will later be discarded in the policy statement definition configured for this class. As mentioned, packets that match a deny statement within an MQC access-group classification ACL are not classified within the associated MQC class-map. This also applies to the implicit deny at the end of the ACL policy as well. The policy actions that are applied to the traffic classes are specified within the CoPP policy configuration as described in Step 4 a bit later.
Step 3: Define Packet Classification MQC Class Maps
Now you must create class maps to complete the traffic-classification process using the previously defined ACLs from Step 2 to categorize IP packets into discrete classes. MQC class maps permit multiple match criteria, as well as nested class maps. The MQC match-any keyword requires that packets meet only one match criteria to be considered “in the class,” whereas the MQC match-all keyword requires that packets meet all of the match criteria to be considered “in the class.” If neither match-any nor match-all is specified, the default behavior is consistent with the match-all keyword. MQC match-not provides criterion that prevents a packet from being included in the class. In general, a match-all classification scheme with a simple, single-match criteria will satisfy initial deployments for CoPP. This is illustrated in Example 5-12 and leaves open the option for fine-tuning through multiple match criteria in the longer term.
Example 5-12. Sample IOS MQC Class Map Format
Router(config)# class-map match-all {class-map-name}
Router(config-cmap)# match access-group {acl-number}
In general, traffic destined to the undesirable class should follow a “match-any” classification scheme. Further, creating class maps with descriptive names also simplifies deployment and operational complexity.
Using the ACLs defined in Step 2, Example 5-13 constructs class maps for the specific traffic classes defined.
Example 5-13. Sample IOS CoPP Traffic Classes Defined Using ACLs
! Define a class for each type of traffic and associate the appropriate ACL
! Define a class-map to collect routing traffic...
class-map match-all CoPP-routing
match access-group 120
! Define a class-map to collect management traffic...
class-map match-all CoPP-management
match access-group 121
! Define a class-map to collect other normal traffic (icmp's etc.)
class-map match-all CoPP-normal
match access-group 122
! Define a class-map to collect undesirable traffic (attacks, etc.)
class-map match-any CoPP-undesirable
match access-group 123
! Define a class-map to collect all remaining IP traffic
class-map match-all CoPP-remaining-IP
match access-group 124
!
Step 4: Define the CoPP Service Policy
Once the MQC class maps are defined in Step 3, they can be used to define policies to enforce each traffic class by referring to them within an MQC policy-map. The MQC policy map is used to associate specific policy actions with specific traffic classes. Two MQC commands are supported within CoPP policy maps, police and drop. Within IOS Software Release 12.0S, only the police command is available. However, drop may be used as an action within the police command for each of the conform-action, exceed-action, and violate-action arguments. This is similar to how traffic flows are permitted within CoPP policies except the permit action is used within the police command instead of drop. Example 5-14 illustrates a CoPP policy with four distinct traffic classes.
Example 5-14. Sample IOS CoPP Drop, Rate-Limit, and Transmit Action Formats
!
policy-map copp-in
class class1
drop
class class2
police 8000 conform-action drop exceed-action drop
class class3
police 10000 conform-action transmit exceed-action drop
class class4
police 20000 conform-action transmit exceed-action transmit
!
control-plane
service-policy input copp-in
!
As illustrated in Example 5-14, all traffic associated with class1 and class2 is filtered (discarded). Traffic associated with class3 is rate limited to 10 kbps and traffic associated with class4 is allowed with no maximum rate limit specified. The 20-kbps rate specified for class4 is insignificant given the exceed-action is transmit. For more detailed information on MQC, refer to the white paper “Cisco Modular Quality of Service Command Line Interface” (listed in the “Further Reading” section). Refer to Chapters 4 and 7 for a discussion on QoS security techniques and the QoS services plane, respectively.
Typical deployments for CoPP use the general format shown in Example 5-15, where {action} is transmit or drop.
Example 5-15. IOS MQC Policy Map Template
Router(config)# policy-map {policy-map-name}
Router(config-pmap)# class {class-map-name}
Router(config-pmap-c)# police {rate} [burst-normal] [burst-max] conform-action
{action} exceed-action {action}
For new CoPP deployments, it is best to start out with a basic, forgiving policy that does not police (rate limit) any traffic classes, with the exception of the CoPP-undesirable class, until you confirm that all protocols are properly classified among class maps and that no authorized traffic has been overlooked. An overly constraining policy can result in network issues, such as loss of management connectivity, or more impacting conditions, such as loss of routing protocols and link state. This is especially true for the catch-all CoPP-remaining-IP class and the always-present class-default class.
One deployment approach is to start out with conform-action transmit exceed-action transmit on all class maps except CoPP-undesirable, and tighten from there once operational experience is gained. Example 5-16 illustrates the CoPP policy configuration using the traffic classes defined previously. It is highly recommended that you start out with a pilot deployment on a few representative routers to gain experience and an understanding of traffic rates within each class map. Note that the police command rates used in Example 5-16 are for illustration purposes only. You must determine what the appropriate rates are for your network. Guidance on performing this task follows shortly.
Example 5-16. Sample IOS CoPP Policy Configuration
! Define a policy-map for CoPP...
policy-map CoPP
class CoPP-undesirable
police 8000 1500 1500 conform drop exceed drop
class CoPP-routing
police 125000 1500 1500 conform transmit exceed transmit
class CoPP-management
police 50000 1500 1500 conform transmit exceed transmit
class CoPP-normal
police 15000 1500 1500 conform transmit exceed transmit
class CoPP-remaining-IP
police 8000 1500 1500 conform transmit exceed transmit
class class-default
police 8000 1500 1500 conform transmit exceed transmit
!
Based on Example 5-16, there are several critical things you need to know about policy-map CoPP and its construction for use with CoPP:
• The class CoPP-undesirable is defined first. As with all MQC policy maps, class maps are processed in order and, hence, the order in which you arrange class maps within the policy map is critical to the operational effectiveness of CoPP. As soon as a match occurs, no further packet classification processing occurs with the current or any subsequent class maps. That is, a packet can be classified as belonging to only a single class map, and it is the first class map during which a match is determined. Therefore, because the desired policy is to deny fragments to the IOS process level on the RP, and fragments are included in the CoPP-undesirable class, this class must be defined first (with a drop policy) to prevent noninitial fragments from reaching the IOS process level. If the CoPP-undesirable class is not defined prior to other classes, fragmented packets may be matched by an earlier class map and handled by that class map’s policy action. This applies to all undesirable traffic as well. Thus, the CoPP-undesirable traffic class should be specified first within the CoPP policy map configuration to prevent undesirable traffic from being mistakenly classified into another CoPP traffic class.
• The class CoPP-remaining-IP is defined second from last. Because class maps are processed in order, any IP traffic that is not explicitly matched by entries ahead of class CoPP-remaining-IP will be matched by this class. There are two main reasons why you want to define a catch all IP class immediately prior to class-default. First, exception IP transit traffic must be handled by the IOS process level but cannot be matched by explicit policies (for example, Router Alert option). Because some attack vectors attempt to exploit this, it is recommended that this catch all IP class be defined to appropriately rate limit this traffic class. Second, and equally as important, if this catch-all IP class is not defined, then all of these transit IP and exception IP traffic flows will fall into the class-default class. As you will see next, because other non-IP traffic also falls into class-default, it is not recommended that class-default be rate limited. Thus, without the catch-all IP class CoPP-remaining-IP, you would be unable to prevent transit IP and exception IP traffic from adversely impacting L2 protocol traffic, including keepalives.
• The class class-default is automatically placed last in the policy map. Any traffic that does not match any of the defined class maps previously described automatically falls into the class class-default. MQC class-default is a special class that is automatically defined and always included in MQC policies, whether it is specified by name or not. If it is not explicitly specified, it is still included but is not policed in any way. If it is included, as it is in Example 5-16, then an appropriate police action must be specified. In the current CoPP implementation (all IOS versions), the only Layer 2 protocol that can be matched by MQC within CoPP is ARP. (When ARP is not specifically classified, as it is not in Example 5-13 above, it will also fall into the class-default class.) All other non-IP and Layer 2 control plane packets will also fall into class-default. Non-IP and Layer 2 traffic includes Layer 2 keepalives, CLNS, as well as (at the time of this writing) MPLS labeled packets handled at the IOS process level, including those with the Router Alert Label or having an aggregate label that requires a second-level packet header lookup. Because of this, class-default should never be policed. As mentioned previously, this is why the class map immediately prior to class-default must be a catch-all for all remaining and unclassified IP traffic. This guarantees that class-default only contains non-IP and Layer 2 control plane traffic, and that it can safely be left unpoliced. You may also consider defining a distinct CoPP traffic class for ARP traffic, as illustrated in Example 5-17, to isolate ARP traffic from other types of Layer 2 traffic. A distinct CoPP class for ARP traffic would then limit the aggregate rate of ARP traffic received, thereby helping to mitigate the risk of ARP attacks.
Example 5-17. Sample IOS CoPP Traffic Classes Defined for ARP Traffic
! Define a class-map to collect ARP traffic...
class-map match-all CoPP-arp
match protocol arp
• Finally, it is critical to note that, while CoPP policies are defined using MQC syntax, which is generally used for QoS services, this same usage within CoPP does not guarantee the specified bandwidth to the IOS process level for the relevant class. Rather, it is used to limit the bandwidth to the IOS process level that any one traffic class can consume. Also note that the configured maximum rate is the aggregate limit for all traffic associated with the specific class. Consider the case where the ACL used in a rate-limited class combines several protocols—for example, ACL 121 of Example 5-11 above used in the class CoPP-management. Each of those individual protocol’s entries then is capable of consuming the entire amount of bandwidth dedicated to this class. Hence, under attack, it may not be possible to use one configured protocol if another one within the same class is consuming all of the allocated bandwidth. Using ACL 121 and the class CoPP-management as an example, suppose that SNMP was leveraged within a DoS attack and consumed the allocated bandwidth assigned to the CoPP-management class. In this case, you might find it difficult using SSH to gain remote access into the router. Thus, constructing class maps with ACLs that match a single protocol may be reasonable in certain cases (for example, SSH) to provide more-assured availability under attack. Note that if a class is not rate limited, as is the case with the class CoPP-routing of Example 5-16 above, then the class has no maximum limit and one protocol cannot starve another within the same class map. Traffic classes that are not policed are justifiable in certain cases (for example, routing). However, normal traffic that is expected but not essential for network operations should be policed to mitigate the risk of a heavy load of normal traffic from adversely affecting routing and management protocols.
Step 5: Apply the Service Policy to the Control Plane
The final step in deploying CoPP is to attach the policy map developed in Step 4 to the logical receive interface. The general commands for applying the CoPP policy in the input direction are illustrated in Example 5-18.
Example 5-18. IOS CoPP Policy Attachment
! Attached the CoPP policy to the control plane interface
control-plane
service-policy input CoPP
!
This generalized form is available on all router platforms that support CoPP. The Cisco 12000 series includes an additional distributed mode of CoPP. This and other 12000-specific CoPP deployment guidelines are described later in this section.
Now that you have learned about CoPP policy construction methods, let’s turn the attention toward CoPP policy tuning.
Tuning CoPP Policies
Policy construction is the key to operational success with CoPP. Policies will need to be adjusted over time, however. It is possible that adjustments such as adding class maps or adding or modifying ACLs may be required, especially as new routers and services are deployed. However, the primary effort that likely will be required is to make adjustments to the rate limits applied to policy map classes. Questions on how to best tune policy rate limits are the most frequently asked by network operators, and thus will be the main focus here.
When a CoPP policy is initially deployed, as previously mentioned, the initial policers should be conform transmit exceed transmit on all classes, except CoPP-undesirable. You can then use the results of the show policy-map command to understand the baseline measurements of the current traffic rates for each class within the policy map. After the production CoPP policy is deployed, you use these same techniques to validate rate-limit settings and fine-tune policies as necessary. The show policy-map command provides several keywords that help refine the output to information specific to the control plane. Some of the more important commands include the following:
• Verify and review the CoPP service policy map configuration and status:
show policy-map control-plane [all] [input [class {class-name}] | output [class
{class-name}]]
• Verify/review (all) policy map(s) configured on the router:
show policy-map [policy-map-name]
• In addition to the show policy-map command, the show class-map command also provides invaluable information. Verify/review (all) class map(s) configured on the router:
show class-map[class-map-name]
• Finally, reviewing the ACE counters on the access lists associated with class maps provides a wealth of information in terms of how effectively your policies are constructed to classify appropriate traffic. If you see a large number of hits against the ACL used in the catch-all IP class CoPP-remaining-IP, you should review the traffic types that are hitting this class and potentially modify other class map ACLs as appropriate to explicitly classify this traffic. Verify/review (all) access lists (associated with the class maps):
show access-lists [ACL-number]
Example 5-19 shows a sample of the output generated by the show policy-map control-plane input command. As you can see, this output lists, per class map, the packet rates for matching traffic that both conforms or exceeds the policy, the names of the traffic classes and match criteria (ACLs in this case), and the policy action (police). These results should provide valuable guidance for policy tuning.
Example 5-19. Sample show policy-map Output Detailing CoPP Class Statistics
Router# show policy-map control-plane input
Control Plane
Service-policy input: CoPP (225)
Class-map: CoPP-undesirable (match-any) (4988273/4)
0 packets, 0 bytes
5 minute offered rate 0 bps, drop rate 0 bps
Match: access-group 123 (4791698)
0 packets, 0 bytes
5 minute rate 0 bps
police:
cir 8000 bps, bc 1500 bytes
conformed 0 packets, 0 bytes; actions:
drop
exceeded 0 packets, 0 bytes; actions:
drop
conformed 0 bps, exceed 0 bps
Class-map: CoPP-routing (match-all) (7222977/1)
0 packets, 0 bytes
5 minute offered rate 0 bps, drop rate 0 bps
Match: access-group 120 (11449986)
police:
cir 125000 bps, bc 1500 bytes
conformed 0 packets, 0 bytes; actions:
transmit
exceeded 0 packets, 0 bytes; actions:
transmit
conformed 0 bps, exceed 0 bps
Class-map: CoPP-management (match-all) (10957137/3)
0 packets, 0 bytes
5 minute offered rate 0 bps, drop rate 0 bps
Match: access-group 121 (5208466)
police:
cir 50000 bps, bc 1500 bytes
conformed 0 packets, 0 bytes; actions:
transmit
exceeded 0 packets, 0 bytes; actions:
transmit
conformed 0 bps, exceed 0 bps
Class-map: CoPP-normal (match-all) (12606385/2)
0 packets, 0 bytes
5 minute offered rate 0 bps, drop rate 0 bps
Match: access-group 122 (8647266)
police:
cir 15000 bps, bc 1500 bytes
conformed 0 packets, 0 bytes; actions:
transmit
exceeded 0 packets, 0 bytes; actions:
transmit
conformed 0 bps, exceed 0 bps
Class-map: CoPP-remaining-IP (match-all) (1062113/5)
40 packets, 8589 bytes
5 minute offered rate 1000 bps, drop rate 0 bps
Match: access-group 124 (10461554)
police:
cir 8000 bps, bc 1500 bytes
conformed 40 packets, 8589 bytes; actions:
transmit
exceeded 0 packets, 0 bytes; actions:
transmit
conformed 1000 bps, exceed 0 bps
Class-map: class-default (match-any) (9318433/0)
18 packets, 46123 bytes
5 minute offered rate 6000 bps, drop rate 0 bps
Match: any (4397474)
18 packets, 46123 bytes
5 minute rate 6000 bps
police:
cir 8000 bps, bc 1500 bytes
conformed 8 packets, 1383 bytes; actions:
transmit
exceeded 10 packets, 44740 bytes; actions:
transmit
conformed 0 bps, exceed 6000 bps
Router#
Example 5-20 shows sample output generated by the show access-lists command. As you can see, this output lists the ACE classification rules associated with each ACL and nonzero hit counts per ACE rule. The output of Example 5-20 accounts for 1000 ping packets sent to the router and permitted by the CoPP policy.
Example 5-20. Sample show access-lists Output Detailing ACL
Router# show access-lists
Extended IP access list 120
permit tcp host 10.0.10.1 gt 1024 host 10.0.10.11 eq bgp
permit tcp host 10.0.10.1 eq bgp host 10.0.10.11 gt 1024 established
permit tcp host 10.0.20.1 gt 1024 host 10.0.20.11 eq bgp
permit tcp host 10.0.20.1 eq bgp host 10.0.20.11 gt 1024 established
permit tcp host 209.165.200.13 gt 1024 host 209.165.201.1 eq bgp
permit tcp host 209.165.200.13 eq bgp host 209.165.201.1 gt 1024 established
permit ospf 10.0.0.0 0.0.255.255 any precedence internet
Extended IP access list 121
permit tcp 10.0.30.0 0.0.0.255 10.0.20.0 0.0.0.255 eq 22
permit tcp 10.0.30.0 0.0.0.255 eq 22 10.0.20.0 0.0.0.255 established
permit udp 10.0.30.0 0.0.0.255 10.0.20.0 0.0.0.255 eq snmp
permit udp host 10.0.40.1 eq domain 10.0.20.0 0.0.0.255
permit tcp host 10.0.40.2 10.0.20.0 0.0.0.255 established
permit udp host 10.0.40.3 10.0.20.0 0.0.0.255 eq ntp
permit tcp host 10.0.40.4 eq ftp 10.0.20.0 0.0.0.255
permit udp any gt 10000 any gt 10000
Extended IP access list 122
permit icmp any any echo (1000 matches)
permit icmp any any echo-reply
permit icmp any any ttl-exceeded
permit icmp any any unreachable
permit icmp any any port-unreachable
permit icmp any any packet-too-big
Extended IP access list 123
permit tcp any any fragments
permit udp any any fragments
permit icmp any any fragments
permit ip any any fragments
permit udp any any eq 1434
Extended IP access list 124
permit ip any any
Router#
!
SNMP queries may also be used to automate the process of gathering CoPP service policy transmit and drop rates. The Cisco QoS MIB CISCO-CLASS-BASED-QOS-MIB provides the primary mechanisms for MQC-based policy monitoring via SNMP. The implementation of this MIB is IOS release-dependent. Example 5-21 and Example 5-22 show simultaneous sample outputs generated by the show policy map control-plane IOS command and the snmpwalk SNMP command, respectively, and that indicate identical statistics for each class within the policy map.
Example 5-21. Sample show policy-map control-plane Output Detailing CoPP Class Statistics
Router# sh policy-map control-plane input | include packets
0 packets, 0 bytes
conformed 0 packets, 0 bytes; actions:
exceeded 0 packets, 0 bytes; actions:
0 packets, 0 bytes
conformed 0 packets, 0 bytes; actions:
exceeded 0 packets, 0 bytes; actions:
1058 packets, 110704 bytes
conformed 88 packets, 9824 bytes; actions:
exceeded 970 packets, 100880 bytes; actions:
1002 packets, 104196 bytes
conformed 21 packets, 2172 bytes; actions:
exceeded 981 packets, 102024 bytes; actions:
6799 packets, 1398439 bytes
conformed 6791 packets, 1394827 bytes; actions:
exceeded 8 packets, 3612 bytes; actions:
2923 packets, 7505870 bytes
conformed 1285 packets, 177458 bytes; actions:
exceeded 1638 packets, 7328412 bytes; actions:
Router#
Example 5-22. Sample snmpwalk Output Detailing CoPP Class Statistics
unix-station$ snmpwalk -v 2c -c cisco 10.82.69.121 .1.3.6.1.4.1.9.9.166.1.15.1.1.2
SNMPv2-SMI::enterprises.9.9.166.1.15.1.1.2.225.1062113 = Counter32: 6799
SNMPv2-SMI::enterprises.9.9.166.1.15.1.1.2.225.4988273 = Counter32: 0
SNMPv2-SMI::enterprises.9.9.166.1.15.1.1.2.225.7222977 = Counter32: 0
SNMPv2-SMI::enterprises.9.9.166.1.15.1.1.2.225.9318433 = Counter32: 2923
SNMPv2-SMI::enterprises.9.9.166.1.15.1.1.2.225.10957137 = Counter32: 1058
SNMPv2-SMI::enterprises.9.9.166.1.15.1.1.2.225.12606385 = Counter32: 1002
unix-station$
The bottom line is, you should review and tune your CoPP service policies based on the statistics learned through the use of IOS CLI show commands and/or management station snmp queries. You should review service policy transmit and drop rates to ensure that the appropriate traffic types and rates are receiving the appropriate policing policy. The IOS command show policy-map control-plane is invaluable for reviewing and tuning site-specific policies and troubleshooting CoPP. This displays dynamic information about the number of packets (and bytes) conforming or exceeding each policy definition. This command is useful for ensuring that appropriate traffic types and rates are reaching the IOS process level on the RP. You should also review the output of the IOS command show access-list, which displays hit counts on a per-ACE basis. The presence or absence of hits indicates flows or lack thereof for that packet type reaching the IOS process level. Large numbers of packets or an unusually rapid increase in rate of packets processed may be suspicious and should be investigated. The lack of packets may also indicate unusual behavior, or that a rule may need to be revisited.
When updating CoPP deployments, tighten existing policies based on confirmation of appropriate protocol distributions within each class map, and on confirmation of traffic rates within each class map under normal operating conditions. It is also highly recommended that you understand the behavior and performance of your CoPP policy when the router is under attack. This should be accomplished within a lab environment, and preferably before “the real thing” hits your operational network. When setting rate-limiting policies, take care to ensure that the required rates of traffic are well understood. A very low rate might discard necessary traffic, whereas a high rate might allow the IOS process level to be inundated with a flood of noncritical packets. Overall, the following general principles have proven effective in operational settings:
• Routing protocols should never be rate limited.
• Management traffic should be rate limited to prevent spoofed packets and to prevent rogue servers or processes from consuming excessive bandwidth to the IOS process level on the RP.
• User traffic that must be permitted (for example, ICMP and so forth) should be rate limited to prevent abuse (the main reason for CoPP, of course).
• An undesirable class should always be configured, should always come first, and should always have the policy actions of conform-action drop exceed-action drop.
• A catch-all IP class should always be configured, should always come second to last in ordering (just before class-default), and should always be carefully rate limited (based on operational experience).
• The class-default class should never be policed (conform transmit exceed transmit). Optionally, define a distinct ARP traffic class to limit the aggregate rate of ARP traffic received.
CoPP Handling of Malicious Traffic
As an advanced CoPP deployment technique, you may consider adding an additional class to your CoPP policy (in addition to an ARP traffic class). The CoPP policy map listed in Example 5-16 contains six classes in the following order: CoPP-undesirable, CoPP-routing, CoPP-management, CoPP-normal, CoPP-remaining-IP, and class-default. The CoPP-arp class illustrated in Example 5-17 represents a seventh class. If you follow the progression of authorized control and management plane traffic, legitimate but unclassifiable traffic (for example, exception IP transit traffic), and malicious (unauthorized) traffic flows through this CoPP policy map, recalling that classes are processed in order and the first match terminates the processing for each packet, you will see the following:
• Upon entering the policy map, authorized control and management plane traffic will pass through the CoPP-undesirable class, and then should be picked up by class CoPP-routing, CoPP-management, or CoPP-normal (assuming the traffic characterization process has been thoroughly completed). If this traffic is picked up by the class CoPP-remaining-IP, you must reconfigure your ACLs to move this traffic to the appropriate authorized traffic class.
• Upon entering the policy map, legitimate but unclassifiable traffic (for example, exceptions IP transit traffic) will pass through the classes CoPP-undesirable, CoPP-routing, CoPP-management, and CoPP-normal and then be picked up by the class CoPP-remaining-IP. This is the desired behavior.
• Upon entering the policy map, malicious IP traffic will have one of two things occur given the configuration shown in Example 5-16: If the malicious traffic matches the characteristics defined for the class CoPP-undesirable, it will match this class and be discarded. For example, SQL Slammer traffic destined to the RP would automatically be discarded in this case. However, other malicious traffic that does not hit the class CoPP-undesirable will continue on through the remaining classes until it hits CoPP-remaining-IP. In this case, malicious traffic and legitimate exceptions traffic are both matching this single class.
Obviously, you’d like to drop all malicious traffic and allow legitimate traffic at some specified rate. So how do you distinguish between legitimate and malicious traffic in this case? If you consider what malicious means from the perspective of the router and the RP, this can actually be reasonably well defined. Realistically, from the perspective of the router, it is not appropriate to define exception IP transit traffic as malicious because you just do not know whether it is or is not malicious. It could be, but you cannot be certain. In this case, it is completely appropriate, however, to rate limit how much of this traffic is able to hit the IOS process level on the RP—and that is in fact what the policy for the class CoPP-remaining-IP does. What you can define as malicious for certain is any traffic that has a CEF receive adjacency (receive) destination and that is not already classified by the classes CoPP-routing, CoPP-management, and CoPP-normal. For example, ACL 120 is used by class CoPP-routing to classify legitimate BGP traffic. However, if an attacker were to source malicious BGP traffic toward the same receive destination, that traffic would not match ACL 120 and would end up hitting the class CoPP-remaining-IP in this case. The fact that malicious traffic ends up in the class CoPP-remaining-IP along with legitimate exception IP transit traffic makes setting an appropriate rate for class CoPP-remaining-IP very difficult.
Therefore, as an advanced deployment technique, it is recommended that you create an additional class (call it CoPP-bad-receive, for example) that is designed to catch all traffic destined to the receive address space and that has not been previously identified as legitimate by any other classes. This new class must then be placed third from last within the policy map, just ahead of the class CoPP-remaining-IP, so that it can police this unauthorized traffic headed toward the receive address space (that is, the control and management plane). If you assume that ACLs 120, 121, and 122 cover all legitimate traffic destined to the receive address space, then a new ACL must be created to cover all other traffic for these same receive destinations. Example 5-23 shows this sample configuration, including the new classification ACL (125), class-map (CoPP-bad-receive), and policy-map (CoPP-extra), as well as the required class ordering. (Note: it is assumed that the receive address space is fully contained within the 10.0.0.0/8 address block.)
Example 5-23. IOS CoPP Configurations to Drop Malicious Traffic to the IOS Process Level on the RP
! Define ACL - Anything not previously classified and destined to receive block
should be matched (and discarded)
access-list 125 permit ip any 10.0.0.0 0.255.255.255
!
! Define a class-map to collect ACL 125 traffic...
class-map match-all CoPP-bad-receive
match access-group 125
! Define the new policy-map for CoPP...
policy-map CoPP-extra
class CoPP-undesirable
police 8000 1500 1500 conform drop exceed drop
class CoPP-routing
police 125000 1500 1500 conform transmit exceed transmit
class CoPP-management
police 50000 1500 1500 conform transmit exceed transmit
class CoPP-normal
police 15000 1500 1500 conform transmit exceed transmit
class CoPP-bad-receive
police 8000 1500 1500 conform transmit exceed drop
class CoPP-remaining-IP
police 8000 1500 1500 conform transmit exceed drop
class class-default
police 8000 1500 1500 conform transmit exceed transmit
!
Because classes are processed top-down within a policy map, you should see that legitimate receive adjacency traffic will be properly classified in class CoPP-routing, CoPP-management, and CoPP-normal. Other packets with a receive destination are malicious and will be classified into the CoPP-bad-receive class. The policy in Example 5-23 rate limits this class to a very low level. This is done to leave some margin of error in case ACLs 120, 121, and 122 are not complete. However, over time, you should strive to change the policy for class CoPP-bad-receive to conform-action drop exceed-action drop.
Note also that this behavior can also be accomplished by modifying the already-existing class CoPP-undesirable rather than creating a new class and updating the policy map. Using this approach, however, requires the addition of pairs of ACL entries that first include a deny statement that mimics each legitimate (in other words, permitted) traffic specification in ACLs 120, 121, and 122, followed by a permit statement for the same protocols but using any in the source field and 10.0.0.0/8 (in this case) in the destination field. In this way, legitimate traffic will match the deny statements, causing no further processing for this class but allowing the legitimate traffic to still be classified against the remaining CoPP classes. Subsequently, this legitimate traffic would match the appropriate class as described earlier. However, malicious traffic will not match the deny statement but will instead hit the permit statement for the same protocol and be discarded.
These guidelines should provide you with the tools necessary to successfully deploy CoPP within your network. As stated at the beginning of the CoPP section, CoPP offers two different operating modes, aggregate and distributed. Aggregate mode CoPP generally operates within the central RP CPU of an IOS router. The Cisco 10720, 10000 (PRE-2 and PRE-3), 7600/6500 (PFC3), and Catalyst 4500 series, however, provide hardware-based (ASIC) support for aggregate mode CoPP. Hardware-based aggregate CoPP prevents filtered traffic from adversely affecting the central RP CPU because filtered packets are discarded in hardware and not at the IOS process level. Although software-based IOS router platforms (for example, ISR, 7200) support aggregate CoPP functions within the RP CPU only, aggregate software-based CoPP has still proven to be an effective added layer of protection because filtered packets are immediately discarded prior to any protocol processing at the IOS process level. The aggregate and distributed modes of CoPP are described further in the “Platform-specific CoPP Implementation Details” section that follows.
CoPP output policies are also supported within IOS Software Releases 12.2(25)S, 12.3(4)T, and later, excluding the Cisco 10720 and 7500 series. The CoPP output policy applies to egress packets that are locally sourced by the router—for example, ICMP replies. However, CoPP output policies do not reduce packet processing resources at the IOS process level because the router still generates the packet only to be silently discarded by the CoPP output policy. Hence, the benefit of a CoPP output policy is limited in terms of DoS protection. However, a CoPP output policy can provide a stealth capability to your router deployment by preventing router-generated responses from being emitted by the router. (In some forums, this is referred to as emanations security, or EmSec for short.)
Platform-Specific CoPP Implementation Details
There are some platform-specific implementation details that are important for operational CoPP deployments. These platform-specific implementation details are mainly due to hardware differences on the relevant platforms and are covered in detail next.
Cisco 12000 CoPP Implementation
The Cisco 12000 is a distributed routing platform and implements a special version of CoPP that takes advantage of this architecture. On the 12000, CoPP can be deployed in aggregate mode on the main RP (PRP), or it can be deployed in distributed mode on individual distributed line cards. This concept is illustrated in Figure 5-7.
Figure 5-7. CoPP Operations on the Cisco 12000 Series Distributed Routing Platform

These two modes of CoPP, aggregate and distributed are described next.
Aggregate CoPP
Aggregate CoPP Aggregate CoPP (aCoPP) applies a single and global CoPP input policy to the cumulative traffic destined for the IOS process level irrespective of the ingress router interface (or distributed line card slot). All packets that ingress the receive interface of the central PRP are subjected to the aCoPP input policy (if configured). aCoPP is configured using the control-plane command in IOS global configuration mode in exactly the same way as CoPP was described in the “CoPP Configuration Guildelines” section above. Because the 12000 is a distributed routing platform, only certain receive (and exception IP transit traffic) is required to be forward to the PRP for handling. Much of this load is handled directly by each ingress line card CPU. Hence, the construction of this aCoPP policy may differ from that used for distributed mode CoPP (discussed next).
Distributed CoPP
Distributed CoPP (dCoPP) is supported only on the Cisco 12000 series routers. When dCoPP is configured, a CoPP input policy may be assigned to each individual distributed line card slot within the chassis. Each distributed CoPP input policy is then applied to all traffic that ingresses the associated slot and is destined to the IOS process level of the central PRP specifically. That is, only packets punted to the central PRP are subject to dCoPP input policies. Punted traffic that is handled locally by the line card CPU is typically not subject to dCoPP policies. For example, the Cisco 12000 processes ICMP Echo Reply (Type 0) messages, ICMP Time Exceeded (Type 11) messages, ATM OAM packets, and BFD protocol packets directly on the distributed line card CPU, as opposed to on the central PRP. Therefore, these packets are not subject to dCoPP input policies, because they are not punted to the central PRP. The one exception is if these packets include IP header options, in which case they will be punted to the central PRP and consequently subject to the dCoPP input policy.
Distributed CoPP is configured using the control-plane slot {slot-number} command in IOS global configuration mode. Upon entering the control plane slot {slot-number} command, you enter IOS control plane configuration mode commands exactly as previously described. These general commands for applying input dCoPP are shown in Example 5-24.
Example 5-24. IOS Distributed CoPP Policy Attachment
Router(config)# control-plane slot {slot #}
Router(config-cp)# service-policy input {policy-name}
Distinct dCoPP input policies may be applied to each individual slot, or a common policy may be applied to each slot. In either case, the router applies policies and tracks all statistics on a per-slot basis. Each dCoPP input policy executes on the distributed line card CPU of the assigned slot. Unauthorized or rate-limited packets are then discarded on the ingress distributed line card(s) without involvement by the central PRP.
Distributed CoPP is generally applied to every slot on the 12000 chassis, including slots that do not contain line cards at the time of configuration. Applying the dCoPP policy to an empty slot will be accepted by the IOS CLI and kept within the router configuration. The router will automatically apply a configured dCoPP policy to a slot when a line card is later inserted, assuming dCoPP has previously been specified for that slot. If a line card is removed from a slot on which dCoPP is configured, the router will still retain the policy within the IOS router configuration. If the same or a different line card type is reinserted in the slot, the same dCoPP policy will be applied. Distributed mode also does not require that a dCoPP input policy be attached to each individual 12000 slot. You may decide, for example, to apply dCoPP input policies only on slots supporting external (untrusted) interfaces, versus slots supporting internal (trusted) core uplinks. In support of the defense in depth and breadth principles, however, distributed CoPP should be considered for each active slot, because it provides an added layer of protection for both external and internal router interfaces.
Similar to IP rACL processing, distributed CoPP prevents filtered packets from adversely impacting the Cisco 12000 central PRP, which executes most control and management plane services. Hence, under a directed or transit DoS attack aimed at the Cisco 12000 router, the distributed line card CPU utilization may increase; however, the central PRP, which serves as the master controller of the router, will not be adversely affected (unless, of course, the attack traffic is permitted by the distributed CoPP input policy to reach the central PRP).
As previously stated, aCoPP manages the cumulative amount of traffic destined for the IOS process level (central PRP). Distributed CoPP is applied on a per-slot basis, and hence manages the cumulative amount of traffic received by all interfaces on the associated line card within the slot. (That is, it is per-slot and not per-interface.)
Note
When considering the deployment of distributed mode CoPP, the question of whether a common policy or custom policies should be used for each slot often arises. The value in having custom policies per slot is that it gives you the opportunity to tailor permitted traffic types and rate limits that are appropriate for the interface types (speeds) and attached services. For example, external interfaces typically do not require IGP traffic to be supported. Thus, assuming that all interfaces for the line card in the slot support the same policy, a custom dCoPP policy that excludes (drops) IGP traffic would be beneficial. Then, for slots supporting backbone-facing uplinks, a different dCoPP policy that does support IGP traffic would be appropriate. In addition, different line cards support different performance rates, and again, different dCoPP policies may be appropriate. On the other hand, maintaining multiple dCoPP policies and ensuring that the correct policy type is applied to the correct slot adds significantly to the management burden. If line cards are moved between slots, or change functionality, having multiple dCoPP policies leaves open the possibility of adverse network impacts due to inappropriate traffic filtering. Whatever you decide, be conscious of the implications.
Both distributed and aggregate CoPP policies may be applied simultaneously on the Cisco 12000 series routers. Punted packets destined for the 12000 PRP would hit the dCoPP policy first, and then, assuming they are permitted, would be switched to the central PRP, where the aCoPP policy (if configured) would then be applied. The combination of dCoPP and aCoPP policies applied together is useful for simplifying per-slot traffic characteristics and rate limiters.
Note
When considering the deployment of distributed mode CoPP, the question of whether IP rACL and dCoPP/aCoPP can be deployed simultaneously on the same router often arises. The answer is yes. There may be value in deploying one, two, or all three techniques, depending on your network and traffic mix. Keep in mind that all three techniques are effective against somewhat different traffic sets. IP rACLs see only IP packets with receive destinations. They do not see exception IP transit packets. dCoPP sees some but not all IP packets with receive destinations, some but not all exception IP transit packets, and no Layer 2 traffic (class-default sees no traffic in dCoPP policies). aCoPP, on the other hand, sees the aggregate of all IP packets that reach the central PRP, including Layer 2 packets (these end up in class-default). Thus, the question of whether or not to deploy multiple mechanisms depends mostly on what needs to be protected. In addition, maintaining multiple techniques adds significantly to the management burden.
Cisco Catalyst 6500/Cisco 7600 CoPP Implementation
As previously stated, the Catalyst 6500 and Cisco 7600 series platforms (PFC3 and DFC3) provide ASIC-based (hardware) support for aggregate mode CoPP. Similar to the 12000 dCoPP described in the preceding section, ASIC-based aggregate CoPP prevents filtered traffic from adversely affecting the central MSFC (Multilayer Switch Feature Card) CPU because filtered packets are discarded in hardware before hitting the IOS process level. (In 12000 dCoPP, filtered packets are discarded on the ingress line card CPU before hitting the IOS process level on the PRP.) Aggregate CoPP is configured on the Catalyst 6500 and Cisco 7600 series platforms just as described in the previous section, but with the following differences:
• MLS QoS must be enabled using the mls qos command in global configuration mode prior to configuring CoPP. Otherwise, CoPP will work only in software (MSFC CPU) and will not provide any hardware (PFC3 and DFC3) filtering.
• CoPP uses hardware QoS TCAM resources. If you have a large QoS configuration, the system may run out of TCAM resources if CoPP is also enabled. In this event, CoPP may be performed in software (MSFC) only. With PFC3A, egress QoS and hardware-based CoPP cannot be configured at the same time. Use the show tcam utilization command to monitor TCAM resources.
• To display the hardware counters for bytes discarded and forwarded by the CoPP policy, use the show mls qos ip command. The show access-list and show policy-map control-plane commands, described earlier in the “Tuning CoPP Policies” section, are also available to monitor CoPP policies.
• Hardware CoPP is performed on a per-forwarding-engine (PFC3 or DFC) basis and software CoPP (MSFC) is performed on an aggregate basis. Hence, the global CoPP policy applied operates independently on each PFC3 and DFC within the system.
• MQC police is the only supported CoPP policy action.
• Only an input CoPP service policy is supported (not output CoPP).
• The only MQC match types supported include match ip precedence, match ip dscp, and match access-group. Note, only match access-group classification is supported in hardware (PFC and DFC). Classification ACEs defined with the log keyword are ignored by CoPP, and hence the log keyword is not recommended. Further, you may enter only one match command within a given CoPP-based MQC class map.
• Broadcast packets and CoPP classes that match multicast addresses are also not supported by CoPP in hardware (PFC and DFC) but are policed in software (MSFC). However, PFC3 supports built-in special-case hardware rate limiters (independent of CoPP), which can rate limit various types of traffic flows, including but not limited to broadcast and multicast packets.
The hardware-based rate limiters available on the PFC3 include:
• Ingress and egress ACL bridged packets: This rate limiter rate limits packets sent to the MSFC because of an ingress/egress ACL bridge result. You may configure this using the mls rate-limit unicast acl command in global configuration mode. This rate limiter is disabled by default and applies to unicast packets only.
• uRPF check failures: This rate limiter rate limits exception packets that failed the uRPF check but were permitted by the uRPF ACL. Such packets are sent to the MSFC. You may configure this using the mls rate-limit unicast ip rpf-failure command in global configuration mode. This rate limiter is enabled by default with a limit of 100 packets per second (PPS) and a burst size of ten packets.
• TTL failure: This rate limiter rate limits IPv4 packets sent to the MSFC due to IP TTL expiration. You may configure this using the mls rate-limit all ttl-failure command in global configuration mode. This rate limiter is disabled by default and applies to both unicast and multicast packets. It is an effective technique to mitigate the risk of IP TTL expiry–based attacks.
• ICMP unreachable: This rate limiter allows you to rate limit packets sent to the MSFC containing unreachable IP addresses. Such packets would normally result in an ICMP Destination Unreachable (Type 3) being generated by the MSFC. As outlined in Chapters 2 and 4, a flood of such packets represents a potential attack vector. Four distinct ICMP unreachable rate limiters are available to rate limit packets containing unreachable addresses, including ICMP unreachable no route, ICMP unreachable ACL drop, IP errors, and IP RPF failure. You may configure this using the mls rate-limit unicast ip icmp unreachable command in global configuration mode. These rate limiters are enabled by default with a limit of 100 pps and a burst size of ten packets, and only apply to unicast packets. This is an effective technique to mitigate the risk of ICMP Destination Unreachable–based attacks. Alternatively, you may configure the no ip unreachable command, as described in Chapter 4.
• FIB (CEF) receive cases: This rate limiter rate limits all packets that contain the MSFC IP address as the destination address (in other words, CEF receive adjacencies). Note, do not enable the FIB receive rate limiter if CoPP is enabled. The FIB receive rate limiter overrides any CoPP policy applied. You may configure this using the mls rate-limit unicast cef receive command in global configuration mode. This rate limiter is disabled by default and applies only to unicast traffic.
• FIB glean: This rate limiter does not limit ARP traffic, but provides the capability to rate limit traffic that requires ARP resolution and requires that it be sent to the MSFC. This situation occurs when traffic enters a port and contains the destination of a host on a subnet that is locally connected to the MSFC, but no ARP entry exists for that destination host. In this case, because the MAC address of the destination host will not be answered by any host on the directly connected subnet that is unknown, the “glean” adjacency is hit and the traffic is sent directly to the MSFC for ARP resolution. This rate limiter limits the possibility of an attacker overloading the CPU with such ARP requests. You may configure this using the mls rate-limit unicast cef glean command in global configuration mode. This rate limiter is disabled by default and applies only to unicast traffic.
• Layer 3 security features: Some Catalyst 6500 and Cisco 7600 security features are processed by first sending applicable packets to the MSFC. For these security features, you need to rate limit the number of these packets being sent to the MSFC to reduce any adverse MSFC CPU impact. The security features include authentication proxy (auth-proxy), IPsec, and inspection. Authentication proxy is used to authenticate inbound or outbound users, or both, and is described in further detail in Chapter 6. These users are normally blocked by an access list, but with auth-proxy, the users can bring up a browser to go through the firewall and authenticate on a TACACS+ or RADIUS server (based on the IP address). The server passes additional access list entries down to the router to allow the users through after authentication. These ACLs are stored and processed in software, and if there are many users utilizing auth-proxy, the MSFC may be overwhelmed. Rate limiting would be advantageous in this situation. IPsec and inspection are also done by the MSFC and may similarly require rate limiting. When the Layer 3 security feature rate limiter is enabled, all Layer 3 rate limiters for auth-proxy, IPsec, and inspection are enabled at the same rate. You may configure this using the mls rate-limit unicast ip features command in global configuration mode. This rate limiter is disabled by default and applies only to unicast traffic.
• ICMP redirects: This rate limiter rate limits traffic punted to the MSFC for ICMP Redirect (Type 5) message processing. As outlined in Chapters 2 and 4, a flood of such packets represents a potential attack vector. You may configure this using the mls rate-limit unicast ip icmp redirect command in global configuration mode. This rate limiter is disabled by default and applies only to unicast packets. This is an effective technique to mitigate the risk of ICMP Redirect–based attacks. Alternatively, you may configure the no ip redirects interface command, as described in Chapter 4.
• VACL log: This rate limiter rate limits packets that are sent to the MSFC for VLAN-ACL logging. A high volume of packets requiring logging may overwhelm the MSFC CPU. You may rate limit such packets using the mls rate-limit unicast acl vacl-log command in global configuration mode. This rate limiter is enabled by default with a limit of 2000 PPS and a burst size of ten packets, and applies to unicast packets only. Note, if you do not use VLAN logging, this rate limiter should be disabled.
• MTU failure: This rate limiter rate limits IPv4 packets sent to the MSFC due to MTU failures (in other words, packets requiring fragmentation but the Do Not Fragment bit is set within the IP header). As outlined in Chapter 2, a flood of such packets represents a potential attack vector. You may configure this using the mls rate-limit all mtu command in global configuration mode. This rate limiter is disabled by default and applies to both unicast and multicast packets. Best common practices relating to MTU handling and configuration are discussed in Chapter 7.
• L2 multicast IGMP snooping: This rate limiter limits the number of Layer 2 IGMP packets destined for the supervisor engine. If enabled, IGMP snooping listens to IGMP messages between the hosts and the supervisor engine. You may configure this using the mls rate-limit multicast ipv4 igmp command in global configuration mode. This rate limiter is disabled by default.
• L2 PDU: This rate limiter allows you to limit the number of Layer 2 PDU protocol packets (including BPDUs, DTP, PAgP, CDP, STP, and VTP packets) destined for the supervisor engine and not the MSFC CPU. You may configure this using the mls rate-limit layer2 pdu command in global configuration mode. This rate limiter is disabled by default.
• L2 protocol tunneling: This rate limiter limits the Layer 2 protocol tunneling packets, which include control PDUs, CDP, STP, and VTP packets destined for the supervisor engine. This may be configured using the mls rate-limit layer2 l2pt command in global configuration mode. This rate limiter is disabled by default.
• IP errors: This rate limiter rate limits packets with IP checksum and length errors. When a packet reaches the PFC3 with an IP checksum error or a length inconsistency error, it must be sent to the MSFC for further processing. You may configure this using the mls rate-limit unicast ip errors command in global configuration mode. This rate limiter is enabled by default with a limit of 100 pps and a burst size of ten packets.
• Multicast IPv4: This rate limiter rate limits IPv4 multicast packets. Within the IPv4 multicast rate limiter, there are three distinct rate limiters available to rate limit IPv4 multicast packets:
— The FIB-miss rate limiter is enabled by default (100,000 pps, burst size of 100 packets) and allows you to rate limit the multicast traffic that does not match an entry in the mroute table.
• The multicast partially switched flow rate limiter is enabled by default (100,000 pps, burst size of 100 packets) and allows you to rate limit the flows destined to the MSFC3 for forwarding and replication. For a given multicast traffic flow, if at least one outgoing Layer 3 interface is multilayer switched, and at least one outgoing interface is not multilayer switched (no H-bit set for hardware switching), the particular flow is considered partially switched, or partial-SC (partial shortcut). The outgoing interfaces that have the H-bit flag are switched in hardware and the remaining traffic is switched in software through the MSFC3. For this reason, it may be desirable to rate limit the flow destined to the MSFC3 for forwarding and replication, which might otherwise increase CPU utilization.
• The multicast directly connected rate limiter is disabled by default and limits the multicast packets from directly connected sources.
You may configure these using the mls rate-limit multicast ipv4 command in global configuration mode. This rate limiter is enabled by default with a limit of 100 PPS and a burst size of ten packets.
• Multicast IPv6: This rate limiter rate limits IPv6 multicast packets. Within the IPv6 multicast rate limiter, there are five distinct rate limiters available to rate limit IPv6 multicast packets. The details of each of these IPv6 multicast rate limiters is beyond the scope of this book. Nevertheless, they are enabled by default and may be configured using the mls rate-limit multicast ipv6 command in global configuration mode. For more information on these rate limiters, refer to the “Cisco 7600 Series: Configuring Denial of Service Protection” reference listed in the “Further Reading” section.
When you enable these hardware rate limiters, you should be aware that they override the CoPP policy for packets matching the rate-limiter criteria. Namely, the matching hardware rate-limiter policy takes precedence over a CoPP policy. Conversely, packets that do not match a hardware rate limiter are subject to the applied CoPP policy. The Catalyst 4500 series also supports hardware-based aCoPP and hardware rate limiters similar to the Catalyst 6500 and Cisco 7600 described here. There are differences between the hardware rate limiters; however, a review of the Catalyst 4500 series platform specifics is beyond the scope of this book. For further information on each of these platforms, refer to the references listed in the “Further Reading” section.
CoPP is a relatively new feature within Cisco IOS and, as such, is just beginning to become widely deployed within IP networks today. The relative complexity of deployment is somewhat higher than that of IP rACLs given the complexities of traffic classification and the added requirement to establish appropriate rate limits. Where CoPP has been deployed to date, it has proven itself as an effective technique for improving a router’s resistance to attacks. When deployed in conjunction with infrastructure ACL policies, it provides an effective second layer of defense in support of the defense in depth and breadth principles described in Chapter 3. For additional platform-specific CoPP information on these IOS platforms, refer to the references in the “Further Reading” section. The IOS 12.4(4)T Control Plane Protection feature, which is an extension of CoPP, allows for additional or separate aggregate CoPP policies to be configured and applied on different types of newly defined control plane subinterfaces, including host, transit, and CEF-exception subinterfaces. For more information on the Control Plane Protection feature, refer to the reference in the “Further Reading” section.
Neighbor Authentication
IP rACLs and CoPP are effective and proven techniques for increasing the resistance of an IOS router against security attacks. However, they both rely upon IP header information for packet classification, including, for example, IP source addresses. As outlined in Chapter 2, spoofed attacks are often used to bypass such security policies. Consider the restrictive IP rACL policy illustrated in Example 5-25, which only allows BGP and OSPF protocol packets sourced from 209.165.200.225/32 and 192.168.0.0/16, respectively.
Example 5-25. Sample IOS IP Receive ACL Policy
ip receive access-list 100
access-list 100 deny ip any any fragments
access-list 100 deny tcp any any eq 23 precedence internet
access-list 100 permit ospf 192.168.0.0 0.0.255.255 192.168.0.0 0.0.255.255
precedence 6
access-list 100 permit tcp 209.165.200.225 209.165.200.226 eq bgp precedence 6
access-list 100 deny icmp any any echo
access-list 100 deny ip any any
Although this policy filters any BGP and OSPF protocol packets from any other IP source addresses, it would permit any spoofed packets that use 209.165.200.225/32 or 192.168.0.0/16 as the IP source addresses for BGP and OSPF, respectively. For “internal only” network protocols such as an IGP (for example, OSPF) or Telnet, this is simple to mitigate through antispoofing protection ACLs, uRPF, or infrastructure ACLs at the network edge. These techniques may be deployed to prevent an external source from sending internal protocol packets destined to the routers and to prevent external sources from spoofing internal infrastructure IP addresses. As a result, only a valid internal source is permitted to source OSPF or Telnet protocol packets. Conversely, for protocol packets exchanged with external peers (for example, BGP), source verification is much more difficult because you have limited ability to assure the integrity of a packet’s source address beyond your network edge.
You must allow specific external protocol packets destined to your edge routers from valid external peers as required. For example, if you are running eBGP with an external peer, not only must your edge router’s BGP configuration explicitly specify this external peer, but your edge infrastructure ACL policy as well as your IP rACL and/or CoPP security policies must also allow BGP protocol packets from this configured peer. This is a prerequisite of external protocols, and they will not operate otherwise. uRPF antispoofing mechanisms will drop at the network edge packets with spoofed source IP addresses that do not have a valid reverse path to the source address, but this does not prevent an attacker from spoofing any source addresses that do have valid reverse paths, such as, for example, sources within the prefix range of the ingress interface. Hence, a downstream attacker may easily spoof the address of an external peer (10.0.0.1 in this case), as shown in Figure 5-8.
Figure 5-8. BGP Spoofing Attack
The threat depicted in Figure 5-8 illustrates the need for strict control over permitted external protocols. Internet SPs (ISP), for example, generally only use (and permit) eBGP with Internet peers (in other words, other ISPs), or with customers that are multihomed. Static IP routing is generally used with transit customers that are not multihomed, because only a single access line provides customer connectivity. This eliminates the need to permit BGP protocol packets on these single-homed access ports, thereby reducing the scope of a BGP security attack. ICMP is generally the only other external protocol that may be required between external peers. Techniques to reduce the scope of ICMP security attacks were described in the “ICMP Techniques” section above and in Chapter 4. Nevertheless, external protocols such as BGP are a fundamental requirement for connectivity between peer IP networks. Internet peering among ISPs (both settlement-free and settlement-based), for example, cannot function without eBGP. As such, neighbor authentication is critical for preventing routers from illegitimately joining a routing domain and for protecting routing protocols from malicious attacks and unintentional misconfigurations.
MD5 Authentication
A wide variety of control plane protocols—including, but not limited to, BGP (RFC 2385), OSPFv2 (RFC 2328), MPLS LDP (RFC 3036), RIPv2 (RFC 2082), IS-IS (RFC 3567), MSDP (RFC 3618), and Cisco’s EIGRP, HSRP, Director Response Protocol (DRP) Server Agent, and Gateway Load Balancing Protocol (GLBP)—use the MD5 message digest algorithm (RFC 1321) to generate a 128-bit (16-byte) hash-based Message Authentication Code (MAC) for protocol messages exchanged between peers. The use of a hash-based MAC allows a peer to verify that the message comes from a source who knows the secret key (authentication check), and that it has not been modified in transit (integrity check). The secret key is shared among valid peers to compute the cryptographic MAC inserted in transmitted messages, and to re-create the MAC for received messages. Receivers compare the MAC appended to messages received with what they recompute. If they do not match, the message is discarded. If they do match, the protocol message is accepted as authentic. These principles are illustrated in Figure 5-9.
Figure 5-9. MD5 Neighbor Authentication
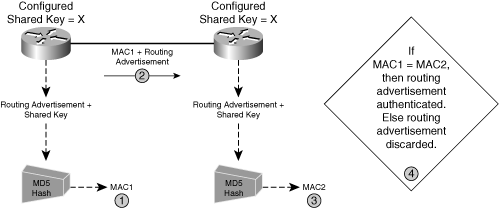
The procedure for computing and appending a MAC within protocol messages depends upon the specific control protocol and its underlying transport protocol. For example, the MAC for MD5-supported TCP-based protocols is computed and authenticated for each TCP segment exchanged between peers. In this case, as per RFC 2385, the MAC is transmitted as an option (kind 19) within the TCP header. Conversely, the MAC for non-TCP-based protocols is typically computed and authenticated for each individual protocol packet, as it is with OSPF for example. Nevertheless, the MD5 MAC is computed based on the data carried within the routing protocol update plus the shared secret. (Adding the shared secret to the routing update to compute the MAC prevents man-in-the-middle (MiTM) attacks that may attempt to modify these packets.) By using MD5 signatures, the receiving peer can detect even a single-bit change in a packet or TCP segment. For more information on protocol authentication using MD5, refer to the protocol-specific RFCs referenced at the beginning of this section above as well as RFC 1321. MD5 is also commonly used to hash router passwords and to verify the integrity of downloaded IOS software files. The use of MD5 within the IP management plane is further discussed in Chapter 6.
IOS also supports plaintext authentication for some routing protocols. Rather than computing an MD5 hash-based MAC for authentication, plaintext authentication methods simply append the shared key to the protocol messages as they are transmitted. Plaintext authentication is not considered a network security BCP because the shared secret itself is sent in the clear across the network. Conversely, MD5 authentication only transmits the hash-based MAC (or cryptographic signature) and never the shared key. Plaintext authentication is useful to protect against routing protocol misconfigurations, not security attacks. Therefore, plaintext authentication will not be covered further. MD5 helps to protect against both.
The required IOS configuration of MD5 authentication differs depending upon the specific protocol:
• BGP: BGP supports only MD5-based authentication and is configured on a neighbor or peer group basis using the neighbor password command in IOS router configuration mode or router address-family configuration mode. The neighbor router must have the same MD5 key value. Historically, changing a BGP MD5 key automatically caused BGP to reset the TCP protocol session (meaning the BGP session was also reset), which made it very difficult to dynamically manage MD5 keys in SP networks. As of 12.0(23)S, 12.2(15)T, 12.2(15)S, and later, BGP MD5 keys may be changed without causing a reset of the protocol session, provided the new keys are configured on both the local and remote sides before the BGP holddown timer expires. Otherwise, the session will be reset.
• OSPF: OSPF MD5 authentication can be configured on an interface, within an area, or both. OSPF MD5 authentication is configured on an interface using the ip ospf message-digest-key md5 command within IOS interface configuration mode. OSPF MD5 authentication is configured within an area using the area authentication message-digest command within router configuration mode. OSPF MD5 authentication supports the configuration of multiple keys, which simplifies the migration of MD5 keys because neighbors do not need to be reconfigured within the OSPF holddown time to prevent adjacencies from being reset. Increased rotation of MD5 keys helps to mitigate the risk of keys being compromised.
• LDP: MPLS LDP authentication is configured using the mpls ldp neighbor password command in IOS global configuration mode. Changing the LDP MD5 keys will reset the protocol session. LDP support for changing MD5 keys without protocol session resets is not available at the time of this writing but is planned in the future.
• RIPv2: RIPv2 MD5 authentication is configured using the ip rip authentication key-chain and ip rip authentication mode md5 IOS configuration commands within interface configuration mode. RIPv2 supports key chains, which simplifies the migration of MD5 keys. Key chains may be configured using the key chain command in IOS global configuration mode.
• IS-IS: IS-IS MD5 authentication is configured using the authentication mode md5 command in router configuration mode, and the authentication mode md5 command in interface configuration mode. IS-IS also supports key chains, similar to RIPv2.
• RSVP: RSVP authentication is configured using the ip rsvp authentication type [md5 | sha-1] configuration command within IOS interface configuration mode. Note, only RSVP supports both MD5 and SHA-1 hashing algorithms. SHA-1 is newer and recognized as more secure.
• EIGRP: EIGRP MD5 authentication is configured using the ip authentication mode eigrp md5 command in IOS interface configuration mode. EIGRP also supports key chains, similar to RIPv2 and IS-IS.
For information on MD5 configuration for other supported IOS protocols as well as key chain configurations, refer to the IOS Configuration Guides.
All MD5 hash processing is performed at the IOS process level. Hence, enabling MD5 authentication does increase resource utilization on the central RP CPU because it adds additional IOS process level packet processing overhead. The specific impact depends upon the authenticated protocol, session timers, router platform, routing table size, and protocol stability because the greater volume of authenticated protocol messages (transmit or received) requiring a hash-based MAC computation increases the impact. This increase in router CPU utilization is often used to argue that enabling MD5 authentication actually makes IP routers more susceptible to security attacks, because it takes less packets to flood the device. It is important to note, however, that this form of attack is a simple DoS attack and not a routing protocol attack. The primary driver for MD5 authentication is to prevent attackers from injecting false information into the control plane. It does not prevent packet flood attacks. Hence, although MD5 authentication may lower the PPS threshold for packet flood DoS attacks, such packet flood attacks are still feasible without MD5 authentication. Thus, MD5 does not introduce any new risk as argued but rather is intended to mitigate the risk of false routing information being injected into the control plane.
With that said, published results against MD5 show how to subvert its collision resistance. There have been no results that break the MD5 key that is used to compute a MAC. Going forward, in the worst-case scenario, if additional developments allowed an attacker to use this attack to somehow derive a new packet with a correct MAC, the attacker would still need to inject the packet into the conversation, and the receiving side would need to accept and process it. There are additional challenges here, including antispoofing techniques, TCP sequence numbers, and so on, that still make such an attack nontrivial. It is important to remember that the strength of the MAC is in the shared key. Even a hash function that may be considered weak by the standards of the cryptographic community can still provide significant protection. A poorly chosen, easy-to-guess shared key greatly diminishes the value of a MAC. Nevertheless, MD5 authentication adds yet another layer of defense that an attacker must overcome.
Generalized TTL Security Mechanism
In most cases, control plane messages are exchanged between adjacent routers that are directly connected. This is the default behavior for IGP adjacencies and MPLS LDP, and is the common deployment model for eBGP peering sessions. The Generalized TTL Security Mechanism (GTSM) as defined in RFC 3682 takes advantage of these link-local protocol messages to provide antispoofing protection using the IP header TTL value. IOS provides GTSM support for eBGP (not iBGP) in releases 12.0(27)S, 12.2(25)S, 12.3(7)T, and later. This capability is also known as the IOS BGP Support for TTL Security Check feature. Further, this was originally known within the industry as the BGP TTL Security Hack (BTSH). The BTSH concept was then extended to allow support for other protocols, and is now known as GTSM.
For directly connected eBGP peers, IOS uses a default IP TTL value of 1 for locally sourced eBGP packets. Similarly, by default, an IOS eBGP peer only checks that received IP TTL values are equal to 1 or greater. Any IP TTL value greater or equal to 1 is considered valid per RFC 791. Because network and router security policies permit eBGP protocol packets from valid peers, only TCP port and sequence number verification and, if optionally enabled, MD5 authentication prevent a remote attacker from injecting spoofed eBGP protocol packets into the session, as previously illustrated in Figure 5-9. The weakness in this approach is that the receiving router does not know whether the packet traveled one hop or many.
Whether GTSM is enabled or not, TCP port and sequence number checking remains the same. Similarly, MD5 authentication is also independent of GTSM. However, with GTSM enabled on both sides of the eBGP session, the handling of IP TTL values for eBGP packets changes in the following manner:
• IOS transmits locally sourced eBGP packets with an IP TTL value of 255.
• IOS only accepts eBGP packets having an IP TTL value equal to or greater than 255, less the configured hop count for the associated eBGP peering session.
A hop count of 1 is generally configured for directly connected eBGP peers. Hence, eBGP accepts only packets having an IP TTL value of 254. Because remote attackers cannot spoof an IP TTL value of 254, they cannot inject spoofed packets into the session, as illustrated in Figure 5-10.
Figure 5-10. BGP TTL Security Check (or GTSM)
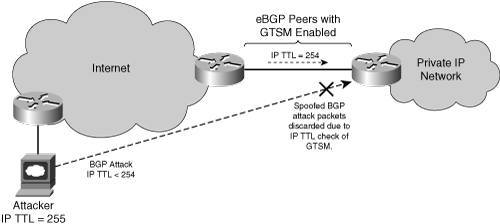
Thus, GTSM for eBGP reduces the scope of attacks against directly connected eBGP sessions. Namely, only attackers that are also directly connected—for example, through a shared LAN—may succeed against the IP TTL check provided by GTSM.
GTSM supplies greater security for directly connected eBGP peers than it does for multihop eBGP peers, because a higher hop count must be configured for multihop peers. Each additional hop between multihop eBGP peers increases the range (TTL diameter) of attack by that same amount, as illustrated in Figure 5-11.
Figure 5-11. GTSM for eBGP Multihop
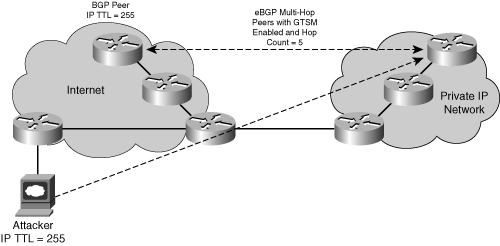
To attack a directly connected eBGP session, the attacker needs to be directly connected to spoof an IP TTL value of 254. Similarly, to attack a multihop eBGP session configured with a hop count of 10, for example, the attacker needs to be within only ten hops of either peer to spoof an IP TTL value of 245. Any farther away and the natural TTL decrement process would automatically reduce the IP TTL to a value less than 245, even if the attack packets started with an initial value of 255.
To maximize the effectiveness of this feature, the hop count should be tightly configured to match the number of hops between the two eBGP peers. However, you should also consider path variation when configuring this feature for multihop peers. To configure GTSM for eBGP, use the neighbor ttl-security hops {hop-count} command in IOS address-family or router configuration mode. This command applies to both directly connected and multihop eBGP sessions. However, when this command is configured for a multihop peering session, the neighbor ebgp-multihop router configuration command cannot be configured. These commands are mutually exclusive, and only one command is required to establish a multihop peering session. If you attempt to configure both commands for the same peering session, an error message will be displayed in the console.
When eBGP peering is configured from loopback-to-loopback (interfaces) between two directly connected peers, these sessions do not automatically come up. This is due to the connected-interface check that IOS does for default (TTL=1) eBGP sessions. That is, by default, the peer addresses for eBGP sessions with TTL=1 must be within the same subnet. Because loopback interfaces on two different routers will not be within the same subnet, the eBGP session is prevented from being established. The resolution to this issue was to use the neighbor {peer address} ebgp-multihop 2 command in router configuration mode, which disabled this connected-interface check. (This led to the common confusion that loopback-to-loopback connections were two hops away, which is not the case.) Under certain conditions, this configuration opened a minor eBGP peering vulnerability. Therefore, a new command was added in IOS releases 12.0(22)S and 12.2(13)T that disables this connected-interface check and allows TTL=1 loopback-to-loopback eBGP sessions. This new command is neighbor {peer address} disable-connected-check and is configured in router configuration mode. When GTSM is used for loopback-to-loopback eBGP configurations, the connected-interface check still applies. Thus, to enable GTSM for loopback-to-loopback eBGP configurations, you may do either of the following:
• Configure neighbor {peer address} ttl-security hops 2
• Configure neighbor {peer address} ttl-security hops 1 and neighbor {peer address} disable-connected-check
Note that the neighbor update-source Loopback0 command is also required in either case.
The GTSM capability should also be configured on each side of the eBGP session to take full advantage of its protection capabilities. However, when this is not possible (for example, when GTSM is not supported in the version of IOS code used on one side), eBGP sessions may still be operated with only one side enabled for GTSM, provided that the other side (not enabled for GTSM) also has an adequate IP TTL value set via the neighbor {peer address} ebgp-multihop {hop-count} command in IOS router configuration mode.
At the time of this writing, software development of GTSM for OSPF is well under way but not yet available within IOS. OSPF support for GTSM will work similarly to eBGP, except, of course, OSPF is not TCP-based and it generally discovers its adjacencies dynamically instead of through static configuration. GTSM for OSPF may be enabled on individual OSPF interfaces using the ip ospf ttl-security command within IOS interface configuration mode. Alternatively, it may be enabled within IOS router configuration mode using the ttl-security all-interfaces command. Neither of these commands, however, applies to virtual or sham links. To enable GTSM for OSPF virtual links and sham links, use the area virtual-link ttl-security and area sham-link ttl-security commands, respectively, in IOS router configuration mode. The same {hop-count} value considerations that apply to eBGP multihop peering sessions also apply to OSPF virtual links and sham links.
GTSM is an effective way to increase the DoS resiliency of eBGP peering sessions. As you recall, BGP is processed at the IOS process level. Even when spoofed packets injected into the BGP control plane have incorrect TCP sequence numbers, if they are spoofing the correct TCP source and destination ports for an existing BGP session, these packets may cause excess CPU utilization due to the extent of processing invoked. Enabling MD5 authentication as described in the “MD5 Authentication” section above tends to exacerbate this condition because the MD5 check must be completed prior to the TCP sequence number check, and MD5 hash computations are resource-intensive. When GTSM is enabled, however, the low-impact TTL check is made very early in the packet-processing cycle, thus saving CPU resources for obviously spoofed packets. Although attackers may craft the initial IP TTL value for a packet, the fact is, this TTL field is decremented by 1 for each hop (or router interface) along the path to its final destination. Hence, IP TTL values outside the configured GTSM range cannot be spoofed. This makes GTSM an effective technique to mitigate remote attacks against a directly connected peering session. The strength of GTSM depends on an attacker not being inside a configured network diameter. If an attacker is within the configured hop-count diameter, GTSM cannot protect against packet floods or the injection of false routing information, although MD5 authentication can still protect against false routing information injection in this case. Other IOS protocols are expected to support GTSM in the future, including OSPF as described previously.
Protocol-Specific ACL Filters
Protocol-specific ACL filtering is another control plane security technique available for a limited number of control plane protocols. Whereas IP interface ACL policies are applied to specific router interfaces, and both IP rACL and CoPP policies are applied to the IOS receive interface, protocol-specific ACL policies are applied directly to a specific IOS control plane protocol. This generally allows you to control the valid protocol peers and the protocol information that peers exchange. One benefit in using this capability is that the ACL policy defined is specific to the associated protocol. Namely, IP rACL and CoPP ACL policies must consider all control, management, and services plane protocols and, in the case of CoPP, exception data plane packets punted to the IOS process level. Protocol-specific ACL filters, on the other hand, consider only the associated protocol, which helps with policy management. Some of the commonly deployed control protocol-specific ACL filter types include:
• MPLS LDP: LDP offers IOS commands to control label binding advertisements, including:
— The mpls ldp advertise-labels command applied in IOS global configuration mode controls which local label bindings are advertised to which LDP neighbors. The specific local label bindings and specific LDP neighbors are defined using the distinct for ACL and to ACL arguments within the command syntax, respectively.
— The mpls ldp neighbor labels accept command applied in IOS global configuration mode allows you to filter inbound label bindings from a particular LDP peer. The configurable ACL argument is used to filter label bindings advertised by the specified neighbor. If the prefix part of the label binding is permitted by the ACL, the router will accept the binding. If the prefix is denied, the router will not accept or store the binding. This functionality is particularly useful when two different organizations peer using LDP—for example, MPLS CsC and Inter-AS VPNs. For more information on this command, refer to Chapter 7.
• PIM: Using the ip pim neighbor-filter command within IOS interface configuration mode, you may restrict PIM protocol messages received on the associated interface such that only PIM messages from authorized neighbors are accepted. PIM messages received from sources not explicitly permitted within the configured neighbor filter ACL are discarded. Hosts, for example, should never be advertising PIM protocol messages.
• IGMP: Using the ip igmp access-group command within IOS interface configuration mode, you may restrict the multicast groups that hosts on the IP subnet serviced by the associated interface can join. This enables you to apply specific IGMP policies for an interface, including:
— Deny all state for a multicast group G
— Permit all state for a multicast group G
— Deny all state for a multicast source S
— Permit all state for a multicast source S
— Filter a particular source S for a group G
• MSDP: MSDP offers IOS commands to control label binding advertisements, including:
— The ip msdp filter-sa-request command applied in IOS global configuration mode may be configured within an ACL to control exactly which Source-Active (SA) request messages the router will honor. If an ACL is specified, only SA request messages from those groups explicitly permitted will be honored. All others will be ignored.
— The ip msdp sa-filter in command applied in IOS global configuration mode is used to configure an incoming filter list for SA messages received from the specified MSDP peer. If the command is configured, but no ACL or route map is specified, all (S,G) pairs from the peer are filtered. If both the ACL and route-map keywords are used, only those (S,G) pairs explicitly permitted will be accepted.
— The ip msdp sa-filter out command applied in IOS global configuration mode is used to configure an outbound filter list for SA messages advertised to the specified MSDP peer. If the command is configured, but no ACL or route map is specified, all (S,G) pairs are filtered from advertisement. If both the ACL and route-map keywords are used, only those (S,G) pairs explicitly permitted will be advertised.
Similar protocol-specific ACL filters may be available for other control plane protocols. This chapter simply introduces the concept, given the wide variety of configurable control plane protocols. You are tasked with determining if your specific control plane protocols support this capability. Chapter 6 reviews the commonly deployed management plane protocol-specific ACL filter types. For more detailed information on IP multicast security, refer to the Cisco Networkers Cannes 2007 Multicast Security (BRKIPM-2019) breakout session listed in the “Further Reading” section.
BGP Security Techniques
IOS support for GTSM was first introduced for eBGP, because eBGP is the primary external protocol and a common target for external attacks. IGP and other internal control protocols are much less susceptible to external attacks, given the nature of their operation, and assuming that infrastructure ACLs are used appropriately. Further, in support of defense in depth and breadth principles, IP rACLs, CoPP, and MD5 authentication provide an added layer of protection for internal protocols in the event that infrastructure ACLs are bypassed. Techniques to mitigate the risk of external ICMP attacks were described in the “ICMP Techniques” section above as well as in Chapter 4.
Infrastructure ACLs, IP rACLs, CoPP, and MD5 authentication, as well as the GTSM and IOS TCP sequence number generation improvements, also reduce the scope of external BGP attacks. Further, because eBGP operates over external links, it also makes sense to filter traffic destined to PE-CE and PE-PE links using any one of the available techniques outlined in Chapter 4. This prevents remote eBGP attacks that transit your network. However, despite all of these protection mechanisms, threats remain from a variety of sources:
• An attacker able to bypass the preceding BGP protection mechanisms
• A valid BGP peer that unintentionally triggers a DoS event or security event due to misconfiguration
• A valid BGP peer that intentionally launches an attack or that is compromised
To protect against these scenarios, you should consider deploying the BGP-specific protection mechanisms outlined in this section, which are available today within IOS. These mechanisms increase the level of robustness within BGP at its application layer and provide better controls for prefix and path information received (and advertised) to external peers.
BGP Prefix Filters
Prefix filters provide a means of filtering specific routes from routing advertisements learned from and sent to BGP peers. Prefix filters provide two main benefits:
• Filter false, hijacked, or unnecessary prefixes, including:
— Bogon prefixes: These include DUSA (private and reserved addresses defined by RFC 1918 and RFC 3330) and address blocks that have not been allocated to a Regional Internet Registry (RIR) by the Internet Assigned Numbers Authority. Such IP prefixes should not be advertised within the public Internet. The IANA allocation of IPv4 address space to various registries is available at http://www.iana.org/assignments/ipv4-address-space. Regularly updated IP prefix configuration templates for bogon filters are available at http://www.cymru.com/Bogons/.
— Your own prefixes: Your peer should not be advertising prefixes within your address block to you. Exceptions may include cases where you are multihomed or use the public Internet for connectivity between sites. In the latter case, your upstream ISP should advertise only the prefixes associated with your remote sites, and not local prefixes.
— A default route also known as the gateway of last resort or 0.0.0.0/0: If you prefer to drop traffic destined to prefixes not explicitly carried within your routing table, then you should filter any default route advertisements received. Otherwise, you are at an increased risk of spoofing and transit attacks.
• Prevent deaggregation of CIDR address blocks. CIDR, as defined in RFC 1518 and RFC 1519, allows for classless route summarization, which reduces the amount of routing information maintained within routing tables. CIDR has helped to manage the growth of the global Internet routing table. The size of a routing table affects a router’s scalability and stability, including convergence speed. Reducing or maintaining the number or prefixes to an acceptable level improves router performance. Conversely, significant and rapid expansion of the routing table size may adversely impact a router’s performance and stability, because each router has a finite amount of memory in which to store the routing tables (and compute best paths), as described in Chapter 2. Consider the example illustrated in Figure 5-12.
Figure 5-12. IP Prefix De-aggregation Example

In Figure 5-12, ISP-1 receives many more-specific prefixes from ISP-2 than from ISP-3, which is advertising a single aggregate prefix for the same address block. Hence, rather than carrying 1 prefix, ISP-1 is forced to carry 4 prefixes. If all of ISP-1’s peers advertised more-specific prefixes, as opposed to aggregate prefixes, the size of the ISP-1 routing table might exceed its routers’ memory capacities and affect ISP-1’s network stability. Therefore, to mitigate this risk, you should filter more-specific prefixes as appropriate for your network. IANA does not allocate address blocks longer than /24. Hence, at a minimum, it makes sense to filter all prefixes longer than /24. Some exceptions may exist, such as multihomed customers; however, you need to manage the number of prefixes maintained within your routing table so as to not affect network stability.
The preceding two scenarios may be advertised by the peer unintentionally via misconfiguration, for example, or intentionally with malice. Alternatively, the peering router may have been compromised, or perhaps your upstream provider has no filtering and one of its downstream customers is falsely advertising a hijacked prefix. Applying ingress prefix filters at the network edge (for all eBGP peers) helps to mitigate these risks. Policies need not be the same for each peer but may be customized per peer.
To create a prefix list or add a prefix-list entry, use the ip prefix-list command in IOS global configuration mode. To prevent distribution of BGP neighbor information as specified in a prefix list, use the neighbor prefix-list command in IOS address-family or router configuration mode. The configuration illustrated in Example 5-26 applies the prefix list named foo to incoming advertisements from neighbor 192.168.2.2.
Example 5-26. Sample IOS BGP Prefix Filter Configuration
router bgp 65001
address-family ipv4 unicast
network 192.168.2.1
neighbor 192.168.2.2 prefix-list foo in
! To accept a mask length of up to 24 bits in routes with the prefix 192/16:
ip prefix-list foo permit 192.168.0.0/16 le 24
! To deny mask lengths greater than 25 bits in routes with the prefix 192/16:
ip prefix-list foo deny 192.168.0.0/16 ge 25
! To deny mask lengths greater than 25 bits in all address space:
ip prefix-list foo deny 0.0.0.0/0 ge 25
! To deny all routes with a prefix of 10/8:
ip prefix-list foo deny 10.0.0.0/8 le 32
IP prefix filters are a widely deployed technique to filter improper prefix advertisements. They should be applied both on ingress and on egress so that you do not inadvertently advertise any bogus prefixes that slip through your ingress prefix filter policies.
IP Prefix Limits
In addition to prefix filtering, you may also limit the total number of prefixes that may be received from a specific peer. BGP prefix limits may be configured using the neighbor maximum-prefix command in IOS router configuration mode. This limits the total number of prefixes irrespective of their lengths and, thereby, prevents a peer from flooding your router with BGP advertised routes.
Peering sessions that exceed the maximum configured limit of prefixes will be torn down (by default). The session stays down until you bring the session back up by entering the clear ip bgp command. Entering the clear ip bgp command also clears stored prefixes. The optional restart keyword within the neighbor maximum-prefix command configures the router to automatically reestablish the peering session that has been disabled due to the maximum prefix limit being exceeded. An optional restart-interval is also configurable (in minutes), which specifies the time interval after which a peering session is reestablished after it was disabled. By using the warning-only optional keyword, you may also configure the router to generate a log message when the maximum prefix limit is exceeded, instead of terminating the peering session. Similarly, you may also configure a warning threshold specifying at what percentage of the maximum prefix limit the router starts to generate a warning message. The range is from 1 to 100; the default is 75.
Before applying such prefix limits, you should baseline your routing table and understand the prefixes advertised per peer. You must also consider potential network and topology changes and any associated impact they may have on the routing table and individual peering sessions. Further, the intention is to protect the router and not necessarily to micromanage the prefix limits of each peer.
AS Path Limits
Cisco IOS also supports a configuration command that allows you to filter BGP prefixes based on the total number of AS-PATH segments (or AS-PATH length). By default, there is no limit. To configure BGP to discard routes that have an AS-PATH length that exceeds a specified value, use the bgp maxas-limit command in IOS router configuration mode. With bgp maxas-limit enabled, if the AS-PATH length for a given prefix exceeds the configured limit, the offending prefix will be marked as invalid within the BGP table, which prevents it from being considered during best path selection and advertised to other BGP peers, and then logged.
The AS65000 BGP Routing Table Analysis Report (http://bgp.potaroo.net/as1221/bgp-active.html), at the time of this writing, reports a maximum AS-PATH length of 12 and a maximum prepended AS-PATH length of 30. These metrics provide useful guidelines for configuration of the bgp maxas-limit command, which should be tuned using the diameter of the Internet from the perspective of the configured router. This configuration command also applies to all BGP sessions associated with the configured address family and should be deployed specifically on edge routers with eBGP peers.
BGP Graceful Restart
An IOS router that is NSF-capable or NSF-aware for BGP can do the following:
• Detect an RP switchover on a peer
• Maintain the peering session
• Retain the routes associated with the session
• Continue forwarding for these routes while the peer recovers
Both peers need to be NSF-capable or NSF-aware, although they do not need to be operating in the same NSF mode (NSF-capable or NSF-aware).
Nonstop Forwarding (NSF)
An IP router is said to be NSF-aware if it is running NSF-compatible software. An IP router is said to be NSF-capable if it has been configured to support NSF. A router that is NSF-aware functions the same as an NSF-capable router, with one exception: an NSF-aware router is incapable of performing Stateful Switchover (SSO) operations whereby the active RP continuously synchronizes its FIB and adjacency tables with the standby RP such that state is maintained during RP failover events.
When an NSF router establishes a BGP session, it sends an OPEN message to the peer. Included in the message is a declaration that the NSF router has graceful restart capability. BGP graceful restart, as defined in RFC 4724, provides a mechanism by which BGP peers may avoid a routing flap following an RP switchover on the peer. SSO provides a mechanism by which the local BGP speaker may avoid a routing flap following a local RP switchover. If the BGP peer receives this graceful restart capability declaration, it becomes aware that the device sending it supports NSF. Both NSF peers need to exchange the graceful restart capability declaration in their OPEN messages at the time of session establishment. If both of the peers do not declare themselves graceful restart capable, the session will not provide NSF.
If the BGP session is established using graceful restart and one peer has an RP switchover, the other marks all the routes learned from the peer as stale; however, it continues to use these routes to make forwarding decisions for a (configurable) period of time. This functionality prevents any packet loss while the peer’s newly active RP and forwarding tables converge. When the standby RP becomes active, it reestablishes the BGP session. In establishing the new session, it sends a new graceful restart message that identifies the peer as having restarted. At this point, the routing information is exchanged between the two BGP peers. Once this exchange is complete, the NSF peers use the routing information to update the RIB and the FIB with the new path and forwarding information, respectively. The NSF peers use the new routing information to remove stale routes from the BGP tables. Following that, the BGP protocol and CEF table are fully converged.
If a BGP peer does not support the graceful restart capability, it will ignore the graceful restart capability declaration in the OPEN message but will still establish a non-graceful restart capable BGP session with the NSF peer. This allows interoperability and backward compatibility between NSF and non-NSF peers.
BGP graceful restart provides an effective technique to reduce the impact of TCP RST attacks. If, for example, a BGP attack against an IP router results in the resetting of a BGP session, BGP graceful restart enables each peer to continue traffic forwarding for prefixes advertised by the lost peer while the session reestablishes itself. Hence, the data plane is not affected by a fault within BGP. Use the bgp graceful-restart command within IOS router configuration mode to enable the graceful restart capability and NSF behavior.
Layer 2 Ethernet Control Plane Security
Chapter 2 reviewed potential security threats that may exist within a Layer 2 switched Ethernet network environment. Security techniques available to mitigate attacks within the Layer 2 switched Ethernet data plane were described in Chapter 4. Techniques available to protect the control plane of Layer 2 switched Ethernet networks are described in this section. Chapter 6 reviews techniques available within the management plane.
In addition to the techniques described in this section, Cisco offers a Network Admission Control (NAC) solution that uses the network infrastructure, including but not limited to IEEE 802.1X port-based authentication, to enforce security policies on all devices seeking to access network computing resources. Details of the Cisco NAC technologies and solutions are beyond the scope of this book. However, additional details, including white papers and design guides, can be found on Cisco.com at http://www.cisco.com/en/US/netsol/ns617/networking_solutions_sub_solution_home.html.
VTP Authentication
VTP, as described in Chapter 2, is a Cisco-proprietary Layer 2 messaging protocol that enables network operators to centrally manage VLAN configurations within a switched Ethernet domain. Given that it is a Layer 2 protocol, VTP messages are not forwarded by IP routers. VTP messages are only exchanged between VTP servers and VTP clients within the same VTP domain, which generally includes neighboring L2 Ethernet switches. To mitigate the risk of spoofed VTP advertisements sourced from a local attacker, you may configure MD5 authentication using the vtp passwd command in VLAN configuration mode. The configured password is included in the calculation of the 16-byte MD5 checksum used within VTP messages. Specifically, the password is mapped to a hexadecimal secret key, which is then used in conjunction with VLAN information for calculating the MD5 checksum. All VTP-enabled Ethernet switches within the same VTP domain must be configured with the same shared password. Otherwise, VTP messages exchanged between server and client LAN switches will be discarded, similar to the manner in which messages are discarded for IP routers as depicted earlier in Figure 5-9. The default VTP configuration does not apply passwords.
VTP version 3 introduces the ability to hide configured passwords such that they do not appear in plaintext within the show configuration command similar to VTP versions 1 and 2 plaintext passwords. You may configure this by adding the hidden keyword to the vtp passwd command. When you use the hidden keyword, the hexadecimal secret key that is generated from the configured password is shown in the configuration instead of the plaintext password, as shown in Example 5-27.
Example 5-27. Hiding VTP Version 3 Passwords
Console> (enable) set vtp passwd foobar hidden
Generating the secret associated to the password.
The VTP password will not be shown in the configuration.
VTP3 domain server modified
Console> (enable) show config
.
.
.
set vtp passwd 9fbdf74b43a2815037c1b33aa00445e2 secret
To configure the secret key directly, use the secret keyword of the vtp passwd command. The plaintext password and secret key are mutually exclusive. You cannot configure both simultaneously. If you configure a plaintext password, it replaces a current secret password, and similarly, if you paste a secret password into the configuration, the initial password is removed.
VTP version 3 also introduces the configuration of a primary server using the set vtp primary command configurable on a per-port basis. Only primary servers can make configuration changes within the VTP domain. If the VTP password is configured as hidden using the hidden password configuration keyword as described earlier in this section, you are prompted for the password when you try to configure the switch as a primary server. Only if your password matches the hidden password will the switch become a primary server allowing you to configure the domain. The use of a VTP password helps to mitigate the risk of spoofed VTP attacks, as outlined in Chapter 2.
DHCP Snooping
DHCP may be leveraged for a variety of attacks, as outlined in Chapter 2. To reduce the risk of such attacks, IOS supports a security feature called DHCP snooping. The DHCP snooping feature validates DHCP messages received on untrusted LAN interfaces. Invalid messages are discarded and the aggregate rate of DHCP messages (both invalid and valid) may be, optionally, rate limited. Rate limiting DHCP messages helps to mitigate the effects of DHCP-based DoS attacks that aim to exhaust DHCP server resources, including IP address pools. Such DHCP starvation attacks may also be mitigated using the port security technique described in Chapter 4.
To enable DHCP snooping, apply the ip dhcp snooping command in IOS global configuration mode. However, DHCP snooping is not active until you enable the feature on at least one VLAN. DHCP snooping is configurable on a per-VLAN basis and is also supported for private VLANs (PVLAN). By default, the feature is disabled on all VLANs. You can enable the feature on a single VLAN or a range of VLANs by using the ip dhcp snooping vlan command in IOS global configuration mode. The following are DHCP messages considered invalid by the DHCP snooping feature when received on an untrusted interface associated with a DHCP snooping-enabled VLAN:
• Server-to-client DHCP message types, including DHCPOFFER, DHCPACK, and DHCPNAK, per RFC 2131.
• Relay agent-to-server DHCPLEASEQUERY message type, per IETF draft draft-ietf-dhc-leasequery.
• DHCP messages where the source MAC address of the Layer 2 Ethernet frame and the client hardware address within the DHCP message itself do not match. Note, this specific integrity check is performed only if the DHCP snooping MAC address verification option is enabled via the ip dhcp snooping verify mac-address command in IOS global configuration mode.
• DHCPRELEASE or DHCPDECLINE messages associated with an existing entry in the DHCP snooping binding table, where the interface information in the binding table does not match the ingress (untrusted) interface. The DHCP snooping binding table contains binding entries associated with untrusted ports. Each entry in the table includes the MAC address, the leased IP address, the lease time, the binding type, and the VLAN number and interface information associated with the untrusted host. To display the DHCP snooping binding table, use the show ip dhcp snooping binding command as illustrated in Example 5-28.
Example 5-28. Display DHCP Snooping Binding Table
Router# show ip dhcp snooping binding
MacAddress IpAddress Lease(sec) Type VLAN Interface
------------------ --------------- ---------- ------------- ---- ------------
--------
00:02:B3:3F:3B:99 10.1.1.1 6943 dhcp-snooping 10 FastEthernet6/10
• DHCP messages that include a relay agent IP address that is not 0.0.0.0, per RFC 2131.
• DHCP messages that include the relay agent information option (option 82). Option 82 enables a DHCP relay agent to include information about itself when forwarding client-originated DHCP packets to a DHCP server. The DHCP server can then use this information to implement IP address or other parameter-assignment policies. With IOS Software Release 12.2(18)SXF1 and later, you can change the default IOS behavior and enable the DHCP option 82 on untrusted port feature using the ip dhcp snooping information option allow-untrusted command in IOS global configuration mode. Normally, the switch drops packets with option 82 information when packets are received on an untrusted interface. This feature enables untrusted ports to forward DHCP packets that include option 82 information as may be required by IP aggregation routers that connect to IP edge routers serving as DHCP relay agents for attached IP hosts. When ip dhcp snooping information option allow-untrusted is enabled on the aggregation router shown in Figure 5-13, you can also still enable dynamic ARP on the aggregation switch while the switch receives packets with option 82 information on ingress untrusted interfaces to which hosts are connected, under the condition that the port on the edge switch that connects to the aggregation router is configured as a trusted interface. For more information on dynamic ARP inspection, refer to the next section.
Figure 5-13. DHCP Relay Agent Using Option 82
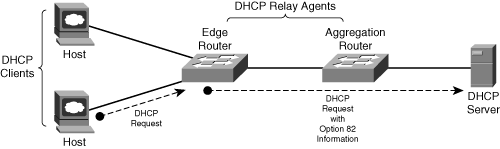
The default DHCP trust state of an IOS multilayer Ethernet switch LAN interface is untrusted. To configure the interface as trusted, use the ip dhcp snooping trust command within IOS interface configuration mode. You must explicitly configure LAN interfaces connected to valid DHCP servers as trusted. Ensure that DHCP servers are connected through trusted interfaces before enabling DHCP globally. Otherwise, DHCP itself will not function properly, given the DHCP snooping integrity checks outlined listed previously. DHCP host port LAN interfaces are generally configured as untrusted as are aggregation router interfaces that connect to edge routers since such aggregation router interfaces are in the forwarding path towards untrusted IP hosts. Conversely, edge router interfaces connecting to the aggregation router must be configured as trusted since such edge router interfaces are in the forwarding path towards the trusted DHCP server. Note that the edge router inserts the option 82 information, not the untrusted IP host. Hence, if the edge router is not considered a trusted device, do not apply the ip dhcp snooping information option allowed-untrusted command on the aggregation router. Otherwise, the edge router may spoof DHCP option 82 information as part of a security attack. Other security features, such as Dynamic ARP Inspection (DAI), discussed in the next section, also use the information stored in the DHCP snooping binding database.
To configure DHCP message rate limiting, use the ip dhcp snooping limit rate {rate} command within IOS interface configuration mode. This configured rate limit applies to both valid and invalid DHCP messages received on the interface. By default, DHCP snooping does not rate limit DHCP messages, so you must explicitly configure it if necessary. In the event the configured rate limit is exceeded, DHCP snooping places the associated port into the error-disabled state. The interface remains in the error-disabled state until either you manually enable error-disabled recovery using the errdisable recovery dhcp-rate-limit global configuration command, or you enter the shutdown and no shutdown interface configuration commands.
When the DHCP snooping feature is enabled, all ARP messages received on untrusted interfaces within the applied VLAN(s) are intercepted and handled at the IOS process level on the RP where DHCP snooping integrity checks are applied. Hence, you must consider the CPU impacts of enabling DHCP snooping before deployment so as to not adversely affect the router or introduce a potential new attack vector. For more information on DHCP snooping, refer to the IOS platform-specific documents referenced in the “Further Reading” section.
Dynamic ARP Inspection
ARP may be also leveraged for a variety of attacks, as outlined in Chapter 2. To reduce the risk of ARP spoofing and ARP cache poisoning attacks, IOS supports a security feature called Dynamic ARP Inspection (DAI). The DAI feature behaves very similarly to the DHCP snooping feature whereby it validates all ARP messages received on untrusted interfaces. DAI, in fact, cannot function or be enabled without DHCP snooping being first configured, because DAI uses the DHCP snooping binding table to validate ARP messages. For untrusted IP host devices that do not use DHCP, you must configure a static entry within the DHCP snooping binding table or use ARP ACLs to permit or deny ARP messages. Otherwise, DAI will consider all ARP messages sourced from untrusted IP hosts with statically assigned IP addresses as invalid, thereby preventing network connectivity. Invalid messages are discarded and the aggregate rate of ARP messages (both invalid and valid) is rate limited. Unlike DHCP snooping, aggregate rate limiting of ARP messages received on an untrusted interface is enabled by default. Rate limiting ARP messages helps to mitigate the effects of ARP-based DoS attacks that aim to exhaust or poison ARP caches.
DAI is configurable on a per-VLAN basis and is also supported for PVLANs. By default, the feature is disabled on all VLANs. You can enable the feature on a single VLAN or a range of VLANs by using the ip arp inspection vlan command in IOS global configuration mode. The following ARP messages are considered invalid by the DAI feature when received on an untrusted interface associated with a DAI-enabled VLAN:
• ARP messages having an invalid IP-to-MAC address binding. DAI determines the validity of the IP-to-MAC address binding by using the local (and trusted) DHCP snooping binding database described in the preceding section. The ip arp inspection vlan command enables only this specific DAI integrity check. Additional DIA validation and integrity checks may be enabled using separate DIA-related commands as described in the rest of this list.
• ARP messages explicitly denied by a user-configured ARP ACL. DAI requires ARP ACLs for untrusted hosts with statically configured IP addresses, given that a valid IP-to-MAC address binding will not exist within the DHCP snooping binding table. ARP ACLs may be configured using the ip arp inspection filter command in IOS global configuration mode. ARP ACL filtering is applied before the preceding DHCP snooping binding table check. Hence, if the ARP ACL denies an ARP message, it will be immediately discarded even if a valid binding exists in the DHCP snooping binding table. If the message is permitted by the ARP ACL, the DHCP snooping binding table is then used to verify the IP-to-MAC address binding per the preceding bullet.
• ARP messages (responses only) where the target MAC address within the ARP message itself is different from the destination MAC address specified within the Ethernet frame header. You may enable this specific integrity check using the ip arp inspection validate dst-mac command in IOS global configuration mode.
• ARP messages where the sender MAC address within the ARP message itself is different from the source MAC address specified within the Ethernet frame header. You may enable this specific integrity check using the ip arp inspection validate src-mac command in IOS global configuration mode. Note, this integrity check may be enabled in conjunction with the preceding destination MAC address integrity check using the ip arp inspection validate dst-mac src-mac command in IOS global configuration mode.
• ARP messages (both requests and responses) with invalid source IP addresses, including 0.0.0.0, 255.255.255.255, and all 224.0.0.0/4 IP multicast addresses, and ARP response messages (not requests) with invalid destination IP addresses, including 0.0.0.0, 255.255.255.255, and all IP multicast addresses (in other words, 224.0.0.0/4). You may enable these specific integrity checks using the ip arp inspection validate ip command in IOS global configuration mode. Note, this integrity check may be enabled in conjunction with either or both of the previous destination and source MAC address integrity checks using the ip arp inspection validate {[dst-mac] [ip] [src-mac]} command in IOS global configuration mode.
The default DAI trust state of a LAN interface on an IOS multilayer Ethernet switch is untrusted. On untrusted interfaces, the router forwards received ARP messages only if they pass the validation and integrity checks outlined in the preceding list. ARP packets received on trusted interfaces bypass any DAI validation and integrity checks. Therefore, use the DAI trust state configuration carefully. To configure the interface as trusted, use the ip arp inspection trust command within IOS interface configuration mode.
To configure DAI rate limiting, use the ip arp inspection limit rate {pps} command within IOS interface configuration mode. The IOS default rate limiting of ARP messages on untrusted interfaces is 15 ARP messages per second with a maximum burst interval of 1 second. In the event the configured (or default) rate limit is exceeded, DAI places the associated port into the error-disabled state. The interface remains in the error-disabled state until either you manually enable error-disabled recovery using the errdisable recovery arp-inspection global configuration command, or you enter the shutdown and no shutdown interface configuration commands.
DAI-filtered ARP messages are logged within IOS by default. DAI logging parameters are configurable as follows:
• Use the ip arp inspection log-buffer entries {number} command in IOS global configuration mode to configure the DAI logging buffer size. The default buffer size is 32.
• Use the ip arp inspection log-buffer logs {number_of_messages} interval {length_in_seconds} command in IOS global configuration mode to configure the logging-rate interval. The default logging-rate interface is 5 per second.
• Use the ip arp inspection vlan {vlan_range} logging {acl-match {matchlog | none} | dhcp-bindings {all | none | permit}} command in IOS global configuration mode to configure DAI log filtering to limit which denied ARP messages are logged.
When the DAI feature is enabled, all ARP messages received on untrusted interfaces within the applied VLAN(s) are intercepted and handled at the IOS process level on the RP where DAI integrity checks are applied. Hence, you must consider the CPU impacts of enabling DIA before deployment so as to not adversely affect the router or introduce a potential new attack vector. For more information on DAI, refer to the IOS platform-specific documents referenced in the “Further Reading” section. CoPP also supports ARP rate limiting using the MQC match protocol arp command. For more information on CoPP, refer to the “Control Plane Policing” section earlier in the chapter.
Sticky ARP
ARP (RFC 826), as described in Chapter 2, provides a mechanism to resolve an IP address to an L2 MAC address to provide IP connectivity between IP hosts within the same Layer 2 broadcast domain and between hosts on disparate IP networks. This latter case makes use of proxy ARP (RFC 1027), whereby the local IP default gateway routers advertise their own MAC addresses on behalf of the remote IP host associated with a subnetwork installed within their IP routing tables. IP routers including IP default gateways maintain IP/MAC address bindings (as well as interface and/or VLAN bindings) within their local ARP tables (or cache). Dynamically learned ARP table entries are maintained within the cache, provided the associated IP/MAC source address periodically transmits an IP-encapsulated Ethernet frame within a specified timeframe. The default ARP timeout value within IOS is 14400 seconds (or 4 hours). Excluding statically configured ARP cache entries, entries associated with inactive hosts are aged out of the ARP cache after their timeout value expires. ARP timeout values are configurable per interface using the arp timeout command within IOS interface configuration mode.
In addition to being refreshed, whereby the age is reset to 0, ARP table entries may also be updated or overridden within the cache. This includes modifying the IP/MAC address binding itself such that the IP address is associated with a new MAC address, or vice versa. Such ARP cache entry changes may be triggered by a variety of events, including but not limited to
• New ARP broadcasts, including gratuitous ARPs
• DHCP environments whereby a released IP address may be reassigned to a different IP host having its own unique MAC address
• IP and/or MAC spoofing (refer to Chapter 2)
To prevent dynamically learned ARP cache entries from being overridden or aged out, IOS Software Release 12.2SX introduced the sticky ARP feature. Sticky ARP entries do not age out and cannot be overridden. In the event that a different IP host uses an IP address already installed within the ARP cache, a logging message is generated, as illustrated in Example 5-29.
Example 5-29. Sticky ARP Overwrite Attempt Log Message
04:04:54: %IP-3-STCKYARPOVR: Attempt to overwrite Sticky ARP entry: 10.1.1.3, hw:
0060.0804.09e0 by hw: 0060.9774.04a5
Further, the existing ARP cache is not modified in any way. Namely, a new entry is not created nor is the existing entry overridden. This helps to mitigate the risk of spoofing attacks within Layer 2 switched Ethernet networks. Sticky ARP is configured using the ip sticky-arp command in IOS global configuration mode. It is enabled by default within IOS 12.2SX and later and is supported on both native IP interfaces and PVLAN interfaces. The ip sticky-arp command is also configurable per interface. This allows you to overwrite the ip sticky-arp global configuration for specific interfaces. Note, the no ip sticky-arp command enables IP address reuse, such as may be required in DHCP environments. Given that sticky ARP entries cannot be overridden and do not age out, you must manually remove ARP entries if a MAC address changes. Also, unlike static entries, sticky ARP entries are not stored within the IOS configuration. Hence, when you reload the IOS device, sticky ARP entries must be dynamically relearned.
Spanning Tree Protocol
As outlined in Chapter 2, STP may also be leveraged for a variety of security attacks. To reduce the risk of STP attacks, IOS supports the following two security features:
• BPDU Guard: An Ethernet switch should receive Bridge PDUs (BPDU) only on interswitch interfaces. This applies to both point-to-point and shared LAN interswitch interfaces, as illustrated in Figure 5-14.
Figure 5-14. Spanning Tree Protocol BPDUs

Reception of a BPDU on point-to-point or shared LAN access interfaces providing connectivity only to IP hosts is an STP protocol violation. Only a misconfiguration, software defect, or malicious attack would trigger this error condition. Note, BPDUs will be exchanged between redundant Ethernet switches providing IP host connectivity via a shared LAN, as illustrated in Figure 5-14. When enabled on an access interface, the BPDU Guard feature places the associated port into the error-disabled state if it receives a BPDU, regardless of the interface’s PortFast configuration. The interface remains in the error-disabled state until either you manually enable error-disabled recovery using the errdisable recovery bpduguard global configuration command, or you enter the shutdown and no shutdown interface configuration commands. This prevents such access interfaces from participating in the STP protocol and, thereby, mitigates the risk of a misconfiguration, software defect, or STP-based attack sourced from an attached IP host or unauthorized device.
There are two options for enabling BPDU Guard:
— Apply the spanning-tree portfast bpduguard default command in IOS global configuration mode. This enables BPDU Guard on all interfaces in operational PortFast state.
— Apply the spanning-tree bpduguard enable command in IOS interface configuration mode. This allows you to configure BPDU Guard on individual interfaces and override the setting of the spanning-tree portfast bpduguard default global configuration command if configured.
• Root Guard: STP forwarding paths within a Layer 2 switched Ethernet network are calculated based on the elected root bridge. The Root Guard feature provides a way for you to enforce root bridge selection in the network. When enabled on an interface, the Root Guard feature places the associated port into the root-inconsistent (blocked) state if it receives a superior BPDU from an attached device. This prevents Root Guard–enabled ports from becoming a root port. While in the root-inconsistent state, no traffic passes through the port. Only after the attached device stops sending superior BPDUs is the port unblocked again. Once unblocked, normal STP procedures will transition the port through the listening, learning, and forwarding states. Recovery is automatic; you do not need to enable error recovery or reenable the port. Root Guard is configured using the spanning-tree guard root command within IOS interface configuration mode. The deployment of Root Guard helps to prevent unauthorized devices from becoming the root bridge due to their spoofed BPDU advertisements.
Summary
This chapter reviewed a wide array of techniques available to mitigate attacks against the control plane within the IP networks. In addition, techniques available to mitigate attacks within the control plane of Layer 2 switched Ethernet networks were reviewed. The IP data, management, and services planes rely upon the IP control plane for correct operation. Therefore, attacks against the control plane may also adversely affect the data, management, and services planes. Protecting the control plane is critical. The optimal techniques that provide an effective security solution will vary by organization and depend on network topology, product mix, traffic behavior, operational complexity, and organizational mission. Defense in depth and breadth strategies discussed in Chapter 3 can be helpful in understanding the interactions between various IP traffic plane security techniques, and in optimizing the selection of control plane protection measures.
Review Questions
1 Name an ICMP message type (excluding ICMP replies) defined within RFC 792 that is processed by default within IOS and does not have a configuration command to disable processing.
2 SPD extended headroom applies to which specific control plane protocol packets?
3 True or False: IP rACLs apply to transit data plane packets punted to the IOS process level.
4 True or False: CoPP applies to transit data plane packets punted to the IOS process level.
5 Given that IOS BGP MD5 authentication does not support key chaining, how can you avoid resetting the BGP session when changing the MD5 key?
6 Explain the difference in the receive-side behavior of directly connected eBGP peers when GTSM is enabled (with a hop-count value of 1) versus when GTSM is not enabled.
7 Name techniques available within BGP to mitigate the risk of security attacks.
8 Name two techniques available to mitigate the risk of DHCP starvation attacks.
9 In a network environment that assigns IP host addresses dynamically, what other IOS security feature must be configured before enabling Dynamic ARP Inspection (DAI)?
10 Name two techniques available to reduce the risk of STP-based security attacks.
Further Reading
Antoine, V. et al. Router Security Con figuration Guide, Version 1.1c. NSA, Dec. 15, 2005. http://www.nsa.gov/snac/routers/C4-040R-02.pdf.
Deleskie, J., T. Scholl, A. Popescu, and T. Underwood. “BGP Filtering—Myths Legends and Reality: Peer Filtering in the Modern Backbone.” NANOG 35. Los Angeles. Oct. 24, 2005. http://www.nanog.org/mtg-0510/pdf/deleskie.pdf.
Eckert, T. “Multicast Security.” (BRKIPM-2019.) Cisco Networkers 2007. Cannes, France.
Fuller, V., T. Li, J. Yu, and K. Varadhan. Classless Inter-Domain Routing (CIDR): an Address Assignment and Aggregation Strategy. RFC 1519. IETF, Sept. 1993.
http://www.ietf.org/rfc/rfc1519.txt.
Gill, V., J. Heasley, and D. Meyer. “The BGP TTL Security Hack (BTSH).” draft-gill-btsh-01.txt. IETF, May 2003. http://tools.ietf.org/html/draft-gill-btsh-02.
Hoffman, P., and B. Schneier. Attacks on Cryptographic Hashes in Internet Protocols. RFC 4270. IETF, Nov. 2005. http://www.ietf.org/rfc/rfc4270.txt.
McDowell, R. “Implications of Securing Backbone Router Infrastructure.” NANOG 31. San Francisco. May 4, 2004. http://www.nanog.org/mtg-0405/mcdowell.html.
McDowell, R. “Network Core Infrastructure Protection: Best Practices.” Cisco Networkers 2006. Las Vegas. June 2006.
Mikle, O. “Practical Attacks on Digital Signatures Using MD5 Message Digest.” Cryptology ePrint Archive, Report 2004/356. Dec. 2, 2004. http://eprint.iacr.org/2004/356.
Parmakovic, D. “Service Provider Security.” Cisco white paper. http://www.cisco.com/web/about/security/intelligence/sp_infrastruct_scty.html.
Rivest, R. The MD5 Message-Digest Algorithm. RFC 1321. IETF, April 1992. http://www.ietf.org/rfc/rfc1321.txt.
Scholl, T. “BGP MD-5: The Good, Bad, Ugly?” NANOG 39. Toronto. Feb. 6, 2007. http://www.nanog.org/mtg-0702/presentations/Scholl.pdf.
Sherman, T. “Understanding, Preventing, and Defending Against Layer 2 Attacks.” Cisco Networkers 2006. Las Vegas. June 2006.
Stevens, M., A. Lenstra, and B. de Weger. “Chosen-prefix Collisions for MD5 and Colliding X.509 Certificates for Different Identities.” EuroCrypt 2007. March 22, 2007. http://www.win.tue.nl/hashclash/EC07v2.0.pdf.
Wang, X., D. Feng, X. Lai, and H. Yu. “Collisions for Hash Functions: MD4, MD5, HAVAL-128 and RIPEMD.” Cryptology ePrint Archive, Report 2004/199. Aug. 17, 2004. http://eprint.iacr.org/2004/199.
Wang, X., Y. Yin, and H. Yu. “Collision Search Attacks on SHA1.” CRYPTO 2005. August, 2005.
Welcher, P. “Secure Management of Routers.“ Chesapeake NetCraftsmen, March 5, 2001. http://www.netcraftsmen.net/welcher/papers/securemgmt.html.
Wright, J., and J. Stewart. Securing Cisco Routers: Step-by-Step. SANS Institute, 2002. ISBN: 0-97242-733-3.
“Catalyst 3750 Switches.” Cisco Documentation. http://www.cisco.com/univercd/cc/td/doc/product/lan/cat3750/index.htm.
“Catalyst 4500 Series: Configuring Control Plane Policing.” Cisco Documentation. http://www.cisco.com/univercd/cc/td/doc/product/lan/cat4000/12_2_37s/config/cntl_pln.htm.
“Catalyst 4500 Series Switches.” Cisco Documentation. http://www.cisco.com/univercd/cc/td/doc/product/lan/cat4000/index.htm.
“Catalyst 6500 Series Switches.” Cisco Documentation. http://www.cisco.com/univercd/cc/td/doc/product/lan/cat6000/index.htm.
“Cisco 7600 Series: Configuring Denial of Service Protection.” Cisco Documentation. http://www.cisco.com/univercd/cc/td/doc/product/core/cis7600/software/122sr/swcg/dos.htm.
isco 7600 Series Cisco IOS Software Configuration Guide, 12.2SR. Cisco Documentation. http://www.cisco.com/univercd/cc/td/doc/product/core/cis7600/software/122sr/swcg/index.htm.
“Cisco Modular Quality of Service Command Line Interface.” Cisco white paper. http://www.cisco.com/en/US/products/ps6558/products_white_paper09186a0080123415.shtml.
“Configuring Advanced BGP Features.” Cisco IOS BGP Configuration Guide, Release 12.4T. http://www.cisco.com/en/US/products/ps6441/products_configuration_guide_chapter09186a00805387d7.html.
“Control Plane Policing.” Cisco IOS Software Release 12.2(18)S Feature Guide. http://www.cisco.com/en/US/products/sw/iosswrel/ps1838/products_feature_guide09186a008052446b.html.
“Control Plane Protection.” Cisco IOS Software Releases 12.4 T Feature Guide. http://www.cisco.com/en/US/products/ps6441/products_feature_guide09186a0080556710.html.
“Defining Strategies to Protect Against UDP Diagnostic Port Denial-of-Service Attacks.” Cisco Tech Note. (Doc. ID: 13367.) http://cio.cisco.com/warp/public/707/3.html.
“Deploying Control Plane Policing.” Cisco white paper. http://www.cisco.com/en/US/partner/products/ps6642/products_white_paper0900aecd804fa16a.shtml.
“DHCPLEASEQUERY Message.” Cisco Documentation. http://www.cisco.com/univercd/cc/td/doc/product/rtrmgmt/ciscoasu/nr/nr50/cliref/clie.htm.
FIRST Best Practice Guide Library (BPGL). FIRST. http://www.first.org/resources/guides/.
“GSR: Receive Access Control Lists.” (Doc. ID: 43861.) Cisco white paper. http://www.cisco.com/en/US/tech/tk648/tk361/technologies_white_paper09186a00801a0a5e.shtml.
“Internet Multicast Addresses.” IANA. http://www.iana.org/assignments/multicast-addresses.
“Operational Security Capabilities for IP Network Infrastructure (opsec).” IETF. http://www.ietf.org/html.charters/opsec-charter.html.
“Protocol Numbers.” IANA. http://www.iana.org/assignments/protocol-numbers.
“Spanning Tree PortFast BPDU Guard Enhancement.” (Doc. ID: 10586.) Cisco Design Tech Note. http://www.cisco.com/en/US/tech/tk389/tk621/technologies_tech_note09186a008009482f.shtml.
“Spanning Tree Protocol Root Guard Enhancement.” (Doc. ID: 10588.) Cisco Design Tech Note. http://www.cisco.com/en/US/tech/tk389/tk621/technologies_tech_note09186a00800ae96b.shtml.
“TCP and UDP Small Servers.” (Doc. ID: 12815.) Cisco Tech Note. http://www.cisco.com/warp/public/66/23.html.
“The SANS Security Policy Project.” SANS Institute. http://www.sans.org/resources/policies/.
“Understanding Selective Packet Discard (SPD).” (Doc. ID: 29920.) Cisco Tech Note. http://www.cisco.com/warp/public/63/spd.html.