Chapter 7. Web servers: Building a MediaWiki server
This chapter covers
- Building dynamic web servers using Apache
- Managing backend application data with SQL databases
- Identifying and resolving application package dependencies
- Installing and configuring a MediaWiki CMS
Got a small company blog to publish, or 30 years of technical and corporate data spanning 100,000 pages? You’ll need some kind of content management system (CMS). In case you’re wondering, a CMS is an application designed as a framework for the creation and administration of digital content. Popular CMS applications you might have encountered include WordPress and Joomla.
A wiki can be a particularly effective way to manage large communities of contributors. It’s a kind of CMS whose architecture is intentionally decentralized, allowing users to freely collaborate not only on the content itself, but on the larger structure of the entire data collection. A wiki engine is a platform on which wikis are built, usually using some kind of simple and intuitive markup language. MediaWiki is a popular example of an open source wiki engine, but Atlassian Confluence is a mature commercial alternative.
MediaWiki itself may not be all that important to us right now. I only chose to focus on installing MediaWiki because it’s a great way to illustrate the process of building a web server (often known as a LAMP server) on Linux. Considering that more than two of every three web servers on the internet today are running on Linux, that’s a big deal.
Don’t get me wrong: MediaWiki doesn’t lack for charm. It is, after all, the CMS originally created to power the tens of millions of articles that make up Wikipedia and the other Wikimedia Foundation projects. If you’re looking for a robust and reliable way to manage a great deal of media content, whether private collections documenting your company’s processes or public-facing help pages, you could do a lot worse than MediaWiki. But those specific use cases aren’t common enough to justify inclusion in a core-skills kind of book like this one.
Working through a MediaWiki deployment can, however, teach you about the software packages that make up a Linux web server and how they fit together to make those two out of three websites possible. As a Linux admin, there’s a good chance that you’ll be asked to build web servers to support all kinds of applications, so you’ve got an interest in learning how to do this stuff, right?
7.1. Building a LAMP server
If you or your business has information, applications, or services, the odds are that you’ll want to make them available for consumption by web browsers. A web server is software running on a computer that allows locally hosted resources to be viewed and consumed by visitors to a website. To be clear, the term web server is also often used to describe the computer hosting the web server software.
This section will guide you through the process of building a dynamic website. That’s a website whose pages are generated with the help of server-side operations. It’s also possible to create static websites that, for the most part, provide only plain HTML files that delegate all the work to the client web browser.
For simpler sites, static can be a fast and affordable option. But because there’s nothing Linux-y about that, I’ll say no more about the subject here. Chapter 6 of my Learn Amazon Web Services in a Month of Lunches (Manning, 2017), on the other hand, includes a nice demonstration of using AWS’s S3 to host a static site.
As illustrated in figure 7.1, most Linux web servers are built on the four pillars of what’s known as a LAMP server. The letters LAMP stand for Linux, the Apache web server administration software, either the MySQL or MariaDB database engine, and the PHP server-side scripting language (or, alternatively, Perl or Python). Those, in addition to Linux, with which I’d hope you’re already familiar, will be the focus of this chapter.
Figure 7.1. The Apache web server software exposes HTTP-based resources to external clients and coordinates internal services.

The LAMP server is such a common Linux configuration that Ubuntu, at least, has its own installation meta package. The caret (^) at the end of this example identifies the target as a special package bundled together to make installing common software stacks simpler:
# apt install lamp-server^
That one command will, after asking you to create a database password, automatically drop a working web server on top of your system, leaving you with nothing to do besides create some website content. Directing your web browser to the server’s IP address should display a welcome page created when Apache was installed.
But automation isn’t always the best solution. Sometimes you’ll want to customize your software stack by specifying particular release versions to ensure application compatibility, or by substituting one package for another (MariaDB over MySQL, for instance, as you’ll soon see). Setting things up manually will be particularly helpful in this case, as it’ll force you to better understand how each bit works. That’s the approach I’ll take in this chapter. Here’s a list of what needs doing to get you to your goal:
- Install Apache
- Add a web page or two to the web document root
- Install an SQL engine (MariaDB in this case)
- Install the PHP server-side scripting language
- Install and configure MediaWiki
7.2. Manually setting up an Apache web server
Web server software has one primary job—to guide site visitors to the right directories and files on the server host—so appropriate website resources should be made available. Practically speaking, entering a uniform resource locator (URL) address in your browser address bar is really a request for the web server software running on a remote website host to retrieve a web page, video, or other resource from the host file system and load it in your browser. Web server software will usually integrate closely with other systems on the host server like networking, security, and file system tools so that access to local resources is well managed.
Although it’s a volatile market, the open source Apache HTTP server tends to dominate the web server market across all platforms. Because it’s so popular, and despite the fact that Apache has serious competitors including Nginx (also cross-platform) and Microsoft’s IIS (which runs exclusively on Windows servers), I’m going to stick with Apache. (C’mon. Did you really think I’d devote an entire chapter to IIS?)
7.2.1. Installing the Apache web server on Ubuntu
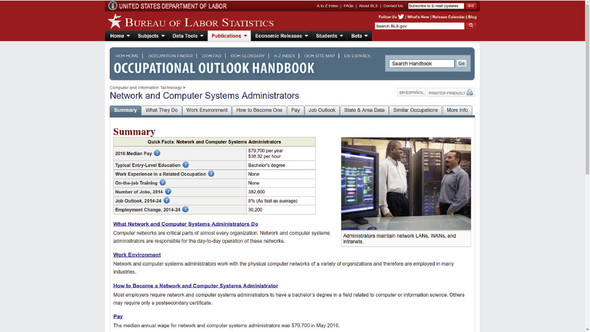
Installing Apache itself is easy. On Debian/Ubuntu, it’s apt install apache2. If you’re following along on an Ubuntu machine, once Apache is installed, there’s nothing stopping you from opening a browser and visiting your live website right away. You’ll be greeted by the introduction page seen in figure 7.2.
Note
The URL you’ll use to reach an Apache site running on your workstation is localhost. If, instead, you chose to work on an LXC container or VirtualBox VM, then you’ll use the machine’s IP address for the URL. To make sure you’ll have network access to sites running on your VirtualBox VM, ensure it’s configured to use a bridged adapter (the way you did it in chapter 2).
Figure 7.2. The Apache default page displayed in browsers directed to your server’s URL or IP address includes some important basic configuration and navigation information.

Ubuntu makes things easy. But where’s the fun in that? Once again, learning how it works on CentOS will help you understand what’s happening under the hood. Even if you don’t happen to have a VM or container running CentOS, Fedora, or Red Hat right now, I’d recommend you at least familiarize yourself with the CentOS way of doing things.
The CentOS processes you’ll see in this chapter are different than Ubuntu’s. For clarity, I decided to separate the two, placing all CentOS directions in their own section: 7.6. If you’re aiming to install Apache on CentOS, head there for details.
7.2.2. Populating your website document root
Fantastic! You’ve got yourself a working website. Considering that there’s nothing on the site besides the Apache welcome page, don’t expect to win any awards (or generate much revenue). You’re going to need to add some content. And to do that, you’ll need to know where the content goes.
The content’s location is controlled by the DocumentRoot setting in an Apache configuration file. On CentOS systems, the configuration is set in the httpd.conf file in the /etc/httpd/conf/ directory. Ubuntu users will find it in a file called 000-default.conf in the /etc/apache2/sites-available/ directory. Either way, searching the configuration file for DocumentRoot will probably show you a value like this:
DocumentRoot "/var/www/html"
This means that Apache will direct all incoming browser requests to files in the /var/www/html/ directory. You can change this value to point to any location on your file system you’d like. In fact, although it’s not a topic for this book, if you plan to host multiple websites on your server, you’re able to point to multiple file system locations.
If you’ve never done it before, why not take a couple of minutes right now and build a simple website of your own? Create a text file called index.html in your document root. (This file will overwrite Apache’s welcome page using the same name.) You can type some welcome text of your own in the file along with a link to a second HTML file and a graphic image. Make sure to create that second file along with an image. The index.html file might look like this:
<h2>Welcome!</h2>
Take a look at our <a href="info.html">company history</a>.
<br>
And how about a look at our new company logo: <img src="logo.png">
7.3. Installing an SQL database
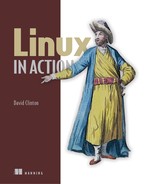
Take a quick look at the US government’s Bureau of Labor Statistics (BLS) Occupational Outlook Handbook page for Network and Computer Systems Administrators (http://mng.bz/kHN3) as shown in figure 7.3. Given all the content displayed on each of the page’s nine tabs, there’s quite a lot of text. But I suspect that very little of it was manually added to this page by a human being.
Figure 7.3. A page from the Bureau of Labor Statistics. The What Network and Computer Systems Administrators Do header was probably expanded from something like this: What $selected_occupation Do.
What’s more likely is that the database on the BLS server contains terabytes of raw data, within which can be found structured information related to each of the many thousands of included occupations. That data is probably then organized by information categories (Summary, Work Environment, and so forth). When I requested this page from the BLS menu (or through an internet search engine), the BLS web server might have requested the relevant raw data from the database and dynamically organized it on the page the way you see it in figure 7.3.
There are many more ways that a website can make use of dynamic access to a database engine installed in the backend, but that was a good illustration. The kind of database engine most likely used for a BLS-like project (or for our MediaWiki site) is called a relational database, which is a tool for organizing data into tables made up of columns and rows. The data contained within an individual row is known as a record. A record is identified by an ID value known as a key, which can be used to reference records between tables.
The Structured Query Language (SQL) is a standardized syntax for managing data on relational databases. A database engine is software for managing relational database data and exposing it to administrators and automated processes using SQL syntax.
I’ll show you how to create and display a simple database table in a moment. But first, you’ll have to install your own database engine so you can follow along yourself. Because our long-term goal is a full LAMP server, it would make sense to install this on the same computer/VM/container where you built your Apache web server. (The CentOS way can be found at the end of the chapter.)
# apt update
# apt install mariadb-server            1
- 1 Install MariaDB on your server.
Why did I choose MariaDB over MySQL? They both work with the exact same MySQL standards. In fact, they were both initially created by the same people. Both are great, but, right now at least, MariaDB seems to be the beneficiary of more active development and support. In addition to those two, there are other important SQL database engines in heavy use around the IT world, including Oracle, PostgreSQL, and Amazon’s Aurora, which was built specifically for AWS workloads.
Why not check the status of the database (DB) you’ve just installed? You can confirm the DB is running using systemctl:
# systemctl status mysql                                      1
? mysql.service - MySQL Community Server
   Loaded: loaded (/lib/systemd/system/mysql.service;
       enabled; vendor preset: enabled)
   Active: active (running) since Wed 2018-05-02 12:26:47 UTC; 6h ago
  Process: 396 ExecStartPost=/usr/share/mysql/mysql-systemd-start post
       (code=exited, status=0/SUCCESS)
  Process: 318 ExecStartPre=/usr/share/mysql/mysql-systemd-start pre
       (code=exited, status=0/SUCCESS)
 Main PID: 395 (mysqld)
    Tasks: 28
   Memory: 126.3M
      CPU: 20.413s
   CGroup: /system.slice/mysql.service
           ??395 /usr/sbin/mysqld

May 02 12:26:29 base systemd[1]: Starting MySQL Community Server...
May 02 12:26:47 base systemd[1]: Started MySQL Community Server.
- 1 Whether you’ve got MySQL or MariaDB installed, Linux refers to the DB using the mysql command.
7.3.1. Hardening SQL
Once MariaDB’s installed, it’s always a good idea to harden your database security, so you’ll want to run the mysql_secure_installation tool. If you weren’t prompted to create a root MariaDB password during the installation process (something that’s quite common), then you’ll need to run mysql_secure_installation, as that’s also how you’ll set up your authentication. Running this tool presents the following interactive dialog:
# mysql_secure_installation                                            1

NOTE: RUNNING ALL PARTS OF THIS SCRIPT IS RECOMMENDED FOR ALL MariaDB
      SERVERS IN PRODUCTION USE!  PLEASE READ EACH STEP CAREFULLY!

In order to log into MariaDB to secure it, we'll need the current
password for the root user.  If you've just installed MariaDB, and
you haven't set the root password yet, the password will be blank,
so you should just press enter here.

Enter current password for root (enter for none):                      2
OK, successfully used password, moving on...

Setting the root password ensures that nobody can log into the MariaDB
root user without the proper authorisation.

Set root password? [Y/n]
- 1 Note that this command may require sudo privileges, which will cause trouble later. Stay tuned.
- 2 Enter the password of the database root user, not the Linux root user.
The values recommended by mysql_secure_installation are aimed at preventing anonymous and remote users from accessing your data. Unless you’re planning to use this database only for testing, and it won’t contain important or sensitive data, you’ll want to accept the defaults.
Note
If the mysql_secure_installation only works when run using sudo, then create your password that way. But keep in mind that this will create a problem that will need fixing later. You’ll see how to address that in the next section.
7.3.2. SQL administration
Now, as promised, I’m going to show you some simple database administration commands. The fact is you might never have to run any of these commands directly because most databases are accessed from within application code, rather than from the command line. Considering how inconvenient it would be to manually manage the thousands or even millions of data records commonly included in SQL databases, this makes a lot of sense. You’ll see a perfect example of this automated application/ database relationship a bit later in this chapter when we finally get to installing and configuring MediaWiki.
Still, you may sometimes need to handcraft your own database. Perhaps you need some test data to work with while you’re putting a new application together. Or maybe your new business is starting off slowly and, rather than investing in a new application, for now it makes sense to manage your customers manually. You should at least know how it’s done.
Feel free to skip to section 7.4 if you feel you’re not up to a database dive right now. But before you go, there’s one more important thing I should talk about.
By default, you’ll access and administer the databases in your MariaDB or MySQL installations using the root user. That’s a bad idea. For security reasons, individual databases should be owned and managed by regular database users who have been given only the authority they need to do their specific jobs. Nevertheless, for this demo, I’m going to throw caution to the wind and, for the sake of simplicity, use the root user. Later, when I show you how to set up your MediaWiki database, I’ll do it properly by creating a non-root user.
Accessing the database
Whether you’ve installed MariaDB or MySQL, you log in to your shell using mysql, followed by -u root. This tells the database that you want to authenticate as the root user. The -p means you’ll be prompted for your MariaDB password:
$ mysql -u root -p                                            1
Enter password:
Welcome to the MariaDB monitor.  Commands end with ; or g.
Your MariaDB connection id is 10
Server version: 5.5.52-MariaDB MariaDB Server

Copyright (c) 2000, 2016, Oracle, MariaDB Corporation Ab and others.

Type 'help;' or 'h' for help. Type c to clear the current input statement

MariaDB [(none)]>                                             2
- 1 Log in by specifying a user, and prompt for the user’s password.
- 2 The [(none)] value will change to the name of an active database.
Here’s where the trouble I hinted to earlier might rear its ugly head. MariaDB might not let you log in unless you run the mysql command as sudo. If this happens, log in using sudo and provide the MariaDB password you created. Then run these three commands at the MySQL prompts (substituting your password for your-password):
> SET PASSWORD = PASSWORD('your-password');
> update mysql.user set plugin = 'mysql_native_password' where User='root';
> FLUSH PRIVILEGES;
The next time you log in, you should no longer require sudo and, more importantly, MediaWiki should be able to do its job properly. With that little trouble out of the way, take a look around your SQL environment. Here’s how to create a new database:
MariaDB> CREATE DATABASE companydb; 1
- 1 Most MySQL commands must end with a semicolon (;). Forgetting this will prevent the execution of the command.
Suppose your company needs to store customer contact information. You might create a new table for contacts within your database like this:
MariaDB> use companydb
MariaDB> CREATE TABLE Contacts (
    ID int,
    LastName varchar(255),
    FirstName varchar(255),
    Address varchar(255),
    City varchar(255)
);                              1
- 1 This is the last part of a single command, stretched over seven lines for clarity.
Just got your first customer? Congrats! Here’s how you’d enter the new information:
MariaDB> INSERT INTO Contacts (ID, LastName, FirstName, Address, City)    1
VALUES ('001', 'Torvalds', 'Linus', '123 Any St.', 'Newtown');
- 1 This line establishes which columns in the table will have new values added.
Want to see what you’ve done? To display all the data in your new Contacts table, type select *:
MariaDB> select * from Contacts;
+------+----------+-----------+-------------+---------+
| ID   | LastName | FirstName | Address     | City    |
+------+----------+-----------+-------------+---------+
|    1 | Torvalds | Linus     | 123 Any St. | Newtown |
+------+----------+-----------+-------------+---------+
1 row in set (0.00 sec)
Note the ID value in your table, which can be used as the key value for your records. When you’re all done, you can close the MariaDB shell by typing exit.
If, as I noted earlier, you might never need to perform any of those tasks manually, why bother reading about it here? Because, to integrate automated operations with your databases, you’ll almost certainly need to include variations of MySQL syntax within scripts and application code someday. Even the simplest of web shopping portals lives on external data. You may not be the one doing the coding, but the odds are that someone you know or love will, and they may need your help making the database connection. All in a day’s work for a tireless Linux sysadmin.
Creating a MediaWiki database user
There’s one more bit of database administration. As you’ve seen, MariaDB comes with an active root user out of the box. But because that user has full admin rights over all the tables in the system, it isn’t a good idea to use root for day-to-day operations. Instead, from a security perspective, you’re better off creating unique users for each database consumer and giving them only the access rights they need.
Let’s log in to MariaDB one more time and create a new database called wikidb for MediaWiki to use later. Then you’ll create a user that you’ll call mw-admin. The FLUSH PRIVILEGES command enables the new settings and grants the mw-admin user full control over the wikidb database:
mysql> CREATE DATABASE wikidb;
Query OK, 1 row affected (0.01 sec)
mysql> CREATE USER 'mw-admin'@'localhost' IDENTIFIED BY 'mypassword';
Query OK, 0 rows affected (0.00 sec)
mysql> GRANT ALL PRIVILEGES ON wikidb.* TO 'mw-admin'@'localhost'
   IDENTIFIED BY 'mypassword';
mysql> FLUSH PRIVILEGES;
Query OK, 0 rows affected (0.00 sec)
mysql> exit
7.4. Installing PHP
The final LAMP ingredient is the PHP scripting language. PHP is a tool that can be used to write your own web applications. Prebuilt PHP applications are often used by third-party applications like MediaWiki to access and process system resources. It’s safe to assume, therefore, that you’ll be needing the P in your LAMP server.
7.4.1. Installing PHP on Ubuntu
Despite what the examples you’ve seen so far might suggest, Ubuntu installations aren’t always simpler than CentOS. But here’s one more task that goes down quicker the Ubuntu way. Want the latest PHP? apt install php is all it takes for Ubuntu to grant your desire. Because you’ll want it to play nicely with Apache, you’ll also need an extension:
# apt install php
# apt install libapache2-mod-php
You should get into the habit of restarting Apache whenever making changes to a web server’s system configuration. Here’s how:
# systemctl restart apache2
That’s it. PHP should now be live.
7.4.2. Testing your PHP installation
To make sure your PHP installation is live (and to learn about PHP’s local environment and resource integration), create a new file using the .php filename extension in the Apache web document root directory. Then fill the file with the remaining lines of text as shown here:
# nano /var/www/html/testmyphp.php
<?php
phpinfo();
?>
Now head over to a browser, enter the IP address of the machine that’s running PHP (or localhost, if it’s the desktop you’re working on) and the name of the file you created:
10.0.3.184/testmyphp.php
You’ll be treated to a long web page (like the one you see in figure 7.4), broken down into many sections, that describes your computer and the ways PHP talks to it.
Note
When you’re done, make sure to either delete or restrict access to the testmyphp.php file. Exposing this kind of information about your system to the public is a serious security breach.
Figure 7.4. A small sample from the configuration and environment data displayed by phpinfo

As before, getting all this done on CentOS will come later. For now, let’s give MediaWiki its very own database.
7.5. Installing and configuring MediaWiki
Got documents and media to share (as we discussed at the start of this chapter all those pages ago)? You’ve come to the right place. Here’s how that process will break down:
- Download and unpack the MediaWiki archive package
- Identify and install necessary software extensions
- Connect MediaWiki to your MariaDB database
- Run and test the installation.
Head over to the MediaWiki download page (www.mediawiki.org/wiki/Download), and click Download MediaWiki to get the latest package. If you’d rather pull the file directly into your server via the command line, you can right-click the Download link, select Copy Link Address, and paste the address into a terminal window along with the wget program:
$ wget https://releases.wikimedia.org/mediawiki/1.30/
    mediawiki-1.30.0.tar.gz                               1
- 1 The exact address (and version) will probably have changed by the time you read this.
Note
If you get a -bash: wget: Command Not Found error when running the previous command, then you’ll need to install wget.
Running tar against the downloaded archive creates a new directory containing all the extracted files and directories. You’ll want to copy that entire directory hierarchy to the location on the file system where it’ll do its work. If MediaWiki is going to be the only web application hosted on your server, that will probably mean your web root directory:
$ tar xzvf mediawiki-1.30.0.tar.gz
$ ls
mediawiki-1.30.0  mediawiki-1.30.0.tar.gz
# cp -r mediawiki-1.30.0/* /var/www/html/
If MediaWiki is going to be just one of a number of applications, then you might want to create a subdirectory within the document root that will expose the service in a practical and predictable way. Putting the files into a directory called /var/www/html/mediawiki/, for instance, would mean that your users would find MediaWiki at www.example.com/ mediawiki, assuming that you’re using example.com as your public domain.
From this point, the MediaWiki browser interface takes over. Point your browser to the index.php file in the MediaWiki directory on your server’s IP address (or localhost if you’re running all this on your desktop). If you copied the files to the /var/www/ html/ root, then it would look something like this:
10.0.3.184/index.php
If, instead, you created a subdirectory for MediaWiki, it might look like this:
10.0.3.184/mediawiki/index.php
Normally, when I install an application for the first time, I’ll follow the instructions of a good online guide, preferably one created and maintained by the project developers themselves. More often then not, such a guide will provide me with a long list of package dependencies that I’ll quickly read (often too quickly) and then copy and paste into an apt install command.
This time, however, I’ve turned the process upside down and installed just the bare bones of the Apache, MariaDB, and PHP packages. I know that this won’t give MediaWiki enough to work with, and that’s exactly what I want. What better way to learn about how all the complex bits are supposed to fit together?
7.5.1. Troubleshooting missing extensions
The people who designed the MediaWiki setup process intelligently understood that things wouldn’t always go smoothly. If it turns out that there’s something missing from your configuration, rather than failing silently, you’ll get an error page containing helpful information. In this case, as illustrated by figure 7.5, I seem to be missing a couple of PHP extensions: mbstring and xml.
Figure 7.5. A helpful error page telling me that my system is missing two extensions and providing links to appropriate PHP documentation pages

I’ll use apt search to see what packages relate to mbstring. Since I’m running PHP 7, the php7.0-mbstring package seems like the one most likely to put a smile back on MediaWiki’s flowery face:
$ apt search mbstring
Sorting... Done
Full Text Search... Done
php-mbstring/xenial 1:7.0+35ubuntu6 all
  MBSTRING module for PHP [default]

php-patchwork-utf8/xenial 1.3.0-1build1 all
  UTF-8 strings handling for PHP

php7.0-mbstring/xenial-updates 7.0.18-0ubuntu0.16.04.1 amd64
  MBSTRING module for PHP                                      1
- 1 Provides multibyte string encoding for PHP 7
A similar search for both xml and php (apt search xml | grep php) told me about a package called php7.0-xml that seemed likely to satisfy MediaWiki’s XML requirements. I’ll install both packages and then use systemctl to restart Apache:
# apt install php7.0-mbstring php7.0-xml
# systemctl restart apache2
The beautiful thing about the way all this works is that you (and I) don’t need to understand what multibyte string encoding or even XML is and why it is that MediaWiki feels so completely lost without them. As long as we can trust an application’s developers, there’s nothing wrong with following their instructions. That assumes we can trust the application’s developers, something that’s often hard to assess. The philosophy underlying the entire Linux package management system is built on the premise that the managers of official repositories have already done the vetting job for us. It’s up to us to hope they’re right.
Getting back to our example, if everything goes according to plan, refreshing the browser page should take you back to the initial MediaWiki intro page. When the page loads, you’ll see a warning about a missing LocalSettings.php file and a link to set up the wiki. When you click the link, you’ll get to select a language preference and then, the MediaWiki Environmental Checks page and...more trouble!
The biggest issue is the absence of a database driver. That would be the software used to negotiate between PHP and, in our case, MariaDB. Not having that installed is, indeed, a killer. Although the suggested package shown in figure 7.6 is php5-mysql, apt search tells us that we’re more likely to see success with the php-mysql package.
Figure 7.6. The bright x indicates a show-stopping hole in our configuration; other notes present less severe warnings.

Also throw in the suggested PHP extensions for APCu (part of a framework for caching and optimizing PHP intermediate code) and ImageMagick (an image-processing tool). Another restart for Apache and another refresh of the browser window, and you should be all set:
# apt install php-mysql php-apcu php-imagick
# systemctl restart apache2
You’ll see a Continue button at the bottom of the page. Use it.
7.5.2. Connecting MediaWiki to the database
The information you provide through the Connect to Database page tells MediaWiki:
- What kind of database you’ve got installed on your system (MySQL or compatible, in this case)
- Where the database lives (it can be remote or even cloud-based, but this is on the local server, so localhost is the correct value)
- The name you’d like to give the database that MediaWiki will use (I’ll use the wikidb database I created earlier)
- The name of the existing database user account (mw-admin in this case)
- The password of the current database account (this allows MediaWiki to access MariaDB and create and administrate its database;
see figure 7.7)
Figure 7.7. Part of the MySQL settings page where you tell MediaWiki how to connect to the database

Note
That didn’t work? If MediaWiki can’t connect to your database, confirm that you’re using the right password, but also make sure that you’re able to log in to a MariaDB shell from the command line.
If all goes well, you’ll be taken through a series of screens from which you’ll enter configuration details like database settings, a name for your wiki (something like Company Documentation for this example) and a username, password, and contact email address for a wiki administrator account. This account is not connected to the accounts you already have on the Linux host or MariaDB.
Some optional setup questions let you set preferences for user rights, copyrights for the wiki content, a mail server to send notification emails, and add-on software extensions for things like an in-browser WikiEditor or anti-spam software. With the possible exception of the return email address, the defaults should work.
When you’re done, MediaWiki starts its installation process. When that’s complete, it prompts you to download a file called LocalSettings.php and then save it to the MediaWiki root directory (/var/www/html/ in this example). You can use scp to copy the file you’ve saved to your user’s home directory:
$ scp LocalSettings.php [email protected]:/home/ubuntu/
And then, from a command line on your server, move it to the document root:
# cp /home/ubuntu/LocalSettings.php /var/www/html/
With everything in place, head back to the browser page at the same address you used earlier (something like 10.0.3.184/index.php). This time, as you can see in figure 7.8, you’ll find yourself on the main page of your brand-new wiki. From here on in, it’ll be your job to start packing your wiki with the many fruits of your wisdom and experience.
Figure 7.8. You can add and edit the page’s contents and links by clicking the Edit tab at the top.

Feel free to spend some time with the MediaWiki User’s Guide (www.mediawiki.org/wiki/Help:Contents). Here’s where you’ll learn how to work with files and to write using the simple markup language.
7.6. Installing the Apache web server on CentOS
If you want to avoid some of the trouble we experienced in our Ubuntu installation efforts, consider doing some preemptive research to find out exactly which release versions you’ll need for each part of the LAMP puzzle. A quick trip to the MediaWiki Installation Requirements page (http://mng.bz/4Bp1) should give you all the information you’ll need to install the Apache web server (or httpd, as it’s known on CentOS). Once that’s done, getting the software is simple:
# yum install httpd
By default, Apache won’t be running. Remember how to fix that on systemd? No peeking! I hoped you guessed this:
# systemctl start httpd
# systemctl enable httpd
The command systemctl start launches the service, and enable causes it to start every time the computer boots. To confirm that Apache is running, you can use curl to print a web page to the terminal, specifying localhost to tell curl that you’re after the default page being served locally. You may need to install curl...I’m sure you’re OK with that by now. If curl spits out something that starts this way, then Apache is obviously doing its job:
$ curl localhost
<!DOCTYPE html PUBLIC "-//W3C//DTD XHTML 1.1//EN"
  "http://www.w3.org/TR/xhtml11/DTD/xhtml11.dtd"><html><head>
<meta http-equiv="content-type" content="text/html; charset=UTF-8">
     <title>Apache HTTP Server Test Page
         powered by CentOS</title>                                        1
     <meta http-equiv="Content-Type" content="text/html; charset=UTF-8">
[...]
- 1 The title attribute for this Apache test index.html page
But here’s something strange: that successful curl command means that Apache is running and, hopefully, you know that you’ve got network connectivity between your computer and your CentOS VM through the bridged adapter. (Chapter 14 will be helpful if you’re having trouble with that.) But you probably still won’t be able to load the page from a GUI browser. The odds are you’ll get a This Site Can’t Be Reached error, instead. What’s the problem?
This error illustrates another interesting way that the Ubuntu philosophy differs from CentOS’s. By default, Ubuntu ships without a firewall of any sort. (Because there are no open network services beyond basic infrastructure, that’s not nearly as crazy as it sounds.) Apache is ready to accept incoming external traffic as soon as it’s installed. Naturally, there are plenty of ways to shut down network access to fit your needs, but out of the box, you’re open to the world. CentOS, on the other hand, comes with all ports securely shut tight. If you want your web server to receive inbound HTTP requests, you’ll first need to open the HTTP port (which, by convention, is port 80).
7.6.1. Understanding network ports
What, by the way, is a network port? It’s nothing more than a way to identify a particular server resource to network users. Imagine that your server is hosting two separate applications. Visitors can reach your server using either its public IP address or a corresponding DNS domain name (like 172.217.1.174 for google.com). But how will a browser know which of the two applications you want to load?
Applications can be told to listen for traffic coming to the server when a predetermined port is specified. Thus, one application could use port 50501 and another, port 50502. As you can see in figure 7.9, the first application would, therefore, respond to incoming requests using 192.168.2.10:50501 (assuming that 192.168.2.10 is your server’s IP address), and the second application would expect traffic using 192.168.2.10:50502.
Figure 7.9. Applications configured to listen on separate network ports (80 = insecure HTTP; 443 = secure HTTPS; 30303 = a custom application)

We’ll come back to ports later in the book in chapters 9 and 14. But it’s your web server software (like Apache) that will do most of the heavy lifting for servers hosting multiple websites, automatically translating ports into local file system locations. If you’re considering opening up your web server to more than one site, software configuration guides (like those at http://mng.bz/w6h4) are the place to start.
7.6.2. Controlling network traffic
How do you control access to your network? One way is through firewall rules. On CentOS, that’s handled through the firewalld service and its firewall-cmd tool. In this case, you’ll want to add the http service and, through the --permanent flag, ensure that the rule will be active each time you restart the service or boot the computer. (I’ll have much more to say about firewalls in chapter 9.) To apply the changes, restart the service:
# firewall-cmd --add-service=http --permanent
success
# systemctl restart firewalld
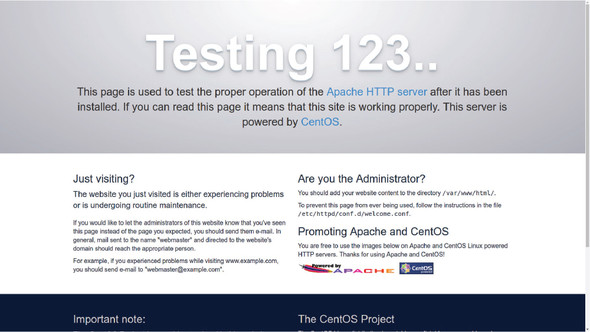
With that done, you should be able to successfully load the CentOS version of the Apache test page (figure 7.10).
Figure 7.10. The default web page on a CentOS Apache web server
7.6.3. Installing MariaDB on CentOS
Again, the installation itself is simple. You’ll need to manually start MariaDB, however, and then use enable to configure it to load on system boot:
# yum install mariadb-server
# systemctl start mariadb
# systemctl enable mariadb
From here, you can follow the MariaDB setup steps outlined earlier as part of the Ubuntu installation process.
7.6.4. Installing PHP on CentOS
At the time of writing, the default version of PHP available though the CentOS repository was still 5.4, which is well behind the latest version available from the Ubuntu repository. The problem is that the current MediaWiki version (1.30) will not work with anything older than PHP 5.5.9. By the time you read this, the issue might have resolved itself. If it hasn’t, you’ll need to use web searches to find repositories containing more up-to-date versions of PHP to install.
I’m not mentioning this because CentOS happens to be a version or two behind at the moment, but because things like that happen all the time; there are important lessons to learn. The first lesson is to always check the package version before installing it. All Linux package managers make all kinds of information available for you before you jump in. Get in the habit of reading. Following is the software summary information for the PHP installation package:
# dnf install php
Using metadata from Sun Jul 23 10:37:40 2017
Dependencies resolved.
======================================================================
 Package        Arch         Version                Repository    Size
======================================================================
Installing:                                                              1
 libzip         x86_64       0.10.1-8.el7           base          48 k
 php            x86_64       5.4.16-42.el7          base         1.4 M   2
 php-cli        x86_64       5.4.16-42.el7          base         2.7 M
 php-common     x86_64       5.4.16-42.el7          base         564 k

Transaction Summary
======================================================================
Install  4 Packages

Total download size: 4.7 M
Installed size: 17 M
Is this ok [y/N]:                                                        3
- 1 dnf displays an installation summary before launching the action.
- 2 Note the PHP version dnf will, by default, install.
- 3 The installation will not begin until you explicitly authorize it.
It’s also important to keep in mind that both newer and older versions of software packages can coexist within the repository system at the same time. Remember that you’ve got choices. And remember, too, that the most recent one is not always the one you want. This can be because another application you’re working with might break with the latest version of this package or because a newer version might not be stable or secure enough for your project.
Note
There’s a good chance that you might one day need to install a package that’s not part of an official Linux repository. This is neither a crime nor an immoral act, so there’s no reason to feel guilty. But you should be aware that you will be fully responsible for making sure that compatibility with other services and applications is maintained, and that your non-repo package and configuration survive system updates. And, of course, you must be extra careful to ensure that the package itself doesn’t contain malware.
Whether or not you use the official CentOS PHP repository version, you’ll probably need to manually add individual modules to support your intended operations. Following online guides to setting things up will prove useful. But you can run yum search php- to check for available modules, and then yum info and the name of an interesting choice to learn more about a specific package:
# yum search php- | grep mysql                                      1
php-mysql.x86_64 : A module for PHP applications that use
   MySQL databases                                                  2
php-mysqlnd.x86_64 : A module for PHP applications that use
   MySQL databases
php-pear-MDB2-Driver-mysql.noarch : MySQL MDB2 driver
php-pear-MDB2-Driver-mysqli.noarch : MySQL Improved MDB2 driver
[...]
# yum info php-mysql.x86_64                                         3
Available Packages
Name        : php-mysql                                             4
Arch        : x86_64
Version     : 5.4.16
Release     : 42.el7
Size        : 101 k
Repo        : base/7/x86_64
Summary     : A module for PHP applications that use MySQL databases
URL         : http://www.php.net/
License     : PHP
Description : The php-mysql package contains a dynamic shared object
            : that will add MySQL database support to PHP. MySQL is
            : an object-relational databasemanagement system. PHP is
            : an HTML-embeddable scripting language. Ifyou need MySQL
            : support for PHP applications, you will need to install
        : this package and the php package.
- 1 Because a MySQL-like database is installed, it makes sense to look for related modules.
- 2 The php-mysql package for 64-bit architectures
- 3 Use yum info to learn more about an interesting package.
- 4 This is the package name you’ll use with yum to install the module.
After installing PHP and any additional PHP modules, restart Apache to ensure that Apache can incorporate the new modules into its service:
# systemctl restart httpd.service
As was described during the Ubuntu setup process earlier in the chapter, use phpinfo to confirm PHP is properly installed.
Summary
- Web server packages like Apache coordinate connectivity between system resources such as databases and files, and expose website resources to clients.
- Available software package versions can vary between Linux distributions, and the release version you need can depend on your specific project.
- Package dependencies can be met with the help of search tools and metadata provided by package management systems (like APT and Yum).
- Applications will often need access to a database engine and will, therefore, need to be given valid authentication information.
Key terms
- A wiki is a tool for creating and managing distributed, collaborative projects.
- A content management system (CMS) is an application designed to make creating, sharing, and editing digital content easy.
- A web server is software designed to safely and reliably expose server resources to remote clients.
- DocumentRoot is the Apache setting determining where on the file system the web server will look for website files.
- Structured Query Language (SQL) is a syntax for managing data in relational databases.
- Package dependencies are programs or extensions required for the proper function of installed applications.
Security best practices
- Ensure your system firewall settings permit appropriate client access to system resources but block all other requests.
- In most cases, it’s not a good idea to allow remote root access to your database.
- Never leave a file running phpinfo exposed on a public-facing website.
Command-line review
- apt install lamp-server^ (a single Ubuntu command) installs all the elements of a LAMP server.
- systemctl enable httpd launches Apache on a CentOS machine at every system boot.
- firewall-cmd --add-service=http --permanent permits HTTP browser traffic into a CentOS system.
- mysql_secure_installation resets your root password and tightens database security.
- mysql -u root -p logs in to MySQL (or MariaDB) as the root user.
- CREATE DATABASE newdbname; creates a new database in MySQL (or MariaDB).
- yum search php- | grep mysql searches for available packages related to PHP on a CentOS machine.
- apt search mbstring searches for available packages related to multibyte string encoding.
Test yourself
Which of the following packages would you need to install to provide a database for a LAMP web server?
- mariadb
- httpd
- mariadb-client
- mariadb-server
Which of these platforms enables networking between browser clients and data resources on a server?
- Apache
- Perl
- PHP
- systemctl
localhost is a designation used to invoke
- The DocumentRoot of a remote client
- The DocumentRoot of the server from which the command is run
- The .conf file on a web server
- The default HTTP port on a host server
Where, by default, is the DocumentRoot of an Apache web server?
- /var/www/html/
- /var/html/www/
- /etc/apache2/
- /home/username/www/html/
Which of the following commands will allow web browser traffic into a CentOS web server using port 80?
- firewalld --add-service=http
- firewall-cmd --add-service=https
- firewall --add-service=https
- firewall-cmd --add-service=http
Which of the following commands will let you successfully log in to your MariaDB shell?
- mariadb -u root
- mysql root -p
- mariadb -r -p
- mysql -u root -p
Which of the following yum commands will display contextual data about the specified package?
- yum search php-mysql.x86_64
- yum describe php-mysql.x86_64
- yum info php-mysql.x86_64
- yum data php-mysql.x86_64
Which of the following tools is optional for running MediaWiki on a LAMP server?
- php-mysql
- mbstring
- php-imagick
- php7.0-xml
Answer key
d
a
b
a
d
d
c
c