
9 Chemistry
Floating and Sinking with Colors, and Exploring Chemical Reactions
Ahhh, the wonders of a chemistry set! Mixing chemicals in a test tube and watching the resulting reaction is a visceral urge deeply seated in the psyche of every fourth grader. Safety is first, though, and many chemicals are not at all safe. Commercial chemistry sets try to profit from the urge while guarding the safety of the child. It is equally secure and quite a bit cheaper to limit the experimentation to common substances used for cooking (not the ones used for cleaning—that can get dangerous in a hurry). Even though there’s no danger to speak of here, it’s essential to pass out the safety glasses; it helps establish the habit as well as promoting lab fashion as chic.
Reactions, per se, are not required to do good chemistry. In the first activities here, there are only molecules sliding around each other. Solids, gases, and other liquids will interact with a base liquid to the joy of all observing. Observing is especially important here; many subtleties may be overlooked without a keen eye to what’s going on in the cup.
But reactions may be called the core of chemistry, so let’s tinker with some of them, too! I’ll show two nice ones that produce gas from the mixing of a solid and a liquid. The results are altogether different.
These tinkerings are all about observation and then hypothesizing the explanation. Unlike most of the tinkering activities we do at the Watsonville Environmental Science Workshop, with these we generally hold back the materials and hand them out one at a time to increase the chance that students will notice key phenomena, and decrease the chance that one student dumps the whole bottle into his experiment. Chemistry is bound to be messy, so round up some towels ahead of time. You can also use cafeteria-type trays to contain the mess.
Make: Floating and Sinking with Colors
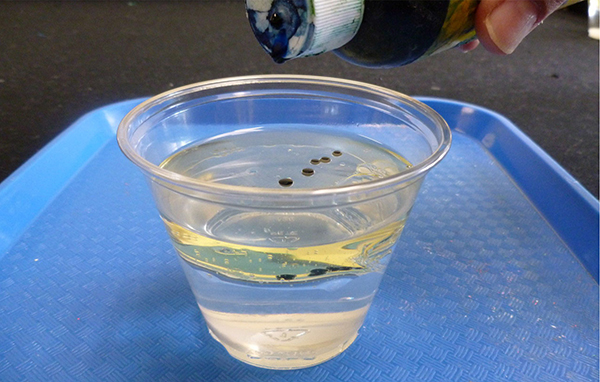
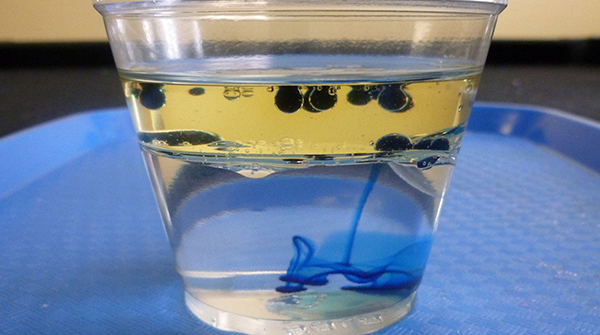
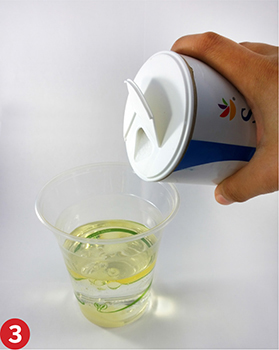
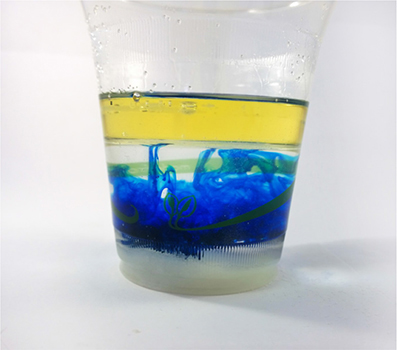
Figure 9-1. Experimenting with drops of color
Gather Stuff
• Clear low/short cups (tumblers)
• Water
• Cooking oil
• Salt, the normal table kind
• Food coloring
• Stirring stick of some sort
• Some small objects to try floating and sinking:
– Plastic beads
– Corks
– Beans or corn kernels
– Rocks
– Steel nuts
– Real nuts
– Toothpicks or bamboo skewers
• Other bits of stuff to drop into the cup
• Three transparent bottles
• Effervescent tummy tablet (Alka-Seltzer works well)
• Base board and mounting system for horizontal bottle
Gather Tools
• Knife or box cutter
• Magnifying glass
Tinker
Step 1
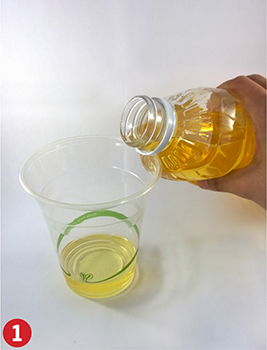
Pour a finger’s thickness of oil into the cup.
Step 2
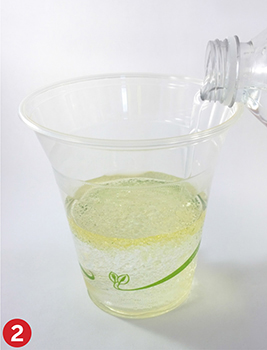
Pour in water until their is a good amount of liquid in the cup. Notice the position of the oil and water.
Step 3
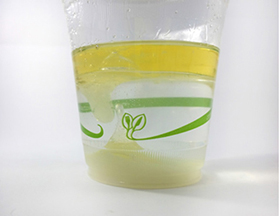
Dump salt into the cup, a burst at a time, and watch the action through the side of the cup. Try to figure out what’s going on there, up and down, taking into consideration the four substances sliding back and forth: air, water, oil, and salt.
Step 4
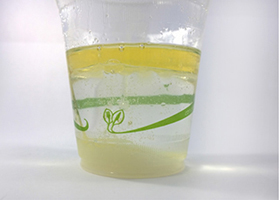
Drop a couple of sizable blobs of food coloring into the cup. Watch carefully, but don’t stir, if you can resist it. This may take a couple of minutes. Whip out that magnifying glass if you’ve got it.
Step 5
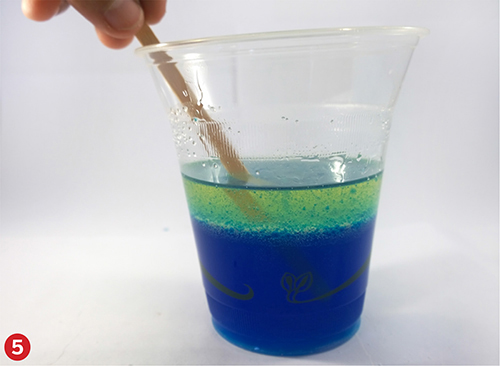
When you’re done watching the miniature, inverse eruptions, stir it up good and then observe it as it settles down. You’ll notice some more amazing stuff.
Step 6
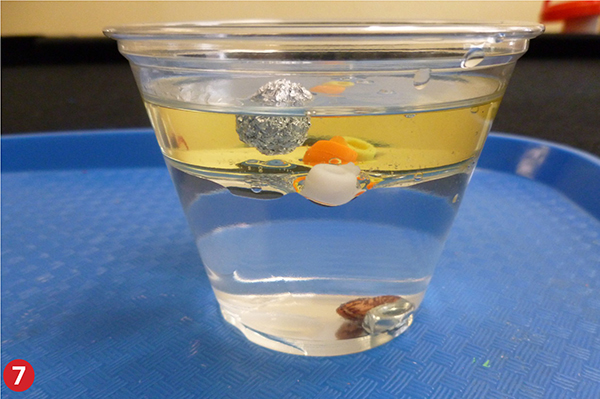
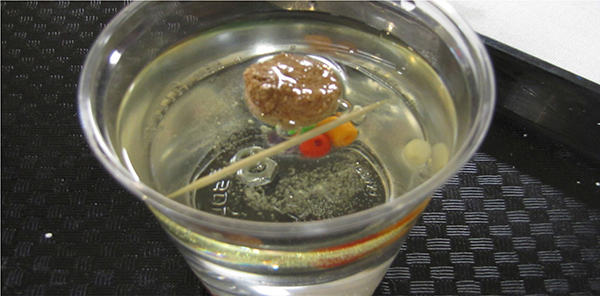
You can continue using that cup full of stuff, or pour yourself a fresh one of water and oil, with no salt this time to make the view clearer. Assemble a bunch of objects to toss into the cup.

Step 7
Drop them in, one by one. You can try to predict where they’ll sink to before you drop them. Keep dropping stuff in until you’ve got things resting on top, on the very bottom, and at the boundary between the oil and water. It’s a bit hard to catch this on camera, but in the second image, you can see a toothpick and a piece of cork floating on top, plastic beads floating in the middle, and beans and a steel nut resting on the bottom. Again, you can stir it up and see what happens.
Step 8
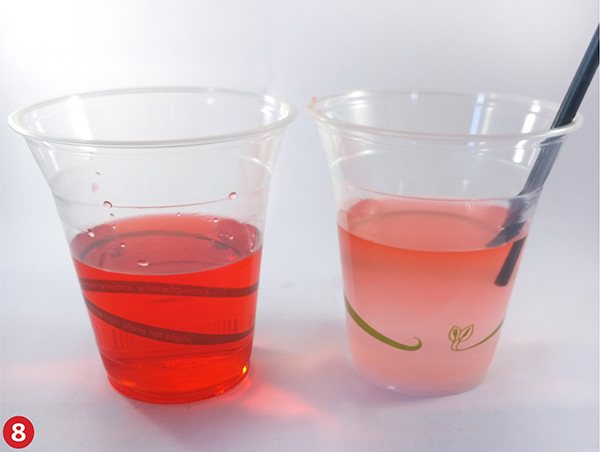
There are several other cool things to tinker with on this same topic. Here, the cup on the right has salt water at the bottom, no food coloring, and fresh red-colored water at the top. We used the straw to gently move the red water to the top of the salt water—cover the top of the straw with a thumb and move a couple of inches of red water over and let it slowly out on the surface. If you just pour it in, they tend to mix. You can try for three layers if you make one cup of super-salty water, one of medium salty water, and one of fresh water. When you’re done observing, stir it up and see what happens.
Step 9
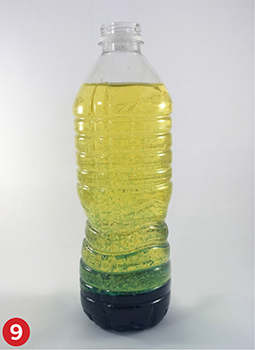
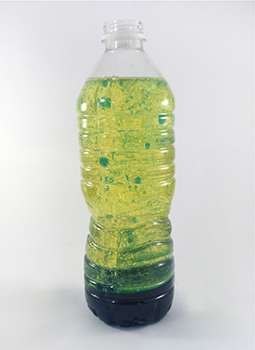
So far, we’ve tinkered with liquids and solids. Here is an arrangement in which you can introduce gas into the mix. It’s a bottle mostly full of oil, with only an inch or so of blue-colored water at the bottom. In goes the effervescent tablet, and, wow, watch what happens. (You must leave that lid off for safety; wouldn’t want to build up any pressure in there.)
Step 10
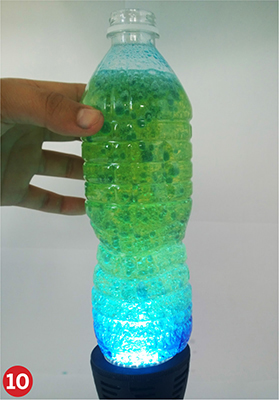
Put a flashlight underneath and flick off the lights: party time!
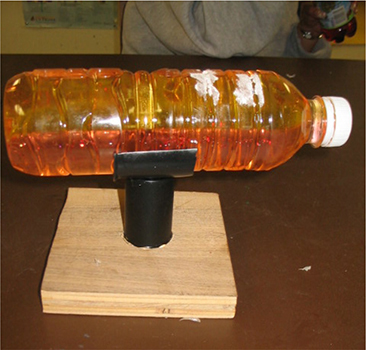
Finally, you can fill a transparent bottle completely with oil and water, slightly more oil than water, then build a tiny boat out of material that floats between the water and oil. Build a fancy mount for it, and you’ll have an executive desk toy worth $40 in the designer catalogs (Figure 9-2).
Since it’s a bit hard to see the boat within the bottle, Figure 9-3 shows it separate. We used plastic from a milk bottle, a section of bamboo skewer, and a bit of plastic bag for the flag.
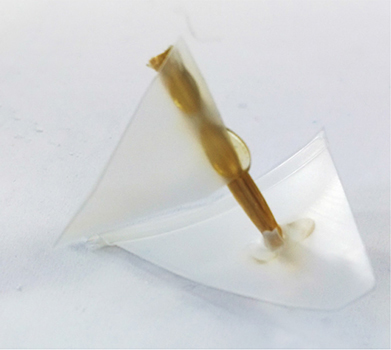
Figure 9-3. A close up of the boat
Make: Chemical Reactions

These two activities require the use of a match or burning splint. Attempt these only with adult supervision, and be sure to have a fire extinguisher handy.
Gather More Stuff
• Baking soda or baking powder
• Vinegar
• Peroxide
• Yeast
• Matches
• Craft sticks
• Cork, to fit bottle
• Napkin
Tinker
Step 1
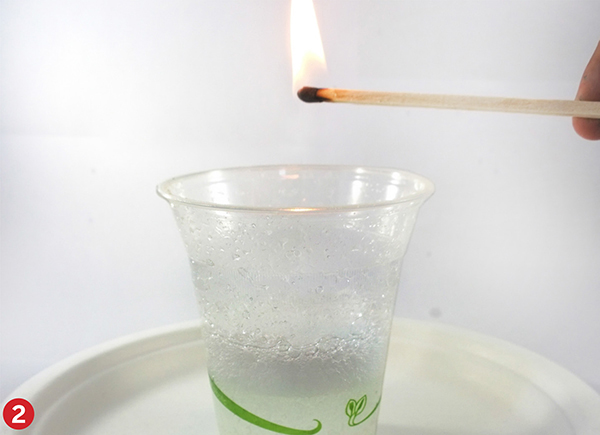
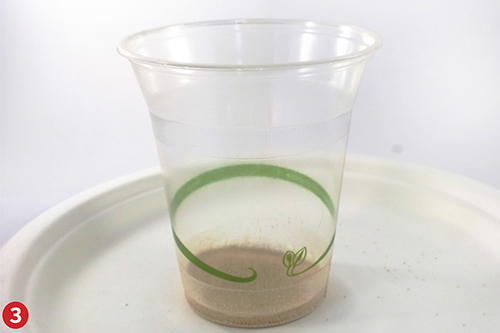
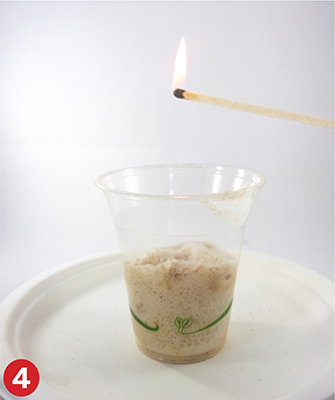
This must be the granddaddy of all chemistry activities: mix baking soda and vinegar. Here we do it in a cup, since we’ll want to analyze the gas that is produced. The exact proportions are not important; make it fizz, baby.

Step 2
After it’s fizzed a bit, light a match or a wood splint, and lower it into the cup. What happens?
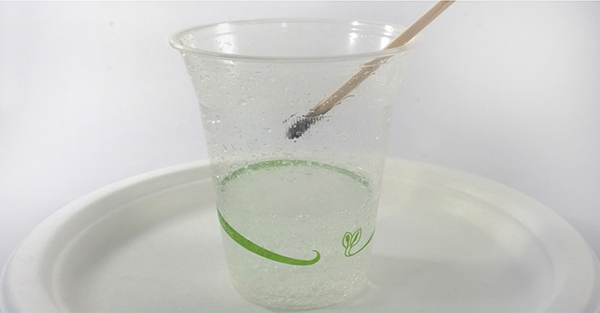
Step 3
Now for the second reaction: hydrogen peroxide and yeast. Mix’er up.
Step 4
Whip out the matches or the wood splint again. Get one burning, blow it out, and lower the glowing tip into the cup. Observe.
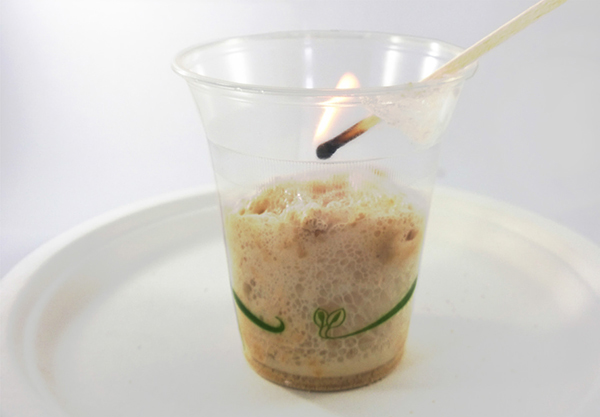
In each of these activities, you can also feel the sides of the cup to see if they get hot or cold.
I can’t resist showing you one more that I got from an old science activity book when I was a kid. It’s a classic’s classic: shooting a cork with the pressure from a baking soda and vinegar reaction. First get a bottle and find a cork that fits it snugly. Put a bit of vinegar in the bottle and some soda in a napkin (Figure 9-4).
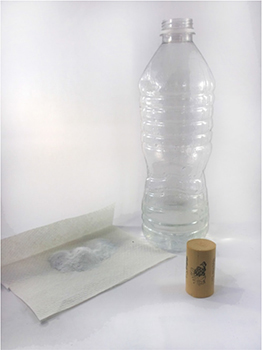
Figure 9-4. Prepping your ingredients
Go outside. Roll the napkin up around the soda so that you can stuff it into the bottle (Figure 9-5).
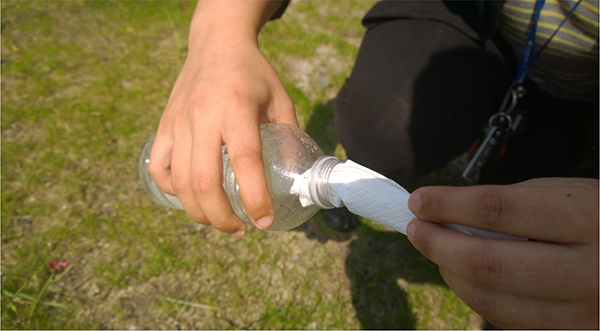
Figure 9-5. Stuffing the napkin in the bottle
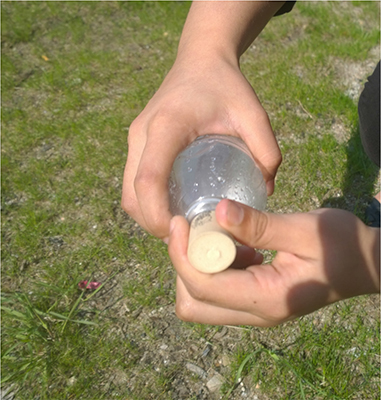
Figure 9-6. Cork it, and get away!
Keep your face away from the cork once you’ve placed it! It’s always best to wear safety glasses.
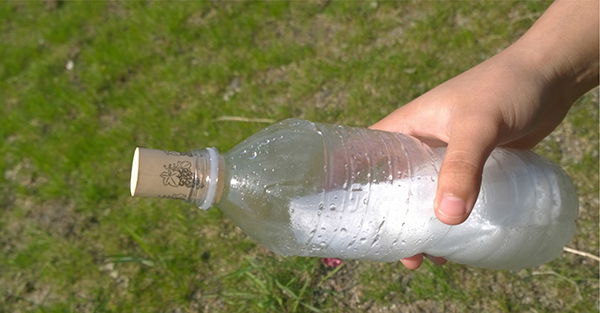
Contemplate the universe as you wait for chemistry to happen (Figure 9-7). And then physics.
What’s Going On?
The tinkering activities on floating and sinking here show how far you can go just putting different materials together and observing them. Even sticking to totally safe kitchen materials, this is the tip of the chemical iceberg. Think of the other stuff you could mix together, and see what happens: different oils (olive oil or body oil), beer or stronger alcohol, fizzy drinks, soap, milk, sugar, ice, honey, peanut butter, chocolate, mustard, Jello...1 Each of these things will interact with the others in a specific manner linked to its chemical properties.
One of the main observations we make while tinkering with this stuff is which item goes up and which item sinks. This is a pretty big question. If you throw a tiny pebble in a lake, it sinks, but an entire tree uprooted by a hurricane and carried out to sea floats. So do giant oil tankers and cruise ships and perhaps the biggest things ever to float on water, enormous icebergs that have cracked off an ice shelf on Antarctica. Naturally, these things are all heavier than the pebble, so what’s up?
Floating and sinking are often trivialized by the following (accurate) statement: things of lower density float atop things of higher density. This only answers the question if you understand density and gravity.
Density is how much mass there is in a given volume. Take two identical bottles—same volume—but fill one with air and the other with sand. Cap them tightly, chuck them in the swimming pool, and you’ll see that you can change density just by changing mass and leaving volume constant. Now take a little rock and hack out a piece of Styrofoam so that it has exactly the same mass as the rock. (You can do this on a balance made from a ruler sitting crossways and centered on a pencil.) The Styrofoam will be much bigger—that is, it’ll have a bigger volume. Chuck these two in the pool and you’ll see that density can be different even if mass is constant, as long as the volume is different.
Technically speaking, density is calculated by measuring the mass and the volume of something and then dividing the mass by the volume. Density = mass/volume, in the language of mathematics.
The density of the water in those examples above is key. The things that sink have a greater mass than an equal volume of water, that is, they’re more dense than water. Things that float are less dense. This is true in all fluids, whether the floaty/sinky things are solids, liquids, or gases.
A fluid is something that flows; basically it’s something that’s not solid. Water and air are both fluids, and things float or sink in both water and air.
You may say, well, things have to be pretty darn light to float in air! To which I’d reply, yes, lighter than air, or more accurately, using our new understanding of density, they have to be less dense than air. They have to have less mass than an equal volume of air. Hot air and helium balloons, as well as the air surrounding a fire, all meet this condition and float, that is, rise in air. They feel an upward force.
To understand where the force comes from that pushes up on something that’s floating, you have to look the other way: gravity. Say you’ve got bottle full of air, tightly capped, and you’re pushing it under the water. It wants to float, but you’re forcing it under. The force you feel pushing up is called the buoyant force. Here’s where it comes from: the bottle is taking up space in the water. If you let the bottle go, it will rise, and water will rush in to take up the place where it used to be. That water rushing in is pulled by the earth’s gravity, which always pulls things down. So basically the bottle is pushed up by the water being pulled down.
The bottle is being pulled down, too, mind you, but with less force than the water, because it is less dense. So the water wins and the bottle floats.
Thinking about a discrete bottle is simple. Thinking about an oil slick is a bit more complicated. Every drop of the oil is less dense than water, so every drop will float on top of the water. Likewise, in the first activity, the food coloring is more dense than the oil, so any little drop will eventually make its way down to the bottom.
Think about all the things you’ve seen float and sink. Can you understand them in terms of this explanation? When you are floating in a pool, do you see that your density is less than the water?
Now that I’ve got that density/gravity/floating/sinking issue off my chest, let’s look at each observation. Salt going into the cup with oil and water goes to the bottom since it’s more dense. On the way down it gets covered with oil, but takes some air with it. This air eventually burbles away from the salt and glorps back to the top, maybe with a bit of oil. This is because it’s less dense.
Did you notice a bit of oil and maybe air staying with the salt at the bottom? As long as the whole blob together has a density greater than water, it will stay down there.
Common food coloring is made to color water-based foods, so it doesn’t mix with oil. Once it makes its way to the water, it mixes quite well, following previously invisible motion in the water. Some of this motion is currents left over from you pouring the stuff in and jostling the cup, and some of the motion is innate to the fluid molecules, and is called Brownian motion. Essentially all those water molecules are knocking into one another, and when the food coloring comes in, you can watch it get knocked into as well. Eventually it spreads through the entire volume of water.
You can get oil-based food coloring at fancy food shops and on the Web. It’s used to color butter and other greasy things. If you can get a hold of some, tinker around with it in the same way to see what happens.
When you stir it up, the densities of these things don’t change, and they don’t mix much, so they return to their original spot. If you dump soap into the cup, there will be some mixing as the soap molecules pull on the water molecules with one hand and the oil molecules with the other. In the activity with salt water and fresh water, they’ll mix together and never come back apart. This makes sense, since the salt is ready to mix into the fresh water just as it did to make the salt water. Oil and water are different enough that they won’t do that.
With the solid objects, again it is simply a question of density and gravity. Those sitting contentedly in the center have densities greater than oil but less than water. The parts of the little boat in the bottle are all connected, so its combined mass and its combined volume determine its density. At the same time, the mast may be a bit less dense, tending to keep it above the hull—convenient, since that’s the way boats should be, even if they’re at the bottom of a sea of oil.
Adding a solute to a solvent, that is, dissolving something in a liquid, tends to make it more dense. Thus, we get the layered salt water. Tummy tablets release gas upon contact with water. This gas is much, much less dense than the water or oil, so it takes off upward with vigor. It may bring a bit of colored water with it, much as the salt brought some of the oil down in the first activity.
Now on to the reactions. Hydrogen peroxide can be viewed as water with an added oxygen: H2O2. In Spanish and other languages, it’s spelled out clearer—it’s called “agua oxigenada,” oxygenated water. Yeast is little specs of dormant fungus, and when you mix it with the peroxide, this is enough to set free that additional oxygen and leave yeasty H2O in the cup. Other things work also; you could try adding salt to release the oxygen from peroxide.
Baking soda is sodium bicarbonate (NaHCO3), and vinegar is watered-down acetic acid (CH3CO2H). Baking powder is mostly baking soda together with other stuff that tweaks the reactions in baking. When those two kitchen chemicals come together you have a base reacting with an acid with a resultant of carbon dioxide.2
Both oxygen and carbon dioxide are gases at room temperature, so in both cases you have the thought-provoking situation of a solid (soda or yeast) and a liquid (peroxide or vinegar) coming together to create a gas. The properties of these gases are quite different. One promotes burning; oxygen is the key element in many combustion reactions. The other stifles burning; some fire extinguishers are filled with CO2. This can be seen nicely with the burning splints.
Have you ever fanned a fire, or blown on it to get it going? You were force-feeding it oxygen, just like you did when you lowered the glowing splint into the peroxide and yeast cup.
These gases are formed in the bottom of the cup and tend to stay there. Again, the issue is density, but since molecules all take up the same volume when they are gases, we can just compare the masses. The mass of air can be estimated by taking its largest two components: nitrogen at 78% and oxygen at 21%. (The last percentage point is argon, carbon dioxide, and a bunch of other stuff, and then there is water vapor, which can reach 3%, but let’s ignore these for now.) Nitrogen and oxygen both tend to bond with themselves in pairs. Nitrogen has an atomic weight of 143 and oxygen 16. Doubling those numbers for the mass, the weighted average comes to 0.78(28) + 0.21(32) = 21.84 + 6.72 = 28.56.
Carbon dioxide, CO2, has a mass of 44, and oxygen, O2, 32. Both of these are more massive, that is, denser than air. So both the carbon dioxide produced in the baking soda and vinegar reaction and the oxygen liberated in the peroxide and yeast reaction tend to stay sunk in the bottom of the cups, allowing a bit of time for analysis by dunking in burning splints.
The flying cork activity shows that when a gas is formed in a closed space, it can create a high pressure. When molecules turn from liquid or solid to gas, they take up 1,000 times more space, so it makes sense that the more gas is formed in the bottle, the higher the pressure gets until... kabloom.
Did you have the experience of making a bottle of vinegar and baking soda that would not blow its cork? It takes a certain amount of pressure to blow it, and if the reaction is over and no more gas is being created, the cork will never blow. Solution: Next time add more reactants!
Keep On
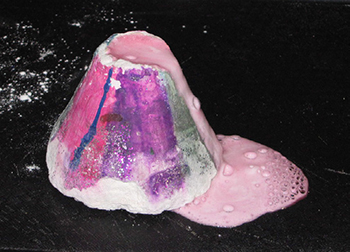
As long as you’ve got the baking soda and vinegar mess out, you may as well make the classic volcano. This one (Figure 9-8) was made with plaster of Paris in the neck of a two-liter bottle, with a hole drilled for the reactants. Soap and red food coloring go a long way toward making a realistic volcano. We pour the vinegar in last, and then out comes the lava to flow down the side of the volcano (Figure 9-9).
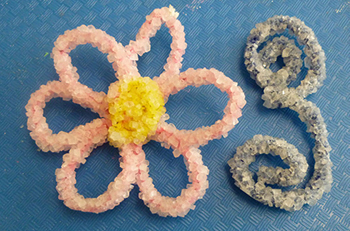
Crystals are another fabulous and safe area to tinker in. Figure 9-10 shows some crystal jewels made on pipe cleaners dunked into a super-saturated solution of borax and a bit of food coloring.
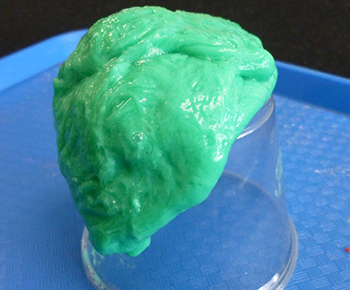
Last, your chemistry tinkering will not be complete without making gak, also known as slime. White glue, water, and borax, with or without color, will give your kids hours and hours of polymer delight. Change the proportions, and you’ll get different gak! Figure 9-11 shows it making its way down the sides of an overturned cup.
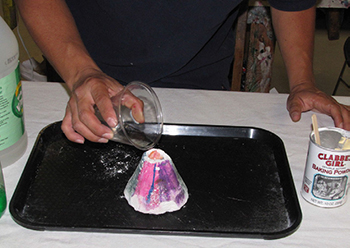
Figure 9-8. Loading the volcano
Internet Connections
• Search “electrolysis” on YouTube to see water molecules ripped apart by an electric current. You can do it with a few batteries and a cup of salt water.
• Search “sulfuric acid sugar snake” to see a somewhat more dangerous experiment between acid and sugar.
• All crystals are formed by materials solidifying out of a fluid. Check out photos of the world’s largest gems and geodes (crystals inside of hollow rocks).
Standards Topic Links
• Density, mass, atomic weight, chemical reactions, acids and bases, states of matter, floating and sinking, and buoyancy
More Tinkering with Chemistry
• Simon Quellen Field, Why Is Milk White? (Chicago Review Press, 2013) and Culinary Reactions: The Everyday Chemistry of Cooking (Chicago Review Press, 2011)
• Virginia Mullin, Chemistry Experiments for Children (Dover, 1968; a classic from the 1960s)
• Pat Murphy, Boom! Splat! Kablooey!: Safe Science That’s a Real Blast (Klutz, 2009)