
1 Sound
Tinkering with a Shrink-Wrapped Drum Set and a Torsion Drum
Sound is great to tinker with. It’s rare to find a kid who doesn’t enjoy making noise. Kids have at their disposal more noises than there are sections in an orchestra, but here we’ll delve primarily into the percussion section. To make drums is trivial: pots, pans, cans, bottles, boxes, buckets, jugs, shells, skulls, coconuts, gourds, oil drums, and lids of all shapes and sizes become drums the moment you hit them. Put many together and you can tinker with sounds for hours with your drum set. Do it at the wrong time of night and you’ll have the authorities at your door. A drum vibrates to give sound, and the pitch of the sound is determined by how the material is vibrating. Someone discovered long ago that a tightly stretched skin or other membrane can be made to sound quite nice. It turns out to be a bit tricky to stretch a skin, but with the nifty chemical technology of plastic shrink-wrap, we can all make a skin drum.
Make: Drum Set
Gather Stuff
• Stiff plastic bottles and containers (water bottles don’t work well), cans, sturdy cardboard tubes, and boxes, all ideally larger than 2 inches in diameter
• Double-sided sticky tape
• Shrink-wrap plastic, sold as shrink film, to cover and insulate windows in the winter
• Electrical tape
• Wood base and back boards (optional)
• Dowels, 1/4" or 5/16" (optional)
• Bamboo skewers
• Beads of various sizes and weights
• Craft sticks
• Other sticks to try, such as dowels, spoons, rulers, etc.
• Decorations
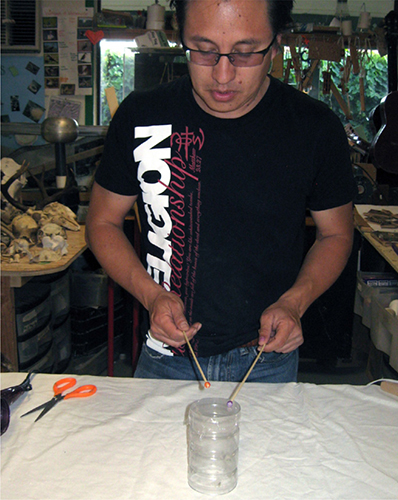
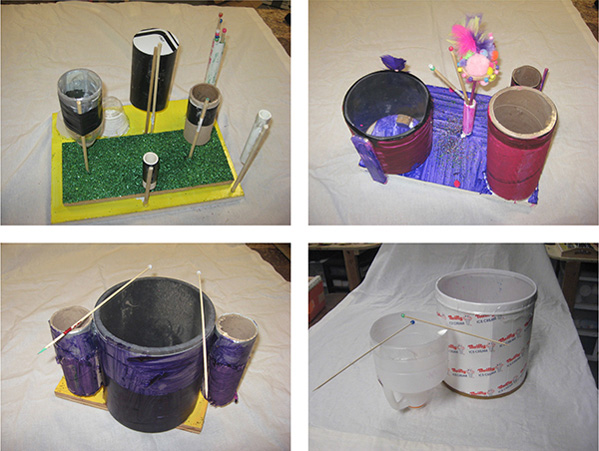
Figure 1-1. Trying out the drum set
Gather Tools
• Scissors
• Hacksaw or small-toothed wood saw
• Drill with bits (optional)
• Hot glue guns and glue sticks
• Hair dryer
Tinker
Basically, you’ll cut out a tube for a drum body and then stretch plastic over the top of it, holding it down with double-sided sticky tape.
Step 1
Cut some of the tubes and things you gathered into drum shapes and sizes. Leave the bottoms on some of the bottles and cans, and cut some off to leave open tubes.
Step 2
Stick double-sided tape around the rim of the ones you want to attach the skin to.
Step 3
Cut a piece of shrink-wrap plastic that is a bit larger than the tube diameter.

Step 4
Stretch it across the opening as you stick it on the double-sided tape.
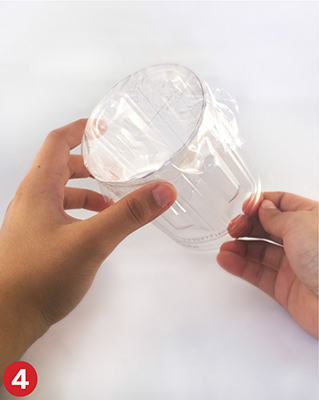
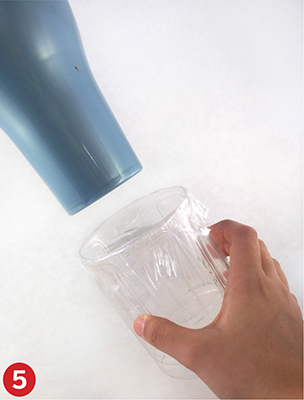
Step 5
Heat the plastic with a hair dryer until it’s tight.
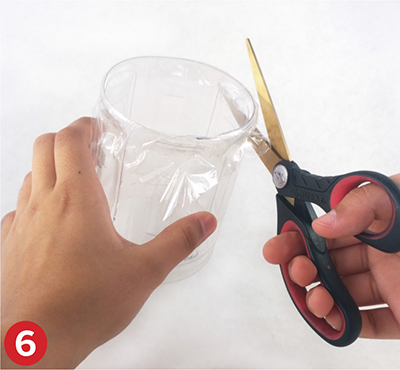
Step 6
Trim the plastic around the tape. If you doubt the strength of your double-sided tape, go over it again with black tape.
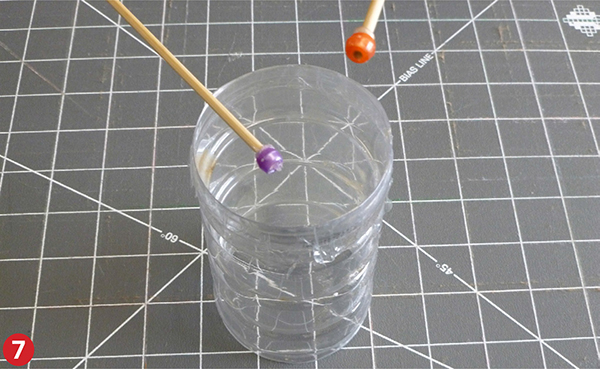
Step 7
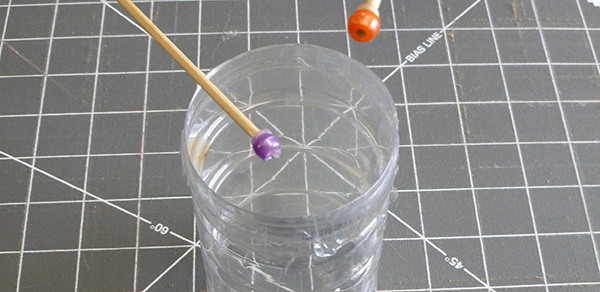
Try hitting it with various things, including craft sticks and bamboo skewers, both naked and with different kinds of beads on the ends. Try hitting it in the center and at the edges.
Mount your drums together into a set if you want, and add other nonskin drums and cymbals.
Make: Torsion Drum
Now that you know how to make a drum with a stretched head, you can make this folk toy that I’ve seen on three continents.
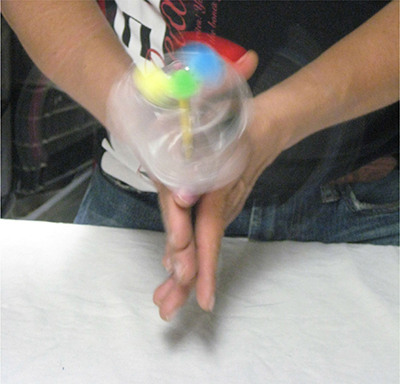
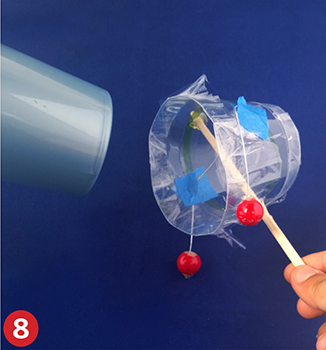
Figure 1-2. Playing the torsion drum

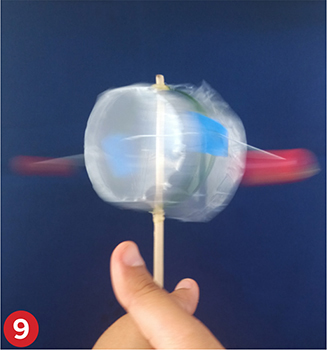
Figure 1-3. The torsion drum in a rare moment of inactivity
Gather More Stuff
• String
• Dowel, 1/4” or 5/16”, or a new pencil
Tinker
To make the torsion drum, stretch plastic film across two heads of a short drum body, poke a stick through the center of the body, and dangle beads on strings to whack the heads when you twist it back and forth.
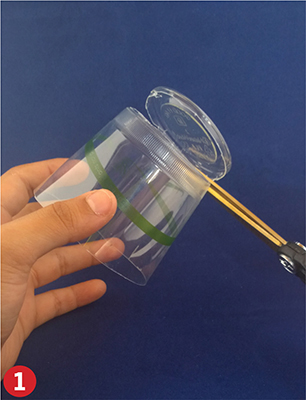
Step 1
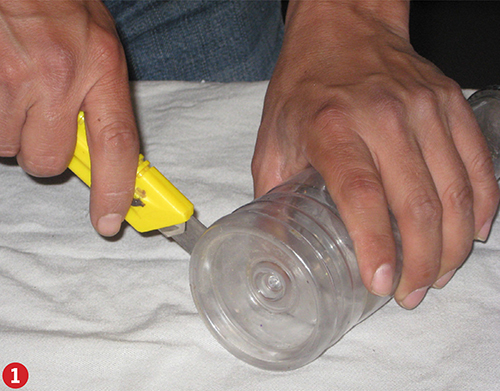
Cut out the bottom of a cup or cut a section of cardboard tube about as long as its diameter. A cup is nice, since the ends will each have a different radius, giving different sounds. On the other hand, a cardboard tube can be larger and sturdier than a cup. You can use a knife to make a slit then use scissors to cut it off.
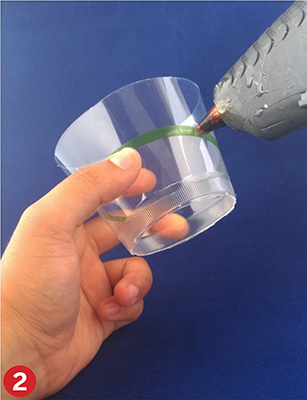
Step 2
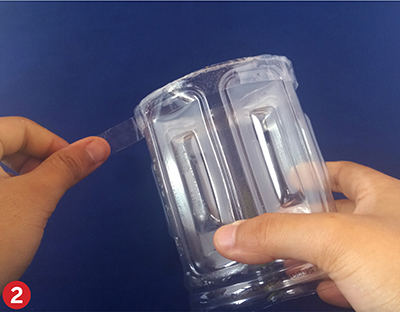
Drill or poke four equally spaced holes in the center of the walls of the drum. We melt the holes with the hot tip of the glue gun.
Step 3
Tie beads to the ends of two strings that are plenty long to reach from the side of the cup to the center of the head.

Step 4
Thread the strings through two holes opposite each other—beads on the outside—and tape the strings on the inside such that the beads will hit the two drum heads, one on each side.
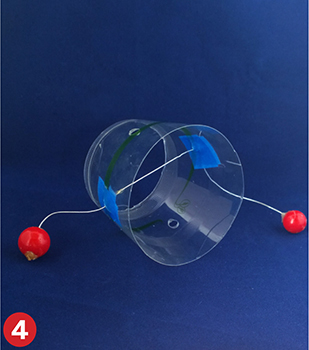
Step 5
Poke the dowel or pencil through the other two holes. Hot glue it top and bottom.
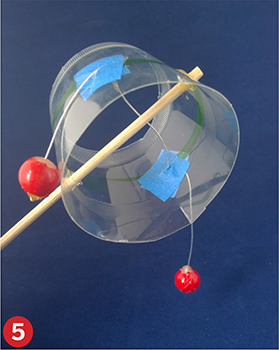
Step 6
Stick a strip of double-sided sticky tape around the edge at both ends.
Step 7
Stretch shrink-wrap plastic heads on the two ends.
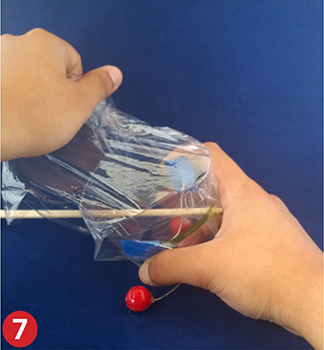
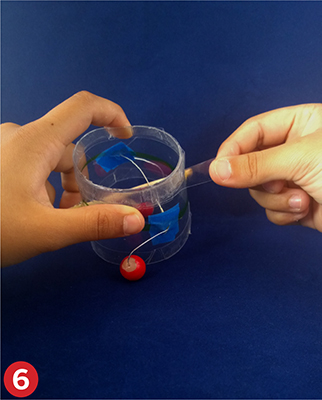
Step 8
Tighten it up with the hot hair dryer, and trim off the extra plastic.
Step 9
Twist it side to side (a movement called “torsion”) such that the beads swing around to hit the heads.
Judging by your experience with the Drum Set, you can make another hole in the side of the Torsion Drum if you think the sound will be better.
What’s Going On?
To get a nice ringing sound, a vibration has to continue for a while. Any sound has one or more frequencies, and pleasant sounds often have a pleasant combination of frequencies. (A whistle, for instance, has only one primary frequency and can soon drive you mad.) Bells, chimes, and drum heads all vibrate in multiple, geometric patterns, each of which gives a certain frequency. The frequency of a sound is its pitch. A high-pitched sound means something is vibrating at a high frequency, that is, moving back and forth rapidly. This usually means it’s not very large. Likewise, a large thing will generally vibrate more slowly, at a low frequency, giving low-pitched sound. Thus tubas and kettle drums give low-pitched sounds, and piccolos and violins give high-pitched sounds.
Did you find that your larger diameter drums have a lower pitch? Did the smaller end of your torsion drum have a higher pitch?
When something is stretched tightly, this usually also leads to rapid vibrations. When you heated your drum head, maybe you could hear the pitch rising. If you hit a membrane that is not stretched at all—like a sheet on a bed—there is no force to take it back to the previous position. (This force is called the restoring force in physics.) That’s why you don’t get much sound when you tap on your bed sheet and why drum heads have to be stretched.
When the head of a drum moves inward during a vibration, it is effectively pushing air into the drum. If the drum is sealed, like if you made a drum from a bottle and didn’t cut the bottom off of it, then the air inside has nowhere to escape and must instead pack itself together more tightly. That’s called compression, and it will affect the motion of the membrane. If, on the other hand, the bottom is open or if there is a hole in the side wall, the air can rush in and out as the membrane pushes it back and forth. Different drums have different arrangements for air flow. Small holes may not let the air enter and exit fast enough to make a difference.
What hole arrangement gave you the best sound?
A musical instrument always produces vibrations, and usually in the end the entire instrument is vibrating at least a bit. At the same time, there is almost always some part of the instrument that produces the original vibration. On the drum, this original vibration arises in the membrane, the head. But after a very short time, the air inside, the side walls, and even the stand holding it up are all vibrating. This is why the diameter, the length, and the material of the drum all make a difference in its sound. A drum stick hits the drum membrane, and is kicked back up by the membrane’s first vibration. Thus the weight and material of the stick has an impact on the sound.
Which drum material gave you the most pleasant sound? Why do you think the best sounding stick worked better than the others?
When you compare two different drums, you can think about what is making them sound different. Different characteristics of a drum, such as its diameter, length, or material, are called factors or variables. If you want to try to determine the influence of a certain variable, you have to isolate it. To do that, you make sure all the other variables stay the same and then only change the one you’re interested in. Thus, you can make two drums from the same cardboard tube, one long and one short, and then play them with the same sticks. When you compare their sounds, you can be sure that any difference arises from the lengths. (If there is no difference, you have discovered that the length variable has no influence on the pitch.)
On the contrary, if you make one drum from a small, short, plastic cup and another from a large, long, cardboard tube, they’ll probably sound different, but you’ll be hard pressed to tell which variables are influencing what. This is a key concept in all kinds of science; if you can pass it to your students, they’ll be set for anything, and it may help them in their daily lives as well.
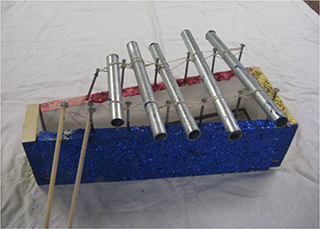
Figure 1-4. Metal conduit xylophone
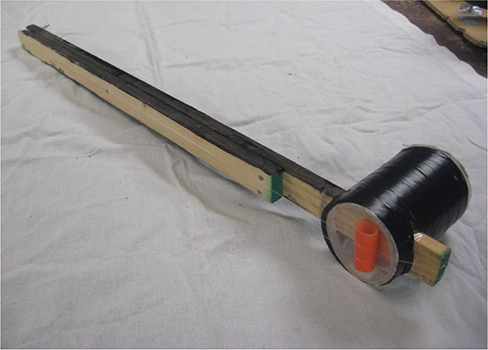
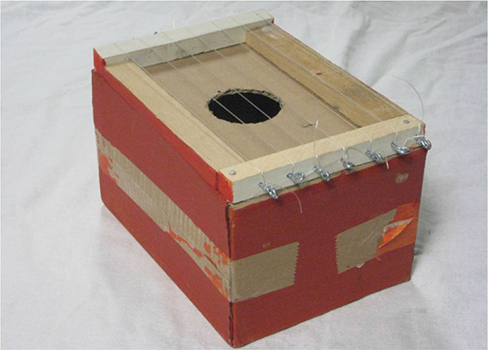
Figure 1-6. Cardboard box autoharp
Keep On
You can make many toy and folk instruments and continue tinkering with sound. Figure 1-4 shows a xylophone made from metal conduit tubes suspended with rubber bands over a small wood box. The box is not so important; you can also just pound nails into a board and suspend the pieces between them. We use nuts on the end of dowels to hit the instrument. The sound is surprisingly pleasant.
Figure 1-5 is a guitar we made using shrink-wrap plastic for the front of the box, 40-pound fishing line for the two strings, and screw eyes for the tuning pegs. I can actually tune this like a mandolin—the strings five steps apart—and play a song on it.
Figure 1-6 shows a sort of autoharp or zither, again with fishing line and screw eyes, this time stretched over a cardboard box, reinforced with wood. Amazing tone and volume.
Internet Connections
• Search “drum head vibration video” for many phenomenal slow-motion videosof how a stretched skin is actually moving when it rings.
• I bet you thought about how large you could go with this project. Check outimages from the Drum Tower of Xi’an, China.
• Search for “vegetable instruments.” Wow.
Standards Topic Links
• Sound, waves, vibrations, energy transfer, motion, velocity, and matter
More Tinkering with Music
• Dennis Waring, Cool Cardboard Folk Instruments to Make & Play (Sterling/Tamos, 2000) and Great Folk Instruments to Make & Play (Sterling, 1999)
• Bart Hopkin, Gravikords, Whirlies & Pyrophones: Experimental Musical Instruments (Ellipsis Arts, 1996)
• Ginger Summit and Jim Widess, Making Gourd Musical Instruments: Over 60 String, Wind & Percussion Instruments & How to Play Them (Sterling, 2007)