
CHAPTER 10
BONUS CONTENT
It seems to have become a tradition in my books to end with a bonus chapter—a chapter in which I share a few random Photoshop tips, tricks, and techniques that most likely have nothing to do with what we’ve covered in these pages, but this is a good excuse to include them.
I guess I could write a “Random Stuff I Know How To Do in Photoshop” book, but I’m not sure that title hits the spot, so until then, here’s some random bonus stuff for you. Enjoy!
FACEBOOK IMAGE SETTINGS
If you use Facebook and upload the occasional photograph, you’ve probably noticed how they never seem to look as good once you’ve shared them. Facebook seems to have a knack for completely battering your images and making them look, well, awful.
Here then, is a simple method for resizing your images and saving them in a format that will guarantee they look great.
- 1.With an image open in Photoshop, we’ll first take a look at the dimensions by going to Image > Image Size (Figure 10.1).
The long edge—in this case, the width—measures 7515 pixels. For images uploaded to Facebook, the optimum length for the longest side of an image—be it the length or height—is 2048 pixels.
- 2.In the Image Size dialog, change the longest side of your image (in my case it would be the width) to 2048 pixels.
Tick the Resample checkbox, and because we’re downscaling the image, choose Bicubic Sharper (reduction) (Figure 10.2).
There are a number of options available for when we’re downscaling or even upscaling our images, but NEVER choose Automatic!
Click OK.
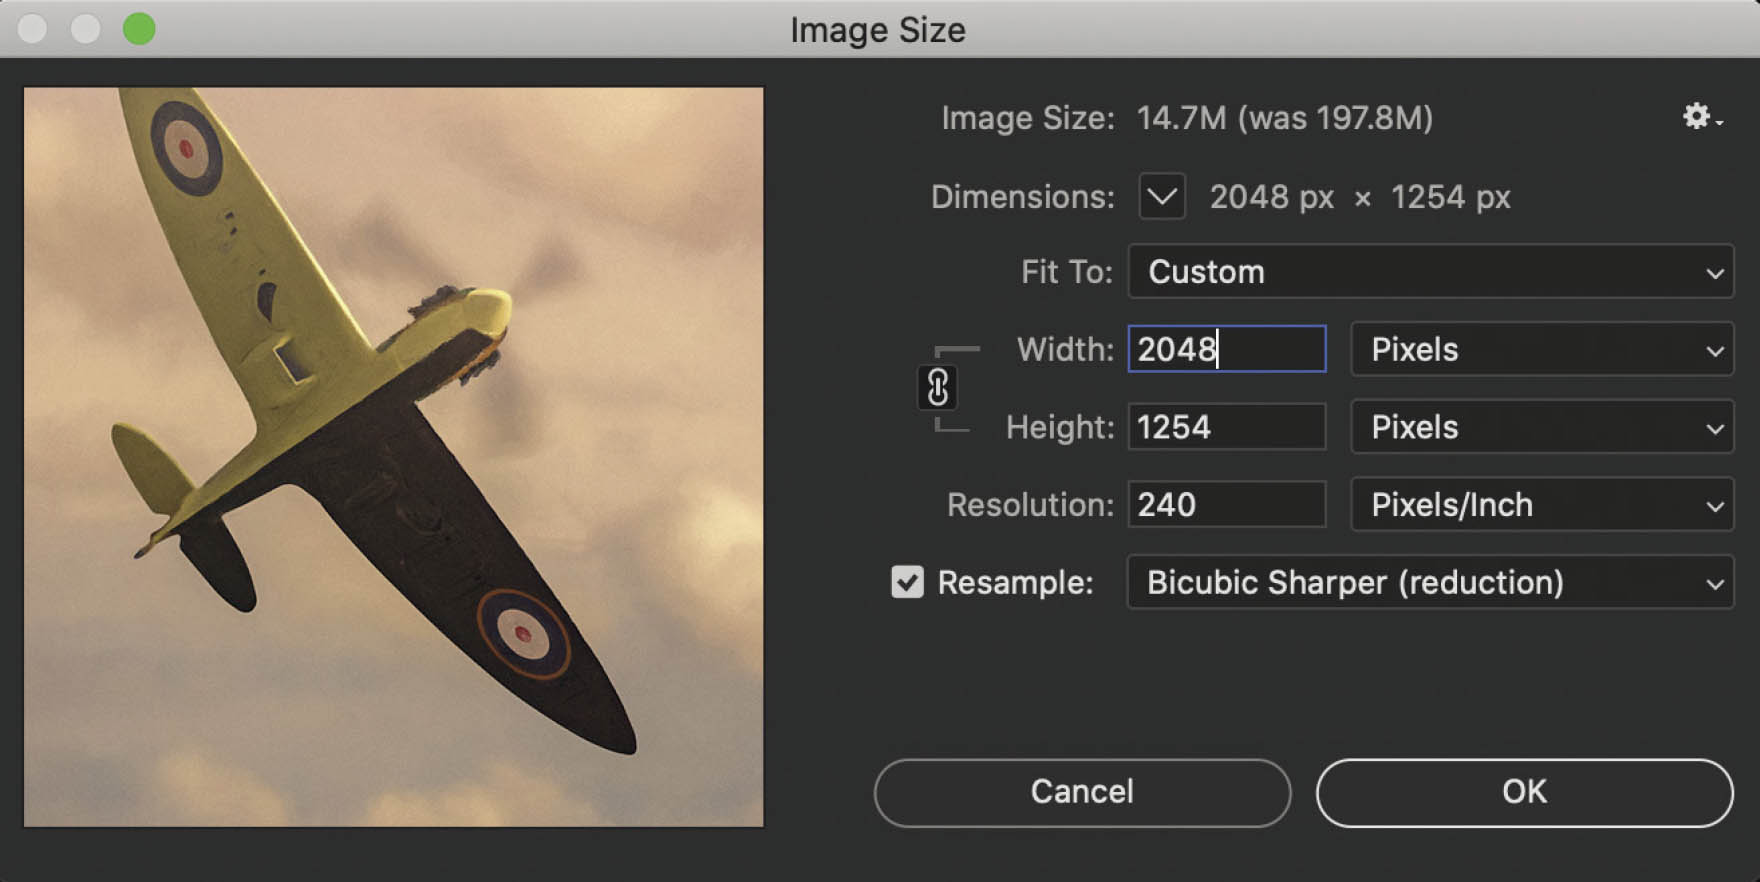
FIGURE 10.1

FIGURE 10.2
- 3.Go to File > Export > Export As (Figure 10.3). This opens the Export As dialog (Figure 10.4), and over on the right side, we can choose some settings (Figure 10.5).
- File Settings For Format, choose PNG.
- Image Size We’ve already made the changes to the dimensions of the image, so this can be left alone.
NOTEWe could have changed the dimensions in here instead of in the Image Size dialog, but it tends to slow Photoshop down considerably if you open a large image here, and there is no explanation for the Resample.

FIGURE 10.3
- Metadata I always include Copyright and Contact Info.
- Color Space Enable both Convert to sRGB and Embed Color Profile.
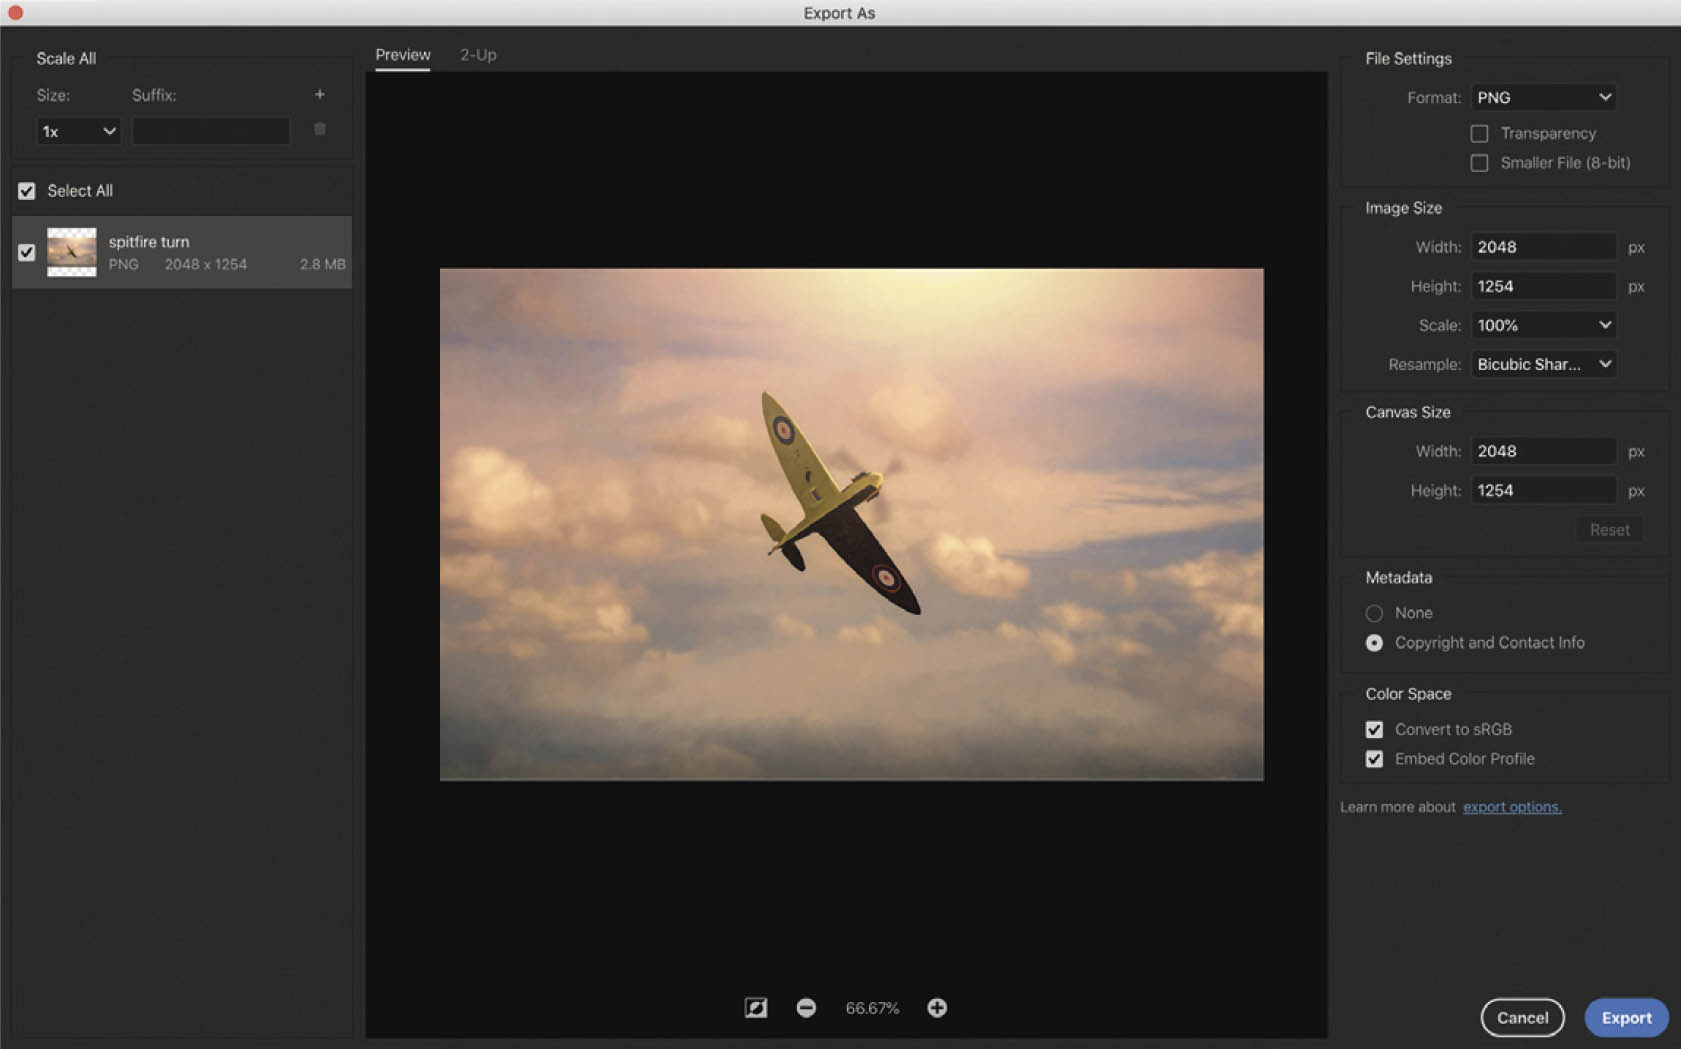
FIGURE 10.4
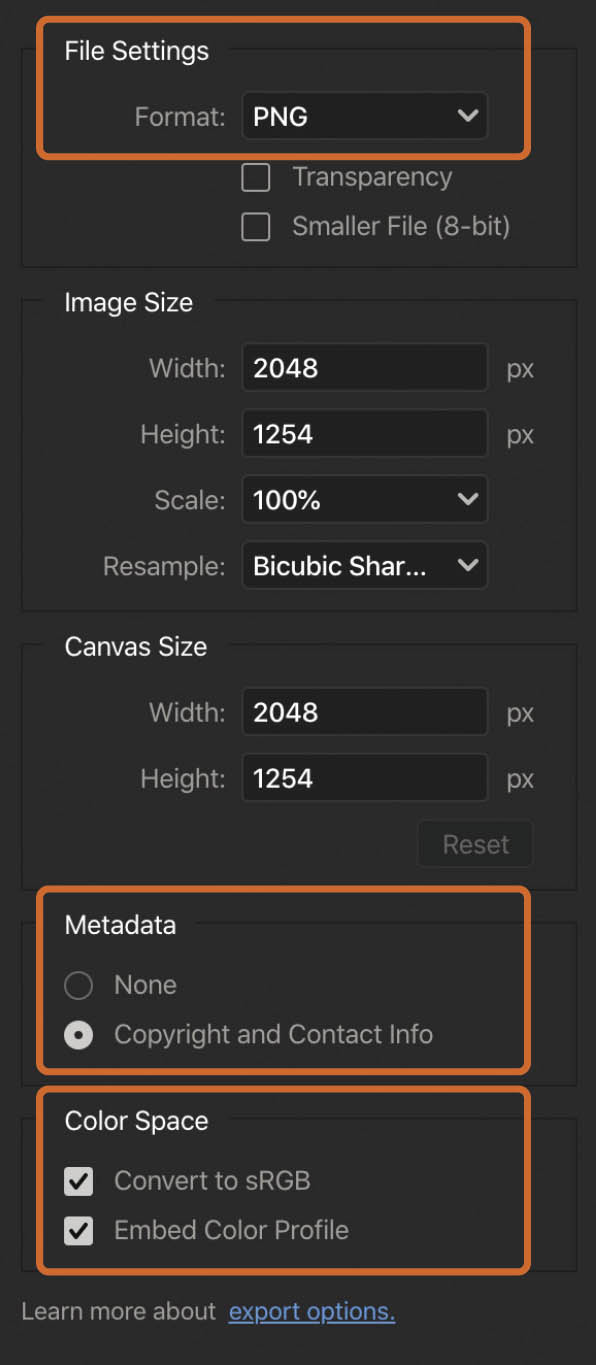
FIGURE 10.5
- 4.Click on Export, navigate to a folder in which you want to save the image, and click OK.
Done! You can now upload this image to Facebook, and it will look a whole lot better (Figure 10.6); well, at least until they change some algorithms or whatever it is they do.
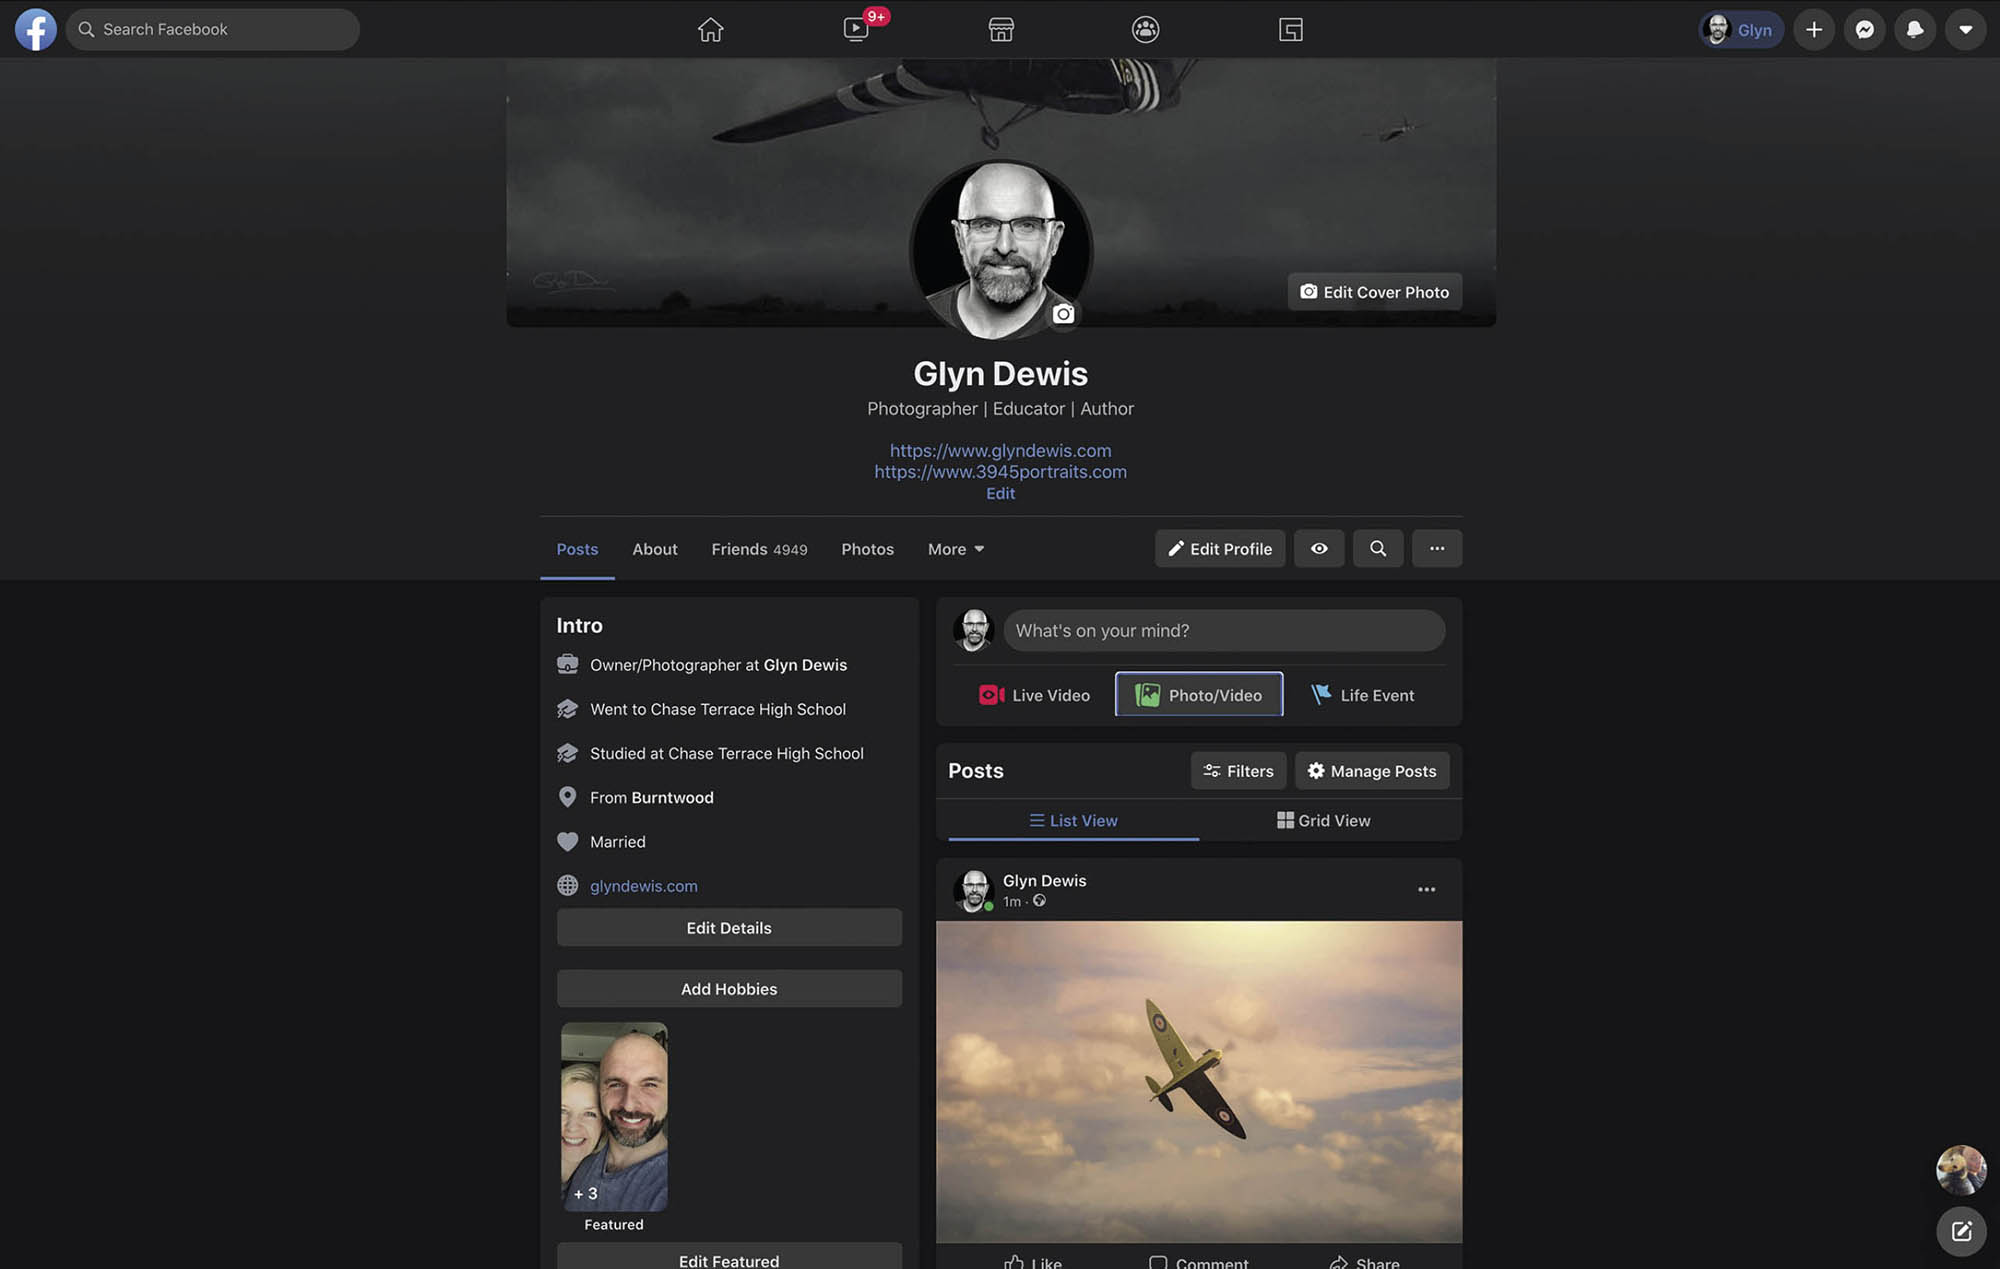
FIGURE 10.6
ADDING DEPTH AND DIMENSION
This is a technique I use to add depth and dimension to pretty much every single portrait I make because it has the effect of grabbing the viewer’s attention by making the portrait seem to be almost coming forward off the screen or print. This works on the principle that when we look at pictures, we are naturally drawn to the areas that are the sharpest, brightest, and have the most contrast.
Also, brighter areas appear closer and darker areas appear farther away, which is why when I used to photograph physiques, I would brighten the muscle slightly and darken the areas where the muscle connected, enhancing the ripped look.
Anyway, when we use this technique on a portrait, it brings it to life.
- 1.Open the gordon.tif file and follow along as I show you how I do this.
This is a portrait of World War II veteran Gordon Drabble, whom I photographed for my 39-45 Portraits Project (Figure 10.7). I photographed him at a very wide aperture so that his eyes were sharp and in focus, and everything beyond was out of focus. This made his eyes stand out already.
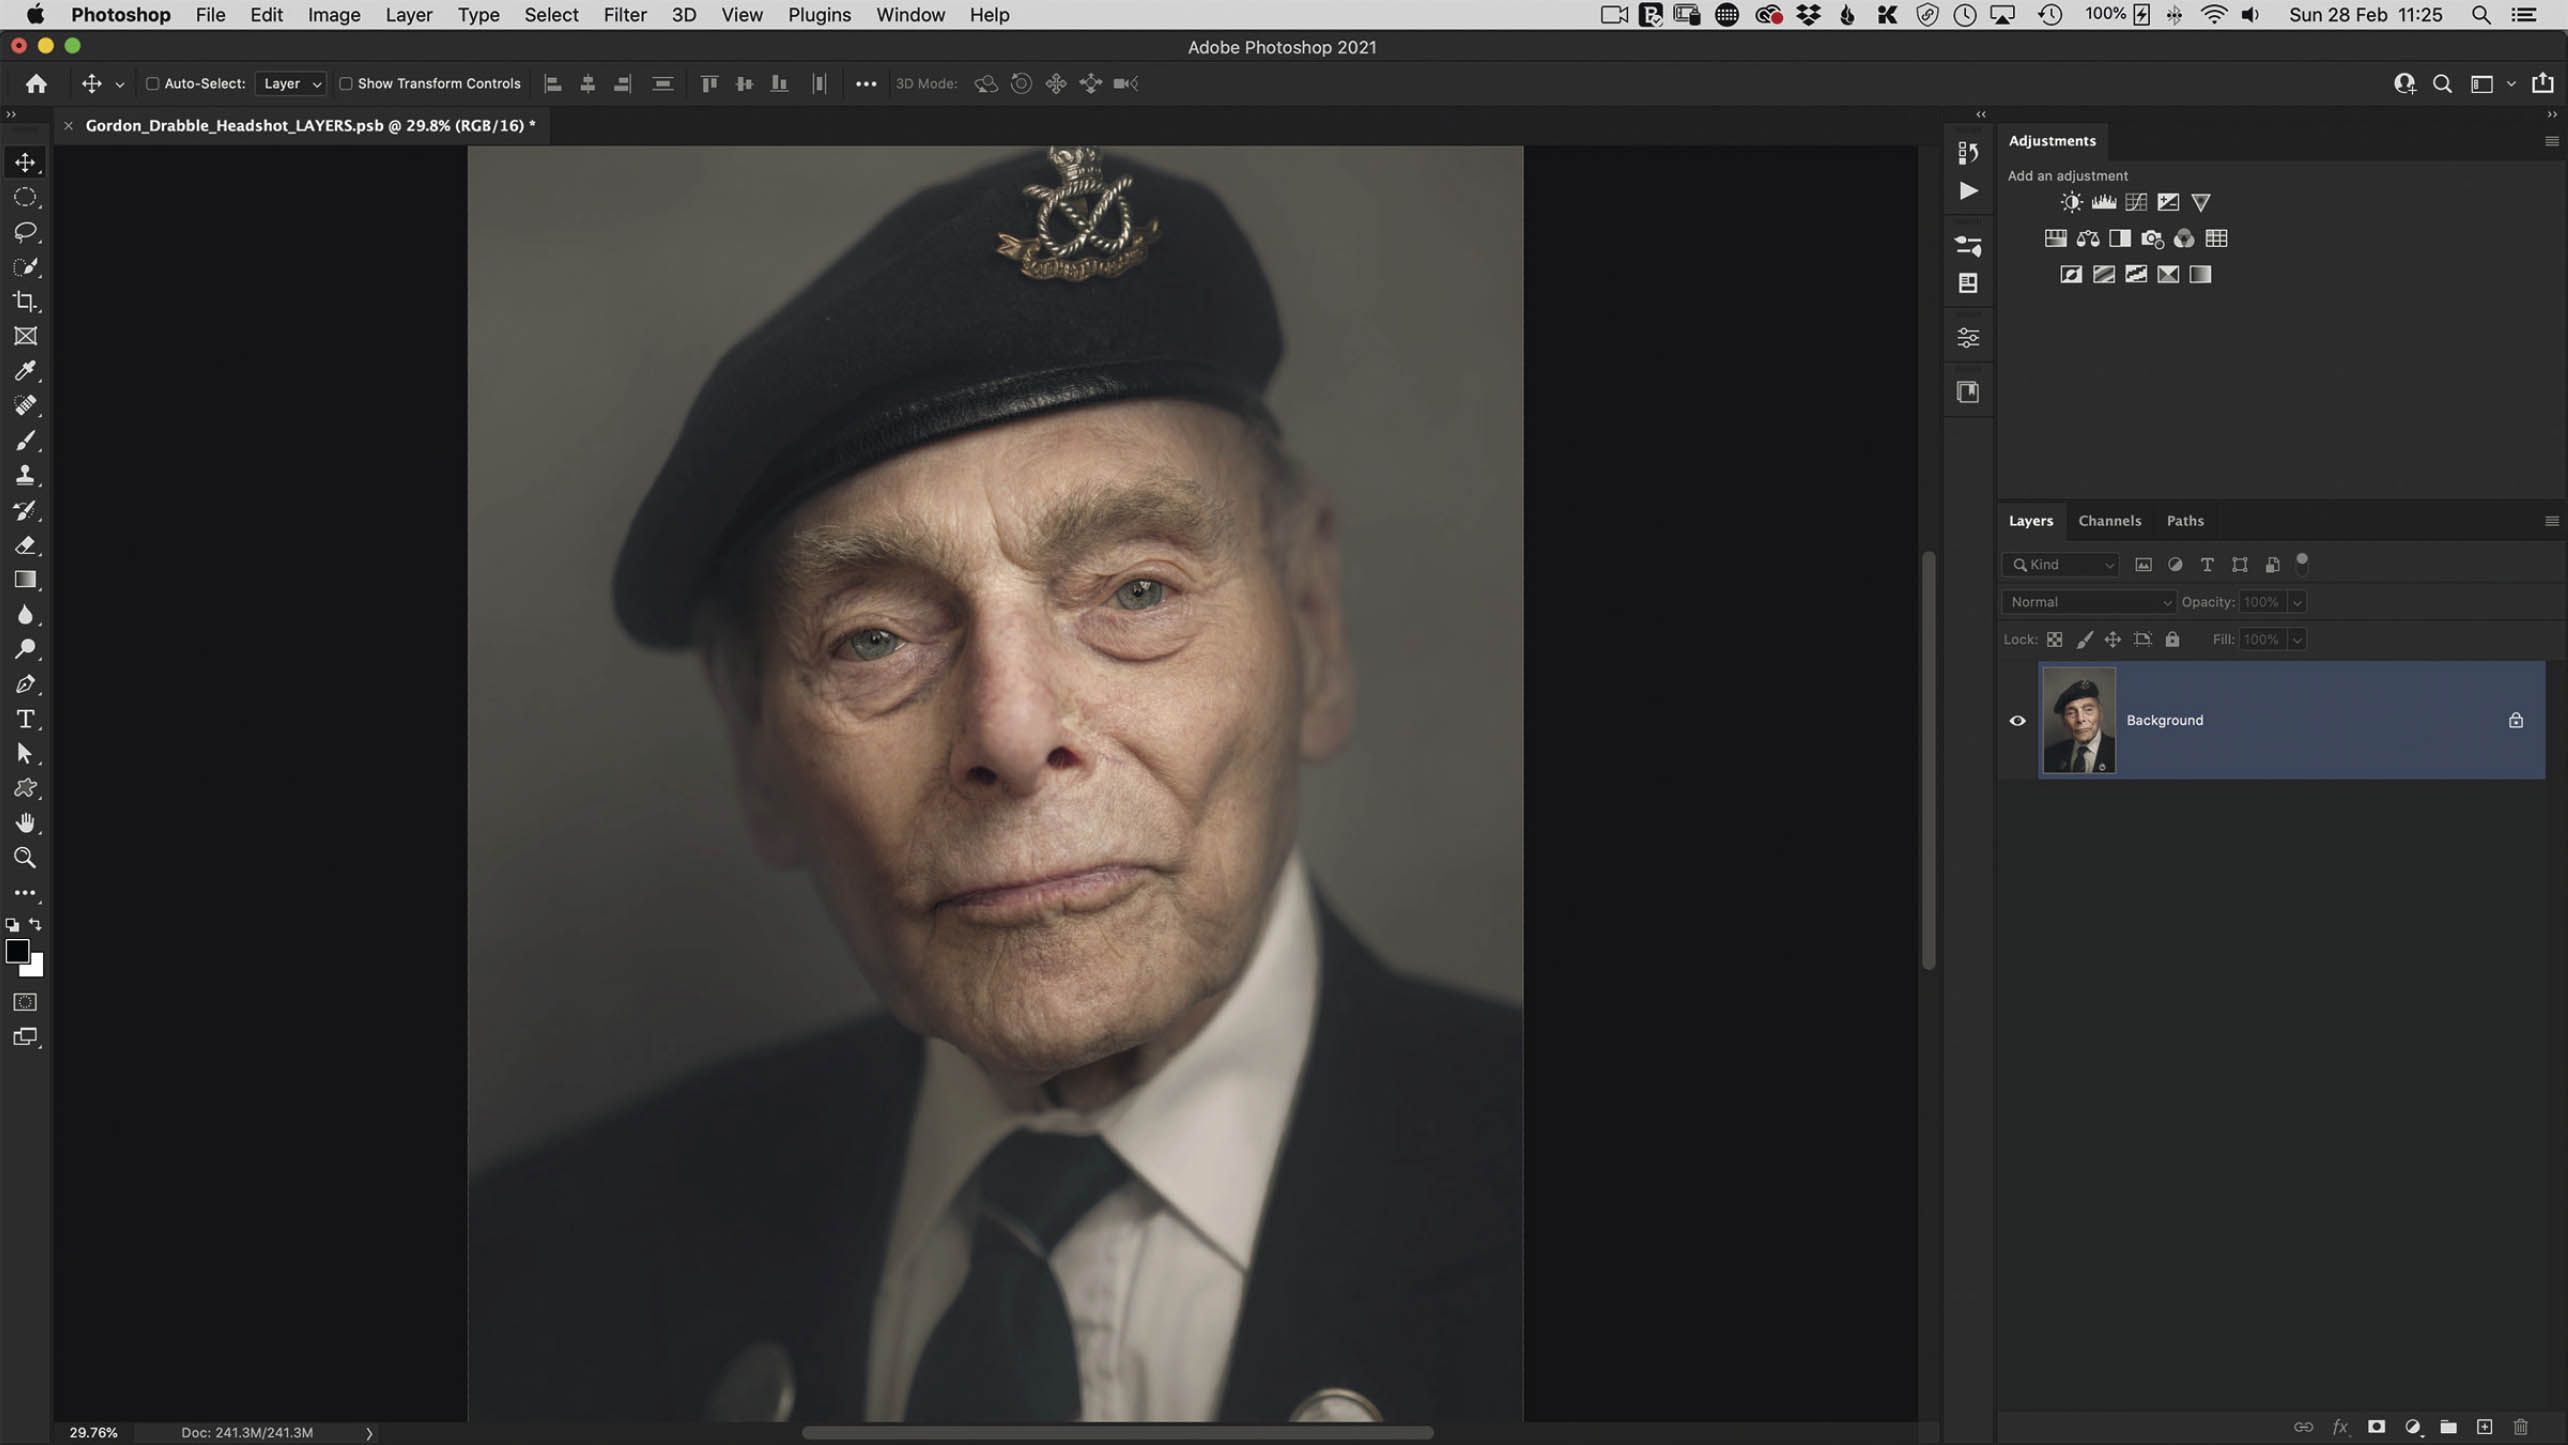
FIGURE 10.7
- 2.In the Layers panel we have one layer, the Background layer. Create a duplicate of this layer by pressing Command (Mac)/Ctrl (PC) + J. Rename the new layer light (Figure 10.8).
- 3.Go to Filter > Convert for Smart Filters (Figure 10.9). This converts the light layer into a Smart Object, which gives us the ability to make changes to settings we apply, rather than having to undo and redo lots of steps. You can tell a layer is a Smart Object when you see the symbol shown in Figure 10.10 in the bottom-right corner of the layer thumbnail.
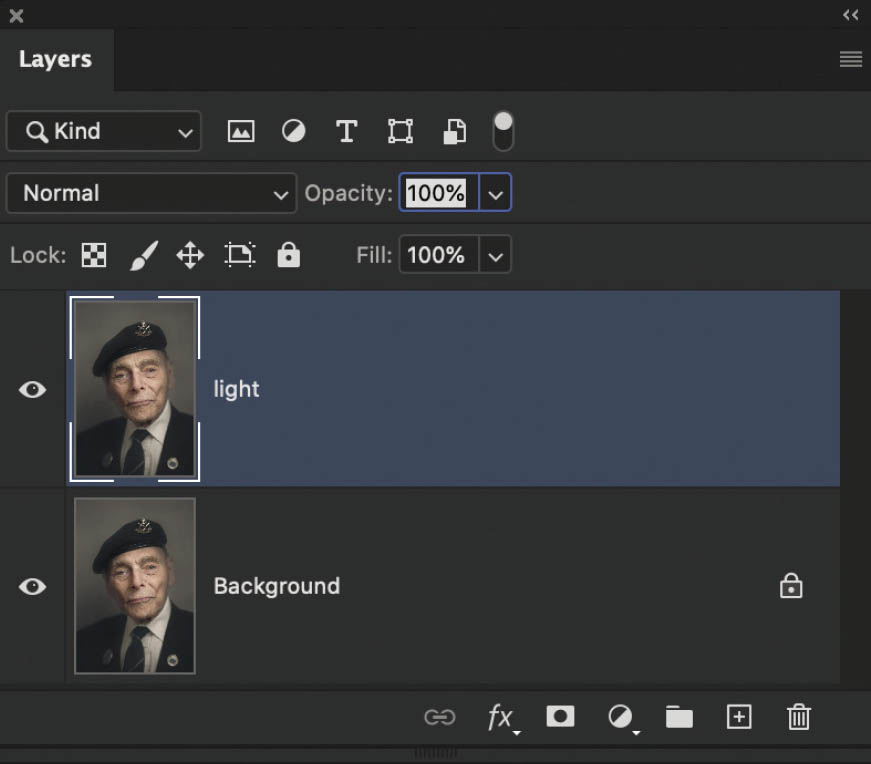
FIGURE 00.8
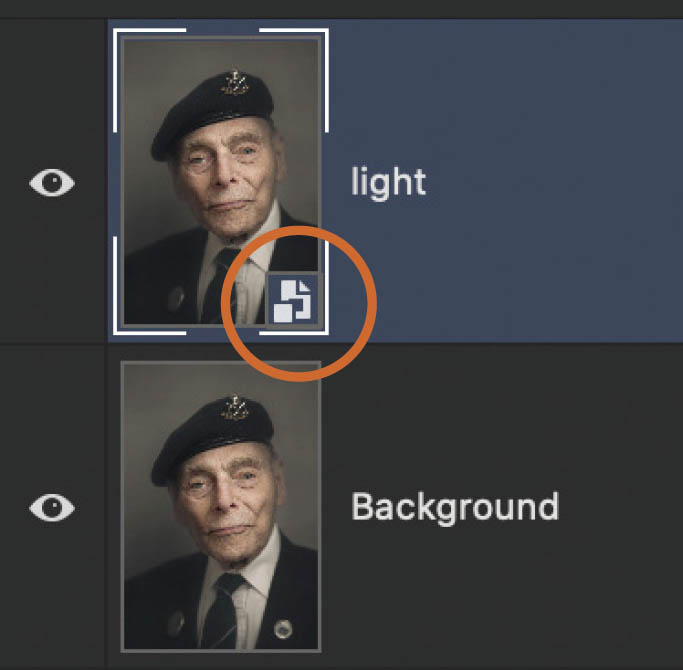
FIGURE 10.9
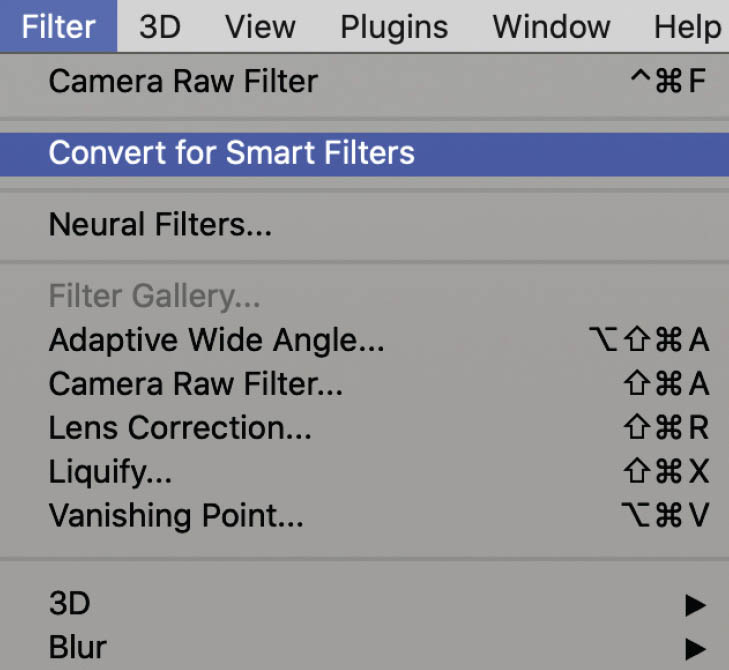
FIGURE 10.10
- 4.Go to Filter > Camera Raw Filter. Choose the Adjustment Brush (K) from the toolbar on the right side of the interface, increase the Exposure slider to around 0.40 (Figure 10.11), and brush over the inner area of Gordon’s face. You can see where I have painted when I turn on the Mask Options checkbox at the bottom of the Brush section in the panel on the right (Figure 10.12).
Turn off the Mask Options checkbox to see how much brighter this exposure adjustment has made the face, and increase or decrease it further if necessary. Once you’re happy, click OK.
- 5.Now we need to add a merged layer, sometimes called a stamp layer, to the top of the layer stack. This is a layer at the very top made by combining all of the layers in the Layers panel. To do this, press Shift + Option + Command + E on a Mac, or Shift + Ctrl + Alt + E on a PC. Rename this layer 20.20 (Figure 10.13).

FIGURE 10.11

FIGURE 10.12

FIGURE 10.13
- 6.Go to Filter > Sharpen > Unsharp Mask. This is a fantastic way to add quite a substantial amount of contrast to an image without seeing any halos or color shift. Use the following settings (Figure 10.14):
- Amount: 20%
- Radius: 20 Pixels
- Threshold: 0 levels
- Click OK.
- 7.This has applied the contrast to the entire image, but we only want it to be visible on Gordon’s face. To do this, we need to add a black layer mask and use a white brush to reveal the contrast where we want it.

FIGURE 10.14
Hold down the Option (Mac)/Alt (PC) key and click on the Add Layer Mask icon at the bottom of the Layers panel.
With a simple round, soft brush and a white foreground color, brush over Gordon’s face to reveal the contrast. Press the backslash key to see where you have brushed (Figure 10.15). Press the backslash key to return to normal view.
- 8.Create another merged layer at the top of the layer stack (Shift + Option + Command + E on a Mac, or Shift + Ctrl + Alt + E on a PC), and this time, rename it 10/10 (Figure 10.16).
- 9.Go to Filter > Sharpen > Unsharp Mask, and this time, input half of what you did last time (Figure 10.17), so:
- Amount: 10%
- Radius: 10 Pixels
- Radius: 0 levels
Click OK.

FIGURE 10.15

FIGURE 10.16
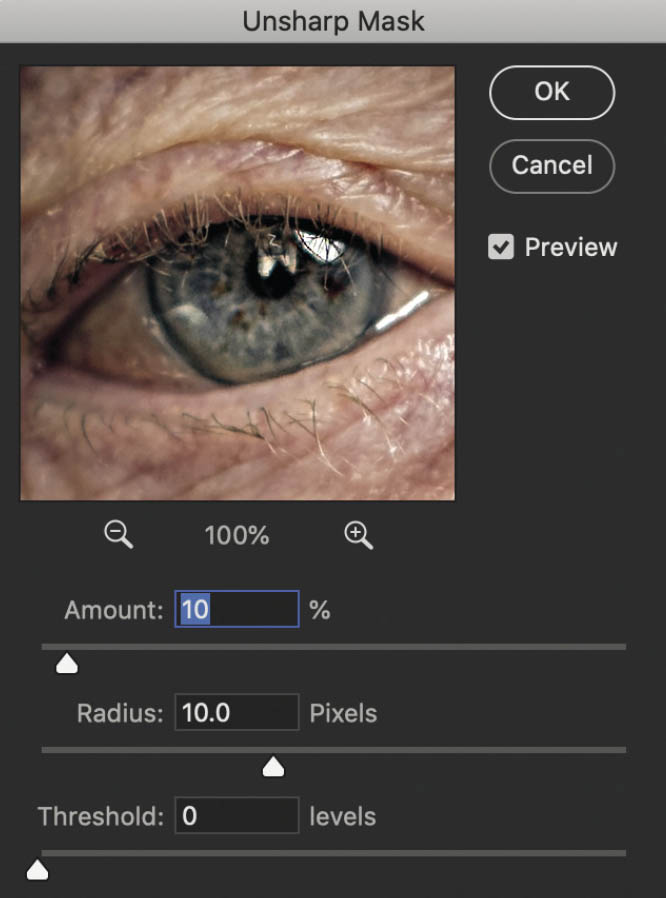
FIGURE 10.17
- 10.Add a black layer mask to the 10/10 layer, and with a round, soft brush and a white foreground color, brush on top of each of Gordon’s eyes only (Figure 10.18).
And that’s it! To see what this has done, hold down the Option (Mac)/Alt (PC) key and click on the eye icon of the Background (original) layer in the layers stack. This turns off every other layer so you can see a before and after.
Believe me, when you do this on portraits, especially before they are printed, it makes such a big difference. So many people commented on how it seemed like you could almost touch the faces of the portraits on display at my 39-45 Portraits Project Exhibition.

FIGURE 10.18
PHOTOSHOP BIG
Have you ever gone to save an image, only for Photoshop to say the file is too big (Figure 10.19)? Unfortunately, you only get this warning after Photoshop has tried to save an image exceeding 4GB in size, rather than beforehand (hint, hint Adobe).
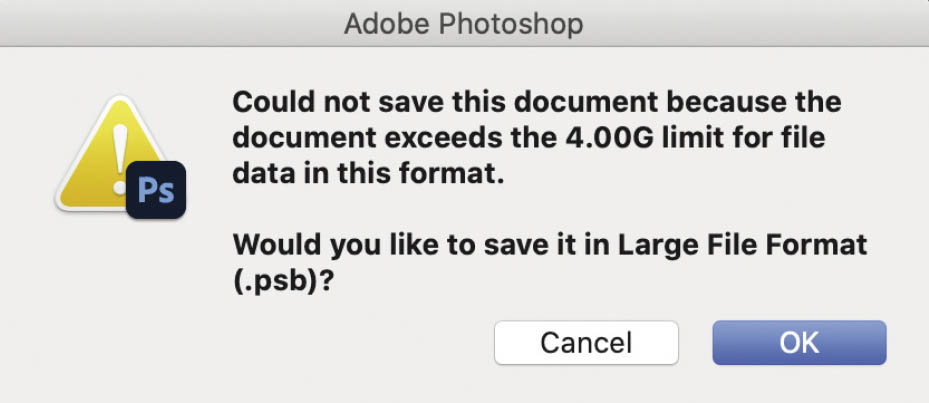
FIGURE 10.19
To solve this problem, you have a couple of choices:
- Flatten all the layers (not advisable).
- Save in the Photoshop Large Document Format (.psb, which stands for Photoshop Big).

Go to File > Save As, and in the Format menu, choose Large Document Format (Figure 10.20).
Photoshop can now save the image, including all the layers, PLUS the .psb file format is viewable in Lightroom.

FIGURE 10.20
PINCH
When I first started out as a photographer, I photographed a lot of physiques because I had been a competitive bodybuilder. Now, I’m not admitting that I ever did this, but here’s a technique I could have, might have, used never, once, or twice . . .
- 1.With an image open in Photoshop, first create a duplicate of the Background layer by pressing Command (Mac)/Ctrl (PC) + J.
- 2.With the Elliptical Marquee Tool, position a circular selection so that the center is over the main area you want to enhance (Figure 10.21).
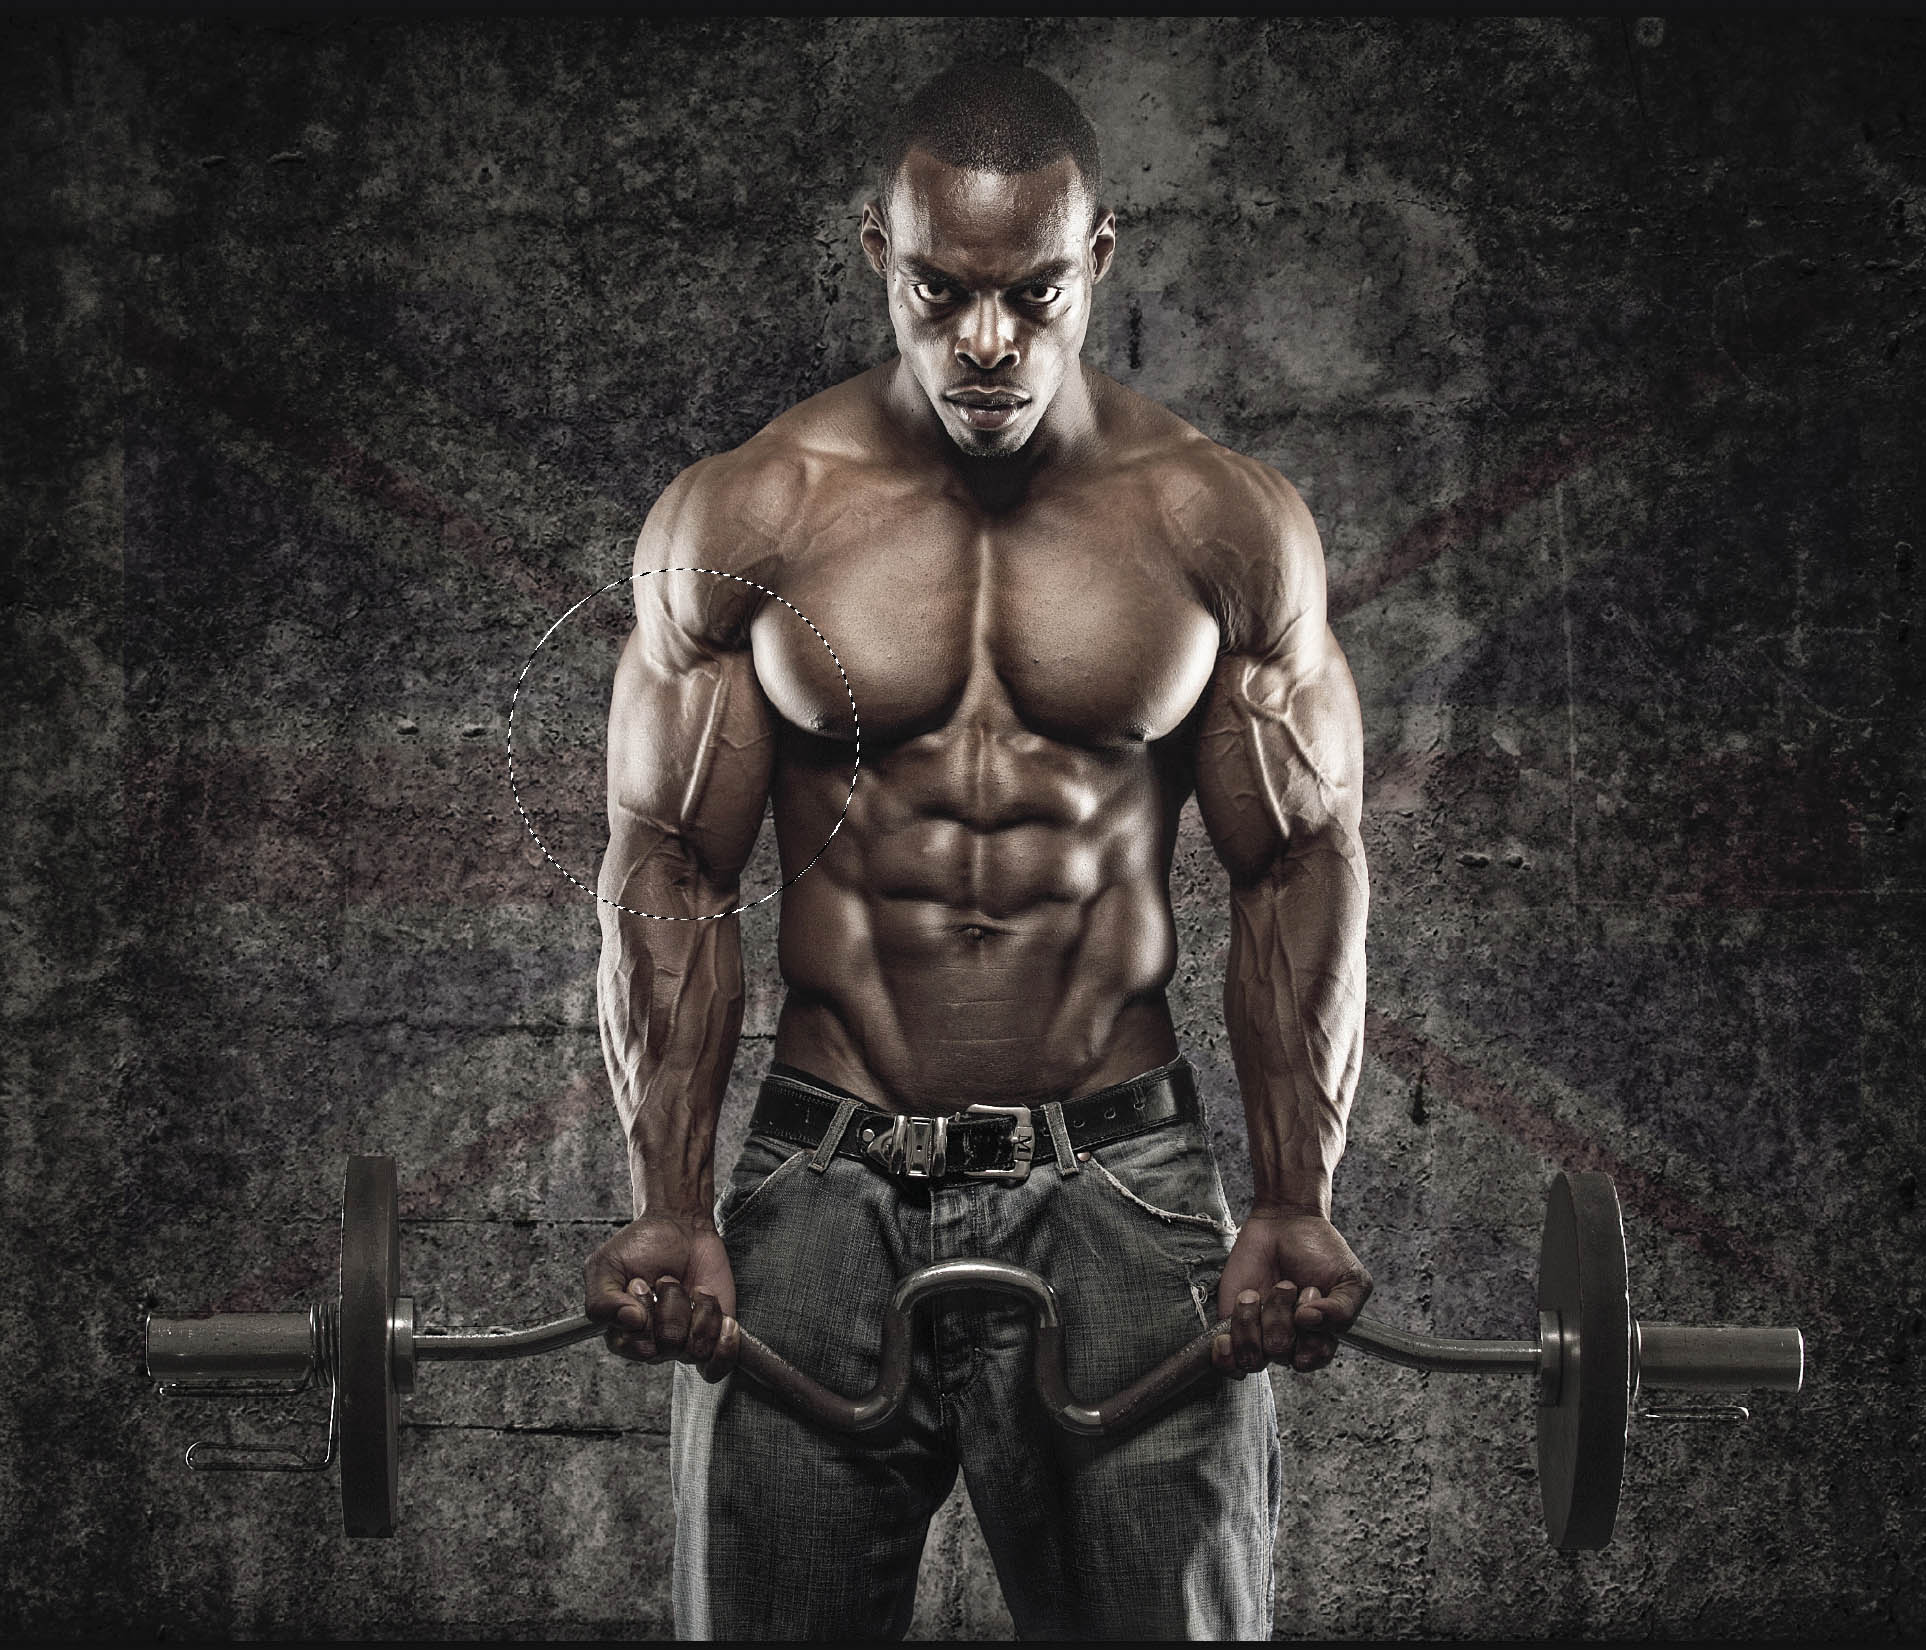
FIGURE 10.21
- 3.Go to Filter > Distort > Pinch. Drag the image in the preview window so that you can see the area you are working on, and then use the Amount slider to pinch or swell (couldn’t think of another word for it) the area.
Dragging to the left (minus) makes the area grow; dragging to the right (plus) pinches the area smaller (Figure 10.22).
To see a before and after as you are doing this, place your cursor in the preview window and click down.
Of course, IF you were to do such a thing, make sure you repeat the steps on the other arm.
NOTEWe do have the Liquify Filter in Photoshop, which works great; however, the advantage of using Pinch where we’ve placed a circular selection is that the changes made are evenly distributed.

FIGURE 10.22
For the record, this is a picture of my friend Nigel that I photographed some years back, and he in no way needs any enhancement, thanks to the genetics with which he has been blessed.
AUTO BLEND LAYERS
I’m going to finish off by showing you a function in Photoshop that saved me an incredible amount of time. In fact, this function did a far better job than I probably could have done myself taking A LOT of time and using countless layer masks, brushes, and blend modes.
Figure 10.23 is a portrait of Yeoman Warder Scott Kelly, whom I photographed at the Tower of London after he’d presented World War II veteran Jim Hooper, formerly of the Glider Pilot Regiment, a substantial check for money he’d raised on behalf the Blind Veterans Charity.
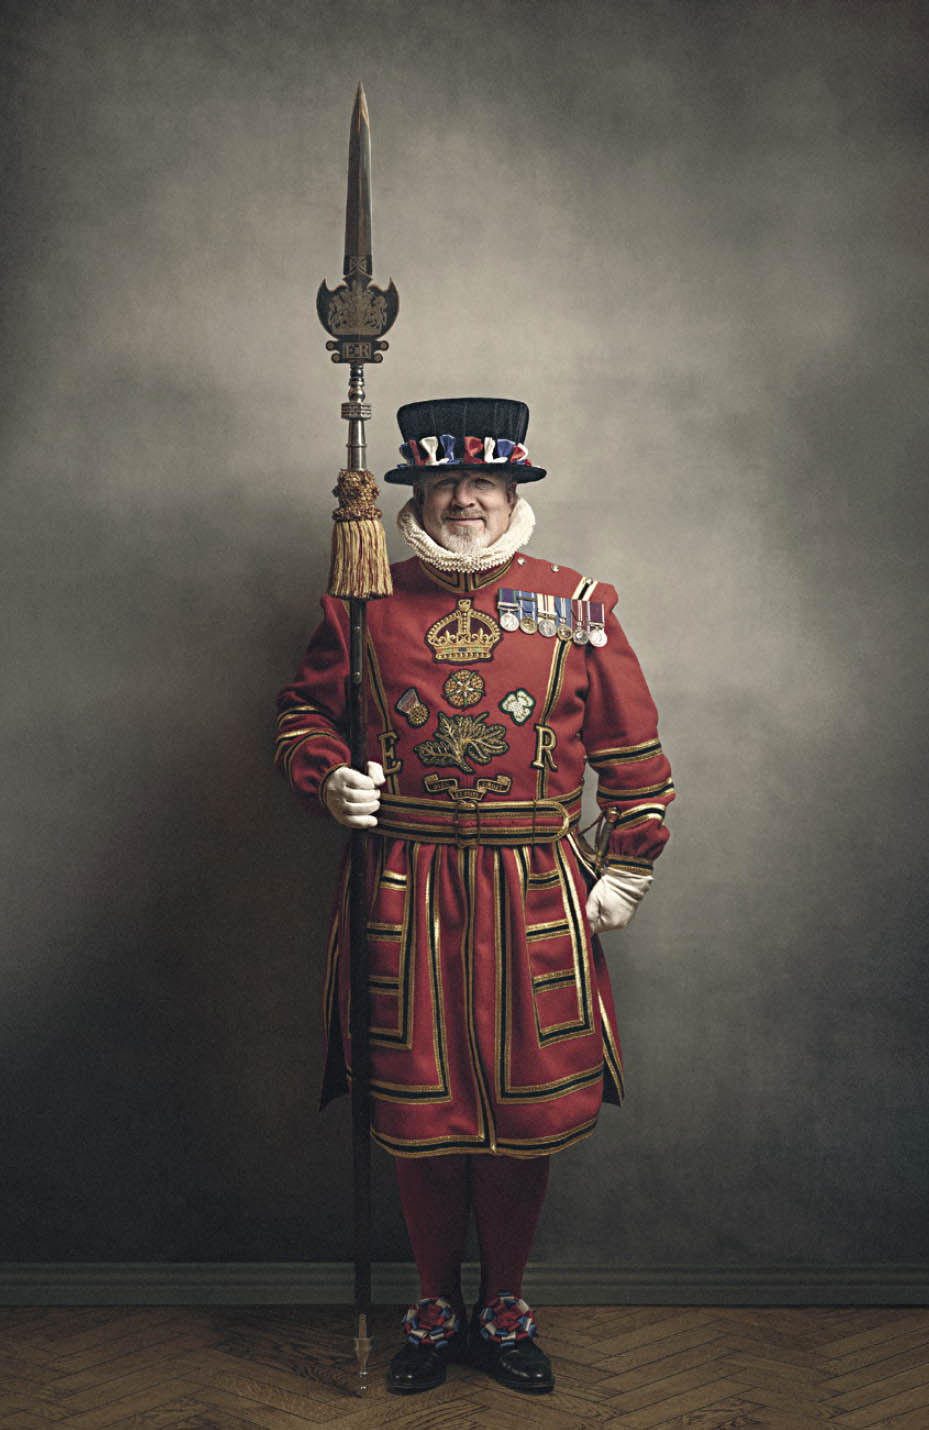
FIGURE 10.23
I was asked to take a portrait of Scott in the same style as portraits I’d taken of World War II veterans for my 39-45 Portraits Project. The problem here, though, was that the background I use, the X-Drop made by F.J. Westcott, measures 7 feet tall by 5 feet wide—not big enough to include Scott and the full height of the Partisan.
The solution was to take two pictures—one with the background resting on the ground (Figure 10.24) and a second with the background lifted off the ground (thanks to my friend Jane Barkway-Harney) (Figure 10.25)—while Scott remained perfectly still.
These images then needed to be blended together to make it appear as though the background I’d used was far bigger than it actually was. Here’s how to do it:
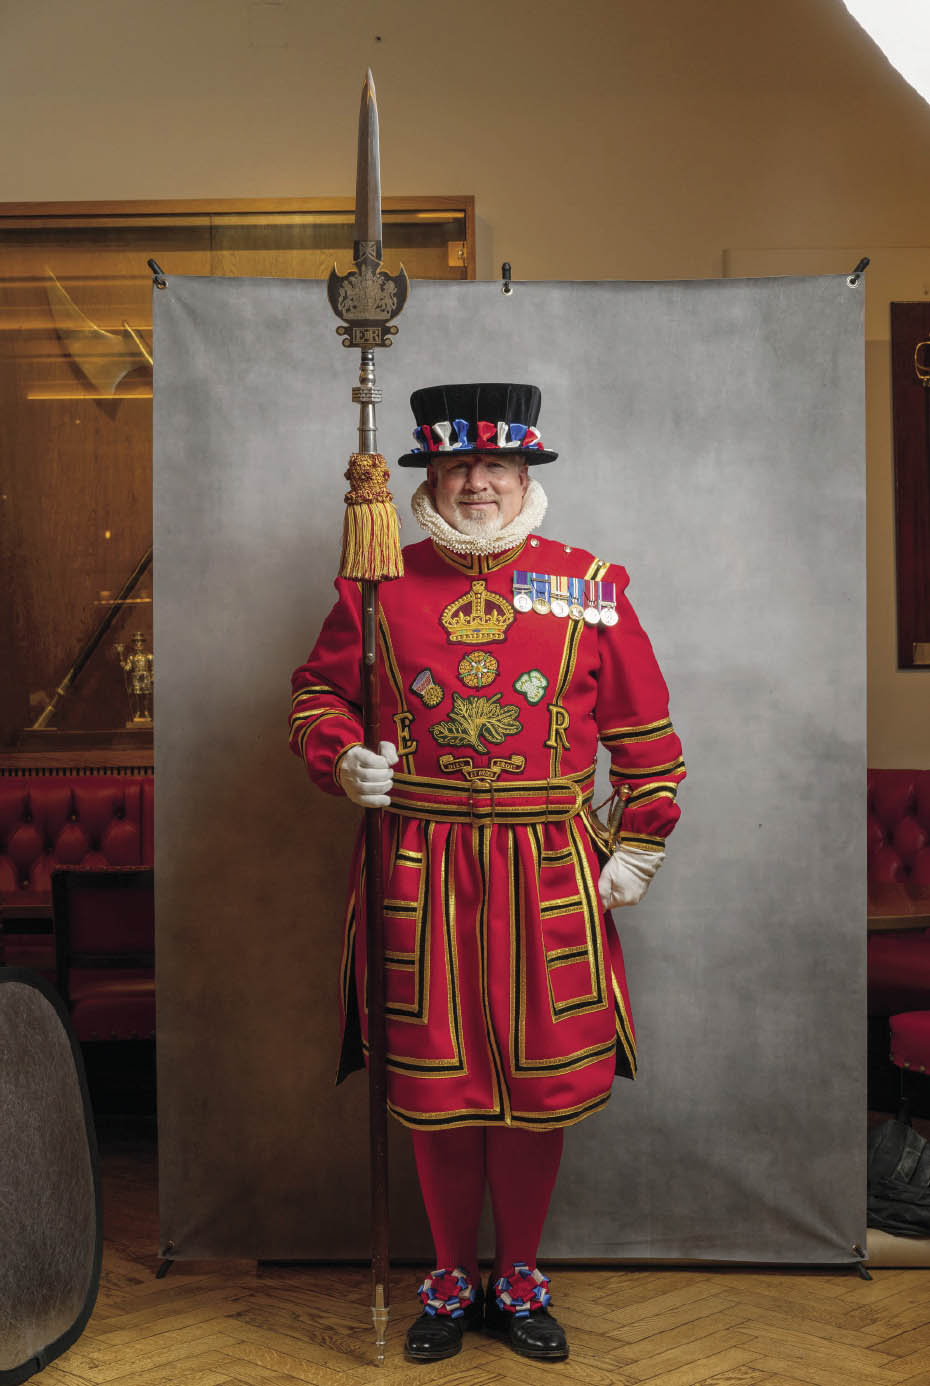
FIGURE 10.24

FIGURE 10.25
- 1.With the two images (sk-1.jpg and sk-2.jpg) open in Photoshop, use the Crop Tool to crop out the sides of both images where there is no background at all (Figure 10.26), making sure that in the options bar at the top of the screen, the Delete Cropped Pixels checkbox is ticked (Figure 10.27).
- 2.Use the Move Tool to drag one of the images directly on top of the other by clicking on it and dragging up to the title bar. When the image in the workspace changes, drag downward and hold the Shift key, then release. Both images are now in the same workspace, with one above the other in the layer stack (Figure 10.28). If it isn’t there already, then drag the image with the background on the floor to the top of the layer stack.

Download all the files you need to follow along step-by-step at: http://rockynook.com/PLSW
FIGURE 10.26

FIGURE 10.27

FIGURE 10.28
- 3.If we turn the upper layer on and off by clicking on the eye icon next to the thumbnail in the Layers panel, we can clearly see that we need to line up the two images. To do this, with the uppermost layer highlighted, hold down the Shift key and click on the bottom layer in the Layers panel. Both layers are now highlighted (Figure 10.29). Go to Edit > Auto-Align Layers (Figure 10.30), make no changes in the Auto-Align Layers dialog, and click OK.
FIGURE 10.29
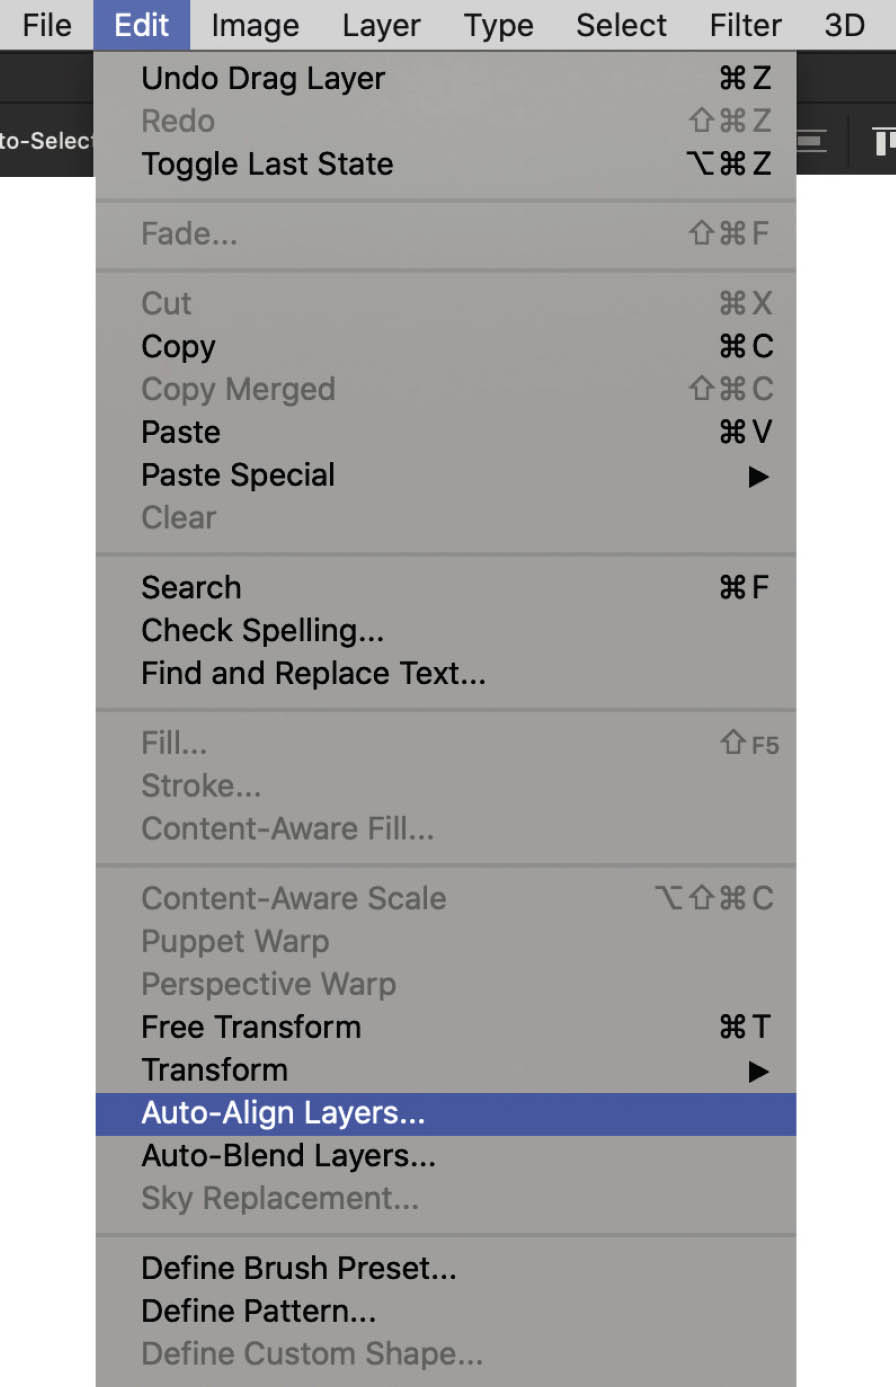
FIGURE 10.30
- 4.After a second or two, Photoshop has done a great job in lining up both of the layers. You can check this again by turning the eye icon for the uppermost layer on and off. Scott sure did a great job standing still!
- 5.Turn off the bottom layer in the layer stack and click on the uppermost layer (Figure 10.31). With the Rectangular Marquee Tool, make a selection of the area at the top of the image where there is no background (Figure 10.32).
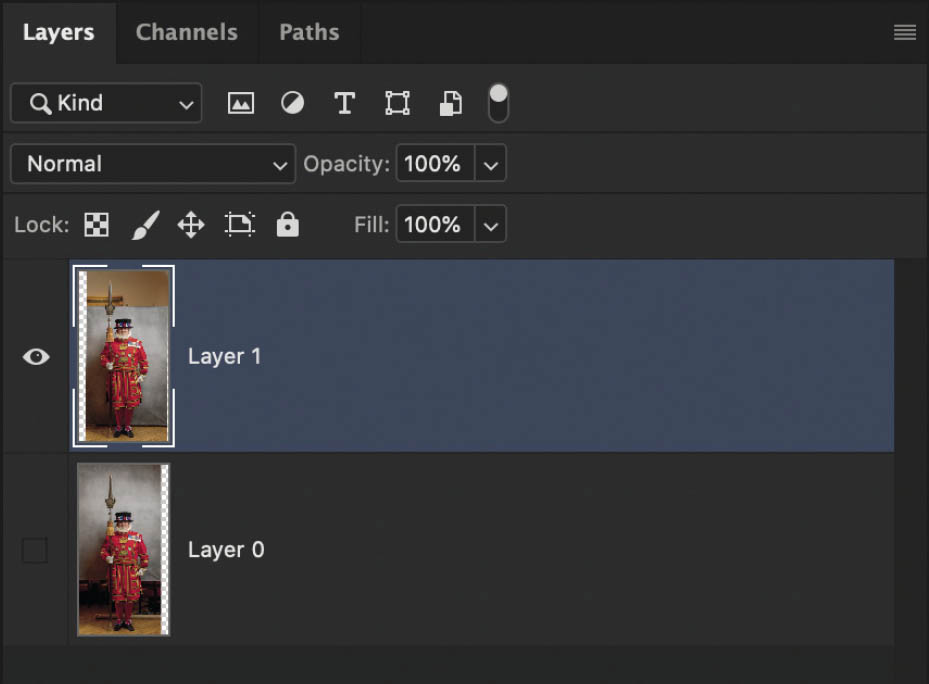
FIGURE 10.31
- 6.Press Delete, then go to Select > Deselect to remove the active selection (marching ants).
- 7.Repeat this on the other layer, making a selection with the Rectangular Marquee Tool of the area at the bottom that contains no background, and then pressing Delete.
- 8.Make both layers visible in the layer stack so that in the workspace we see that we have the top area of one and the bottom area of the other to blend together (Figure 10.33).
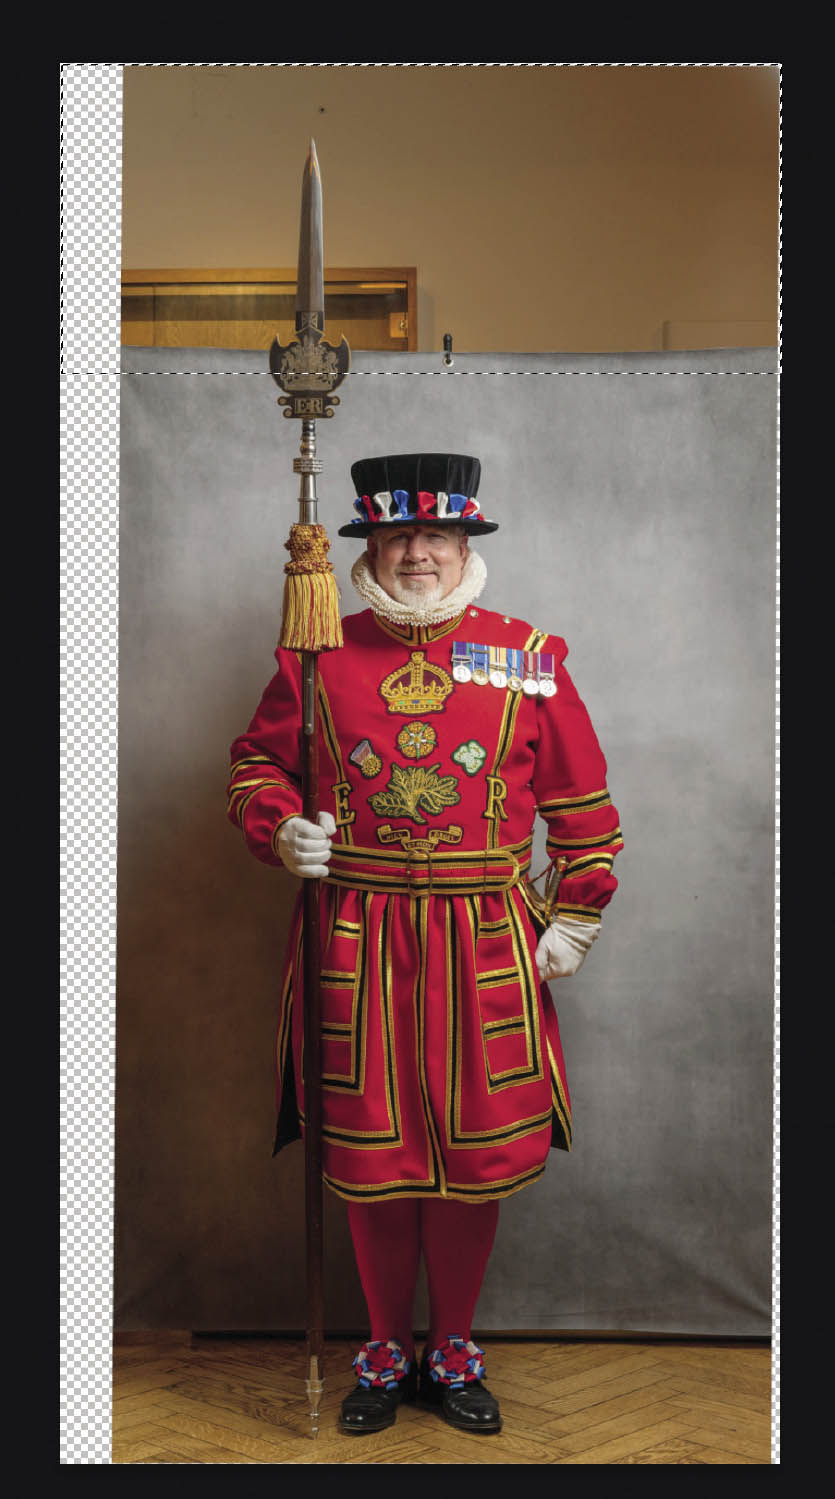
FIGURE 10.32
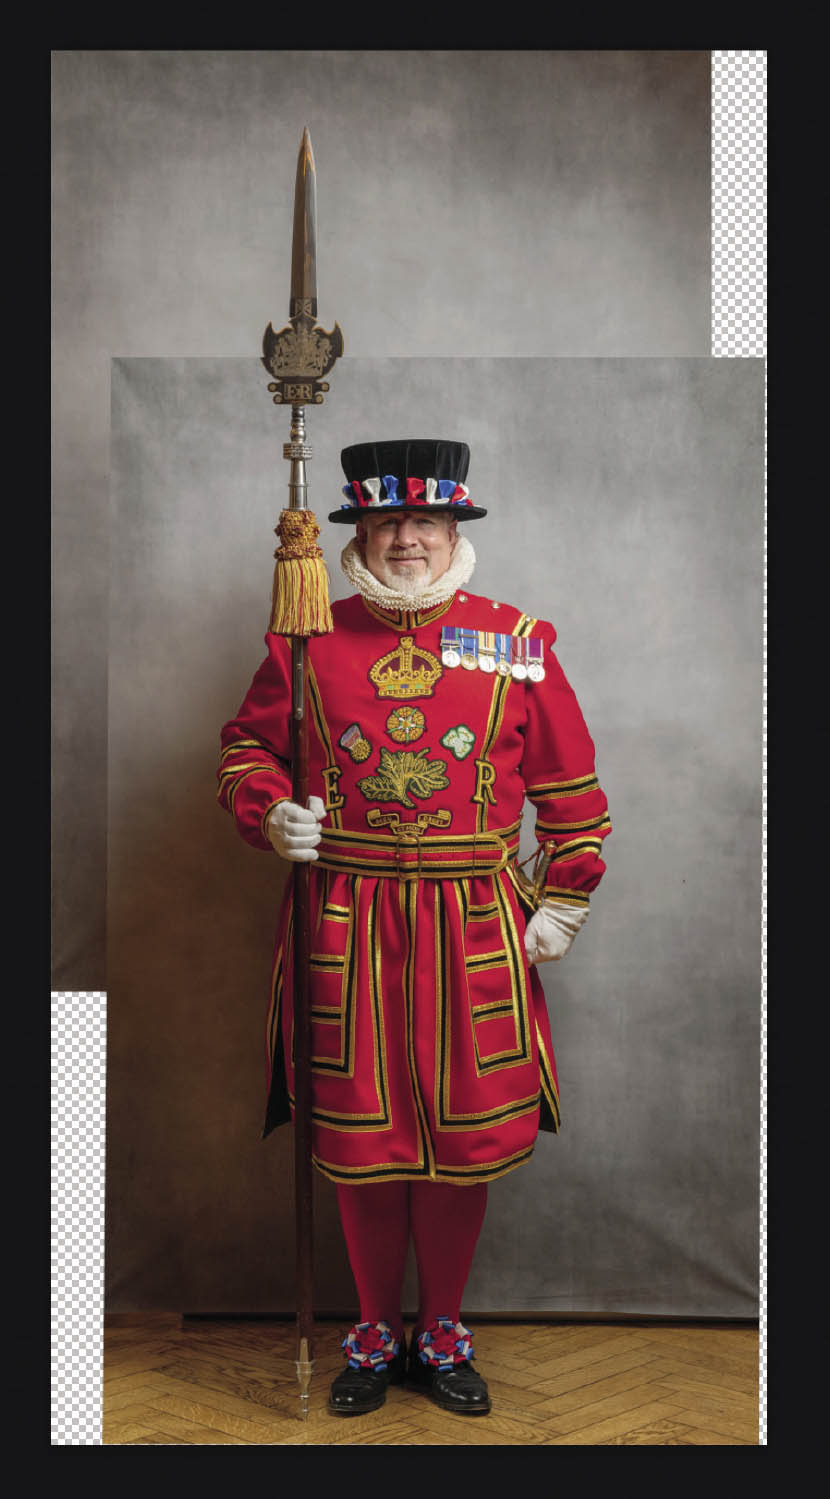
FIGURE 10.33
- 9.Make both layers active in the layer stack by clicking on one to highlight it, holding down the Shift key, and clicking on the other.
- 10.Go to Edit > Auto-Blend Layers. Leave the Blend Mode set to Panorama, but at the bottom, make sure that Seamless Tones and Colors has a tick in the checkbox (Figure 10.34)—this is what does the magic!
- 11.Put a tick in the checkbox for Content Aware Fill Transparent Areas. This will fill any empty spaces. Click OK.
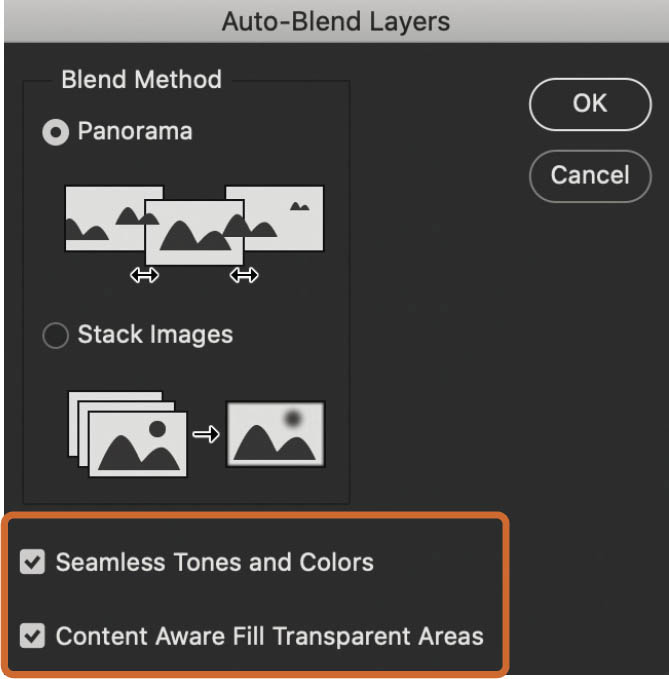
FIGURE 10.34
There’s a little bit of cleaning up to do where the background meets the floor, but for the rest of the image, Photoshop has done an incredible job, and so quickly, too (Figure 10.35)!
If you look at the opening image for this chapter (the final image of Scott), you’ll see that to solve the floor meeting the background problem, I created a shape that looks like baseboard, stretched it across the width of the image, and then used a layer mask to make it look as though it was behind Scott. This is what Joel Grimes would call “Selling the Fake.” ![]()
ONWARDS AND UPWARDS . . .
So hopefully now you’re feeling ready and able to take on any selection you face.
We’ve gone through the common selection tools in Photoshop, and we’ve also learned that we can combine tools and techniques to achieve the results we want, even if it means using tools and techniques that were never designed for that purpose.
One of the things I love about Photoshop is that there’s no right or wrong way to do something. Sure, there are methods that are more efficient than others, and there are good and bad results, but really, unless we’re working with a tight deadline, does it matter what tools and techniques we use if we get the results we want?
I encourage you to approach using Photoshop with the attitude of “what would happen if . . . ?”
Experiment. Use a tool you may have been avoiding in the past. Try the same techniques on different images—a technique that works great for selecting a tree with all its branches and leaves could work great for selecting hair. Push sliders to their maximum, their minimum, and in between—what does that do?
Above all else, enjoy!
Photoshop is an incredible piece of software that continues to be developed, and I find that incredibly exciting. When we’re using it, we can become completely immersed in what we’re doing and almost escape the world around us, and in recent times, that’s been somewhat of a blessing
Keep safe and well,
Glyn
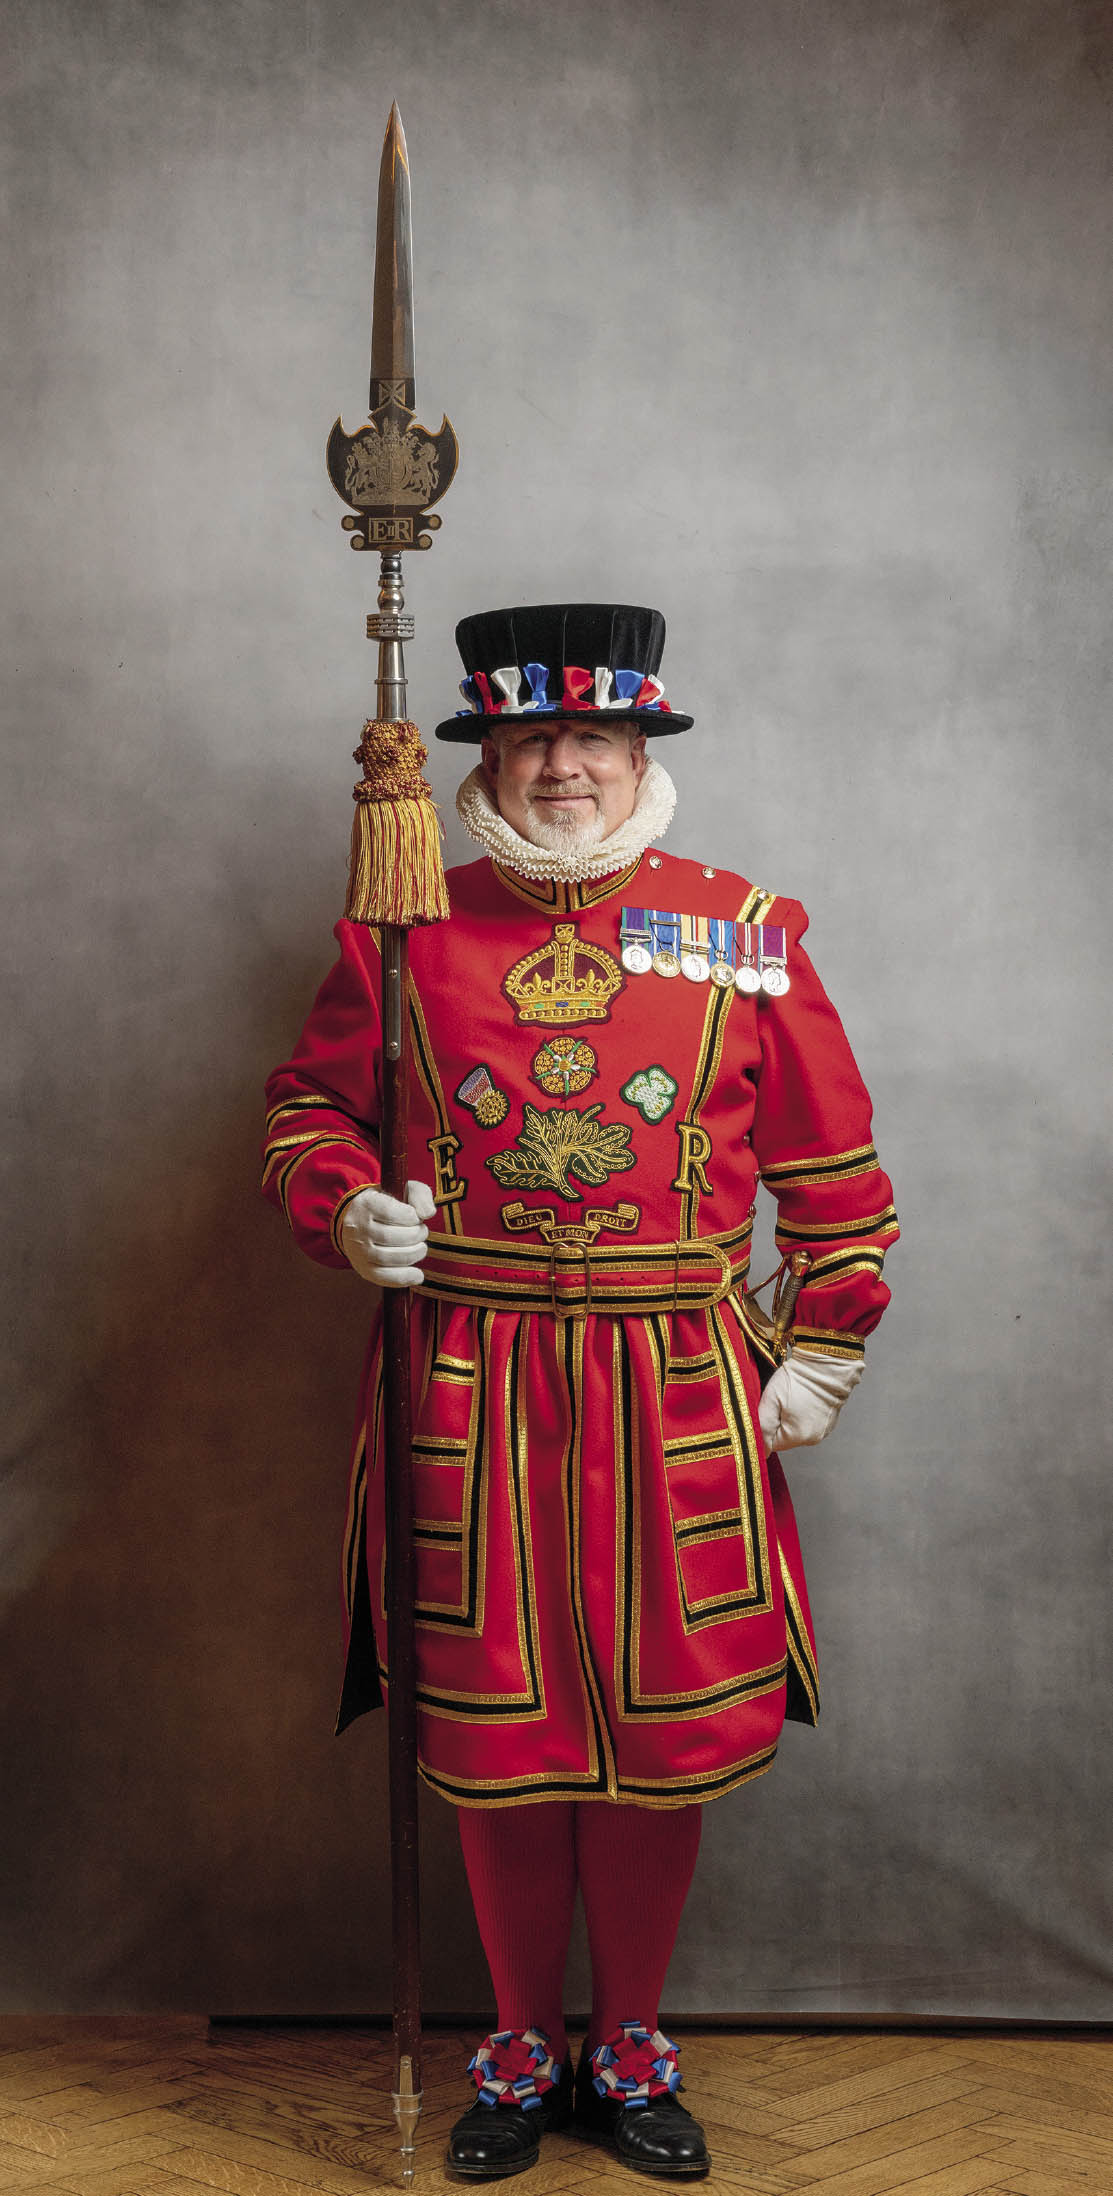
FIGURE 10.35