The second block of content that we need to create for our Blog listing page is a little more complex to build and will provide us with experience of building and combining multiple views into a single view.
Our recent posts block will be a view that contains a listing of three of the most recent posts added to our site. We will take advantage of the Teaser display mode of our Post content type to present our view block.
To get started, we will need to navigate to /admin/structure/views and click on the Add new view button. From the Views Admin screen, we will add the following information:
- VIEW BASIC INFORMATION:
- View name:
Recent Posts. - Check the Description box.
- Description:
A listing of recent posts.
- View name:
- VIEW SETTINGS: Show: Content of type: Post sorted by: Newest first.
- BLOCK SETTINGS:
- Check Create a block.
- Block title: Recent Posts.
- BLOCK DISPLAY SETTINGS:
- Display format: Unformatted list of: Teasers.
- Items per block:
3. - Click on the Save and edit button.
With our view now created, if we look at the Preview section, we will see our Post Teaser displayed with the title and thumbnail image. Since we are using the display mode of our post, we can manage the fields directly from the content type. Our Teaser display happens to be configured exactly how we will need it, so there is no need to change anything.
Make sure to click on the Save button to finalize our changes. We have the first part of our block created. Now we need to create our next view to display popular posts.
Popular posts, or anything popular for that matter, is all subjective. However, clients often want to see this type of information. We can accomplish this type of View block by utilizing the Comment statistics for each post. The number of comments each post has will determine which post will be displayed.
To get started, we will need to navigate to /admin/structure/views and click on the Add new view button. From the Views Admin screen, we will add the following information:
- VIEW BASIC INFORMATION:
- View name: Popular Posts.
- Check the Description box.
- Description: A listing of popular posts.
- VIEW SETTINGS: Show: Content of type: Post sorted by: Newest first.
- BLOCK SETTINGS:
- Check: Create a block.
- Block title: Popular Posts.
- BLOCK DISPLAY SETTINGS:
- Display format: Unformatted list of: Teasers.
- Items per block: 3.
- Click on Save and edit button.
With our view now created, if we look at the Preview section, we will see our Post Teaser displayed with the title and thumbnail image. However, we are only sorting the posts by the date they were authored versus the number of comments each post contains.
In order for us to determine the most popular posts, we will need to sort by the number of comments each post has. Begin by following these steps:
SORT CRITERIA:
- Select the Content: Authored on (desc) link.
- Click on the Remove link.
- Click on the Add button.
- Select Comment count from the Add sort criteria window.
- Click on the Apply (all displays) button.
- Choose Sort descending from the Order options.
- Click on the Apply (all displays) button.
Make sure to click on the Save button in the main view window to save the changes. Now that we have our Popular Posts view complete, we need to combine it with our recent posts so that the two views act as one.
One feature within views is the ability to create view footers. View footers can consist of custom text, other fields, or, as in our case, another view. We will use this feature to add our recent posts view by following these steps:
FOOTER:
- Click on the Add button.
- Scroll to bottom of the Add footer window and choose View area.
- Click on the Apply (all displays) button.
- Select View: recent_posts - Display: block_1 from the View to insert dropdown.
- Click on the Apply (all displays) button.
Make sure to click on the Save button in the main view window to save the changes. If we look in the preview window, we should now see both views being displayed. This is not so difficult once you understand how to use and manipulate Drupal views. Now that we have our two View blocks combined into a single Block, we can add it to our Blog listing page.
Any time we create a new block display using views, we can easily assign it to any region from the Block layout page. Let's begin by navigating to /admin/structure/block and following these steps:
- Locate the Sidebar second region.
- Click on the Place block button.
- Locate the Popular Posts block.
- Click on the Place block button.
- Uncheck Display title.
- Select the Pages tab under Visibility.
- Enter the path
/bloginto the Page text field. - On a second line, add another path to
/blog/*. - Make sure the Show for the listed pages checkbox is selected.
- Click on the Save block button.
With our Popular Posts block assigned to the Sidebar second region, we will want to make sure it is second in the block order. Reorder the blocks if necessary and then click on the Save blocks button. If we navigate back to the Blog listing page, we will now see our new block displayed, but in desperate need of some styling.
Now for the fun part. We need to create a Twig template and modify the output of our View block so that we can place each view into its own tab. Let's take a look at how we can accomplish that.
The structure for Twitter Bootstrap tabs requires each block of content to be wrapped in a <div> element with a class of tab-pane. Also, each Tab pane must consist of an unordered list of items to display. We will start with converting both view blocks from an unformatted list to an unordered list, similar to what we did with our Categories block.
Begin by navigating to the core/modules/view/templates folder and follow these remaining steps:
- Copy
views-view-unformatted.html.twigand place it in ourtheme/octo/templatesfolder. - Rename
views-view-unformatted.html.twigtoviews-view-unformatted--recent-posts.html.twig. - Next, we will need to replace the current markup with the following:
New markup
{% if title %}
    <h3>{{ title }}</h3>
{% endif %}

<ul class="simple-post-list">
{% for row in rows %}
    {%
    set row_classes = [
    default_row_class ? 'views-row',
    ]
    %}
    <li{{ row.attributes.addClass(row_classes) }}>
        {{ row.content }}
    </li>
{% endfor %}
</ul>
Once finished, make sure to save the template, clear Drupal's cache, and then refresh the page in the browser to verify that our Recent Posts block is now displayed as an unordered list. We will now repeat this step for the Popular Posts view.
Begin by navigating to the core/modules/view/templates folder and follow these remaining steps:
- Copy
views-view-unformatted.html.twigand place it in ourtheme/octo/templatesfolder. - Rename
views-view-unformatted.html.twigtoviews-view-unformatted--popular-posts.html.twig. - Next, we will need to replace the current markup with the following:
New markup
{% if title %}
    <h3>{{ title }}</h3>
{% endif %}

<ul class="simple-post-list">
{% for row in rows %}
    {%
    set row_classes = [
    default_row_class ? 'views-row',
    ]
    %}
    <li{{ row.attributes.addClass(row_classes) }}>
        {{ row.content }}
    </li>
{% endfor %}
</ul>
Once finished, make sure to save the template, clear Drupal's cache, and then refresh the page in the browser to verify our Popular Posts block is now displayed as an unordered list. This next part will be a little trickier to accomplish, but will demonstrate that anything is possible with Twig templates.
The main structure of views is contained within the views-view.html.twig template. We will need to modify this template to add some additional classes that will allow us to display each view within their own tab, as designed in the mockup. Like our previous view templates, the naming convention follows the same rules:
[base template name]--[view machine name].html.twig
So in the case of our Popular Posts view, will want to create a new Twig template with the name of views-view--popular-posts.html.twig that we can then modify the markup to accomplish our tabbed design.
Begin by navigating to the core/modules/view/templates folder and follow these remaining steps:
- Copy
views-view.html.twigand place it in ourtheme/octo/templatesfolder. - Rename
views-view.html.twigtoviews-view--popular-posts.html.twig. - Next, we will need to replace the current markup with the following new markup:
New markup
<div class="tabs">

  <ul class="nav nav-tabs">
    <li class="active">
      <a href="#popularPosts" data-toggle="tab">
        <i class="fa fa-star"></i> {{ 'Popular'|t }}
      </a>
    </li>
    <li>
      <a href="#recentPosts" data-toggle="tab">
        {{ 'Recent'|t }}
      </a>
    </li>
  </ul>

  <div class="tab-content">

    {% if rows %}
      <div class="tab-pane active" id="popularPosts">
        {{ rows }}
      </div>
    {% elseif empty %}
      <div class="view-empty">
        {{ empty }}
      </div>
    {% endif %}

    {% if footer %}
      <div class="tab-pane" id="recentPosts">
        {{ footer }}
      </div>
    {% endif %}

  </div>

</div>
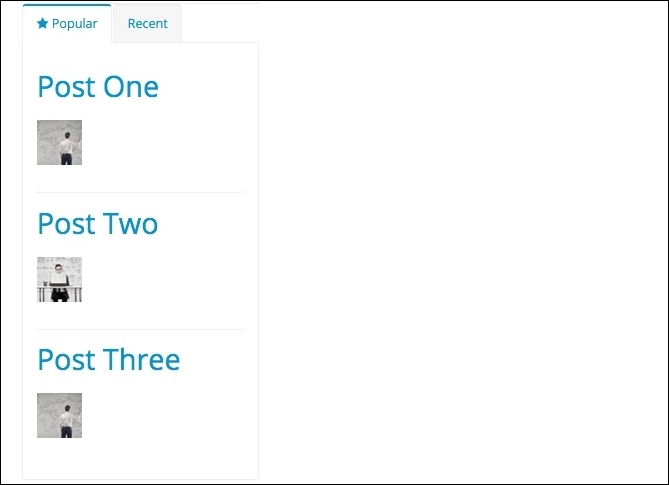
Once finished, make sure to save the template, clear Drupal's cache, and then refresh the Blog listing page. Our Popular/Recent Posts block is now displaying in the tabbed interface, as shown in the following image:

By reviewing the markup, we can see that the way we constructed our view block allows for each independent view to be displayed in its own tab.
We are not quite done with our theming of this new block. As we can see from the page, our Post Teaser is missing some additional fields and formatting necessary to match our mockup. We will need to introduce another Twig template to handle the Teaser display mode and clean up our markup.
Currently, the teaser display for our Post content type uses the default node.html.twig template. If we inspect the markup of our block, we can create a new Twig template with the recommended file name of node--post--teaser.html.twig.
Begin by navigating to the core/modules/node/templates folder and follow these remaining steps:
- Copy
node.html.twigand place it in ourtheme/octo/templatesfolder. - Rename
node.html.twigtonode--post--teaser.html.twig. - Next, we will need to replace the current markup with the following:
New markup
<div class="post-image">
  <div class="img-thumbnail">
    <a href="{{ url }}">
      {{ content.field_thumbnail }}
    </a>
  </div>
</div>

<div class="post-info">
  <a href="{{ url }}" class="tabbed-title">{{ label }}</a>
  <div class="post-meta">
    {{ node.createdtime|date('M d, Y') }}
  </div>
</div>

{{ content|without('field_thumbnail') }}
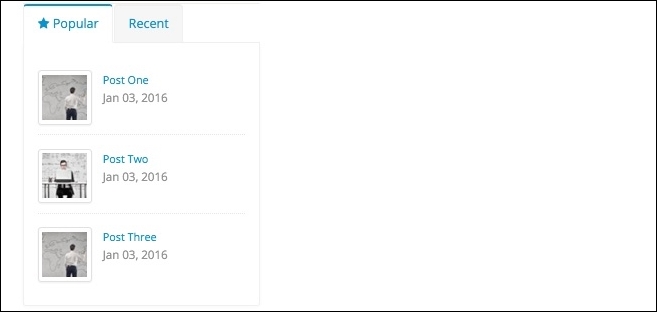
Once finished, make sure to save the template, clear Drupal's cache, and then refresh the Blog listing page. As we can see from the following image, our tabbed interface is identical to our mockup:

The markup we added is pretty straightforward. We are utilizing the content variable that each node has available to print out the thumbnail image, title, and post created date. We used these same techniques when we created the Post Listing template earlier.
There are quite a few steps involved in creating the final tabbed interface, but the ease of being able to create Twig templates makes modifying the markup simple.
