
The project is an important concept in Code::Blocks. A project can be described as a collection of source files and build targets.
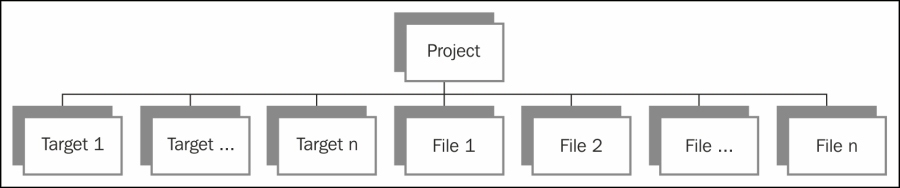
A build target can be defined as a label or a tag for each source file, which contains separate set of build (compiler, linker and resource compiler) options. Each build target contains a set of build options and during compilation of a project Code::Blocks selects currently active target. All files of that target is then compiled using that build target's build options.
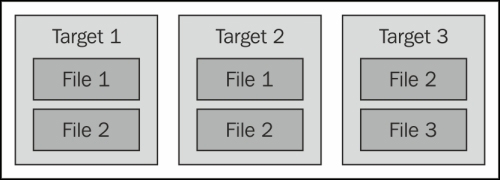
A project requires a minimum of one target and one source file to compile. A source file may be part of all or none of the targets. Build targets can be dependent upon other targets, which in turn helps to maintain a relationship between different source files. We'll explain a bit more on importance of build targets in the next section.
But before doing that let's create a project and develop an app. Perform the following steps for the same:
- Click on the new button in the main toolbar, then click on the Project menu option. A wizard will be presented, as shown in the following screenshot. Now select Console application and click on the Go button:

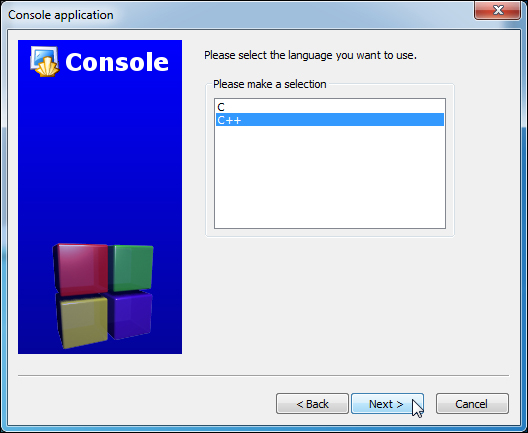
- Click on the Next button on the first page of the wizard. Then choose C++ and click on the Next button as shown in the following screenshot:
- As shown in the following screenshot enter Project title (app name) as
App1and choose a folder to createApp1project. Now, click on the Next button to continue.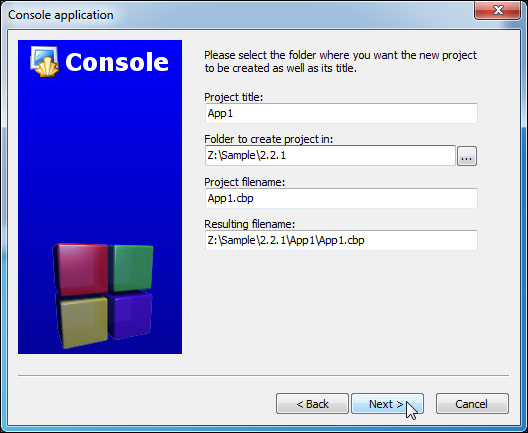
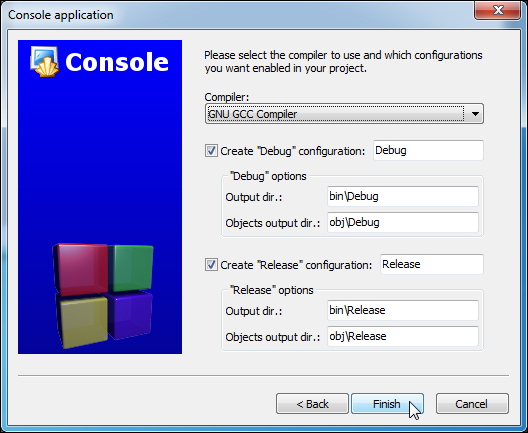
- Click on the Finish button in the Console application window as shown in the following screenshot and the project will be generated with a default code:
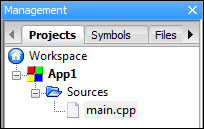
The following screenshot shows the Management window that has been populated with the newly created project files. Double-click on the main.cpp item on the tree to open the Code::Blocks editor.
Let's replace the default code with the following code:
#include <iostream>

class HelloWorld {
public:
  HelloWorld() {}
  ~HelloWorld() {}

  void Print() {
    std::cout << "Hello World!" << std::endl;
  }
};

int main()
{
  HelloWorld hello;
  hello.Print();
  return 0;
}
We have replaced earlier HelloWorld code with a code using Object Oriented Programming (OOP) concepts of C++. We have used C++ classes to achieve the same goal of printing "Hello World!" text.
C++ classes are specific data types that can be defined as a collection of data structure and member functions that operate on these data structures. All member functions and base classes are private by default. Classes can contain overloaded operator which allows customized operations associated with a particular class.
Classes can also be defined with a struct keyword. However, all members, that is, functions and base classes are public by default if a class is defined with a struct keyword.
Let's analyze our code. We have defined a class named HelloWorld. We have also defined a constructor function HelloWorld() and a destructor function ~HelloWorld(). We have a publicly accessible function named Print() to print out "Hello World!" text. In the main() function we created an object named hello of class HelloWorld and then we have used it to call Print() function.
Hit F9 key to build and then run this project. A console window will pop up displaying "Hello World!" text.