This chapter commences our journey into web development in Scala. Web development has become an area where the choice of architectures and frameworks is tremendous. Finding the right tool for the job is not always a straightforward task as it ranges from traditional Java EE or Spring-based architectural styles to more recent Ruby on Rails-like approaches. Most of the existing solutions still rely on the adoption of the servlet-container model, whether they use lightweight containers such as Jetty/Tomcat or support EJBs (Enterprise JavaBeans) such as JBoss, Glassfish, WebSphere, or WebLogic. Many online articles and conference talks have tried to compare some of the alternatives, and as these frameworks evolve rapidly and sometimes focus on different aspects (such as frontend versus backend), compiling a fair and accurate list remains difficult. In the Scala world, alternatives to create web applications range from lightweight frameworks such as Unfiltered, Spray, or Scalatra to full-featured solutions such as the Lift or the Play Frameworks.
We have chosen to concentrate on the Play Framework, because it embraces important features that we think are the key to maintainable, modern software development. Some of the advantages of the Play Framework are:
- The Play Framework is scalable and robust. It can handle large loads because it is built on a fully asynchronous model on the top of technologies that are ready to handle multicore architectures such as Akka, a framework to build concurrent and distributed applications that we will cover in Chapter 8, Essential Properties of Modern Applications – Asynchrony and Concurrency.
- It provides us with enhanced developer productivity by promoting ease of use, promoting the DRY (short for Don't Repeat Yourself) principle, and taking advantage of the expressiveness and conciseness of Scala. In addition to that, the hit refresh workflow of Play by which you can simply refresh your browser and get instant feedback on the changes you make is a real boost in the productivity, in contrast with the longer deployment cycles of the Java servlet and EJB containers.
- It provides good integration with the existing legacy of infrastructure based on the JVM.
- It provides good integration with modern, client-side development trends that heavily rely on JavaScript/CSS and their surrounding ecosystem, including frameworks such as AngularJS or WebJars. Moreover, the LESS (short for Leaner CSS) dynamic stylesheet language as well as CoffeeScript, a small and elegant language that compiles to JavaScript, are supported by Play Framework without any additional integration.
The Play Framework Version 2.x exists both for Java and Scala, which is an additional strength as Java developers will probably get acquainted with the differences more quickly and may have previous experience with the Java version before moving on to Scala.
Several alternatives are offered to rapidly get you started with the Play Framework and create a minimalistic helloworld project. Note that all these alternatives create projects based on SBT, as we mentioned briefly in Chapter 3, Understanding the Scala Ecosystem.
Download the classic Play distribution from http://www.playframework.com/download, and unpack the .zip archive in a directory of your choice. Add this directory to your path (so that running the play command anywhere on your filesystem will create a new application). With this alternative, you can open a terminal window and enter the following command:
> play new <PROJECT_NAME> (for example play new playsample)
The following output will be displayed:
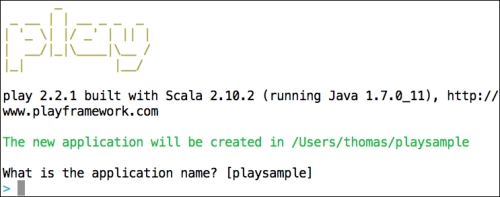
We just need to press Enter as we have already given a project name on the previous command. The following will be displayed on pressing Enter:
Which template do you want to use for this new application?
  1             - Create a simple Scala application
  2             - Create a simple Java application
> 1
OK, application playsample is created.

Have fun!
That's all; in less than a minute, we already have a fully working web app that we can now execute. As it is an SBT project (where the sbt command has been renamed play instead), we can just navigate to the root of the created project and start our Play session as if we were working on an SBT project. This is done as follows:
> cd playsample
> play run
[info] Loading project definition…
--- (Running the application from SBT, auto-reloading is enabled) ---

[info] play - Listening for HTTP on /0:0:0:0:0:0:0:0:9000

(Server started, use Ctrl+D to stop and go back to the console...)
Notice that the application is started on port 9000 by default. If you want a different port, you can type the following command instead:
> play
This will bring you to the Play (SBT) session, and from there, you can choose the port to listen to. This can be done as follows:
[playsample] $ run 9095
[info] play - Listening for HTTP on /0:0:0:0:0:0:0:0:9095
Another alternative is to enter > play "run 9095" in the terminal.
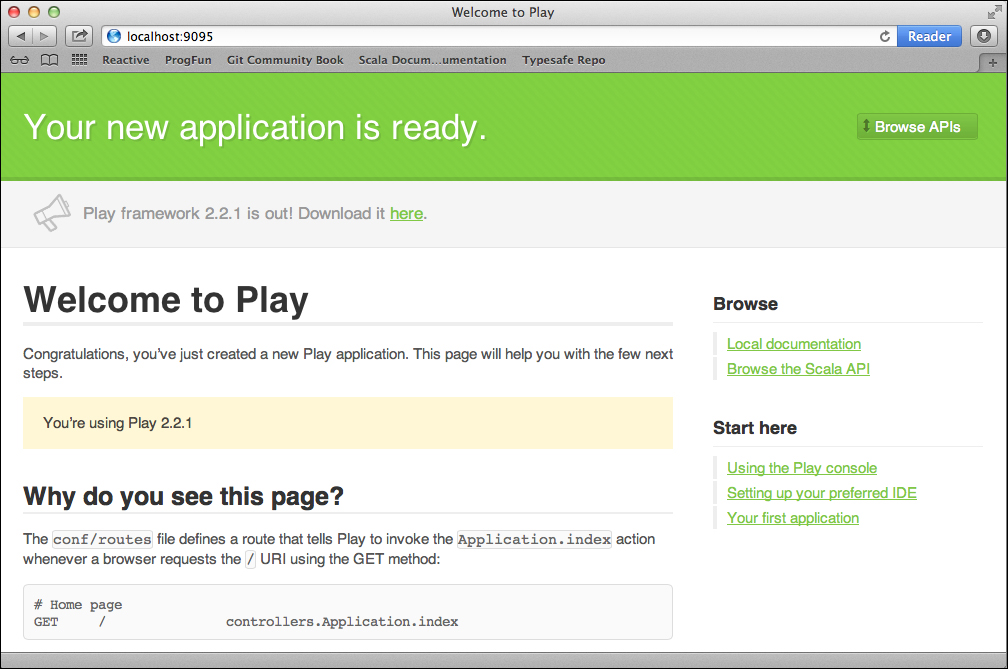
Launch a browser at http://localhost:9095/ (9000 if you are running using the default port), and you should see the
Welcome to Play page on your running portal: