
Now that you have your camera connected, you can begin to access some amazing capabilities that have been provided by the open source community. The most popular of these for computer vision is OpenCV.
Now you need to install OpenCV, a complete vision library that provides tools for you to use to capture, process, and save your images. Before you do this, you need to expand the partition on your SD card so that you can download all the applications that you need. When you wrote the Linux operating system to your SD card, you copied a 2 GB image; so now your card thinks it is only a 2 GB card, no matter what size it really is. You need to reclaim this space.
To do this, you'll need to issue some fairly cryptic commands, but you can use the defaults, so it will be straightforward. First, open a terminal window. The card I am using is an 8 GB card, so if your card is of a different size, you might not see the exact same numbers. Fortunately you'll be using default values throughout the process, so you won't need to know anything special about your card. To begin, type sudo su, and then enter your password. Then follow these steps:
- Type
ll /dev/mmcblk*and you should see output similar to the following screenshot: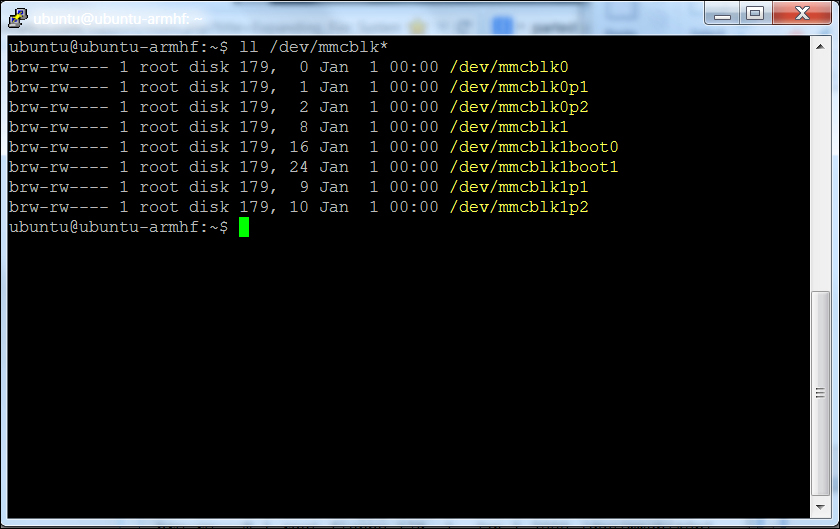
- Now you are going to make changes to the
mmcblk0device. Typefdisk /dev/mmcblk0. - Enter the
pcommand and you should see the details of the different types of storage that you currently have available, similar to the output shown in the following screenshot:
- You are going to expand the second device,
/dev/mmcblk0p2. To do this you are going to delete the partition, then create a new partition. The information that exists on your SD card should be preserved throughout this process, however. Enterdat the prompt, then2, for partition 2. Now enterpagain and the following screenshot will be displayed: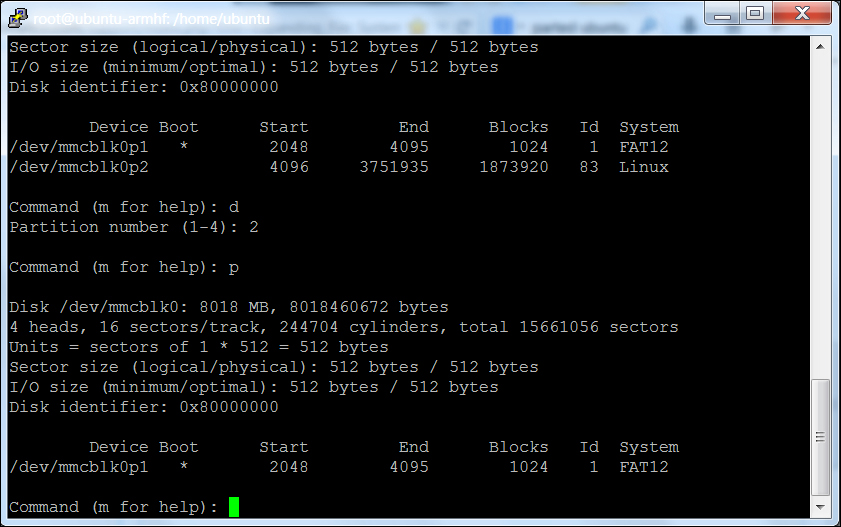
- Now you will create a new partition using defaults so that the partition takes up the entire card. At the Command prompt type an
n, thenp, then2and then hit Enter through each choice that the programs request. Your device should now reappear, similar to the following screenshot, with a different size based on the size of your SD card: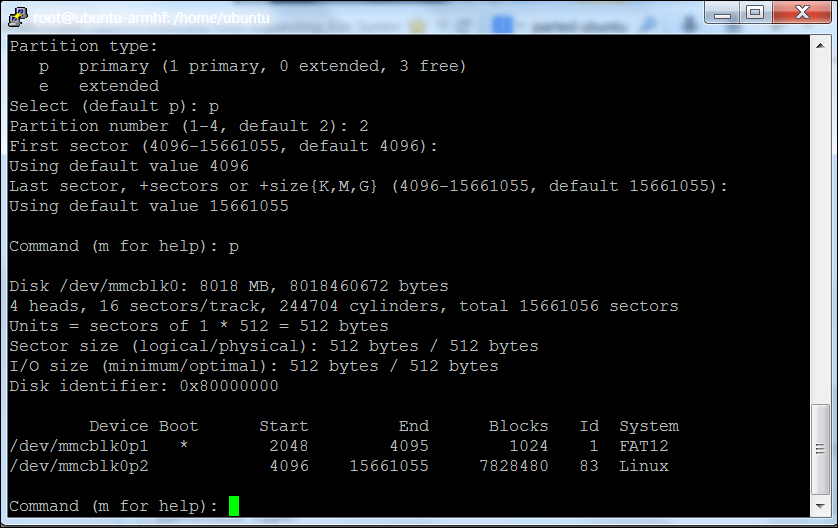
- Notice that the second partition is now much larger than the original. Now type
wto commit your changes. Now you need to reboot, so typereboot. - The final steps will expand the file system. After the system reboots, type
sudo suand enter your password. Now typedf, the command to see how much disk you have free. You should be able to see the output as shown in the following screenshot: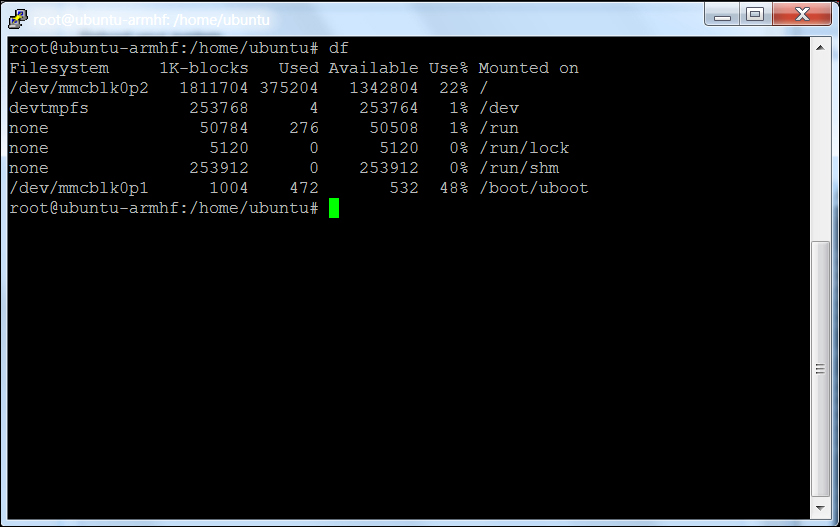
- It is the
/dev/mmcblk0p2device that you want to resize. Typeresize2fs /dev/mmcblk0p2and then enterdf; you should be able to see the output as shown in the following screenshot: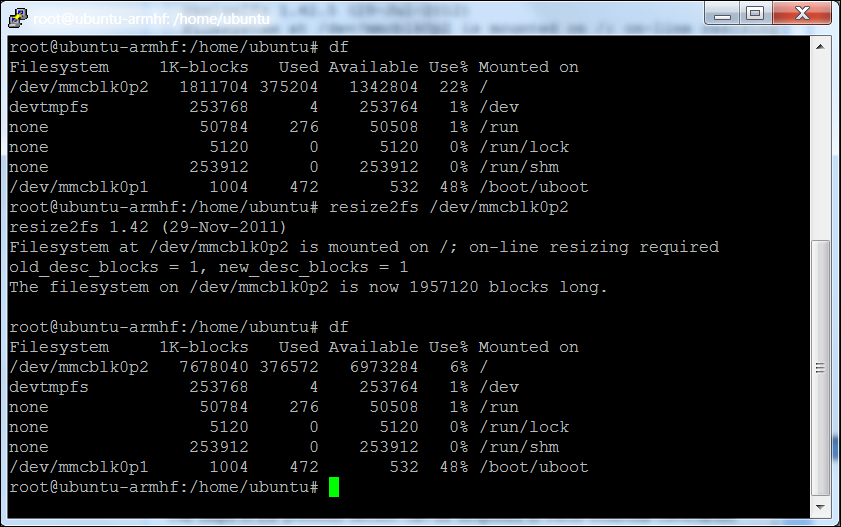
Now your device is ready to use.
First, you'll need to download a set of libraries and OpenCV itself. There are several possible steps. I'm going to suggest the ones that I follow to install it on my systems. Once you have booted the system and opened a terminal window, type the following commands in the given order:
sudo apt-get install update: If you haven't done this in a while, it is a good idea to do this now before you start. You will be downloading a number of new software packages, so it is good to make sure everything is up to date.sudo apt-get install build-essential: You have done this in the previous chapter, but if you skipped that part, you are going to need this package.sudo apt-get install libavformat-dev: This library provides a way to code and decode audio and video streams.sudo apt-get install ffmpeg: This library provides a way to transcode audio and video streams.sudo apt-get install libcv2.3 libcvaux2.3 libhighgui2.3: These are the basic OpenCV libraries. Note the number. This will almost certainly change as new versions of OpenCV become available. If Version 2.3 does not work, either try Version 2.4 or google for the latest version of OpenCV.sudo apt-get install python-opencv: This is the Python development kit for OpenCV, needed as you are going to use Python.sudo apt-get install opencv-doc: This library provides the documentation for OpenCV, just in case you need it.sudo apt-get install libcv-dev: This library provides the header files and static libraries to compile OpenCV.sudo apt-get install libcvaux-dev: This library provides more development tools for compiling OpenCV.sudo apt-get install libhighgui-dev: This is another package that provides header files and static libraries to compile OpenCV.- Make sure you are in your home directory, and then type
cp-r/usr/share/doc/opencv-doc/examples: This will copy all the examples to your home directory. - Go to the
examples/cdirectory by typingcd ./examples/cand typesh build_all.shand you will have a set of executable files that will allow you to see if the system is working.
Now you are ready to try out the OpenCV library. I prefer to use Python when programming simple tasks, so I'll show the Python examples. If you prefer the C examples, feel free to explore. In order to use the Python examples, you'll need one more library. So type sudo apt-get install python-numpy as you will need this to manipulate the matrices that OpenCV uses to hold the images.
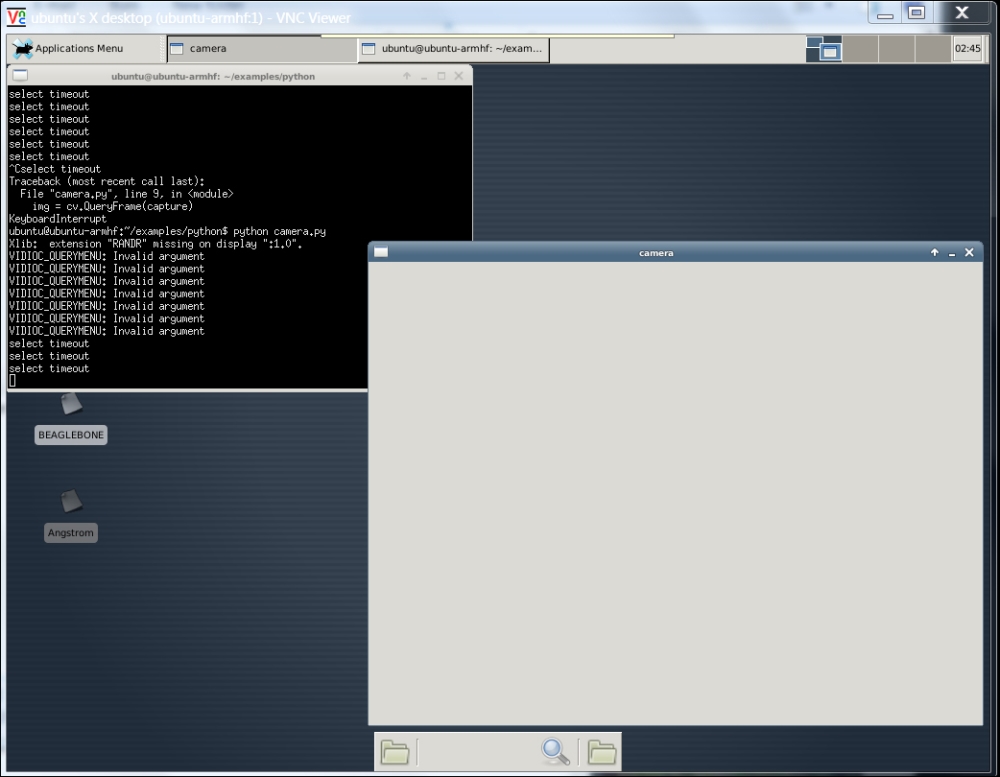
Now that you have those, you can try one of the Python examples. Change directory to the Python examples by typing cd /home/ubuntu/examples/python. In this directory you will find a number of useful examples, we'll only look at the most basic. It is called camera.py. You can try running this example; however, to do this you'll either need to have a display connected to the BeagleBone Black, or you can do this over the vncserver connection. Bring up a terminal window and type python camera.py. You should see output similar to the following screenshot:
In my case the camera window eventually turned black, but did not show the output from the camera. I found that I needed to change the resolution of the image to the one supported by the camera and OpenCV. To do this you edit the camera.py file, and add two lines as shown in the following screenshot:
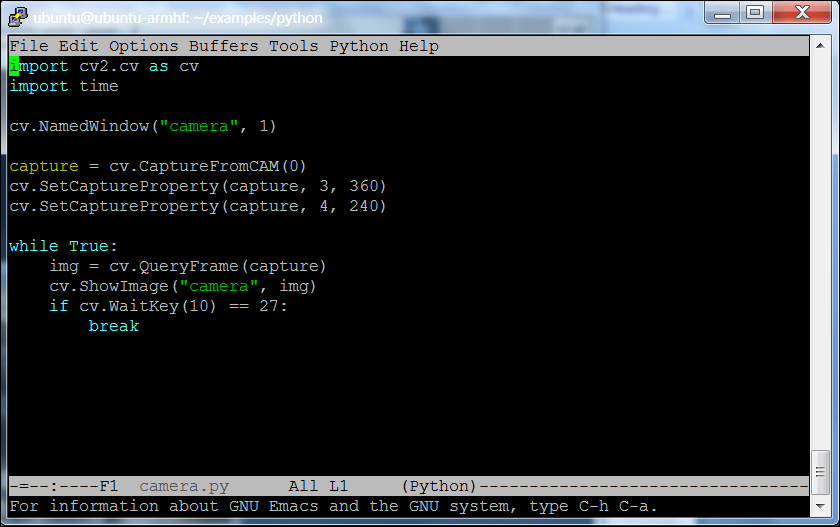
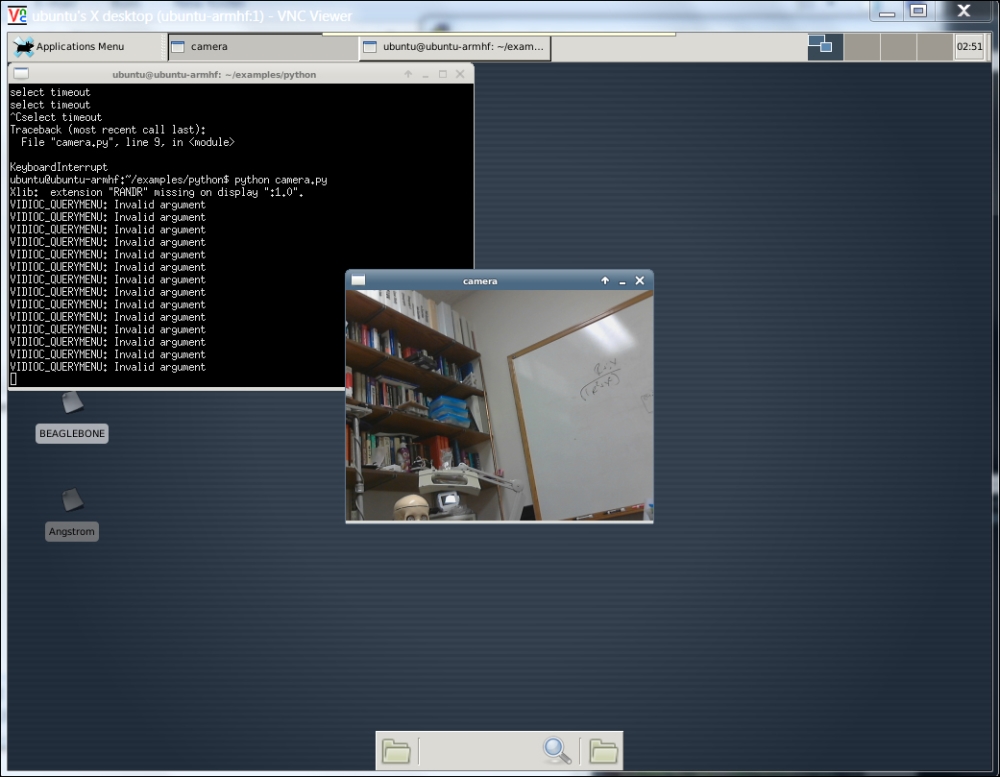
These two lines change the resolution of the captured image to 360 x 240 pixels. Now run camera.py, and you should be able to see the output similar to the following screenshot:
Your project can now see! You will use this capability to do a number of impressive tasks that will use this vision capability.
You may want to play with the resolution to find the optimum for your application. Bigger images are great—they give you more detailed view of the world—but they also take up significantly more processing power. You'll play with this more as you actually ask your system to do some real image processing. Be careful if you are going to use vnc to understand your system performance as this will significantly slow down the update rate. An image that is twice the size (width/height) will involve four times more processing.