
Now that you've created platforms that can move on land, let's turn to a completely different type of mobile platform—one that can sail. In this section, you'll discover how to use the BeagleBone Black to control your sail boat.
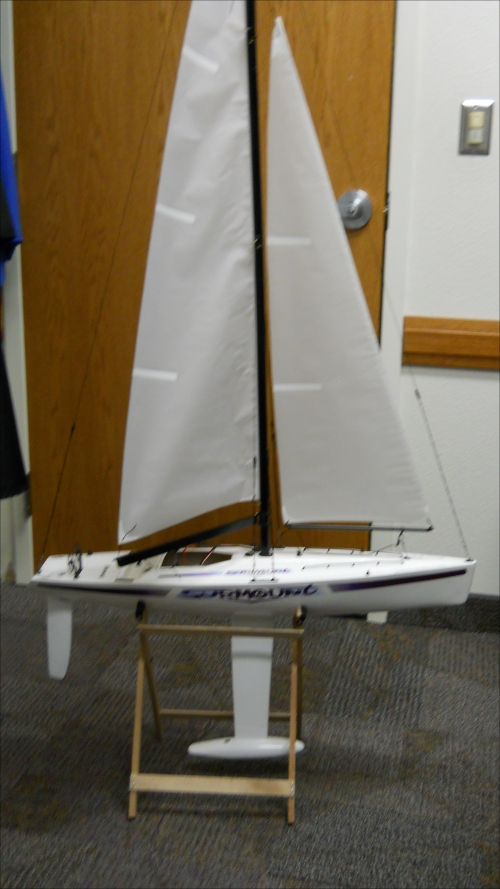
Fortunately, sailing on the water is about as simple as walking on land. First, however, you need a sailing platform. The following image shows an RC sailing platform that can be modified to accept control from the BeagleBone Black:
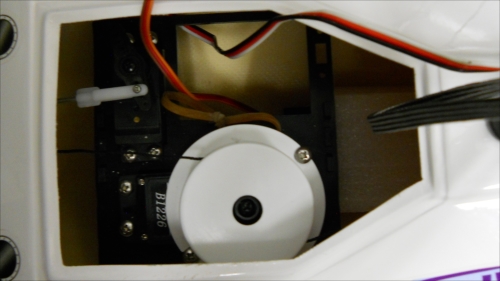
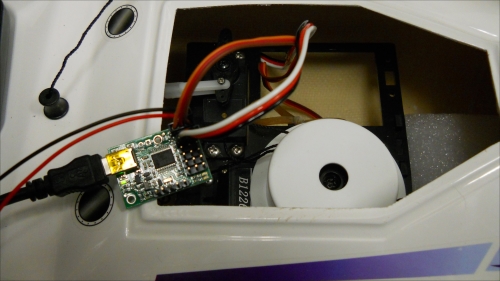
In fact, many RC controller boats can be modified to add the BeagleBone Black. All you need is space to put the processor, the battery, and any additional control circuitry. In this case, the sailing platform has two controls: a rudder that is controlled by a servo and a second servo that controls the position of the sail. These are shown in the following image:
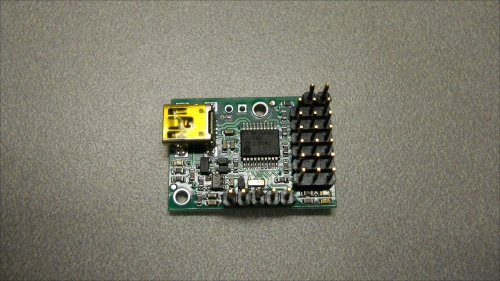
To automate the control of the sail boat, you'll need your BeagleBone Black, a battery, and a servo controller. The servo controller I would advise for this project is the little brother to the servo controller you used in Chapter 5, Making the Unit Mobile – Controlling Wheeled Movement. It is a six-servo controller made by Pololu, available at http://www.pololu.com, and it looks similar to what is shown in the following image:
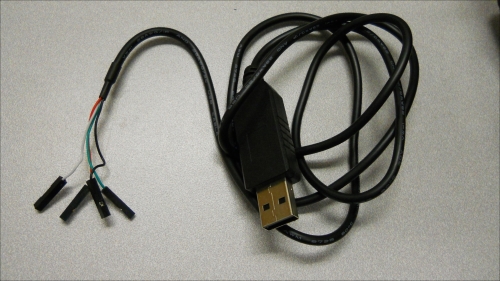
The advantage is that this servo controller is much smaller and fits in limited space. The only challenge is creating a power connection to the device. Fortunately there is a cable that you can purchase that makes these power connections available from a standard cable. The cable you want is a USB to TTL serial/RS232 adapter cable. Make sure that the TTL end of the cable has individual female connectors. You can get this cable at http://www.amazon.com, and also at http://www.adafruit.com. An image of the cable is shown as follows:
The red and black wires will be power. Now this can be connected to the servo controller, as shown in the following image:

Once you have assembled your sail boat, you will need to first hook up the servo controller to the servos on the boat. You should try to control the servos before installing all the electronics inside the boat, similar to what is shown in the following image:
Just as in Chapter 5, Making the Unit Mobile – Controlling Wheeled Movement, you can use the MaestroController SW to control the servo controller from your PC. When you are ready to hook it up to the BeagleBone Black, you can start with the same Python program you used in Chapter 5, Making the Unit Mobile – Controlling Wheeled Movement. You will probably want to control the system without a wired connection, so you can use the principles that you learned in Chapter 7, Avoiding Obstacles Using Sensors.
It may be a bit challenging if you are using the standard 2.4 GHz keyboard, or smaller 2.4 GHz controller. You can add a bit more distance by connecting via a more powerful 2 way communications process. One possible solution is wireless LAN, unfortunately most lakes or ponds won't have an open wireless network available. You could also set up your own adhoc wireless network using a router connected to a laptop. Or many cell phones have the ability to set up a wireless hot spot, which can create a wireless network so that you can communicate remotely with your sailboat.
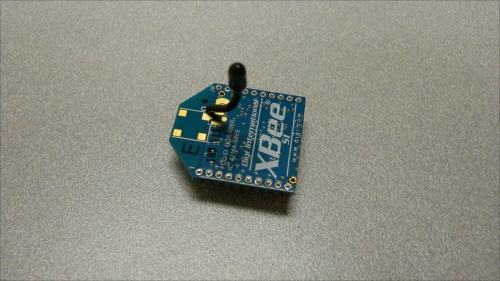
Another possible solution is to use ZigBee wireless devices to connect your sail boat to a computer. An image of a ZigBee device, called the XBee, is shown as follows:
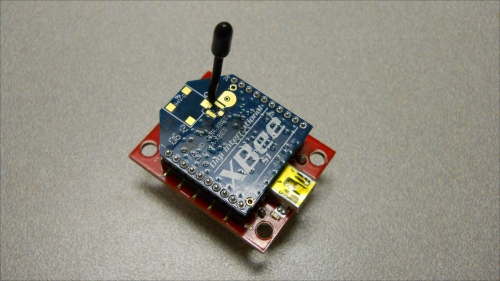
You'll need two of them and a USB shield for each. You can get these at a number of places, including http://www.adafruit.com. The following image shows the device on the shield.
Now you can connect your computer and your BeagleBone Black via this wireless network. The advantage is that it only carries communications to and from your sail boat and can have a range of almost a mile using the right devices. Here is a website that provides an excellent example of how to configure and have two computers talk over this type of dedicated wireless link: http://www.examples.digi.com/get-started/basic-xbee-802-15-4-chat/.
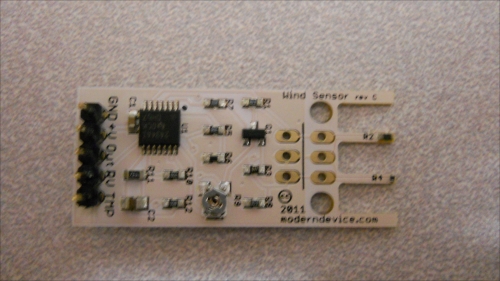
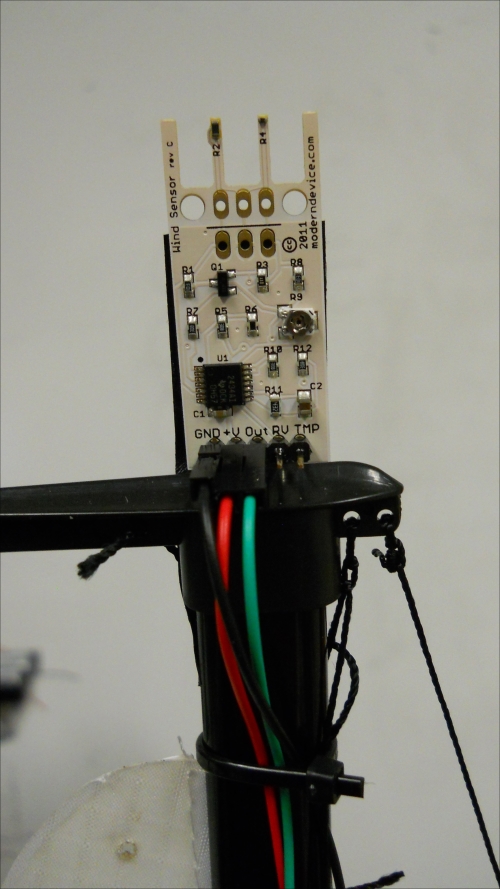
Now you can sail your boat, controlling it all through an external keyboard or through a ZigBee wireless network from your computer. If you want to fully automate your system, you could add your GPS and then have your sailboat sail to different positions. One additional item you might want to add for a fully automated system is a wind sensor. The following image shows a wind sensor that is fairly inexpensive from http://www.moderndevices.com:
You can mount it to the mast if you'd like; I used a small piece of heavy-duty tape and mounted it to the top of the mast, similar to what is shown in the following image:
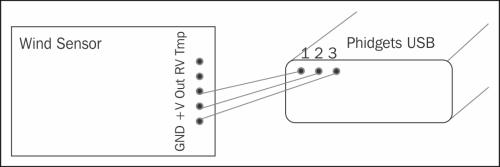
To add this to your system, you'll also need a way to take the analog input from the sensor and send it to the BeagleBone Black. You could try sending it to one of the GPIO analog input pins on the BeagleBone Black. This can be a bit tricky to program, and the ADC inputs on the board can only handle up to 1.8 Volts. If you are a bit nervous about connecting directly into the GPIO, the PhidgetInterfaceKit 2/2/2 from http://www.phidgets.com can help. It will actually take the analog and convert it to a reading that you can access via USB. The following image is how this device appears:

The following image shows the wind sensor connected to the converter:

A wiring diagram is as follows:
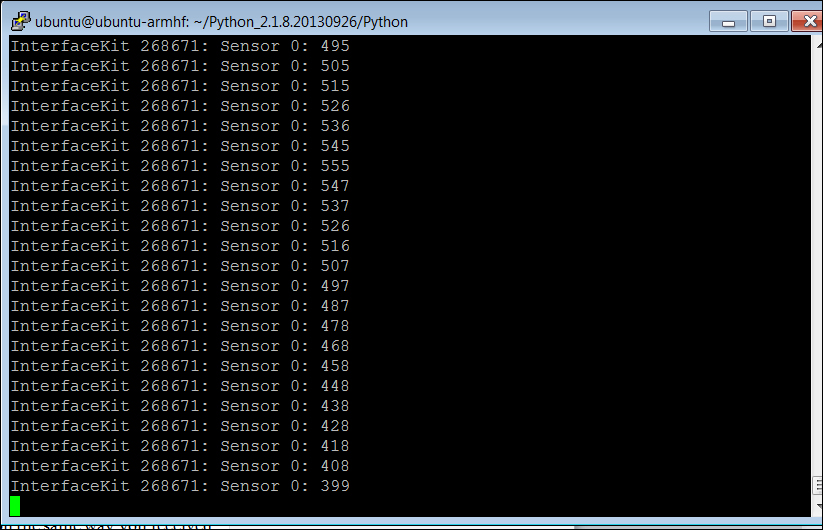
Now you can access the wind speed from the USB connection the same way as you received data from the other USB devices that you have already used. The Phidgets website will lead you through the download process; I chose Python as my language, and downloaded the appropriate libraries and example code. When I run the program I get the following output when blowing on the sensor:
Now that you have a way to measure your location, and a way to measure the wind, you can use your BeagleBone Black to sail all by itself. You'll need to be careful with waterproofing, especially when sailing in a heavy wind. Think about attaching the hatch that covers the electronics securely; I added small screws and tabs to hold the hatch and also some waterproof sealant.