
In this section, you will learn to use the vector mask, filters, and a Bitmap class with an example. The Bitmap class is a subset of DisplayObject; thus, it has almost all the properties of the Shape class, such as filters, mask, and so on.
Here is an example of using a vector mask with a Bitmap class:
//query the canvas element
var canvas = document.getElementById("canvas");

//create the Stage class
var stage = new createjs.Stage(canvas);

//create the mask layer
var mask = new createjs.Shape();
mask.x = img.width / 2;
mask.y = img.height / 2;
mask.graphics.drawCircle(0, 0, 100);

var bg = new createjs.Bitmap(img);
//add blur filter
bg.filters = [new createjs.BlurFilter(50,50,10)];
bg.cache(0,0,img.width,img.height);
bg.mask = mask;
stage.addChild(bg);

stage.update();
In the first line, we created the canvas variable that refers to our canvas element on the page. Then, we initiated the stage variable with the Stage class.
In the next line, we initiated a mask variable using the Shape class. This shape is our mask layer, and it's a circle. For the mask layer coordinates, we used img.width / 2 and img.height / 2 to place the mask layer in the center of the picture. Then, we created the circle using the drawCircle method.
Then we created the bg variable, which refers to our image. We initiated this variable using the Bitmap class; the first parameter of the Bitmap class is the Image class. We already loaded the image using the Image class.
Here is an example of loading an image and using an onload event:
var img = new Image();
img.src = "easlejs.png";

img.onload = function(evt) {
    //logic
}Then, we added a blur filter to the picture filters and cached the shape using the cache method.We used the original image dimensions for the cache method. Then we assigned the mask layer to the bg variable using the mask property.
Finally, we added the bg variable to the stage event and updated this event to apply the changes.
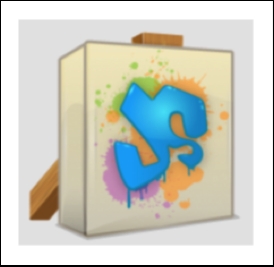
In order to understand the differences better, look at the following output screenshot of the bg variable without the mask property. This is the Bitmap class without the mask layer.
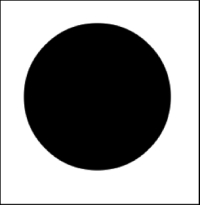
The following image shows the vector mask separately:
The following screenshot illustrates the final result of our example with the mask layer:
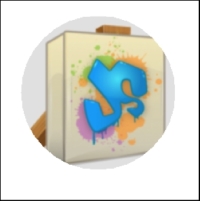
As you can see, the whole image is visible in the first screenshot. However, the only visible part in the third image is our mask layer, that is the circle. That's the way vector masks work with pictures and shapes. You can create any shape and mask an existing layer, such as a picture with this shape.
In the next example, we will create a drag-and-drop interaction using vector masks.