
In the previous chapter we learned about and studied different automation subjects. Now let's have a look at what we have studied to date:
- Test automation framework creation
- Integration with Jenkins
- Integration with Ant
- Creating reports
- Data-driven frameworks
- Selenium integration
- Different types of frameworks
- Utilities in a test automation framework
- Integration with HP QC
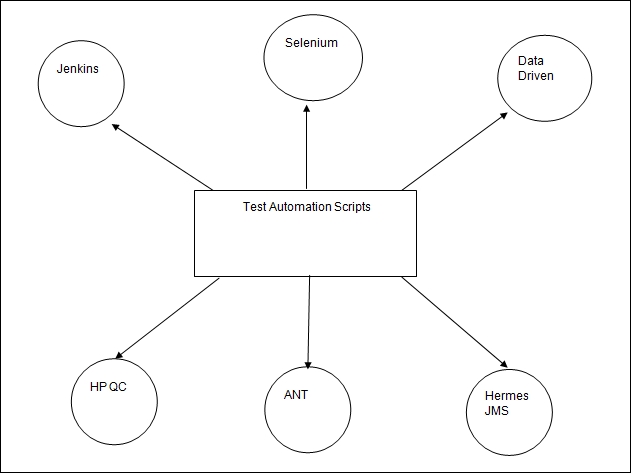
Now let's take a case where we need to integrate all of these together.
Requirements of a test automation framework:
- Implementation of continuous integration testing where tests are run each time a build changes or as a business needs.
- An external data source is required to keep test data.
- Integration with test management tools
- The test case has JMS services exposed over IBM MQ so we need a handler for the JMS message. We need reports to be generated and sent by e-mail to destined stakeholders
So, after analyzing the preceding requirements, lets simplify them:
- We need a data-driven framework
- We need to have a solution where we can invoke the UI
- We have an exposed web service so we would need a handler or a tool integration for the same
- We need the test case repository to be updated automatically when automated test runs.
- We need to generate reports and e-mail automatically.
- We need to integrate the framework with tools like Jenkins.
So the big question is how do we do it? Let's take it step-by-step:
- Data driven framework.
Solution: we have studied in previous chapters how to data drive a test. Let's revise the way we do it. We need two things:
- Groovy script
- Excel spreadsheet
When you create a test case, add a Groovy step, and make this step the very first step in the test case. Second, we need to call the created parameters in the request.
We can use the following script:
Excel integration via Groovy script
import com.eviware.soapui.model.*
import com.eviware.soapui.model.testsuite.Assertable
import com.eviware.soapui.support.XmlHolder
import java.io.File;
import java.util.*;
import jxl.write.*
import jxl.*
def regLogger = org.apache.log4j.Logger.getLogger("RegressionTestLoger");
def groovyUtils = new com.eviware.soapui.support.GroovyUtils( context )
def properties = new java.util.Properties();
def s2
def s3=(testRunner.testCase.getPropertyValue("RUN"))
regLogger.info(s3);
if (s3 !=1 & s2 != 1&s3 !=3);
{ testRunner.testCase.setPropertyValue("RUN");
  s3=(testRunner.testCase.getPropertyValue("RUN"));
}
Workbook workbook = Workbook.getWorkbook(new File(D:\testdata.xls)
for (count in 2..< 11)
{

  Sheet sheet = workbook.getSheet(1)
  Cell a1 = sheet.getCell(0,count) // getCell(row,column) — place some values in myfile.xlsCell b2 =
  sheet.getCell(s3.toInteger(),count) // then those values will be acessed using a1, b2 & c3 Cell.
  String s1 = a1.getContents();
  s2 = b2.getContents();
  //Cell c2 = sheet.getCell(2,1)
  testRunner.testCase.setPropertyValue(s1,s2);
}
workbook.close()
The preceding script will ensure that step 1 (making a data driven framework) is completed. Now let's move to step 2.
- We need to have an integration with the UI automation tool.
For this requirement we studied the integration of Selenium with SoapUI in Chapter 6, Multilayer Test Automation Using SoapUI and Selenium of this book.
Create a step, as per the business requirement of the test case, and arrange a step in the sequence in which the case demands.
The following is a sample script for Selenium integration:
import org.openqa.selenium.By
import org.openqa.selenium.WebDriver
import org.openqa.selenium.WebElement
import org.openqa.selenium.firefox.FirefoxDriver
import org.openqa.selenium.support.ui.ExpectedCondition
import org.openqa.selenium.support.ui.WebDriverWait

  WebDriver driver = new FirefoxDriver()

  // And now use this to visit facebook
  driver.get("http://www.Facebook.com")      // Find the text input element by its name
  WebElement element = driver.findElement(By.name("Login"));  // Enter something to search for
  element.sendKeys("pranai!")


  //Close the browser
  driver.quit()
The preceding scripts will make sure that step 2 is achieved. Now let's move on to step 3.
- We have a web service, so we would need a handler or a tool integration for the same.
To achieve step 3, and to send message over JMS in SoapUI, we have Hermes JMS, which can be invoked by clicking on Tools.
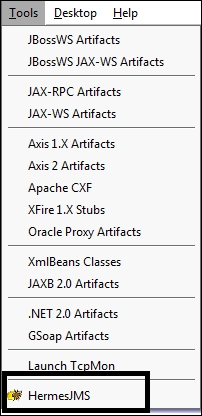
You can use Hermes JMS to connect to any ESB (short for Enterprise Service Bus). See the following screenshot:
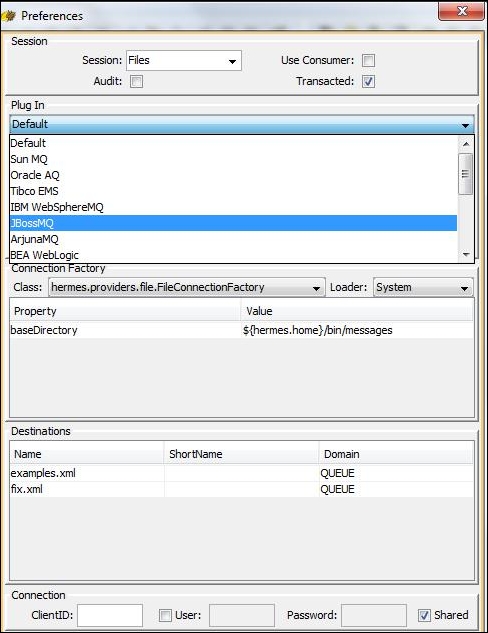
Details of how to configure Hermes JMS are explained in previous chapters.
Alternatively we can also use the following Groovy script to connect to queues and topics:
import com.eviware.soapui.impl.wsdl.submit.transports.jms.JMSConnectionHolder import com.eviware.soapui.impl.wsdl.submit.transports.jms.util.HermesUtils import com.eviware.soapui.impl.wsdl.submit.transports.jms.JMSEndpoint import hermes.Hermes import javax.jms.* def jmsEndpoint = new JMSEndpoint("jms://activeMQSession::queue::queueQ1"); def hermes = HermesUtils.getHermes( context.testCase.testSuite.project, jmsEndpoint.sessionName) def jmsConnectionHolder = new JMSConnectionHolder( jmsEndpoint, hermes, false, null ,null ,null); Session queueSession = jmsConnectionHolder.getSession(); Queue queueSend = jmsConnectionHolder.getQueue( jmsConnectionHolder.getJmsEndpoint().getSend() ); Queue queueBrowse = jmsConnectionHolder.getQueue( jmsConnectionHolder.getJmsEndpoint().getReceive() ); MessageProducer messageProducer =queueSession.createProducer( queueSend ); TextMessage textMessageSend = queueSession.createTextMessage(); textMessageSend.setText( "jms message from groovy"); messageProducer.send( textMessageSend ); textMessageSend.setText( "another jms message from groovy"); messageProducer.send( textMessageSend ); QueueBrowser qb = queueSession.createBrowser(queueBrowse); Enumeration en= qb.getEnumeration(); while(en.hasMoreElements()){ TextMessage tm = (TextMessage)en.nextElement(); log.info tm.getText() } jmsConnectionHolder.closeAll() - We need the test case repository to be updated automatically when we have automated test runs.
Let's assume that we have HP QC as a test management tool. We can use Dragonfly to integrate with SoapUI.
Details of how to integrate SoapUI with Dragonfly can be found in the previous chapter.
Let's move to step 5 now.
- We need to generate reports and e-mail them automatically.
To generate reports and e-mail them we need to use Ant scripts, so we will need to set up Ant and also place a
javamail.jarfile in thelibfolder of Ant.The following scripts that can be used to generate reports and send e-mail:
Here is the
build.xmlfor generating reports.arg line= "-j -f 'C:/Users/pnandan/Desktop/Analysis/NewFolder' 'C:/Users/pnandan/Desktop/Test/Pranai/Production.xml'"/> </exec> </target> <target name = "testreport" depends ="soapui"> <junitreport todir="C:/Users/pnandan/Desktop/Analysis/NewFolder"> <fileset dir="C:/Users/pnandan/Desktop/Analysis/NewFolder"> <include name="TEST-TestSuite_1.xml"/> </fileset> <report todir="C:/Users/pnandan/Desktop/Analysis/NewFolder/HTML" styledir="C:/Testing/apache-ant-1.9.6/etc" format="frames"> </report> </junitreport> </target> </project>here is the
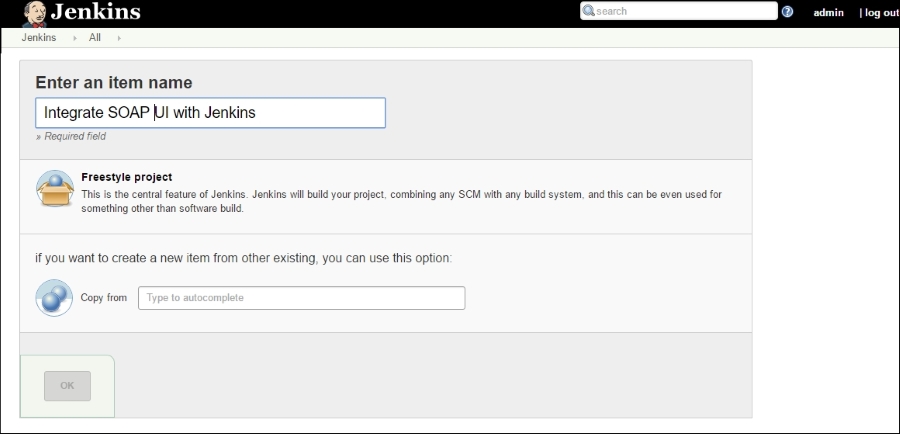
build.xmlfile for sending e-mails:<property name="line2" value="Message"/> <echo message="${line2}"/> <mail mailhost="[email protected]" mailport="25" subject="Test build" charset="utf-8"> <from address=" [email protected] "/> <to address="[email protected]"/> <message>Test Message</message> </mail> - Click on New Item and select a free style project as shown in the following screen:
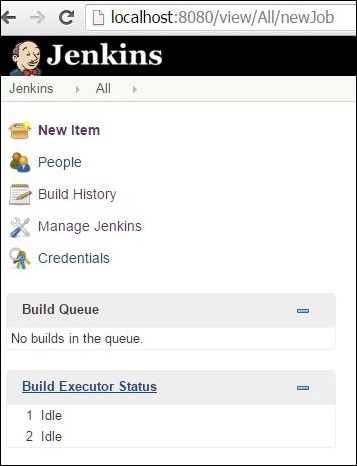
- After selecting the project type, click on OK:
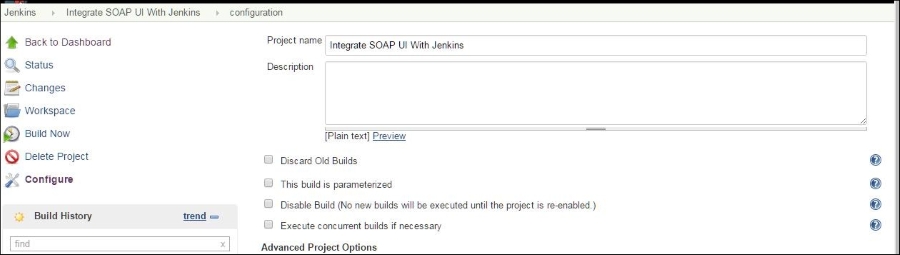
- After this you will be navigated to the following screen:
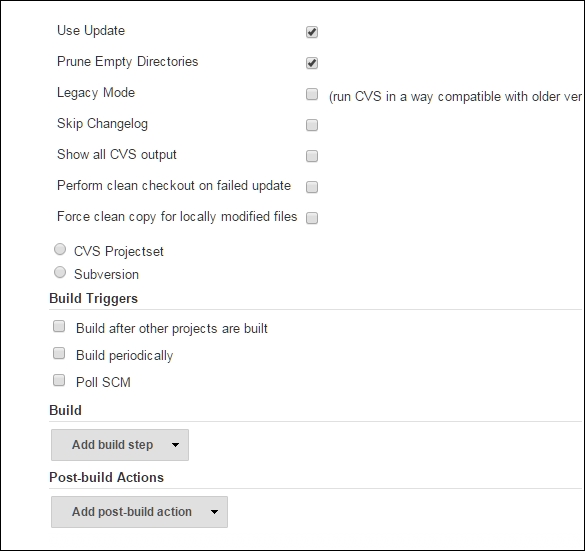
- Configure the source code repositories by using the Advanced Project Options.
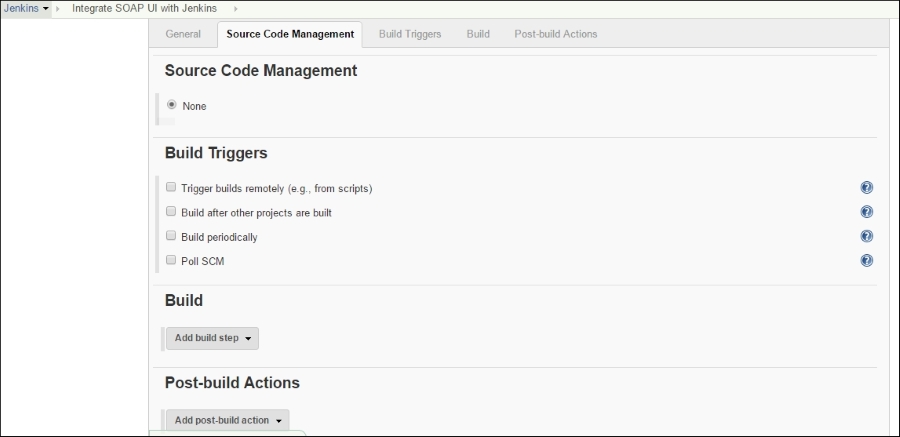
After we have added the source code repository details your repository is in sync with your tool.
You also have certain other Build options that can be useful in configuring your build:
For more detailed steps please refer to Chapter 7, SoapUI Integration with Jenkins and HP QC.
With this, we have seen that all the steps are addressed with the test automation framework.