
Web services use multiple protocols for transport, for example, HTTP or JMS. Communication can also be different, for example, Soap or JSON. So let's go configure JMS for different middleware like Tibco,Oracle SOA, IBM WebSphere.
To configure JMS in SoapUI we have a utility called Hermes JMS to help us configure JMS in our test.
Following are the steps to configure Hermes JMS in SoapUI:
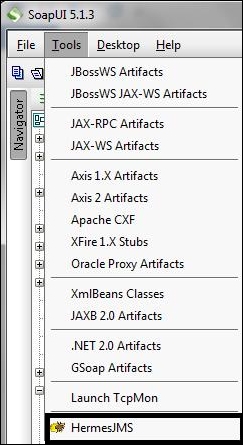
- Open HermesJMS from the Tools option on the top and select HermesJMS:
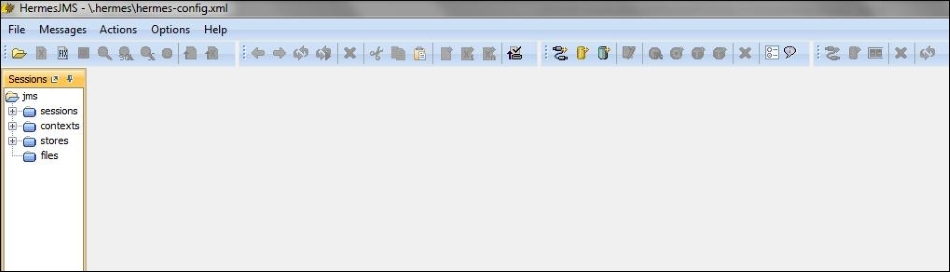
- Verify that HermesJMS will open on your desktop:
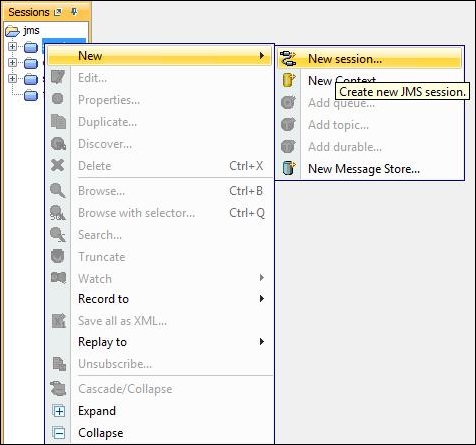
- Configuring a session: Select a New Session:
- Configuring a New session: On selection of a new session, verify that the Preferences window comes up:
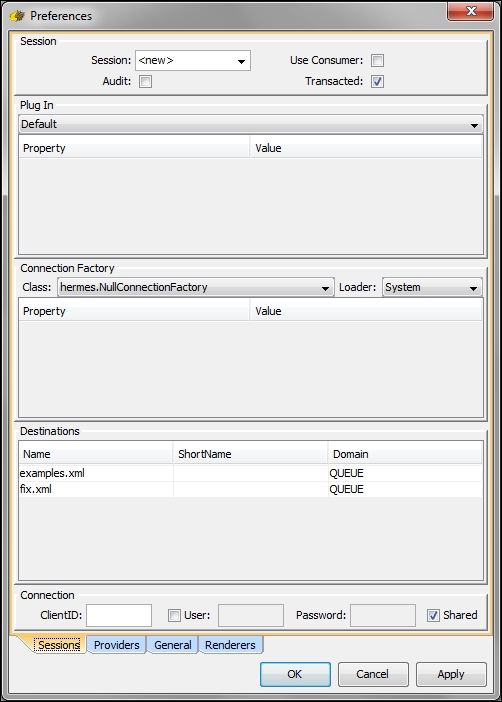
- On the Preferences window select the Providers tab.
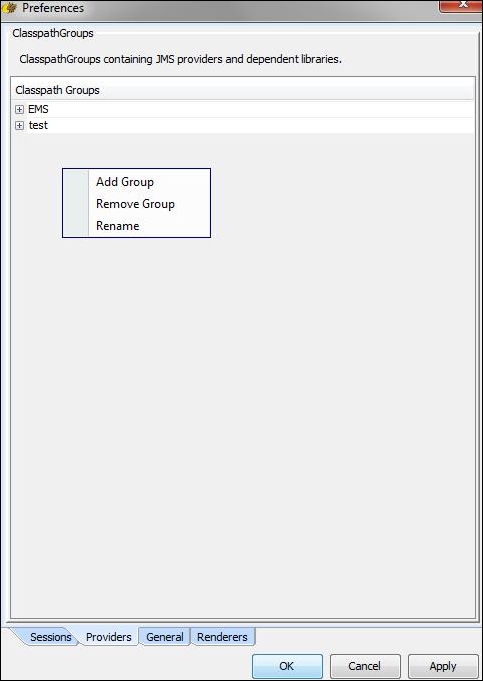
- On selection of a New Group add the Jars based on the middleware used, for example, for Tibco, use the following JARS:
Tibemsd.JARTibjms.jarTibjmsadmin.jar
- For Active MQ use the following:
com.ibm.mq.pcf-6.1.jarcom.ibm.mq.jarcom.ibm.mqjms.jardhbcore.jarconnector.jar
- After adding the Jars click on Apply and move to the Sessions tab.
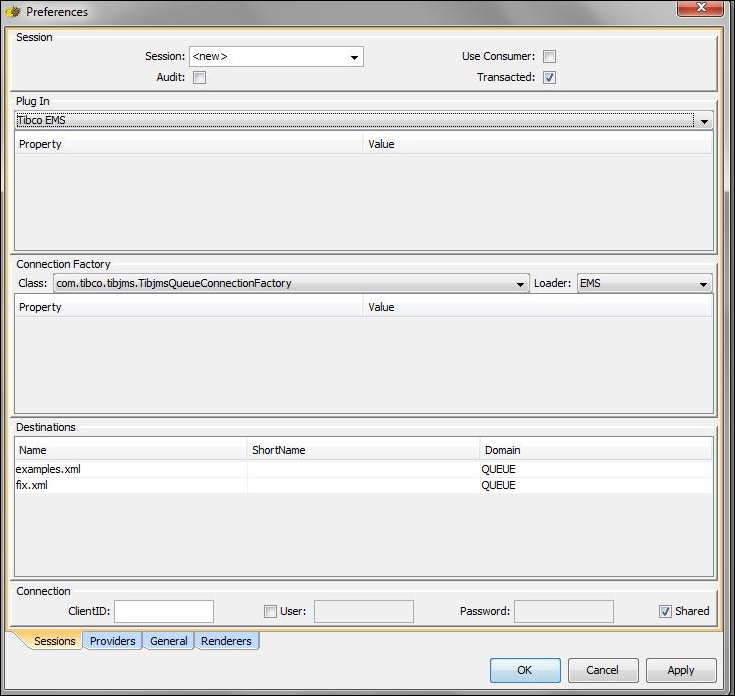
- From the Sessions tab, repeat the following steps in the following sequence:
- Select the Loader and select the name of the Class path group you created in the Providers tab.
- Select Class:Com.tibco.tibjms.TibjmsQueueConnectionFactory for TIBCO.
- Select the plugin with the relevant Plugin name. For Tibco, select Tibco EMS; for IBM, select IBM WebSphere.
- After that click on the Apply button.
- On the left hand pane, select the session name provided and right click on it.
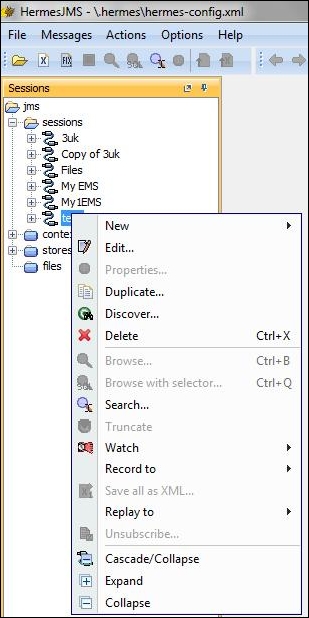
- Select the Discover option. You will then have all of the queues discovered.
- Open SoapUI and move to the binding of the JMS service and right click on it.
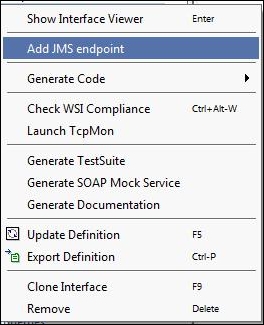
- On selecting to Add JMS endpoint you will be routed to the Add JMS endpoint window:
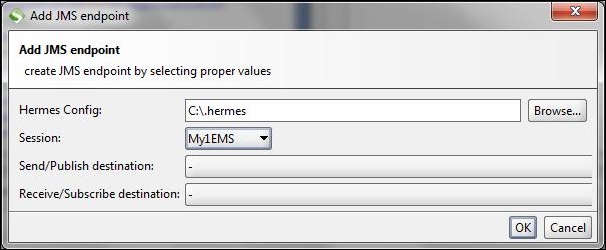
- Select the Session and then the Send Queue from the list of the queues:

Now let's take an example of configuring the request for JMS messages:
- Open the request and configure the endpoint with the queue name and then
add ::queue_at the end of the queue. So any JMS endpoint in SoapUI would be like the following:Jms//session name::sendingQueue::receiving queueHere you are having
queue_as a temporary queue in SoapUI to receive the response and acting as a receiving queue.
- Select the two checkboxes from the JMS headers option:
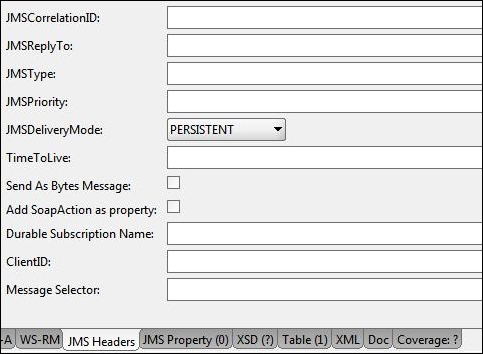
Let's have a look at the options shown in the preceding screenshot:
- JMSCorrelationID: This is used to map the request and response message in a transaction
- JMSReplyTo: This describes the queue or a topic to which the response must be sent
- JMSType: This field indicates the nature of the message enumeration may vary based on the JMS vendor
- JMSPriority: The priority at which the message is sent range varies from 0 to 9 with 0 as least, and 9 as most important
- JMSDeliveryMode: It has two enumerations:
- PERSISTENT: Message is stored in a store
- NON PERSISTENT: Message is not stored in a store
- TimeToLive: The time the message should exist on the queue till
- Send As Bytes Message: This option, when selected, sends the message as bytes
- Add SoapAction as property: This option when checked adds SoapAction to the request
- Durable Subscription Name: Name of the durable subscription
- ClientID: Used to uniquely identify any durable subscriber
- Message Selector: Allows you to filter the messages that a Message Consumer will receive
After this you can successfully launch a test against all JMS services.
You can also use the script from the following section to send any JMS messages on a destined queue.