
A test automation framework is usually comprised of the following:
- Test drivers: A test driver is usually the mechanism through which the test is executed
- Assertion/validations: Assertions to validate if the test passed or failed
- Report generating tools: Report generation to get the test results
- Clean-up script: To clear all data generated for test
- E-mail notification: E-mail notification of test results
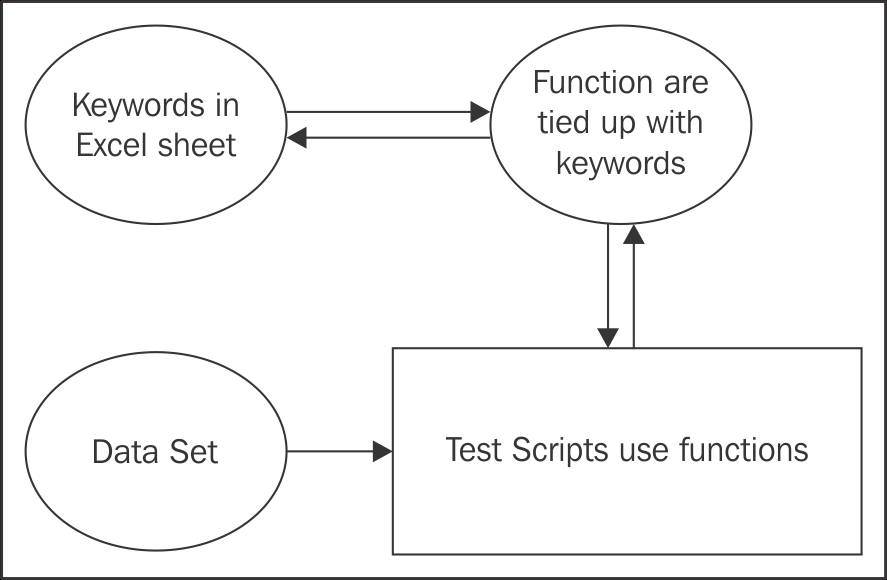
Keyword driven: A keyword driven framework is a collection of keywords, which are maintained in an Excel sheet, and functions are called based on the keyword to complete an end-to-end flow.
Major components of a keyword-driven framework:
- Excel sheet to store the keywords: Where you store your keyword with respect to your test cases and terminology selected by you
- Function library: Functions that you create which should be tied up with the keywords
- Data sheets: Data sheets contacting data
- Test script or driver script: Test script and driver script to run the test suites
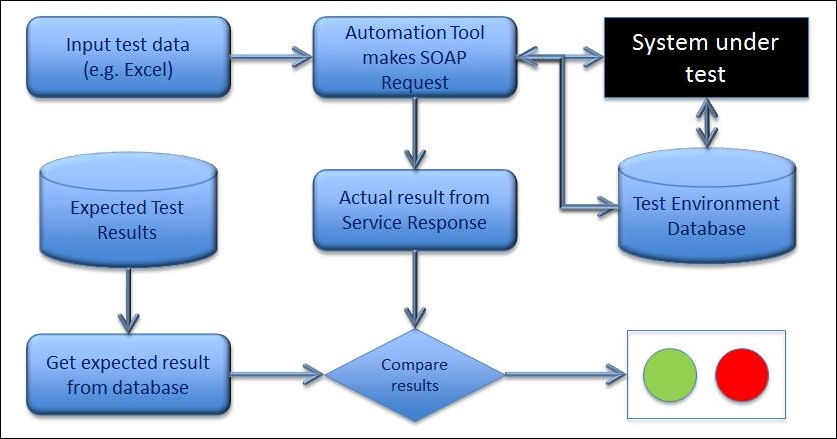
Data-driven framework: As the name suggests, data-driven frameworks are driven by data itself, in the form of hardcoded values within the code, or from an external data source Excel, or notepad. The major drawback of data-driven frameworks is that when the environment changes the scripts may break because of the change in data.
However, it's a rapidly implemented framework, which can be maintained with ease, and could be successful if skilled resources are used to maintain the data for each environment change or revision.
Example of a data-driven framework is show following:
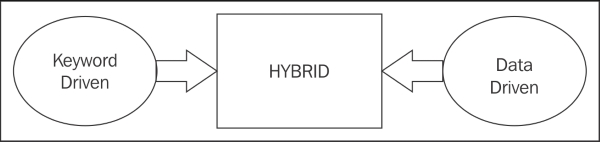
Hybrid framework: This framework uses the best of both of the preceding frameworks. This is the most successful framework, which is used for real time implementation, and is less prone to failures.
We also should focus on our scope before we implement any type of framework.
Linear and modular scripting types are explained following:
- Linear scripting: Linear scripting is when we don't implement function-related architecture and directly start scripting without creating any functions. This type of scripting makes it easy to write scripts and could be considered for small scale automation.
- Modular scripting: This type of scripting is a function-based scripting where we make use of functions and driver script to achieve desired results. This type of scripting is suitable for large-scale automation.
Now let's have a look at SoapUI open source and SoapUI Pro capabilities for framework creation:
|
Features |
SoapUI |
SoapUI Pro |
|---|---|---|
|
Data source or data read |
No [Script required] |
Yes |
|
Database connection |
No [Script required] |
Yes |
|
Reporting |
No [Script required] |
Yes |
|
E-mail functionality |
No [Script required] |
Yes with a plugin |
|
Assertions |
Yes |
Yes |
|
Library extension |
Yes |
Yes |
|
Dynamic environment switching |
No |
Yes |
Now, as we can see that SoapUI open source has limited functionality available to help us create an automation framework, we would need to create a few utilities ourselves.
Let's start creating a customized script for data source implementation
So what do we need?
- An open source library to help us read from Microsoft Excel
- Documentation of the library to write code
- JExcel
- Apache POI
Let's see how to write the script using JExcel.
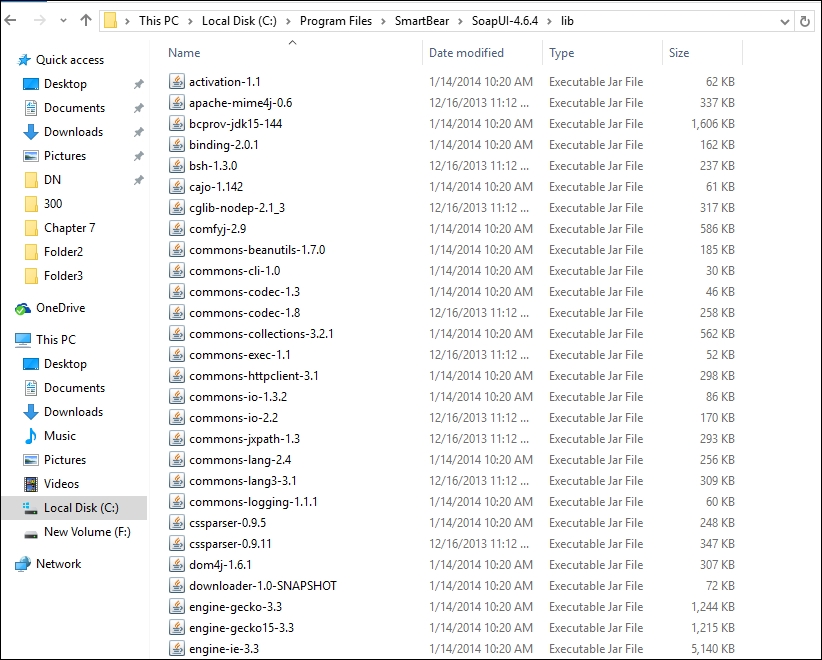
In SoapUI we have an external (ext) folder where we can place any external library and utilize it in our Groovy script.
This folder is very useful in integrating any tools or external libraries with SoapUI.
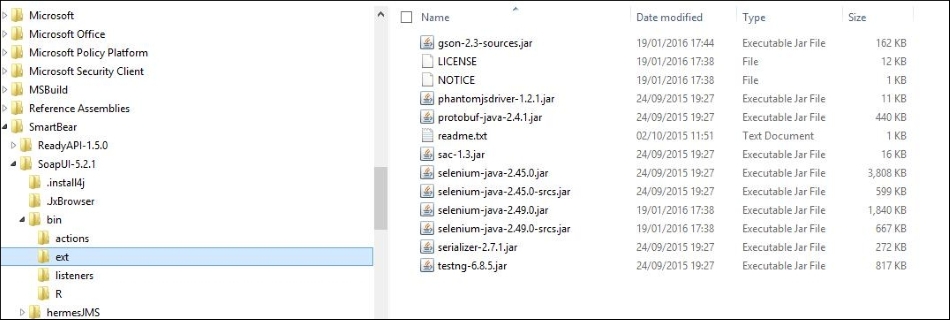
So our first step is to download JExcel, from the following link:
Download link: https://sourceforge.net/projects/jexcelapi/files/jexcelapi/2.6.12/
Download the JAR file and place it in the ext folder of SoapUI.
Once that is done you are set to write code in Groovy to use JExcel.
For any information on the method and details of the library you can refer to the documentation and the release note of the version you download
Documentation link: http://www.andykhan.com/jexcelapi/tutorial.html
Just for information, this library can also be used to perform many other functions with Excel, and can help create a bridge between SoapUI and Excel sheets for the export and import of data.
Ok, so let's start writing some code.
Following is the Groovy script for reading data:
import com.eviware.soapui.model.*
import com.eviware.soapui.model.testsuite.Assertable
import com.eviware.soapui.support.XmlHolder
import java.io.File;
import java.util.*;
import jxl.write.*
import jxl.*
def regLogger = org.apache.log4j.Logger.getLogger("RegressionTestLoger");
def groovyUtils = new com.eviware.soapui.support.GroovyUtils( context )
def properties = new java.util.Properties();
//context.expand('${Properties#propertyname}')
def s2
def s3=(testRunner.testCase.getPropertyValue("RUN"))
regLogger.info(s3);
if (s3 != '1' && s3 != '2' && s3 != '3')
{
  testRunner.testCase.setPropertyValue("RUN", '1' );
  s3=(testRunner.testCase.getPropertyValue("RUN"));

}

Workbook workbook = Workbook.getWorkbook(new File("D:\myfile.xls"))
for (count in 1..< 11)  // This is from row1 to row 11 based on the number of properties that you have in the excel sheet in this case the values were 10
  {
    Sheet sheet = workbook.getSheet(1)
    Cell a1 = sheet.getCell(0,count) // getCell(row,column) — place some values in myfile.xls
    Cell b2 = sheet.getCell(s3.toInteger(),count)  // values will be acessed using a1, b2 & c3 Cell.
    String  s1 = a1.getContents();
    s2 = b2.getContents();
    testRunner.testCase.setPropertyValue(s1,s2);
  }
workbook.close()This script serves two objectives:
- Imports the data from the Excel sheet to the properties of SoapUI
- Verifies that the tests are uniquely on each data set
Note that the script utilizes test runner for writing the properties into SoapUI Properties:
The properties of SOAP can be accessed in SoapUI using testRunner.testCase.getPropertyValue ("Name of the property")).
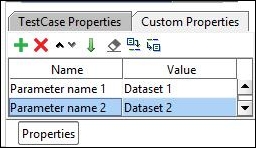
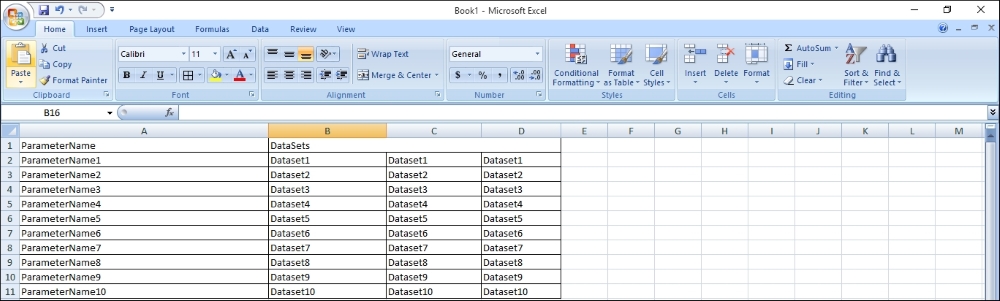
Let's assume that there were three data sets for each parameter, and you want the test to run uniquely on each data set.
The following screenshot shows an example of an Excel spreadsheet that is suitable for the preceding example:
Now, if we look at the second objective, how do we make sure which data set to pick on which run? For that, we need to place a sample script at the last step of the test case, which keeps track of the test run, and updates the value of the property run in the preceding script.
You can also see in the following code how the value is reset to 1:
if (s3 != '1' && s3 != '2' && s3 != '3'){  // S3 means the value of the excel sheet column from where the data values of request are taken from
testRunner.testCase.setPropertyValue("RUN", '1' );
s3=(testRunner.testCase.getPropertyValue("RUN"));
So following is the script that keeps tracks of the run, and can be compared to the data loop functionality in SoapUI Pro:
import com.eviware.soapui.support.XmlHolder
def groovyUtils = new com.eviware.soapui.support.GroovyUtils( context )
Run1 = (testRunner.testCase.getPropertyValue("RUN")).toLong()+1;
 testRunner.testCase.setPropertyValue("RUN",Run1.toString ());
The previous script updates the value of the run by 1, so the value picked up is correct, and the test case is run on a unique value each time.
Note
Note: The preceding values are written with respect to the three datasets that are to be imported. The logic can be enhanced as per requirement.
For example, we have three data sets for the request, so the preceding script makes sure that if the value of the run is one, then next time the request runs on the second data set and then the third and finally sets the value to 0.
The JXL utility can be used to create an Excel report that maintains expected results and so on.
We can also use Notepad also for maintaining test data, but Excel is a better solution.
We need to interact with databases based on several needs, for example:
- Retrieving a value for orchestration automation where a request generates a unique ID that needs to be passed in the request.
- Storing a value for reporting or auditability purpose.
- Validating a value from the database to the expected value.
We need to use different database drivers for different databases:
Oracle:
- Name:
OJDBC7.jar - Download link: http://www.oracle.com/technetwork/database/features/jdbc/default-2280470.html
SQL Server:
- Name: JDBC drivers
- Download link: https://www.microsoft.com/en-us/download/details.aspx?displaylang=en&id=11774
Please note that these driver need to be place in the
LIB and ext folders of SoapUI
Now let's have look at the following example to connect to an Oracle database:
import groovy.sql.Sql;
def regLogger = org.apache.log4j.Logger.getLogger("RegressionTestLoger");
def GUID;
def delayStep = testRunner.testCase.testSuite.getPropertyValue("delayStep")
def tryCount = testRunner.testCase.testSuite.getPropertyValue("delayRetries")
int x = 1
int y = 0
while ( x <= Integer.parseInt(tryCount) & y != 1  & y != 2 )

{
  println "Delaying " +  Integer.parseInt(delayStep)* 0.001 + " seconds."
  Thread.sleep(Integer.parseInt(delayStep))
  def sql = groovy.sql.Sql.newInstance("jdbc:oracle:thin:@10.252.168.219:1521:PSYMQA4","CWDEV4SL", "CWDEV4SL", "oracle.jdbc.driver.OracleDriver")
  row = sql.firstRow ("select ordstatus, ordtype, GUID, errorcode, errorsource, errortext from com_header where accountnumber= "  + account +  "order by cwordercreationdate desc")
To use a different database, use the appropriate JDBC connection string; please see the documentation for that specific database.
Now, as you can see in the script, we have connected to the database with the connection string and are able to retrieve data from the database.
There is one catch, though, we have to put a retry mechanism in to connect to the database in case the first attempt is not successful; for that we have placed two parameters:
To refer to the logic please refer to the three lines of following code, which are from the preceding script:
[Snippet]
while ( x <= Integer.parseInt(tryCount) & y != 1  & y != 2 ){
  println "Delaying " +  Integer.parseInt(delayStep)* 0.001 + " seconds."
  Thread.sleep(Integer.parseInt(delayStep))
}
For multiple selections from the database you can use the following snippet:
sql.eachRow('select * from tablename where name='Pranai'You may also try to insert and update the tables by using the following statements:
def params = [10, 'Name', 'Age']
 sql.execute 'insert into PROJECT (id, name, Age) values (?, ?, ?)', params
Updating the values of a table

 def newname = 'Nandan'
 def project = 'Testing'
 sql.executeUpdate "update PROJECT set Name=$newname where name=$project"
Now lets consider the need to validate a value from the database to the expected values; in this case we would need to extend the script.
Validation using values retrieved from the database:
import groovy.sql.Sql;
def regLogger = org.apache.log4j.Logger.getLogger("RegressionTestLoger");
def GUID;
def delayStep = testRunner.testCase.testSuite.getPropertyValue("delayStep")
def tryCount = testRunner.testCase.testSuite.getPropertyValue("delayRetries")
def account = testRunner.testCase.getPropertyValue("imsComboAcct2")
int x = 1
int y = 0
while ( x <= Integer.parseInt(tryCount) & y != 1  & y != 2 )
{
  println "Delaying " +  Integer.parseInt(delayStep)* 0.001 + " seconds."

 Thread.sleep(Integer.parseInt(delayStep))

 def sql =
groovy.sql.Sql.newInstance("jdbc:oracle:thin:@10.252.168.219:1521:PSYMQA4","CWDEV4SL", "CWDEV4SL", "oracle.jdbc.driver.OracleDriver")
 row = sql.firstRow ("select ordstatus, ordtype, GUID, errorcode, errorsource, errortext from com_header where accountnumber= "  + account +  "order by cwordercreationdate desc")

 if (row.ordstatus == "COM" ) { y = 1 }
 w=5
  GUID=row.GUID
  testRunner.testCase.setPropertyValue("GUID1",GUID.toString ());
  testRunner.testCase.setPropertyValue("pranai",w.toString ());

 if (row.ordstatus == "ERR" )   { y = 2 }
 x++
}

if  (row.ordstatus == "COM" )
{
  return (" Passed account# =" + account + " in pending pre-provisioning completed in : " +
  x * Integer.parseInt(delayStep) * 0.001 + " sec"  )
  testRunner.testCase.setPropertyValue("checkorder","Passed");

}

else

{
  regLogger.info("*FAILED Acct: " + account + " , Case: " + testRunner.testCase.name);
  assert false: "error" + "account#" + account + " status=" + row.ordstatus + " source= " +
  row.errorsource + " text=" +  row.errortext + " delay=" + x * Integer.parseInt(delayStep) * 0.001 + " sec"
  testRunner.testCase.setPropertyValue("checkorder","Failed");
}About the scenario: We need to verify the order status in the database and then mark the test case passed or failed based on it.
if (row.ordstatus == "ERR" which means the account is in error state and hence the test case should fail.
Or:
if (row.ordstatus == "COM" which means that the account is provisioned and the test case is passed.
We have used assert for validations in the script.
We may also, at certain points, need to validate the number of rows for particular search criteria, and for that the following code might be useful:
def rows = sql.rows("select * from PROJECT where name like 'Pranai%'")
 assert rows.size() == 2
So, let's move to our third asset in test automation reporting.
As we have seen in the comparison table, the open source version doesn't have the reporting feature. Well it's not true that SoapUI has limited reporting in text format. Let's have a look at it:
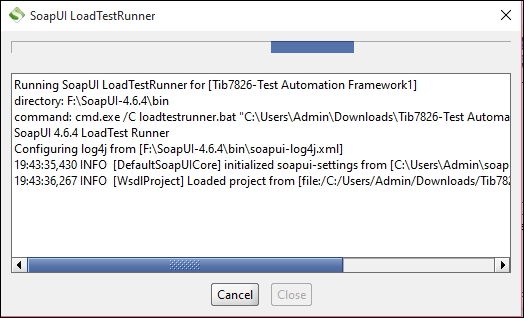

As you can see in the preceding screenshot, two files are generated in the folder. The text file is one from which report files are generated, whereas the XML file contains the raw results.
Let's have a look at the report:
Status: OK
Time Taken: 2384
Size: 1181
Timestamp: Sat Feb 20 12:01:53 GMT 2016
Test Step: GetCustomerValidationRules - Request 1

----------------- Messages ------------------------------

----------------- Properties ------------------------------
Encoding: UTF-8
Endpoint: http://10.97.119.24:9001/IntegrationServices/Customer/CustomerAccount/CustomerAccountManagement/CustomerAccount_v1/Service/CustomerAccount_v1.serviceagent/SOAPHTTP

---------------- Request ---------------------------
Request Headers: Host : 10.97.119.24:9001
Content-Length : 2183
SOAPAction : "SOAPHTTP/GetCustomerValidationRules"
Accept-Encoding : gzip,deflate
User-Agent : Apache-HttpClient/4.1.1 (java 1.5)
Connection : Keep-Alive
Content-Type : text/xml;charset=UTF-8


<soap:Envelope xmlns:soap="http://www.w3.org/2003/05/soap-envelope" xmlns:v1="http://three.co.uk/xsd/resource/common/commondefinitions/msf/messagecontext/v1" xmlns:v11="http://www.three.co.uk/xsd/interface/customer/customeraccount/customeraccountmanagement/customeraccount/v1" xmlns:v12="http://three.co.uk/xsd/cdm/common/commondefinitions/udf/v1">
   <soap:Header>
      <v1:MessageContext TimeToLive="?" messageID="?" messageType="REQUEST" timestamp="1999-05-31T13:20:00-05:00">
         <!--Optional:-->
         <v1:CorrelationID>?</v1:CorrelationID>
         <v1:TransactionID>?</v1:TransactionID>
         <!--Optional:-->
         <v1:BusinessKey>?</v1:BusinessKey>
         <!--Optional:-->
         <v1:ApplicationID>?</v1:ApplicationID>
         <!--Optional:-->
         <v1:UserID>?</v1:UserID>
         <!--Optional:-->
         <v1:ServiceInstanceID>?</v1:ServiceInstanceID>
         <!--Optional:-->
         <v1:SourceProcess>?</v1:SourceProcess>
      </v1:MessageContext>
   </soap:Header>
   <soap:Body>
      <v11:GetCustomerValidationRulesRequest>
         <v11:BAN>9600188008</v11:BAN>
         <v11:salesChannel>Contact_Centre</v11:salesChannel>
         <v11:username>[email protected]</v11:username>
         <v11:orgID>COM01</v11:orgID>
         <v11:contactType>Account Holder</v11:contactType>
         <v11:userLocation>Call Centre</v11:userLocation>
         <v11:validationReason>Upgrade</v11:validationReason>
         <v11:ValidationFactors>
            <!--Zero or more repetitions:-->
            <v11:ValidationFactor>
               <v11:factorID>MEMORABLE_NAME</v11:factorID>
               <v11:factorType>MEMORABLE_NAME</v11:factorType>
               <!--Optional:-->
               <v11:factorSource>My3</v11:factorSource>
               <v11:FactorDetails>
                  <!--Zero or more repetitions:-->
               </v11:FactorDetails>
               <!--You may enter ANY elements at this point-->
            </v11:ValidationFactor>
         </v11:ValidationFactors>
         <!--You may enter ANY elements at this point-->
      </v11:GetCustomerValidationRulesRequest>
   </soap:Body>
</soap:Envelope>

---------------- Response --------------------------
Response Headers: Date : Sat, 20 Feb 2016 12:01:46 GMT
#status# : HTTP/1.1 500 Internal Server Error
Content-Length : 1181
Connection : close
Content-Type : text/xml;charset=utf-8
Server : Apache-Coyote/1.1


<SOAP-ENV:Envelope xmlns:SOAP-ENV="http://schemas.xmlsoap.org/soap/envelope/">
   <SOAP-ENV:Body>
      <SOAP-ENV:Fault>
         <faultcode>SOAP-ENV:Server</faultcode>
         <faultstring>This is an operation implementation generated fault</faultstring>
         <faultactor/>
         <detail>
            <ns:ExceptionInfo context="" description="Invalid response code received from service" exceptionCode="ERR-MSF-COMMON-0040" exceptionID="db25cbd5-9600-442f-a9b1-5546551577b4" exceptionType="TECHNICAL" ns1:Operation="wsGetPaymentMethodDetails" ns1:ResponseCode="" ns1:ResponseMessage="Other Exception Code" ns1:Service="MSF_PaymentGateway-2_root" severity="FATAL" timestamp="2016-02-20T17:31:46.517+05:30" transactionID="?-0174be99-872d-47fa-a832-c255e1707017" xmlns:ns="http://three.co.uk/xsd/resource/common/commondefinitions/msf/exceptioninfo/v1" xmlns:ns0="http://schemas.xmlsoap.org/soap/envelope/" xmlns:ns1="http://three.co.uk/xsd/resource/common/commondefinitions/msf/exceptioninfoextended/v1" xmlns:xs="http://www.w3.org/2001/XMLSchema" xmlns:xsi="http://www.w3.org/2001/XMLSchema-instance"/>
         </detail>
      </SOAP-ENV:Fault>
   </SOAP-ENV:Body>
</SOAP-ENV:Envelope>
As we can see, we don't get comprehensive information or an impressive format in the report and hence there arises a need for a better report for SoapUI open source.
So let's see how to build up an impressive reporting format for SoapUI Open Source.
We'll start with what we will need:
- Apache Ant
- Java path to be set
- Apache Ant path to be set
The most important thing to consider is that we need admin rights on the machine where we are setting things up.
Ok so let's start:
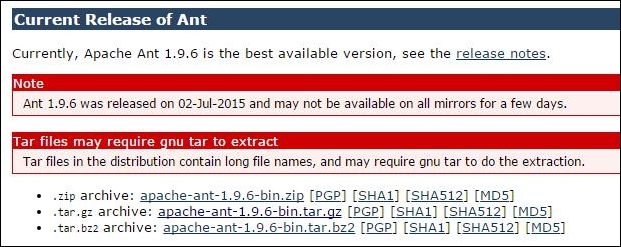
- Download Apache Ant.
Note
Download Link: https://ant.apache.org/bindownload.cgi
- Set the path of the Apache Ant in the system:

Now it's time to download JDK and JRE, if you haven't done so already, and set the Java path.
Next, we have to build the build.xml to connect with SoapUI and generate a report:
<project name="Project-Dev" default="testreport" basedir=".">
  <target name="soapui">
    <exec dir="." executable="C:/Program Files/SmartBear/SoapUI-5.2.1/bin/testrunner.bat">
    <arg line= "-j -f C:/Projects/SoapUI /Production.xml'"/>
    </exec>
  </target>
  <target name = "testreport" depends ="soapui">
    <junitreport todir="C C:/Projects/SoapUI /NewFolder">
    <fileset dir="C:/Users/pnandan/Desktop/Analysis/NewFolder">
      <include name="TEST-TestSuite_1.xml"/>
    </fileset>
    <report todir=" C:/Projects/SoapUI /NewFolder/HTML"
       styledir="C:/Testing/apache-ant-1.9.6/etc"
       format="frames">
    </report>
    </junitreport>
  </target>
</project>- For the execution of test cases,
build.xmlhas set the path to the test runner. Have a look at the following line:[executable="C:/Program Files/SmartBear/SoapUI-5.2.1/bin/testrunner.bat"]
- The path of the project to execute is also provided to run the specific project which may contain a number of test suites:
[arg line= "-j -f 'C:/Users/pnandan/Desktop/Analysis/NewFolder' C:/Users/pnandan/Desktop/Test/Pranai/Production.xml]
- The path of eports to be generated is given here:
[report todir="C:/Users/pnandan/Desktop/Analysis/NewFolder/HTML]
- The path to the directory of Apache Ant is given here:
[Styledir="C:/Testing/apache-ant-1.9.6/etc"]
- If you see a specific test suite report you can specify the name of it:
[include name="TEST-TestSuite_1.xml"]
Now let's start by executing the test and viewing the report.
Executing the test:
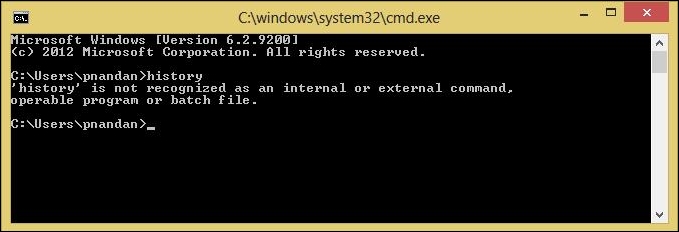
- Open the command prompt:
- Go to the folder containing
build.xmland typeant: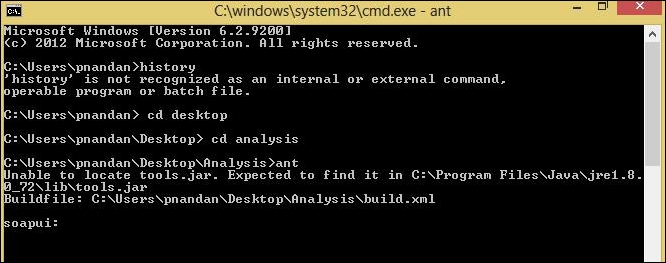
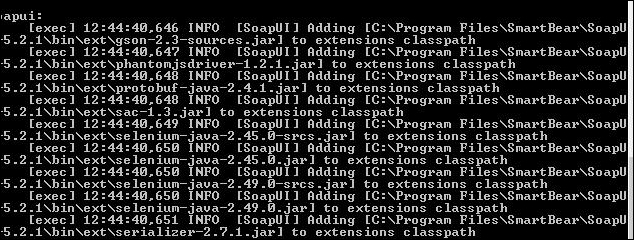
- Verify that the execution starts:
- When the execution finishes, go to the folder specified in the
build.xml: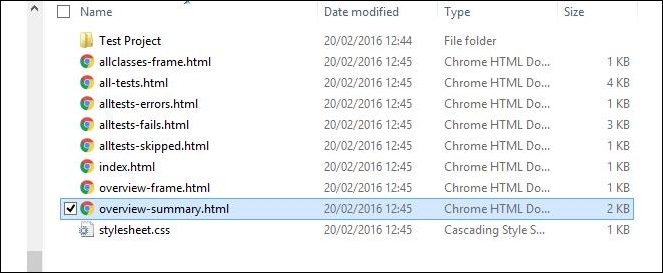
- To view the summary, open the file overview-
summary.html: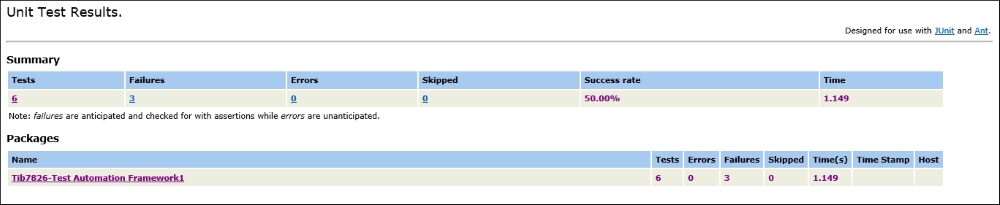
- Now if you want to see a detailed view, click on the test project hyperlink:
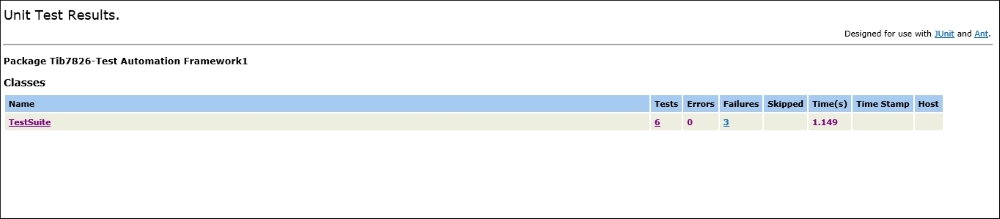
On the previous page, click on the test suite name for which you want to see the detailed analysis. In this case, there is only one test suite to choose from.
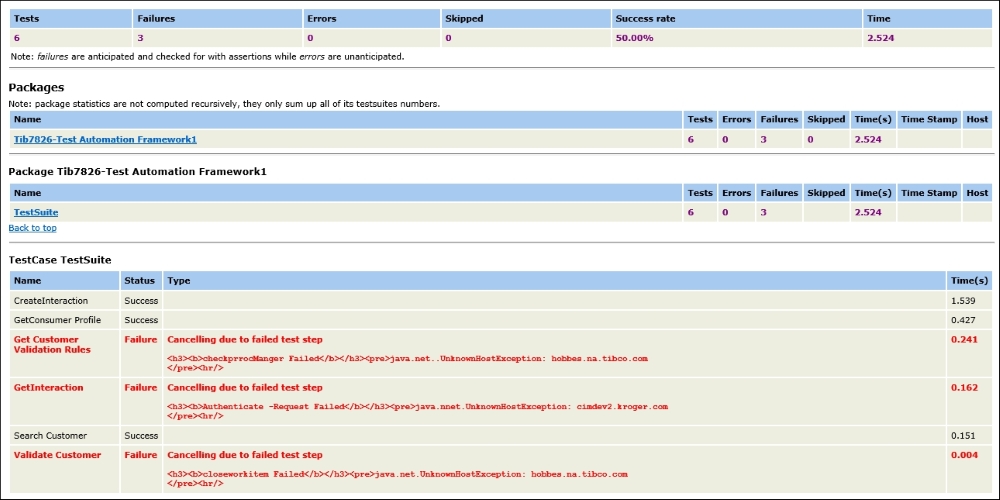
Detailed summary report:
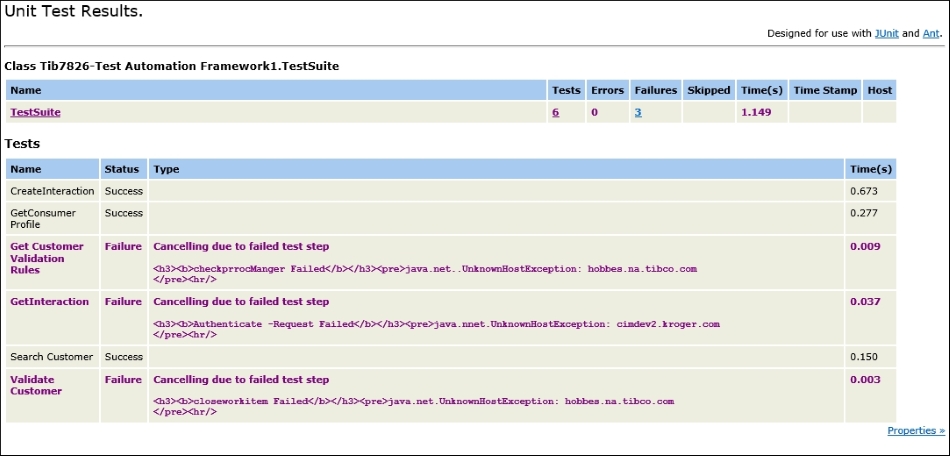
As we now see, we can view the detailed report for the test suites. Let's go by the nomenclature of the reports:
- Name: represents the test case name
- Status: represents the test case status
- Type: describes the details
- Time: represents the time taken for execution of the test cases
Here is where you can find the .xml file:
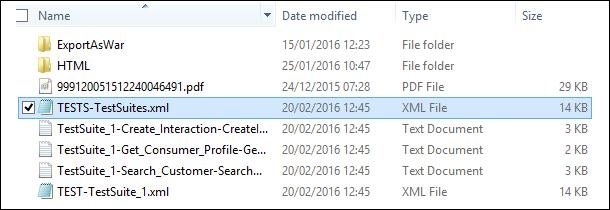
Now we have two XML files: one specific to a test suite and the other to the project. If your test project has multiple test suites you can pass the TESTS-TestSuites.xml in your build.xml file.
So now we know how to generate a more structured report in SoapUI, but there is still one challenge to face, which is auditability.
If we need to track the result of the old test runs that were done then we don't have a mechanism yet, since in the current structure the new report data always overwrites the old one.
So, to achieve auditability we have another build.xml, extending the previous build.xml, that will provide you a better structure of reports and auditability:
<project name="Project-Dev" default="testreport" basedir=".">
  <target name="soapui">
    <tstamp>
      <format property="timestamp" pattern="yyyyMMddHHmmss"/>
    </tstamp>
    <exec dir="." executable="C:/Program Files/SmartBear/SoapUI-5.2.1/bin/testrunner.bat">
    <arg line= "-j -f 'C:/Users/pnandan/Desktop/Analysis/NewFolder' 'C:/Users/pnandan/Desktop/Test/Pranai/Production.xml'"/>
    </exec>
  </target>
  <target name = "testreport" depends ="soapui">
    <junitreport todir="C:/Users/pnandan/Desktop/Analysis/NewFolder">
      <fileset dir="C:/Users/pnandan/Desktop/Analysis/NewFolder">
        <include name="TEST-TestSuite_1.xml"/>
      </fileset>
      <report todir="C:/Users/pnandan/Desktop/Analysis/NewFolder/HTML"
         styledir="C:/Testing/apache-ant-1.9.6/etc"
         format="noframes">
      </report>
    </junitreport>
    <move file="C:/Users/pnandan/Desktop/Analysis/NewFolder/HTML/junit-noframes.html" tofile="C:/Users/pnandan/Desktop/Analysis/NewFolder/HTML/soapUIResults/soapUIResults-${timestamp}.html"/>
  </target>
</project>
Now here, in the preceding build.xml, we are consolidating the results in a single page and using the timestamp feature to name the report by the timestamp, so that you can trace your test results history. The changes from the previous build.xml are highlighted.
So let's have a look at the new structure of the reports and the report itself:

As you can see, the names of the report end with the timestamp by which you can easily recognize the last runs and also compare them as.
Folder structure:
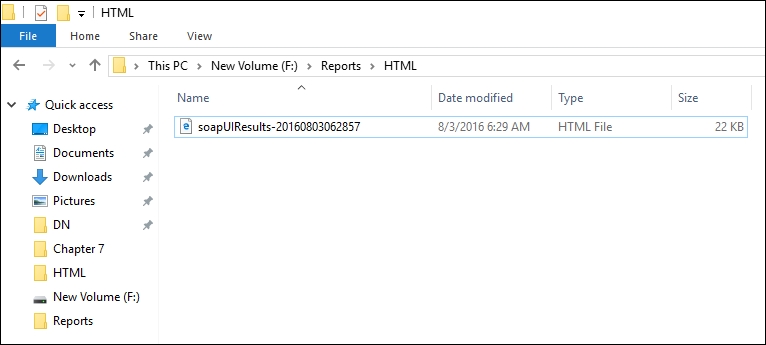
The new folder structure contains the new folder soapUIResults that has the new reports format and all the reports of the last runs.
New report:
So as you can see, we no longer have a drill down report; a single page tells us about the status of the tests.
E-mail notification:
Well, since now we know how to generate a report, we would like to send automatic notifications to the stakeholders to the e-mail with the reports attached, so let's see how we can achieve that.
For e-mail notification we need to use Javamail.jar and place it in the following path: C:Testingapache-ant-1.9.6lib#
Now when you have done that, we can proceed with the build.xml file:
<target description="Generates and send junit test reports" name="send-report">
  <mail mailhost="your mail host" mailport="your mail host port" password="your password" ssl="true" subject="Test build" user="your email id">
     <from address="[email protected]"></from>
     <replyto address="SIT @gmail.com"></replyto>
     <to address="SIT @gmail.com"></to>
     <message>The Test Run has been completed</message>
     <attachments>
       <fileset dir="attachment directory path">
          <include name="**/*.zip"></include>
      </fileset>
     </attachments>
  </mail>
</target>
When combined with the build.xml for execution of test cases and report generation, this functionality will add a cherry on the cake and send you automated reports each time the tests are triggered.
So the next question is how do we combine them together?
Well, one way to do that would be by clubbing both the build.xml into a single build, but that would be unstructured. A better way would be to create a better-structured approach. So for this specific purpose we can create a BAT file that will be used for two purposes:
- To run the
build.xmlfor execution and report generation - To run the
build.xmlfor sending the e-mail with the report attached
So here is your batch file to do that:
set Script=C:\SOAP_Test
   cd %Script%
 call ant -f  Build.xml
set Script=C:\mfg
  %progdrive%
 cd %Script%

 call ant -f Build.xml
 pause(100000000000000)
A deliberate pause is given, so that the message that the e-mail is being delivered is displayed for a while on the screen.
This script can be further enhanced to your requirements.
To run this script you just need to click on it.

We often see situations where we need to frequently target our tests on different environments such as staging, prod, pre prod, and QA.
We have two ways to do it. Let's discuss it:
Strategy 1:
- Put the environment variable into a spreadsheet
- Load the environment variable in the properties folder of SoapUI
- Use a regular expression to parameterize the end point URL
With this first technique configured, you just need to change the environment in the Excel sheet and the test will run on the specific environment.
We have already have seen how to achieve Step1 and 2 (data upload from Excel Groovy script). Now here is an example of how to construct a regular expression to parameterize a test:
Creating a property at project level:
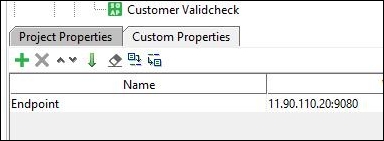
Now once the property is created you can pass a regular expression like this:
${#Project#Endpoint} to the endpoint URL
The endpoint would look like: http://${#Project#Endpoint}/Test/Test1/services/HTTP.
This is an effective way of achieving dynamic end point validation.
Strategy 2:
Another way of doing it is through Groovy script. If you want to use Groovy script to do this please find it following:
import com.eviware.soapui.model.*
import com.eviware.soapui.model.testsuite.Assertable
import com.eviware.soapui.support.XmlHolder
import java.io.File;
import java.util.*;
import jxl.write.*
import jxl.*
import com.eviware.soapui.support.XmlHolder
import com.eviware.soapui.model.*
import com.eviware.soapui.model.testsuite.Assertable
import com.eviware.soapui.support.XmlHolder
def groovyUtils = new com.eviware.soapui.support.GroovyUtils( context )
import java.io.File;

def regLogger = org.apache.log4j.Logger.getLogger("RegressionTestLoger");

def properties = new java.util.Properties();
def environment = context.expand( '${#TestSuite#Environment}' )
def myEndpoint = environment

//def myEndpoint = "http://10.10.101.1/myApplicationAPI/version2.1/service.svc"
def project = context.testCase.testSuite.project
 testSuiteList = project.getTestSuites()
 text = "~"
 testSuiteList.each
 {
 testSuite = project.getTestSuiteByName(it.key)
 testCaseList = testSuite.getTestCases()
 log.info " ${text*5} TestSuite :: $testSuite.name"
 testCaseList.each
  {
  testCase = testSuite.getTestCaseByName(it.key)
  log.info " ${text*5} Testcase :: $testCase.name"

  wsdlTestSteps = testCase.getTestStepsOfType( com.eviware.soapui.impl.wsdl.teststeps.WsdlTestRequestStep.class )
  wsdlTestSteps.each
   {

   it.properties['Endpoint'].value = myEndpoint
   }
  }
 }
log.info "All the endpoints are now : $Endpoint desired"
The preceding scripts works by taking in the endpoint value stored at the test case level as their input and setting the endpoint of all the test cases in the corresponding test suite to the desired end point.
We have already discussed this in the previous chapters, so to recap what we have discussed here is a checklist:
- Property content assertions
- Compliance, status and standards
- SLA
- JMS
- Security
- Database assertions (in the current chapter we have seen examples of these)
So the only assertion that's left is script assertion where we need to write scripts to verify certain validations.
Let's take an example:
Example 1: Consider an application where a request once triggered by SoapUI now hits multiple subsystems. You want to validate whether the request you sent hits certain domains at the backend or not, which is stored in the database:-
Here is an example:
import groovy.sql.Sql;
import java.util.regex.Matcher;
import java.util.regex.Pattern;
import com.eviware.soapui.model.*
import com.eviware.soapui.model.testsuite.Assertable
import org.junit.Assert.*;
import com.eviware.soapui.support.XmlHolder
import java.io.File; import java.util.*;
def regLogger = org.apache.log4j.Logger.getLogger("RegressionTestLoger");
def groovyUtils = new com.eviware.soapui.support.GroovyUtils( context )
def properties = new java.util.Properties();

int x = 1
int y = 0

def sql=groovy.sql.Sql.newInstance("jdbc:oracle:thin:@17.239.192.134:2296:DAEH","app_eai", "123", "oracle.jdbc.driver.OracleDriver")

def data =sql.rows("SELECT Distinct DOMAIN FROM EH_TRACE_LOG WHERE EVENT_LOCAL_ID=" + Prop + "")  // Prop is unique Identifier
testRunner.testCase.setPropertyValue("ActualDomainHit",data.toString());
def Prop =testRunner.testCase.getPropertyValue("MSSIDtobeusedfordb");


def Expected=testRunner.testCase.getPropertyValue("ExpectedDomainHit")
def Actual=testRunner.testCase.getPropertyValue("ActualDomainHit")

assert Actual =~ Expected
In this script we are validating whether the backend domains that should be hit by a particular request are hit or not. We are storing the results to the database as an ActualDomainHit and we are comparing it against the expected values
We usually want to validate the data in real time with the expected values. To do that, SoapUI provides us with an XPath assertion and an XQuery assertion, but if you want to do it with help of Groovy script, that is possible as well. The following is an example of how to achieve that in real time:
import com.eviware.soapui.support.XmlHolder
import com.eviware.soapui.model.*
import com.eviware.soapui.model.testsuite.Assertable
import com.eviware.soapui.support.XmlHolder
import java.io.File;
import java.util.*;
import jxl.write.*
import jxl.*
import com.eviware.soapui.support.XmlHolder
import com.eviware.soapui.model.testsuite.Assertable
import com.eviware.soapui.support.XmlHolder
import java.io.File;
import com.eviware.soapui.support.*;
import java.util.*;
import java.lang.*;
def groovyUtils = new com.eviware.soapui.support.GroovyUtils( context )
def project = context.testCase.testSuite.project
def holder = groovyUtils.getXmlHolder( "getSROrderData 02#Response" )
holder.namespaces["ProvTypes"] = "http://xml.comcast.com/provisioning_/types"
holder.namespaces["CSCTypes"] = "http://xml.comcast.com/common/types"
holder.namespaces["ProvServices"] = "http://xml.comcast.com/provisioning_/services"
def L=testRunner.testCase.getPropertyValue("productIDHSD")
def ProvisionStatus = holder.getNodeValue("//ProvServices:SubmitProvisioning[1]/ProvServices:ProvisioningReqType[1]/ProvTypes:serviceRequestCustomerService[1]/ProvTypes:serviceRequestCustomerService[1]/ProvisionStatus/text()")
def NewOrderStatus =holder.getNodeValue("//ProvServices:SubmitProvisioning[1]/ProvServices:ProvisioningReqType[1]/ProvTypes:serviceRequestCustomerService[1]/ProvTypes:serviceRequestCustomerService[1]/InstallStatus[1]/text()")
if (ProvisionStatus==Pass && NewOrderStatus =="SUCCESS!")
{
testRunner.testCase.setPropertyValue("New Install Status scenario","Passed")
testRunner.testCase.setPropertyValue("scenario",m)
}
else
{
testRunner.testCase.setPropertyValue("New Install Status scenario","Failed")
}
The previous script is used to validate the response data for two values:
ProvisionStatusNewOrderStatus
If the status is success for both fields, it signifies that the request was successful and hence we can mark the test case as passed; otherwise we can mark the test case as failed.
Assertions are the most powerful weapon of software automation testers, and we should list down the assertion types before designing any automation framework or planning for automation in the project. This gives you a foresight of things and you can plan as per you needs.
Well this brings us to the end of the test automation framework design utilities section, but before we close it, would like to share some sample script which can be handy while you test automate your applications:
Running a test case using a Groovy script:
def testStep = testRunner.testCase.testSteps['Test Step name1']
for (count in 0..< 2)
{
testStep.run( testRunner, context)
}
def testStep1 = testRunner.testCase.testSteps['Test Step name2']

for (count1 in 0..< 2)

{testStep1.run( testRunner, context)

}

def testStep2 = testRunner.testCase.testSteps['Test Step name3']

for (count2 in 0..< 2)

{testStep2.run( testRunner, context)

}
Since we are ready with the utilities we can design the test automation framework.
Test automation framework design hybrid
Things required:
- Test cases in an Excel sheet and test case creation in SoapUI
- Data set
- Validations
- Report
- Unique data
Requirement 1: Test cases in an Excel sheet and test case creation
|
TC_ID |
Test case name |
Description |
Result |
Candidate for automation |
Automated |
|---|---|---|---|---|---|
|
TC_01 |
Order orchestration for a new order |
Verify that Successful response is returned when valid data is passed in the request |
Pass |
Yes |
In progress |
So now we need to have the name of the test case in the Excel sheet the same as the name of the automated test case in SoapUI
You can do that manually while creating the test case, or you can improvise by writing a Groovy script by accessing the name of the test case by using following code:
Script for creating a test project using Groovy script:
import com.eviware.soapui.impl.wsdl.teststeps.registry.GroovyScriptStepFactory
suite = context.testCase.testSuite.project.addNewTestSuite("TestAutomationDemo")
tc = suite.addNewTestCase("Order Orchestration for a New order ")
gs = tc.addTestStep( GroovyScriptStepFactory.GROOVY_TYPE, "ali's GroovyScript" )
gs.properties["script"].value = 'log.info('hello world')'
context.testCase.testSuite.project.save()
This script can further be utilized with the test data import script to automatically create all the test cases in SoapUI. Following are the steps to do that:
- Import the name of the test cases with the test case ID using the utility of test data import.
- Loop the script for test case creation for the number of test cases.
This will then create all your dummy test cases in SoapUI.
Requirement 2: Test data
Now let's move to the second most important feature which is test data. We can not only import test data but also any initialization values like database passwords, Endpoint, and important credentials, so we will break this into two categories
- Test initialization data
- Test request data
Both of these should be maintained in an Excel sheet and can be imported using test data import script, however below an example for test initialization script:
import com.eviware.soapui.model.*
import com.eviware.soapui.model.testsuite.Assertable
import com.eviware.soapui.support.XmlHolder
import java.io.File;
import java.util.*;
import jxl.write.*
import jxl.*
def regLogger = org.apache.log4j.Logger.getLogger("RegressionTestLoger");
def groovyUtils = new com.eviware.soapui.support.GroovyUtils( context )
def properties = new java.util.Properties();


Workbook workbook = Workbook.getWorkbook(new File("D:\TestinitializationProperties.xls"))
for (count in 0..< 1)
{
Sheet sheet = workbook.getSheet(1)
Cell a1 = sheet.getCell(0,count)
String  s1 = a1.getContents();
Cell b2 = sheet.getCell(1,count)
String  s7 = b2.getContents();

testRunner.testCase.testSuite.setPropertyValue(s1,s7);
}
So now we know how to load the test data and initialization values.
Requirement 3: Validations
Validation script can be created previously if we understand the scope of automation and architecture of the application. Here is an example of how dummy validation scripts can be created:
Do you remember the script that we created for validations? I have just modified it to make it generic
def holder = groovyUtils.getXmlHolder( "Name of the step #Response" )
holder.namespaces["namespace1"] = "value1"
holder.namespaces["namespace2"] = "value2"
holder.namespaces["namespace3"] = "value3"
def ProvisionStatus = holder.getNodeValue("Xpath")
def NewOrderStatus =holder.getNodeValue("Xpath"))
if (ProvisionStatus== "expected value" && NewOrderStatus ==" expected value ")
{
testRunner.testCase.setPropertyValue("New Install Status scenario","Passed")
testRunner.testCase.setPropertyValue("scenario",m)
}
else
{
testRunner.testCase.setPropertyValue("New Install Status scenario","Failed")
}
So now we see that we can create reusable script for validations.
Requirement 4: Reporting
As we discussed previously, we can always generate the report using the scripts .We have seen in previous sections of this chapter the use of Ant and how to generate reports, so this should now be easy for the readers of this book to create reports for their automation framework.
Requirement 5: Unique data
In certain cases, a situation arises where each time the test request is run we need to send unique data in one or other of the parameters. For this specific purpose you can use the random number generation script and use it for your test data creation:
def UniqueID;
def regLogger = org.apache.log4j.Logger.getLogger("RegressionTestLoger");
try{
synchronized(log)
{
    UniqueID = (testRunner.testCase.testSuite.getPropertyValue("UniqueID")).toLong()+1000;
    testRunner.testCase.testSuite.setPropertyValue("UniqueID",UniqueID.toString ());
    testRunner.testCase.setPropertyValue("UniqueID",UniqueID.toString ());
   regLogger.info("* UniqueID: " + UniqueID + " , Case: " + testRunner.testCase.name);
}
}catch(Exception e){
log.info(Error+e);
}
With this we come to the end of creating a test automation framework, which has flavors of keyword, as well as a data-driven framework and hence is a hybrid.
I would recommend that you create these scripts as a SoapUI project and as a master test case so whenever you are required to reuse your script you can just drag and drop it. This will cut your test automation creation time significantly.
The following screenshot that displays how you should configure your reusable test scripts:
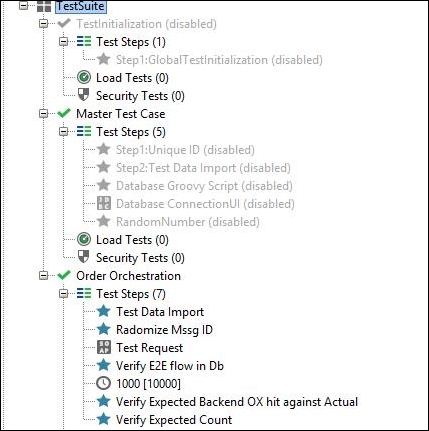
As you can see in the screenshot, we have a master test case and a test initialization test case as reusable scripts, and order orchestration as a real test case where we are reusing the scripts of the master test case and the test initialization.
Since we have now finished creating an end-to-end framework, let's have a look at its advantages:
- Data-driven testing: Provides a mechanism to parameterize test data having its data source as an Excel spreadsheet
- Connecting and querying databases easily: Provides a mechanism for integration with multiple databases like SQL Server, Oracle, DB2
- Integration with UI automation tools: Provides seamless integration with the rich and famous automation tool Selenium to address any multilayer testing needs, or capture and assert UI elements based on different UI technologies like GWT, ExtJS, JavaScript and JSP
- Auto-configuration of environments/endpoints: Provides a mechanism to change the endpoint of all the test cases in a test suite with a single click in order to allow switching between multiple environments, for example, QA, staging, and production
- Dynamic data assertions: Asserts data based on input data passed
- Flexibility: Integrates with third-party systems like Hermes JMS and tools like Selenium and JUnit
- Reporting: Provides an enhanced HTML report with the history of reports tracked
And finally to conclude this chapter we come to the summary of it.