
We have seen how we can grade assignments by accessing the activities from within the main course screen. However, in Chapter 3, Adding Graded Activities, we also added a graded activity directly into the Gradebook. So, how do we grade this? We go into the Gradebook! Let's take a look:
- From the main course screen, go to the Grades area (navigate to Administration | Grades).
- Click on the Turn editing on button in the top-right corner of the screen.
- We will be able to add a grade directly into the graded item.
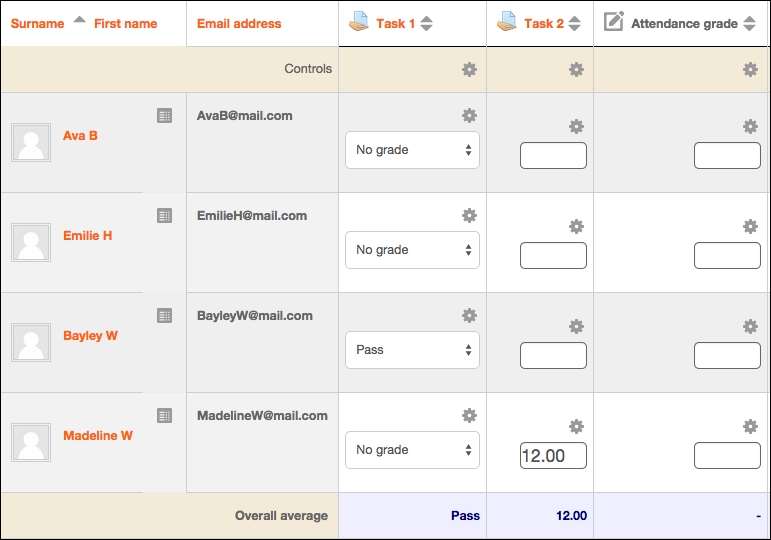
In the previous screenshot, you can see the Attendance grade option. This item was set up as a value grade. To add the grade, we type a number into the empty textbox. At the bottom of the screen, there is an Update button that saves any grades that we have added.
We can also use this grading method for any other type of graded activity within the Gradebook.
Turning editing on within the Grades area will allow us to grade any graded activity.

In the previous screenshot, we can see different types of grades. Task 1 is an example of an assignment that is graded with a scale and, therefore, quick grading provides a drop-down list that enables us to choose the grade we would like to award. Task 2 and Task 3, however, have been set as numerical grades, so we need to type the number into the grade box. Also, as part of Task 3, there are two columns that show you outcomes that are graded using a drop-down list that chooses a scale item.
After we have amended grades on this screen, we need to click on the Update button to save the grades.
There are a few things to consider when using quick grading:
- We cannot see the maximum grade when adding number grades.
- The marking guide and rubric-graded assignments cannot be marked via the quick grading option.
When using the quick grading option, we can choose to add quick feedback, but this option is not shown on the current screen. However, we can change some settings to enable this:
- Click on the My preferences tab, or click on Grader report under the My preferences heading.
- Scroll to the General section at the bottom of the page.
- Next to the Show quick feedback text, change the drop-down list to Yes.
- Click on the Save changes button at the bottom of the page.
The quick feedback option is limited to adding text, so if a lot of text is required, it is recommended that the individual grading screen be used.