
Within the Grade section, there are three types of grading methods, and so far, we have only used the default Simple direct grading option. However, there are two other types of grading methods: Marking guide and Rubric.
The simple direct grading option enables us to choose the grade options (such as number or a scale), and the teacher adds the grade that is awarded to the student. The alternative grading methods use a very different grading process. The teacher does not select the final overall grade but grades individual criteria instead, and the score for each of these is added together to create the final grade. When creating an assignment that uses Marking guide or Rubric, we need to identify the criteria that will be used to assess the assignment.
The marking guide's grading method allows us to add criteria and identify a top grade for each piece of criteria. When grading the assignment, the teacher will choose the grade to be awarded and can also add specific feedback. We will be setting up three criteria, two with a top mark of 5 and one with a top mark of 10.
If the student is graded with the top marks for each of the three criteria, they will receive the maximum grade of twenty. Let's add this together:
- Click on the Turn editing on button.
- Click on Add an activity or resource.
- Click on Assignment and then click on Add.
- In the Assignment name box, type in the name of the assignment (such as
Assignment 4). - In the Description box, provide the assignment details.
- Within the Grades section, navigate to Grade |Type and set it to Point and ensure that Maximum points is set to
20. Change Grading method to Marking guide using the drop-down list.Note
Please note that the criteria does not need to add up to the maximum grade given for the assignment, as Moodle will convert the final grade received for the assignment to a decimal (by adding together the grade awarded for each criterion and dividing this by 100). This will be multiplied by the maximum grade set for the assignment. This is a normalization process that is explained in much more detail in Chapter 5, Using Calculations.
- Scroll to the bottom of the screen and click on Save and display.
The next step is to set up the marking guide, where the screen will look like the following screenshot:
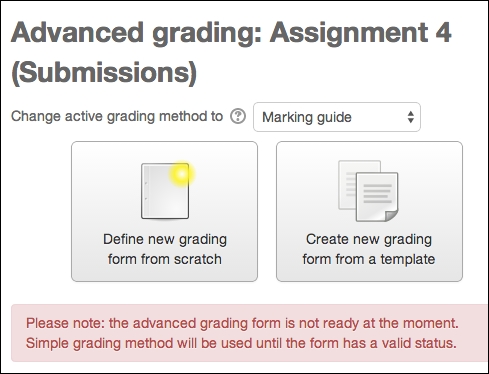
The previous screenshot lets us know that the advanced grading form is not yet ready and we have a choice between Define a new grading form from scratch and Create new grading from a template. If no marking guide is created at this stage, the assignment will make use of the standard direct grading method when the assignment is assessed.
- Select Define new grading form from scratch.
- After opening the grading form, we need to add in a name for the marking guide and description. Add some information to these boxes (for the following example, we can name the marking guide Presentation and the description Present your ideas for a research project).
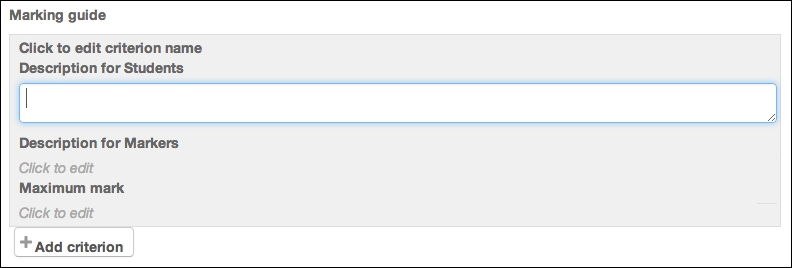
- The next section is the actual Marking guide setup area, which has a place to add the first criterion. There are three elements for each criterion:
- Description for Students: This is the information that a student will see in order to find out the assignment criteria. This will only be shown if the option for students to view the criteria is turned on.
- Description for Markers: This information will be seen by teachers when they are grading the work and will help the teacher identify the grade to be awarded to the student.
- Maximum mark: A teacher can choose the maximum grade possible for this criteria. When grading, the teacher can choose any grade from zero to this maximum number.
- Under the Marking guide title, click on the Click to edit criterion name and add the text
Planning. - Under the Description for Students title, click on Click to edit. Add the this to the box:
The presentation has been planned to include an initial overview plus as outline of each type of research. - Within the Description for Markers section, click on the Click to edit text and add:
To gain top marks the overview must be very clear including the research question. There needs to be at least three types of research. There are five marks possible and should be based on 1 point for each item (clear overview, research question, three types of research). - Finally, click on Click to edit under the Maximum mark title and add in the number
5. We now need to add some more criteria. Click on the Add criterion button and repeat the preceding process for the following criteria:Criterion name
Description for students
Description for markers
Maximum mark
Presentation
The presentation is clearly and confidently presented
The student presented confidently with evidence that he/she planned and practiced the presentation.
The student presented without reading a script.
The presentation aids were appropriate, clear, and had the information required for the project.
10
Questions
The questions are answered at end of the presentation
The maximum points should be awarded if students were able to answer questions confidently, displaying understanding of their project.
Lower points will be awarded if students were required to use their notes to answer questions or if they were unable to answer questions.
5
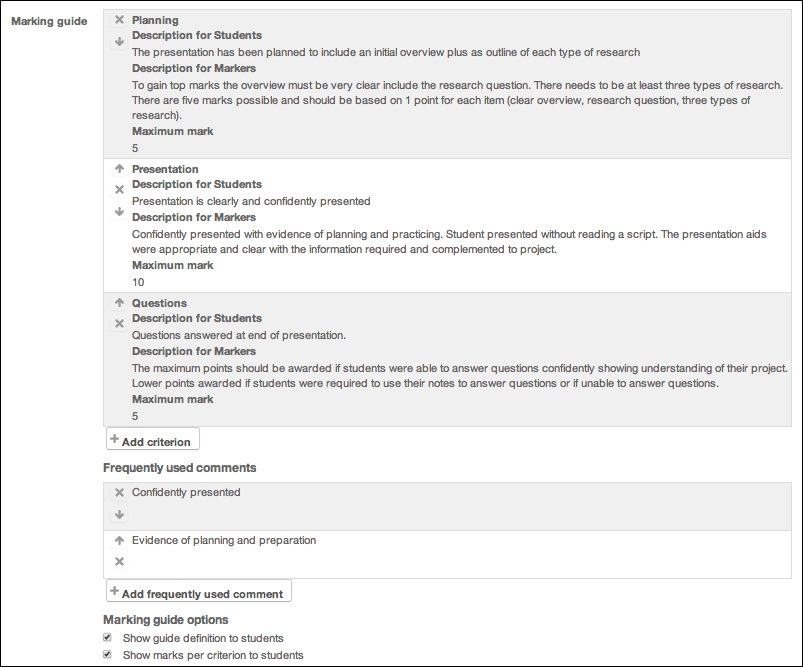
- The next section to set up a marking guide is the Frequently used comments area where we can add statements that can be used when grading the assignment. Click on Add frequently used comment and type in
Confidently presentedandEvidence of planning and preparation. - Finally, we have two marking guide options that can be turned on and off using the tick boxes. Keep both of these turned on.
Your completed marking guide should look like this:
- Click on Save marking guide and make it ready.
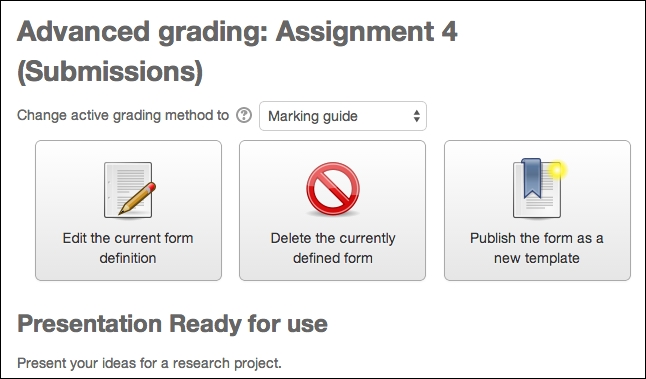
- The next screen will indicate that the marking guide is now ready for use. You can still click on Edit the Current form definition or Delete the currently defined form to start a new form or to revert to the simple direct grading method. You can also click on Publish this form as a new template so that it can be used for other assignments and in other courses.
We will look at how to grade work using the marking guide in Chapter 4, Assigning Grades.
The second method of alternative grading is called Rubrics. Rubrics allow a set of criteria to be set up for the assessment along with descriptors that outline the different levels at which the criteria are met. Each descriptor has a value that enables Moodle to calculate a final grade for the assessment based on the criteria met. Rubrics are a more detailed version of the marking guide, and they make the grading process simple for the teacher and students.
When using the Rubric grading method, we will need to create a grading form in a similar way in order to create the marking guide. We will set up a rubric assignment together:
- Click on Turn editing on button.
- Click on Add an activity or resource.
- Click on Assignment and then click on Add.
- In the Assignment name box, type in the name of the assignment (such as
Assignment 5). - In the Description box, provide the assignment details as
Core criteria of an assignment. - Within the Grades section navigate to Grade | Type and set it to Point and ensure that Maximum points is set to
30. Change Grading method to Rubric. - Scroll to the bottom of the screen and click on Save and display. You will see an advanced grading screen like the one shown in the following screenshot:
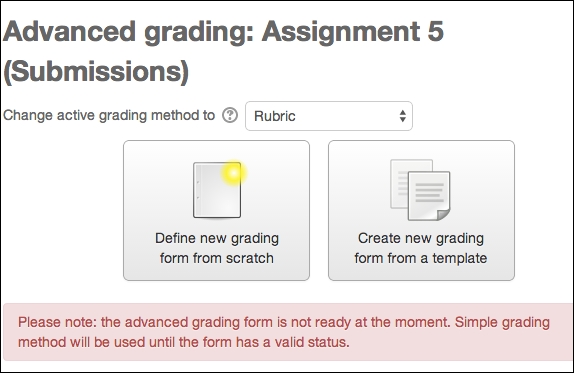
- From this screen, we will choose the Define new grading form from scratch option. However, note that you can also select Create new grading form from a template. This enables you to use grading forms that you have already created in this or other courses or use standard (site-wide) forms created on the Moodle site.
- As this is the first form we have created, click on Define new grading form from scratch. The following screenshot will appear:
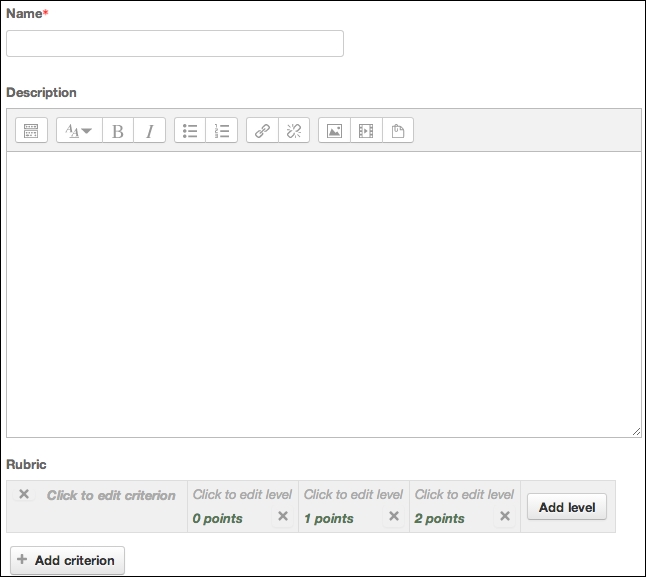
- In the Name box, type in the name for this set of rubric criteria. For this example, we will call it
Core assignment criteria. You can also add a description to the Description box (this is useful when sharing rubrics or searching for your own rubrics in order to use them as templates).
We will be completing the rubric criterion and level boxes, but first let's find out how rubrics are used and what these options are.
Within a rubric, there is at least one criterion, and each criterion has specific levels of grading. The criterion is an element of the assignment that needs to be met. The levels are the extent to which this criterion has been met. Statements are added and are used to assess the work, and when grading we can choose the relevant statement based on the extent to which this criterion has been met. For assignments that have multiple criteria, the points awarded for each criterion are added together to create the final grade.
The default setting within a rubric is for one criterion, with three points levels ranging from zero to two points. Additional criterion as well as additional grading levels for each criterion can be added (the number of grading levels can also be removed so that there can be fewer than three grading levels). The points awarded for each level can also be amended.
We will be setting up three criteria, each with a top grade of 10. If the student is graded the top marks for each of the three criteria, they will receive the top grade of 30 (we set 30 as the maximum grade when we added the assignment).
Note
As with the marking guide, the criteria does not need to always add up to the maximum grade given for the assignment, as a normalization process will convert the grade. This will be explained in Chapter 5, Using Calculations.
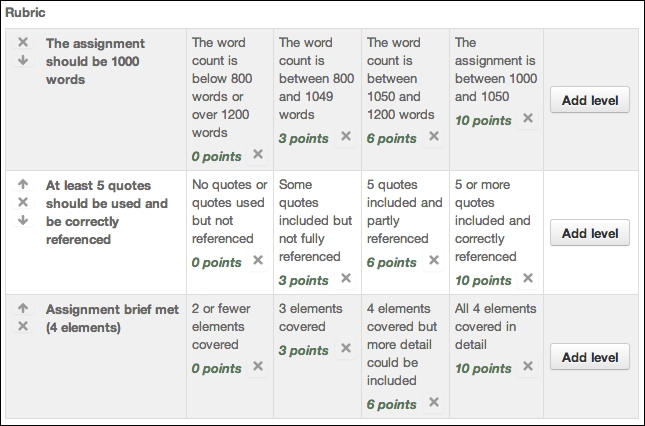
You can see the criteria we will be using in the following table; we will be using the same point system for each level in this example:
|
Criterion |
0 points |
3 points |
6 points |
10 points |
|---|---|---|---|---|
|
The assignment should be 1,000 words |
The word count is below 800 words or over 1,200 words |
The word count is between 800 and 1,049 words |
The word count is between 1,050 and 1,200 words |
The assignment is between 1,000 and 1,050 words |
|
At least 5 quotes should be used and be correctly referenced |
No quotes used or quotes used but not referenced |
Some quotes included but not fully referenced |
5 quotes included and partly referenced |
5 or more quotes included and correctly referenced |
|
The assignment brief met (4 elements) |
2 or fewer elements covered |
3 elements covered |
4 elements covered but more detail could be included |
All 4 elements covered in detail |
Let's add these criteria and levels to the course. We will add the first one together:
- Click on the gray Click to edit criterion text to add the criteria detail.
- Type in the first criterion (
The assignment should be 1000 words). You can make the text box larger by holding your cursor in the bottom-right section of the box and dragging the box to make it bigger. - Click on the gray Click to edit level text in the box on the right-hand side of the criterion we have just added. This is where we need to type the statement for the zero points level shown in the preceding table (
The word count is below 800 words or over 1200 words). Make sure the points box reads0. - Click on the next gray Click to edit level text in the box (currently, the
1points level). Type in the three points level statement from the table. Change the points number to3. - Click on the last available level box and add in the six points statement and change the number of points to
6. - We have now run out of the default number of levels but we still need to add the ten points level. Click on the Add level button on the right-hand side of the current level that we are working on.
- Add in the level statement for ten points and change the points to
10. - Click anywhere on the screen to finalize this text.
- We now need to add another line for the next criterion. Under the current criterion, there is a Add criterion button. Click on this and an additional row to add another criterion and the level statements and points will appear. Use the preceding table to complete this rubric. Once completed, your rubric table should look like this:
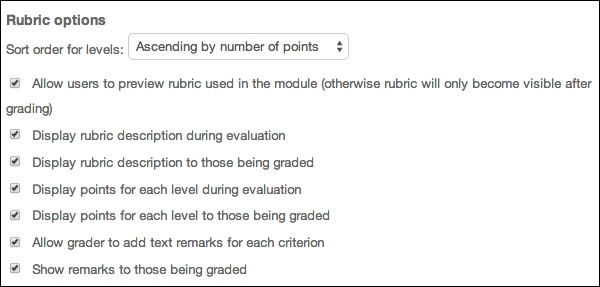
- Underneath the criteria section of the rubric creation page, there are a number of options that show you how the rubric can be used. The text explains the options, and these are turned on by adding a tick and turned off by removing the tick. Keep them all turned on, as shown in the following screenshot:
- Scroll to the bottom of the screen and click on Save rubric and make it ready.
- The rubric is now ready for use when grading the assignment. We will look at how to grade this in the next chapter.
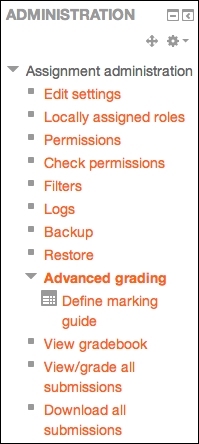
- If you want to edit your rubric, you will need to use the Administration block when you are viewing the assignment on the screen. Click on Advanced grading and then choose Define rubric, which will take you to the Rubric editing screen.