3
Preparing a Character Rig in Photoshop
In the previous chapter, we imported a .svg file into Character Animator. While the app reads this file format, it’s not the most ideal way to work. What’s recommended is importing .psd files. Character Animator can read these files directly, bringing in not only the layers but also any groups and special tags as well.
It’s also important to have access to an application that can read and edit these files. Luckily, if you have a subscription to Adobe Creative Cloud, you have access to Photoshop, which is what we will use in this chapter. Here is what we will cover:
- Designing your character
- Streamlining and renaming layers
- Organizing with normal and independent groups
- Putting the hair in its own layer
- Cleaning up PSD layers
Be sure to have Character Animator and Photoshop (or an app that can work with .psd files) ready to go. Once you’re ready, we can begin!
Designing your character
This book will not go into the art of character design in depth. It’s a vast topic that goes beyond what we’re covering in this book, but there are some simple guidelines to follow if you do plan to design your own characters. Even if you have someone else design your characters, you may find that their way of dealing with layers doesn’t quite fit the way Character Animator thinks. That means you may have to go in and adjust the layout before you can move over to the rigging phase.
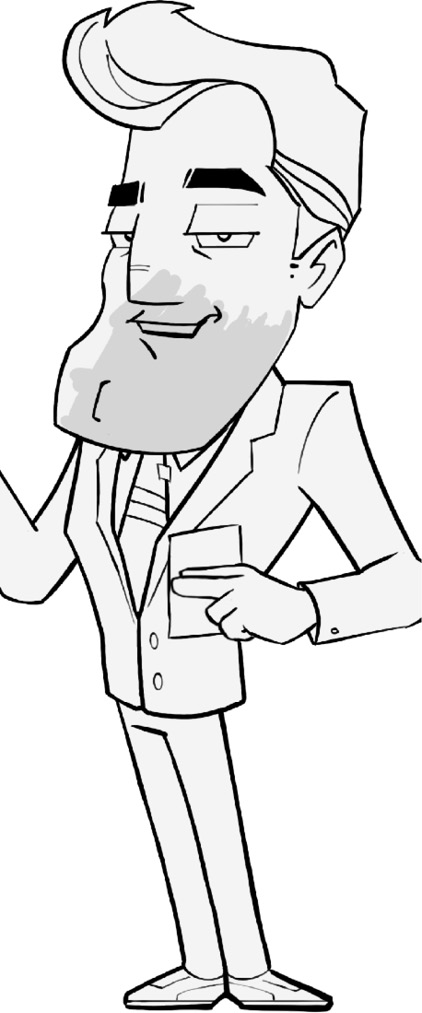
Figure 3.1: A concept sketch of the character we will be animating
If you decide to design your own character, here are some tips to keep in mind:
- Draw all facial features on their own layers. This includes eyes, eyelids, and mouth poses.
- Create groups or folders for layers meant to trigger an animation. This includes things such as mouth poses, eye blinks, head turns, and hand poses.
- You can create toggle-able props or parts of the character, such as glasses, clothes, hairstyles, and so forth.
- Keep limbs separate and kept to one layer each.
- Naming your layers a certain way will help Character Animator interpret how parts of the rig react. We will see this soon when we look at the book’s character .psd file.
- You can add physics to layers. So, if you want to allow fabric or hair to move, be sure to accommodate that when drawing.
- You can always look at the complete character .psd file in this book as a reference.
- We can add additional layers as long as names and order don’t conflict.
As you move through this chapter and work with the book’s character rigs, it should help develop an understanding of the art of character design.
Streamlining and renaming layers
Now is the time to look at our first character rig, Chaz the TV Host. Another artist designed this character, so we will need to go in and make sure the overall layer structure will work for our purposes.
You may find it easier to follow along with body_part_guide_ch3.pdf, which is included in the chapter’s exercise files. This PDF is a screenshot of the character fully assembled for this chapter.
Open the Chaz_Host_v1.psd file so we can begin looking over this character design. Again, we will use Photoshop for this process.

Figure 3.2: Chaz is a TV show host who knows how to captivate an audience
Chaz is not only incredibly handsome but he also has a pretty complex layer list. This is how the artist originally laid out the file.
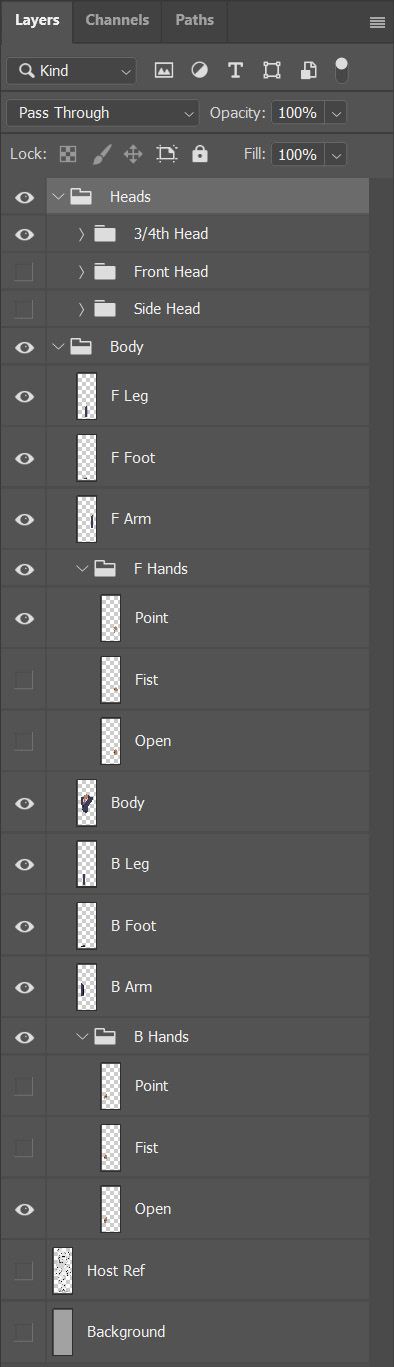
Figure 3.3: A preview of Chaz’s layers
When using some other animation apps, the layout would work just fine, but here, we’re going to need to do some streamlining to ensure this process goes as smoothly as possible when importing it into Character Animator.
Creating a character group
The first thing we are going to do is place the character inside its own group. Here’s how we’re going to do it:
- Select the Heads group by clicking on it once.
- Hold down the Shift key and click the bottom layer labeled Background.
- Right-click and choose Group from Layers... from the options list:

Figure 3.4: Along with Group from Layers..., we have other useful options too

Figure 3.5: The New Group from Layers dialog box
You should now see a new group containing all other character layers:
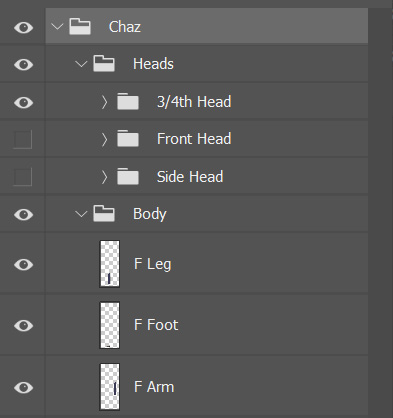
Figure 3.6: The Chaz group will contain all the character layers
With this group in place, we can go through and clean up any layers we don’t need.
Removing unneeded layers
Depending on your character’s design, there may be some layers left over. We can simplify our layer list and overall make rigging easier. With Chaz, the two bottom layers, Host Ref and Background, are unneeded:
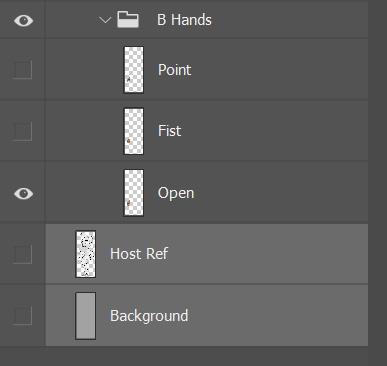
Figure 3.7: Host Ref and Background are currently hidden and not needed
The Host Ref and Background layers are leftovers from the design process. Let’s remove these layers:
- Click once on Host Ref.
- Hold down the Shift key and click Background.
- Press the Delete key on your keyboard (or click the trash can icon in the Layers panel):
Figure 3.8: The trash can icon is located on the bottom right of the Layers panel
Depending on the design of your characters, you may find that other layers are unneeded, but these two are the only ones for this rig. With that taken care of, we can focus on the next task.
Merging and renaming the limbs
It’s best to make sure the limbs each sit on one layer – meaning that if you have separated an arm into two layers, let’s say a bicep and forearm, you’ll want to go in and merge those two layers.
Let’s look at Chaz for this example. In the Body group, you will see four layers making up the arms:
- F Bicep
- F Forearm
- B Bicep
- B Forearm
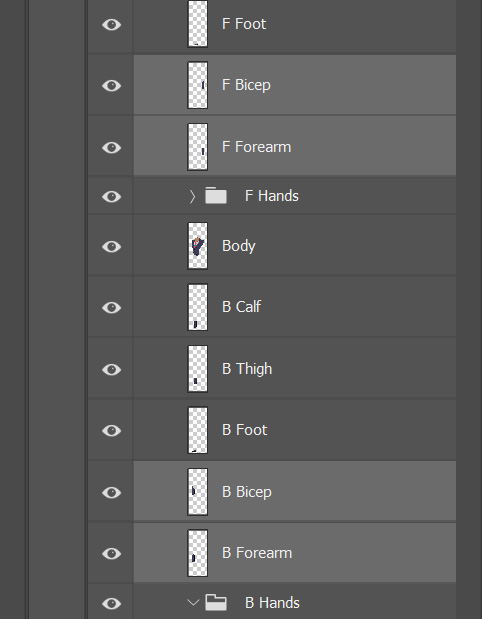
Figure 3.9: The arm layers
The layers labeled with F stand for the front while B is for the back. There are different ways you can label your layers to show order, such as left (L) or right (R). Since the body is a 3/4th view, it makes sense for us to use front and back labels. You will see this labeling with other layers as we continue to work.
The goal here is to merge the arm layers labeled F together and then do the same for B. We will start at the top of the layers list and work our way down. To do this, let’s see the following steps:
- Click on F Bicep.
- Hold down the Shift key.
- Click F Forearm.
- Right-click and choose Merge Layers from the list:
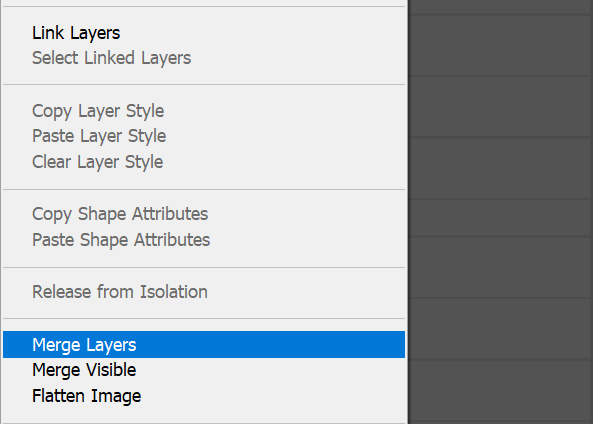
Figure 3.10: The menu when you right-click on a layer
You should now see a new layer combining the assets in each layer we selected. The layer will also adopt the name of the top layer from the merger. For us, that means the layer is now labeled F Bicep:
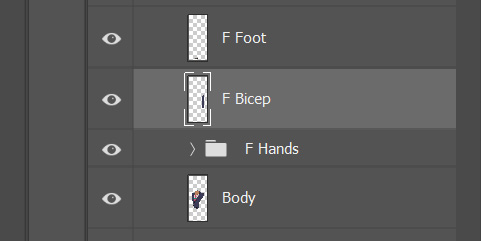
Figure 3.11: The two arm pieces are now one layer
Let’s make this a more accurate name for now so that it’s easier to identify. We will end up changing it again in the next section when we group items. To rename the layer, see the following:
- Double-click on the name of the layer and the name should highlight in blue (don’t double-click on the thumbnail of the layer or you’ll open the Layer Style panel).
- Rename the layer F Arm and hit Enter on your keyboard:
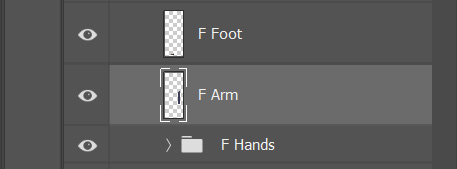
Figure 3.12: F Bicep changed to F Arm
You will now need to go in, merge the limbs, and rename them following the same steps. As a reminder, here’s what you’ll need to do:
- Merge B Bicep and B Forearm and rename it B Arm.
- Merge F Calf and F Thigh and rename it F Leg.
- Merge B Calf and B Thigh and rename it B Leg:
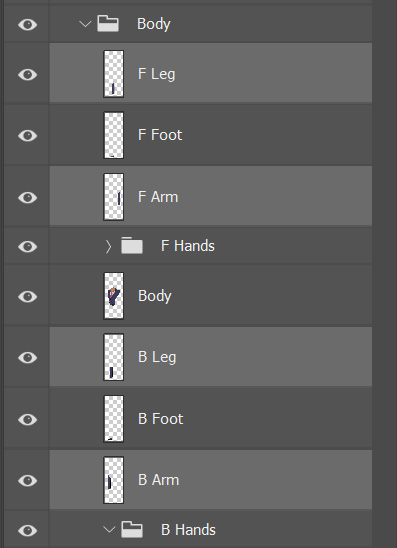
Figure 3.13: The limbs are now reduced to four layers
Once you have finished merging, we will need to create four separate groups for each limb. Not only will we be placing limbs in these folders but also the feet and hands as well. Here’s the easiest way to do this:
- Click F Leg, hold the Shift key, and click F Foot. This will select both layers:
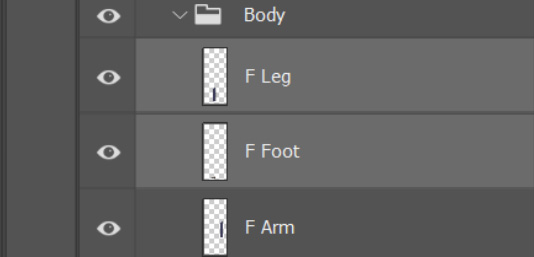
Figure 3.14: Legs and hands are separated
- Right-click on one of the selected layers and choose Group from Layers.
- A new panel will appear allowing us to name the new group. Choose F Leg and click OK:
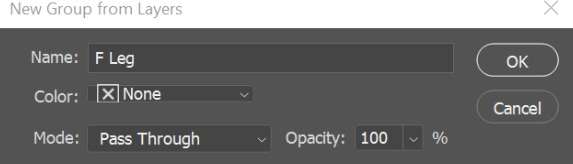
Figure 3.15: F Leg is an appropriate name for this group
- Repeat these steps for the remaining three limbs:
- Group F Arm and F Hands to create the new group, F Arm.
- Group B Leg and B Foot to create the new group, B Leg.
- Group B Arm and B Hands to create the new group, B Arm:
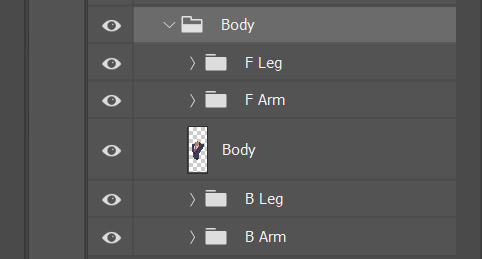
Figure 3.16: Four groups making up each limb
With those new groups in place, we can turn our attention toward the eyes.
Reorganizing the eye layers
If we look at the eyes, which are in the three head groups, you will find we have a few things going on. Let’s focus on the 3/4th Head group first. Be sure to press the arrow next to the group to expand the layers to see everything. Here are the elements that the artist included for the eyes:
- Whites of eyes
- Eyelids
- A blink phase
- Pupils
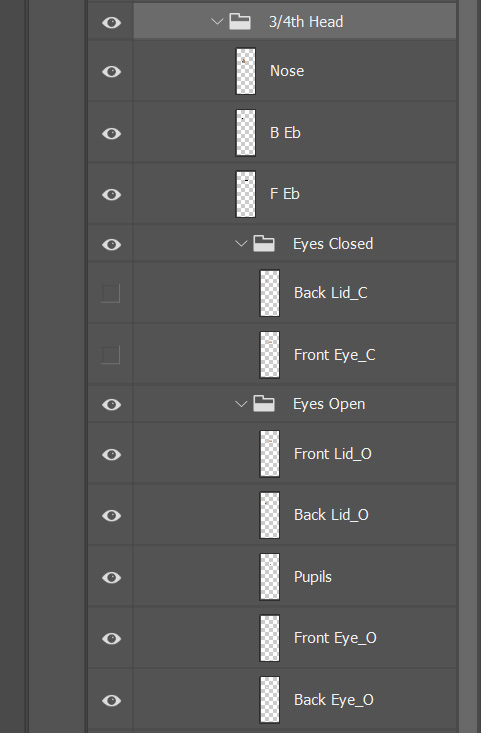
Figure 3.17: A preview of the original layer list for the ¾ Head
These layers live in two primary groups. This may be a good setup for other animation software, but Character Animator needs something a bit more streamlined to function properly.
Separating the pupils in the ¾ head phase
The artist has included both pupils on a single layer, but Character Animator can control each pupil separately. Plus, the software has an easier time understanding what the layers do when they’re separated.

Figure 3.18: The pupils are currently sharing one layer
- Click on the Pupils layer.
- Select the Rectangular Marquee Tool option (M on the keyboard):
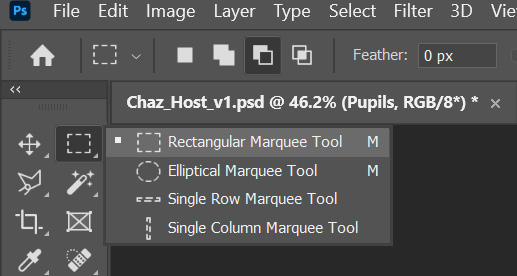
Figure 3.19: Holding down on the second tool grants you access to a variety of selection tools
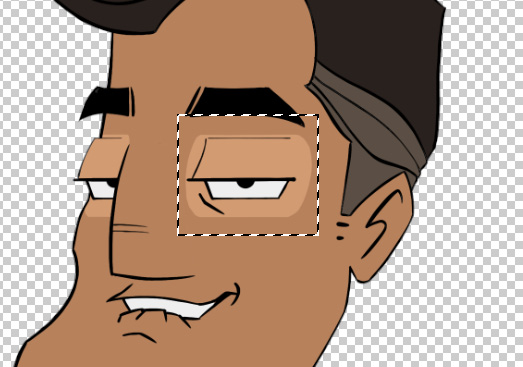
Figure 3.20: Selecting the entire area of the eye
- Cut the pupil out of the layer by using Ctrl + X (or ⌘ + X).
- Use Ctrl + Shift + V or ⌘ + Shift + V to Paste in Place.
This will remove the front pupil and place it in its own layer labeled Layer 1 in the same spot as it was before.
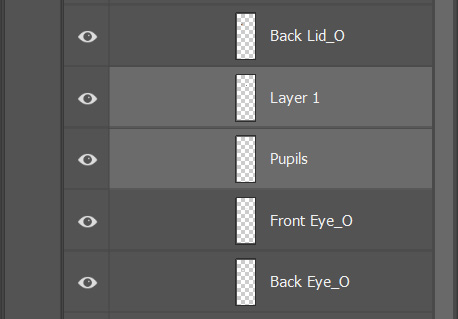
Figure 3.21: Layer 1 contains the newly pasted pupil
Note
There are two ways to paste in Photoshop. Paste will place the copied item in the center of the canvas while Paste in Place will place the item exactly where you had it before. That’s why we use Paste in Place here, as it saves time and is more accurate.
Finally, let’s rename the layers so they’re easier to identify. Let’s rename them as follows:
- Layer 1 to F Pupil
- Pupils to B Pupil
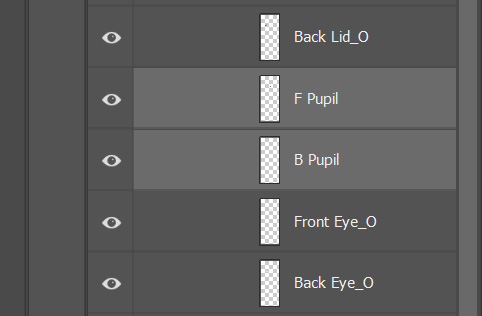
Figure 3.22: F Pupil and B Pupil are much easier to identify
With that complete, we can look at building a blink phase.
Correcting the 3/4th head blink phase
As with everything else we’ve covered, the blinking design is fine. It just requires some rearranging.

Figure 3.23: The original layout for the eyes in the ¾ head
Blinking is currently being simulated by overlaying lids on the eyes. Again, while sometimes effective, we need a different setup for Character Animator:
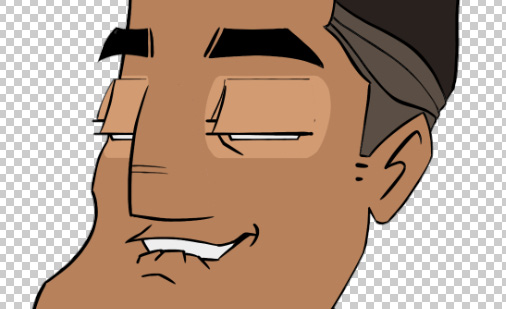
Figure 3.24: The blink layer overlays the open eyes with this design
As with the pupils, each closed eye will be on its own layer. To put this in working order, see the following:
- Locate Front Eye_O and Back Eye_O on the layers panel. They’re located under the Eyes Open group.
- Duplicate the layers in place by using Copy with Ctrl + C or ⌘ + C and Paste in Place with Ctrl + Shift + V or ⌘ + Shift + V:
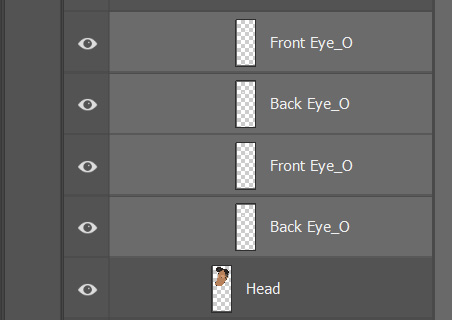
Figure 3.25: The duplicate eye layers
You should have two copies of each eye layer. Now, we want to take those lids that go over the whites of the eyes and combine them with these newly duplicated layers.
- Drag Front Eye_C, which is located in the Eyes_Closed folder, right above the first Front Eye_O layer listed.
- Drag Back Lid_C, also located in the Eyes Closed folder, above the first Back Eye_O layer listed:
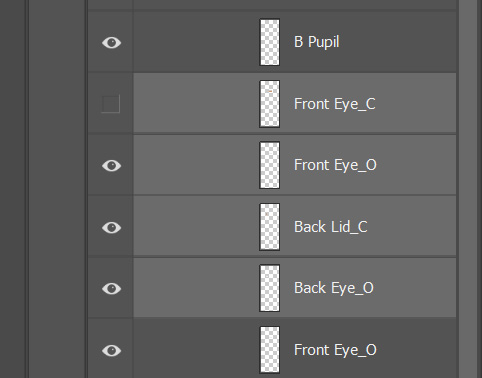
Figure 3.26: The eyebrow and eye layers properly lined up
- Select Front Eye_C and Front Eye_O, right-click, and choose Merge Layers.
- Rename the new layer F Blink.
- Select Back Lid_C and Back Eye_O, right-click, and choose Merge Layers.
- Rename the new layer B Blink.
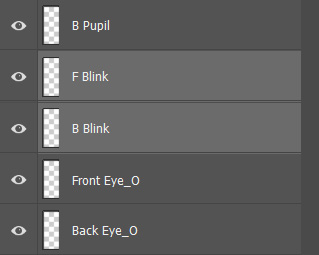
Figure 3.27: F Blink and B Blink after merging and renaming
With that, we now have two layers, each representing a blinking eye.
Note
When merging layers, always make sure they are all visible with Opacity set to 100%. If you merge an invisible or transparent layer with another, you will be unable to adjust after the fact.
Creating eyes for the front view
Now, we need to correct the eyes for the front view. This process will be similar to the previous one for correcting the 3/4th view blink and pupils. Here’s what we need to do:
- Collapse the ¾ Head group and hide it by clicking on the eye icon to the left of the layer.
- Make sure Front Head is visible and expanded so we can see its contents.
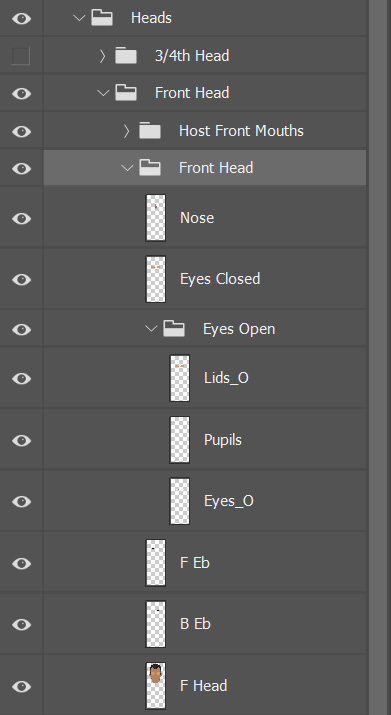
Figure 3.28: Front Head’s current contents
- Under Front Head is another folder with the same name, called Front Head. Let’s expand that folder and locate Eyes Closed.
- Select the left eye with the Rectangle Marquee Tool option (M).
- Use Ctrl + X or ⌘ + X to cut and Ctrl + Shift + V or ⌘ + Shift + V to paste in place, putting the left eye on its own layer.
- Rename the new layer L Blink and the original layer R Blink.
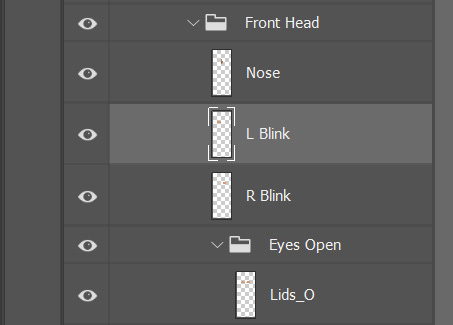
Figure 3.29: F Blink and B Blink after merging and renaming
- Under the Eyes Open group, we will find three layers: Lids_O, Pupils, and Eyes_O.
- Each of these will need to be separated into two layers using the same method as before:
- Select the left item on the layer.
- Cut and paste in place.
- Once this is complete, you should have six layers in the Eyes Open folder.
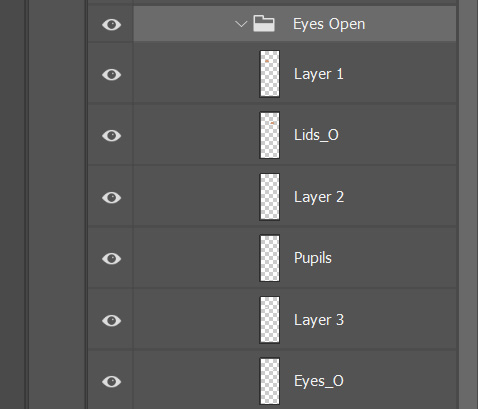
Figure 3.30: Eyes Open containing layers prior to merging
- Rename these to indicate what belongs to the left and right eyes. Starting at the top, the names should be as follows:
- L Lid
- R Lid
- L Pupil
- R Pupil
- L White
- R White
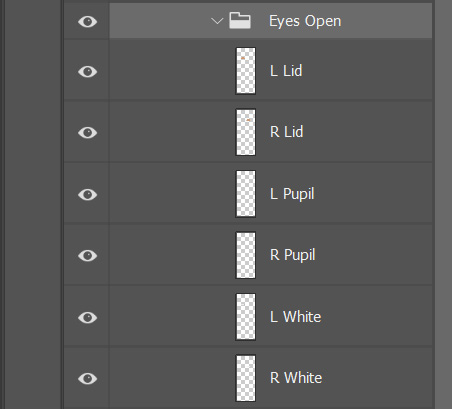
Figure 3.31: Eyes Open layers renamed properly
Luckily, the Profile head only shows one eye and doesn’t need any separation. With all layers accounted for, we can move on to the final part of this chapter.
Organizing with normal and independent groups
While we can organize and tag to an extent in Character Animator, it’s best to do as much work as possible in Photoshop. With that said, we are going to restructure and further refine the layer names. Independent groups are shown with a + symbol before the group name. These groups or layers will act differently in Character Animator, staying separate or independent from the influence of other layers. We will learn more about this in an upcoming chapter.
Creating main groups
To begin, it’s best to have your character in its own group, along with the Head and Body groups housing all the layers underneath. We currently have this setup, which is a good start:
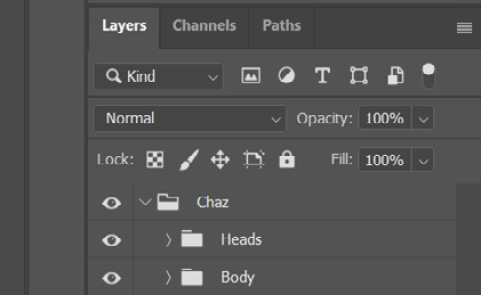
Figure 3.32: Eyes Open layers renamed properly
We will group and label most head items in a specific way:
- Inside the Heads group, expand the first ¾ Head group.
- Inside this group, we’re going to add the following groups:
- +Right Eyebrow
- +Left Eyebrow
- +Right Eye
- +Left Eye
- Mouths
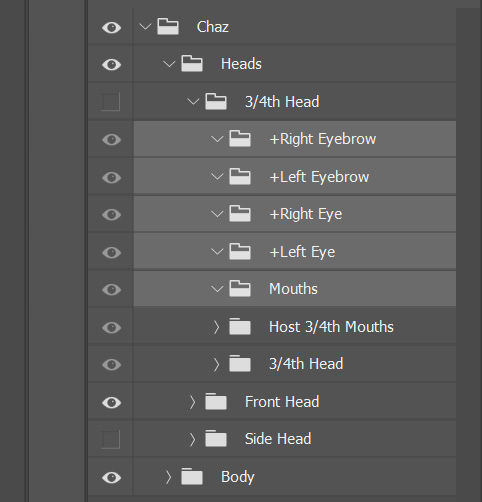
Figure 3.33: New groups added to the layer list
- Next, expand the Host 3/4th Mouths group.
- Select all the mouth poses in this group and drag them into the new Mouths group.
- Delete the Host 3/4th Mouths group.
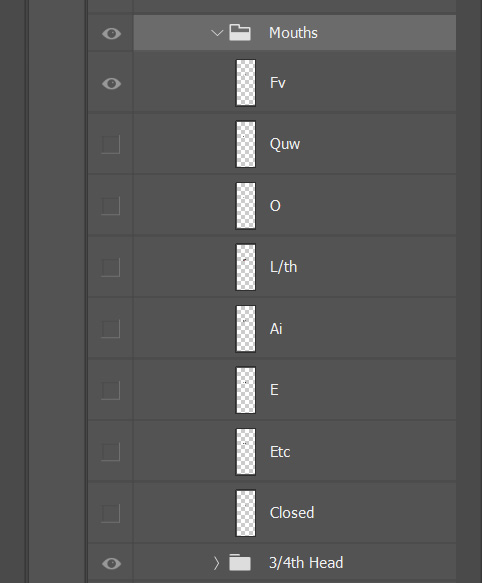
Figure 3.34: Streamlined mouth group for the ¾ view
Now, we can move on to organizing the next groups.
Adding eyebrow phases
The eyebrows can be animated by Character Animator. To achieve this, we need to set three layers for each brow: Angry, Worried, and Neutral:
- Drag B EB into +Right Eyebrow and F EB into +Left Eyebrow.
- Inside +Right Eyebrow and +Left Eyebrow, rename B EB and L EB Neutral.
- Duplicate each Neutral layer twice by selecting the layer, using Ctrl + C or ⌘ + C, and then pasting in place with Ctrl + Shift + V or ⌘ + Shift + V twice.
- Rename the new layers in each group Angry and Worried:
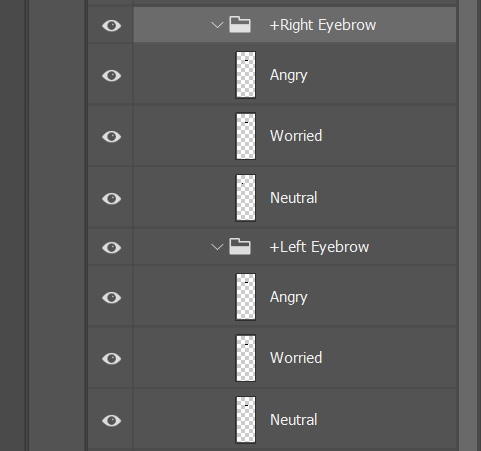
Figure 3.35: Eyebrow phases properly laid out
- Select the Angry layer in +Right Eyebrow.
- Press Ctrl + T or ⌘ + T to engage the Free Transform Tool option. A selection area should appear around the canvas
- Place the cursor on the outside of the selection area and your cursor will change to a half circle, allowing you to rotate.
- Rotate and move the eyebrow so it’s slanted down, sitting on the top of the upper eyelid:
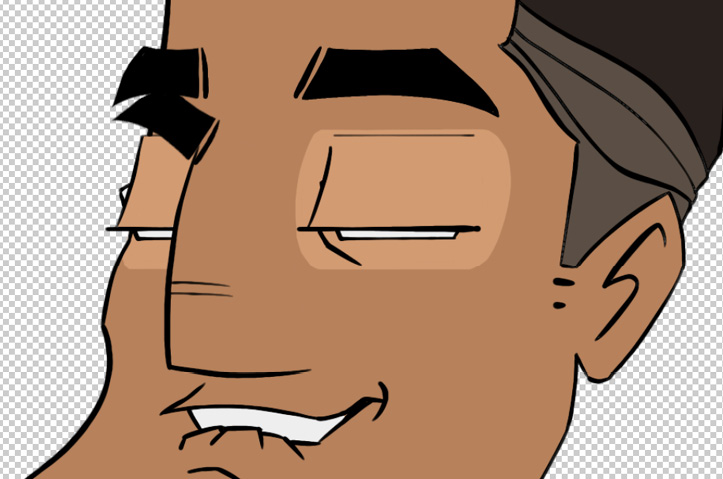
Figure 3.36: Angry and neutral eyebrows
- Now, select the Worried eyebrow and rotate and move it in the opposite direction so that it’s raised and its right side is facing up:
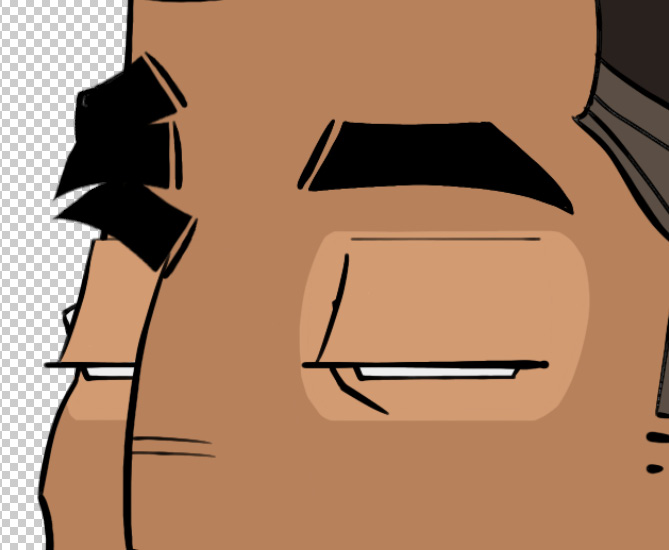
Figure 3.37: Worried eyebrow next to the others
- Repeat these steps for the +Left Eyebrow group and ensure Angry, Neutral, and Worried are all represented.
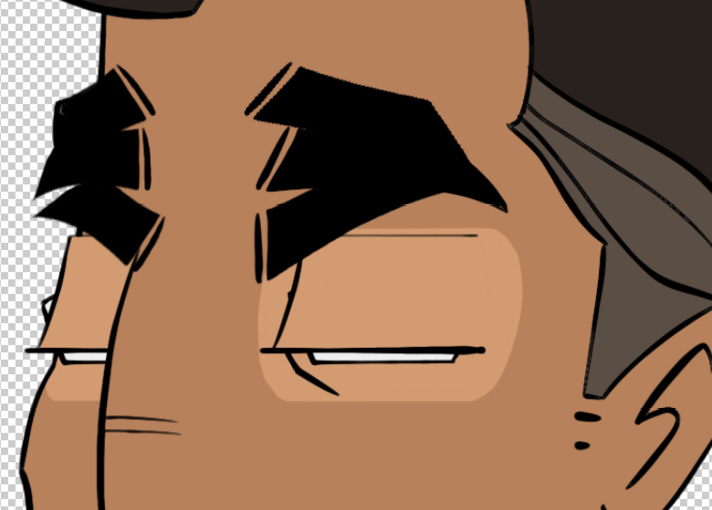
Figure 3.38: Both eyebrows with three phases each
While it may look odd right now, seeing three eyebrows on each eye, the eyebrows are now ready to be animated in Character Animator when the time comes.
Arranging the eye groups
This section will require less work than the previous one. We’re just going to rearrange the eye layers and rename them to make them more Character Animator-friendly. Here’s what we do:
- Under the Eyes Open folder, select Front Lid_O, F Pupil, F Blink, and Front Eye_O.
- Drag these into +Left Eye.
- Rename the layers to the following:
- Front_ Lid_O to Top Lid
- F Pupil to +Left Pupil
- F Blink to Left Blink
- Front Eye_O to Left Eye
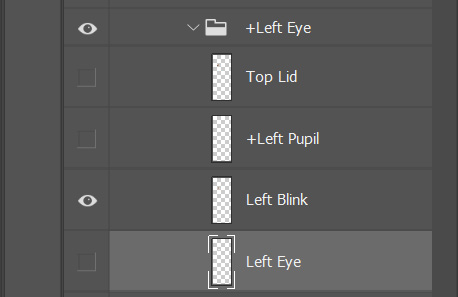
Figure 3.39: The right eye set up properly
- Now, repeat these steps for the right eye. Drag the remaining Open Eyes layers into +Right Eye and name the layers the following:
- Back Lid_O to Lid
- B Pupil to +Right Pupil
- B Blink to Right Blink
- Back Eye_O to Right Eye
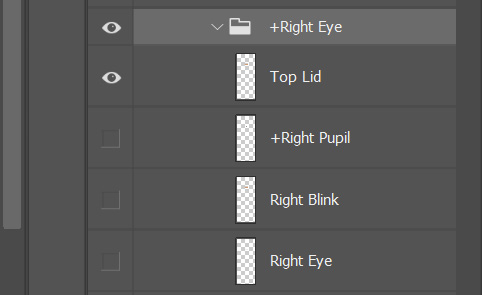
Figure 3.40: The right eye set up properly
- Now, in the layers, under ¾th Head, let’s grab the Nose layer and move it above the +Right Eye group’s list.
- For the Head layer, move it out of the 3/4th Head group, to the bottom of the group list.
- Rename the layer Background.
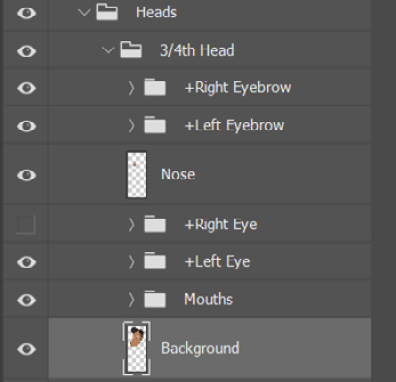
Figure 3.41: The character’s head should be labeled Background
From here, you will want to go to the Profile and Front head groups and repeat the steps in this section. That includes creating three eyebrow phases, ensuring the naming conventions are accurate and all layers are in their proper groups. Look at these images to compare them to your layer list:
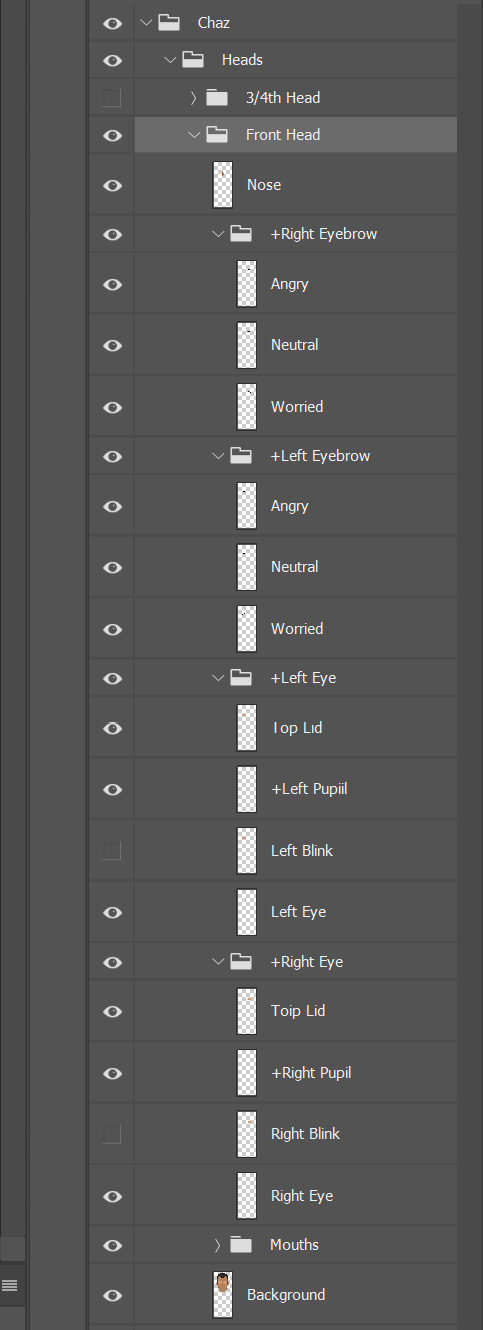
Figure 3.42: The front head’s layer list

Figure 3.43: The front head set up properly
With the order now established, let’s look at the hair and how we should set it up to reflect physics and other interactions in Character Animator.
Separating out the hair
Depending on the complexity of the scene and rig, you may find you want to animate the hair in its own layers, especially as we introduce more behaviors into the mix. This means we will need to go back to the rig and ensure the hair is isolated for the three head phases. To do this, see the following:
- In Photoshop, start at the top of the layer list. In this case, expand 3/4th Head and click Background.
- You can select the hair in a variety of different ways. The quickest may be to use the Magnetic Lasso Tool option (cycle to it using L on the keyboard):
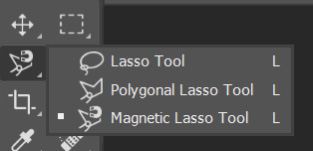
Figure 3.44: Pressing L allows you to cycle through a variety of useful selection tools
- Click once and drag along the edge of the hair. The magnetic function should snap to the outline. If you need to add a point manually, simply left-click.
- Keep dragging until you’ve selected all the hair. If a point gets added by mistake, you can move a step backward with the Delete key on your keyboard.
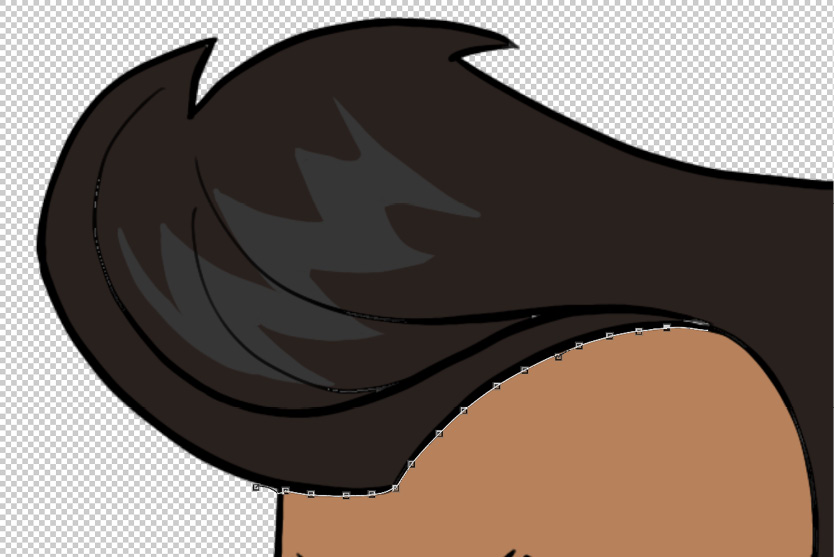
Figure 3.45: If you stay close to the hairline, the tool should easily detect what to select
Note
If you are having issues selecting the hair or other parts of the rig, you may want to try the other selection tools by pressing W. There are three tools to cycle through just as with the Lasso tools.
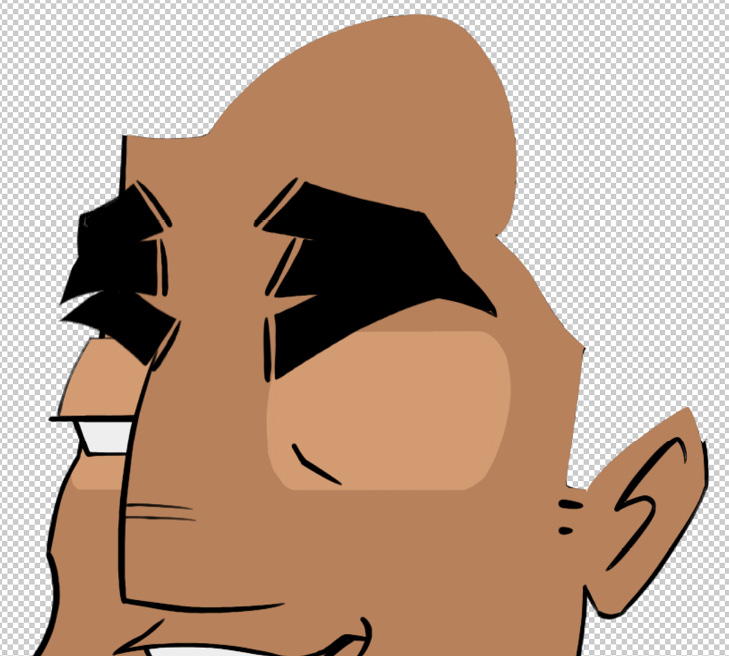
Figure 3.46: When you cut the hair off, your head will look something like this
- Paste in place with Ctrl + Shift + V or ⌘ + Shift + V.
- Rename the new layer Hair and make sure it’s placed above Background within the 3/4th Head group.
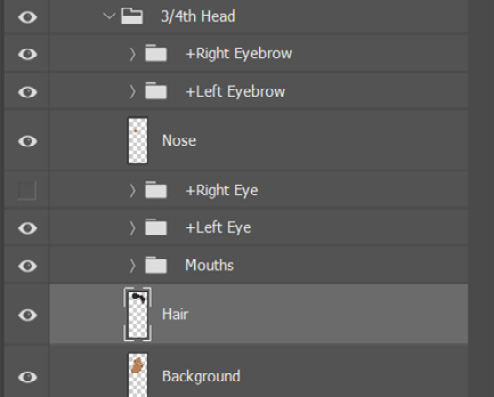
Figure 3.47: Place Hair above Background in the 3/4th Head group
You will need to repeat this process for the other two head phases as well. Isolating the front head hair will be like editing the 3/4th head. However, you will need to account for the hair from each profile phoneme (there are eight profile phonemes). Here’s the easiest way to handle this task:
- Under Side Head is the Mouths group. Select the Fv layer in that group.
- Select the hair on the layer with the selection tool of choice.
- Press the Delete key on your keyboard. This will remove the hair from Fv.
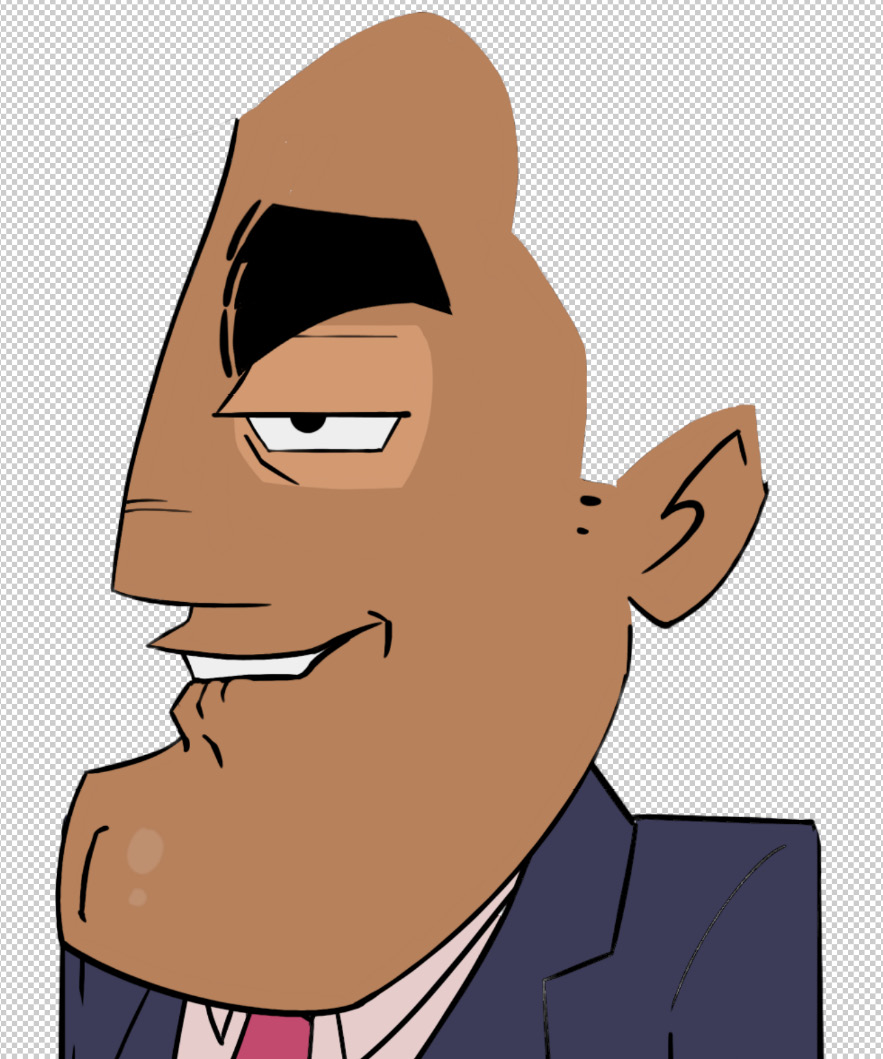
Figure 3.48: Deleting the hair from each phoneme but one
- Go down to the next phoneme, Quw, and your hair should remain selected. Press Delete.
- You will want to repeat this task down to Etc.
- Then, on Closed, cut the hair (Ctrl + X or ⌘ + X) and paste it in place (Ctrl + Shift + V or ⌘ + Shift + V).
- Rename this new layer Hair and place it above the Mouths group:
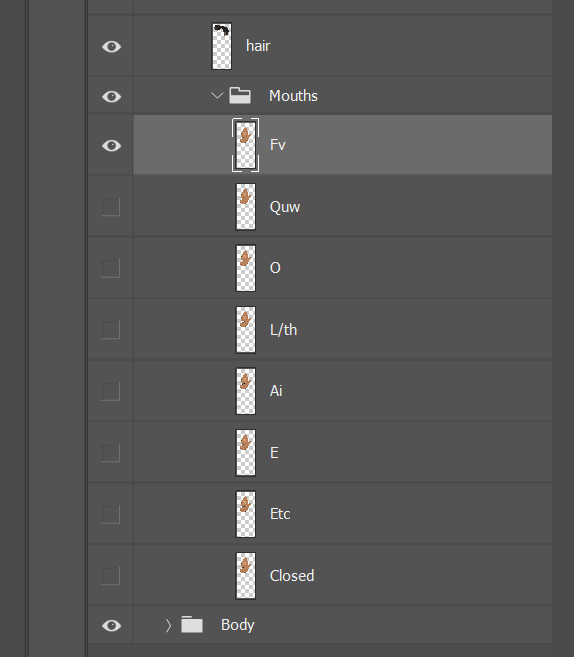
Figure 3.49: Hair will be placed above the head just like the other two phases
With this step, your hair should now be separated and ready for the next step!
Cleaning up PSD layers
This last step may not apply if the art was drawn in Photoshop itself, but outside apps, such as Procreate, seem to import each layer of the .psd at canvas size as opposed to just what the artwork requires. While in most cases, this will work in Character Animator, some actions, such as moving the pupils and viewing custom controls, may have issues.
To test this, see the following:
- Locate Worried under +Right Eyebrow for 3/4th Head.
- Select the Move tool (V).
- Use Ctrl or ⌘ + A to select the artwork in the layer.
- Use Ctrl or ⌘ + T to activate the Free Transform Tool option.
You will see that a selection area forms around the artwork:
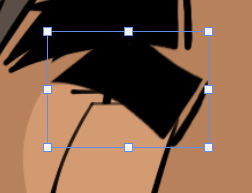
Figure 3.50: The Worried eyebrow is the only artwork being selected
Press Enter to deselect the eyebrow. Click on Neutral under +Right Eyebrow and follow the same steps as before. You should see that the selection area doesn’t hug the eyebrow, but rather matches the canvas.
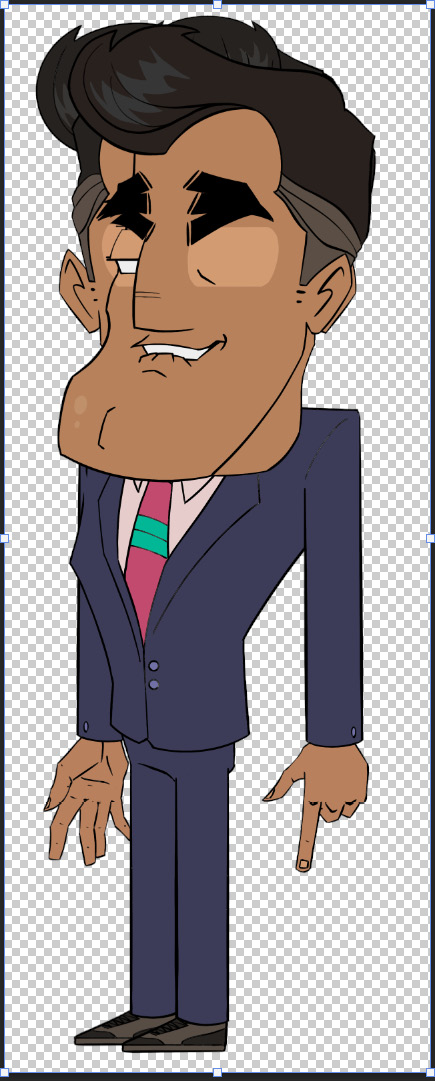
Figure 3.51: The Neutral eyebrow has transparent pixels that cover the entire canvas size, which isn’t useable in some cases in Character Animator
We want to have each layer act as Worried does and not Neutral, so how do we do this? While there are a number of options, all seem to require time and patience, as you will need to review each layer to ensure it’s acting appropriately. Here’s an easy way:
- Select the offending layer with Ctrl or ⌘ + A.
- Use Ctrl or ⌘ + X to cut the artwork out of the layer.
- Use Ctrl or ⌘ + Shift + V to paste it in place.
This should remove the excess pixels while keeping the proportions and locations of all artwork intact. Rinse and repeat until no layer has the issue. Once you are finished with this process, be sure to save your .psd file. You can also go to Chaz_Host_v2.psd to reference the final result using clean layers, along with all the other work we carried out this chapter.
Summary
Phew – that should be it! Not every rig will require as much work as we covered here. It will all depend on how you or your artist sets up the layers and groups. Everyone has a different way of designing. However, now, at least you know the following:
- Groups must be named and organized for an easier workflow in Character Animator.
- All limbs must be contained in their own group.
- To take full advantage of facial features, be sure to create a blink phase, three emotions for the eyebrows, and a mouth group with phonemes.
- You can always add more layers (such as multiple outfits or hairstyles) to your rig than shown here.
- Rigs also don’t have to have everything shown here to function. As an example, you don’t have to have three head phases for a character if you don’t need the character to turn their head when animating.
If you’re unsure about any of these steps, you can always refer to the completed rig for this chapter, Chaz_Host_v2. If we missed anything, we can always go back and alter the rig, even when working in Character Animator at the same time.
Be sure to save your file so we can start rigging in the next chapter!