7
Assigning Mouths and Props with Triggers and Swap Sets
As you continue to develop your characters and build scenes, you may find you need more flexibility with your rigs. Let’s say you want a character to hold a prop but later need that hand free. Or perhaps you have multiple props, or phases – for example, for a hand – that you want to change when the production calls for it. Triggers and swap sets can handle these functions, and each function has different uses.
In this chapter, we will look at the following topics:
- Creating triggers for props
- Creating swap sets for mouths and hands
- Further exploring triggers and swap sets
Once this chapter is complete, you will know how to add even more interactivity and flexibility to your Character Animator productions. With that said, let’s get going!
Technical requirements
We will be using Character Animator along with the Chat with Chaz project file. Be sure to load up Version 3 from the History panel so you can follow along.
Creating triggers for props
Props can mean many things, depending on your background and design philosophy. For this book, a prop will mean whatever item a character can hold or interact with.
Creating triggers for props is useful, as it allows us to evoke or trigger a prop into view when needed. We will use the keyboard, as it’s the most common device to control triggers.
Importing props
First, in order to create a trigger, we will need to add at least one prop to our current rig. We can do this in one of two ways: editing the .psd in Photoshop or importing the props directly to the Character Animator file. Since we’ve edited the PSD already in previous chapters, let’s import a prop into the project. To do this, follow these steps:
- Make sure you’re on the Rig panel.
- Open the Import window by going to File | Import or using the Ctrl + I or Command + I keyboard shortcut.
- Inside this chapter’s exercise files, double-click coffee cup.png.
- Open the Project panel. The coffee cup image should now appear in the list.

Figure 7.1: The current state of the Project panel
- Drag the coffee cup into the F Arm group and below F Hands (the cup will appear large on the screen).

Figure 7.2: The mug is imported but not in the right spot
Also note that we have a puppet, with the coffee cup image placed inside it.

Figure 7.3: The imported image automatically converts to a puppet with one layer, which is the image itself
- Click on the giant mug in the workspace. This will select the coffee cup puppet.
- Using the Properties panel, we can adjust the position, size, and rotation of the mug to fit into Chaz’s front hand:
- X = -19.8 px
- Y = 1,272.4px
- X Scale = 29%
- Y Scale = 29%
- Rotate = -90°

Figure 7.4: We can adjust any layer during the design or animation process with the Layer Properties panel
As you make adjustments on the Properties panel, you will see the changes in real time on the Puppet panel:
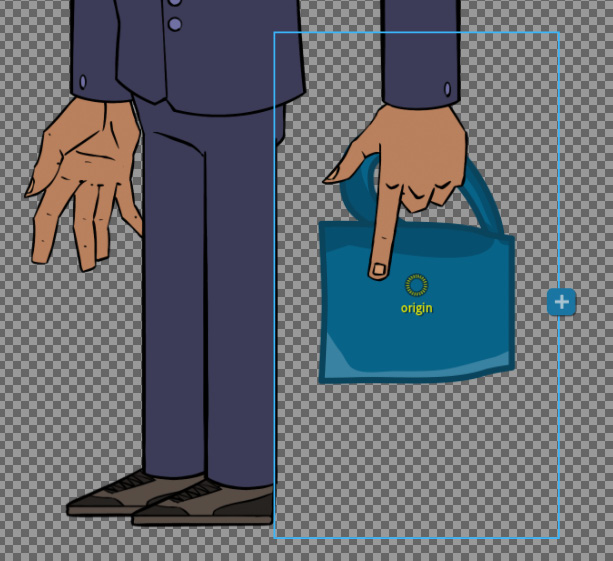
Figure 7.5: Move and resize the mug to fit the front hand
- Click and drag the origin point to the knuckles of the hand. This will allow us to rotate or create physics that allow the mug to bob and move as if it’s being held by a moving person:
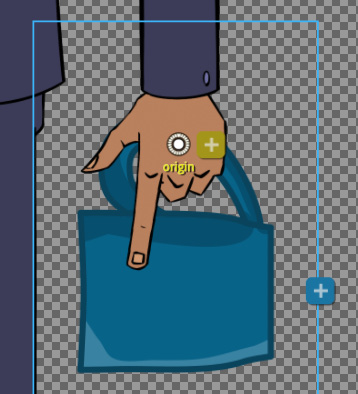
Figure 7.6: Setting the origin point toward the hand will allow us to add different behaviors properly later on if we wish
With our prop properly placed in the rig, we can now set up a trigger.
Creating triggers
In order to create a trigger, follow these steps:
- Go to Window | Triggers to reveal the Triggers panel if it’s not visible. It’ll appear on the bottom left of the screen.

Figure 7.7: The Triggers panel is currently blank

Figure 7.8: Clicking the coffee cup layer will allow us to focus on this layer’s triggers only
- Right-click on coffee cup and choose Create Trigger in “coffee cup”.

Figure 7.9: Right-clicking a layer reveals some useful options
- In the Triggers panel, coffee cup.png will appear with an open field next to it. Here, you can click the field and press any key on your keyboard to set this trigger. For this example, we will use the C key, which will be reflected in the panel.
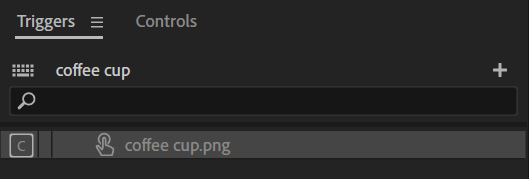
Figure 7.10: The coffee cup layer now shows up in the Triggers panel
With the trigger set, we can test it out by going to the Record tab and pressing the C key. Note how pressing the key toggles the visibility of the cup.

Figure 7.11: Pressing C will reveal the mug
As it’s set up right now, we hid the mug until we press the C key. But what if you want to have the mug visible right away? Or perhaps you don’t want to hold down the C key to keep the mug on the screen. We can change these options within the Triggers panel:
- Go back to the Rig tab.
- With the coffee cup.png layer still selected, click the coffee cup.png trigger.
- At the bottom of the panel, you have access to a handful of options:
- Midi Note allows you to set a key to trigger the action, assuming you have the device to use it.
- Latch allows you to toggle the trigger rather than having to hold the key down.
- Default for Swap Sets, which we will use, allows us to set which pose displays with no key presses.
- Layers and Replays will show layers tied to the trigger. Right now, we only affect the coffee cup with the C key.
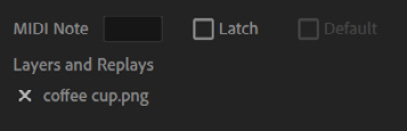
Figure 7.12: The current state of our Project panel
So, what are swap sets and how do they compare to triggers? Let’s take a look at that next.
Creating swap sets for hands
Triggers are binary, allowing for the layer assigned to be turned on or off. Swap sets allow us to switch or swap out different layers as we record. For this book’s project, we will set up a swap set to change our hand poses.
Since we grouped our hands when laying out the rig in Photoshop, we can set this up pretty easily:
- Make sure you’re on the Rig tab.
- Locate F Hands, found under F Arm.
- Right-click on F Hands and choose Create Swap Set.
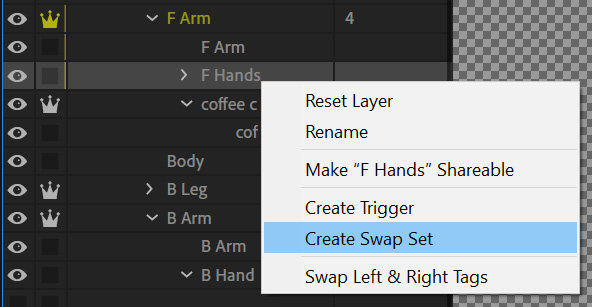
Figure 7.13: Choosing Create Swap Set will automatically make the group layers swappable
The Triggers panel should now show F Hands with the three hand poses we organized below it.

Figure 7.14: A swap set lays out each asset in the group, allowing you to customize your keys
Don’t worry – the cup trigger is still present. We can access it again by clicking the coffee cup.png layer from the list. But for now, we are fine focusing on the swap set.
Swap sets allow us to set multiple triggers. In this case, let’s set the swap to the following:
- P for Point
- F for Fist
- O for Open

Figure 7.15: A swap set lays out each asset in the group, allowing you to customize your keys
Before we go to the Record tab, let’s decide which hand pose we want to appear first.
- Click Open and choose Default from the bottom options.
- Right-click on any of the poses and choose Select Label Group. This will select all poses for the hands.

Figure 7.16: You can also assign colors for your swap sets for easier organization
- Click Latch on the bottom of the panel so that we don’t have to hold down keys to keep poses on the screen.
- Now, go to the Record tab. Note how the front hand starts with the open pose.
- Press P or O. The hand pose should change. Pressing the key again will switch the hand back to the default open pose.
- Switch the hand to the fist pose and then press C to bring in the cup. As you can see, such actions will allow us to drop and pick up the cup when needed.

Figure 7.17: Combining triggers and swap sets can allow for some nice animation tricks
- Finally, make sure to make B Hand a swap set (right-click the group and choose Create Swap Set). Ensure no triggers for the back hand are the same as the front, or else they will both swap at the same time when pressing the key.
Now that we have some understanding of triggers and swap sets, let’s talk about some other uses for these two features.
Further exploring triggers and swap sets
In some cases, you may find creating a visual interface within Character Animator to be more beneficial when using swap sets or triggers. Luckily, we can trigger actions beyond using the keyboard, if desired.
Creating visual controls for triggers
Here’s how we can set up a visual interface for our swap sets:

Figure 7.18: We can easily generate controls with Add to Controls Panel
- Click the coffee cup.png layer in the Puppet panel while on the Rig tab.
- In the Triggers panel, right-click on the coffee cup.png trigger and choose Add to Controls Panel.
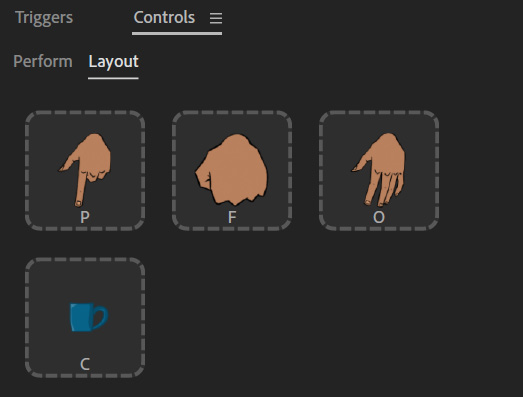
Figure 7.21: The Layout tab under Controls allows for a visual representation of your current triggers and swap sets
- The Layout view allows you to organize the keys. If you have a certain preference for how the controls are laid out, simply drag and drop where you want them to go.

Figure 7.22: You can set up the Controls panel however you see fit
Press any of the keys on the keyboard. Doing so will light up the linked control, showing the connection.
- Go to the Record tab, if you are not there already.
- Under Controls, go to Perform.
- Now, click on any of the controls. Note how you can interact with these triggers in the same way you used your keys.
Again, this is simply an optional extension to triggers. If you want to use just hardware, such as your keyboard, that’s fine. However, you may find a touch interface or other peripherals benefit from the Layout and Perform interface.
Other tips for using triggers and swap sets
You can set up triggers and swap sets for any item in your Character Animator project. It’s impossible to cover every scenario that requires or benefits from these tools, and we will be using triggers and swap sets when we animate our little production. So, here is a list of ideas:
- You can use triggers to turn props off that may be in the scenery. A good example of this would be having the coffee cup placed outside of the rig on a table. A second cup, rigged with a trigger, will be in the hand of the puppet. This cup will be invisible at first. When we animate the rig to grab the cup, we can trigger the scenery cup to disappear and the rig cup to appear. This quick switch will make it look like the character has grabbed the cup and lifted it up. You can set one key to trigger multiple layers. Let’s say you want both hands to open at the same time. Placing O as the open phase for both hands will allow this simultaneous animation.
- Swap sets could be used for changing clothing, hairstyles, or any other design choice that would benefit from being changed on the fly.
- While Character Animator relies heavily on a camera and microphone to track emotion, eyes, the mouth, and more, you could use a swap set to evoke these actions manually if desired.
There are several other uses, but hopefully, these will give you some ideas, especially as we start to build our animated scene in this book.
Summary
Triggers and swap sets are great for turning assets on and off or swapping the state of one asset for another. They are mostly used for simple switches, such as hands, but other more advanced uses can be integrated. Also, be sure to take advantage of the Control panel if the keyboard controls are not working out for you.
Next, we will build on the concept of triggers by working with more facial features, as well as integrating head turns for even more control and immersion.