
5
Creating Control Handles and Behaviors
In the previous chapter, we went through our character’s layers and added tags. These tags, at the moment, don’t really have much influence on the rig. We can change that though by assigning different controls and behaviors to our tags. These behaviors and controls can be universal, affecting the whole rig, or we can target layers for our behaviors. In this chapter, we will work with the following:
- Adding modifiers for mouse control
- Linking Independent groups
- Refining limbs with the stick tool
- Adjusting limb rotation
By the time we have finished this chapter, you will have a functional rig you can control using your mouse. This will also open up more options for us in future chapters. Let’s get going!
Technical requirements
Be sure to have your tagged character open in Character Animator, or you can access Chat_with_Chaz.chproj and load Version 1 under the History panel if you wish to work with the book’s example. Let’s get going!
Note
You may find when loading a Character Animator project version the .psd file for the puppet may appear to be missing. This can be fixed by relocating the file through the Properties panel or disabling than re-enabling Auto Sync Artwork.
Adding modifiers for mouse control
Modifiers are essentially controls or behaviors we can add to the rig. This can involve the ability to drag that part of the rig, anchor it to the ground, dangle things, and much more.
Let’s move over to the Record tab for a moment. If your scene is blank and you don’t see the rig, see the following:
- Drag and drop the CHAZ puppet from the Project panel into the middle of the screen.
- Chaz should appear on the Scene panel. He will probably be larger than the scene dimensions. If this is the case, let’s shrink him down.
- Click once on CHAZ on the Timeline panel (located at the bottom of the screen).
- On the right-hand side, see Properties and change Scale to 30%.
You should now be able to see Chaz fully.
As it stands, right now, the rig doesn’t react in any way when we click or drag around on the canvas. The only other thing that may react is the character’s face if you have your camera and microphone enabled. It’s recommended you turn those options off for now so we can focus on the draggers without distraction:

Figure 5.1: Scaling the puppet allows us to make sure he’s in the workspace
Let’s click on the Rig tab, bringing us back to the setup phase for the character.
Adjusting the layer and mesh properties
When you select any layer or group on the Puppet panel, Properties on the right will display for the given Layer. This means you can resize, rotate, and more with the options here. This may be useful if we missed something in Photoshop. Making modifications is easier to make in real time to test Attach Styles and such as well. We may need to refer to this panel from time to time, but we can leave everything as is for now:

Figure 5.2: The Layer panel analyzing the F Arm group
Your Layer Mesh options are available below the Layer options. By default, we can see the following:
- Mesh Shape is set to Contour
- Mesh Island Connection Width is set to 1
- Connect Each Island to is set to Nearest
- Mesh Expansion is at 0

Figure 5.3: You can adjust aspects of each layer’s mesh if further refinement is needed
These settings are optional and are only needed if the mesh isn’t fitting around the rig correctly, so if you see a piece of the rig sticking outside of the mesh, these options can help correct that. However, for now, we can leave these options alone.
Now that you know where to access Layer Properties, let’s add some controls so we can move a hand!
Adding draggers and fixed modifiers
To add dragger controls to Chaz’s hands, see the following:
- Click on F Arm, which is under the Body group for the Chaz puppet.
- Select the bottom tag, which is Left Wrist.

Figure 5.4: The selected tag will highlight in white
Note
To properly select a tag, you will need to click on the tag icon (the circle highlighted with a box in Figure 5.4) itself, not the label. You will know when it’s selected when the tag turns white. Clicking on the X sign on the label will remove the tag. If you do this accidentally, don’t worry! You can easily click the modifier on the Tag panel to re-enable it.
In the Tags panel, which is on the right-hand side of the screen, locate Modifiers near the bottom.
Click Draggable, the first option under Modifiers.

Figure 5.5: Modifiers, Physics, and Miscellaneous are all categories we can play with
Click on the Record button and click and drag the front hand to see the result.
As you’ll see, the entire rig, not just the arm, moves around the screen when we click and drag. Why is this? Well, with no other Modifiers to work with this Draggable wrist, the entire puppet will move. Here’s how we can fix this:
- Go back to the Rig tab.
- Click on the F Leg layer.
- Click the bottom tag labeled Left Heel.

Figure 5.6: Properly tagging the front or left foot
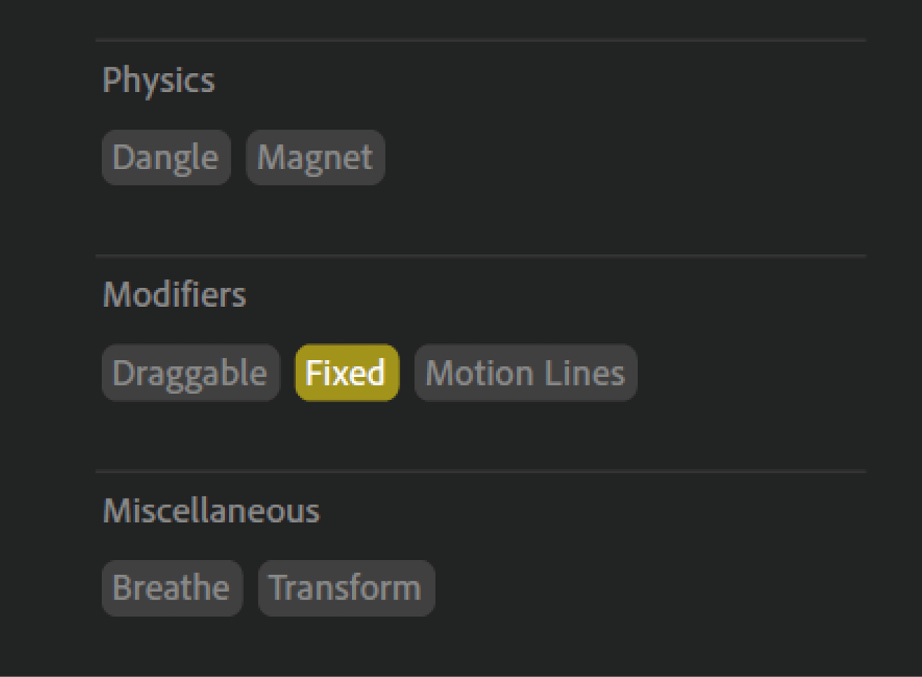
Figure 5.7: Fixed will lock the heel in place
- Now, go to the Record tab.
- Try moving the hand after the scene loads.
- The arm should move with the left or front foot anchoring the character down.

Figure 5.8: We can easily pull the arm back if we want
As you can see, adding the Fixed modifier allows us to anchor tags on the rig. This not only helps with the current situation but also allows for more realistic or grounded animation. This is a good start, but you may notice it’s difficult to point the arm where we want it.
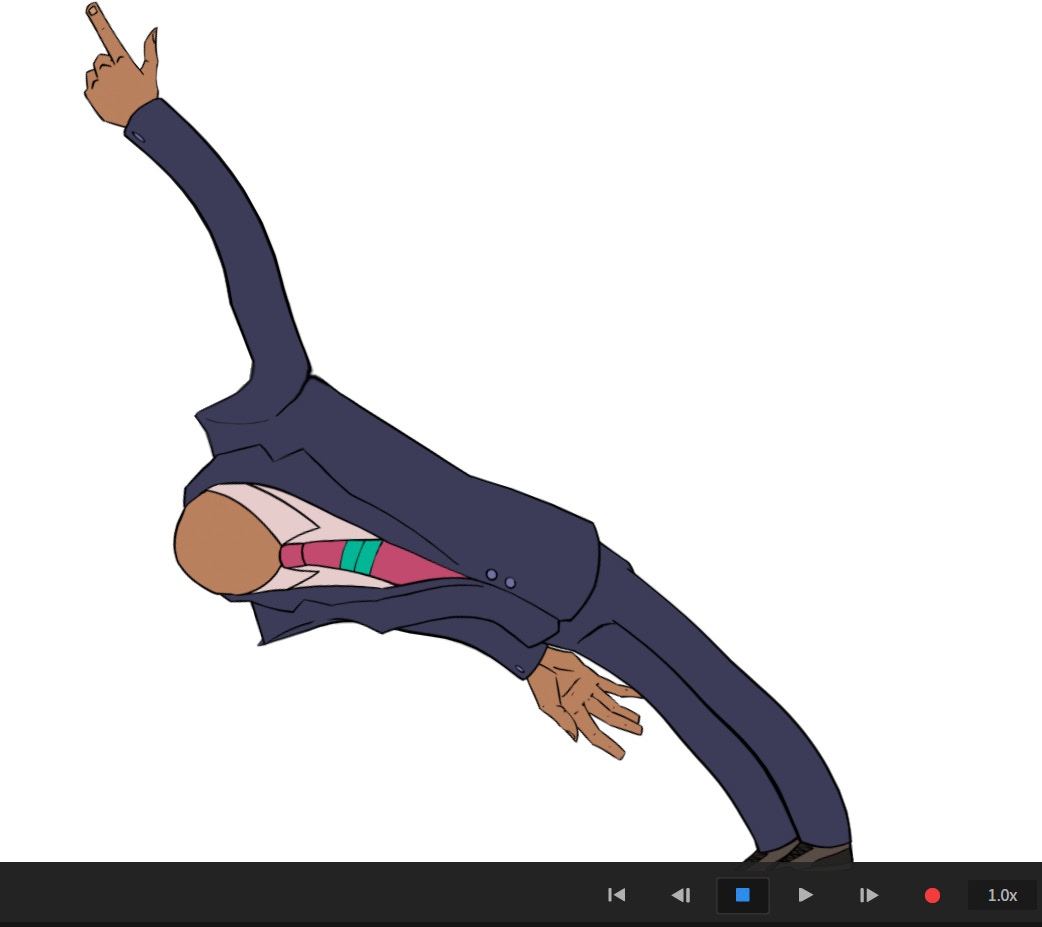
Figure 5.9: Trying to point the finger forward, however, is more difficult
That’s because we have more modifiers and parameters to add. So, let’s continue:
- Go back to the Rig tab.
- Click on the B Leg layer.
- Go down to Right Ankle and click on the tag. By tagging everything properly, we can create flexible feet that we can pin down on the heel or toe.
- Under Modifiers, enable Fixed.

Figure 5.10: Fixing the back heel as well
- Click B Arm on the Layers panel.
- Select the bottom tag, Right Wrist.
- Enable Draggable under Modifiers.
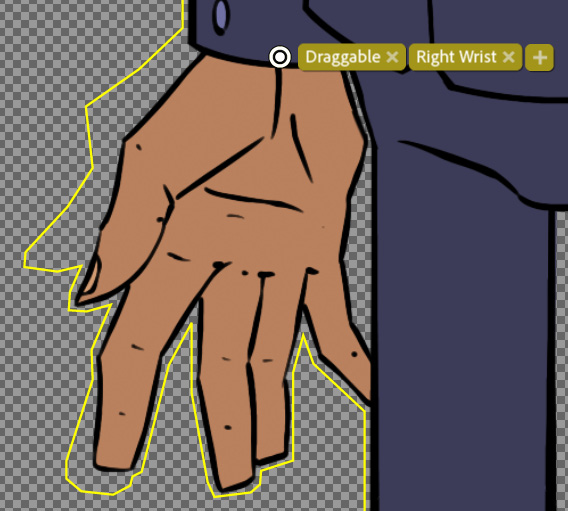
Figure 5.11: Make the back hand draggable
The back hand should move and the back foot should be fixed, but something isn’t quite right when moving either hand.

Figure 5.12: Pointing backward looks a little better with both feet fixed

Figure 5.13: The back hand is stuck to the back leg
Now that the back hand is draggable, we now have an additional issue: the back hand sticks to the back leg of the rig. Remember in Chapter 3 when we talked about making layers and groups independent when setting up our character? This is where that becomes important. Let’s talk more about it.
Linking Independent groups
By default, your rig will act as one piece when animating. The best example of this is the back hand being stuck to the back leg. Since we tagged none of the body layers as Independent, Character Animator thinks we want this all to act as one piece. The reason we don’t have the same issue with the front arm is because of the front hand is not touching the rig, unlike the back hand.
Luckily, we can easily assign new Independent layers without having to go back to Photoshop. From there, we will need to weld some pieces together to ensure the rig will properly animate.
Assigning layers as Independent
Let’s inspect how Character Animator is currently viewing the connection of our body layers. Go back to the Rig tab. Do you see the yellow outline surrounding the character? This is the boundary of the mesh. The mesh allows Character Animator to interpret the way the layers connect. Since we labeled no body parts as Independent, Character Animator works with just one mesh, which explains why the back hand sticks to the back leg.

Figure 5.14: The yellow outline indicates one mesh is making up the entire body
This is where independence comes in handy. Here’s what we can do to make this work in our favor:
- Select the B Arm group.
- Click to the right of the layer visibility icon (the eye) to enable independence (indicated by a crown).
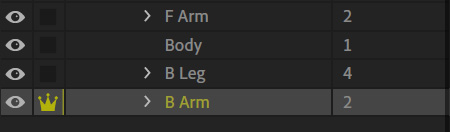
Figure 5.15: The crown is essentially the same as adding a “+” to the name in Photoshop
- You may be seeing a change already. If you click on Body, the back arm is no longer included in the main Body mesh.
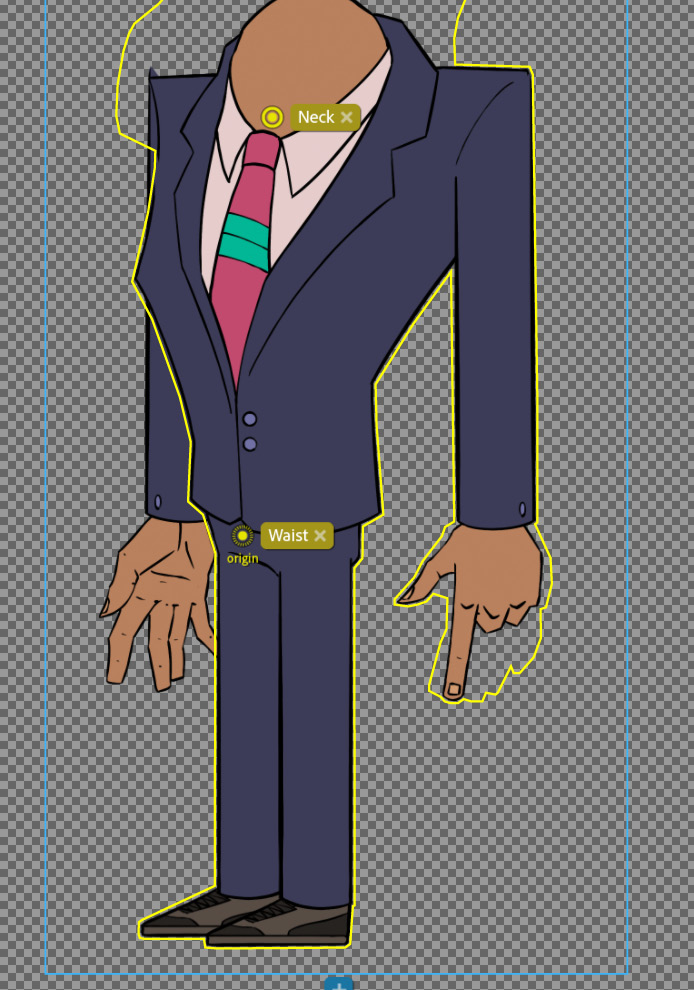
Figure 5.16: The back arm is no longer included in the main mesh
- Enable independence for B Leg, F Arm, and F Leg, and note how the yellow mesh outline appears now when clicking on Body again. Just the head and torso are now outlined.
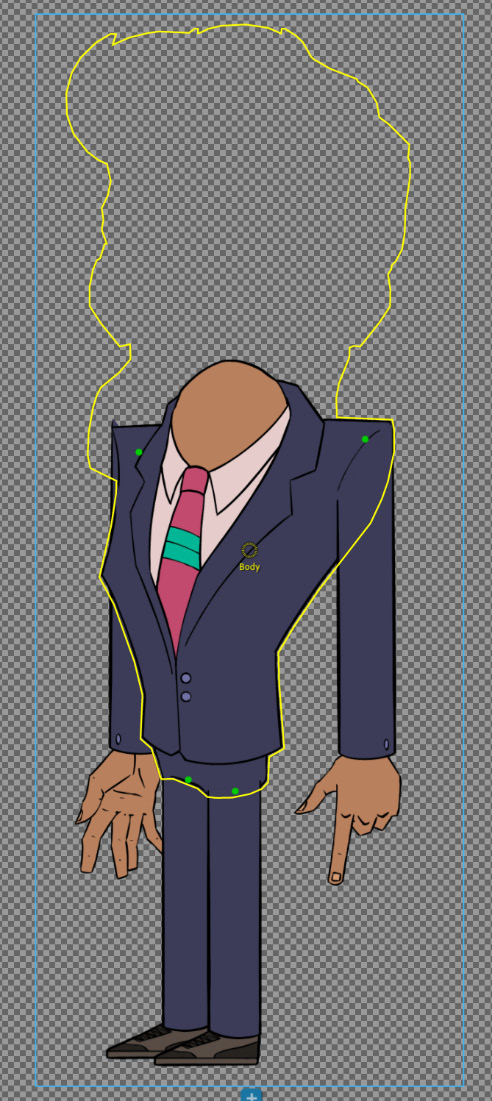
Figure 5.17: All limbs now appear separated from the main mesh
With the body parts now set as Independent, we can tell Character Animator how to connect all of these pieces.
Welding Independent groups to the body
To ensure everything is connected properly, let’s test out the front arm first. To do this, see the following:
- Click on F Arm under the CHAZ Puppet panel.
- Click on the top tag, Left Shoulder, and drag it a pixel or two. Note how the body and head turn green:

Figure 5.18: The green highlight means the Independent layer is welded to the main mesh
The green highlight is telling us this Independent group is properly welded to the main body.
- To test this further, grab the same tag and move it away from the body. Note the change to a yellow highlight.
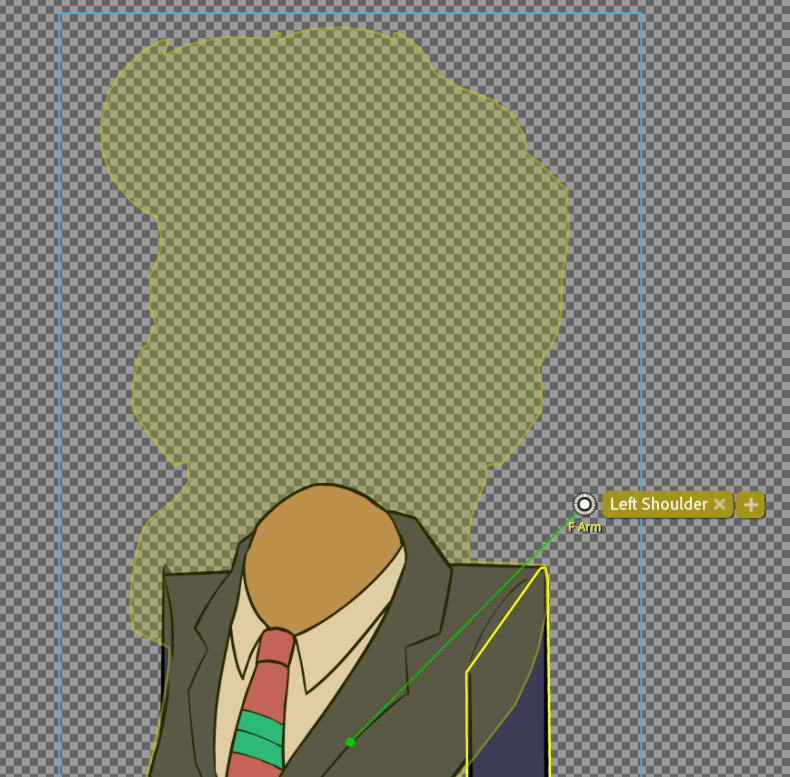
Figure 5.19: Yellow means the current layer is not welded to the main mesh
This is telling us the layer is not connected and will act on its own. This can be useful in some cases, but for standard character animation, we want the arm to connect to the body. So, move the tag back to its original spot, reinstating the green highlight.
Now, let’s go through and weld each limb to the body (if it isn’t already):

Figure 5.20: Connecting Left Hip to the bottom of the main mesh
With Left Hip connected to the torso, we can do the same for Right Hip:

Figure 5.21: Connecting Right Hip to the bottom of the main mesh
Let’s not forget the back arm! Click and drag to ensure the arm is attached to the torso:

Figure 5.22: Connecting Right Shoulder to the top left on the main mesh
Once you have finished welding the tags, jump over to the Record tab and try moving the arms. You should now see the arms move independently while remaining attached to the body.

Figure 5.23: Properly setting the limbs as Independent fixes the stuck back hand
With our limbs properly linked with the body, we can move on to refining the movements a bit more.
Refining limbs with the stick tool
As you have seen by now, by default, Character Animator does its best to set up the limbs based on tags alone. While this can work sometimes, further refinement is required.

Figure 5.24: While the arms bend, the effect isn’t pleasing
Let’s check out the stick tool. This will allow us to refine the bends, creating more pleasing movement:
- Go back to the Rig tab.
- Click on F Arm.
- Select the stick tool from the bottom toolbar (S on the keyboard is the shortcut). The icon is a line with a circle in the middle:

Figure 5.25: The stick tool lies to the right of the handle tool
- Starting right below Left Shoulder, click and drag down to the elbow to create a stick.
- Below Left Elbow, click and drag again down to the wrist. We have now created two sticks:

Figure 5.26: Two sticks to refine the arm bend
- Go to the Record tab, grab the front hand, and drag around. The bend should be less rounded and squished and more defined.

Figure 5.27: Testing the bend reveals a cleaner result
- Repeat this step for the three other limbs, drawing two sticks for each. Once you’re finished, you can test out the second arm to ensure the bends are more refined.

Figure 5.28: The back arm also looks more refined
- If you’d like to test the legs, set the heels and toes to Draggable, go to the Record tab, and move the feet. You should be able to see enough to make out the bends.
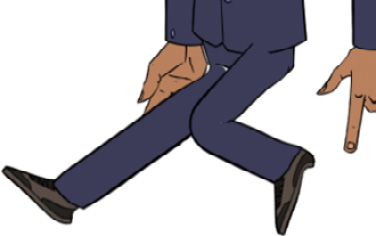
Figure 5.29: Draggers can be added to any handle, including fixed feet
And with that, we have a more functional rig that’s ready for further refinement. There is one more thing we can look at when it comes to working with limbs.
Adjusting limb rotation
When working with your rig, you may find that the arms and legs bend in an undesirable way. As an example, you may decide you want the rig’s front arm to point forward, not back.

Figure 5.30: Right now, when moving the front arm, it will bend back
This can easily be modified by adjusting the rig’s pins. Let’s take a look at an example:
- Go back to the Rig tab. Note how the pins are in the middle of the arm.

Figure 5.31: Note how the pins are laid out

Figure 5.32: The wrist pin is aligned to the left

Figure 5.33: The arm now points forward
You can use this method for any rig you need to adjust the limb bends for. Be sure to keep this in mind as you rig new characters!
And with that, we have a more functional rig that’s ready for further refinement. For now, we will save a new version of this rig in the History panel. It will be labeled Version 2 for your reference.
Summary
We have set up the rig for basic movements and refinement. There is a lot more to cover and many more ways to interact with the rig, but it’s always best to start with the basics and work up from there. Just remember the following:
- Tagging your handles appropriately is important to the entire setup
- Sometimes, you need layers to act on their own, which is where Independent groups come in handy
- We can only weld Independent layers to non-independent layers
- Fixed and Draggable are just two functions you can assign to handles
- Using the stick tool will shore up any glitches that may occur in the limb bends
- Adjusting the location of pins can alter the way a limb bends
In the next chapter, we are going to go even further by setting up swappable assets with props and changing the rig with more behaviors.