8
Refining Layers and Exploring Optional Rig Features
With everything we’ve worked on, your rig should be close to ready to be put into an animated scene. All we need to do is fix and polish a few things and refine the behavior strengths, and we should be ready to go. However, there are also additional features we can take advantage of. Some of these are style choices, while others can enhance any rig you’re using. To achieve this, we will cover the following topics in the chapter:
- Animating eyelids
- Animating breathing and jaw animations
- Designing a character for head turns
After this, you will have more options for animating your character, opening up style possibilities and enhanced control. With that said, let’s get going!
Technical requirements
Make sure to have Character Animator open with Version 4 loaded under the Chat_With_Chaz project file. Additionally, we will be referencing the PSD files labeled Chaz_Host_v5_fixed_eyes and Chaz_Host_v6_eyelids.
Animating eyelids
With the rig set up as it is, we cannot take advantage of animating eyelids. The reason for this is the blink layers we have inserted into the eye groups cancel this feature out, even if we properly label and set the rig up for it. Simply disabling the visibility of the blink layers won’t work either. We also only have one eyelid for each eye. To do this, we will require two.
To test the current layer switch for the blink, go to the Record tab and try blinking. While it may be hard to tell (since you’re closing your eyes and can’t see the screen) the blink layers come in and replace the eye for that moment. You can try winking with one eye or create a small recording to test this as well. We can animate the lids in real time, like the pupils, head, or mouth, for a more fluid motion.
Is it better to track eyelids or simply have the layer switch over? It really comes down to your rig layout and aesthetic preferences. Let’s see what our character looks like with animated lids.
Importing a character with eyelids
To test a character with eyelids that can be animated, let’s bring in a version of Chaz equipped with bottom eyelids:
- Make sure you’re on the Rig tab.
- Click on CHAZ on the Puppet panel.
- In the Puppet section on the Properties panel, click the file link to change the file path:
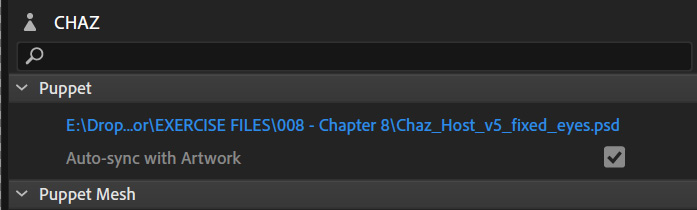
Figure 8.1: Clicking on the file path to select a new .psd file
- In your exercise files, double-click on Chaz_Host_v6_eyelids.psd to replace the rig.
Figure 8.2: Choosing Chaz_Host_v6_eyelids.psd to test how we can animate eyelids
- When the file comes in, the head may be hidden. Simply click the eye icon next to the head if this is the case. You should now have a new version of Chaz. This time, he’s missing two blink layers but has gained two bottom eyelids.

Figure 8.3: Chaz looks a bit odd with eyelids, but don’t worry, this is just a temporary test
Since the artist didn’t name the eyelids to be Character Animator-friendly, we will need to add some tags so the lids will properly track movement. You may also want to hide the Angry and Worried eyebrow layers again for a cleaner work area.
Tagging the eyelids
Tagging the eyelids is just like tagging any other body part. Here’s what we need to do:
- Go back to the Rig tab.
- On the Puppet panel, expand the Left Eye group to reveal its layers:

Figure 8.4: The Left Eye’s layers for 3/4th Head

Figure 8.5: The diagram displays both the bottom and top lids for each eye
The tag, in this case, Left Eyelid Bottom, will also display on the Puppet panel.
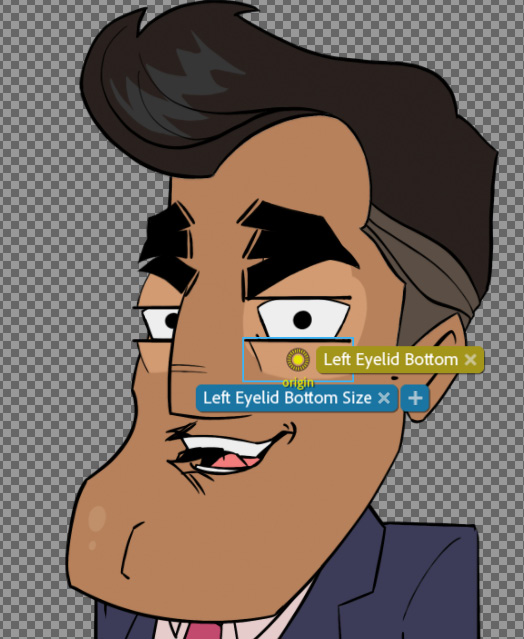
Figure 8.6: Once the eyelid is tagged, you will see the label update on the rig
- Click on the Top Lid layer and then click on the top left eyelid on the Tags diagram.
- Expand Right Eye and repeat the steps for the right top and bottom eyelids.
- Make sure the crown is turned on for each layer – that way, they can be animated freely from the head.
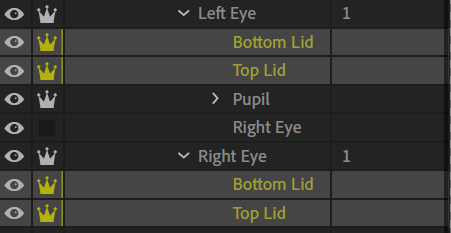
Figure 8.7: If you leave the lids dependent, it will affect the scale of the face when animating

Figure 8.8: It’s always best to make sure your tags and origin points match the artwork
With the new eyelids properly tagged and origin points set, we can test out those eyelids:
- Click on the Record tab.
Note how the eyelids track your eye movements.
- You can adjust the strength of the eyelids with the Eyelid Strength dial in the Behaviors panel. Around 88% should allow the eyelids to touch when the eyes close:

Figure 8.9: The lids should separate and come together when tracking the actor’s blinks
Again, having lids that interact like this is completely optional. Leave your rig like this if you prefer it. For this book, we will use the swap-to-blink layer method, as we designed the rig with that choice in mind. However, before we swap the .psd file back, let’s look at other optional handles.
Animating breathing and jaw animations
While Character Animator can lip-sync by switching mouth poses based on phonemes, we can enhance this effect even further by adding a Nutcrack Jaw behavior. This will allow the jaw to drop based on what the mouth is doing. As with the eyelids, this is an optional feature. We will also add a Breathing behavior for further exploration:
- Click on Mouths inside of 3/4th Head.
- Using the handle tool, click and add a handle below the mouth:
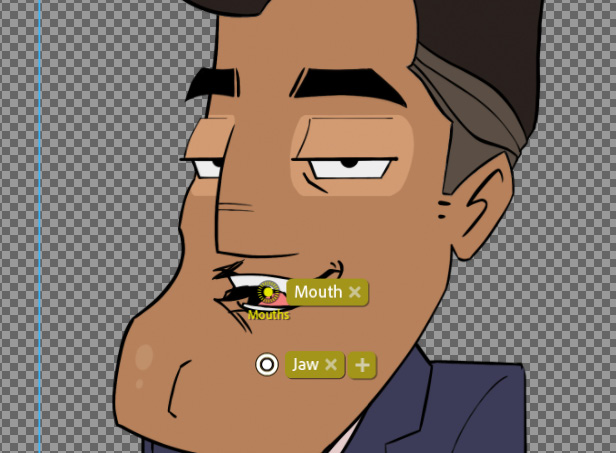
Figure 8.10: The new handle can be placed below the mouth
- On the Tags panel, click on the jaw icon to define the layer.
- At the bottom of the Tags panel is a plus sign next to Behaviors. Click on the plus sign and choose Nutcracker Jaw from the list:
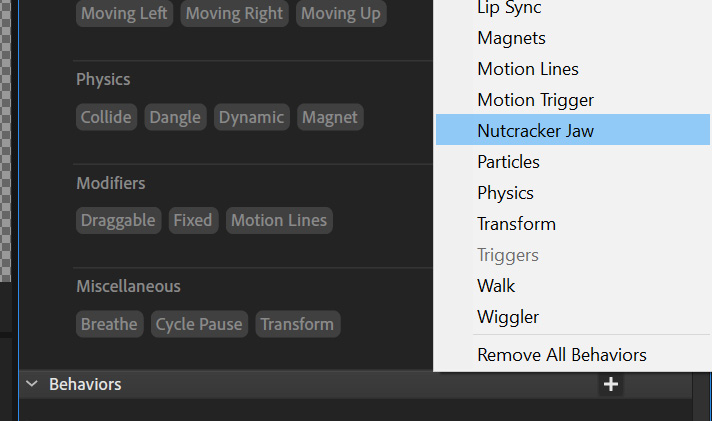
Figure 8.11: Adding the Nutcracker Jaw behavior to the mouth will allow us to control the parameters when recording
- Next, click on the Body layer and add a handle in the middle of the tie.
- Tag it as Breathe, which is located under Miscellaneous in the tag panel.
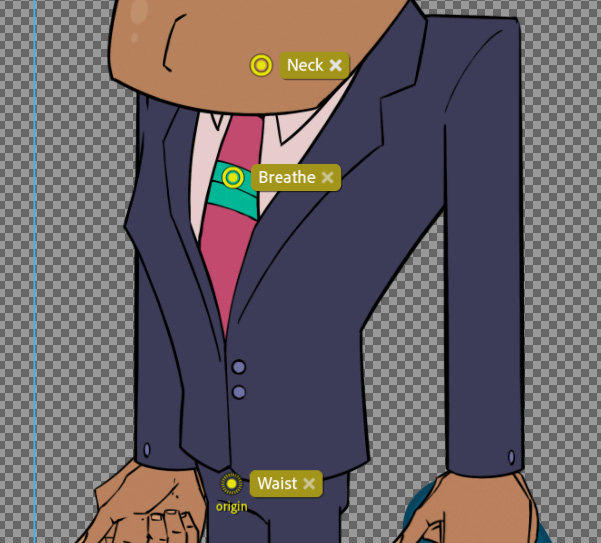
Figure 8.12: The Breathe handle will be the focal point of the transformation effect
- While still on the body, click on the + button next to Behaviors and choose Breathe from the list.
- Go to the Record tab to see the results.
- Now, try moving your mouth. You should notice the jaw for the character moves as well. You can adjust how the behavior reacts on the right. The same goes for the Breathe panel. You should notice the chest expanding and compressing. You can adjust how fast and how extreme this effect is in the Behaviors panel.
For this book, we won’t be using the Jaw or Breathe behaviors. It really comes down to a style choice and we will go back to Chaz_Host_v5_Fixed_Eyes.psd and remove the Jaw and Breathe handles and behaviors.
Implementing head turns
With a rig set up properly, it can react to the actor turning their head on camera, and as with most behaviors, it can be modified and controlled using a keyboard and mouse if desired. All it takes is setting the proper tags, duplicating layers, and adjusting some values.
Tagging the head phases
As you have seen, our Chaz rig comes with various layers to create a head turn. The three main poses are left ¾, left profile, and front. We went through and refined the rig structure. Now, we just need to tell Character Animator how to react.
Let’s tag the phases and set up the behavior:
- On the Rig tab, click on the Heads layer.
- On the bottom right should be the Behavior panel. Click on the + icon and choose Head & Body Turner from the list. This will tell Character Animator that this is where the sub-groups are for the head phases:
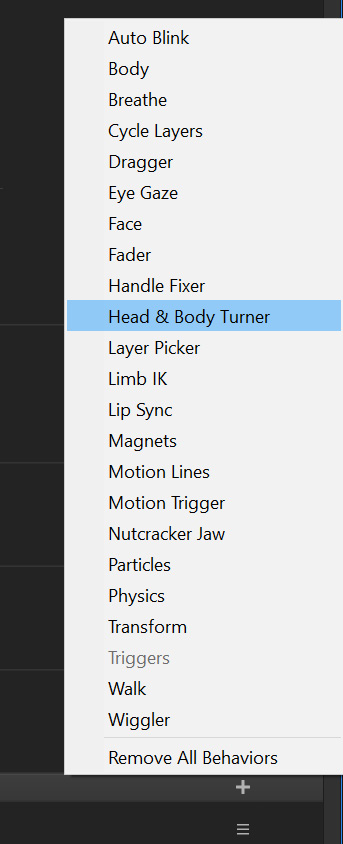
Figure 8.13: The Head & Body Turner behavior enables us to animate head turns
- With this behavior enabled, it will now listen for the phase changes.
- Click once on the 3/4th Head layer.
- Under the Tags diagram, you will find head phases. Since we are on 3/4th Head and it’s looking to the left, we will want to choose Left Quarter.

Figure 8.14: Tagging the head turns requires selecting the appropriate phase for the layer you’re tagging
- Let’s disable independence for Hair by clicking on the crown to turn it off.
- Now, we can continue tagging the other head phases. Click on Front Head and choose the Frontal head view from the Tags panel
- Click on Side Head and choose Left Profile.
As you can see from the diagram, if you have other phases, such as right facing or tilting up or down, we can include those as well. Since the artist only provided three head phases, we will just focus on the left views.
Testing the head turns
Jump into the Record panel and start turning your head. If set up correctly, the character’s head phases will switch according to what you’re doing. Now, your character has more movement than before!
If you’re having issues, go back through and check to make sure the following applies:
- You’ve calibrated your camera
- Your eyebrow and eye layers are Independent
- Your head layers are Independent (this will prevent the brows from morphing the forehead)
- The rig itself is set to Independent
- Everything on the face is tagged appropriately
One little adjustment or setting can throw the whole rig off. It’s not uncommon to have to test things a few times to get everything right. This is especially true for more advanced rigs. You can also refer to Version 5 in the Character Animator project file to see the completed result.
Summary
After some refining and polishing, our rig is now closer than ever to being ready for animation. Sometimes, going back to the PSD file multiple times is required if additions are needed or errors need correcting. Depending on your needs, you can choose to animate eyelids or jaws. Head turns add yet another dimension to your project.
Up next, we will look at how to use preset animation to help speed up the production workflow of your project.