
Chapter 7: Hunting for Credentials
Pen testers are always looking for ways to get their hands-on clear text credentials and access tokens. After compromising assets, the machines are looted for more credentials and the adventure continues. In the next two chapters, we will provide techniques that can be used for credential hunting. We will look at various aspects across operating systems, so we will be switching between technologies quite a bit. Hopefully, there will be something interesting for you to learn about or something that will help you explore further.
By the end of this chapter, you will have a solid understanding regarding the basic techniques for credential hunting and how they can be leveraged across operating system stacks. We will also understand the importance of hunting for ciphertext and hashes. I have not invented all these techniques; rather, this is a compilation of a number of interesting and effective techniques that I have used in the past. I'm certain there are alternative and, at times, more efficient ways to perform certain tasks, but the tactics highlighted here worked for me.
The list of techniques described here is by no means comprehensive, but some of the most important ones are highlighted.
The following topics will be covered in this chapter:
- Finding clear text credentials using a variety of tools and techniques, as well as using operating system built-in indexing features
- Understanding some common patterns to look for
- Leveraging indexing techniques to find credentials
- How to search Microsoft Office documents for secrets
- Understanding the importance of hunting for ciphertext and hashes
Technical requirements
In this chapter, we will work with Windows, macOS, and Linux to explore built in features to search for credentials. There are parts that will require the installation of custom software, such as Docker, Sourcegraph, or PowerShell for Linux or macOS. The majority of the examples will work out of the box, as long as you have the operating systems discussed. The content may require debugging and troubleshooting; it is not designed for beginners.
The code for this chapter can be found at https://github.com/PacktPublishing/Cybersecurity-Attacks-Red-Team-Strategies/tree/master/Chapter07.
Clear text credentials and how to find them
Clear text credentials (especially passwords) are commonly found in insecure locations – too common, unfortunately. They can be found in expected and unexpected places. Organizations across the board struggle to solve this challenge. Some of the obvious places to look for are file shares, the local filesystems of compromised machines, source code repositories, the command-line history, and so on.
Inspecting the history of check-ins can sometimes also uncover some unexpected results as developers remove clear text credentials form source code, but, at the same time, they do not rotate the secret. Rotating means to update the leaked secret to a new one, such as resetting your password. Hence, old passwords that got deleted from source control might still be valid.
This is something employees need help with, so keep them honest. Everyone, at times, is under pressure to ship features and may accidently (or non-accidentally) not rotate secrets when they get broadly exposed.
If your company has an internal version of something such as pastebin or Stack Overflow, or uses discussion groups, they are worth exploring for credentials. Shared platforms are a goldmine for reconnaissance and credential hunting. When under time pressure, engineers might paste entire screen output when asking questions, and this might include passwords, access tokens, and so on.
Although pen testing focuses quite often on the engineering groups and source code, a critical step to maturing your red teaming is to look at other places. Marketing, sales, legal, and especially public relations employees quite often store critical passwords in cloud services, such as Twitter, Salesforce, and Facebook, for your organization on their laptops in clear text—with little oversight or guidance.
First, let's look at some common patterns to locate clear text secrets.
Looking for common patterns to identify credentials
In this section, we will explore some basic tactics and techniques to identify some of the most obvious secrets quickly. Throughout this chapter, we will explore a couple of scripts. Some of them are written in PowerShell, while some are written in Bash. Generally, there will be examples on how to leverage Windows, Linux, and/or macOS variations too.
To install PowerShell Core for Windows, macOS, or Linux, follow the instructions here: https://docs.microsoft.com/en-us/powershell/scripting/install/installing-powershell
In case you didn't know, PowerShell is available also for macOS and Linux. Please refer to the following commands to install them:
On Ubuntu: sudo apt install powershell
(if you don't have the Microsoft repository GPG keys added yet, follow instructions in the preceding link)
On macOS: brew cask installpowershell
After installing PowerShell Core on Linux, launch it with pwsh, as seen in the following screenshot:

Figure 7.1: Running PowerShell Core on Ubuntu
The previous screenshot shows how to launch PowerShell Core on Linux. Do not worry if you are not familiar with PowerShell. There will be plenty of examples using other environments.
When gaining access to filesystems, source code repositories, and so on, some simple searches can already highlight a number of sweet spots to look at.
In PowerShell, this is achieved with Select-String:
Get-ChildItem -Recurse | Select-String password
Important Note
Pretty much every command has an alias in PowerShell. For example, Get-ChildItem can be abbreviated to gci, and Select-String to sls. The same goes for command-line arguments (such as abbreviating -Recurse).
So, to shorten things, you could use gci -r | sls password.
The preceding search can be useful to find hits quickly, especially in source code and configuration files. The basic idea with this technique is to quickly feel the temperature of the patient and understand the overall code quality and hot spots to dig deeper with reviews and analysis.
However, it might return a lot of false positives. To deal with false positives quickly during manual analysis, a good next step is to remove false positives via -NotMatch to get a better high-level view:
gci -r | sls password | sls -NotMatch "falsepos1","falsepos2"
On Linux/macOS, the same can be done with grep:
grep -ir password *
Alternatively, with grep, use the -v option to remove lines that are not wanted:
grep -ir password * | grep -v false_positive
This technique can be used to filter down large amounts of input quickly for some low-hanging fruit.
Hunting for interesting patterns and strings
There are typical strings and regular expressions to look out for. The following table highlights the patterns and keywords that have been useful in my experience:

Figure 7.2: Common patterns and strings to look out for during credential hunting
The preceding list is also located at https://github.com/wunderwuzzi23/scratch/blob/master/creds.csv. It is certainly not comprehensive, but it gives some good insights and ideas on what to look for. When reviewing millions of lines of code and config files, it's great to quickly highlight certain places of interest. Typically, a couple of quick searches can highlight some problematic areas in the code. Afterward, follow the code upstream to find out more.
Important Note
Virtual disk images and related files might contain valuable information on them (including sensitive files and password hashes). Sometimes, red teamers find virtual disk images of servers or even domain controllers with password hashes for all users on them.
Next, we will cover some techniques on how to better automate ad hoc searching for secrets.
Searching for patterns stored in a separate file
Searching for single strings or regular expressions one at a time is cumbersome. As an improvement, put all the search patterns into a separate file, for instance, something named searchstrings.txt, and then leverage your favorite grep tool to find the matches. The following screenshot shows the usage of a pattern file in PowerShell:

Figure 7.3: Searching for multiple patterns in one run using expressions
The previous screenshot shows the usage of PowerShell, and with grep, we can achieve the same by using the -f command-line option.
Additionally, in this case, we want to exclude binary files using -I options as well. There are a lot of variations that can be explored. The following screenshot shows how this is done:

Figure 7.4: Leveraging -f with grep to search for multiple patterns in one run
The previous example shows the usage of multiple command-line options for more efficient searching, including the use of a pattern file (searchstrings.list), as well as the exclusion of binary files, searching recursively, and ignoring the case of strings.
Important Note
It's also possible to store the false positives in a separate file (such as a false_positives.txt file) and filter out any matches with | grep -v -f false_positives.txt. PowerShell's Select-String and/or grep are usually installed by default on hosts that pen testers gain access to (either Windows, macOS, or Linux). In case you are dealing with situations with Windows where PowerShell is not available, there is a legacy tool available called findstr. Let's now look at findstr in more detail.
Using old-school findstr on Windows
If you are on Windows, there is a somewhat antiquated yet powerful tool called findstr. It's straightforward to use, although probably less well known these days. The following screenshot shows how to run the tool:

Figure 7.5: Using findstr.exe on Windows
As can be seen, it basically offers all the same features that we leveraged with grep and PowerShell's Select-String.
Important Note
When processing untrusted files with tools and scripts, consider the possibility that a file contains malware. Hence, take proper precautions. Also, consider that your Blue Team has honeypot files in place to trick you!
So far, we've covered some basic utilities that ship with operating systems and allow for some basic searching of targeted folder and files. One common problem you might run into is that some file formats won't be directly searchable for strings; for instance, binary files or some Office documents.
By way of a quick detour, let's look at a simple mechanism that we can use to look through Office documents using the tactics we've learned so far. We're also doing this to understand some of the limitations of these tactics. Later in this chapter, we will cover much more advanced scenarios to search such files, but for now, we'll keep it simple.
Searching through Microsoft Office documents
When it comes to Microsoft Office documents, we have to consider the format they are stored in. For instance, just running strings on a .docx document will not provide proper results.
Consider this Word document:

Figure 7.6: A Microsoft Word document saved in .docx format
This document uses the .docx format, which is a compressed ZIP archive. This means that running tools such as Select-String, strings.exe, and greps will not provide hits for the passwords since the archive must be unzipped first.
The following is the result of running strings.exe (from sysinternals) on the Word document:

Figure 7.7: Running strings.exe on compressed Word documents does not give results
As can be seen in the preceding screenshot, the command did not highlight the password strings in the document.
A possible solution is to unzip the files and then run regular secret scanning on the extracted files. In PowerShell, an archive file (.zip) can be extracted using Expand-Archive. Here is a quick script to do that:
PS C:>gci -Recurse -Include *.docx,*.xlsx /temp/analysis/ | % { $dest = $_.FullName+".zip" cp $_.FullName $dest $expanded = $dest+".expanded" Expand-Archive -Path $dest -Destination $expanded Write-Host "Expanded Archive:" $expanded }
When reviewing the script, you might wonder why we had to rename the files. This is because I noticed that the Expand-Archive command only processes .zip files. It simply does not attempt to expand the Word documents.
Important Note
To enter multi-line statements with PowerShell, use Shift + Enter for a soft line break.
The following screenshot shows running this command and the results:

Figure 7.8: PowerShell script to expand Office archives
As can be seen in the preceding screenshot, the Office documents were found and expanded. After the files have been extracted, it's straightforward to search through the files via a regular Select-String or grep method:
gci -r *.expanded | sls password | select Path,LineNumber,Line
The following screenshot shows running the command and its results:

Figure 7.9: Searching through files using PowerShell gci and sls
As can be seen in the previous screenshot, this now searches the actual content of the Office documents to see whether there are passwords located in the files. And indeed, we did identify the password from the Word document at the beginning of this section. If you would like to have a PowerShell full screen experience, hit Alt + Enter.
There are many other tools that allow us to search for patterns in files (including archives). For instance, ripgrep (https://github.com/BurntSushi/ripgrep) might be worth a look if you want to explore other options as well.
Important Note
There are other (better) ways to search for sensitive data in Microsoft Office documents:
(1) There's Windows Search, which we will explore in the following section. (2) In Chapter 9, Powerful Automation, we will explore details of Office COM automation, which is another technique we can use to search through documents.
In this section, we continued to discover how to leverage simple search techniques for credential hunting. In the next section, we will explore an interesting example of retrieving clear text credentials in regard to Wi-Fi passwords.
Retrieving stored Wi-Fi passwords on Windows
An interesting approach to retrieving Wi-Fi passwords is to use the Windows netsh command. Open PowerShell or the cmd.exe console as an Administrator and type in the following command:
netsh wlan show profile
As a result, you will see a list of all the Wi-Fi access points the machine has connected to in the past. You might be in for a surprise when looking at this.
For instance, on mine, I noticed a coffee shop that I have not been to in over 8 years—and it's still on the list—it seems Windows is syncing things, which sometimes might not be as obvious to the end user. This was the list on one of my test machines:

Figure 7.10: Showing Wi-Fi hotspots that were previously connected to
The neat thing now is that you can display the clear text password that Windows stored by running the following command:
netsh wlan show profile name= "CoffeeShop" key=clear
In the result, look for the property called Key Content, which contains the clear text password if Windows stored it. Unfortunately, there is no way to show all the clear text passwords at once.
However, this can easily be done with a little script:
netsh wlan show profiles | sls ":" | % {
$ssid = ([string]$_).Split(":")[1].Trim();
if ($ssid -ne "")
{
$key = netsh wlan show profile name="$ssid" key=clear | sls "Key Content"
if ($key -ne $null) { $ssid + ": " +([string]$key).Split(":")[1] }
}
}
The preceding script will lead to the following output:

Figure 7.11: Printing the passwords for previously connected Wi-Fi hotspots
As you can see, it will display clear text passwords for the Wi-Fi endpoints. Please note that some of the passwords have been redacted in the previous screenshot.
Important Note
The scenarios and code examples are kept intentionally simple and on the command line. Feel free to save these script's contents to files, for example, a show-wlan.ps1 file. Then, run the file directly in PowerShell.
In this section, we looked into retrieving passwords for Wi-Fi endpoints on Windows. In the next section, we will cover some automated tools that can help with credential discovery.
Tooling for automated credential discovery
There are third-party tools available for more comprehensive searching, some of which are extensible as well. From a security engineering point of view, such tools need to be integrated into the DevOps pipeline.
The goal is to prevent the most obvious credentials making it into a shared repository.
Building and integrating credential scanning into the engineering pipeline is not a typical red team task. However, it depends on the size of your organization if the red team should take on such tasks. For a smaller company, the red team certainly can step in here to help.
On the other hand, larger organizations should have dedicated security engineering resources for such tasks. The idea is that the red team continuously finds new patterns and locations. Remember from the first part of this book that one of the core contributions and values of establishing a red team program is to focus on uncovering the unknowns.
A tool worth highlighting is truffleHog. The reason for this is that it has two unique features that many other credential scanning tools lack:
- It allows the Git commit history to be searched.
- It uncovers high-entropy strings that might reflect passwords or ciphertext
truffleHog can be found here: https://github.com/dxa4481/truffleHog
When searching for high-entropy strings, the number of false positives will increase, but, at times, you might discover some interesting findings using these features.
An additional benefit is that it's pretty straightforward to customize the regex patterns to better identify other secrets that might be specific to your organization.
In the next section, we will explore a set of options to leverage source code indexing for quickly finding credentials.
Leveraging indexing techniques to find credentials
When it comes to searching for credentials, a very effective technique is to leverage indexing technologies. This could be a system that you run on your own infrastructure to index source code for better analysis. Understanding and using indexing built-in operating systems and indexing services is a powerful technique post-exploitation as well. There's nothing easier and quicker for finding credentials than by just querying an index.
Let's explore both scenarios, starting with third-party tooling to index source code for analysis.
Using Sourcegraph to find secrets more efficiently
Companies with large amounts of source code typically have tooling in place that indexes code and allows for quick searches across the entire code base. Such tools can be very handy for the red team for finding sensitive information that is checked into code.
Red teams should consider leveraging indexing techniques themselves. A useful tool that can be self-hosted quickly – and one I have successfully leveraged for better insights into source code during penetration tests – is Sourcegraph.
The following screenshot shows the basic user interface experience:

Figure 7.12: Searching for credentials using Sourcegraph
The previous screenshot highlights some of the core features of Sourcegraph, which is the quick and easy way to search through and analyze source code repositories. It is a powerful tool for indexing and searching through large code bases.
If you want to explore indexing code repos and learn more about Sourcegraph, there is a Docker image available to get started quickly.
Let's walk through the steps to get you started with experimenting and using Sourcegraph in Docker:
- Installing and configuring Docker: Doing a deep dive on Docker is beyond the scope of this book, but you can install it with the following command:
sudo apt install docker.io
You should not run Docker as root. Instead, add specific accounts to the Docker group with the following command:
sudo usermod -G -a docker $USER
Note that this command typically means you have to log out and back in again for any changes to take effect.
- Downloading the Docker Sourcegraph image: If Docker is running, you can pull the Sourcegraph image. For the latest instructions, please refer to https://docs.sourcegraph.com/#quickstart (since the version numbers will likely have changed by the time you read this). The following screenshot shows how to run the Docker container and start up Sourcegraph:

Figure 7.13: Downloading and running Sourcegraph in Docker
The previous screenshot shows bootstrapping and running the Docker image and what the Sourcegraph server looks like once it is started up.
- Browsing to the Sourcegraph user interface: Once the server is running, go to 127.0.0.1:7080 in Firefox. The main user interface will appear, as shown in the following screenshot:
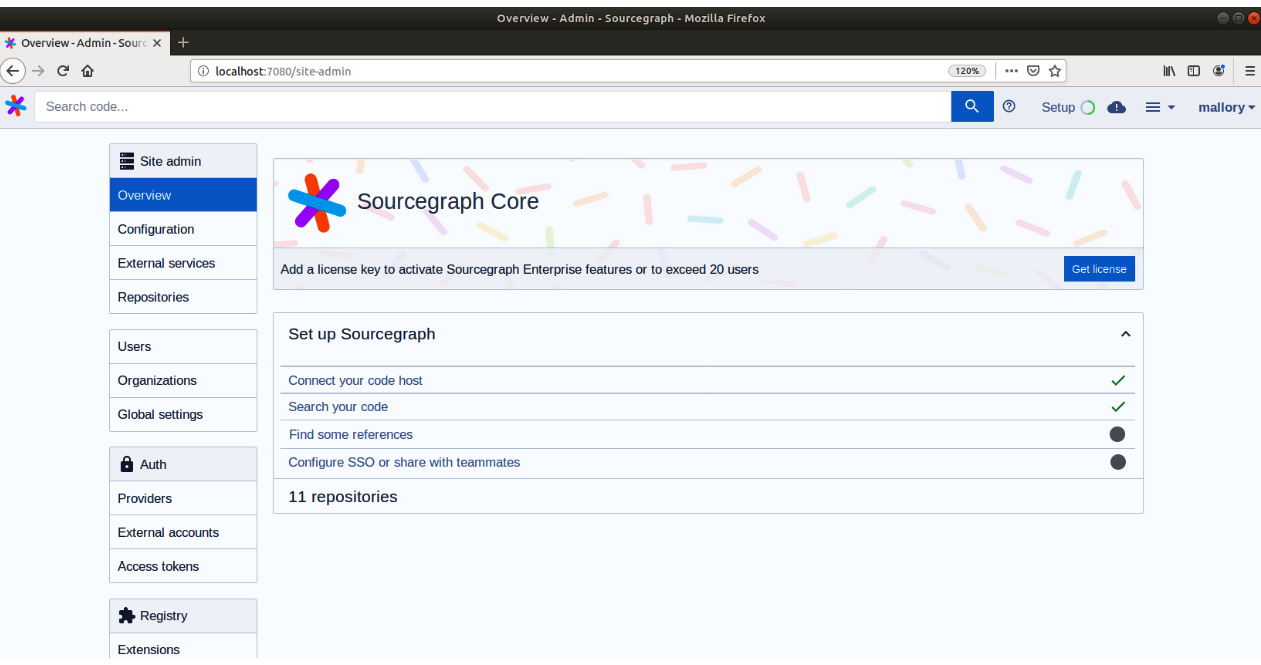
Figure 7.14: Sourcegraph admin interface
The previous screenshot shows the basic setup screen when navigating to Sourcegraph initially. There are a few steps that need to be carried about before we can start hunting for credentials and patterns.
- Creating an admin account: You will be prompted to create an admin account.
- Setting up the repos to index using External services: Setting the services and repos to index can be done by adding External services. A wide range of cloud services, as well as gitolite, are supported. In the configuration, you will need to provide an access token. The following screenshot shows the Add external service screen:

Figure 7.15: Adding external source repos to index
After you've added the repos and you would like to index using the Add external service configurations, Sourcegraph will go to work and index the data.
- Searching for credentials: The search experience is available at http://localhost:7880/search, as can be seen in the following screenshot:

Figure 7.16: Hosting your own Sourcegraph instance is straightforward
The previous screenshot shows the main user interface for searching. After indexing is complete, we can start hunting for credentials.
Let's start with the most obvious first query, which is likely just searching for password:

Figure 7.17: Searching for password using Sourcegraph
The previous screenshot shows the search query as well as the results of the search. Notice that searching will be super quick! The index is also kept refresh automatically.
The query engine supports regular expressions and other features to help identify things in code that should not be there: https://docs.sourcegraph.com/user/search/queries
Sourcegraph also indexes diffs and commit messages, which is useful for finding places where credentials were removed in the past (but maybe not rotated, and hence are still valid). The following screenshot shows how to look at the history of diffs. This screenshot highlights a credential that was checked in by accident and then later removed:

Figure 7.18: Searching diffs
The previous screenshot shows how to search through diffs, which allows us to look at past check-ins and how the code changed over time. This, at times, highlights secrets that were removed from code but might still be valid.
Another place to look is the commit messages themselves as they, at times, give hints on what change occurred. The commit messages might highlight issues and places to investigate further as a red teamer. A message that highlights the removal of credentials (or the word accident) could be useful:

Figure 7.19: Searching through commit messages
The search examples so far have been focused on basic words, but we can query for more complex regular expressions as well:

Figure 7.20: Doing more complex regular expression searches
The previous screenshot highlights the usage of regular expressions for searching, which enables powerful password pattern finding. The queries can be automated and there is also a built-in alerting system. Indexing source code and data is a powerful technique that can be used to help analyze a large code base, configuration files, and so forth.
Important Note
A note for blue teamers! Applying active defense strategies, as we discussed in the first part of this book, can be useful here to leverage Homefield Advantage. If your company has source code indexing available for engineers, the Blue Team should start monitoring queries that come in to build alerts in case someone starts excessively searching for credentials.
For instance, the Blue Team should monitor for honeypot service accounts in query logs. If anyone starts searching for the names of honeypot service accounts, alerts can go off to monitor the actor more closely.
Searching for credentials using built-in OS file indexing
Operating systems come with built-in indexing solutions that allow us to search for filenames quickly, and some, by default, also index the content of files. In this section, we will explore the indexing features of Windows and macOS, namely, Windows Search and Spotlight.
Using Windows Search and directly querying the system index database
Windows Search is the default indexing tool on Windows.
To explore the Windows Search configuration, type Indexing Options into the Windows search bar to open the configuration settings. The following screenshot shows the indexing options. By clicking Advanced, you can explore what file location and file types are indexed.
The following screenshot shows the dialogue and the settings per file type:

Figure 7.21: Exploring Windows Indexing Options per file type
As can be seen, there are two options: indexing properties and file contents. Look through the list of locations and explore formats such as .txt, .doc, or .xls to get a better understanding of what Windows indexes by default.
Remember the Word document in the previous section? Looking at the indexing options for .docx, we can see that .docx is being fully indexed, including file content. The following screenshot shows this:

Figure 7.22: Word documents and content is indexed by default
Now that we know what files are indexed, we can leverage Windows Search to find passwords in them!
Options for using Windows Search
At a high level, there are two different approaches you can take to Windows Search:
- The first one is via the user interface:
This might be the one most users are quite familiar with. This, by default, only shows your own files and excludes those of other users (this also happens when you are an Administrator).
The following screenshot highlights the search experience. The dedicated tab on the top left is used to enter the Search mode, while on the right search box, we can query the index and see results. In this case, we search for files containing password:

Figure 7.23: Searching using Explorer on Windows
As the preceding screenshot shows, there was one file that did indeed contain password.
However, a more efficient way than using the Explorer user interface is to do this via code and directly connect to the database that stores the index.
- Using the underlying Windows Search database:
The arguably better approach, especially for a red teamer, is to directly connect to the underlying Windows Search database to query for properties and full text directly.
The following is a simple PowerShell function that will query the index:
function Invoke-WindowsSearch
{
param
(
[Parameter()][string] $SearchString = "password"
)
$query = "select system.itemname, system.itempathdisplay from systemindex where contains('$SearchString')"
$provider = "Provider=Search.CollatorDSO.1;Extended?PROPERTIES='Application=Windows'"
$adapter = new-object System.Data.OleDb.OleDBDataAdapter -Argument $query, $provider
$results = new-object System.Data.DataSet
$adapter.Fill($results)
$results.Tables[0]
}
The previous script connects to the Windows Search database and performs a contains search. There are a variety of options and parameters that can be specified to change search behavior.
To author the function, you can use the PowerShell ISE development environment that ships with Windows, as shown here:

Figure 7.24: The Invoke-WindowsSearch function to perform a simple full text search
The following screenshot shows Mallory searching the entire machine for passwords within a few moments by querying the index:

Figure 7.25: Results of querying the index with admin privileges
As an Administrator, the search shows matching files that are indexed on the machine. In order to run as an Administrator, make sure to launch the PowerShell session with Run as Administrator.
There are plenty of code examples on how to use Windows Search, with a variety of technology stacks available on GitHub as well:
Let's look at the search query language in a bit more detail.
Exploring more advanced full-text search features
There are a wide set of features that can be leveraged when querying, such as CONTAINS, FREETEXT, and LIKE usage in the WHERE clause, that are quite powerful. The following link gives an overview of Windows Search, as well as the query language's capabilities, including relevance and ranking using RANK BY:
https://docs.microsoft.com/en-us/windows/win32/search/-search-sql-ovwofsearchquery.
Feel free to read up on the documentation to explore the full power of full text searching.
Searching remote machines
Windows Search can also be used to search the index of remote machines that are sharing files out. To search remote machines, include the remote server in the SELECT query and add a SCOPE parameter accordingly, as follows:
SELECT System.ItemName, System.ItemPathDisplay FROM saturn.SystemIndex WHERE CONTAINS('password') AND SCOPE='file://saturn/shareName'
The following example shows how to use PowerShell to query the remote index \saturnshare:

Figure 7.26: Querying a remote Windows Search index
The previous screenshot shows how to query for information on the index of a remote machine named saturn.
Whenever you use an indexer, remember that not all file locations on a host might be indexed.
In this section, we explored how to use Window Search to our advantage. Next, we'll explore Spotlight on macOS.
Using mdfind and Spotlight on macOS
Spotlight is the indexing solution on macOS. Let's briefly explore how this can be leveraged to our advantage during red teaming.
Using mdfind on macOS, an adversary can quickly find files that contain sensitive words:
Figure 7.27: Running mdfind to find passwords
The following screenshot shows the creation of a file and how quickly it will be indexed by Spotlight:

Figure 7.28: Using mdfind on macOS to search files for sensitive content
Here is a quick explanation of the steps that were taken in the previous screenshot:
- We created a file named secret.information that contains a secretkey as a string.
- Then, we used mdfind to search for files containing such secret keys. Interestingly, there were two such files on the machine. The first one was secret.information, which is the file we had just created, which was indexed immediately by Spotlight. The second one is the key.info file, which is a file that was already present and indexed.
To show the content of the entire line, the third command uses xargs and grep to retrieve the entire line.
In this section, we explored built-in operating system features that can allow the red team to find sensitive documents quickly on compromised hosts. However, looking for clear text passwords is not the only area to focus on. For an adversary, ciphertext can be just as valuable. This is what we will look at next.
Indexing code and documents using Apache Lucene and Scour
There is one more interesting and straightforward approach for indexing to highlight. It is a PowerShell module named Scour, which uses Apache Lucene, a popular indexing framework. Scour was created by Lee Holmes and is described in more detail in this blog post: https://www.leeholmes.com/blog/2018/08/28/scour-fast-personal-local-content-searches/
To give you an idea of how it works, here are the basic steps to get going with indexing and searching for passwords:
- Install the PowerShell module:
PS C:source>Install-Module -Name Scour
- Index the current folder recursively:
PS C:source>Initialize-ScourIndex
The following screenshot shows running the indexing command:

Figure 7.29: Indexing content with Scour
The previous screenshot shows the process during indexing of the files. This might take a moment, depending on the number of files and their sizes. What files get indexed is customizable. Notice that, in the local directory, there will be a folder named __scour, which contains the index.
- Search the index for passwords using the Search-ScourContent command:
PS C:source>Search-ScourContent password
The following screenshot is the result of a simple password search:

Figure 7.30: Searching for passwords using Search-ScourContent
As you can see, the preceding command prints out the files that contain the text password. More advanced queries are possible as well. In most cases, during red teaming, you probably want to use the Windows Search Index, as we highlighted earlier, but Scour can be very useful for doing local source code analysis. The focus lies on the analysis of source and configuration files.
In this section about hunting for clear text credentials, we covered some basic techniques to search for credentials, as well as built-in operating system capabilities that can help you identify clear text secrets.
Let's explore what else we should be looking for. In particular, let's dive into searching for ciphertext and hashes.
Hunting for ciphertext and hashes
It's quite common to find ciphertext or hashes stored in widely accessible locations; for instance, inside deployment configuration files, or sometimes hardcoded in the source directly. Let's look at these two cases in more detail, starting with ciphertext.
Hunting for ciphertext
Storing ciphertext is slightly better than storing clear text credentials. But this approach has its weaknesses. An adversary can exfiltrate the ciphertext, and then perform an offline brute-force attack to attempt to recover the clear text. If the ciphertext was encrypted using a simpler password, then an adversary might be successful quickly. This is one example of an attack, but there are more.
Also, if you identify ciphertext in code, then always parse the surrounding code to see where the key to decrypt the ciphertext is located. There have been countless times in my career where the key is basically co-located in the same file or directory.
Typical places where ciphertext can be found include in code directly, but also in configuration files, such as Ansible configuration files.
Next let's look at password hashes.
Hunting for hashes
Hashes can also be brute-forced offline (cracked) to recover the original value. There are two famous tools that can be used to crack hashes, namely, Hashcat and John. Depending on the strength of the password and the hashing algorithm used, this can be quite effective in gaining access to recover clear text passwords. There are also attacks such as pass-the-hash and relay attacks where an attacker never has to know the clear text credential in the first place.
Hashes can be found in a large variety of places and forms, from hashes that are used for authenticating to the operating system and remote devices, to hashes for web applications and other systems stored in files or databases.
Let's look at some common places where hashes can be found.
Windows – LM, (Net-)NTLM, and NT Hash
Windows has a couple of hashes that are interesting to look for and know about. The naming is a bit confusing; LM, NTLM, NT Hash, and Net-NTLM and the different version numbers all sound somewhat similar, even though they mean different things.
NT Hash is directly created from a user's password. If an attacker is in possession of an account's NT Hash, they attempt to crack the password to recover the clear text. Furthermore, if the NT Hash is valid, it can be used to impersonate the victim's Windows account without having to crack it. These direct attacks are called pass-the-hash attacks. In Active Directory, the domain controllers store the NT Hash of all accounts in a local file called NTDS.dit.
LM Hash is a rather old way to hash a password, and it has been known to be insecure for multiple decades. Nevertheless, for backward compatibility, you might still stumble upon it.
When running tools that dump hashes, you will see both types of hashes if they are present:
Tom:SATURN:382EE38891E7056E17306D272A9441BB:A107E5624083963DB8DBE61F3D288588
The previous example shows both LM Hash and NT Hash, separated by colons, as well as the account name and host. Tools vary a bit when printing this information, and often, you might not observe an LM Hash at all in modern, securely configured environments. The NT Hash can also be used to perform a pass-the-hash attack with tools such as Mimikatz or Windows Credential Editor.
Challenge: Can you figure out what the actual password of the hash is? Can you crack it?
Although being similarly named, NTLM, the network authentication protocol, also deals with hashes. When discussing those hashes, you will often see them being referred to as Net-NTLM hashes, and they come in various versions (NTLMv1, NTLMv2, and so on).
If one of these hashes is captured during the authentication flow, it can be cracked, but there is something more interesting we can do with them. The authentication protocol can be exploited with relay attacks. Here is a high-level summary of how this works:
- An adversary wants to gain access to the SQL Server database on the network.
- The adversary creates a malicious web server that requires NTLM authentication.
- The adversary tricks the victim into visiting the web server (for example, via phishing or updating a wiki page with a bad link).
- At this point, the victim's computer starts the NTLM authentication flow, and the malicious web server relays all packets to the target SQL Server accordingly.
- If the victim has access to SQL Server, the attacker can use the NTLM hash, which flows during the authentication process and gains access to the target.
- The result is that the adversary gains access to the targeted server using this technique. There is very good tooling available to perform such attacks.
Responder (https://github.com/lgandx/Responder) and Inveigh (https://github.com/Kevin-Robertson/Inveigh) are tools that can help emulate these attacks.
Security scanners often run with high privileges and connect to most machines on the network, including potentially malicious ones. An adversary that creates a malicious file server might be able to impersonate the account of the network security scanner if it is not configured securely. This is certainly something that should be tested for in your environment.
Important Note
Virtual disk images (such as .vhd) might contain valuable information on them (including sensitive files and password hashes). Sometimes, red teamers find virtual disk images of domain controllers with password hashes for all users on them.
Now that we've covered Windows, let's look at Unix-based systems and how to find hashes.
Looking at shadow files on Linux
On Linux/Unix, the hashes are typically in the /etc/shadow file. To crack those, you must first unshadow that file by merging /etc/passwd and /etc/shadow using the unshadow command. Afterward, you can start cracking with tools such as john.
Accessing hashes in the directory service on macOS
On macOS, the hashes for accounts are stored in the local directory service. Implementation-wise, these are the .plist files stored under the dslocal path on the filesystem at /var/db/dslocal/nodes/Default/users/*.
On the latest versions of macOS, System Integrity Protection (SIP) does not allow root to access the files directly. If there are multiple accounts on your Mac and you would like to explore the .plist files, then you could disable SIP (be careful, though).
You can see whether SIP is enabled by running csrutil:
# csrutil status
System Integrity Protection status: enabled.
Alternatively, there is the directory service command-line tool, dscl. As root, you can read the details of any other account. For instance, let's look at Bob:
# dscl . -read /Users/Bob/
The following screenshot shows the detailed output of the preceding command:

Figure 7.31: Exploring details of accounts using dscl on macOS
As you can see in the preceding screenshot, there is quite a lot of information available, including the following:
- creationTime
- failedLoginCount
- passwordLastSetTime
- Password hash (ShadowHashData)
- Authentication hint in clear text, and much more
Since our goal is to recover the clear text password, let's look at the password hash in more detail with the following command:
# dscl . -read /Users/Bob/ dsAttrTypeNative:ShadowHashData
The following screenshot shows what the results will look like:

Figure 7.32: Reading password hashes using dscl
As can be seen in the preceding screenshot, this command returns the bytes of the hash, salt, as well as iterations in plist form. Once these have been extracted, the base64-encoded values have to be converted into hex for Hashcat to crack them.
Important Note
The first time I did this, I had to figure out a lot of these conversions and it took a while. The following link was quite useful along the way: https://apple.stackexchange.com/questions/220729/what-type-of-hash-are-a-macs-password-stored-in/220863
The goal is to construct a Hashcat-compatible line for Bob's SALTED-SHA512-PBKDF2 hash in the form of $ml$iterations$salt$entropy.
The iterations are in the dscl output directly. In this case, the number is 34129.
The following screenshot shows how to convert the base64 salt and entropy into a hex:

Figure 7.33: Converting a base64-encoded value into a hex
Next, we do the same for the entropy and then put it all together in a hash.txt file. Finally, we can run hashcat and attempt to crack it using the following command:
$ hashcat -m 7100 hash.txt -a 0 word.list
The following screenshot shows how to run Hashcat:

Figure 7.34: Using Hashcat to crack the password hash
That's it! As shown in the previous screenshot, we successfully cracked the hash using our simple wordlist, and the password is insecure.
Interestingly, you can also get detailed information, such as the password hint and other information in clear text:
# dscl . -read /Users/Bob/ AuthenticationHint
Authentication Hint:
The password hint is not encrypted!
The string shown is the actual string that the user entered as the authentication hint.
Another option for looking at this information is the Directory Utility on macOS. To launch it, hit Command + Spacebar and type Directory Utility. The following screenshot shows the Directory Utility:

Figure 7.35: Directory Utility on macOS to explore local accounts and Active Directory
If your Mac is connected to Active Directory, you can explore the entire enterprise directory with the built-in Directory Utility. The previous screenshot shows the local database only.
Now that we've covered the popular places to find and use hashes on the major operating systems, let's look at one more approach that is quite different. This attack is about Bash Bunny and involves physically plugging a USB device into a host. Let's explore this in more detail.
Bash Bunny – stealing password hashes from locked workstations
Bash Bunny is a USB stick by hak5 and it can be loaded and customized with a set of scripts. It can act as a network, mass storage, or as a simple input device that sends keystrokes to a workstation after being plugged in.
Important Note
The reason to highlight Bush Bunny here is because it can be used to steal Net-NTLM hashes from entirely locked workstations. All that is needed is to plug the USB device into the target computer.
If you have scoped in physical pen testing and proper authorization, this might be something to explore during an operation. More details and features of Bash Bunny can be found here: https://wiki.bashbunny.com
In this section, we covered hashes, and where to locate and use them on different operating system. With that, we've come to the end of this chapter.
Summary
In this chapter, we focused on hunting for credentials. We started off with basic, yet effective, ways to search through files and code for clear text passwords. Afterward, we dove into applying similar concepts and techniques on ciphertext and hashes. This included highlighting the various locations where popular operating systems store password hashes.
Source code indexing aids tremendously in quickly searching through large amounts of code. For the red team, this can be useful after exfiltrating large amounts of source code. The code can be analyzed for credentials and other weaknesses using indexing tools such as Sourcegraph.
We also explored searching utilities for operating system index solutions (such as Spotlight) that can be leveraged to quickly find content on compromised hosts during operations.
In the next chapter, we will continue to explore how to find credentials via more advanced and, at times, offensive techniques, including leveraging tracing and logging, as well as spoofing and optical character recognition.
Questions
- What PowerShell command can be used to find strings in text?
- What grep command-line option does not match a pattern (for instance, if you want to remove false positives)?
- Can the Windows Search Index be queried remotely? If so, how?
- What is the name of the command-line tool that's used to query Spotlight on macOS?