
When inside a route, you can use the controller to transition to another route. We'll look at an example on how to transition from one route to another.
- In a new application, generate the following files:
$ ember g route foo1
$ ember g route foo2
$ ember g controller foo1
$ ember g controller foo2
$ ember g template index
This will generate two different routes for us—the
foo1andfoo2routes. Each route will have a button that transitions to the other route. Each controller will handle the action logic. - Add an action to the foo1 controller:
// app/controllers/foo1.js
import Ember from 'ember';

export default Ember.Controller.extend({
    actions: {
      enter(){
        this.transitionToRoute('foo2');
      }
    }
});
This controller has one action called
enterthat transitions to the route calledfoo2. Thethis.transitionToRoutemethod is used to transition to different routes in the application. It takes two arguments. The first argument is the name of the route. The second argument is optional, and it is where you enter in the model. By default, it will be serialized in the URL if added.The
trasintionToRoutemethod can take route paths as well. For example, you might have afoo2nested route calledfoo3. You can transition to this route by callingthis.trasitionToRoute('foo2.foo3'). - Add an action to the foo2 controller:
// app/controllers/foo2.js
import Ember from 'ember';

export default Ember.Controller.extend({
    actions: {
      enter(){
        this.transitionToRoute('foo1');
      }
    }
});
When the
enteraction is triggered, it transitions to thefoo1route. - Update the foo1 template:
// app/templates/foo1.hbs
This is Foo1<br>

<button {{action 'enter'}}>Move to route foo2</button>
This
buttontriggers theenteractionin thefoo1controller. - Update the foo2 template:
// app/templates/foo2.hbs
This is Foo2<br>
<button {{action 'enter'}}>Move to route foo1</button>
This
buttontriggers theenteractionin thefoo2controller. - Add a link to both the routes in the index template file:
// app/templates/index.hbs
{{link-to 'Foo1 Route' 'foo1'}}<br>
{{link-to 'Foo2 Route' 'foo2'}}<br>
This uses the
link-tohelper in a non-block form. The first argument is the name displayed and the second is the name of the route. - Update the application template file:
// app/templates/application.hbs
{{#link-to 'application'}}<h2 id="title">Welcome to Ember</h2>{{/link-to}}

{{outlet}}
The application template file has a link back to the application at the top.
- Run
ember serverand you'll see the following screen after opening a web browser: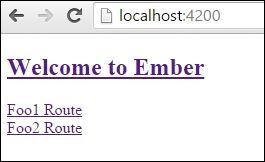
- Click on the Foo1 Route link. The following page will be displayed:
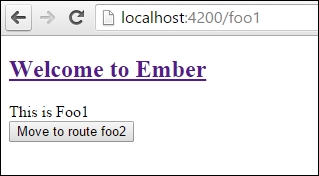
This displays the foo1 route.
- Click on the Foo2 Route button. The following screen will be displayed:
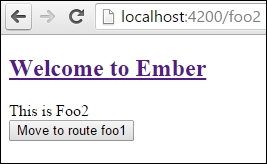
After the button is clicked, the foo2 route is displayed.