
Components can communicate changes with actions. These actions can be sent back to the parent or be handled in the component. Let's take a look at a few recipes that show this.
In this recipe, we'll create a student list that we will then manipulate.
- In a new project, generate a
student-listcomponent:$ ember g component student-listThis will generate the
student-listcomponent and the necessary files. - Update the
student-list.jsfile in theapp/componentsfolder. We'll need to create a fewactionsand a new array:// app/components/student-list.js import Ember from 'ember'; export default Ember.Component.extend({ init() { this._super(...arguments); this.setup(); }, actions: { remove(){ this.get('listOfStudents').popObject(); }, reset(){ this.setup(); } }, setup(){ let st = this.set('listOfStudents',[]); st.clear(); st.pushObject('Erik'); st.pushObject('Bob'); st.pushObject('Suze'); } });The first part of this component is the
initmethod. This will fire as soon as the component is initialized. This is a private method that sets up the component. As we are overriding this framework method, we must callsuperso that the component is created correctly. Thesetupmethod is then called.The
setupmethod creates a newlistOfStudentsarray, clears it, and creates three new string objects by popping them onto the array. As we are creating thelistOfStudentsarray in theinitmethod, it will be local to this component instance. It's good practice to declare objects or properties in theinitordidInsertElementmethods. Otherwise, if the object or array is declared as a property of the component, the component will no longer have its own independent state. We'll be discussing thedidInsertElementhook later in the book.There are two
actionslisted,removeandreset. Both will tie back into actions in the component's template that we'll use later. Theremoveaction removes or pops off one object from the top of the array. Theresetmethod callssetup, and this returns the component to its original state. - Add a couple of buttons and use the
eachhelper to list the contents of the array in thestudent-list.hbsfile in theapp/templates/componentsfolder:// app/templates/components/student-list.hbs <button {{action 'remove'}}>Remove</button> <button {{action 'reset'}}>Reset</button><br> {{#each listOfStudents as |student|}} {{student}}<br> {{/each}}The
{{action}}helper will fire when theremoveandresetbuttons are pressed. The first argument to theactionhelper is always the action name. Theeachhelper lists the contents of thelistOfStudentsEmber array. - For the last part, add the
student-listcomponent to the application template:// app/templates/application.hbs <h2 id="title">Welcome to Ember</h2> {{student-list }} {{outlet}}This will display the contents of the
student-listcomponent. - After starting
ember server, your output will look as follows: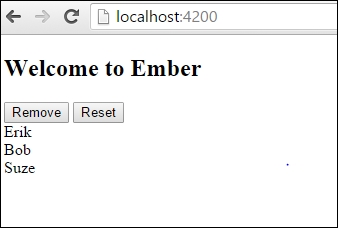
Pressing the Remove button will remove each item one by one. The
Resetbutton will reset the array back.
Ember provides you with a way to send actions from a parent to child component. We can use closure actions to make this possible.
- In a new project, generate a new
applicationroute and astudent-listcomponent:$ ember g route application $ ember g controller application $ ember g component student-list
This will generate the
application.jsfile in theapp/routesfolder, theapplicationcontroller, and thestudent-listcomponent. - In the application route file, add a new
listOfStudentsarray:// app/routes/application.js import Ember from 'ember'; export default Ember.Route.extend({ listOfStudents: [], beforeModel(){ this.reset(); }, model(){ return this.get('listOfStudents'); }, reset(){ let st = this.get('listOfStudents'); st.clear(); st.pushObject('Tiffany'); st.pushObject('Zack'); st.pushObject('George'); }, actions: { removeRoute(){ this.get('listOfStudents').popObject(); }, resetRoute(){ this.reset(); } } });This might look familiar to you from the previous example. Here, we are creating a new array called
listOfStudents. ThebeforeModelhook will run before the model is set up. In thisbeforeModel, theresetmethod is called. This adds the default data to the array.The model hook returns the
listOfStudentsarray. In addition, we added two actions,removeandreset, to remove an item or reset the items back to the original array, respectively.This was essentially the same code that we had in the component earlier but we moved it to the route instead.
- Edit the
application.hbsfile and add the component that we just created:// app/templates/application.hbs <h2 id="title">Welcome to Ember</h2> {{student-list onRemove=(action 'removeController' ) onReset=(action 'resetController')}} {{#each model as |student|}} {{student}}<br> {{/each}} {{outlet}}This template will show a list of students from our model and our
student-listcomponent. TheonRemoveandonResetproperties are set to actions that are basically functions in our parent controller that we can pass to the component. This is called a closure action. All closure actions must have parentheses surrounding the(action 'removeController')action. - Add two new actions to the controller:
// app/controllers/application.js
import Ember from 'ember';

export default Ember.Controller.extend({
    actions:{
      removeController(){
        this.send('removeRoute');
      },
      resetController(){
        this.send('resetRoute');
      }
    }
});
These two actions use
this.sendto send the action to theremoveRouteandresetRouteactions that we defined earlier. You can use thesendmethod to trigger actions from parent routes or controllers. - Update the component template file:
// app/templates/components/student-list.hbs
<button {{action 'removeComponent'}}>Remove</button>
<button {{action 'resetComponent'}}>Reset</button>
This component displays two buttons that are linked to actions that are defined in the component.
- Update the component JavaScript file with the two new actions:
// app/components/student-list.js
import Ember from 'ember';

export default Ember.Component.extend({
    actions: {
      removeComponent(){
        this.get('onRemove')();
      },
      resetComponent(){
        his.attrs.onReset();
      }
    }
});
These actions will be triggered from the component template. At this point, they'll trigger the function that was passed to it from the closure actions,
onRemoveandonReset.To invoke these methods, you can do it using either
this.getorthis.attrs. Thethis.getmethod and the name of the property, in this caseonRemove, will invoke the method passed to it.In the other case, you can use
this.attrsto access the attributes on the property to invoke the function that was passed on,this.attrs.onReset().The action will flow this way: application template -> component -> controller -> route. The end result is the route triggering the action to remove or reset the list.
- Run
ember serverand you should see a list that you can now delete or reset: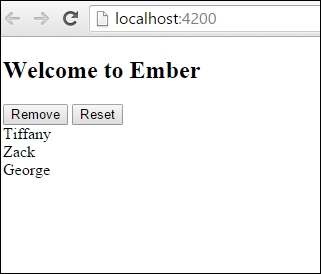
- Clicking on the Remove or Reset buttons will trigger an action that was passed in from the controller. This action will bubble up to the route to reset or remove an item from the list.
Actions can be handled in a few ways in a component. Actions can be added to different HTML tags and be handled within components. Actions can also be sent to parent components or controllers using closure actions or send.
Closure actions make the passing of actions much easier. We can pass down actions to components that they can then invoke. This helps separate logic between different parent routes, controllers, and components.