Architectural photography is one of those photographic specialties that look fairly simple. How hard can it be to point a camera at a building and click the shutter?
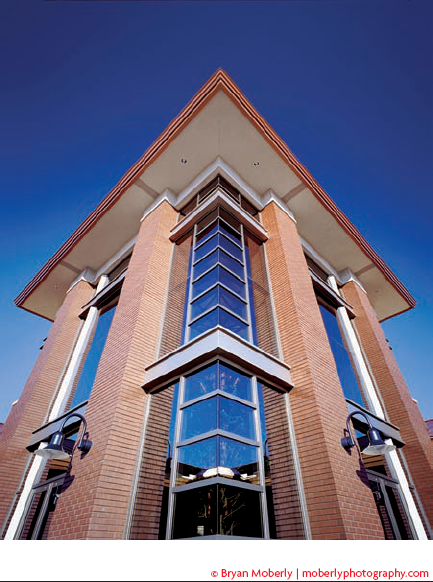
But getting great architectural shots like figure 15-1 takes much more effort than most people realize. You need to have a good eye to find interesting and attractive angles that show off the unique features of each building. And dealing with perspective issues can test a photographer's skill. But most of all, architectural subjects can present some exposure and lighting challenges with demanding outdoor locations and confined spaces and mixed light sources indoors.
Photographing an architectural exterior has a lot in common with shooting a landscape. You can't move the subject to put it into better light, and you can't light the whole structure yourself with normal photographic lighting instruments. Instead, you must wait for the available light to be right, which usually means waiting for the right time of day for the sun to be in position to light the building in an attractive way.
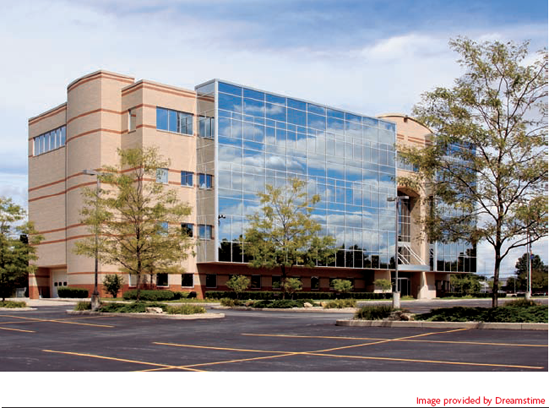
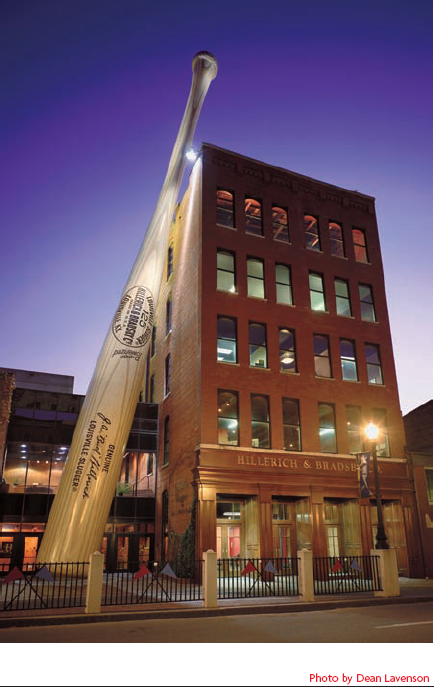
Architectural exteriors can be more demanding than landscapes because the photographer usually has much less leeway in subject selection. When you set out to photograph a landscape, you pick one that looks good and bypass dozens of others that aren't as attractive. You may be able to do the same with buildings if you're an artist looking for interesting architectural details, but most architectural photography is the result of a commercial assignment to photograph a specific building from an angle that includes a sign or other feature, like the one in figure 15-2. Whether the building is a beautiful piece of architectural sculpture or an ugly utilitarian box, your job is to make it look good, and that requires good light. The trick is to predict when the light will be right, so you can be in position to take the picture when it occurs.
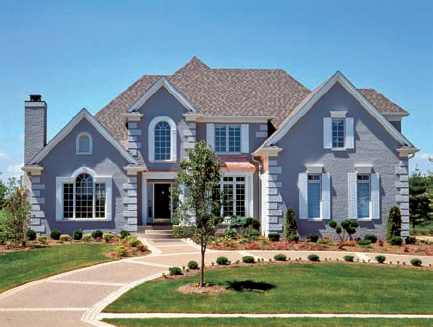
Traditionally, most architectural exteriors such as figure 15-3 are photographed in full sun, because the brilliant light and crisp shadows help accentuate the overall form of the structure, bring out the architectural details, and make the building look clean and bright. Of course, you can sometimes get some nice effects under other lighting conditions (even rain, snow, and fog), but full sun has evolved into the standard for a reason — it works.
Normally, you select the best time of day to photograph an architectural exterior based on the orientation of the building. Pick the time when the sun directly lights the primary façade, main entrance, or other architectural feature that you want to highlight. Keep these tips in mind:
East-facing buildings need morning sun. The east side of the building is usually shadowed and dull in the afternoon.
West-facing buildings need afternoon sun.
The south side of buildings in the northern hemisphere usually gets some sun during most of the day. Select the best time based on which of the adjacent sides you want to include or whether the building is skewed slightly towards the east or west.
The north side of a building (in the northern hemisphere) often gets little or no direct sun, so the best you can get is open shade lighting. You'll probably want to shoot at mid-day and during the summer months. Avoid low sun angles (early morning, late afternoon, winter days in northern latitudes) that might create a backlighting situation.
Mid-day sun generally provides more uniform lighting by minimizing shadows cast to the side and furnishing slightly more illumination on the off side of the building.
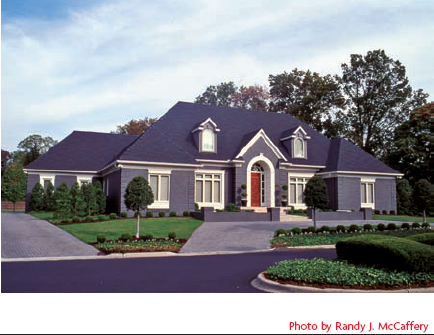
Early morning and late afternoon sun create more dramatic effects with long shadows such as those in figure 15-4. A little later in the day, the light takes on a warmer tone. On the east or west building façades, the low sun angle can actually reduce shadows by reaching farther back under deep overhangs.
To determine the orientation of a building and predict the optimum time to photograph it, scout the location ahead of time. If it's not practical to visit the site, you can often get a good general idea of the building's orientation by checking its address on an ordinary street map.
Tip
When scouting a location for an architectural photograph, don't just guess at the orientation of the building, check it with a compass. Knowing the actual orientation of the building makes it much easier to accurately predict how the lighting will change at different times of day.
Most architectural photos include a significant amount of sky, and the appearance of that sky can enhance or detract from the finished image. A dull, featureless sky tends to make the whole picture look a little dull, so you usually want to avoid shooting on overcast days. You want either a clear blue sky or an attractive cloudscape like the one in figure 15-5.
Tip
To increase your chances of getting a nice rich blue sky, shoot toward the north on a day with low humidity. In the northern hemisphere, the north sky is noticeably darker, with a richer blue color. Humidity creates haze and light scatter that lightens and washes out the sky color, so the lower the humidity the better.
Tip
A polarizing filter can dramatically enrich the color of a blue sky by reducing glare and reflections from water droplets suspended in the air. However, you have to be careful about the impact the polarizer has on window glass. If you reduce the reflections on glass too much, the windows can look dull and vacant.
Ideally, you can photograph your subject when the light on the building is just right, and the clouds create a pleasant pattern in the sky. However, if you're not lucky enough to have both of those conditions occur simultaneously, concentrate on the building, and worry about the sky later. You can use the magic of digital image manipulation to drop in a blue sky and fluffy clouds from another image later. Just be careful to match the color and direction of the light on the clouds to the light on the building, otherwise the finished image will look subtly "wrong."
In contrast to the challenges of getting the right lighting for an architectural exterior, getting the right exposure is usually relatively straightforward. Because photos like figure 15-6 are usually shot in full sun, the sunny-16 rule normally prevails, and you could just set your exposure manually to 1/100 at f−16 with ISO 100. Most architectural subjects comprise a normal brightness scale, so your camera's automatic exposure system should produce good results, too. You're unlikely to need any exposure compensation unless the subject is unusually dark or light and fills the frame with those extreme tones. When selecting exposure settings for architectural exteriors, keep these tips in mind:
Black glass and steel construction usually creates a building that is about one stop darker than middle gray. Meter those areas and then apply exposure compensation of minus one EV.
Most medium red and gray bricks are close to middle gray in value. You can use your camera's spot metering mode and base your exposure on those tones without further adjustment.
Dry concrete, stone, painted siding, and similar building materials are usually about one stop lighter than middle gray. Meter those areas and then apply exposure compensation of plus one EV.
White painted siding, white marble, and highly reflective glass are often two stops brighter than middle gray. Meter those areas and then apply exposure compensation of plus two EV.
As always, shoot a test and then check the histogram to confirm that you've got a good distribution of tones with no clipping at either end of the value scale.
Tip
To keep vertical lines straight and parallel in your photograph, the camera back must be vertical when you take the shot. The swings and tilts of a view camera are designed to allow you to point the camera at an angle to compose the shot and still keep the back straight and plumb. If you don't have access to a view camera, you can shoot with a digital SLR camera that is carefully leveled on a tripod to keep the back vertical. Since you can't tilt the camera to compose the shot, you'll need to compose by cropping the image afterwards. Photoshop and other image editors often include a perspective correction filter that can compensate for some camera tilt, but it's better to avoid the perspective distortion to begin with and not rely on the filter to correct it.
The traditional standard of shooting architectural subjects in full sun works well most of the time, but sometimes you may want something different. You can get some dramatic effects from unusual lighting situations such as the prelude to an approaching storm. You can also get great looks like figure 15-7 at sunset or dusk.
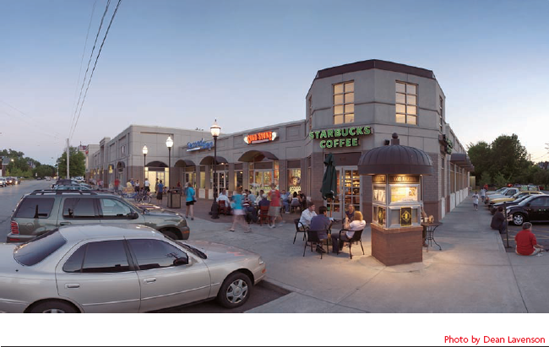
Dusk (a few minutes after sunset) is an especially effective and challenging time to shoot architectural subjects. In figure 15-8, there's still enough daylight to see the outside of the building clearly, and yet it's dark enough for the sign and interior lights to have equal impact. The mix of colors from a variety of light sources can add some color to what would be a drab building during the day. The fading light of day shifts blue with the absence of any direct sunlight. That makes tungsten lights look even more yellow than usual in comparison. Most fluorescent lights tend to go green, and light from signs and other light sources kick in their own colors.
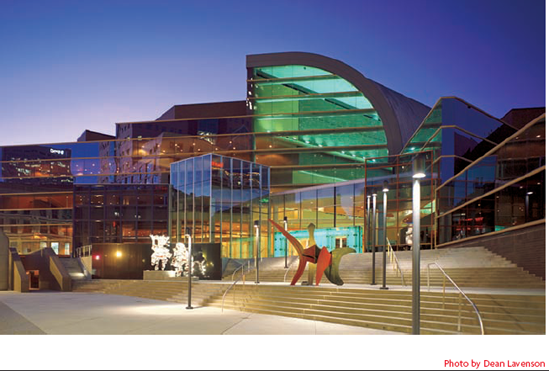
Images such as figure 15-9 can have a stunning effect, but getting the right exposure is not easy. Your camera's automatic exposure system isn't designed for this situation, and achieving good results on the first shot is unlikely. You can try shooting a test and then adjusting your exposure based on the preview image and histogram. However, given how fast the light changes in those fleeting minutes between daylight and dark, it may be difficult to test, evaluate, and adjust fast enough to get the shot. You might be better off just bracketing like crazy.
Note
If you're not familiar with bracketing, see Chapter 3 for an explanation.
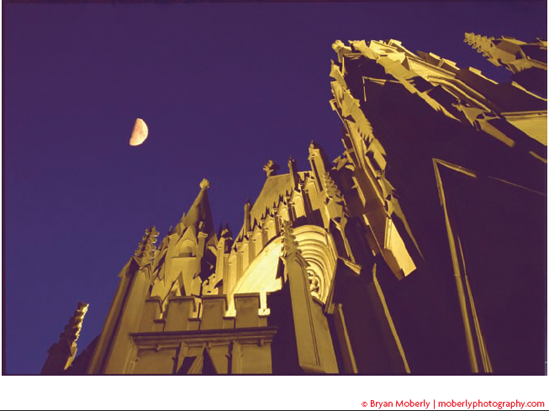
As figure 15-10 shows, architectural photographs are possible later at night if the building is lit by exterior lights or interior light is coming out through lots of glass. However, night exposures can be very tricky. If you decide to attempt a night architectural shot, the following checklist may help:
Light levels are usually low, so long exposure times are the norm. Use a sturdy tripod and remote shutter release or self-timer to avoid camera shake. If your camera has mirror lock feature or an anti-shock feature that delays exposure until a few seconds after the mirror flips up, use that too.
Set your camera for manual exposure mode. Automatic exposure may not work well because of the long exposures and uneven lighting. Manual exposure mode is more reliable and more controllable.
Set your camera for spot metering mode and take a meter reading from the lighted area of the building façade. (Aim the camera so that the central spot metering zone of the viewfinder is on the lighted area, and then half-press the shutter release button to engage the exposure system without taking a picture.) Set your exposure based on that area. Light levels are often uneven across the building face, but the lights are typically positioned to highlight interesting architectural details, so you can usually concentrate on the best-lit highlight areas and let the rest go dark.
If the uneven light levels create extreme hot spots surrounded by more dimly lit areas, and important detail is located in both areas, consider shooting a very wide bracket that includes frames with proper exposures for both brightness extremes. Then you can use Photoshop or another image editor to combine those exposures into a single image that retains detail in both highlights and shadows using one of the high dynamic range image techniques.
Reframe the shot and shoot a test exposure. Evaluate the preview image and histogram, then adjust the exposure settings, and try again as needed.
Mixed light sources are common and they'll create different colors in the image as figure 15-11 clearly shows. You can't match all the colors, but you don't usually need to. Start with the white balance set for tungsten light and then experiment with white balance bracketing to see what setting produces the best effect. Better yet, shoot Camera Raw and deal with color correction when you process the Raw file.
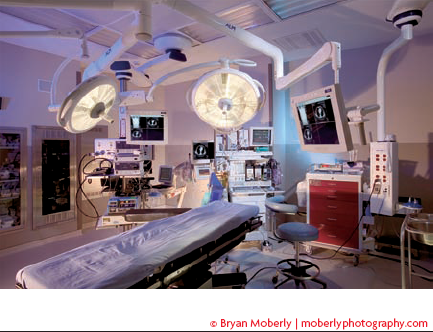
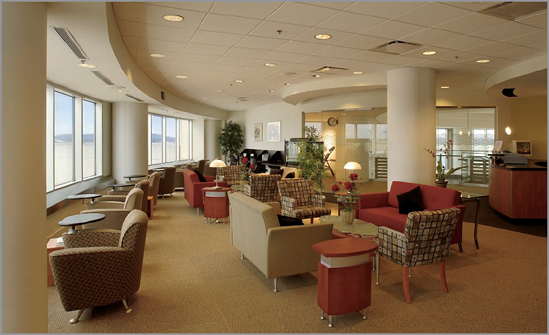
Photographing architectural interiors like what is shown in figure 15-12 is at least as challenging as architectural exteriors. You must deal with the same kind of restricted subject assignment and perspective control issues. Plus, you're working indoors, in a confined space, with lower light levels. The ambient light is often inadequate, and supplementing it with photographic lighting can be problematic.
The ideal scenario is one in which the ambient lighting from windows and/or indoor lights is sufficient to allow you to get a decent photograph without adding supplemental lighting. Scenes such as figure 15-13 are much too big to light effectively, so you must shoot them by available light.
When evaluating a scene to determine whether it will make a good available light photograph, pay more attention to whether there is an even distribution of the light rather than its brightness. Perspective control issues dictate that you must work carefully and deliberately with the camera mounted on a tripod, and not attempt to hand-hold the camera. Because your camera will be on a tripod anyway, it's no problem to compensate for low overall light levels by using slow shutter speeds or even short time exposures.
If there are no windows or if the windows are small and don't admit significant light, you can base your exposure on the artificial light.
Daylight entering the room through large or numerous windows is usually much brighter than the artificial light inside. Consequently, it will be the dominant light source during daylight hours. Daylight often completely overpowers the interior lighting so that the artificial lights make only a minimal contribution to the overall exposure as seen in figure 15-14.
Avoid including in the frame any window that allows direct sun into the room. The extreme brightness difference between the sunlight and the rest of the interior is too great to manage effectively. Unlike architectural exteriors, which almost require a sunny day, interiors are often better on an overcast day because the window light is softer and more uniform on all sides of the building.
If you want to use the artificial interior lights as the dominant light source in a room with windows, shoot after dark.
Daylight and artificial lighting are very different colors. To make matters worse, the various artificial lights (tungsten, daylight fluorescent, warm white fluorescent and so on) each has a different color temperature and it's common to have a mixture of different lights in the same scene.
You can color correct your digital images for one light source, but you can't color correct for two or more different light sources simultaneously. Consequently, any room that includes a mixture of light sources is going to show evidence of a color cast around at least some of those lights. In figure 15-15, the photographer deliberately exaggerated this effect to add color and interest to a mostly monochromatic subject.
The only way to prevent the situation is to color correct for the dominant light source and turn off any light source that doesn't match the dominant light's color temperature. When that's not practical or desirable, try some of the following strategies to work with the mixed light sources:
When the dominant light source is daylight, you can often have some tungsten lights on without creating any unwanted color cast. In situations such as figure 15-16, daylight is so much brighter that it overpowers the tungsten light, leaving just a warm glow around the light itself.
When the dominant light is tungsten and there is a window in the scene, daylight coming through the window will have a distinct blue cast. The blue isn't usually objectionable if it's confined to the window itself and doesn't extend into the room. One very effective way to confine the daylight to the window is to hang sheer drapes over the window. If necessary, you can use screens or diffusers to reduce the light intensity at the window.
Different types of fluorescent lights have different color temperatures and require different color corrections. Ideally, all the fluorescent lamps in a room will be the same type and you can white balance to that color. If the lamp types are mixed, try correcting for the dominant type, or if they are evenly mixed, try an average between the colors. You may need to resort to white balance bracketing to find what setting works best.
The so called "daylight fluorescent" lamps don't actually match the color of real daylight, but they are sometimes close enough to allow some light mixing with daylight. If color rendition in the scene isn't critical, you may be able to split the difference between the color correction for daylight and for the daylight fluorescents.
The compact fluorescent lamps that are marketed as replacements for standard screw-base tungsten light bulbs are fairly close to the color temperature of the tungsten lamps they replace. You can mix them freely and use the same color correction for both.
One of the most common mixed light situations is a mixture of fluorescent and tungsten lights. If one of the light types is clearly dominant, it usually works best to white balance for that light and live with a color cast from the other light. If a prominent foreground object is in the scene, white balance for the light on that object. A color cast in the back ground is usually much less objectionable.
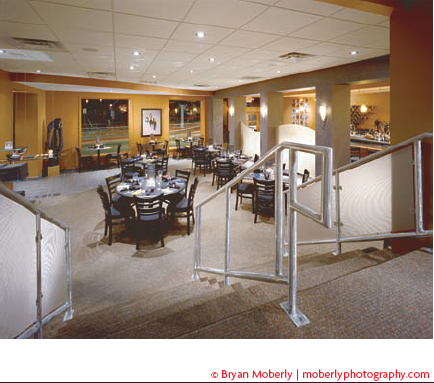
Sometimes the ambient light level in a room is so low that you can't get a good exposure without using such high ISO settings and long exposure times that digital noise begins to degrade the image quality. Sometimes light sources in the frame create hot spots close to the lights and dark corners elsewhere. When you encounter either of these situations, you have no choice but to supplement (or replace) the ambient light as the photographer did in Figure 15-17.
To provide that supplemental lighting, you can use most any lighting instrument you would use for other photographic location lighting, including on-camera flash, portable studio strobes, and tungsten hot lights. However, there are some special considerations when selecting and using the lights for an architectural interior instead of a more common task such as a location portrait — not the least of which is that you probably need more of them.
In most cases, your goal is to light the scene in such a way that it looks natural. In images such as figure 15-18, it isn't immediately obvious that the photographer added light to the scene at all. However, that can be tough to do for two reasons. First, you may be trying to light a fairly large area with a significant distance between the foreground and the far wall. Because light intensity falls off with distance according to the inverse square law, a light placed near the camera may be too bright on the foreground and still not illuminate the far wall adequately. Secondly, because you're usually shooting with a very wide-angle lens in order to encompass as much of the room as possible, there's often not many places to position lights where they won't be in the photograph.
Every scene presents a unique set of challenges for positioning supplemental lighting, and the solutions to those challenges are equally diverse. There is no lighting formula that works all (or even most) of the time. However, you may find the following tips helpful from time to time:
Position lights as far away from the subject as possible. Increasing the distance between the light and the subject reduces the difference in light intensity on the foreground and background.
Bounce lights off walls and ceilings instead of pointing them directly at the scene. This softens the light for a more natural effect, spreads the light out over a wider area, and reduces hot spots and shadows.
If you do need to point a light directly at the scene, try adding a diffuser to the lower half of the light to reduce the light intensity on the foreground.
Try hiding lights behind furniture and around corners in the scene. Sometimes, this is the only way to get light to distant areas.
Match the supplemental lighting to the color of the dominant ambient lighting. Use flash to supplement daylight. Use tungsten hot lights to supplement tungsten lighting.
If you use flash as the supplemental lighting, you can control the ratio of flash to ambient light with your shutter speed selection. The contribution of the flash is the same at all shutter speeds slower than the fastest sync speed. Slower shutter speeds increase the ambient light contribution and faster shutter speeds decrease it.
If the ambient lighting is fluorescent, neither flash nor tungsten supplemental lights will match. Flash is usually closer. Try lighting the foreground with flash and let the ambient fluorescents fill in the background. A slight color cast in the background isn't usually objectionable, especially if it's a stop or so darker than the foreground.
Determining the best exposure is a balancing act between the ambient light and the supplemental lights. If you use tungsten lights for both, you may be able to start with your camera's built-in meter or auto-exposure system. For flash exposures, a flash meter can give you a starting point. When shooting scenes like the one in figure 15-19, the final exposure is likely to be based on trial and error. Shoot a test, evaluate the preview image and histogram, then adjust the exposure settings and try again.
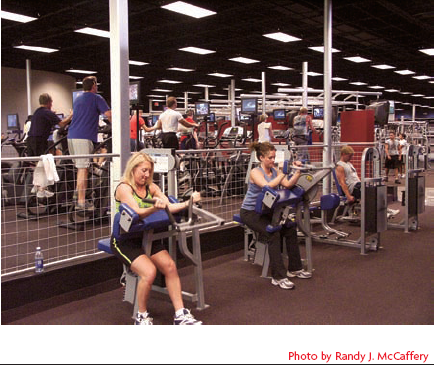
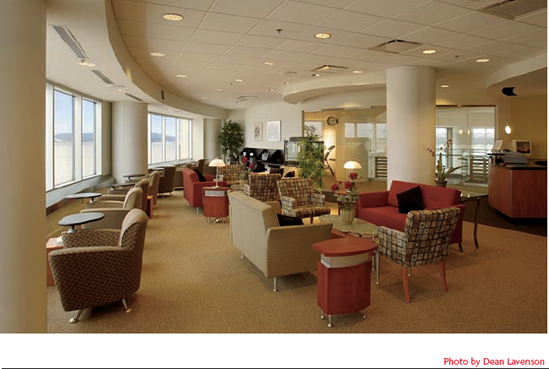
Offices and commercial spaces typically have lots of overhead fluorescent lighting. In figure 15-20, you can see the rows of lights in the ceiling. The good thing about photographing theses spaces is that the lighting is usually designed by an architect and engineered to provide fairly uniform light at a level that is adequate (though certainly not optimum) for photography. If your goal is to photograph the room as a whole, you can probably do it by available light. You may need to add supplemental lighting if you want to show people in the scene, or you have a foreground object that exhibits excessive shadows from the overhead lights.
Offices and commercial spaces often have large windows. The windows can help light the scene, but they can also be a problem if a bright window creates a backlight situation. Sometimes, the only effective solution to the backlight issue is to wait for darkness, or at least wait for the sun to move to the other side of the building. To control the brightness of the windows in figure 15-21, the photographer resorted to manipulating the image in Photoshop, matting windows from a darker exposure into the base image of the overall room.
Tip
Windows in commercial buildings are often tinted to control light intensities and heat gain through the windows. Some tints are a reflective silver or neutral gray that don't cause any color problems in a photograph, but others have a pronounced color cast — usually purple or greenish yellow. If a window has an objectionable color cast, try not to include it in your photograph. If necessary, shoot after dark when the window will not be a light source in the photograph.
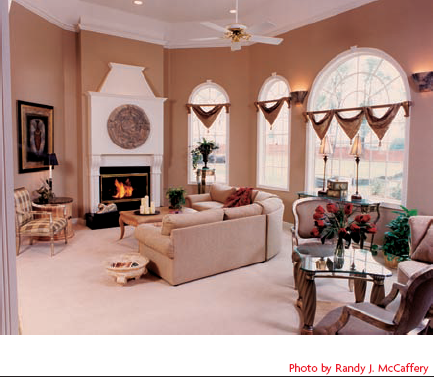
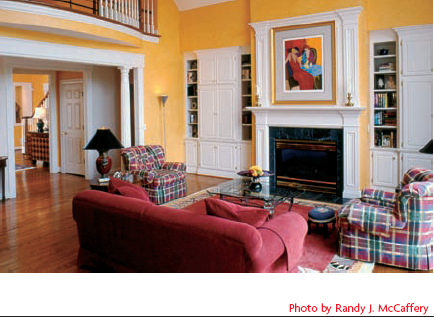
Residential interiors are usually characterized by lower ambient light levels and smaller spaces than commercial interiors. Some grand homes, such as the one shown in figure 15-22, feature high ceilings and open spaces, but low ceilings and small rooms are typical of the average home.
Tungsten lighting is the norm. Unlike the engineered lighting scheme of a commercial building, a residential interior is usually lit by an assortment of floor lamps, table lamps, and perhaps a chandelier or some wall sconces. The overall light level is generally low, but with hot spots around each lamp. During the day, windows may admit enough daylight to create a good ambient light level as shown in figure 15-23, but the available artificial lights are rarely adequate for photography. Plan on providing at least some supplemental lighting.
Small room sizes can be both a problem and an advantage when it comes to lighting the scene. The cramped space gives you very little room to work with to position your lights. However, the small space doesn't need as much light as a larger commercial interior. One light bounced off the ceiling above the camera may be enough.
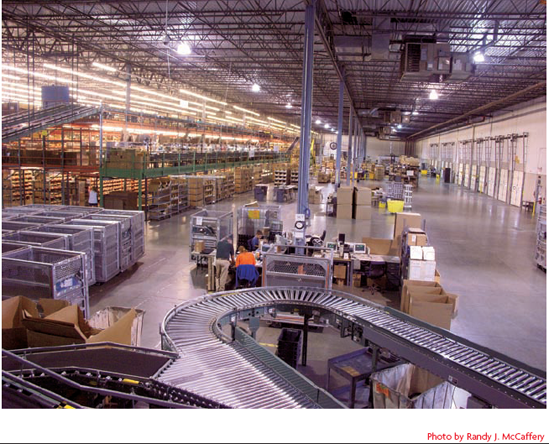
Industrial locations, such as factories and warehouses, are the biggest indoor spaces you're likely to need to photograph. Scenes such as figure 15-24 are much too big to light effectively, so you must use ambient lighting for the overall exposure. Like commercial spaces, the lighting scheme was probably engineered to provide a certain light level throughout the space, although the light may not be as bright or as even as the normal office. If the light level is indeed lower, you may need to boost your ISO setting to get a decent exposure.
Tip
Sodium vapor lights have a strong orange color. Mercury vapor lights have a purplish cast. Other industrial lights have different color tints. All require custom white balancing to achieve acceptable color renditions in a photograph.
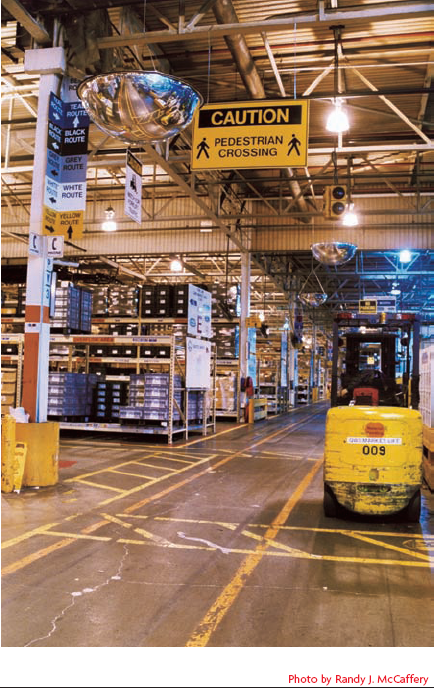
Industrial locations frequently use high-efficiency, low-maintenance lights such as sodium vapor and mercury vapor. These lights give scenes such as figure 15-25 a distinct color cast that is markedly different from the tungsten, fluorescent, and daylight standards. These lights don't match any of the standard white balance presets, which makes setting the correct color balance difficult. The best way to deal with the color is to shoot Camera Raw and adjust the color when you process the Raw file. If that's not possible, try white balance bracketing to help find an acceptable setting.
Why do the colors look a little off in some industrial interiors, even after doing a custom white balance for the lights at the location?
Some light sources, such as the mercury vapor lights used in many industrial locations, don't emit light in a smooth, continuous spectrum like daylight and tungsten lights. Mercury vapor lights emit disproportionately more light in some parts of the spectrum compared to others.
When you adjust the white balance, you are telling the camera what the average color of the light source is. That adjusts the overall color of the image, but doesn't fully correct for the inconsistencies in the color spectrum emitted by the mercury vapor light.
How can I use tungsten lights as supplemental lighting in a daylight scene, or use flash to supplement a scene where tungsten lights are dominant?
Try to avoid mixing light sources in this way, but it is possible to do. In fact, film and television lighting crews do it all the time. You can get special blue color filter gels to put on your tungsten lights that change then to daylight color balance. Similarly, you can use an orange filter gel to change a daylight-balance flash to match the color of tungsten lights. The filters drastically reduce light output, but they can effectively match the color of disparate light sources.
Note that not just any blue or orange filter will do. To get good results, you need to use filter gels that are calibrated to just the right colors for the daylight-to-tungsten or tungsten-to-daylight color shift. You can order them from a theatrical supply house or other outlet that supports the film and television production industry.
Recently a new product has come onto the market to make it easier to mix the output of an external flash unit with ambient tungsten or fluorescent lighting. It's a colored diffuser from Sto-Fen Products (www.stofen.com) that fits onto the flash head of most brands of external shoe-mount and handle-style flash units. There's a green diffuser that approximates the color of fluorescent lights, and a gold diffuser that approximates the color of tungsten lighting. To use this accessory, you set your camera's white balance for the ambient light color (tungsten or fluorescent) and then use the corresponding colored diffuser on the flash to make the flash output conform to that color. The result isn't always a perfectly color balanced image, but there isn't a stark difference between the ambient light and the flash, and the overall color is probably close enough that you can make it look good with just some minor adjustments in an image editor.
