In photography, the lens aperture functions like the iris of the human eye, opening and closing to adapt to changing light levels. The aperture opens wide to admit more light in low-light situations and closes down to a pinhole when the light gets bright.
With older cameras, the photographer often had to adjust the aperture setting manually for each shot. However, modern, auto-exposure, digital cameras typically set the aperture automatically to produce the correct exposure as indicated by the camera's built-in light meter. As a result, digital photographers seldom need to deal with aperture selection — unless they really want to.
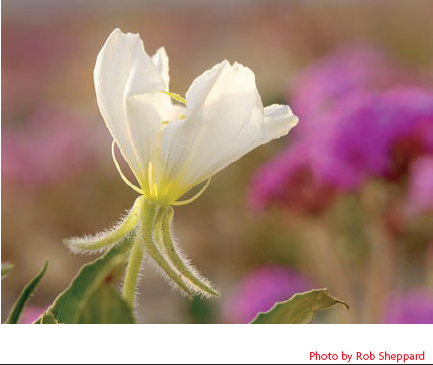
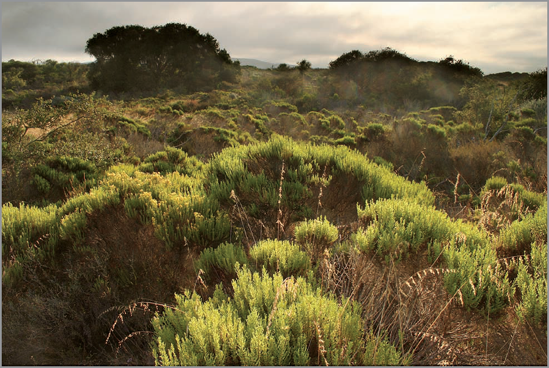
But just because you don't have to actively manipulate aperture settings for each shot in order to get successful exposures, doesn't mean that you should ignore the aperture component of your exposures completely. This chapter explores some of the ways in which aperture selection can have a significant effect on other aspects of your finished image besides the exposure. For example, the selective-focus effect that blurs the distracting background foliage in figure 7-1, is the result of selecting a large aperture to minimize depth of field.
Note
See Chapter 3 for more about the elements of exposure.
This is just one example of a situation where you want to exercise creative control over the aperture setting, instead of letting the camera make that decision for you. Fortunately, all digital SLRs, and most higher-end consumer point-and-shoot cameras, give you the option to control the aperture by providing an aperture-priority shooting mode in addition to a manual exposure mode.
As one of the three basic factors of every photographic exposure, the aperture setting controls the amount of light passing through the lens by adjusting the size of an opening in a diaphragm positioned between (or behind) the lens elements. Opening the diaphragm wider (selecting a larger aperture setting) allows more light to pass through the lens and strike the image sensor. Conversely, reducing the size of the diaphragm opening (selecting a smaller aperture setting) restricts the light going through the lens to the image sensor.
Aperture normally serves as the counterpoint to the time factor in the exposure. For a given light level and ISO (sensitivity) setting, a larger aperture coupled with a faster shutter speed produces the same equivalent exposure as the combination of a smaller aperture and a slower shutter speed. At a given light level, any one of a series of aperture and shutter speed combinations delivers the same total amount of light to the image sensor in your camera.
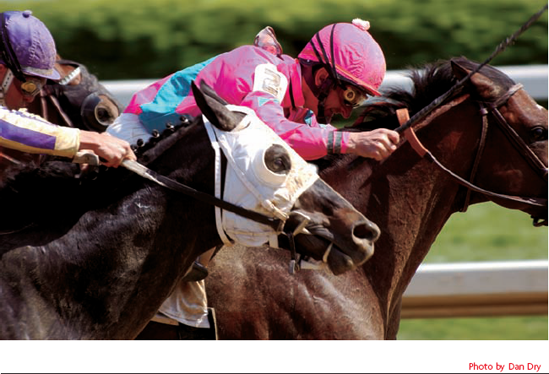
You can use a fast shutter speed with a large aperture to stop motion in an action shot, such as the one in figure 7-2. When shooting action, selecting a fast shutter speed usually takes priority over aperture selection. In this case, the exposure was 1/500 at f−4.
Tip
The aperture is measured in f-stops, and lower f-numbers (such as f 4.0) indicate larger apertures that pass more light, while higher f-numbers (such as f 16) indicate smaller apertures that allow less light through.
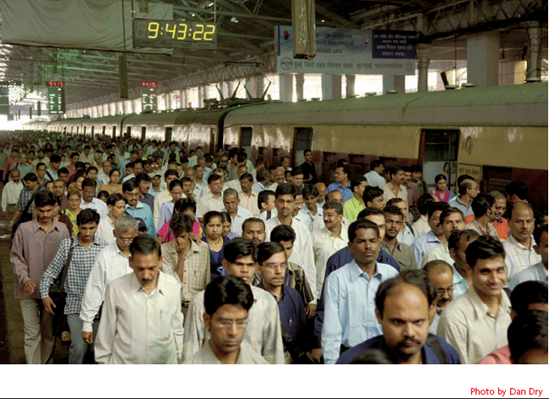
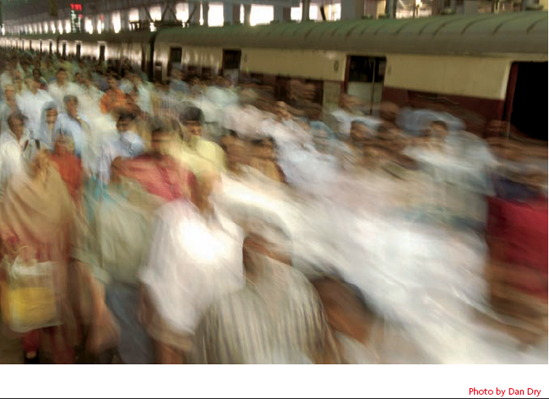
Figures 7-3 and 7-4 show the effect of selecting different aperture/shutter speed combinations to photograph the same scene. The exposure for figure 7-3 was 1/80 at f−2.8, which is a typical exposure for the conditions. In figure 7-4, the photographer elected to use a slower shutter speed at a smaller aperture (0.8 seconds at f−22) to get a different motion effect while maintaining the same overall exposure. Motion effects are controlled by shooting at specific shutter speeds, which relegates aperture selection to whatever is needed for proper exposure.
Of the three factors in an exposure — aperture, time, and sensitivity — aperture gets the lowest priority in most shooting situations. You (or your camera's auto-exposure programming) typically select the sensitivity and time settings first and leave the aperture to last, adjusting the aperture to whatever value is necessary to produce a correct exposure for the light level. However, if the aperture reaches the end of its range, the photographer must adjust the shutter speed or ISO in order to get the correct exposure. This behavior is actually very understandable, because it mimics the way humans all ignore the automatic adjustments of the irises of our eyes unless exceptionally bright or dim light forces us to reach for sunglasses or a flashlight.
Note
The counterintuitive numbering of aperture settings continues to be a source of confusion for many photographers, even after years of experience. Part of the confusion comes from the terms used to describe the aperture settings. When I use "larger" and "smaller" in reference to apertures in this book, the terms are describing the size of the opening, not the f-number. To help avoid confusion, I use "higher" and "lower" to indicate changes in the f-number.
When you are thinking only about exposure, you can think of the aperture as a simple regulator that controls the flow of light through the lens. If your goal is to allow a certain amount of light to reach the imaging sensor in the camera, whether you set the regulator for maximum flow for a very short time, or much smaller flow for a longer time does not affect the image, as long as the total is the same.
However, the aperture has other effects on your image besides regulating the amount of light that passes through the lens during an exposure. Aperture also controls depth of field, and changes in depth of field can cause dramatic changes in your images.
As you may remember from Photography 101 or your other reading, depth of field is the area in a lens' field of view where objects appear acceptably sharp.
Tip
Photographic joke: The circle of confusion is a bunch of photographers sitting around discussing the exact definition of depth of field.
Note
Theoretically, all aperture/shutter speed/ISO combinations that produce equivalent exposures should produce images of the same quality. In practice, slow shutter speeds and high ISO settings both introduce digital noise that degrades the image. So, selecting a small aperture that requires a very slow shutter speed can affect the image in the real world. See Chapter 8 for more information on digital noise.
Objects within the depth of field zone appear sharp, while objects outside the depth of field appear visibly blurred. Depth of field extends some distance in front of and behind the vertical plane that represents the actual focus point of the lens — and aperture controls just how shallow or deep this zone of acceptable sharpness is. Smaller apertures produce greater depth of field and larger apertures produce shallower depth of field.
In order to control depth of field in your photograph, you must control the aperture. Therefore, aperture selection becomes a balancing act between exposure and depth of field considerations. Aperture is not just an exposure regulator anymore.
Perhaps the most common concern that most photographers have about depth of field is how to maximize it to make as much of the scene as possible appear acceptably sharp. You may want to maximize depth of field in a product shot where the entire product must be sharp, or in a scenic shot such as figure 7-5. Or perhaps you're shooting people or pets whose positions are changing rapidly and you need plenty of depth of field to make up for not having time to focus carefully and accurately.
Because smaller apertures produce greater depth of field, maximizing depth of field means using the smallest aperture you can possibly manage. Try f−16, or the smallest aperture available on your lens. Obviously, selecting the aperture means using an exposure mode (manual mode, or aperture-priority auto) that allows you to control that setting.
Of course, to get an equivalent exposure with a smaller aperture, you need to use a slower shutter speed. Unless you're shooting in very bright light conditions, the shutter speeds that combine with those small apertures to produce the correct exposure are sometimes too slow to allow hand-holding the camera, so a tripod or other camera support essential.
One of the best ways to maximize depth of field is to focus your camera to the hyperfocal distance for your lens. The hyperfocal distance is the focus point at which the farthest reaches of depth of field extends to infinity. Focusing at the hyperfocal distance allows objects to appear sharp from some relatively near point all the way out to infinity, as you can see in figure 7-6.
Because changing the aperture changes the depth of field, it also changes the hyperfocal distance. Smaller apertures increase depth of field and move the hyperfocal distance closer to the camera. Larger apertures decrease depth of field and move the hyperfocal distance farther away. There are tables and charts available in books and from various Web sites that show the hyperfocal distance for various combinations of lens focal length and aperture. However, I never seem to have the tables handy when I need them, or I'm using a lens or zoom setting that isn't included in the tables, so I usually employ one of the techniques in the following sections to determine hyperfocal distance.
Finding the hyperfocal distance for a given lens and aperture can be a little tricky, but the results can be impressive.
Manual-focus lenses (or lenses that have manual focus capability) usually have a distance scale and depth of field indicators (pairs of hash marks for each f-stop arrayed on either side of the central focus mark) engraved on the lens barrel, as shown in figure 7-7. To find the hyperfocal distance, you rotate the focus ring to align the infinity mark of the distance scale with the distant depth of field indicator for your chosen shooting aperture (in this case, f−8). The central focus mark indicates the hyperfocal distance (10 feet), and the other depth of field indicator shows the near limit of acceptable sharpness (5 feet). The lens barrel markings are often small, which makes precise adjustments challenging, but this technique can get you close to the hyperfocal distance.
If the lens has a focus distance scale and depth of field indicators marked on the lens barrel, you can follow these steps:
Focus on the closest portion of the subject that needs to be sharp — for example, the foreground bush in figure 7-7. Note the distance on the focus distance scale.
Rotate the focus ring so that the infinity mark is aligned with the depth of field indicator for a given aperture and the close focus distance (from step 1) is aligned with the corresponding depth of field indicator on the opposite side of the central focus point. Leave the lens focused at that point and note the aperture that allows the depth of field indicators to encompass the desired range from close to infinity.
Set the aperture to the f-stop noted in step 2, or smaller.
Frame your shot and shoot, being careful not to change the focus distance or aperture.
The real challenge comes with some newer auto-focus lenses that don't have a distance scale or depth of field markings on the lens barrel. The lens still has a hyperfocal distance, but there is no easy way to find it. You just have to make an educated guess at where in the scene the hyperfocal distance should be and focus on that point. Then, if your camera features a depth of field preview button, you can use it to see if your focus point and aperture setting produce the zone of acceptable sharpness that you expect. Here's the step-by-step technique:
Tip
About one-third of the depth of field is in front of the focus point (nearer to the camera) and two-thirds of the depth of field extends behind the focus point (farther from the camera).
Focus on the closest portion of the subject that needs to be sharp. Make a mental note of its distance from the camera.
Focus on a distant point beyond which the lens doesn't need to change focus any more as the distance to the subject increases. For typical lenses, the infinity focus point is about 50-100 feet, but it may be closer for some wide angle lenses.
Mentally divide the space between the points you found in steps 1 and 2 into thirds. Look for an object near the boundary of the first and second thirds behind the close focus point — one-third of the way back toward the distant point. Focus on that point and lock focus.
Set the aperture to the smallest opening that the light level and other exposure elements allow. If your camera has a depth of field preview button, use it to test the aperture setting to see if it allows enough depth of field to cover the desired range.
Frame your shot and shoot without changing the focus or aperture. You can use your camera's focus lock and/or exposure lock features to keep the camera from changing your settings.
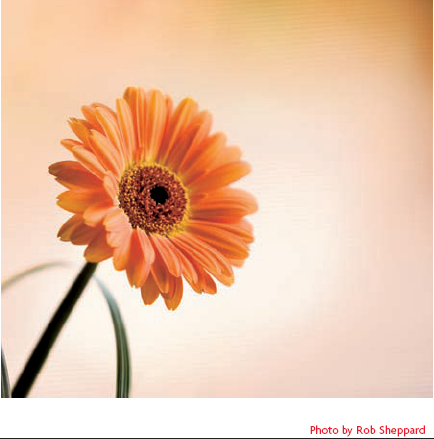
Controlling depth of field doesn't always entail using small apertures to maximize how much of the subject appears to be sharp. Sometimes your goal is just the opposite — to create a shallow depth of field that isolates a sharp-focused subject against an out-of-focus background or blurs a distracting foreground object. For example, the background behind the foreground flower in figure 7-8 would be busy and distracting if it were in crisp focus, but the out of focus blur caused by the photographer's use of shallow depth of field creates a pleasingly soft backdrop.
Just as smaller apertures increase depth of field, wider apertures decrease depth of field. So, creating selective focus effects with shallow depth of field usually entails large aperture settings (f−4.0 or wider).
Distance from the lens to the subject also affects depth of field. The closer the subject is to the lens, the shallower the depth of field becomes. Therefore, a close-up subject (such as the flower in figure 7-7) combined with a large aperture often creates a depth of field that measures only fractions of an inch.
Most lenses offer a range of aperture settings, and you can use any aperture in the range to get a correct exposure. However, just because you can get an equivalent exposure at every available aperture by combining it with the appropriate shutter speed and ISO settings, doesn't mean that you get equivalent image quality at all apertures.
Most lens designs produce optimum results at a specific aperture or within a limited range of apertures. To make the lens usable in a wider variety of situations, lens designers frequently must compromise image quality in order to expand the aperture range. This is especially true of zoom lenses.
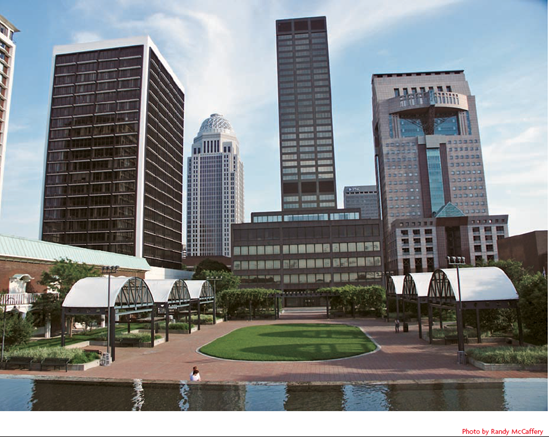
The lens produces the best results when you shoot at or near the optimum aperture. For most lenses, the optimum aperture is somewhere toward the middle of the available range, although some lenses are at their best when stopped down. Apertures toward the extremes of the range often tend to exhibit somewhat less sharpness and more distortion. For example, the building on the left side of the frame in figure 7-9 displays noticeable barrel distortion (bowing out from the center of the frame). This type of distortion is typical of wide angle lenses, and is often exaggerated at the largest aperture. Telephoto lenses often exhibit the opposite distortion effect (pinching in toward the center of the frame), called pincushion distortion.
Tip
Most pros try to avoid shooting with their lens aperture "wide open" because most lenses exhibit the most distortion and lack of sharpness at maximum aperture.
Most auto-exposure cameras default to shutter-priority or programmed exposure modes, but an aperture-priority mode is usually available as an option. You can use aperture-priority mode for those times when controlling depth of field by specifying the shooting aperture is more important than specifying the shutter speed.
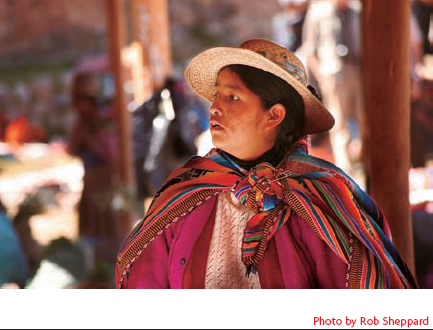
Figure 7-10 shows how a carefully selected depth of field (shooting at f−5.6) keeps all the facial features and clothing sharp while allowing the background to blur. The result is a clear separation between foreground and background, despite some bright spots in the background that would be very distracting if they were sharper.
In aperture-priority mode, you select the aperture and let the camera adjust the shutter speed automatically to achieve the correct exposure. The procedure sounds simple, and it is, but using aperture-priority mode effectively requires you to pay careful attention to the shutter speed that the camera selects.
When shooting at small apertures, it's all too easy to end up with blurred pictures caused by camera shake because the shutter speed was a little too slow. Attempts to improve picture sharpness by increasing depth of field often have the opposite effect. You can avoid that particular pitfall by monitoring the automatically set shutter speed and using a tripod when the speed dips too low.
Shooting at large apertures to create shallow depth of field can cause problems with shutter speeds. It's surprisingly easy to select an aperture that needs a faster shutter speed than most cameras have available. For example, suppose you're shooting a close-up of a flower on a sunny day and want to use shallow depth of field to blur the background. You set the ISO to 100, choose aperture-priority mode, and select f−2.8 as the shooting aperture. According to the sunny-16 rule, the correct exposure at ISO 100 is f−16 at 1/100, and the equivalent exposure at f−2.8 is 1/3200. But only a few cameras have that shutter speed available — many top out at about 1/1000. You could reduce the ISO setting if your camera has a lower setting available, but many do not. So, either you have to select a smaller aperture and accept the increased depth of field, or you need to add a neutral density filter to the lens, or wait for a cloud to pass over the sun and decrease the light level.
Are there specific aperture settings I should avoid because image distortion is more apparent?
Perhaps so. The optimum aperture is different for each lens, and the amount and kind of aberrations that appear at sub-optimum apertures vary. Some lenses deliver excellent results throughout their entire aperture range. Other lenses do produce noticeably different results at different apertures, and some of those results may be unacceptable under certain circumstances. Test each of your lenses at every aperture setting to become familiar with their weak points.
Most of all, what constitutes unacceptable sharpness or distortion varies significantly with the subject you're shooting. If you're trying to capture expressions on people's faces at medium distances, a slight soft focus or pincushion distortion probably won't even be noticeable. However, the same amount of soft focus and distortion could be quite objectionable on an architectural subject or a product photograph for a catalog.
How can I maximize depth of field when I also need to use a faster shutter speed to stop subject motion?
You normally control exposure by manipulating aperture and shutter speed, and when you increase one, you must decrease the other to maintain an equivalent exposure. If subject motion dictates that you use a relatively fast shutter speed, doing so naturally limits your aperture selection to some of the wider settings, leaving you stuck with fairly shallow depth of field. To maximize depth of field, you need to select the slowest shutter speed that will stop the subject motion. If you're photographing a toddler at play, you can get by with a slower shutter speed than if you're shooting a stock car race. Selecting the slowest possible shutter speed allows you to shoot at the smallest possible aperture. If that doesn't give you enough depth of field, you can adjust the third exposure element — the ISO setting. Setting the ISO higher increases the sensitivity of the image sensor and allows you to stop your aperture down. Starting from a typical default ISO setting, you can usually increase it two or three stops (EV), and sometimes more. But beware of increased digital noise at higher ISO settings.
Another trick is to select your focus point to make best use of the depth of field you get from any given aperture setting. Remember that depth of field extends both in front of and behind the focal point. Therefore, focusing about one-third of the way into the object uses both the front and rear depth of field, whereas focusing on the leading edge uses only the depth of field beyond the focal point and waste the portion that is closer to the lens.
