FileMaker’s layouts allow you to vary the appearance of your data without changing the data itself. This gives you the freedom to create layouts tailored to specific tasks and users. Workers entering orders into a database, for example, probably will find it easier to use a layout that mirrors the sequence of information they get from customers. Sales managers, on the other hand, may need layouts that help them spot what’s selling well. Day-to-day tasks need a different layout than big-picture analysis demands. Remember: You need not show all of a database in a layout. In fact, the more you can pare down a layout to just the essential information, the easier it will be to use.
The Layout status area (Figure 10.1), runs down the left side of your screen when you’re in Layout mode. The status area includes all the tools you’ll need for adding text, graphics, fields, and parts to a layout and then applying colors, patterns, and lines to make them attractive.
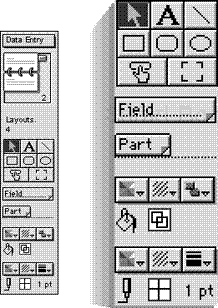
Figure 10.1. All the tools for creating layouts reside in the left-hand status area whenever you’re in Layout mode.
You don’t necessarily need to start from scratch in creating layouts: FileMaker includes dozens of built-in templates. Some you may want to use as is, others may provide a starting point for creating your own custom layouts. For more information, see Using Templates and Scripts on page 209.
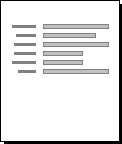
When you first define fields in a database, FileMaker by default generates a standard layout, which lists the fields and their labels in the order they were created (Figure 10.2). You’re free to modify that default layout any way you like. Or you may save yourself some trouble in generating a new layout by choosing from the predefined layout types built into FileMaker.
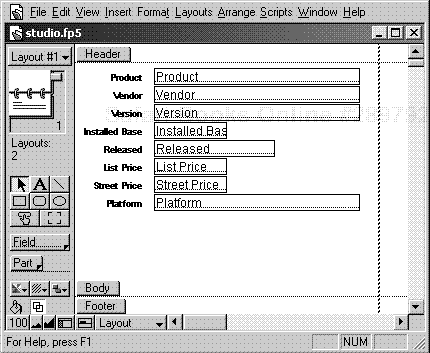
Figure 10.2. When you first define fields, FileMaker by default generates a standard layout with fields and labels listed in the order they were created.
Use the New Layout command for creating standard, columnar, table, label, envelope, and blank layouts. For information on label and envelope layouts, see Using Label and Envelope Layouts on page 149.
Here’s a quick comparison of each layout type:
Standard: Nothing fancy here. This layout displays all the database’s fields in the order they were created. The field labels for each field appear just left of the fields (Figure 10.3). It includes a blank header and footer.
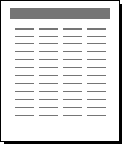
Columnar list/report: This layout places the database’s fields in a row across a single page. The labels for the fields appear in the header above the body of the record (Figure 10.4). (The footer is blank.) You determine the order of the fields when creating the layout or you can go back and rearrange them any time. Columnar lists and reports make it easier to compare one record to another or to squeeze multiple records onto the same screen.
Table view: This isn’t actually a layout as FileMaker usually defines the term. Instead it (Figure 10.5) is an automatically generated view of your data, though a very useful one for seeing and sorting multiple records on a single screen. For details on using tables, see pages 44 and 46. For details on controlling the layout setup for tables, see page 148.
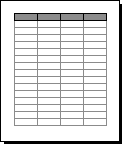
Figure 10.5. The Table view is automatically generated and helps you inspect multiple records on a single screen.
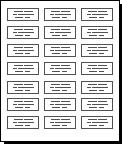
Labels: Use this layout only for labels: you can’t enter data into it directly (Figure 10.6). The dialog box that appears lets you choose from dozens of pre-set Avery label styles. For more information, see To create a label layout on page 149.
Envelope: This layout is tailored for printing on regular business envelopes and includes main and return address areas (Figure 10.7). Like the labels layout, it’s not used for entering data directly. It includes a header and body but no footer. For more information, see To create an envelope layout on page 151.
Blank: This layout is entirely blank—nothing appears in the header, body, or footer (Figure 10.8). If you want to start with a clean slate and only add fields as you’re ready, this is the layout for you.
Because label and envelope layouts behave a tad differently than most layouts, they’re covered separately on pages 149–151.
Choose View > Layout Mode (Figure 10.9).
or
or
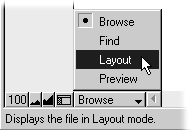
Click your cursor on the status mode pop-up at the bottom left of your screen (Figure 10.10).
FileMaker now includes a set of three screens within the New Layout/Report dialog box that walk you through the process. For Windows users, this Wizard-style guide will be old hat.
Switch to Layout mode (
 in Windows,
 on the Mac). Choose Layouts > New Layout/Report (
 in Windows,
 on the Mac) (Figure 10.11).
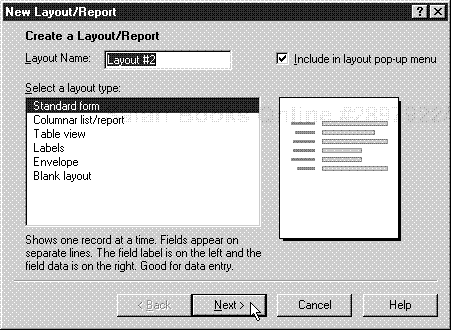
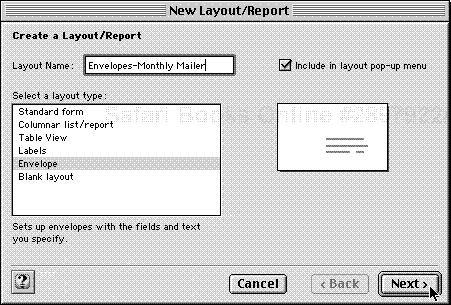
When the Create a Layout/Report portion of the New Layout/Report dialog box appears, type a name into the Layout Name text box (Figure 10.12). By default, FileMaker assigns each new layout a generic name (e.g., Layout #2), but it’s best to give it an easy to recognize name. Choose one of the six layouts in the left-side Select a layout type text box (a preview will appear to the right), and click Next.
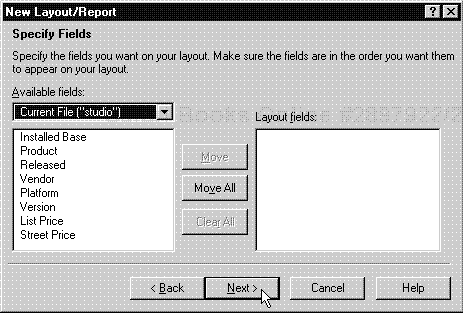
When the Specify Fields screen appears (Figure 10.13), highlight the fields in the left-hand list that you want to appear in the layout and use the Move or Move All buttons to place them in the right-hand list. Or double-click on fields in the left list and they will automatically appear to the right. When you’re done, click Next.
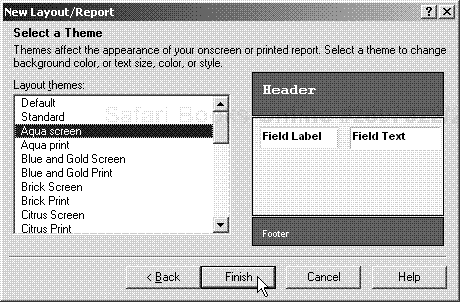
When the Select a Theme screen appears, make a choice in the left-side Layout themes list and a preview will appear to the right (Figure 10.14). When you’re done, click Finish.
The new layout will appear on your screen (Figure 10.15). If you’re happy with the layout, switch to Browse (
 in Windows,
 on the Mac) and begin entering data. More likely, however, you’ll want to further format the layout. For more information, see Formatting Fields or Objects on page 183.
 Tips
Tips
By default, FileMaker activates the Include in layout pop-up menu checkbox in the New Layout/Report dialog box (Figure 10.12). It’s best to leave it checked to ensure that this layout appears in your layouts pop-down menu.
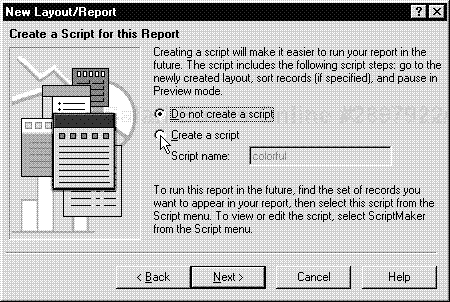
FileMaker’s layout themes offer a quick way to apply colors and formatting consistently. Depending on the complexity of your choices, FileMaker will offer you the option of creating a script for applying the very same steps in the future (Figure 10.16). For more on scripts, see Using Templates and Scripts on page 209.
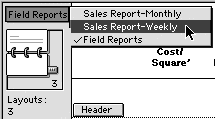
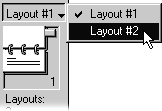
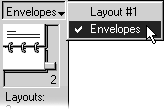
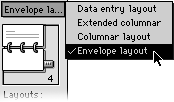
As you create more layouts, click on the pop-down menu above the flipbook icon to quickly switch to the layout you need to use (Figure 10.17).
Make sure you’re in Layout mode (
 in Windows,
 on the Mac), then select the layout you want to rename by clicking it in the pop-down menu just above the flipbook icon (Figure 10.18).
Choose Layouts > Layout Setup (Figure 10.19).
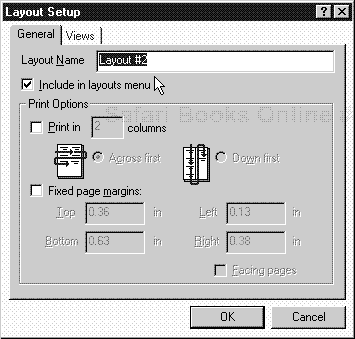
When the Layout Setup dialog box appears, make sure the General tab is selected, type in the new name, and click OK (Figure 10.20). The layout pop-down menu now displays the renamed layout (Figure 10.21).
Make sure you’re in Layout mode (
 in Windows,
 on the Mac), then select the layout you want to rename by clicking it in the pop-down menu just above the flipbook icon (Figure 10.18).
Once the layout appears onscreen, choose Layouts > Delete Layout (Figure 10.22) or use your keyboard: (

 in Windows,
 on the Mac).
A warning dialog box will appear. If you’re sure, click Delete (Figure 10.23). The layout will disappear onscreen, replaced by the next layout listed in the pop-down menu.
This procedure will save you some time if you want to design a new layout based on elements in an existing layout.
Make sure you’re in Layout mode (
 in Windows,
 on the Mac). Select the layout you want to duplicate by clicking on it in the pop-down menu just above the flipbook icon.
Choose Layouts > Duplicate Layout (Figure 10.24). (There are no keyboard equivalents.) The duplicate layout will appear onscreen and will be listed in the layout pop-down menu as a copy of the layout you selected. If you want to give the duplicate layout a more distinctive name, see To rename a layout on the previous page.
Make sure you’re in Layout mode (
 in Windows,
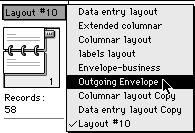
 on the Mac). Click on the pop-down menu just above the left-hand flipbook and release your cursor on the layout of your choice (Figure 10.25).
Make sure you’re in Layout mode (
 in Windows,
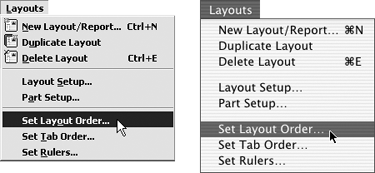
 on the Mac). Choose Layouts > Set Layout Order (Figure 10.26).
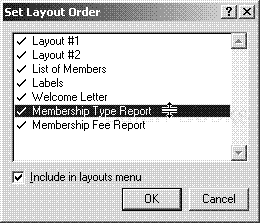
When the Set Layout Order dialog box appears, click on the layout name you want to reorder. Keep your cursor down and a double arrow will appear (Figure 10.27). While holding down the cursor, drag the layout name to the place you want it listed in the order. Release the cursor. Repeat this step to further rearrange the layout order.
Once you’re satisfied with the order, click OK. The layout pop-down menu will now reflect the new order.
FileMaker’s default is to automatically include layouts in the pop-down menu via the checkbox within the New Layout/Report dialog box (Figure 10.28). If you want to tidy up the list by excluding some layouts—or you mistakenly excluded a layout from the list—the steps are the same.
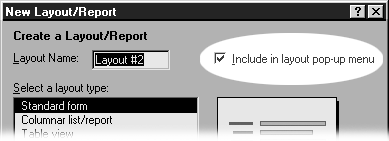
Figure 10.28. So easy to miss: The Include in layout pop-up menu checkbox within the New Layout/ Report dialog box determines which layouts initially appear in the pop-down menu.
Make sure you’re in Layout mode (
 in Windows,
 on the Mac). Choose Layouts > Set Layout Order (Figure 10.26).
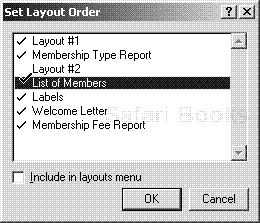
When the Set Layout Order dialog box appears, there will be a column of check-marks just left of the list of layouts. To exclude a layout from the pop-down menu, move your cursor over the layout item’s check-mark and click. The check-mark will disappear. To include a layout, move your cursor to the blank area just left of the layout’s name and click the cursor. A check-mark will appear (Figure 10.29).
When you’re satisfied, click OK.
Use this to change how layout columns print and to change a layout’s page margins.
Pick the layout you want to change by selecting it via the pop-down menu just above the left-hand flipbook.
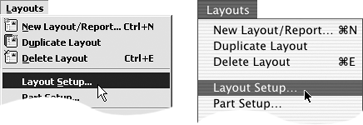
Choose Layouts > Layout Setup (Figure 10.30).
Within the Layout Setup dialog box (Figure 10.31), click the General tab and you’ll have three options for controlling how the layout prints out:
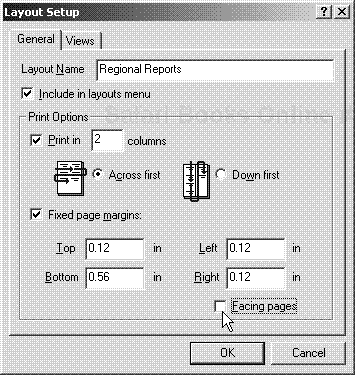
Figure 10.31. The General tab of the Layout Setup dialog box lets you set how the layout prints (across or down the page), its page margins, and whether it accommodates facing pages.
You can have your layout print in columns—even if it’s not a columnar-type layout. Select the Print in checkbox, then fill in how many columns you want. The Across first option works well for mailing labels; use Down first for directory-style printouts.
Use the Fixed page margins checkbox and the four number-entry boxes if you want to use different margins from your printer’s default settings.
Use the Facing Pages checkbox if you’ll be printing on both sides of the page. This will place the narrower, inside margin on the left of odd-numbered pages and on the right of even-numbered pages.
When you’re done, click OK and switch to Browse mode to see the effects of your choices.
Use this to change the setup of the table view. You also can use it to limit a user’s view of the database as a list, form, or table.
Pick the layout you want to change by selecting it via the pop-down menu just above the left-hand flipbook.
Choose Layouts > Layout Setup (Figure 10.30).
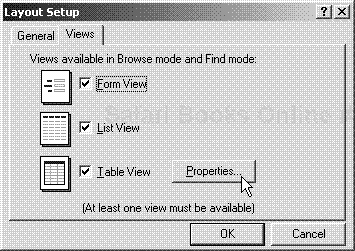
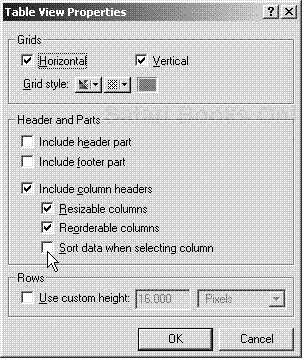
When the Layout Setup dialog box appears, click the Views tab, and then click the Properties button (Figure 10.32).
When the Table View Properties dialog box appears, use the checkboxes to set whether the table will display a grid, a header or any other parts, and column headers (Figure 10.33). You also can use the Rows checkbox and its adjacent text windows to fine-tune the height of the table rows.
Once you’ve made your choices, click OK and switch to Browse mode to see the effects of your choices.
 Tips
Tips
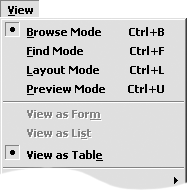
In step 3, if you uncheck any of the three views, that choice will be dimmed (and, so, not available) in the View menu within the Browse mode (Figure 10.34).
In step 4, if you check Sort data when selecting column, you can then resort columns within the Browse mode just by clicking any column header. With the new contextual sort feature, Right-click (Windows) or
 -click (Mac) the header and choose one of three ways to sort: Ascending, Descending, or By Value List (Figure 10.35).
This section only covers label and envelope layouts. For more information on using standard layouts, see Working with Layouts on page 140.
Switch to Layout mode (
 in Windows,
 on the Mac), then choose Layouts > New Layout/Report (
 in Windows,
 on the Mac).
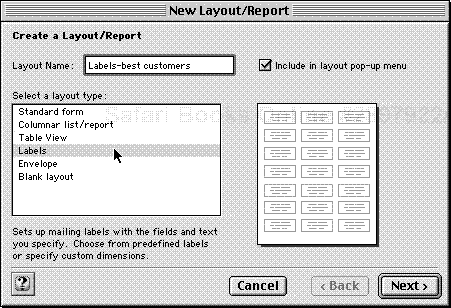
When the Create a Layout/Report screen of the New Layout/Report dialog box appears, type a name into the Layout Name text box. Choose Labels in the left-side Select a layout type text box and click Next (Figure 10.36).
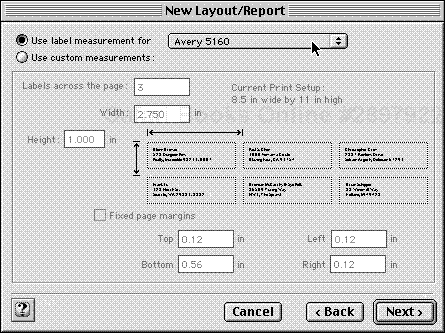
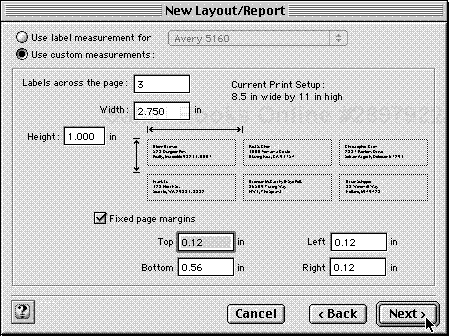
The next dialog box gives you the choice of using one of several dozen preset Avery-based label sizes or creating a custom-size label (Figure 10.37).
To use an Avery-based label, leave the Use label measurement for radio button selected and use the pop-down menu to choose the appropriate Avery size based on the labels you’re using. By the way, even non-Avery label packages usually list an Avery-equivalent stock number.
To create a custom size, select the Use custom measurements radio button, then use the Labels across the page, Width, and Height boxes to configure your label’s size (Figure 10.38).
Click Next.
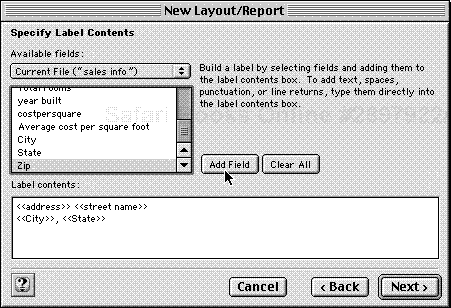
When the Specify Label Contents screen appears, double-click in the upper-left list the fields you want displayed or select a field in the list and click the Add Field button (Figure 10.39). Selected fields will appear in the lower window surrounded by << >> brackets. The brackets act as placeholders for data.
To place a field on a new line, press
 (Windows) or
  (Mac). To insert punctuation marks, space between the fields, or additional text just use your keyboard.
To remove a mistake, select the entry in the lower box and press
 . To start over, click on the dialog box’s Clear All button. To further format the layout, see Formatting Fields or Objects on page 189.
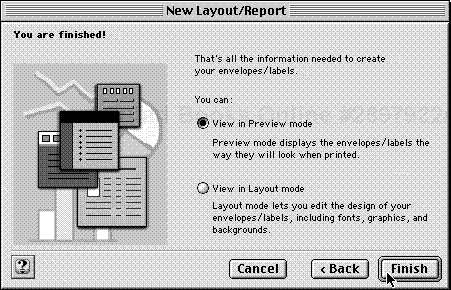
When you’re done, click Next. One final dialog box will appear (Figure 10.40), giving you a choice of switching to Preview mode to see how the labels will print or staying in Layout mode to continue tweaking its appearance. Make your choice and click Finish. The chosen view will appear, which in our example is the Layout view (Figure 10.41).
Switch to Layout mode (
 in Windows,
 on the Mac), then choose Layouts > New Layout/Report (
 in Windows,
 on the Mac).
When the Create a Layout/Report dialog box appears, type a name into the Layout Name text box. Choose Envelope in the left-side Select a layout type text box and click Next (Figure 10.42).
When the Specify Label Contents dialog box appears, double-click on the fields in the upper-left list that displayed or select each one in the list and click the Add Field button (Figure 10.39). Selected fields will appear in the lower window surrounded by << >> brackets. The brackets act as placeholders for data.
To place a field on a new line, press
 (Windows) or
  (Mac). To insert punctuation marks, space between the fields, or additional text just use your keyboard.
To remove a mistake, select the entry in the lower box and press
 . To start over, click on the dialog box’s Clear All button. To further format the layout, see Formatting Fields or Objects on page 189.
When you’re done, click Next. One final dialog box will appear (Figure 10.40), giving you a choice of switching to Preview mode to see how the envelopes will print or staying in Layout mode to continue tweaking its appearance. Make your choice, click Finish and the layout will appear in the chosen mode. For more information on printing, see Printing on page 247.
Once you’ve created an envelope layout, be sure you’re still in Layout mode. Select the layout using the pop-down menu just above the flipbook icon (Figure 10.43).
Select the Type tool from within the Layout mode’s status area, then click within the envelope layout’s header.
Type in the return address, using the text options under the Format menu. For more on formatting individual blocks of text, see Formatting Fields or Objects on page 189. For more on database-wide text defaults, see To set formatting defaults on page 186.
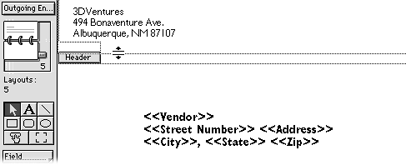
Click on and drag the double arrow between the header and body to close up the empty space around the return address (Figure 10.44).
Choose Preview from the Mode menu (
 in Windows,
 on the Mac) to double-check your envelope layout before you print it (Figure 10.45).
Form letters—standard letters containing bits of customized information—are easy to create using FileMaker’s merge fields. By creating a layout that’s mostly text with a few judiciously placed merge fields, you can create a customized letter for your customers:
Dear Ms. Rose,
Spring is in the air and as a long-time customer, you’ll want to take advantage of our annual spring flower sale.
All bedding plants are 20 percent off, garden tools are discounted by 15 percent, and turf builders are reduced by 30 percent. But the savings don’t stop there! You’ll find hundreds of items on sale.
For preferred customers like yourself, the doors open at 10 a.m. on Thursday, Feb. 21. The sale starts for the general public at 10 a.m. on Friday, Feb. 22.
Sincerely,
James Green
In FileMaker, which uses << and >> to mark merge fields, the letter looks like this:
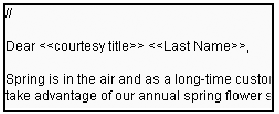
Dear <<courtesy title.>> <<last name>>,
Spring is in the air and as a long-time customer, you’ll want to take advantage of our annual spring flower sale.
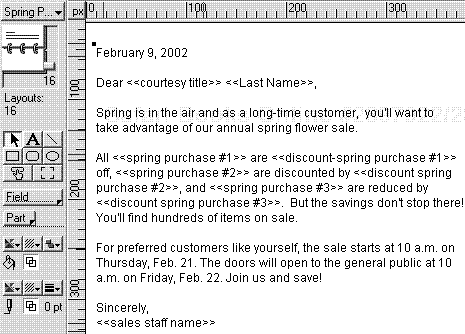
All <<spring purchase #1>> are <<discount-spring purchase #1>> off, <<spring purchase #2>> are discounted by <<discount-spring purchase #2>>, and <<spring purchase #3.> are reduced by <<discount-spring purchase #3>>. But the savings don’t stop there! You’ll find hundreds of items on sale.
For preferred customers like yourself, the doors open at 10 a.m. on Thursday, Feb. 21. The sale starts for the general public at 10 a.m. on Friday, Feb. 22.
Sincerely,
<<sales staff name>>
If you resist the urge to drown customers with frequent mailings, form letters with merge fields can be a powerful tool.
Open the database from which the data will be drawn and switch to Layout mode (
 in Windows,
 on the Mac).
Choose Layouts > New Layout/Report (
 in Windows,
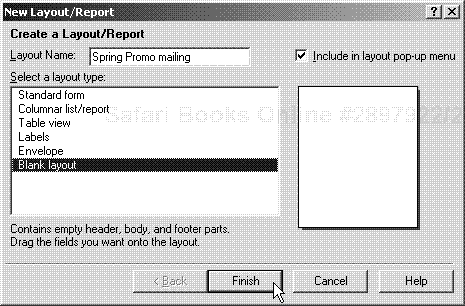
 on the Mac). When the New Layout/Report dialog box appears (Figure 10.46), type a name into the Layout Name text box, choose Blank layout within the Select a layout type area, and click Finish.
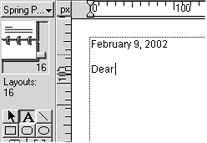
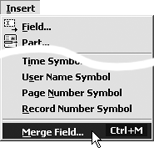
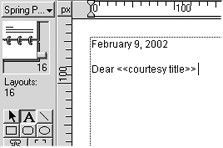
When the new layout appears, select the Type tool from the left-hand Layout status area and begin typing in your letter. When you reach the spot where you want the first merge field to appear (Figure 10.47), choose Insert > Merge Field (Figure 10.48). Or use your keyboard:
 in Windows,

 in Mac OS X,
 in Mac pre-OS X.
When the Specify Field dialog box appears, double-click on the field you want to appear in the letter (Figure 10.49). A merge field will appear within the form letter layout (Figure 10.50).
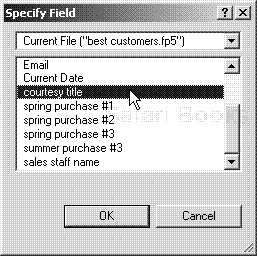
Figure 10.49. When the Specify Field dialog box appears, double-click on the field you want as a merge field.
Continue typing the letter, adding additional merge fields as you need them until you’re done (Figure 10.51). To see what the form letter will look like, switch to Browse mode. To format the letter’s fonts and other text attributes, see Formatting Fields or Objects on page 189. To set the letter’s margins and prepare it for printing, see Printing on page 247.
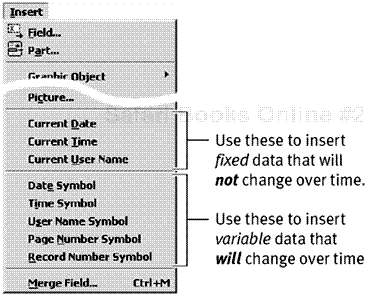
FileMaker’s Insert menu includes a great feature that lets you insert field data that is automatically updated. There are two types of fields in the Insert menu: fixed and variable (Figure 10.52). Fixed data fields—Current Date, Current Time, and Current User Name—paste information that is current at the time it is entered. Once pasted into a file, the data remains fixed and is not updated. In contrast, the variable fields—Date Symbol, Time Symbol, User Name Symbol, Page Number Symbol, and Record Number Symbol—are updated when the file is viewed or printed.
These variable fields are particularly handy for form letters because a letter can be prepared in advance, yet contain the dates and times reflecting the time when it’s actually printed out. This trick, by the way, need not be confined to form letters. Use it in any layout where you need updated information to appear—including onscreen forms.
Make sure you’re in Layout mode (
 in Windows,
 on the Mac), select the Type tool from within the Layout mode’s status area, and click in the layout where you want the variable data to appear.
Choose Insert and then the variable field type you want: Date Symbol, Time Symbol, User Name Symbol, Page Number Symbol, or Record Number Symbol (Figure 10.52). Release your cursor and a placeholder symbol will be inserted (Figure 10.53). For more on what will appear in the layout, especially the placeholder symbols, see Table 10.1.
Return to Browse mode and the placeholder is updated to reflect the most current data (Figure 10.54).
Table 10.1. Variable Field Symbols
TO USE | CHOOSE INSERT AND: | INSERTS (SYMBOL) |
|---|---|---|
Fixed date | Current Date | Date at time field created |
Fixed time | Current Time | Time at time field created |
Fixed user name | Current User Name | Name of person creating field |
Variable date | Date Symbol | Placeholder (//) |
Variable time | Time Symbol | Placeholder (::) |
Variable name | User Name Symbol | Placeholder (||) |
Variable page | Page Number Symbol | Placeholder (##) |
Variable record | Record Number Symbol | Placeholder (@@) |
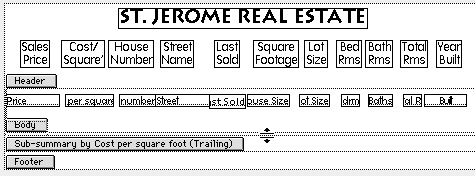
In most cases, the function of the various layout parts are obvious from their names: header, body, and footer. Summary parts work a bit differently than other layout parts. Since summary fields gather information from across several records, they cannot appear within the body of an individual record. That’s where the various kinds of summary parts come in by providing a way to display this cross-record data. Grand summary parts summarize information for all the records being browsed. Subsummary parts do the same for a group of records, based on the break field you designate within the Part Definition dialog box.
Title header: This special type of header appears only at the top of the page or first screen. It can also be used as a title page. Each layout can only contain one title header.
Header: Use for field titles or column headings in columnar layouts (Figure 10.55). It appears at the top of every page or screen. Each layout can only contain one header.

Figure 10.55. Used in a columnar layout, a header part enables you to run field titles across the top for more than one row of records.
Leading grand summary: Use this type of summary part to display summary information at the beginning of the group of the records being browsed.
Body: Use for the bulk of your data, including graphics. The body will appear for each record in the database. Each layout can only contain one body.
Subsummary: Use this type of summary part to display summary information for the group of the records specified by the break field.
Trailing grand summary: Use this type of summary part to display summary information at the end of the group of the records being browsed.
Footer: Use for dates or page numbers. The footer will appear at the bottom of each page or screen. Each layout can contain only one footer.
Title footer: This special type of footer appears only at the bottom of the first page or screen. Each layout can only contain one title footer.
Make sure you’re in Layout mode (
 in Windows,
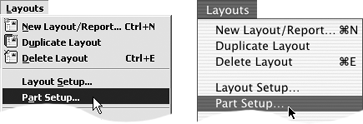
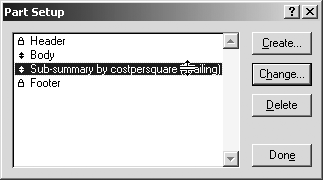
 on the Mac). Choose Layouts > Part Setup (Figure 10.56).
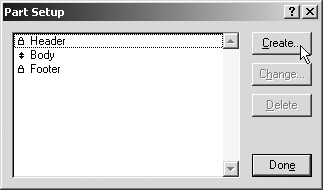
When the Part Setup dialog box appears, click Create (Figure 10.57).
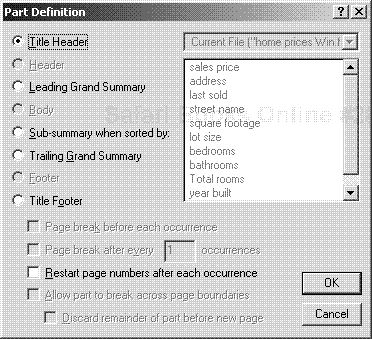
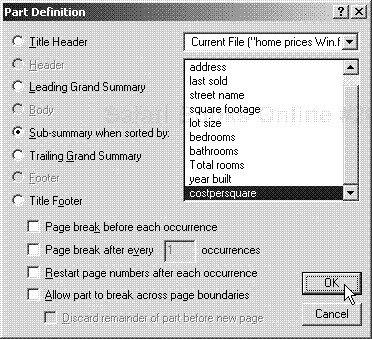
Within the Part Definition dialog box, select the type of part you want to create from the eight choices (Figure 10.58).
If you’re creating a subsummary part, you’ll also need to select from the right-hand list which field (also known as a break field) you’d like the records to sort by.
The Part Definition dialog box also allows you to control where and how pages will break. Check the appropriate box or boxes. Click OK.
When the Part Setup dialog box reappears, click Done and the new part appears in the layout.
 Tip
Tip
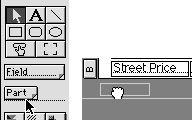
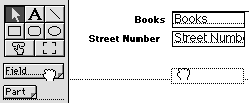
If you’re clear about the purpose and placement of layout parts, you can add a part directly by clicking on the Part button in the left-hand Layout status area and dragging the resulting part to where you want it (Figure 10.59).
Make sure you’re in Layout mode (
 in Windows,
 on the Mac). Choose Layouts > Part Setup.
Click on the part you want to move, hold the cursor down, and drag the part to a new position in the order (Figure 10.60).
Click Done. The part appears in the new position.
Make sure you’re in Layout mode (
 in Windows,
 on the Mac). Click on the dotted line separating one part from another and drag it to make the part larger or smaller (Figure 10.61).
FileMaker’s Part Definition dialog box (Figure 10.62) does more than simply let you change a part’s type. It also gives you control over where a page breaks in relation to a particular part and whether the pages are renumbered after that part. The page break and renumbering options are particularly useful when creating forms from which you may want to print out one record per page (Table 10.2). Here’s a quick rundown of these options:
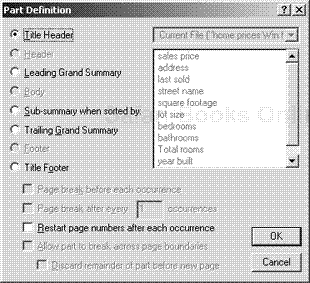
Figure 10.62. The Part Definition dialog box lets you change a part’s type, plus control page breaks and numbering related to that part.
Page break before each occurrence: Choosing this checkbox will place a page break right before the selected part. Examples might include using it for a Trailing Grand Summary, Title Header, Header, or Body.
Page break after every __ occurrences: Choosing this checkbox will place a page break after x instances of the selected header. You set the number of instances. Examples might include selecting a body or footer part where you’ve created a layout in which x records will fit on a page.
Restart page numbers after each occurrence: Use this checkbox if, for example, you want to group a subsummary of records together and restart the page numbers after each subsummary.
Allow part to break across page boundaries: By default, FileMaker will try to keep a part on a single page. Use this checkbox if you do not want to keep a part on the same page or when the body is simply too large to fit on a single page.
Discard remainder of part before new page: This option can only be used if you’ve also checked Allow part to break across page boundaries.
Table 10.2. Page Break and Numbering Options
IN THE PART DEFINITION DIALOG BOX | |
|---|---|
CHOOSE | FOR USE WITH THESE LAYOUT PARTS |
Page break before each occurrence | Subsummary (if sorted by body) Trailing subsummary Trailing grand summary |
Page break after every x occurrences | Leading grand summary Subsummary (if sorted by body) Trailing grand summary |
Restart page numbers after each occurrence | Title header Header Leading grand summary Subsummary (if sorted by body) Footer |
Allow part to break across page boundaries | Leading grand summary Subsummary (if sorted by body) Trailing grand summary |
Discard remainder of part before new page | Leading grand summary Subsummary (if sorted by body) Trailing grand summary |
Make sure you’re in Layout mode (
 in Windows,
 on the Mac). Double-click on the label of the part you want to change.
When the Part Definition dialog box appears, make your new part type choice from the eight left-side choices.
If you want to change the field used by a subsummary part (called a break field by FileMaker), click the Sub-Summary when sorted by button and then make a new field selection in the right-hand list (Figure 10.63).
Click OK. The part type will now change.
Make sure you’re in Layout mode (
 in Windows,
 on the Mac). Double-click on the label of the part you want to change.
When the Part Definition dialog box appears, select the appropriate checkbox among the five in the lower part of the dialog box. See Table 10.2 for more information on which page breaks and numbering schemes work best with various layout parts.
When you’re done making your changes, click OK.
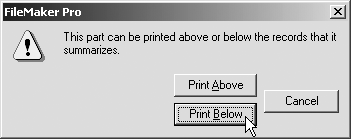
If you chose a summary part, a dialog box may appear asking whether you want the part printed above or below the records it’s summarizing (Figure 10.64). Click on your choice.
When you’re working with layouts remember: Adding a field to a layout isn’t the same thing as creating a field for the database. Layouts are simply differing views of the same data. Add a layout or delete a layout—either way the database itself isn’t changed. The same notion applies when adding a field to a layout: It’s just a view of a field that’s already been created within the database.
For information on how to create a brand new field, see To define a field on page 110. Once you’ve created a field, you can easily add it to a new layout directly without having to define it again. In fact, however, it’s common while designing a layout to discover that you need to define a new field. Just keep straight the difference between defining fields for the database versus adding a field to a layout and you’ll be fine.
To add already defined fields to a layout, click on the Field button in the left-hand Layout status area and drag the resulting field where you want it within the layout (Figure 10.65).
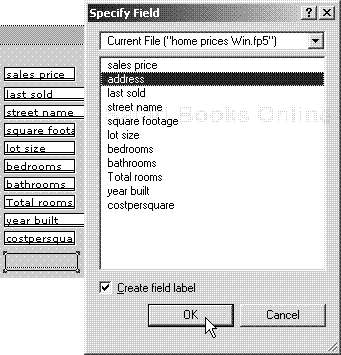
When the Specify Field dialog box appears, click on a name for the new field (Figure 10.66). You can add a field defined in another database by clicking on the Current File pop-down menu above the field list and navigating to the database with the desired field.
If you want a field label to appear in the layout, also check the Create field label box below the list.
Click OK. The layout will reappear with the added field. If you want to further format the field, see Formatting Fields or Objects on page 189.
Sometimes you create a field and only later realize that it is too small for the intended text. (Figure 10.67). In that case, the text will be cut off. Resizing solves the problem.
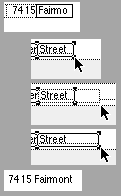
Figure 10.67. To resize a field in Layout mode, click on the field and drag a corner. Once back in Browse mode (bottom), the field’s text is no longer cut off.
Switch to Layout mode (
 in Windows,
 on the Mac).
Click on the field you want to resize and hold down your cursor. The corners of the field will become small black boxes, known as handles.
Drag the handles to make the field larger or smaller. When it reaches the size you want, release the cursor.
Switch back (
 in Windows,
 on the Mac) and you’ll see that all the field’s text now shows. Getting the field big enough may require some toggling between Layout and Browse modes to check your progress.
Sometimes enlarging a field isn’t practical, either because your layout doesn’t have the room or because the field has so much text that it would overwhelm the rest of the layout (Figure 10.68). In such cases, adding a scroll bar to the text field is the best approach.

Figure 10.68. Consider adding a scroll bar when a field has too much text to fit within your layout.
Switch to Layout mode (
 in Windows,
 on the Mac) and click on the field to select it (Figure 10.69).
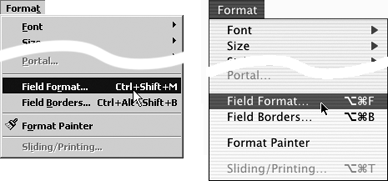
Choose Format > Field Format (Figure 10.70). The Field Format dialog box will appear.
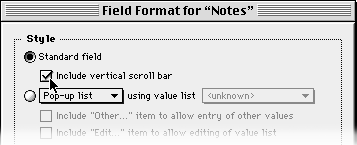
Inside the Field Format dialog box, choose the Standard field radio button, and then check Include vertical scroll bar. Click OK (Figure 10.71).
Back in Layout mode, the field now has a scroll bar. Switch to Browse mode and you’ll see that the scroll bar not only allows you to scroll through all the text but also offers an immediate visual cue that there’s more text than what shows (Figure 10.72).
Switch to Layout mode (
 in Windows,
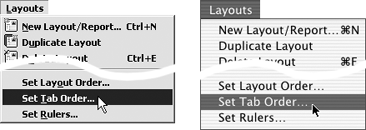
 on the Mac), then choose Layouts > Set Tab Order (Figure 10.73).
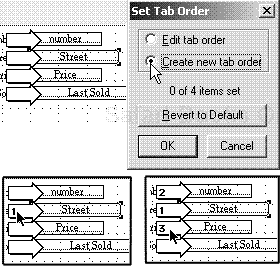
The Set Tab Order dialog box appears, along with a series of numbered arrows indicating the current tab order for your fields.
If you want to just slightly alter the order, click on the tab number you want to change and type it in. If you assign No. 1 to an arrow, you’ll also need to renumber the original No. 1 arrow (Figure 10.74).
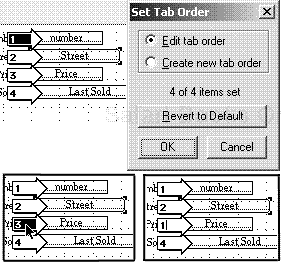
Figure 10.74. To slightly alter the existing tab order (A), click on the arrow you want to change (B), and type in the new number (C).
If you want to completely change the order, click on the Create new tab order radio button in the dialog box, which will eliminate all the tab numbers. Then just click on the arrows in the order you want the tab order set (Figure 10.75).
When you’re done, click OK. The new tab order is now set.
