Whether it’s text, a field, a field name, or a graphic, FileMaker treats them all as separate objects that can be selected, moved, rearranged, and grouped. Most of these functions reside under the Arrange menu, which appears only when you’re in Layout mode. These objects also can be graphically embellished with shading, borders, and fills via the tools in the Layout status area. For more information on using graphics with objects, see Working with Graphics on page 200.
While FileMaker makes it easy to move individual objects around a layout, it also allows you to group objects and then treat them as a single object. By creating groups of groups, you can organize pieces of a layout into units that speed your work.
By default, FileMaker displays objects in the order they were created, with the most recent atop (or in front of) the earlier objects. Sometimes in designing a layout, it’s useful to stack objects atop each other to create a special effect, such as the appearance of a three-dimensional object. While each object remains a separate object, rearranging the stack order changes the overall appearance.
To make it easier to build layouts, FileMaker comes with built-in rulers, T-Squares, and grids. For more information, see Using Layout Guides on page 178.
 Tip
Tip
You may find it faster when arranging and grouping objects to use FileMaker’s Arrange toolbar (Figure 11.1). To turn it on, choose View > Toolbars > Arrange.
Switch to Layout mode (
 in Windows,
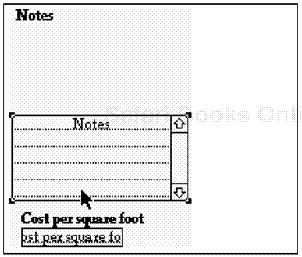
 on the Mac), then select the object by clicking on it with your cursor. Keep pressing your cursor and drag the object to its new location in the layout. A set of dotted lines marks the object’s position as you drag it (Figure 11.2).
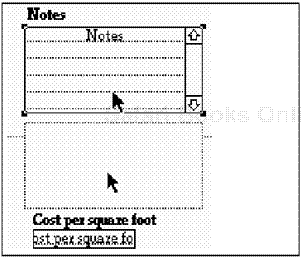
Figure 11.2. To move an object within a layout, click on it and drag it. A dotted outline of the object appears as you move the object.
If you want to ensure that the object only moves horizontally (or vertically), hold down
 as you drag it.
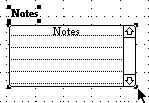
Once you put the object where you want it, release the cursor (Figure 11.3). The object will now appear in the new location within the layout.
 Tip
Tip
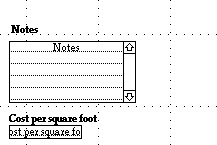
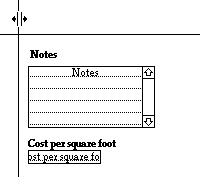
While the field moved in the above example, the “Notes” field label did not. That’s because the label is a separate object. While you can move more than one object at a time by
 -clicking on several objects before dragging them, grouping such objects often makes more sense because things like field labels automatically tag along when you move a field. See To group objects on page 173.
Switch to Layout mode (
 in Windows,
 on the Mac), then select the object by clicking on it with your cursor.
Choose Edit > Cut (
 in Windows,
 on the Mac).
Switch to the other layout and choose Edit > Paste (
 in Windows/
 on the Mac).
Once the object appears in the layout, use your cursor to move it exactly where you want it.
By default, FileMaker treats each item added to a layout as a separate object. But sometimes there can be great advantage to having multiple objects treated as a single object (grouping). For example, if you use labels for fields, grouping the label with the field ensures that they stay together when you move a field within a layout. Similarly, it can speed up your layout work to group related topic fields and then move them to a new spot with a single click-and-drag.
Switch to Layout mode (
 in Windows,
 on the Mac), then select the first object by clicking on it with your cursor.
Hold down
 while you continue clicking on the objects you want to group together (Figure 11.4).
Choose Arrange > Group or use your keyboard:
 in Windows,
 on the Mac (Figure 11.5). The previously individual objects now become a single object (Figure 11.6).
Make sure you’re in Layout mode (
 in Windows,
 on the Mac), then select the objects you no longer want grouped by clicking on each as you hold
  .
.Choose Arrange > Ungroup (Figure 11.7) or use your keyboard:


 in Windows,

 on the Mac. The selected objects will no longer be grouped (see Tip for exceptions).
Make sure you’re in Layout mode (
 in Windows,
 on the Mac), then select the pieces of the layout you want to protect from accidental changes by holding down
  as you click on each object.
Choose Arrange > Lock (Figure 11.8) or use your keyboard:


 in Windows,

 on the Mac.
Make sure you’re in Layout mode (
 in Windows,
 on the Mac), then hold down
  as you click on the objects you want to unlock.
Choose Arrange > Unlock (Figure 11.9) or use your keyboard:


 in Windows,


 on the Mac.
Switch to Layout mode (
 in Windows,
 on the Mac), then select the object you want to move by clicking on it with your cursor.
From the Arrange menu, choose one of four commands: Bring to Front, Bring Forward, Send to Back, or Send Backward. The closer an object lies to the front (or top) of the stack, the more of it will be visible. By selecting and moving various objects, you can manipulate the arrangement to your satisfaction (Figure 11.10).

Figure 11.10. A Initially, the black square lies in the middle of the stack order. B Brought to the front. C Brought forward one layer from its initial position. D Sent back one layer from its initial position. E Sent to the back.
Bring to Front (


 in Windows,

 on the Mac): Use this command to bring the selected object to the very front (or top) of the stack.
Bring Forward (


 in Windows,

 on the Mac): Use this command to bring the selected object forward one layer.
Send to Back (


 in Windows,

 on the Mac): Use this command to send the selected object to the very back (or bottom) of the stack.
Send Backward (


 in Windows,

 on the Mac): Use this command to send the selected object back one layer.
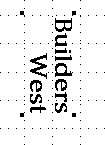
Because every field, label, and graphic within FileMaker is treated as an object, you’re free to rotate them to make a layout more compact, less cluttered, or just more eye-grabbing. FileMaker limits you to rotating objects in 90-degree increments. If you need more precise control, create the object within a true graphics program and then import it into FileMaker.
Switch to Layout mode (
 in Windows,
 on the Mac), then select the object you want to rotate by clicking on it with your cursor (Figure 11.11).
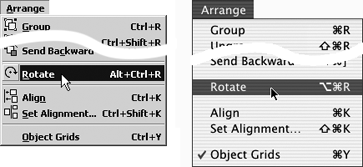
Choose Arrange > Rotate (Figure 11.12) or use your keyboard:


 in Windows,

 on the Mac. The Rotate command moves an object 90 degrees clockwise (Figure 11.13).
Your layout will be easier to read and look more professional if you vertically or horizontally align fields, labels, and groups of fields as much as possible.
Switch to Layout mode (
 in Windows,
 on the Mac), then select the objects you want to align by holding down
  and clicking on them with your cursor.
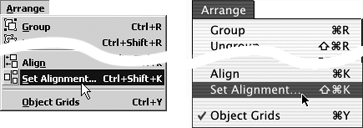
Choose Arrange > Set Alignment or use your keyboard:


 in Windows,

 on the Mac (Figure 11.14).
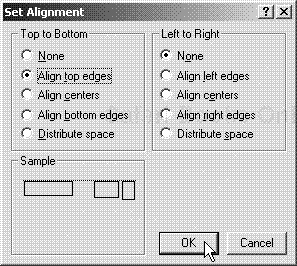
When the Set Alignment dialog box appears, you can control the top-to-bottom and the left-to-right alignment of the selected objects (Figure 11.15). The Sample area in the window’s lower-left corner lets you see the effect of each combination.
When you’re satisfied with the alignment, click OK.
FileMaker’s various layout guides are strictly optional but you’ll find that they make it much easier to create professional layouts. You can use them while you’re creating a layout or to go back and tidy up previous work. Here’s a quick rundown on how each guide functions:
Text Ruler: Provides a horizontal measure in inches, pixels, or centimeters (Figure 11.16).

Figure 11.16. The Text Ruler lets you choose your measurement units and includes icons for choosing fonts, alignments, and tabs.
Graphic Rulers: Provides horizontal and vertical rulers in inches, pixels, or centimeters (Figure 11.17).
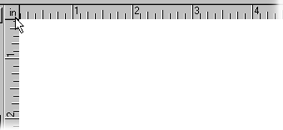
Figure 11.17. The measurement units for Graphic Rulers, which aid horizontal and vertical placement of the selected object, can be changed via the Layouts menu.
Ruler Lines: Provides a matrix of horizontal and vertical dotted lines to help position layout objects. The matrix can be set in inches, pixels, or centimeters (Figure 11.18).
T-Squares: Provides an intersecting horizontal line and vertical line, which can be moved to guide the positioning of layout objects (Figure 11.19).
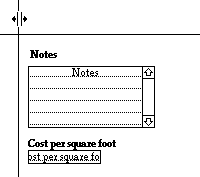
Figure 11.19. The T-Squares option provides a horizontal and a vertical line that extends across the entire layout—easing alignment of multiple objects.
Object Grids: Provides an invisible grid whose measurement units can be adjusted. When Object Grids is on, layout objects “snap” to the nearest grid line.
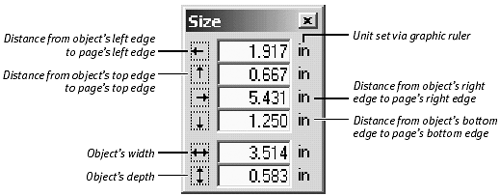
Size Palette: Provides a set of number entry boxes that help you precisely position layout objects (Figure 11.20).

Figure 11.20. The Size Palette allows you to precisely position layout objects via the numeric entry boxes.
Make sure you’re in Layout mode (
 in Windows,
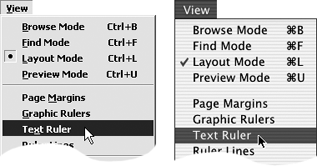
 on the Mac), then choose View > Text Ruler (Figure 11.21).
Use the ruler or, if you have it turned on, the various text icons in the Text Formatting toolbar to adjust selected text as you desire. For more information on text formats, see Formatting Fields or Objects on page 189.
To hide the ruler, choose View > Text Ruler again.
Make sure you’re in Layout mode (
 in Windows,
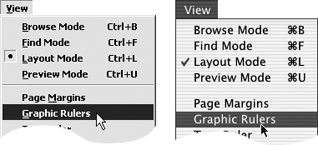
 on the Mac), then choose View > Graphic Rulers (Figure 11.22). To adjust the measurement units used, click the upper-left corner where the horizontal and vertical rulers meet to cycle through the choices: inches, centimeters, or pixels. For more information, see To change ruler and grid units on page 182.
To hide the graphic rules, choose View > Graphic Rulers again.
Make sure you’re in Layout mode (
 in Windows,
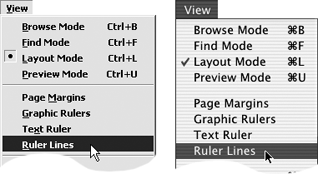
 on the Mac), then choose View > Ruler Lines (Figure 11.23). To adjust the measurement units used, see To change ruler and grid units on page 182.
To hide the rulers, choose View > Ruler Lines again.
Make sure you’re in Layout mode (
 in Windows,
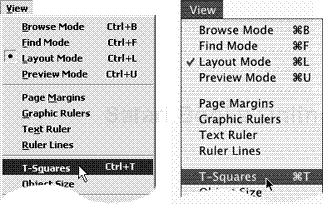
 on the Mac), then choose View > T-Squares (Figure 11.24). To adjust the placement of the T-Square lines, click and hold your cursor, then drag the line where you want it (Figure 11.25).
To hide the T-Squares, choose View > T-Squares again.
Make sure you’re in Layout mode (
 in Windows,
 on the Mac), then choose Arrange > Object Grids (
 in Windows,
 on the Mac) (Figure 11.26). To adjust the measurement units used and the fineness of the grid, see To change ruler and grid units on page 182.
To turn off Object Grids, choose Arrange > Object Grids again.
Make sure you’re in Layout mode (
 in Windows,
 on the Mac), then select the object you want to position by clicking on it with your cursor.
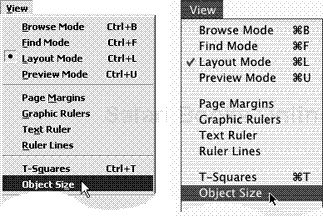
Choose View > Object Size (Figure 11.27).
Once the Size Palette appears (Figure 11.28), make sure you’re working in the measurement units you prefer: inches, pixels, or centimeters. To adjust the palette’s measurement units, see To change ruler and grid units on the next page.
Type in the measurements you want in the Size Palette’s number entry boxes. When you’re done, press
 in Windows,
  on the Mac. The object will be resized based on your entry.
FileMaker lets you set the ruler and grid to measure the layout and its items in inches, pixels, or centimeters.
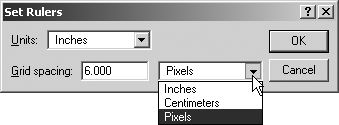
To change the units, choose Layouts > Set Rulers (Figure 11.29).
The Set Rulers dialog box includes two pop-down menus (Figure 11.30). The top one sets the Units used by the Graphic rulers, Ruler lines, the Object Grids, and the Size Palette. The second pop-down menu, Grid Spacing, controls the fineness of the Object Grids’ mesh of horizontal and vertical lines. Make your adjustments to one or both pop-down menus and click OK.
