Chapter 5 : Subjects to Photograph
Automotive Photography
Art doesn’t have to hang in a gallery. It can be seen every day prowling the streets. It is through the innovative aesthetics of design that the car has evolved from an amorphous, utilitarian conveyance into a rolling, metallic sculpture. So how do you capture the personality of such machines? And how do you achieve this with close-up photography?
To begin with, most of us do not have the luxury of choosing the desired background to do a car shoot, nor do we have a hangar-sized, fully equipped studio to accommodate such vehicles. It’s all very well to have someone say, “Why didn’t you shoot the Lamborghini on a wet tarmac to reflect its dynamic lines or position the Shelby Cobra on a stretch of desert highway and shoot it at a high angle with the highway fading off into the horizon? What do you mean, you can’t do that?”
In most cases, vintage, custom, or the super exotic cars are often accessible only at various car shows. Outdoor shows can be frustrating because of the vortex of spectators standing around each exhibit. Indoor car shows are equally hindering because of the crowds, the rope barriers, and the harsh lighting that peppers the surface of each vehicle. Nevertheless, the benefit of photographing vintage cars and street rods is that each one has its own unique features. The objective is to express these traits by separating your subject matter from its ilk. It is the ability to find these idiosyncratic features and photograph them to their best advantage that will make your images irreplaceable.
Create your own style or niche. That is where close-up photography comes in.
Ground-Up Shots
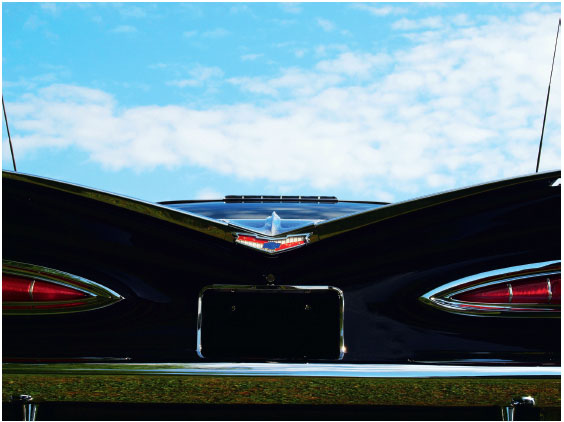
Though most photographers seem interested in photographing a vehicle in an establishing shot (a long shot) by finding the right angle, close-up photography can illustrate the essence of the car’s distinct character. Explore your options. For example, to present a car with a menacing or intimidating appearance, shoot from ground-up (called a “belly shot”) This angle always empowers the subject. As seen in the image of the 1960 Chevrolet Impala, the ground-up approach enables you to enhance the heaviness of the car, the snarl-like design of the chrome of its era, and simultaneously to avoid any superfluous distractions—like people mulling around the vehicle. In addition, the photo is balanced by equalizing the bulk of the car with the lightness of the sky.
To emphasize the winglike trunk and Cat Woman-like taillights of this 1960 Chevrolet Impala, a ground-up shot was required. The result is a somewhat imposing image reminiscent of a vampire bat spreading its wings.
Close-Up Shots
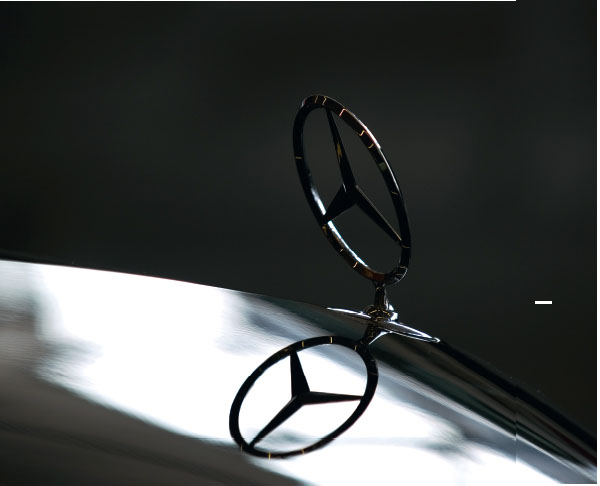
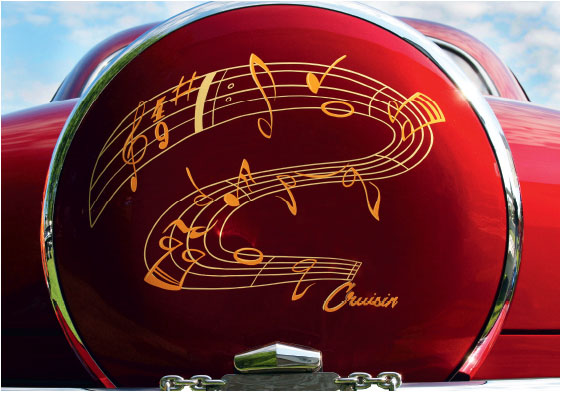
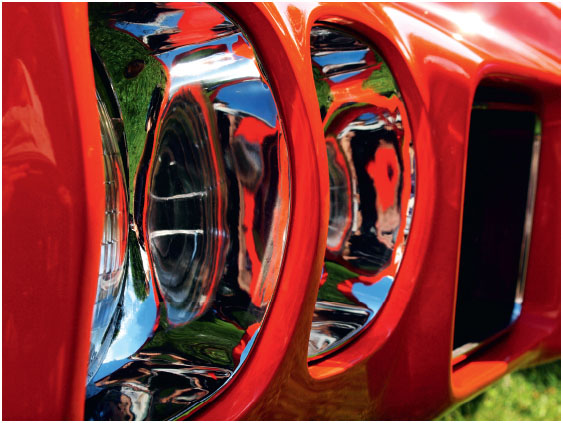
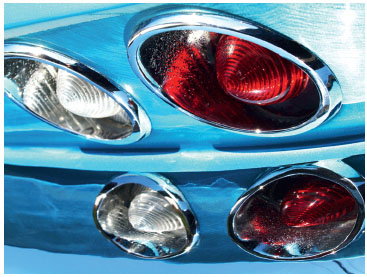
Why should you shoot a close-up of a car? Sometimes intimacy is more seductive to the viewer than the whole ensemble. By focusing on a car’s evident gems like the tail fin of a 1959 Cadillac Eldorado, an E-Type Jag’s grill, or the rear lights of this ‘63 Corvette Coupe, close-ups can whet the viewer’s appetite for more. At the same time, they say so much with so little. Plus, if you are shooting cars at an indoor show, close-ups can avoid the harsh lighting effects. Providing that the close-up is composed correctly, it can convey a wealth of information to the viewer, such as the era of the car, as well as its style, class, and personality. Beware of reflections off the car, including your own.
Often show cars are paraded behind velvet ropes, so tight framing is required using a zoom lens. Instead of using flash, bring a compact reflector with you. There is generally enough lighting at these shows to provide perfect illumination with the reflector without overexposing the subject with flash. If you can get close enough, use a macro, wide-angle, or even a fisheye lens with a tripod. All this equipment may seem awkward, but the result is truly satisfying. Besides, the cars are there to be admired.
Setting a Mood
Like with any good photograph, it is essential that you set a mood with your subject. With any “mood” shot, the composition is critical. Be as innovative as you can be by using irregular angles rather than just shooting the vehicle in a conventional horizontal or vertical format. I used a 45-degree angle to compare the evolution of three Pontiac Trans Ams. It gives the car another dimension without diminishing the respect for its power. Such angles add intrigue that can lead to show-stopping results or interesting documentation.
1976 Pontiac Firebird Trans – Am
1978 Pontiac Firebird Trans – Am

1979 Pontiac Firebird Trans – Am
The distinct, convexed front light display of a 1970 Pontiac GTO 455
Photographing Your Car
Let’s say you want to take a close-up shot of your car to frame. Try not to diminish its appeal with a snapshot. Here are a few simple tips that can seize your viewer’s admiration:
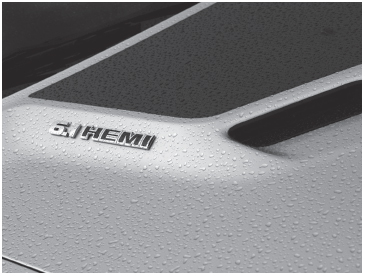
• Wash your car. It sounds ridiculously rational, but just look at used car magazines and see how many of the cars displayed aren’t gleaming. Make sure there aren’t any water spots. Make the paint seamless, the chrome dazzle, the tires sexy.
• Avoid the temptation to take the picture from eye level. Shoot from a ground-up, 45-degree angle to give the proportions of the car more impact. Otherwise, a lateral angle slightly above the vehicle, especially if it’s a convertible, giving the car copious grandeur.
• Use a polarizer to prevent glare and reflections. It also increases color saturation to magnetic lushness and can improve contrast. Make sure you don’t get your own reflection in the shot.
• Pay attention to the time of day. The best lighting conditions are usually right after sunrise or just before sunset. The light is generally warm, seductive, and forgiving—the complete opposite to midday sun that has a tendency to burn out top surfaces, cause murky shadows in the lower regions, and thoroughly bleach out cockpit and engine sections. Use flash during warm lighting conditions. It is also advisable not to photograph the car from the shadow side unless you compensate with flash.
• Don’t forget, a car has personality, so make sure it is emphasized. It if is a muscular car, give it a streamline or powerful angle or from the ground up. If it a cute car, shoot it from a fun perspective. Finally, when you’re shooting, turn your car’s headlights on if it’s just before dusk to add a little drama to your photos.

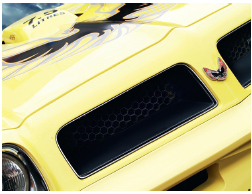
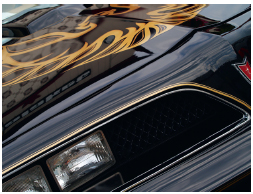
Find the angle that conveys the most about the personality of the car, such as the car’s muscular dimensions, its curvaceous lines, its menacing prowl, or its elegant prowess. And it can all be done with close-up photography. Can you tell what these cars are? Answers are at the back of the book.
Brawny curves and glaring air vents define its raw masculine dimensions.
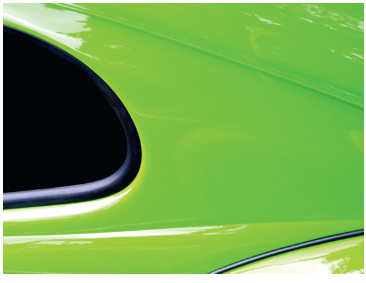
The bulbous curves of unabashed joy depicting this marque’s individualism.
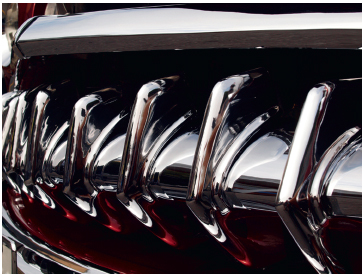
Its chrome grill just oozes with a menacing snarl.
Possibly the sexiest car of its generation in America. Bold, brash, and powerful.
Food Photography
Food is a wonderful subject to photograph because there is so much variety, so it is difficult to go wrong in choosing a product. However, there are ways to avoid making food look bland. Before you shoot, be aware of some key principles: you don’t always have to shoot food at a 45-degee angle, subdue any shadows, pay close attention to your white balance and color casts, make sure the exposure and color rendering is correct, shoot in RAW, and use a tripod. In addition, try different lenses for more rewarding results, such as using a zoom or telephoto lens to focus at a specific detail. Like any other subject matter, find the most desirable angle that will make your subject irresistible:
• When photographing food (or beverages), make sure the background isn’t vying for attention with the foreground product.
• It is key that you adjust the white balance to make sure everything is in its natural color. When shooting meat, fluorescent lighting can give it an anemic blue tinge when it should be shot in warm tones.
• Always try to use natural lighting. Avoid using flash directly on the food, as it is often too harsh. If you can’t use natural lighting, use light diffusers or bounce your lights off a white board, wall, or ceiling. You can even use different colored plastic sheets or cellophane over your lights.
• Incorporate appropriate condiments, cutlery, and chinawear that will complement the setting and the subject. Try to keep the layout as simple and clean as possible.
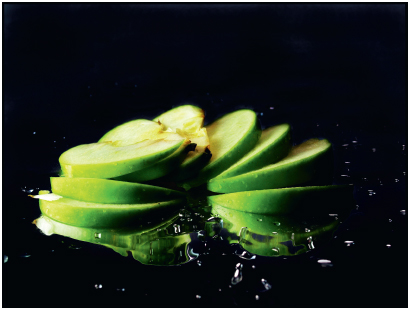
• Everyone knows what an apple looks like, so give it some zing! Slice it, dice it, cut it, or peel it. Give it a whole new twist to catch your viewer off guard, as shown in the photograph below. The same applies to cake, meat, and sandwiches. Display more than simply the exterior of the product, especially with desserts.
• Food and beverages always look more appetizing using close-up photography. This style brings out the intimate texture, color, and finer details that encourage the viewer to savor the presentation.
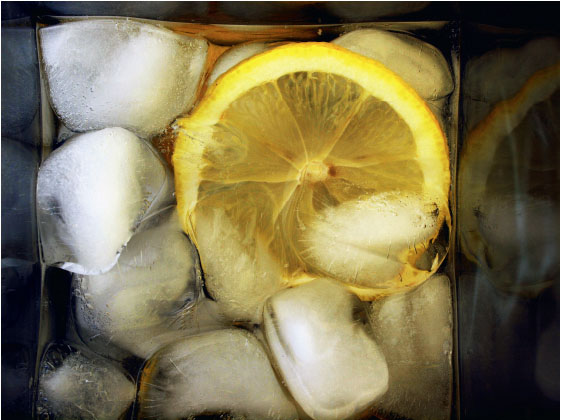
• Citrus fruits, like limes, lemons, and oranges, have a translucent photographic appeal and are best sliced and lit from behind to bring out their lushness, while the layout can be lit softly with front lighting.
• Before you start shooting, take your time to examine what the best angles are for using various lenses and types of lighting. You may need to change everything with each angle. Try a zoom lens, a fisheye lens, and a macro lens.


• Brush on vegetable oil to make your food glisten.
• Apply glycerin to make seafood appear as though it has just been brought in from the ocean.
• Hair spray makes an old cake look new again.
• Spray deodorant on grapes to give them that desirable frosty veneer.
• Brown shoe polish can turn a slap of raw meat into a roasted delicacy.
• Shampoo bubbles can be in place for coffee foam.
• Soaked cotton balls micro-waved, incense sticks, or smoke pellets can give off the appropriate “just out of the oven” steam effect.
• Motor oil can substitute for syrup.
• Make perfect-looking ice cream that won’t ever melt with some mashed potatoes.
Photographing Fruit
Let’s face it, fruit as a whole, isn’t the most exciting subject. So how can you make a banana or lime more interesting? The advantage of fruit is often their radiant color. For example, place a green apple or banana on a plate whose color complements the fruit’s color but make it as simple, almost stark, in contrast. Otherwise, cut a lemon or lime and backlight the intricacies by placing the citrus fruit on a glass or on a colored plastic sheet and light it from underneath or position it in a Ziploc plastic bag against a window.
Cut the fruit about a quarter of an inch thick. If it is too thickly sliced you risk ending up with a dark silhouette, and if it is too thinly sliced the light may be too strong to capture the maximum resplendence of the fruit’s color. For an aesthetic shot, push the ISO as high as possible to give the image a grainy effect to accentuate the texture of the fruit.
Another method is to place a sliced lemon or lime in a clear, carbonated drink, like fizzy bottled water, and capture the percolated bubbles intertwined with the fruit. To accomplish this effect, fill a glass or a jar (for its flat sides) with ice to help keep the fruit in position. Place the glass either in front of a window or on your tabletop with a white, seamless background. Place one light source directly above the glass and another light source at a 45-degree angle above and in front the glass. If you place the lighting directing in front, you will get the light’s reflection; if you place the light behind, you may end up with a silhouette shot (which could be also interesting especially with the bubbles in silhouette).
If you are using tungsten lamps, set your white balance to 3000K and bracket your shots. For those using flash, dial your white balance to the Flash setting. Turn the exposure mode to Manual mode and set the shutter speed to 1/125 of a second with an aperture of f/10 to start. Shoot with a tripod.
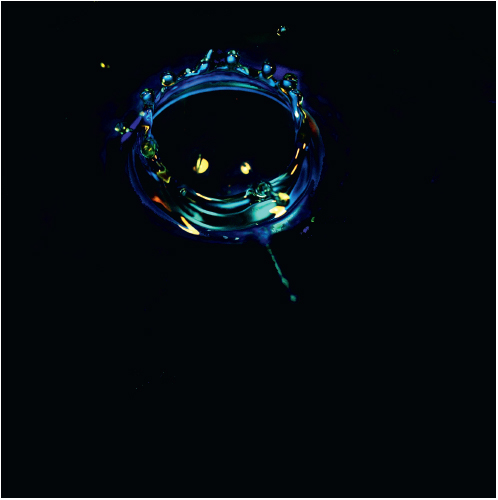
How to Photograph Falling Droplets
I have to admit that this is one of the trickiest shots to take. You have to consider focusing, timing, and lighting simultaneously. The result can be magical, but it may take minutes or hours to accomplish. Here is one method of preparation:
1. Get a container (like a cooking tray or a painter’s roller tray, and black is better than white), and fill a quarter to half with water or coffee creamer or even paint.
2. Clamp an eyedropper or suspend a bag partially full of water (cream or paint), about 3 feet directly above the tray.
3. Position your camera on a tripod at a 45-degree angle aimed downward into the tray. Use a macro lens and set it to Manual or Aperture mode.
4. If you use a flashgun, aim it at a white reflector or white board to bounce your light off it and have it projected toward the water/tray. If you are using tungsten lamps, you can either aim them at the reflective backdrop or position them at 45-degree angles behind the tray. Lighting hitting the water directly will give a flat appearance.
5. For those using a flashgun, set it to Manual mode and dial it to 1/16th power to freeze the motion as a starting point. The key is to get as much even light as possible.
6. If you are using an eyedropper, press a few drops out to see where they land on the tray. If you are using the bag technique, use a tiny pin and puncture a hole at the bottom of the bag and observe where the liquid lands. Then mark the area with a white pencil as the focal point.
7. You want the droplet to be as focused as possible. Start by setting the aperture to f/8, the ISO to 200, and the shutter speed at 1/200. If, for some reason, this isn’t sharp or bright enough, experiment with the exposure until you are satisfied.
8. Take lots of shots and have patience. Try to shoot a split second after the droplet hits the water, not at impact. To make the shot even more interesting, add food coloring to the water.
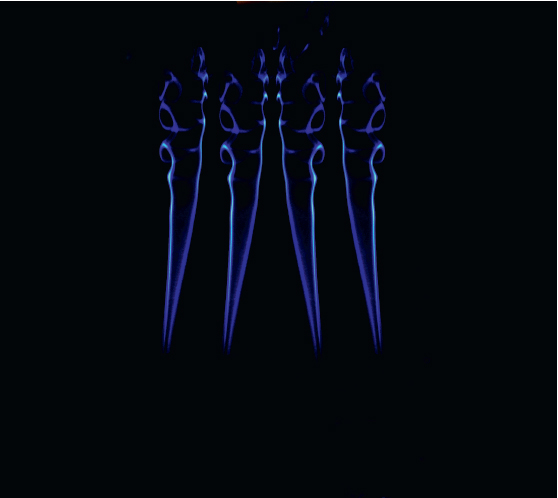
How to Photograph Smoke Trails
Smoke trails can be spellbinding; their ethereal, dancelike movements seem so harmonious. To capture smoke trails, follow these steps:
1. Use a black background and a solid base.
2. Use an incense stick. You can stand it in Plasticine or any other mold.
3. Close all windows. Yes, there may be a lingering scent afterward, but you don’t want unnecessary breeze interfering with the shot.
4. If you are using a flashgun, place it behind the incense stick. Tape a black card to the side of the flashgun closest to the background. This will prevent flash from hitting the black backdrop.
5. If you are using a tungsten lamp, position it 2 feet to the immediate side (and slightly behind) the incense stick.
6. Focus on the tip of the incense stick to prefocus, and set your camera to Manual mode.
7. Set your shutter speed to 1/200 and your aperture to f/14.
8. The ISO is probably best at 200.
9. Set your camera to RAW.
10. Do a couple of test shots to check the exposure. You may need to bracket the shots.
11. Most of the smoke trails will be sinewy straight lines, so you will need to slightly shake the stick to get twirling trail motions.
12. Take 30 to 40 images then, once downloaded, you can manipulate them with color, angles, and so on.
13. Experiment with two or three incense sticks simultaneously.

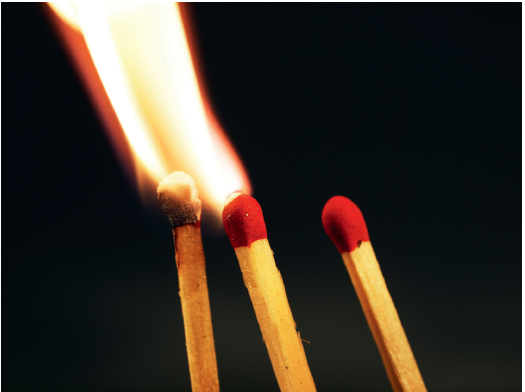
How to Photograph Lit Matches
The problem you may encounter with this particular shot is controlling the exposure—you are dealing with such a discrepancy of light: the lack of light before the match is lit, the explosion of light as it is lit, and the subdued lighting when the match is burning. Try the following steps:
1. To avoid the awkwardness of photographing your hand lighting one match with another, place either one or two matches standing up in Plasticine or sand, their heads bowed together. I say two matches for a greater burst of fire. Glue a thin string behind one matchstick.
2. Position your lights at an angle behind the matches.
3. Dial your camera setting to automatic exposure bracketing (AEB) to take three consecutive shots, allowing you to freeze the sudden explosion of fire.
4. Light the thin string and wait until it reaches the head of the match before shooting.
5. A note of advice: Beware of fires. Dispose of used matches in a bowl of water beside you. Keep a moist facecloth or towel near you for emergencies.
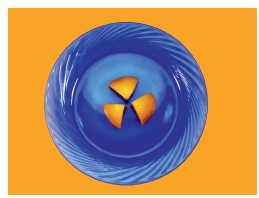
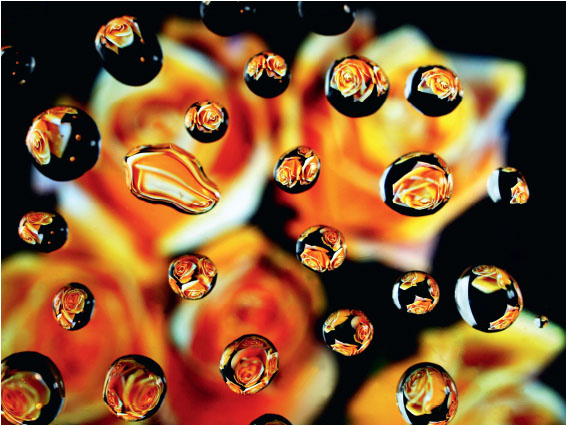
How to Photograph Water Refractions
This experiment can be a lot of fun using water droplets. Find something colorful, such as flowers; colorful candy like Smarties, bubble gum balls, rock candy, or jelly beans; polished pebbles; or a mixed bucket of coins. Then try the following steps:
1. Place the colorful objects in an open, transparent container, like a bowl or a glass vase. Place a black cloth for the container to sit on. Or instead of a bowl or a vase of flowers, place a photographic image of flowers facing up.
2. Position the camera over and parallel with the glass or clear plastic. Make sure there are no scratches or dust on the glass/ plastic surface and that the glass is at least 4 inches or more above the objects in the bowl.
3. With an eyedropper, carefully arrange the droplets on the glass surface, possibly in a circular formation. Make sure the droplets don’t touch each other. You want nice, bulbous droplets. If water doesn’t work, try glycerin. It’s oily but very effective.
4. Set your lights on both sides of the container with a white reflector at the back to help bounce the light back, illuminating the objects.
5. Position your camera, on a tripod, directly over the glass. Use Manual or Aperture focus.
6. Focus on the refracted images within the droplets—not the droplets’ surfaces. Start with the widest aperture of f/22, and experiment with the shutter speed.
Photographing Water
Water is a wonderful object to photograph because of its reflective qualities and how it can magnify colors and textures. Water droplets have a penchant to magnify the surface texture that they lie on. In most cases of close-ups, to maximize depth of field it is best to keep the camera’s sensor parallel with the subject. Be aware that the water pellets may reflect your own image, so you may want to use a longer lens. If this is the case, position your camera at an angle and use a small aperture to compensate for not being parallel with the subject.
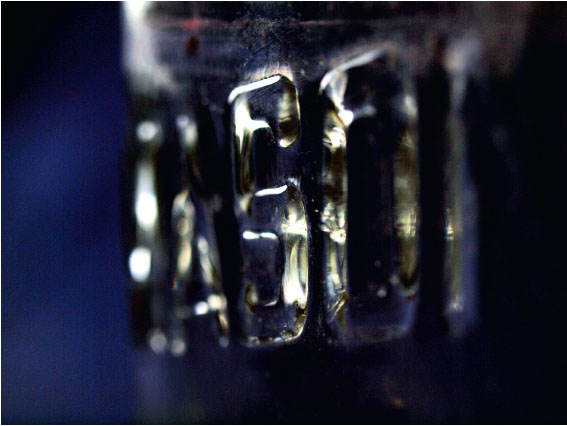
Photographing Glass
Glass, like water, can create a plethora of reflective effects. Try photographing a whiskey, gin, or antique bottle where the letters of the name are embossed and take a close-up of a letter. Flash will be too strong, so place the bottle beside a window for natural lighting. Your shutter speed will depend on the outdoor lighting conditions. Position the bottle so that the shadow from the raised letters is evident—you will require side lighting. If the lighting from the window is too harsh, place tracing paper on the window to give an even light. Other forms of glass (or reflective material) worth photographing are jewelry, crystal, Jack Frost ice patterns on windows, and city lights off metal spheres, just to name a few.
Photographing Synthetic Textures
The synthetic world can be just as illuminating as the natural world, especially when it comes to close-up photography. Find an old computer to dismantle and photograph the hardware, such as the computer chips, where a myriad of technological veins weave between geometric and regimented patterns. Again, depth of field is a concern, so be particular as to what you want to focus on, even when using Manual or Aperture focus. Keep your camera plane to the subject matter. Lighting is optional depending on how creative you want to be. For a flat, documentation shot, place your lighting in front and at a slight angle, but for a more aesthetic image, position the lighting low with severe angles to make the subject look almost alien with deep shadows. One light source should be sufficient.
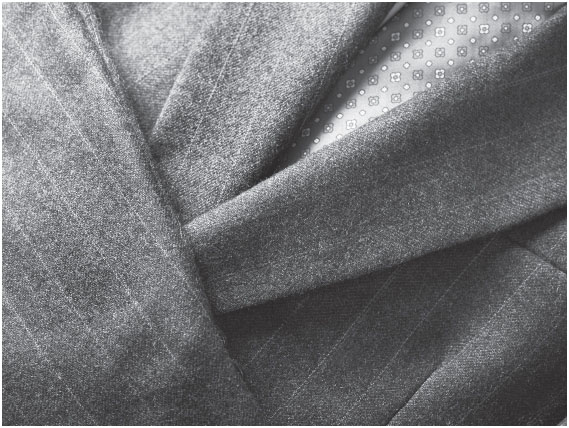
Photographing Fabrics
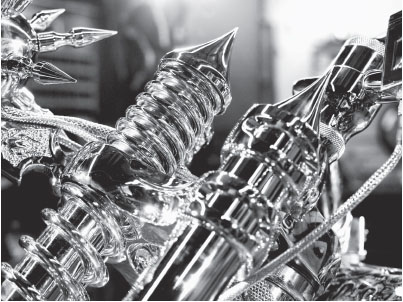
Photographing texture defines the context of the subject. In the case of fabrics, it addresses the quality of the product without having to show the whole ensemble because they convey both visual and tactile sensations. To bring out texture, the light should be at an oblique angle. Finely textured surfaces need softer, more diffused lighting to highlight their qualities than do rough surfaces. Texture, as the example shows, is just as impressive in black and white as it would be in color.
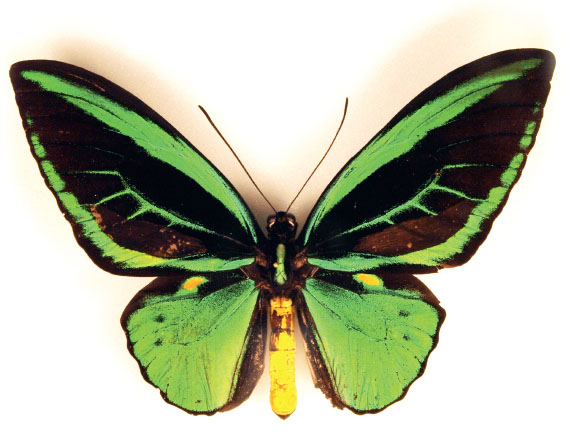
Photographing Insects
I could watch insects for hours as a child. I would collect grasshoppers and house them in a large glass jar with blades of grass. Then, to their horror, I would find a praying mantis and add it to the group of grasshoppers. It wasn’t so much that I was morbid; I was just curious to see how the mantis would react. It was like watching a snake strike a mouse. Although I find insects both fascinating and repulsive, many are blessed with a shimmering display of mesmerizing kaleidoscopic colors, like the eyes of a jumping spider or the abdomen of a long-legged fly.
Shooting Insects Outdoors
Because insects refuse to keep still for very long, I would recommend two strategies:
• Take your shots in the early morning hours. The hues are warm and complementary, and the insects are still awakening from their sleep, so movement will be slow.
• If you are patient and move slowly, you may be able to photograph insects with a macro lens, otherwise, the sight of a human approaching will inevitably scare an insect away. I would recommend a long lens (150mm +) to avoid this dilemma, and you can easily bleed out any distracting background.
Finding Insects
A good time to shoot insects is during the late spring and throughout the summer, but before you go off on some carefree jaunt, know the preferable insect habitats. For instance, bees and wasps will congregate around flowers for their pollen and nectar. Spiders have a desire for trees, branches, and old sheds. And stagnant water is like a singles’ bar for untold breeders and hunters.
Attracting Insects
Now the tricky part. How do you attract insects? Try using an incentive such as honey, syrup, sugar water, or any sticky substance. Spread it on a branch or leaf or even smear it on a Petri dish, and wait to see what other insects emerge.
Documentation
If you are photographing insects for the purpose of documentation, it is essential to keep as much of the insect in focus as you can. There are millions of species—hundreds per family— and one family member has a different name from another simply because of a slight degree of color. Because insects don’t carry around nametags, I would suggest investing in a reliable reference book for identification.
One recommendation is Insects: Their Natural History and Diversity by Steven Marshall.
What to Look For
Find out which angle is best suited for which insect. To give you an example, the tip of its abdomen can determine a species of dragonfly, and so can the venation running through its plastic-like wings. An insect with an extended antenna is usually a male, and a mosquito that bites is a female (she needs blood to nourish her eggs).
Shooting Insects Indoors
The depth of field for close-ups is minimal at best even using Manual or Aperture mode. Unless emphasizing a specific aspect of an insect, such as the eyes, keep the camera as plane as you can to the subject. Avoid using direct flash since most insects are too small to absorb such illumination. Either use incandescent lighting or bounce the flash off a white or silver reflector. Try to keep the lighting as even as possible to avoid deep shadows, so position the lighting on either side of the insect. Use a small aperture (high f-stop number), like f/16 or f/22 for maximum focus. The smaller the insect, the more reason to use an added accessory such as a bellows attachment. To steer clear of color shift from artificial lighting, use daylight-balanced lamps with a temperature of 5000K. You can also adjust your DLSR camera to this requirement.

Storing Insects
Insects are not known for their longevity. In fact, some only live for 24 hours. One way to preserve an insect is to store it in a refrigerator. This treatment won’t kill it and its body temperature (and heart rate) will slow down to acclimatize to the new surroundings. Another “humane” way to kill an insect is by using the “killing jar” method. Take a glass jar with a lid that can close tightly. Cut out several layers of cotton, and place them at the bottom of the jar. Saturate the cotton with ethyl acetate (accessible from lab supply stores or hobby shops), and place the insect into the jar before sealing it. It doesn’t take long before the insect expires. Happy hunting.

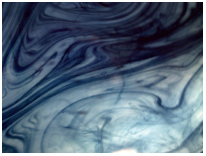
Abstract Photography
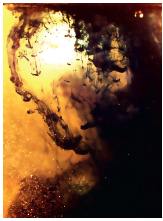
Abstract photography isn’t about precision but about a different perspective on how we view the world. It is more about instinctual reaction than definition, communicating to the viewer’s emotions. In essence, abstract photography relies on our more primal sense of form, color, and curves rather than function. It is also an ideal opportunity to experiment with close-up photography.
Train your eye to edit how objects are juxtaposed to each other, whether there is a nuance between shapes and texture. It is to your discretion whether you want precise focus, soft focus, or complete focus. There really are no rules. It is a raw, psychological form of art, not a documentary. What is so alluring about abstract photography is that you can take any everyday object, no matter how innocuous or bland, and transform it into something compelling.
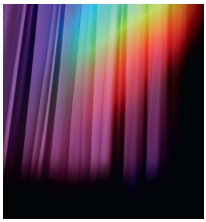
Celestial Curtain (reflections from a CD)
The Final Hours of Hades (food coloring and water poured into a sink)

Adding Fuel to Fire (root beer being poured)
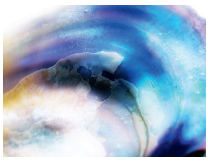
Iridescence (the colors inside a seashell)

The Expulsion of Memories (oil paints mixed)

Pink Ripples (sheets of rolled paper)
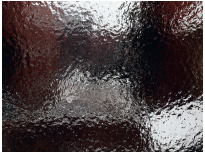
Adieu Paris (a view from a car’s frosted window)
Slow Motion Riot (a mixture of oil and water on a metal plate and dispersed by a fan)