
Capturing the browser page as an image is very fundamental in PhantomJS; the feature was added at an early stage of the development. The basic code to take a screenshot is as follows:
var system = require('system'),
var url = system.args[1];
var page = require('webpage').create();

page.open(url, function(status) {
  if ( status === "success" ) {
    page.render('page.png'),
    phantom.exit(0);
  } else {
    phantom.exit(1);
  }
});
We can take a screenshot of any page using the WebPage object's render() function. It accepts a single parameter, which is the name of the file where the image is to be saved.
In the preceding code, we call the render() function and pass the name page.png, stating that we want our screenshot to be saved as a PNG file.

Upon executing it, the current state and rendered details of the page in the browser memory will be captured and saved as an image in the current folder. This will produce a PNG file that can be viewed with any image viewer. The following screenshot displays the output image of the script:

PhantomJS automatically determines the file format of the image through which the screenshot will be exported based on the file extension that we state in the filename parameter. The preceding script explicitly denotes that the name will be page.png, hence it will save and create a screenshot that is in PNG format.
The following are the three image formats that we can save to:
|
Format |
Extension |
Description |
|---|---|---|
|
PNG |
| |
|
GIF |
| |
|
JPEG |
|
If we want to save the image to another folder location, we include either the relative or the absolute path as part of the name to tell PhantomJS where to save it.
Let us slightly modify our script to the following to make it accept the file format of the screenshot to be saved to:
var system = require('system'),
var url = system.args[1];
var saveas = system.args[2];
var page = require('webpage').create();

page.open(url, function(status) {
  if ( status === "success" ) {
    console.log('Saving screenshot as ' + saveas);
    page.render('screenshot.' + saveas);
    phantom.exit(0);
  }
});.
Now our script accepts two arguments; the first is the web URL and the second is the extension of the image format. We then use the extension to complete the name of our screenshot filename.

The script execution will produce a new file named page.gif. This contains the rendering of the browser page upon loading the specified URL.
Aside from the documented supported image formats, there are also several other formats that can be used to save the screenshot. These are as follows:
|
Format |
Extension |
Description |
|---|---|---|
|
BMP |
|
Bitmap |
|
PBM |
|
Portable Bitmap |
|
PGM |
|
Portable Graymap |
|
PPM |
|
Portable Pixmap |
The following are some screenshot grabs using these formats:
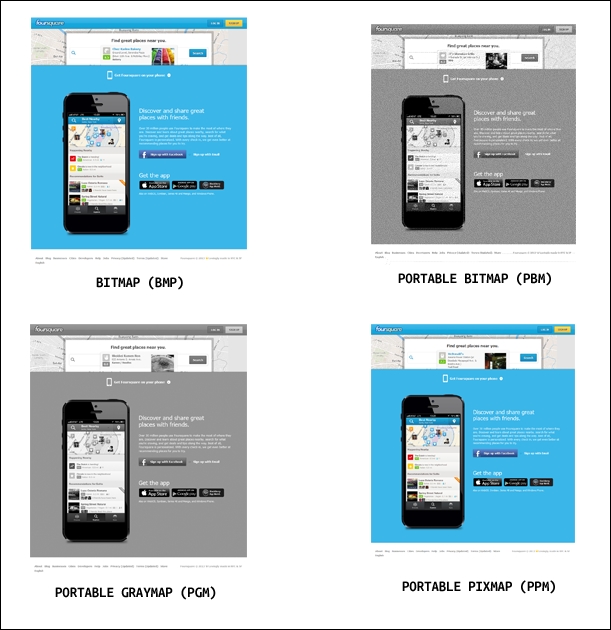
Although we can save in these formats, the first three file formats are more useful on the web as they are widely used in most websites that are now available.