
Chapter 10: Developing Ghidra Plugins
In this chapter, we will dig into the details of Ghidra plugin development, as introduced in Chapter 4, Using Ghidra Extensions. Throughout this chapter, you will learn how to implement your own plugins in order to arbitrarily extend Ghidra's features.
We will start by providing an overview of some existing plugins so that you can explore some ideas from other developers that may inspire you. Next, we will analyze the source code of the plugin skeleton included with Ghidra and available from Eclipse when creating a new plugin.
Finally, we will review a Ghidra plugin example based on the skeleton mentioned previously. This will allow us to dig into the details of implementing a new GUI docking window by adding components and actions to it.
In this chapter, we're going to cover the following topics:
- Overview of existing plugins
- The Ghidra plugin skeleton
- Ghidra plugin development
Let's get started!
Technical requirements
The following are the technical requirements for this chapter:
- This book's GitHub repository, which contains all the necessary code for this chapter, at https://github.com/PacktPublishing/Ghidra-Software-Reverse-Engineering-for-Beginners/tree/master/Chapter10.
- Java JDK 11 for x86_64 (available here: https://adoptopenjdk.net/releases.html?variant=openjdk11&jvmVariant=hotspot).
- Eclipse IDE for Java developers (any version that supports JDK 11 that's available here: https://www.eclipse.org/downloads/packages/) since it is the IDE that's officially integrated and supported by Ghidra.
- Gradle, a build automation tool required for compiling Ghidra extensions (https://gradle.org/install/).
- PyDev 6.3.1 (available here: https://netix.dl.sourceforge.net/project/pydev/pydev/PyDev%206.3.1/PyDev%206.3.1.zip).
Check out the following video to see the Code in Action: https://bit.ly/3gmDazk
Overview of existing plugins
As we saw in the Analyzing the code of the Sample Table Provider plugin section in Chapter 4, Using Ghidra Extensions, a plugin extension is a Java program that extends from the ghidra.app.plugin.ProgramPlugin class, allowing us to handle the most common program events and implement GUI components.
In this section, we will overview how Ghidra features are mostly implemented by plugins which can be easily found on the Ghidra repository. By analyzing an example we will understand the relation between the source code of an existing plugin and the Ghidra component that it implements.
Plugins included with the Ghidra distribution
A lot of Ghidra features are implemented as plugins, so, in addition to the plugin examples that come with Ghidra and the ones available in the ghidra_9.1.2 ExtensionsGhidra folder, you can also learn how to implement your own features by reviewing the source code of the program and/or reusing it.
You can easily find plugins by looking for classes containing the string extends ProgramPlugin (https://github.com/NationalSecurityAgency/ghidra/search?p=1&q=extends+ProgramPlugin&unscoped_q=extends+ProgramPlugin), as shown in the following screenshot:

Figure 10.1 – Looking for Ghidra features implemented as plugins
As you can see, 70 plugins (of course, these search results include plugin examples) are part of Ghidra. A lot of the features that are available from Ghidra's GUI that you are already familiar with are implemented in this way. Remember that when you download a release version of Ghidra, the mentioned source code will be compiled in JAR files and distributed via compressed ZIP files named following the pattern: *-src.zip.
For instance, you can locate the ByteViewer extension in the ghidra_9.1.2Features folder distributed in both forms: compiled JAR file and source code. These are available in the lib directory of the module:

Figure 10.2 – ByteViewer extension file tree view – I
It is implemented as a Ghidra plugin extension located at ghidra_9.1.2/Ghidra/Features/ByteViewer/src/main/java/ghidra/app/plugin/core/byteviewer/ByteViewerPlugin.java, as shown in the following screenshot:

Figure 10.3 – ByteViewer extension file tree view – II
This plugin implements an essential reverse engineering framework feature. The following screenshot shows the functionality provided by Ghidra's GUI mode when the Chapter 4, Using Ghidra Extensions' hello_world.exe program is run:

Figure 10.4 – ByteViewer extension file tree view – III
By doing this, you can relate the GUI component to its source code, which allows you to modify it or reuse some code snippets when you're developing your own Ghidra plugins.
Third-party plugins
In addition to the plugins that come with your Ghidra distribution, you can install third-party plugins from the internet. The following are some examples of useful third-party developed plugins:
- ret-sync (https://github.com/bootleg/ret-sync): A Ghidra plugin extension that allows you to synchronize Ghidra with a lot of common debuggers, such as WinDbg, GDB, LLDB, OllyDbg, OllyDbg2, and x64dbg.
- gdbghidra (https://github.com/Comsecuris/gdbghidra): This plugin allows you to synchronize Ghidra with GDB, set breakpoints from Ghidra, show the register values on Ghidra while debugging, and more. Since Ghidra does not incorporate its own debugger, this Ghidra plugin extension can be very useful.
- OOAnalyzer (https://github.com/cmu-sei/pharos/tree/master/tools/ooanalyzer/ghidra/OOAnalyzerPlugin): A plugin that allows you to import C++ object-oriented information provided by the OOAnalyzer component of the Pharos Static Binary Analysis Framework (https://github.com/cmu-sei/pharos/blob/master/tools/ooanalyzer/ooanalyzer.pod). This is extremely useful for reverse engineering C++ binary files.
In the next section, we will provide an overview of the structure of the simplest Ghidra plugin: the plugin skeleton.
The Ghidra plugin skeleton
As we explained in the Deveeloping a Ghidra extension section of Chapter 4, Using Ghidra Extensions, by clicking on New | Ghidra Module Project…, you can create any kind of Ghidra extension by starting from a given skeleton.
In this section, we will provide an overview of the Ghidra plugin extension skeleton in order to understand the basics that allow us to develop complex plugins.
The plugin documentation
The first part of a plugin's skeleton is the documentation that describes the plugin. Its documentation contains four required fields (optionally, you can add some others):
- The status of the plugin, which can be one of four possible values: HIDDEN, RELEASED, STABLE, or UNSTABLE. (See line 01 of the following code).
- The package of the plugin (see line 02).
- A short description of the plugin (see line 03).
- A long description of the plugin (see line 04).
The following code is a plugin documentation skeleton that you can customize:
00 @PluginInfo(
01 status = PluginStatus.STABLE,
02 packageName = ExamplesPluginPackage.NAME,
03 category = PluginCategoryNames.EXAMPLES,
04 shortDescription = "Plugin short description.",
05 description = "Plugin long description goes here."
06 )
PluginInfo documentation
If you want to include optional description fields inside PluginInfo, check out the following link: https://ghidra.re/ghidra_docs/api/ghidra/framework/plugintool/PluginInfo.html.
As shown in the following screenshot, the plugin's information is shown by Ghidra once the plugin has been installed and detected:
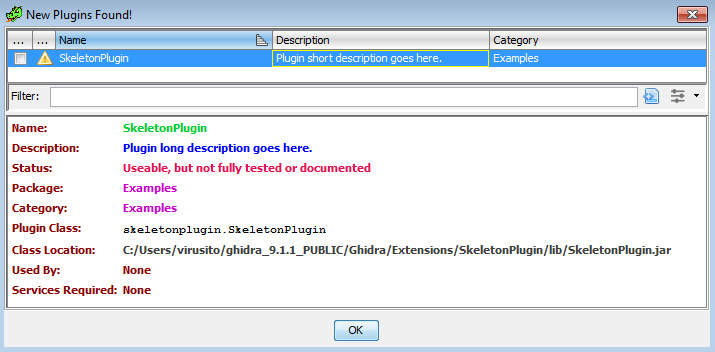
Figure 10.5 – Plugin configuration
After installing PluginInfo, you can write the code for the plugin.
Writing the plugin code
Plugins and their actions are managed by PluginTool, so, it is provided as a parameter to the plugin class. There are three important things in all Ghidra plugin source code:
- provider (line 09) implements the plugin's GUI. It can be permanent (closing the plugin only hides it) or transient (closing the plugin removes the plugin, such as when you're showing the results of a search).
- The constructor can customize provider and the plugin's help options.
- The init() method can be used to acquire services like FileImporterService or GraphService. Check the following link for a full list of documented services: https://ghidra.re/ghidra_docs/api/ghidra/app/services/package-.summary.html.
The following code is the body of an extremely simple plugin example named SkeletonPlugin. Of course, the MyProvider class (line 09), as we mentioned previously, is a plugin provider that implements the GUI of the plugin. We will explain this in detail later:
07 public class SkeletonPlugin extends ProgramPlugin {
08
09 MyProvider provider;
10 public SkeletonPlugin (PluginTool tool) {
11 super(tool, true, true);
12
13 // TODO: Customize provider (or remove if a provider
14 // is not desired)
15 String pluginName = getName();
16 provider = new MyProvider(this, pluginName);
17
18 // TODO: Customize help (or remove if help is not
19 // desired)
20 String topicName =
21 this.getClass().getPackage().getName();
22 String anchorName = "HelpAnchor";
23 provider.setHelpLocation(new HelpLocation(
24 topicName,
25 anchorName)
26 );
27 }
28
29 @Override
30 public void init() {
31 super.init();
32 // TODO: Acquire services if necessary
33 }
34 }
If you want to offer a GUI feature with your plugin, then you need to implement a provider. This can be developed using a separate Java file. In the next section, we will provide an overview of the structure of a Ghidra plugin provider.
The provider for a plugin
The provider implements the GUI component of a plugin. It is usually stored in a separated file named *Provider.java, which consists of the following things:
- The constructor (lines 05-09), which builds the panel and creates the required actions.
- The panel (lines 11-18), which creates the GUI components and customizes them.
- The actions of the GUI (lines 21-43), which are added using addLocalAction(docking.action.DockingActionIf).
- A getter that lets us get the panel (lines 46-48).
The following code is the implementation for a custom plugin provider; that is, the one for the MyProvider class (used in line 09 of the preceding code):
00 private static class MyProvider extends ComponentProvider{
01
02 private JPanel panel;
03 private DockingAction action;
04
05 public MyProvider(Plugin plugin, String owner) {
06 super(plugin.getTool(), owner, owner);
07 buildPanel();
08 createActions();
09 }
10
11 // Customize GUI
12 private void buildPanel() {
13 panel = new JPanel(new BorderLayout());
14 JTextArea textArea = new JTextArea(5, 25);
15 textArea.setEditable(false);
16 panel.add(new JScrollPane(textArea));
17 setVisible(true);
18 }
19
20 // TODO: Customize actions
21 private void createActions() {
22 action = new DockingAction(
23 "My Action",
24 getName()) {
25 @Override
26 public void actionPerformed(
27 ActionContext context) {
28 Msg.showInfo(
29 getClass(),
30 panel,
31 "Custom Action",
32 "Hello!"
33 );
34 }
35 };
36 action.setToolBarData(new ToolBarData(
37 Icons.ADD_ICON,
38 null)
39 );
40 action.setEnabled(true);
41 action.markHelpUnnecessary();
42 dockingTool.addLocalAction(this, action);
43 }
44
45 @Override
46 public JComponent getComponent() {
47 return panel;
48 }
49 }
The Provider Actions documentation
You can learn more about the addLocalAction method (used in line 31 of the preceding code) at the following link: https://ghidra.re/ghidra_docs/api/docking/ComponentProvider.html#addLocalAction(docking.action.DockingActionIf). You can learn more about Docking Actions by looking for the DockingActionIf interface known implementing classes at: https://ghidra.re/ghidra_docs/api/docking/action/DockingActionIf.html.
The following screenshot shows the result of executing this plugin, which you can do by going to Window | SkeletonPlugin via CodeBrowser, and clicking on the green cross button located at the top-right of the screen, which triggers the action (a message box appears once you've done this):

Figure 10.6 – Plugin configuration
In the next section, we will learn how to implement a plugin using this skeleton as a reference.
Developing a Ghidra plugin
In this section, we'll analyze how the ShowInfoPlugin Ghidra plugin example is implemented in order to understand how to develop a more complex plugin.
The source code for ShowInfoPlugin
The source code for ShowInfoPlugin is available here: https://github.com/NationalSecurityAgency/ghidra/blob/49c2010b63b56c8f20845f3970fedd95d003b1e9/Ghidra/Extensions/sample/src/main/java/ghidra/examples/ShowInfoPlugin.java. The component provider used by this plugin is available in a separate file: https://github.com/NationalSecurityAgency/ghidra/blob/49c2010b63b56c8f20845f3970fedd95d003b1e9/Ghidra/Extensions/sample/src/main/java/ghidra/examples/ShowInfoComponentProvider.java.
To implement a plugin, you need to master three key steps. Let's take a look at each!
Documenting the plugin
To document a plugin, you must describe it using the PluginInfo structure:
00 @PluginInfo(
01 status = PluginStatus.RELEASED,
02 packageName = ExamplesPluginPackage.NAME,
03 category = PluginCategoryNames.EXAMPLES,
04 shortDescription = "Show Info",
05 description = "Sample plugin demonstrating how to "
06 + "access information from a program. "
07 + "To see it work, use with the "
08 + "CodeBrowser."
09 )
As you can see, the documentation indicates that this is a release version of the plugin (line 01). The package that the plugin belongs to is ExamplesPluginPackage.NAME, as established in line 02. The plugin is classified in the PluginCategoryNames.EXAMPLES category to indicate that this is an example plugin. Finally, the plugin is described in both short (line 04) and full (lines 05-08).
Implementing the plugin class
The plugin class is called ShowInfoPlugin and extends from ProgramPlugin (line 00), as expected by Ghidra when you're developing a plugin extension. It declares a ShowInfoComponentProvider (for implementing the GUI of the plugin) named provider (line 02) that is initialized inside the constructor of the class (line 06). This, as usual, receives PluginTool as a parameter (line 04).
On the other hand, two of the methods provided by ProgramPlugin are overridden. The first method, programDeactivated, allows us to perform certain actions when the program becomes inactive – in this case, it lets us clear the provider (line 11). The second method, locationChanged, allows us to act once we've received program location events. In this case, it passes the current program and the location to the provider's locationChanged method (line 19). The body of the plugin looks as follows:
00 public class ShowInfoPlugin extends ProgramPlugin {
01
02 private ShowInfoComponentProvider provider;
03
04 public ShowInfoPlugin(PluginTool tool) {
05 super(tool, true, false);
06 provider = new ShowInfoComponentProvider(
07 tool,
08 getName()
09 );
10 }
11
12 @Override
13 protected void programDeactivated(Program program) {
14 provider.clear();
15 }
16
17 @Override
18 protected void locationChanged(ProgramLocation loc) {
19 provider.locationChanged(currentProgram, loc);
20 }
21 }
As we mentioned previously, the preceding code declares a ShowInfoComponentProvider for implementing the plugin's GUI on line 02. In the next section, we will cover the implementation of this class.
Implementing the provider
As we mentioned previously, the provider consists of a class (in this case, ShowInfoComponentProvider) that extends from ComponentProviderAdapter (lines 00 and 01) that implements the GUI of a Ghidra plugin and handles related events and actions.
It starts by loading two image resources (lines 02 and 05). The appropriate way to load resources in Ghidra is by using the resource manager (https://ghidra.re/ghidra_docs/api/resources/ResourceManager.html), as shown in the following code snippet:
00 public class ShowInfoComponentProvider extends
01 ComponentProviderAdapter {
02 private final static ImageIcon CLEAR_ICON =
03 ResourceManager.loadImage("images/erase16.png");
04 private final static ImageIcon INFO_ICON =
05 ResourceManager.loadImage("images/information.png");
To implement the GUI, the Swing widget toolkit (https://docs.oracle.com/javase/8/docs/technotes/guides/swing/) must be used. Here, two Swing components are being declared: a panel that provides space so that we can attach the GUI components (line 06) and a text area component (line 07).
A DockingAction (line 08) associating a user action with a toolbar icon and/or menu item (https://ghidra.re/ghidra_docs/api/docking/action/DockingAction.html) is also defined here. Finally, two attributes are also declared for accessing the current location (line 09) of the current program (line 10).
The following code corresponds to the aforementioned provider attributes:
06 private JPanel panel;
07 private JTextArea textArea;
08 private DockingAction clearAction;
09 private Program currentProgram;
10 private ProgramLocation currentLocation;
Next, the class constructor creates the GUI by calling the create() function declared on lines 13 and 55. It sets some provider attributes, including the provider icon (line 14), the default window position (line 15), and its title (16) before setting the provider to visible on line 17. It also creates the DockingActions call to the createActions() function that's defined on line 18 and implemented on line 62:
11 public ShowInfoComponentProvider(
PluginTool tool,
String name) {
12 super(tool, name, name);
13 create();
14 setIcon(INFO_ICON);
15 setDefaultWindowPosition(WindowPosition.BOTTOM);
16 setTitle("Show Info");
17 setVisible(true);
18 createActions();
19 }
Since the getComponent() (line 21) function of a component provider returns the component to be displayed, it returns panel (line 22), which contains the GUI components:
20 @Override
21 public JComponent getComponent() {
22 return panel;
23 }
The clear function clears the current program and current location by setting it to null (lines 25 and 26) and clears the text of the text area component (line 27):
24 void clear() {
25 currentProgram = null;
26 currentLocation = null;
27 textArea.setText("");
28 }
When the location of the program changes, its location information is updated (lines 33 and 34). Not only does it change the program and its new location, but it also updates the program's information by calling the updateInfo() function (line 36), which is implemented on line 33. This is the main feature of this plugin:
29 void locationChanged(
30 Program program,
31 ProgramLocation location
32 ) {
33 this.currentProgram = program;
34 this.currentLocation = location;
35 if (isVisible()) {
36 updateInfo();
37 }
38 }
The updateInfo() function starts checking whether it can access the address of the current location (line 34). If this is not possible, then it returns.
In this case, the updateInfo() function obtains CodeUnit (https://ghidra.re/ghidra_docs/api/ghidra/program/model/listing/CodeUnit.html) from the current location address of the listing of the program (https://ghidra.re/ghidra_docs/api/ghidra/program/model/listing/Listing.html) by using the getCodeUnitContaining function (line 46). Finally, it shows the CodeUnit string representation (line 52) for prepending a substring, which indicates whether the current CodeUnit is an instruction (lines 55-57), a defined piece of data (lines 58-62), or an undefined piece of data (lines 63-65):
39 private void updateInfo() {
40 if (currentLocation == null ||
41 currentLocation.getAddress() == null) {
42 return;
43 }
44
45 CodeUnit cu =
46 currentProgram.getListing().getCodeUnitContaining(
47 currentLocation.getAddress()
48 );
49
50 // TODO -- create the string to set
51 String preview =
52 CodeUnitFormat.DEFAULT.getRepresentationString(
53 cu, true
54 );
55 if (cu instanceof Instruction) {
56 textArea.setText("Instruction: " + preview);
57 }
58 else {
59 Data data = (Data) cu;
60 if (data.isDefined()) {
61 textArea.setText("Defined Data: " + preview);
62 }
63 else {
64 textArea.setText("Undefined Data: " + preview);
65 }
66 }
67 }
The create() method creates a new panel containing BorderLayout (line 69). This allows us to put GUI components on any of the four borders of the panel, as well as in the center of it.
Then, it creates a non-editable text area that's 5 rows and 25 columns in size (lines 70-71) with scroll capabilities (line 72) and attaches it to the panel (line 73):
68 private void create() {
69 panel = new JPanel(new BorderLayout());
70 textArea = new JTextArea(5, 25);
71 textArea.setEditable(false);
72 JScrollPane sp = new JScrollPane(textArea);
73 panel.add(sp);
74 }
Finally, the createActions() function creates a DockingAction to clear the text area (you can locate it on line 76 of the following code snippet).
In the following screenshot, you can see how the implementation of createActions()produces a GUI button that allows us to trigger the Clear Text Area action:
Figure 10.7 – Docking Action – Clear Text Area
The createActions() function also overrides the actionPerformed() function (https://ghidra.re/ghidra_docs/api/ghidra/app/context/ListingContextAction.html#actionPerformed(docking.ActionContext) with the implementation of the clearing action (line 82). It also establishes a link between the action's logic and the GUI by preparing the toolbar icon of the action (lines 85-87), setting it to enabled (line 89), and adding it to the current tool (line 90):
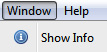
Figure 10.8 – ShowInfo plugin extension available from CodeBrowser's Window menu option
When the GUI component is shown (line 94), it immediately populates the text area with the corresponding CodeUnit information (line 95):
75 private void createActions() {
76 clearAction = new DockingAction(
77 "Clear Text Area",
78 getName()
79 ) {
80 @Override
81 public void actionPerformed(ActionContext context) {
82 textArea.setText("");
83 }
84 };
85 clearAction.setToolBarData(new ToolBarData(CLEAR_ICON,
86 null)
87 );
88
89 clearAction.setEnabled(true);
90 tool.addLocalAction(this, clearAction);
91 }
92
93 @Override
94 public void componentShown() {
95 updateInfo();
96 }
97 }
Here, we learned how to implement a simple plugin provider. If you are interested in implementing more complex GUI extensions, it is highly recommended that you learn more about the Swing widget toolkit. For learning about it, please, check the online documentation (https://docs.oracle.com/javase/7/docs/api/javax/swing/package-summary.html) or refer to Further reading section located at the end of this chapter.
Summary
In this chapter, we learned how to incorporate both official and third-party extensions for Ghidra. This new skill allowed us to mitigate Ghidra's drawback of not including a debugger. We performed a search over Ghidra's source code to discover that a lot of Ghidra's core features are implemented as Ghidra plugins. Finally, we learned how to extend Ghidra with our own ideas, access the program being analyzed by it, implement custom GUI socking windows, and add actions to it.
In the next chapter, we will learn how to incorporate support for new binary formats in Ghidra. This skill will be very valuable to you because it will enable you to reverse-engineer exoteric binary files using Ghidra.
Questions
- Ghidra plugin extensions are implemented in the Java language. Is Ghidra fully implemented using Java?
- How can you add external debugging synchronization to Ghidra?
- What is a provider in the context of Ghidra plugin development?
Further reading
Please refer to the following links for more information on the topics that were covered in this chapter:
- From 0 to 1: JavaFX and Swing for Awesome Java UIs [Video]: https://www.packtpub.com/product/from-0-to-1-javafx-and-swing-for-awesome-java-uis-video/9781789132496
- Swing Extreme Testing, Lindsay Peters, Tim Lavers, June 2008: https://www.packtpub.com/product/swing-extreme-testing/9781847194824
- Java 9 Cookbook, Mohamed Sanaulla, Nick Samoylov, August 2017: https://www.packtpub.com/product/java-9-cookbook/9781786461407