
6. Reviewing and Blocking Ads
In This Chapter
• Using the Allow & Block Ads Tab
• Blocking Different Types of Ads
• Configuring Advanced Settings
How do you keep unwanted ads from appearing on your website? You certainly don’t want to see ads from competitors show up in your AdSense blocks; you probably don’t want to see offensive ads, either, or ads that are overly spammy.
Fortunately, AdSense lets you fine-tune the types of ads that it serves to your site. You can block ads from specific competitors, as well as all ads within a specific category or that contain certain content. This prevents unwanted advertising from appearing on your site—and ensures a better experience for your site’s visitors.
Using the Allow & Block Ads Tab
In the new AdSense interface, you control which ads appear on your site via the Allow & Block Ads tab. When you select this tab, you first see the Overview page. As you can see in Figure 6.1, the Overview page tells you which blocking options you’re currently using:
• Advertiser URLs. How many sites you’re currently blocking.
• General categories. How many ad categories you’re currently blocking.
• Sensitive categories. Which so-called “sensitive” categories you’re currently blocking.
• Ad networks. Which third-party ad networks you’re currently blocking.
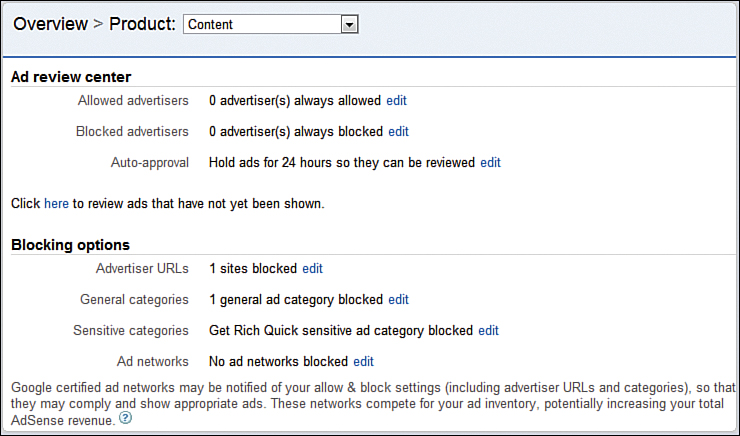
Figure 6.1. Viewing the Overview page of the Allow & Block Ads tab.
You can edit any of these settings by clicking the Edit link next to the item. Further navigation comes from the navigation pane in the left side of the page.
In addition, if you’ve activated the Ad Review Center (which we’ll discuss in a moment), information about allowed, blocked, and pending ads for that function are listed here.
Blocking Different Types of Ads
Now let’s get to the nitty gritty: blocking certain types of ads from appearing on your site. There are lots of ways to do this.
Blocking Competitive Ads
The most obvious ads you might want to block are those from direct competitors, who would probably love to share space on your site. To this end, AdSense lets you block ads from specific URLs—that is, those sites you don’t want advertising on your site.
Here’s how to block ads from competing sites:
1. Click the Allow & Block Ads tab and select the Overview page.
2. Click Advertiser URLs in the Blocking Options section of the navigation pane.
3. When the Advertiser URLs page appears, as shown in Figure 6.2, pull down the Product list and select the specific AdSense product you’re using. (If you want to block ads on your website, select Content from this list; not all options are available for all products.)
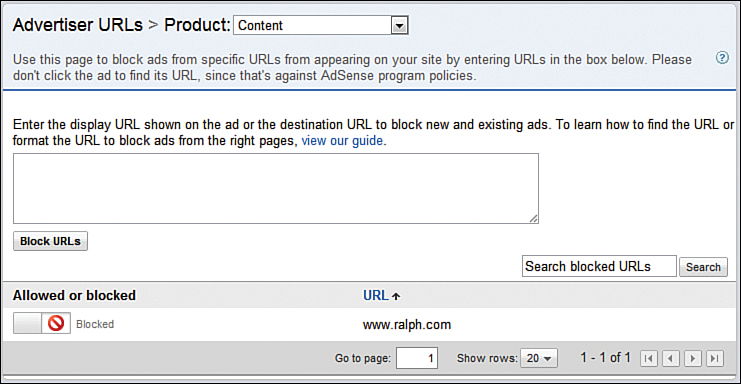
Figure 6.2. Blocking ads from specific URLs.
4. Enter the URL of the site you want blocked into the large text box. To block more than one site, enter multiple URLs on separate lines.
5. Click the Block URLs button.
How precisely you filter a site depends on what you enter for the site’s URL:
• To filter ads linking to all pages in a domain, enter the domain address like this: website.com
• To filter ads linking to a subdomain on the site, enter the subdomain address like this: subdomain.website.com
• To filter ads linking to a specific page on the site, enter the page address like this: website.com/page.html
All sites you’ve previously blocked appear at the bottom of the Advertiser URLs page. To unblock a site, slide the Allowed or Blocked switch for that site to the right.
Blocking Ads by Category
You also can block entire categories of ads from appearing on your pages. This is helpful if you want to avoid all competitive ads without having to identify specific competitors.
What advertising categories does Google use? Here’s the list:
• Arts and entertainment
• Baby care and hygiene
• Beauty and personal care
• Computers and consumer electronics
• Finance
• Health
• Hobbies and leisure
• Internet
• Job listings
• Real estate
• Telephony
• Travel and tourism
• Vehicles
Further subcategories are available within each of these major categories. When you view the General Categories page (which we’ll get to in a moment), click a given category to see the available subcategories
To block ads from one or more of these product categories or available subcategories, follow these steps:
1. Click the Allow & Block Ads tab and select the Overview page.
2. Click General Categories in the Blocking Options section of the navigation pane.
3. When the General Categories page appears, pull down the Product list and select the specific AdSense product you’re using. (Not all options are available for all products.)
4. As you can see in Figure 6.3, the General Categories page displays a list of all available categories, along with data that shows the percent of ad impressions served and earnings generated by each category; click a given category to see available subcategories. This will help you determine how valuable each category is to you, financially.
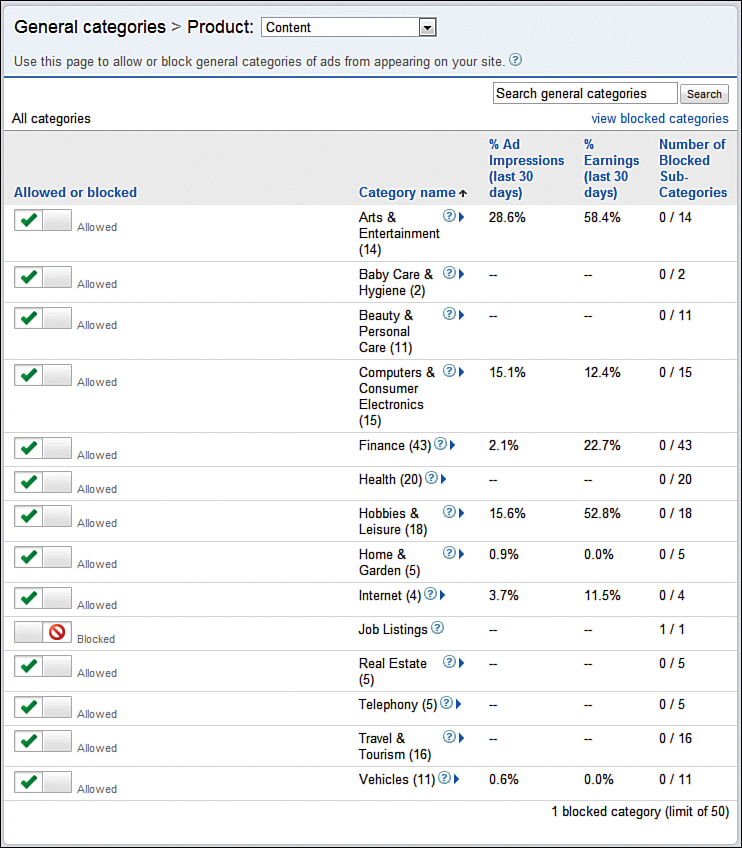
Figure 6.3. Viewing ad performance by category—and blocking certain categories.
5. To block ads from a given category, slide the Allowed or Blocked switch for that category to the left.
Blocking Sensitive Categories
The previous instructions showed you how to block ads by major product category. You can also block ads that represent what Google calls “sensitive” categories.
These sensitive categories include ads for adult products, drugs, and the like, as well as ads that are often spammy in nature. (Think multilevel marketing schemes, weight loss gimmicks, and the like.) In addition, you can block ads with content likely to incite controversy, such as politics and religion.
Here’s the list of sensitive topics you can block:
• Cosmetic procedures and body modification
• Dating
• Drugs and supplements
• Gambling and betting
• Get rich quick
• Politics
• References to sex and sexuality
• Religion
• Ringtones and downloadables
• Sexual and reproductive health
• Video games (casual and online)
• Weight loss
To block ads in any or all of these sensitive categories, follow these steps:
1. Click the Allow & Block Ads tab and select the Overview page.
2. Click Sensitive Categories in the Blocking Options section of the navigation pane.
3. When the Sensitive Categories page appears, pull down the Product list and select the specific AdSense product you’re using. (Not all options are available for all products.)
4. As you can see in Figure 6.4, the Sensitive Categories page displays a list of all these controversial categories, along with data that shows the percent of ad impressions served and earnings generated by each. This will help you determine whether a particular category is financially valuable to you.
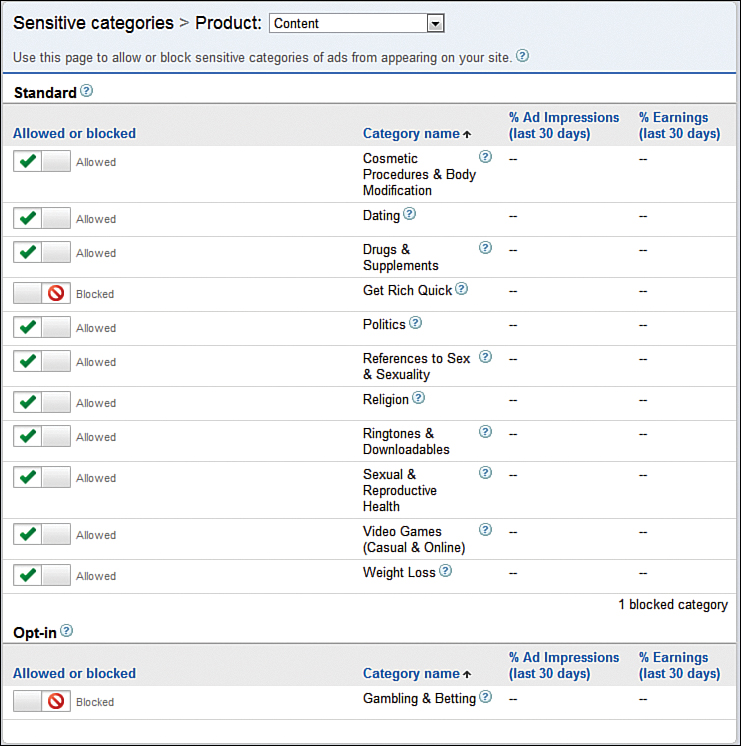
Figure 6.4. Blocking ads from sensitive categories.
5. To block ads from a given category, slide the Allowed or Blocked switch for that category to the left.
Blocking Ads from Specific Ad Networks
Although the bulk of ads you’ll see on your site come directly from Google’s AdSense network, AdSense also serves ads from a number of third-party ad networks. You can, however, block ads from any or all of these non-Google networks. Just follow these steps:
1. Click the Allow & Block Ads tab and select the Overview page.
2. Click Ad Networks in the Blocking Options section of the navigation pane.
3. When the Ad Networks page appears, as shown in Figure 6.5, pull down the Product list and select the specific AdSense product you’re using. (Not all options are available for all products.)
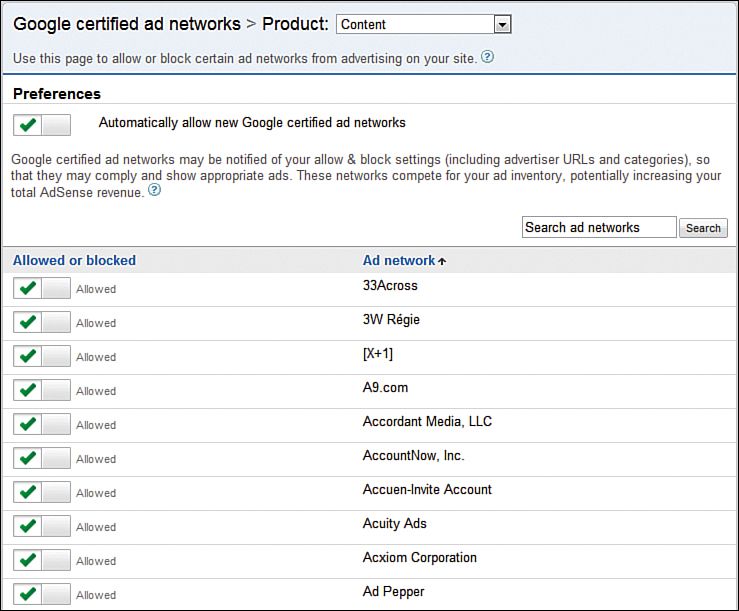
Figure 6.5. Blocking ads from specific third-party ad networks.
4. By default, Google automatically serves ads from new networks it signs up. To not automatically display ads from new ad networks, go to the top of the data table to the Automatically Allow New Google Certified Ad Networks item and slide the Allow or Blocked switch to the left.
5. To block ads from a specific network, go to that network in the list and slide that Allow or Blocked switch to the left.
Configuring Advanced Settings
There are three universal ad blocking settings you can configure from the Allow & Block Ads tab. Just click the Advanced Settings link in the navigation sidebar to display the Advanced Settings page, then pull down the Product list and select the product you’re using. (Not all options are available for all products.)
As you can see in Figure 6.6, you can turn on or off any of the following:
• Interest-based ads preference. When enabled, displays ads based on user interest categories. (Google might use visitation information from your site to determine these categories.)
• Third party ads preference. When enabled, advertisers can use their own audience information to deliver ads to your site.
• Social ads preference. When enabled, Google can use its +1 button and other social annotations in the ads it serves to your site.

Figure 6.6. Configuring advanced blocking options.
All these options are enabled by default. To disable a specific option, slide the switch for that option to the left.
Using the Ad Review Center
Another way to block unwanted ads from your site is to use AdSense’s Ad Review Center. When you activate the Ad Review Center, you’re shown potential ads before they appear on your site; you can then allow or block each ad, individually.
To activate the Ad Review Center, go to the Overview page and click the appropriate link. You’re then encouraged to submit a request to use this product; it can take up to a week for Google to approve your request.
When the Ad Review Center is activated, you’ll see four new links in the navigation pane on the Allow & Block Ads tab, in the Ad Review Center section:
• Awaiting review
• Allowed
• Blocked
• Settings
Configuring the Ad Review Center
To configure your Ad Review Center settings, click the Settings link in the navigation pane. Here you have the option of running all ads immediately or holding ads for 24 hours so you can review them. (If you don’t take action with 24 hours, Google assumes your permission and runs the ad.)
This page also lists all advertisers you’ve marked to always allow their ads, and all advertisers you’ve marked to never allow their ads. You can add new advertisers to either list or remove advertisers from either list, as well. Remember to click the Save button to save any changes you make.
Reviewing Ads
To review all pending ads, click the Awaiting Review link in the Ad Review Center section of the navigation pane. You then see a list of all ads waiting your review; you can then choose from the following options:
• Hold for review. Select this option if you want to postpone your decision. You have 24 hours to make a decision before the ad automatically runs.
• Allow now. Okays the ad to run.
• Block now. Blocks the ad from appearing on your site.
• Allow all future ad groups from this advertiser. Tells AdSense that this advertiser is okay and automatically approves any future ads from this advertiser without prior approval.
• Block all future ad groups from this advertiser. Tells AdSense that this is not an approved advertiser, and automatically blocks all future ads from this advertiser.
To view a list of all ads you’ve approved, click the Allowed link in the navigation pane. To view a list of all ads you’ve blocked, click the Blocked link; you can always reverse any previous decision to block or allow an ad.