
Using the S3 service from AWS can be really convenient, but there are also some drawbacks to it: it implies a recurrent cost, and you have to put your data on a datacenter (the cloud). In some cases it would be very convenient to use an S3 storage, but the cost and/or the fact of storing the data off-premises is a problem. For example, in a data science team working with relatively small datasets (some 100th of a GB), using Spark is very convenient and easy to set up. One of the sources of data supported by Spark is S3. In this case, it can be easier and less costly to host a small Spark cluster in premises, as well as an S3 database, rather than using cloud services.
Since S3 is the de facto standard, there are many tools that support it. Moreover, there are some alternatives to AWS for hosting such a database: other cloud providers have offers compatible with S3, and there are some server implementations that can be hosted on any machine. Minio is one of these tools, and it is available as an open-source project. The installation instructions and the documentation are available in the homepage (https://minio.io/) of the project, and the source code is available on GitHub (https://github.com/minio). The current chapter was tested with Minio as an S3 backend. However, you can use AWS S3 if you prefer, or if you already use it. This does not change anything within the code of the application.
Minio can be installed in many different ways, all of them leveraging popular cloud tools and infrastructures. Here, the simplest installation method is used, with Docker, without any duplication or security features enabled. This is only for test purposes, but it is possible to use Minio in production with features such as encryption and replication. To install Minio, first create some directories where data and configuration will be stored, as shown in the following example:
mkdir minio
cd minio
mkdir data
mkdir config
The data directory will be the location in which to store S3 objects and manage the database. The config directory will contain the configuration file of the instance. Then, installing Minio is very easy with Docker, as can be seen in the following example:
docker run -d -p 9000:9000 --name minio
  -v /home/alice/minio/data:/data
  -v /home/alice/minio/config:/root/.minio minio/minio
  server /data
Note that even though Minio is not in the local registry, it is automatically retrieved from the Docker hub before being started. The pull command is done automatically by the run command when the image is not found. The Minio instance is started in the background with the -d option. Port 9000 is the default HTTP port used by Minio to expose the web interface and the S3 APIs. This port is exposed publicly with the -p option. Then, two volume bindings are configured: one to store the S3 database on the data folder of the host, and one to store the configuration files on the host. A volume binding is a link between a file or directory on the filesystems of the host and the container. In this case, the data and config directories of the host (located at /home/alice/minio) are accessible to the container. Minio automatically creates a default configuration file when it is started for the first time.
Once the server is started, it prints the access key and secret key that are needed to connect it to the database. One principle of Minio is that each account runs a dedicated instance. This clearly targets private hosting where each team or project has its own instance running. The credentials are available in the logs, as can be seen in the following code:
$ docker logs minio
Endpoint:  http://172.17.0.2:9000  http://127.0.0.1:9000
AccessKey: IU0645L6OOSV96GSEG72
SecretKey: udTdXiaUh1equB7BE9Kn691a/DNGnMguIVEh0iyu

Browser Access:
   http://172.17.0.2:9000  http://127.0.0.1:9000

Command-line Access: https://docs.minio.io/docs/minio-client-quickstart-guide
   $ mc config host add myminio http://172.17.0.2:9000 IU0645L6OOSV96GSEG72 udTdXiaUh1equB7BE9Kn691a/DNGnMguIVEh0iyu

Object API (Amazon S3 compatible):
   Go:         https://docs.minio.io/docs/golang-client-quickstart-guide
   Java:       https://docs.minio.io/docs/java-client-quickstart-guide
   Python:     https://docs.minio.io/docs/python-client-quickstart-guide
   JavaScript: https://docs.minio.io/docs/javascript-client-quickstart-guide
   .NET:       https://docs.minio.io/docs/dotnet-client-quickstart-guide
In this case, the access key is IU0645L6OOSV96GSEG72 and the secret key is udTdXiaUh1equB7BE9Kn691a/DNGnMguIVEh0iyu. The web interface is accessible from a browser on localhost: http://localhost:9000.
It is also accessible from other clients on the LAN. Once logged in from a web browser, the following screen should be displayed:

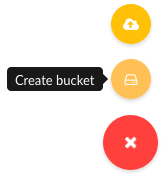
The instance is ready, but there is no bucket in it yet. Click on the + icon on the lower right, and select Create bucket. Name the bucket audio and press Enter to create the bucket. The new bucket is visible on the left pane, but it is still empty. The following screenshot shows what the menu should look like:
Now the server is configured, and ready to store audio objects.