
Chapter 8. nulls and exceptions: Safe and Sound

Everybody wants to write code that’s safe.
And the great news is that Kotlin was designed with code-safety at its heart. We’ll start by showing you how Kotlin’s use of nullable types means that you’ll hardly ever experience a NullPointerException during your entire stay in Kotlinville. You’ll discover how to make safe calls, and how Kotlin’s Elvis operator stops you being all shook up. And when we’re done with nulls, you’ll find out how to throw and catch exceptions like a pro.
How do you remove object references from variables?
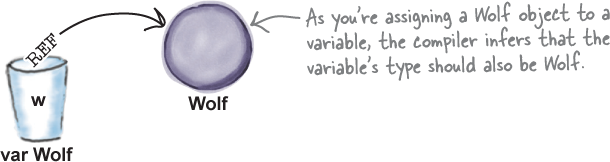
As you already know, if you want to define a new Wolf variable and assign a Wolf object reference to it, you can do so using code like this:
var w = Wolf()
The compiler spots that you want to assign a Wolf object to the w variable, so it infers that the variable must have a type of Wolf:
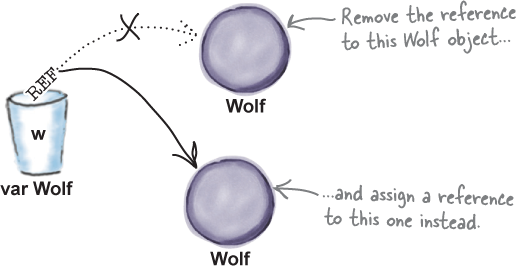
Once the compiler knows the variable’s type, it ensures that it can only hold references to Wolf objects, including any Wolf subtypes. So if the variable is defined using var, you can update its value so that it holds a reference to an entirely different Wolf object using, for example:
w = Wolf()
But what if you want to update the variable so that it holds a reference to no object at all? How do you remove an object reference from a variable once one has been assigned?
Remove an object reference using null
If you want to remove a reference to an object from a variable, you can do so by assigning it a value of null:
w = null
A null value means that the variable doesn’t refer to an object: the variable still exists, but it doesn’t point to anything
But there’s a Big Catch. By default, types in Kotlin won’t accept null values. If you want a variable to hold null values, you must explicitly declare that its type is nullable.
Why have nullable types?
A nullable type is one that allows null values. Unlike other programming languages, Kotlin tracks values that can be null to stop you from performing invalid actions on them. Performing invalid actions on null values is the most common cause of runtime problems in other languages such as Java, and can cause your application to crash in a heap when you least expect it. These problems, however, rarely happen in Kotlin because of its clever use of nullable types.
Note
If you try to perform an invalid operation on a null value in Java, you’ll be faced with a big fat NullPointerException. An exception is a warning that tells you something exceptionally bad has just happened. We’ll look at exceptions in more detail later in the chapter.
You declare that a type is nullable by adding a question mark (?) to the end of the type. To create a nullable Wolf variable and assign a new Wolf object to it, for example, you would use the code:
And if you wanted to remove the Wolf reference from the variable, you would use:

So where can you use nullable types?
A nullable type is one that can hold null values in addition to its base type. A Duck? variable, for example, will accept Duck objects and null.
You can use a nullable type everywhere you can use a non-nullable type
Every type you define can be turned into a nullable version of that type by simply adding a ? to the end of it. You can use nullable types in the same places that you would use plain old non-nullable types:
* When defining variables and properties.
Any variable or property can be nullable, but you must explicitly define it as such by declaring its type, including the
?. The compiler is unable to infer when a type is nullable, and by default, it will always create a non-nullable type. So if you want to create a nullableStringvariable namedstrand instantiate it with a value of “Pizza”, you must declare that it has a type ofString?like this:var str: String? = "Pizza"
Note that variables and properties can be instantiated with
null. The following code, for example, compiles and prints the text “null”:
* When defining parameters.
You can declare any function or constructor parameter type as nullable. The following code, for example, defines a function named
printIntwhich takes a parameter of typeInt?(a nullableInt):fun printInt(x: Int?) {
println(x)
}When you define a function (or constructor) with a nullable parameter, you must still provide a value for that parameter when you call the function, even if that value is
null. Just like with non-nullable parameter types, you can’t omit a parameter unless it’s been assigned a default value.* When defining function return types.
A function can have a nullable return type. The following function, for example, has a return type of
Long?:
You can also create arrays of nullable types. Let’s see how.
How to create an array of nullable types
An array of nullable types is one whose items are nullable. The following code, for example, creates an array named myArray that holds String?s (Strings that are nullable):

The compiler can, however, infer that the array should hold nullable types if the array is initialized with one or more null items. So when the compiler sees the following code:
var myArray = arrayOf("Hi", "Hello", null)
it spots that the array can hold a mixture of Strings and nulls, and infers that the array should have a type of Array<String?>:

Now that you’ve learned how to define nullable types, let’s see how to refer to its object’s functions and properties.
How to access a nullable type’s functions and properties
Suppose you have a variable whose type is nullable, and you want to access its object’s properties and functions. You can’t make function calls or refer to the properties of a null value as it doesn’t have any. To stop you from performing any operations that are invalid, the compiler insists that you check that the variable is not null before giving you access to any functions or properties.
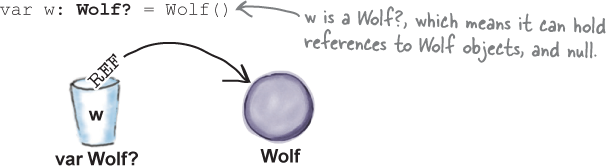
Imagine you have a Wolf? variable which has been assigned a reference to a new Wolf object like this:
var w: Wolf? = Wolf()
To access the underlying object’s functions and properties, you first have to establish that the variable’s value is not null. One way of achieving this is to check the value of the variable inside an if. The following code, for example, checks that w’s value is not null, and then calls the object’s eat function:

You can use this approach to build more complex conditions. The following code, for example, checks that the w variable’s value is not null, and then calls its eat function when its hunger property is less than 5:

There are some situations, however, where this kind of code may still fail. If the w variable is used to define a var property in a class, for example, it’s possible that a null value may have been assigned to it in between the null-check and its usage, so the following code won’t compile:
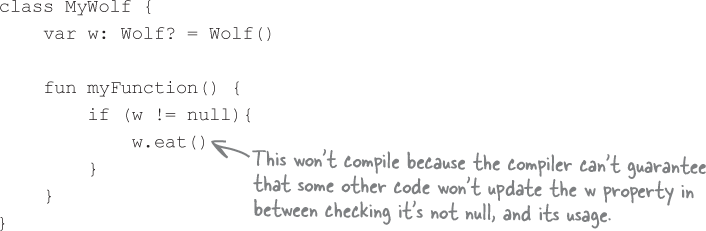
Fortunately, there’s a safer approach that avoids this kind of problem.
Keep things safe with safe calls
If you want to access a nullable type’s properties and functions, an alternative approach is to use a safe call. A safe call lets you access functions and properties in a single operation without you having to perform a separate null-check.
?. is the safe call operator. It lets you safely access a nullable type’s functions and properties.
To see how safe calls work, imagine you have a Wolf? property (as before) that holds a reference to a Wolf object like so:
var w: Wolf? = Wolf()
To make a safe call to the Wolf’s eat function, you would use the following code:

This will only call the Wolf’s eat function when w is not null. It’s like saying “if w is not null, call eat”.
Similarly, the following code makes a safe call to w’s hunger property:
w?.hunger
If w is not null, the expression returns a reference to the hunger property’s value. If, however, w is null, the value of the entire expression evaluates to null. Here are the two scenarios:
Scenario A: w is not null.
The
wvariable holds a reference to aWolfobject, and the value of itshungerproperty is 10. The codew?.hungerevaluates to 10.
Scenario B: w is null.
The
wvariable holds a null value, not aWolf, so the entire expression evaluates tonull.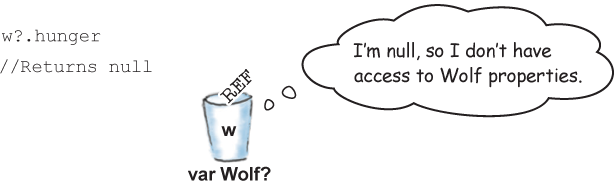
You can chain safe calls together
Another advantage of using safe calls is that you can chain them together to form expressions that are powerful yet concise.
Suppose you have a class named MyWolf that has a single Wolf? property named w. Here’s the class definition:
class MyWolf {

    var w: Wolf? = Wolf()

}
Suppose also that you have a MyWolf? variable named myWolf like this:
var myWolf: MyWolf? = MyWolf()
If you wanted to get the value of the hunger property for the myWolf variable’s Wolf, you could do so using code like this:

It’s like saying “If myWolf or w is null, return a null value. Otherwise, return the value of w’s hunger property”. The expression returns the value of the hunger property if (and only if) myWolf and w are both not null. If either myWolf or w is null, the entire expression evaluates to null.
What happens when a safe call chain gets evaluated
Let’s break down what happens when the system evaluates the safe call chain:
myWolf?.w?.hunger
The system first checks that myWolf is not null.
If
myWolfisnull, the entire expression evaluates tonull. IfmyWolfis notnull(as in this example), the system continues to the next part of the expression.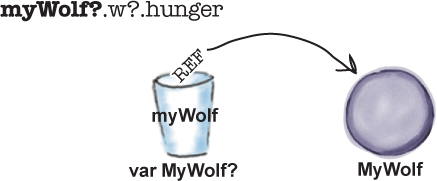
The story continues
The system then checks that myWolf’s w property is not null.
Provided
myWolfis notnull, the system moves on to the next part of the expression, thew?part. Ifwisnull, the entire expression evaluates tonull. Ifwis notnull, as in this example, the system moves onto the next part of the expression.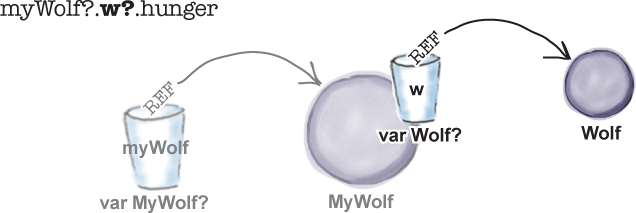
If w is not null, it returns the value of w’s hunger property.
So long as neither the
myWolfvariable nor itswproperty arenull, the expression returns the value ofw’shungerproperty. In this example, the expression evaluates to 10.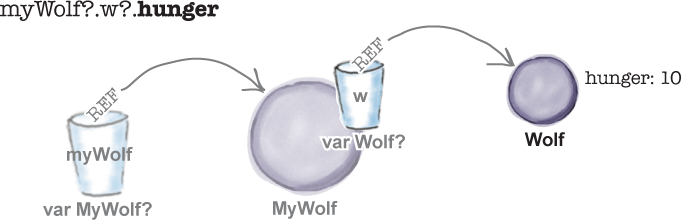
So as you can see, safe calls can be chained together to form concise expressions that are very powerful yet safe. But that’s not the end of the story.
You can use safe calls to assign values...
As you might expect, you can use safe calls to assign a value to a variable or property. If you have a Wolf? variable named w, for example, you can assign the value of its hunger property to a new variable named x using code like this:
var x = w?.hunger
It’s like saying “If w is null, set x to null, otherwise set x to the value of w’s hunger property”. As the expression:
w?.hunger
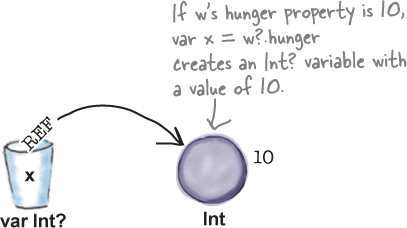
can evaluate to an Int or null value, the compiler infers that x must have a type of Int?.
...and assign values to safe calls
You can also use a safe call on the left side of a variable or property assignment.
Suppose, for example, that you wanted to assign a value of 6 to w’s hunger property, so long as w is not null. You can achieve this using the code:
w?.hunger = 6

The code checks the value of w, and if it’s not null, the code assigns a value of 6 to the hunger property. If w is null, however, the code does nothing.
You can use chains of safe calls in this situation too. The following code, for example, only assigns a value to the hunger property if both myWolf and w are not null:
myWolf?.w?.hunger = 2
It’s like saying “if myWolf is not null, and myWolf’s w property value is not null, then assign a value of 2 to w’s hunger property”:

Now that you know how to make safe calls to nullable types, have a go at the following exercise.
Use let to run code if values are not null
When you use nullable types, you may want to execute code if (and only if) a particular value is not null. If you have a Wolf? variable named w, for example, you might want to print the value of w’s hunger property so long as w is not null.
One option for performing this kind of task is to use the code:
if (w != null ) {

    println(w.hunger)

}
But if the compiler can’t guarantee that the w variable won’t change in between the null-check and its usage, however, the code won’t compile.
Note
This can happen if, say, w defines a var property in a class, and you want to use its hunger property in a separate function. It’s the same situation that you saw earlier in the chapter when we introduced the need for safe calls.
An alternative approach that will work in all situations is to use the code:

It’s like saying “if w is not null, let’s print its hunger”. Let’s walk through this.
The let keyword used in conjunction with the safe call operator ?. tells the compiler that you want to perform some action when the value it’s operating on is not null. So the following code:
w?.let {

 println(it.hunger)

}
?.let allows you to run code for a value that’s not null.
will only execute the code in its body if w is not null.
Once you’ve established that the value is not null, you can refer to it in the body of the let using it. So in the following code example, it refers to a non-nullable version of the w variable, allowing you to directly access its hunger property:

Let’s look at a couple more examples of when using let can be useful.
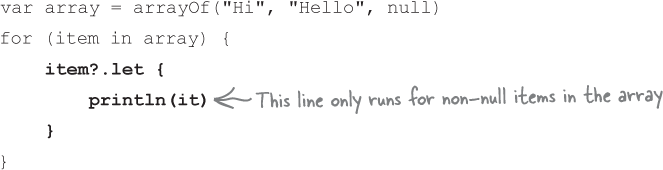
Using let with array items
let can also be used to perform actions using the non-null items of an array. You can use the following code, for example, to loop through an array of String?s, and print each item that is not null:
Using let to streamline expressions
let is particularly useful in situations where you want to perform actions on the return value of a function which may be null.
Suppose you have a function named getAlphaWolf that has a return type of Wolf? like this:
fun getAlphaWolf() : Wolf? {

    return Wolf()

}
If you wanted to get a reference to the function’s return value and call its eat function if it’s not null, you could do so (in most situations) using the following code:
var alpha = getAlphaWolf()

if (alpha != null) {

    alpha.eat()

}
If you were to rewrite the code using let, however, you would no longer need to create a separate variable in which to hold the function’s return value. Instead, you could use:

It’s like saying “get the alpha Wolf, and if it’s not null, let it eat”.
Instead of using an if expression...
Another thing you may want to do when you have nullable types is use an if expression that specifies an alternate value for something that’s null.
Suppose that you have a Wolf? variable named w, as before, and you want to use an expression that returns the value of w’s hunger property if w is not null, but defaults to -1 if w is null. In most situations, the following expression will work:
if (w != null) w.hunger else -1
But as before, if the compiler thinks there’s a chance that the w variable may have been updated in between the null-check and its usage, the code won’t compile because the compiler considers it to be unsafe.
Fortunately there’s an alternative: the Elvis operator.
Note
[Note from editor: Elvis? Is this a joke? Return to sender.]
...you can use the safer Elvis operator
The Elvis operator ?: is a safe alternative to an if expression. It’s called the Elvis operator because when you tip it on its side, it looks a bit like Elvis.
Here’s an example of an expression that uses an Elvis operator:
w?.hunger ?: -1

The Elvis operator first checks the value on its left, in this case:
w?.hunger
If this value is not null, the Elvis operator returns it. If the value on the left is null, however, the Elvis operator returns the value on its right instead (in this case -1). So the code
w?.hunger ?: -1
is like saying “if w is not null and its hunger property is not null, return the value of the hunger property, otherwise return -1”. It does the same thing as the code:
if (w?.hunger != null) w.hunger else -1
but because it’s a safer alternative, you can use it anywhere.
Over the past few pages, you’ve seen how to access a nullable-type’s properties and functions using safe calls, and how to use let and the Elvis operator in place of if statements and expressions. There’s just one more option we want to mention that you can use to check for null values: the not-null assertion operator.
The Elvis operator ?: is a safe version of an if expression. It returns the value on its left if that is not null. Otherwise, it returns the value on its right.
The !! operator deliberately throws a NullPointerException
The not-null assertion operator, or !!, is different to the other methods for dealing with nulls that we’ve looked at over the past few pages. Instead of making sure that your code is safe by handling any null values, the not-null assertion operator deliberately throws a NullPointerException if something turns out to be null.
Suppose, as before, you have a Wolf? variable named w, and you want to assign the value of its hunger property to a new variable named x if w or hunger is not null. To do this using a not-null assertion, you would use the following code:

If w and hunger are is not null, as asserted, the value of the hunger property is assigned to x. But if w or hunger is null, a NullPointerException will get thrown, a message will be displayed in the IDE’s output window, and the application will stop running.
The message that’s displayed in the output window gives you information about the NullPointerException including a stack trace giving you the location of the not-null assertion that caused it. The following output, for example, tells you that the NullPointerException was thrown from the main function at line 45 in file App.kt:

The following output, on the other hand, tells you that the NullPointerException was thrown from a function named myFunction in class MyWolf at line 98 of file App.kt. This function was called from the main function at line 67 of the same file:
Exception in thread "main" kotlin.KotlinNullPointerException

	at MyWolf.myFunction(App.kt:98)

	at AppKt.main(App.kt:67)
So not-null assertions are useful if you want to test assumptions about your code, as they enable you to pinpoint problems.
As you’ve seen, the Kotlin compiler goes to great lengths to make sure that your code runs error-free, but there are still situations in which it’s useful to know how to throw exceptions, and handle any that arise. We’ll look at exceptions after we’ve shown you the full code for a new project that deals with null values.
Create the Null Values project
Create a new Kotlin project that targets the JVM, and name the project “Null Values”. Then create a new Kotlin file named App.kt by highlighting the src folder, clicking on the File menu and choosing New → Kotlin File/Class. When prompted, name the file “App”, and choose File from the Kind option.
We’ll add various classes and functions to the project, and a main function that uses them, so that you can explore how null values work. Here’s the code—update your version of App.kt to match ours:

The code continued...

Test drive

When we run the code, the following text gets printed in the IDE’s output window:
The Wolf is eating meat

The value of x is 10

The value of y is 10

The value of myWolf?.wolf?.hunger is 8

Hi

Hello

The Wolf is eating meat

Exception in thread "main" kotlin.KotlinNullPointerException

	at AppKt.main(App.kt:55)
An exception is thrown in exceptional circumstances
As we said earlier, an exception is a type of warning about exceptional situations that pop up at runtime. It’s a way for code to say “Something bad happened, I failed”.
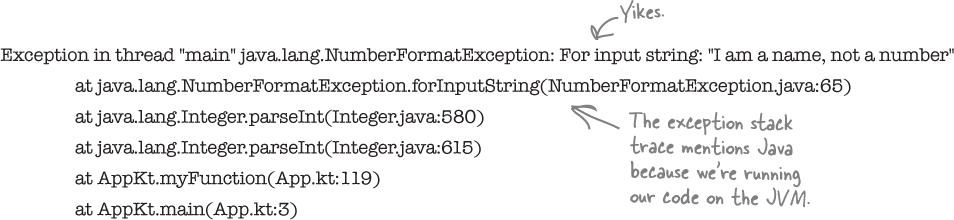
Suppose, for example, that you have a function named myFunction that converts a String parameter to an Int, and prints it:
fun myFunction(str: String) {

    val x = str.toInt()

    println(x)

    println("myFunction has ended")

}
If you pass a String such as “5” to myFunction, the code will successfully convert the String to an Int, and print the value 5, along with the text “myFunction has ended”. If, however, you pass the function a String that can’t be converted to an Int, like “I am a name, not a number”, the code will stop running, and display an exception message like this:
You can catch exceptions that are thrown
When an exception gets thrown, you have two options for dealing with it:
* You can leave the exception alone.
This will display a message in the output window, and stop your application (as above).
* You can catch the exception and handle it.
If you know you might get an exception when you execute particular lines of code, you can prepare for it, and possibly recover from whatever caused it.
You’ve seen what happens when you leave exceptions alone, so let’s look at how you catch them.
Catch exceptions using a try/catch
You catch exceptions by wrapping the risky code in a try/catch block. A try/catch block tells the compiler that you know an exceptional thing could happen in the code you want to execute, and that you’re prepared to handle it. The compiler doesn’t care how you handle it; it cares only that you say you’re taking care of it.
Here’s what a try/catch block looks like:

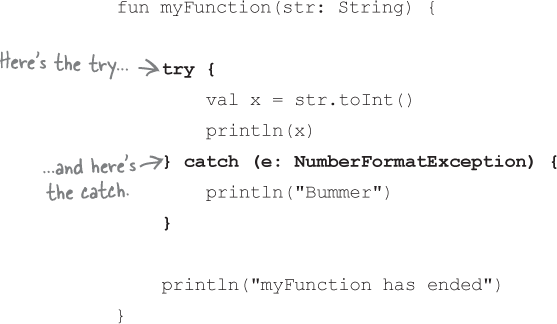
The try part of the try/catch block contains the risky code that might cause an exception. In the above example, this is the code:
try {

    val x = str.toInt()

    println(x)

}
The catch part of the block specifies the exception that you want to catch, and includes the code you want to run if it catches it. So if our risky code throws a NumberFormatException, we’ll catch it and print a meaningful message like this:

Any code that follows the catch block then runs, in this case the code:
println("myFunction has ended")
Use finally for the things you want to do no matter what
If you have important cleanup code that you want to run regardless of an exception, you can put it in a finally block. The finally block is optional, but it’s guaranteed to run no matter what.
To see how this works, suppose you want to bake something experimental that might go wrong.
You start by turning on the oven.
If the thing you try to cook succeeds, you have to turn off the oven.
If the thing you try is a complete failure, you have to turn off the oven.
You have to turn off the oven no matter what, so the code for turning the oven off belongs in a finally block:
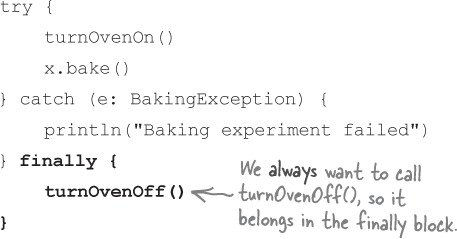
Without finally, you have to put the turnOvenOff function call in both the try and the catch because you have to turn off the oven no matter what. A finally block lets you put all your important cleanup code in one place, instead of duplicating it like this:
try {

    turnOvenOn()

    x.bake()

   turnOvenOff()

} catch (e: BakingException) {

    println("Baking experiment failed")

   turnOvenOff()

}
An exception is an object of type Exception
Every exception is an object of type Exception. It’s the superclass of all exceptions, so every type of exception inherits from it. On the JVM, for example, every exception has a function named printStackTrace that you can use to print the exception’s stack trace using code like this:


There are many different types of exception, each one of which is a subtype of Exception. Some of the most common (or famous) are:
* NullPointerException
Thrown when you try to perform operations on a null value. As you’ve seen,
NullPointerExceptions are nearly extinct in Kotlinville.* ClassCastException
You’ll get this if you try to cast an object to an incorrect type, like casting a
Wolfinto aTree.* IllegalArgumentException
You can throw this if an illegal argument has been passed.
* IllegalStateException
Use this if some object has state that’s invalid.

You can also create your own types of exception by defining a new class with Exception as its superclass. The following code, for example, defines a new type of exception named AnimalException:
class AnimalException : Exception() { }
Defining your own types of exception can sometimes be useful if you want to deliberately throw exceptions in your own code. We’ll look at how this is done after a small diversion.
You can explicitly throw exceptions
It can sometimes be useful to deliberately throw exceptions in your own code. If you have a function named setWorkRatePercentage, for example, you might want to throw an IllegalArgumentException if someone tries to set a percentage that’s less than 0 or greater than 100. Doing so forces the caller to address the problem, instead of relying on the function to decide what to do.
You throw an exception using the throw keyword. Here’s how, for example, you’d get the setWorkRatePercentage function to throw an IllegalArgumentException:

You could then catch the exception using code like this:

try and throw are both expressions
Unlike in other languages such as Java, try and throw are expressions, so they can have return values.
How to use try as an expression
The return value of a try is either the last expression in the try, or the last expression in the catch (the finally block, if there, doesn’t affect the return value). Consider the following code, for example:

The code creates a variable named result of type Int?. The try block tries to convert the value of a String variable named str to an Int. If this is successful, it assigns the Int value to result. If the try block fails, however, it assigns null to result instead:
How to use throw as an expression
throw is also an expression, so you can, for example, use it with the Elvis operator using code like this:
val h = w?.hunger ?: throw AnimalException()
If w and hunger are not null, the above code assigns the value of w’s hunger property to a new variable named h. If, however, w or hunger are null, it throws an AnimalException.
Code Magnets

Some Kotlin code is all scrambled up on the fridge. See if you can reconstruct the code so that if myFunction is passed a String of “Yes”, it prints the text “thaws”, and if myFunction is passed a String of “No”, it prints the text “throws”.
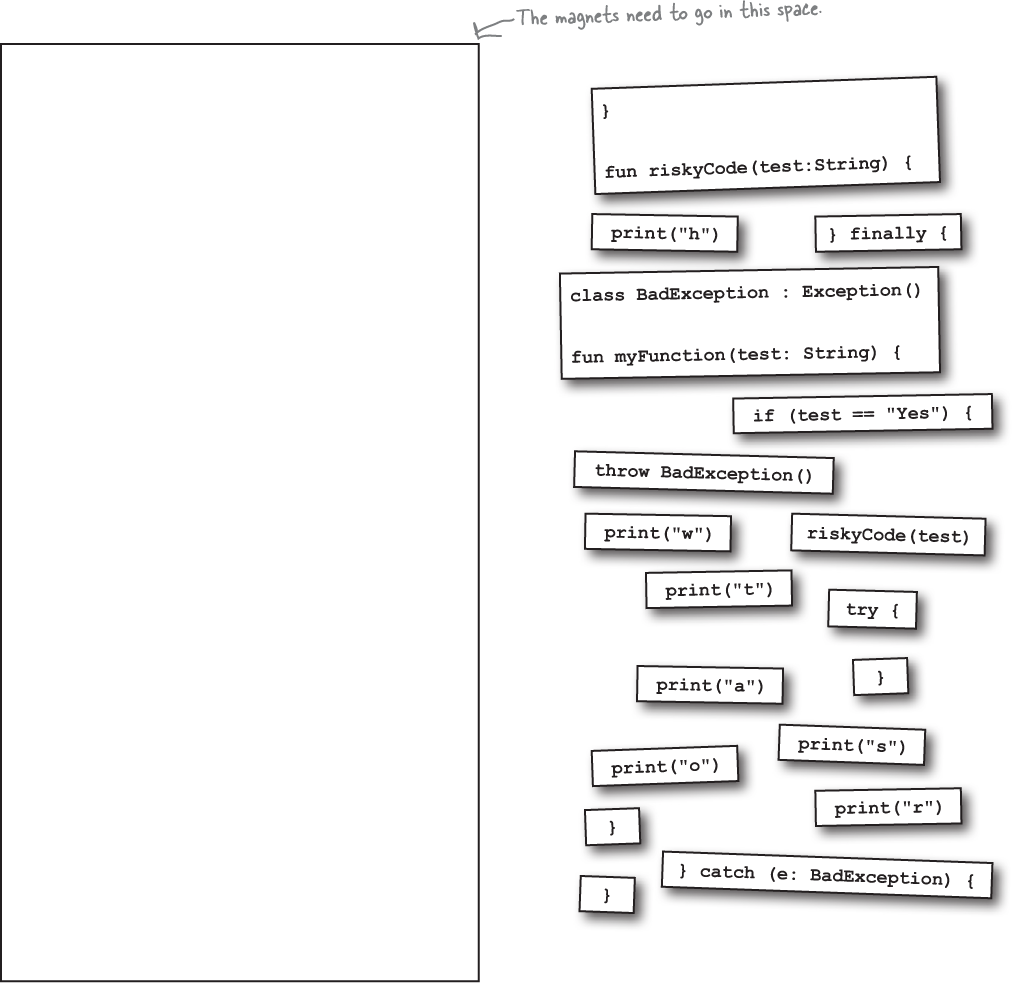
Code Magnets Solution
Some Kotlin code is all scrambled up on the fridge. See if you can reconstruct the code so that if myFunction is passed a String of “Yes”, it prints the text “thaws”, and if myFunction is passed a String of “No”, it prints the text “throws”.

Your Kotlin Toolbox

You’ve got Chapter 8 under your belt and now you’ve added nulls and exceptions to your toolbox.
Note
You can download the full code for the chapter from https://tinyurl.com/HFKotlin.